
Installing Umami Web Analytics on a VPS with Docker, PostgreSQL, and Nginx
TL;DR
In this detailed guide, we will set up your own Umami web analytics system on a Virtual Private Server (VPS) step by step. Using a combination of Docker, PostgreSQL, and Nginx, you will get a fully controlled, private, and high-performance tool for tracking your website's statistics without compromising user privacy.
- You will deploy Umami — a modern, lightweight, and private alternative to traditional analytics systems.
- The entire infrastructure will be containerized using Docker and Docker Compose, ensuring ease of deployment and management.
- A reliable and scalable PostgreSQL database will be used for data storage.
- Nginx will act as a reverse proxy server, providing secure access to Umami via HTTPS with automatic Let's Encrypt certificate acquisition.
- You will gain full control over your data and its security, following best practices for server preparation, backup, and maintenance.
What We Are Setting Up and Why

In the modern digital world, collecting website traffic analytics is critically important for understanding user behavior, optimizing content, and improving conversion. However, traditional solutions like Google Analytics often raise questions regarding data privacy, ownership, and compliance with strict regulations such as GDPR or CCPA. This is where Umami Web Analytics comes into play.
Umami is a simple, fast, and privacy-focused alternative to Google Analytics. It allows you to collect essential traffic metrics (page views, unique visitors, traffic sources, devices and browsers used) without using cookies and without collecting personal data, making it an ideal choice for projects where privacy is paramount. This means you will most likely not need to obtain user consent for cookie usage, which significantly simplifies compliance with legislation.
What the Reader Will Get in the End
Upon completing this guide, you will have a fully functional Umami installation on your own VPS. This will mean:
- Full Data Control: All your analytics are stored on your server, and only you have access to them.
- Privacy by Default: Umami is designed with privacy in mind, does not collect PII (Personally Identifiable Information), and does not use cookies for tracking.
- High Performance: Umami is a lightweight application, and the use of Docker and Nginx ensures efficient resource allocation and fast operation.
- Flexibility and Scalability: The Docker-based architecture allows for easy component updates, resource scaling, and integration of Umami with other services.
- Cost Savings: No monthly fees for cloud analytics, especially with large traffic volumes.
What Alternatives Exist (Cloud-Managed vs Self-Hosted) and Why Self-Hosted on a VPS
There are two main approaches to web analytics:
-
Cloud-managed solutions (e.g., Google Analytics, Fathom Analytics, Plausible Analytics):
- Pros: Easy setup (often just copying JS code), no need to manage a server, automatic updates.
- Cons: Monthly fees, data stored with a third party (which can be an issue for privacy and regulatory compliance), limited control over functionality and integrations.
-
Self-hosted solutions (e.g., Umami, Matomo, Open Web Analytics):
- Pros: Full control over data and infrastructure, no monthly service fees (only for the VPS), possibility for deep customization and integration. Ideal for those who value data sovereignty.
- Cons: Requires technical knowledge for installation and maintenance, responsibility for security and backups lies with you.
Why self-hosted on a VPS? Choosing a VPS for Umami is a golden mean. You get the benefits of a self-hosted solution (control, privacy, cost savings) with relatively low infrastructure costs. A VPS provides dedicated resources, which guarantees stable operation of your analytics, unlike shared hosting. For developers, solo founders, and companies that value data control, this is the optimal choice. You decide where and how your data is stored and ensure its protection in accordance with your requirements.
What VPS Configuration is Needed for This Task
Choosing the right VPS is a key step to successfully deploying Umami. Umami's resource requirements are relatively low, but they depend on the volume of traffic you plan to track.
Minimum Requirements
For small websites or test environments (up to 10,000 page views per month):
- CPU: 1 core (x86-64)
- RAM: 1-2 GB
- Disk: 20-40 GB SSD (fast disk is critical for database performance)
- Network: 100 Mbps or 1 Gbps port, unlimited or sufficient traffic volume (usually 1 TB per month is enough for most websites).
- Operating System: Ubuntu Server 24.04 LTS (recommended) or another modern Linux-based OS.
Recommended VPS Plan for the Task
For websites with medium traffic (10,000 to 100,000 page views per month) or for those planning to host other lightweight services on the same VPS:
- CPU: 2 cores (x86-64)
- RAM: 4 GB
- Disk: 80-160 GB SSD NVMe (for maximum DB performance)
- Network: 1 Gbps port, 2-4 TB traffic per month.
For most tasks related to Umami, a VPS with these characteristics will be suitable. It is important to choose a provider that offers reliable infrastructure and quality support.
When a Dedicated Server is Needed, Not a VPS
A dedicated server becomes necessary when:
- Very High Traffic: If you expect millions of page views per month or tens of thousands of concurrent users, a VPS may not handle the load on the database and application.
- Numerous Services: If, in addition to Umami, you plan to host high-load web applications, databases for other projects, game servers, or demanding CI/CD systems on the server.
- Specific Security/Compliance Requirements: Some regulations may require physical isolation of hardware.
- Performance Requirements: Maximum control over hardware, fine-tuning of BIOS/UEFI, specific RAID arrays are needed.
For most Umami users, even with tens of thousands of visitors per day, a well-configured VPS will be more than sufficient.
Location: What It Affects
Choosing the geographical location of your VPS is important for several reasons:
- Latency: Place your VPS as close as possible to your primary target audience. Lower latency means faster access to the Umami panel for you and faster execution of the analytics script for your users (although the Umami script is very lightweight).
- Data Legislation: Depending on where your users are located and where you conduct business, various data storage and processing laws may apply (e.g., GDPR in the EU). Choosing a VPS location in compliance with these requirements can be critical.
- Price: VPS prices can vary depending on the region.
Always choose a location that best matches your priorities for performance and legal regulations.
Server Preparation
Before proceeding with Umami installation, you need to perform basic setup of your fresh VPS to ensure security and stable operation. We will use Ubuntu Server 24.04 LTS as the operating system.
1. Connecting to the Server
First, connect to your VPS via SSH using the credentials provided by your provider (usually the root user and password, or an SSH key).
ssh root@ВАШ_IP_АДРЕС
Connecting to the server via SSH.
2. System Update
Always start by updating the package list and upgrading them to their latest versions. This ensures you have the most recent software versions and security patches.
sudo apt update && sudo apt upgrade -y
Updating the package list and installing updates.
3. Creating a New User with Sudo Privileges
Working as the root user is insecure. Create a new user for daily operations and grant them sudo privileges.
# Replace 'ваш_пользователь' with your desired name
sudo adduser ваш_пользователь
sudo usermod -aG sudo ваш_пользователь
Creating a new user and adding them to the sudo group.
Exit the root session and log in as the new user:
exit
ssh ваш_пользователь@ВАШ_IP_АДРЕС
Exiting root and logging in as the new user.
4. Configuring SSH Keys (Recommended)
For enhanced security, it is recommended to use SSH keys instead of passwords. Generate keys on your local machine (if you haven't already):
# On your local machine
ssh-keygen -t rsa -b 4096 -C "[email protected]"
Generating an SSH key (locally).
Then copy the public key to the server (replace ваш_пользователь and ВАШ_IP_АДРЕС):
# On your local machine
ssh-copy-id ваш_пользователь@ВАШ_IP_АДРЕС
Copying the public SSH key to the server.
After this, disable password authentication for SSH (recommended). Edit the /etc/ssh/sshd_config file:
sudo nano /etc/ssh/sshd_config
Opening the SSH server configuration file.
Find and change the following lines (or add them if they are missing):
PasswordAuthentication no
PermitRootLogin no
Disabling password authentication and root login.
Save the file (Ctrl+O, Enter) and exit (Ctrl+X). Restart the SSH service:
sudo systemctl restart sshd
Restarting the SSH service.
5. Firewall Configuration (UFW)
Uncomplicated Firewall (UFW) is an easy-to-use interface for iptables. We will configure it to allow only necessary connections.
sudo apt install ufw -y
sudo ufw default deny incoming
sudo ufw default allow outgoing
sudo ufw allow ssh          # Allow SSH (port 22)
sudo ufw allow http         # Allow HTTP (port 80)
sudo ufw allow https        # Allow HTTPS (port 443)
sudo ufw enable
sudo ufw status verbose
Installing UFW, configuring default rules, allowing SSH, HTTP, HTTPS, and activating the firewall.
6. Installing Fail2ban
Fail2ban scans server logs for suspicious activities (e.g., multiple failed SSH login attempts) and temporarily blocks the IP addresses of offenders.
sudo apt install fail2ban -y
sudo systemctl enable fail2ban
sudo systemctl start fail2ban
Installing Fail2ban and starting the service.
Create a copy of the configuration file for customization:
sudo cp /etc/fail2ban/jail.conf /etc/fail2ban/jail.local
sudo nano /etc/fail2ban/jail.local
Copying and editing Fail2ban configuration.
In the jail.local file, ensure that the [sshd] section is active (enabled = true) and, if desired, configure bantime (block time) and findtime (period for detecting violations).
[DEFAULT]
bantime = 1h
findtime = 10m
maxretry = 5

[sshd]
enabled = true
port    = ssh
logpath = %(sshd_log)s
backend = %(sshd_backend)s
Example Fail2ban configuration for SSH.
Save and close the file, then restart Fail2ban:
sudo systemctl restart fail2ban
sudo fail2ban-client status sshd
Restarting Fail2ban and checking the status of the SSH filter.
Your server is now basically prepared and secured. You can proceed with the installation of the main software.
Software Installation — Step-by-Step
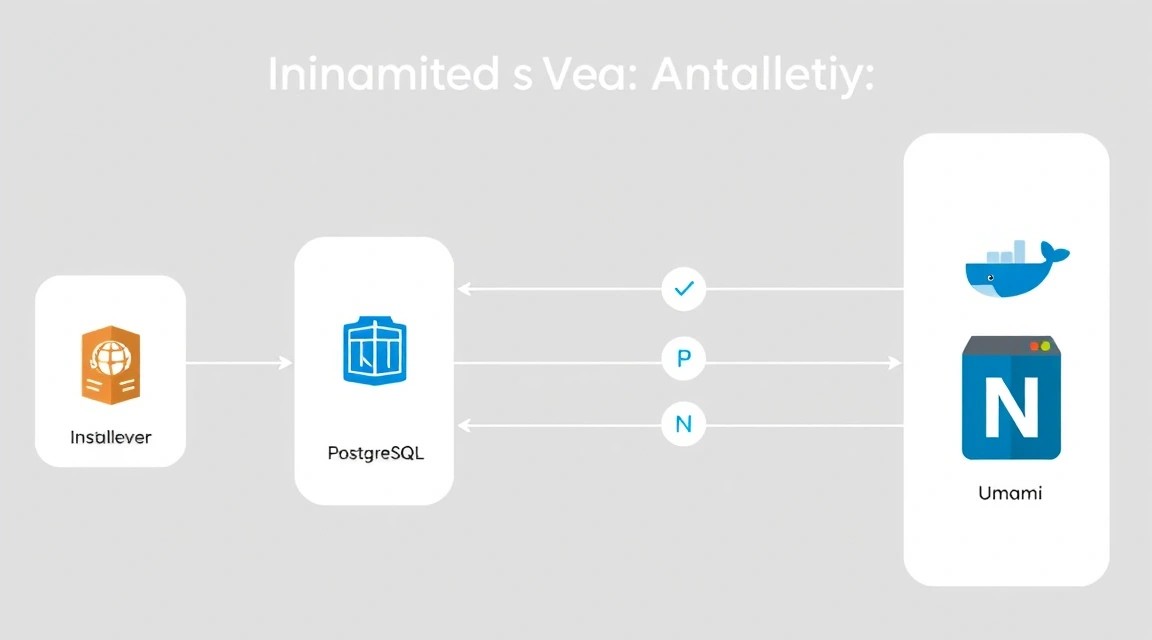
To deploy Umami, we will use Docker and Docker Compose. This will allow us to easily manage the Umami application and its PostgreSQL database in isolated containers, while Nginx will serve as a reverse proxy for handling web requests and HTTPS.
1. Installing Docker Engine
Let's start by installing Docker Engine and Docker Compose. We will use the official script to install the latest stable version of Docker, current for 2026 (we assume it will be version 26.x or newer).
# Install necessary packages for Docker installation
sudo apt update
sudo apt install ca-certificates curl gnupg lsb-release -y

# Add Docker's official GPG key
sudo install -m 0755 -d /etc/apt/keyrings
curl -fsSL https://download.docker.com/linux/ubuntu/gpg | sudo gpg --dearmor -o /etc/apt/keyrings/docker.gpg

# Add the Docker repository to APT sources
echo \
  "deb [arch="$(dpkg --print-architecture)" signed-by=/etc/apt/keyrings/docker.gpg] https://download.docker.com/linux/ubuntu \
  "$(. /etc/os-release && echo "$VERSION_CODENAME")" stable" | \
  sudo tee /etc/apt/sources.list.d/docker.list > /dev/null

# Update the package list with the new repository
sudo apt update

# Install Docker Engine, Docker CLI, and Containerd
sudo apt install docker-ce docker-ce-cli containerd.io -y

# Add the current user to the docker group to avoid using sudo with docker commands
sudo usermod -aG docker ваш_попользователь
Installing Docker Engine and adding a user to the docker group.
Exit the SSH session and log in again for group changes to take effect:
exit
ssh ваш_пользователь@ВАШ_IP_АДРЕС
Reconnecting to apply group changes.
Check Docker installation:
docker run hello-world
Running a Docker test container.
You should see a welcome message from Docker.
2. Installing Docker Compose
Docker Compose is usually installed as a Docker CLI plugin; the current version for 2026 will be 2.x.
# Check if Docker Compose is installed as a plugin
docker compose version

# If not installed, install (if necessary)
# Install Docker Compose as a Docker CLI plugin
sudo apt update
sudo apt install docker-compose-plugin -y
Checking and installing the Docker Compose plugin.
Check Docker Compose installation:
docker compose version
Checking Docker Compose version.
3. Installing Nginx
Nginx will act as a reverse proxy server for Umami and handle HTTPS traffic.
sudo apt update
sudo apt install nginx -y
sudo systemctl enable nginx
sudo systemctl start nginx
Installing Nginx and starting the service.
Check Nginx status:
sudo systemctl status nginx
Checking Nginx status.
You should see that Nginx is active (active (running)).
4. Creating a Docker Compose File for Umami and PostgreSQL
Create a directory for your Umami project and navigate into it:
mkdir umami
cd umami
Creating a project directory and navigating into it.
Create the docker-compose.yml file:
nano docker-compose.yml
Creating the Docker Compose file.
Paste the following content. Pay attention to the image versions: postgres:16 (or postgres:17, current for 2026) and umami-software/umami:postgresql-latest (or a specific stable version, e.g., v2.10.1 or v3.x, current for 2026). Always check official Umami releases and Docker Hub for PostgreSQL for the latest stable versions.
version: '3.8'

services:
  umami:
    image: umami-software/umami:postgresql-latest # Or a specific version, e.g., v2.10.1, v3.0.0
    container_name: umami
    restart: always
    ports:
      - "3000:3000" # Umami listens on port 3000 inside the container
    environment:
      # Replace these values with your own! APP_SECRET should be a long random string.
      DATABASE_URL: postgresql://umami:your_db_password@db:5432/umami
      APP_SECRET: your_super_secret_key_for_umami_app
      # Additional options, if needed, e.g., for email notifications
      # SMTP_HOST: smtp.example.com
      # SMTP_PORT: 587
      # SMTP_USER: [email protected]
      # SMTP_PASS: your_smtp_password
      # SMTP_SENDER: [email protected]
    depends_on:
      - db
    volumes:
      - ./umami-data:/app/umami-data # For storing files, if Umami uses them

  db:
    image: postgres:16 # Or postgres:17, current for 2026
    container_name: umami-db
    restart: always
    environment:
      POSTGRES_DB: umami
      POSTGRES_USER: umami
      POSTGRES_PASSWORD: your_db_password # Replace with a strong password!
    volumes:
      - ./postgres-data:/var/lib/postgresql/data
Docker Compose configuration for Umami and PostgreSQL.
IMPORTANT:
- Replace
your_db_passwordwith a strong, unique password. - Replace
your_super_secret_key_for_umami_appwith a long, random string. You can generate it using the commandopenssl rand -base64 32. - Ensure that
DATABASE_URLin theumamiservice matches the credentials fordb.
# Example of generating APP_SECRET
openssl rand -base64 32
Generating a random key for APP_SECRET.
Save the file (Ctrl+O, Enter) and exit (Ctrl+X).
5. Initializing the Umami Database
Before launching Umami, you need to initialize the database. This is done using the db-push command, which creates the necessary tables.
# Start only the database service so it's ready
docker compose up -d db

# Wait a few seconds for the database to start
sleep 10

# Initialize the Umami database
docker compose exec umami yarn db-push
Starting the database and initializing Umami.
If you see a message like "Database is already in sync", it means the tables have already been created.
6. Starting Umami and PostgreSQL
Now that the database is initialized, you can start all services:
docker compose up -d
Starting all Docker Compose services in the background.
Check the status of the running containers:
docker compose ps
Checking container status.
Both containers (umami and umami-db) should be in the running state.
At this point, Umami is accessible inside your VPS on port 3000 (http://localhost:3000). The next step will be to configure Nginx to access it externally via a domain name and HTTPS.
Configuration
After installing all components, you need to configure Nginx as a reverse proxy for Umami and ensure a secure HTTPS connection using Let's Encrypt.
1. Domain Name Setup
Before proceeding, ensure that you have a domain name (e.g., analytics.yourdomain.com) and its A-record points to your VPS's IP address. DNS changes can take some time to propagate (up to several hours), so make sure this is done in advance.
2. Nginx Configuration for Umami
Let's create a new Nginx configuration file for your domain. Replace analytics.yourdomain.com with your actual domain.
sudo nano /etc/nginx/sites-available/analytics.yourdomain.com
Creating the Nginx configuration file.
Insert the following content:
server {
    listen 80;
    listen [::]:80;
    server_name analytics.yourdomain.com; # Replace with your domain

    location / {
        proxy_pass http://localhost:3000; # Umami listens on port 3000 inside the VPS
        proxy_set_header Host $host;
        proxy_set_header X-Real-IP $remote_addr;
        proxy_set_header X-Forwarded-For $proxy_add_x_forwarded_for;
        proxy_set_header X-Forwarded-Proto $scheme;
        proxy_http_version 1.1;
        proxy_set_header Upgrade $http_upgrade;
        proxy_set_header Connection "upgrade";
    }
}
Nginx configuration for reverse proxy to Umami.
Save the file (Ctrl+O, Enter) and exit (Ctrl+X).
3. Activating Nginx Configuration
Create a symbolic link to the configuration file in the sites-enabled directory and check the Nginx syntax.
sudo ln -s /etc/nginx/sites-available/analytics.yourdomain.com /etc/nginx/sites-enabled/
sudo nginx -t
Creating a symbolic link and checking Nginx syntax.
If the test is successful (syntax is ok, test is successful), restart Nginx:
sudo systemctl restart nginx
Restarting Nginx.
4. Setting up TLS/HTTPS with Certbot (Let's Encrypt)
To ensure a secure HTTPS connection, we will use Certbot to obtain and automatically renew free SSL/TLS certificates from Let's Encrypt.
# Install Certbot
sudo apt install certbot python3-certbot-nginx -y

# Obtain certificate (replace with your domain and email)
sudo certbot --nginx -d analytics.yourdomain.com --email [email protected] --agree-tos --no-eff-email
Installing Certbot and obtaining a Let's Encrypt certificate.
Certbot will automatically modify the Nginx configuration, adding HTTPS settings and redirecting from HTTP to HTTPS. It will also configure automatic certificate renewal via a cronjob or systemd timer.
Check that Certbot has configured automatic renewal:
sudo systemctl status certbot.timer
Checking Certbot timer status for auto-renewal.
You should see that the timer is active and running.
5. Verifying Functionality
Now Umami should be accessible via your domain over HTTPS.
curl -I https://analytics.yourdomain.com
Checking your domain's HTTP headers.
You should see an HTTP/2 200 status and headers indicating Nginx and an SSL certificate.
Open a web browser and navigate to https://analytics.yourdomain.com. You should see the Umami login page. Standard credentials:
- Username:
admin - Password:
umami
Be sure to change the administrator password immediately after the first login!
After logging in, you will be able to add your first website for tracking. Umami will provide you with a small JavaScript code snippet that you will need to insert into the <head> section of your website.
<script async src="https://analytics.yourdomain.com/script.js" data-website-id="ВАШ_ID_САЙТА"></script>
Example Umami tracking script.
Replace https://analytics.yourdomain.com/script.js with your actual URL and ВАШ_ID_САЙТА with the ID that Umami generates for your website.
Backups and Maintenance
Backup and regular maintenance are critically important for any production system. Failure to adhere to these practices can lead to data loss and downtime.
What to Back Up
For Umami deployed with Docker, PostgreSQL, and Nginx, the following components need to be backed up regularly:
- PostgreSQL Database: Contains all your analytical data. This is the most important component.
- Umami Configuration Files: The
docker-compose.ymlfile and any associated.envfiles containing environment variables and secrets. - Nginx Configuration Files: The
/etc/nginx/sites-available/analytics.yourdomain.comfile and other custom Nginx settings. - Let's Encrypt SSL Certificates: Although Certbot renews them, having a copy is a good idea. They are stored in
/etc/letsencrypt/.
Simple Auto-Backup Script
Let's create a simple Bash script that will perform backups of PostgreSQL and configuration files. We will use pg_dump for PostgreSQL and rsync for files.
Create a directory for backups on your VPS:
mkdir -p ~/backups/umami
Creating a directory for backups.
Create the script file backup_umami.sh:
nano ~/backup_umami.sh
Creating the backup script.
Insert the following content, replacing your_db_password with the actual Umami database password:
#!/bin/bash

# --- Configuration ---
BACKUP_DIR="/home/your_user/backups/umami" # Path to the backup directory
DATE=$(date +%Y%m%d%H%M%S)
DB_CONTAINER_NAME="umami-db"
DB_NAME="umami"
DB_USER="umami"
DB_PASSWORD="your_db_password" # Umami database password
UMAMI_COMPOSE_DIR="/home/your_user/umami" # Directory with docker-compose.yml

# --- Creating a backup directory for the current date ---
CURRENT_BACKUP_DIR="$BACKUP_DIR/$DATE"
mkdir -p "$CURRENT_BACKUP_DIR"

echo "Starting Umami backup to $CURRENT_BACKUP_DIR..."

# --- PostgreSQL Database Backup ---
echo "Backing up PostgreSQL database..."
# Use docker exec to run pg_dump inside the database container
docker exec "$DB_CONTAINER_NAME" pg_dump -U "$DB_USER" -d "$DB_NAME" > "$CURRENT_BACKUP_DIR/umami_db_backup.sql"
if [ $? -eq 0 ]; then
    echo "Database backup successfully created."
else
    echo "Error creating database backup!"
fi

# --- Configuration Files Backup ---
echo "Backing up Umami configuration files..."
rsync -avz "$UMAMI_COMPOSE_DIR/docker-compose.yml" "$CURRENT_BACKUP_DIR/"
rsync -avz "$UMAMI_COMPOSE_DIR/.env" "$CURRENT_BACKUP_DIR/" # If you are using a .env file
echo "Umami files backup completed."

echo "Backing up Nginx configuration..."
rsync -avz /etc/nginx/sites-available/analytics.yourdomain.com "$CURRENT_BACKUP_DIR/nginx_umami.conf"
echo "Nginx backup completed."

echo "Backing up Let's Encrypt certificates (symbolic links)..."
# We copy only symbolic links, not the certificates themselves,
# as they can be large and contain many files.
# For full recovery, it's better to reissue them with certbot --nginx
rsync -avzL /etc/letsencrypt/live/analytics.yourdomain.com "$CURRENT_BACKUP_DIR/letsencrypt_symlinks"
echo "Let's Encrypt certificates backup completed."

echo "Backup completed."

# --- Cleaning up old backups (optional, keep last 7 days) ---
echo "Deleting old backups (older than 7 days)..."
find "$BACKUP_DIR" -maxdepth 1 -type d -mtime +7 -exec rm -rf {} \;
echo "Cleanup completed."
Backup script for Umami.
Make the script executable:
chmod +x ~/backup_umami.sh
Granting execution rights to the script.
Where to Store (External S3 / Separate VPS)
Storing backups on the same server as the original data is extremely risky. If the server fails, you will lose both your data and your backups. Always use remote storage:
- Cloud Storage (S3-compatible): Services like Amazon S3, DigitalOcean Spaces, Backblaze B2 offer reliable and inexpensive storage. You can use utilities like
rcloneto automatically synchronize local backups with S3. - Separate VPS: You can have a second, less powerful VPS that will receive backups from the main server via SCP/SFTP or
rsync. - Local NAS/PC: For very small projects, you can periodically download backups to your computer or network storage.
For example, to send backups to S3 using rclone (after installation and configuration):
# Add to backup_umami.sh script
echo "Sending backups to S3..."
rclone sync "$BACKUP_DIR" "my_s3_remote:umami-backups" # Replace with your remote storage name
echo "Sending to S3 completed."
Example rclone command for sending backups to cloud storage.
Setting up Cron for Automatic Backup Execution
Edit the Cron schedule for your user:
crontab -e
Opening the crontab file for editing.
Add the following line for daily backup execution, for example, at 03:00 AM:
0 3 * * * /home/your_user/backup_umami.sh >> /home/your_user/backups/umami_backup.log 2>&1
Adding a Cron job for daily backup.
This line runs the script daily at 3 AM and redirects all output to the log file umami_backup.log.
Updates: rolling vs maintenance window
Regular software updates are important for security and new features. For Umami and its components:
-
Updating Docker Containers (Umami, PostgreSQL):
This can be done with minimal downtime. It is recommended to plan a "maintenance window" when website traffic is minimal.
cd ~/umami
docker compose pull             # Download new images
docker compose down             # Stop and remove old containers
docker compose up -d            # Start new containers
Updating Umami and PostgreSQL Docker containers.
After updating Umami, re-initializing the database might be necessary if there were schema changes in the new version:
docker compose exec umami yarn db-push. -
Updating System Packages (Nginx, Docker Engine, Certbot, OS):
This should be done regularly, for example, once a month. Some updates may require a server reboot.
sudo apt update && sudo apt upgrade -y
sudo apt autoremove -y
# If there were kernel or critical component updates, a reboot might be required
# sudo reboot
Updating system packages.
Always check the logs after updates to ensure all services are functioning correctly.
Troubleshooting + FAQ
Even with careful setup, problems can arise. This section will help you diagnose and resolve the most common issues, as well as answer frequently asked questions.
What to do if Umami cannot connect to the database?
Error: You see messages in Umami logs or on the web page about being unable to connect to the database (Cannot connect to database, Connection refused).
What to check:
- PostgreSQL container logs:
docker compose logs db. Ensure PostgreSQL is running without errors. - Umami container logs:
docker compose logs umami. Look for errors related to database connection. - Environment variables: Make sure that
DATABASE_URLin thedocker-compose.ymlfile for theumamiservice exactly matches the PostgreSQL credentials (username, password, database name) and the database service name (db). - Ports: Ensure that containers can communicate with each other through the internal Docker network (by default, Docker Compose creates its own network).
How to fix: Double-check DATABASE_URL and PostgreSQL environment variables. Ensure passwords match. If you modified docker-compose.yml, restart the containers: docker compose down && docker compose up -d. If PostgreSQL does not start, check if the server has enough RAM or free disk space.
Nginx returns 502 Bad Gateway or 504 Gateway Timeout.
Error: When trying to access Umami via a browser, you see an Nginx 502 or 504 error.
What to check:
- Umami container status:
docker compose ps. Ensure theumamicontainer is in therunningstate. - Nginx logs:
sudo tail -f /var/log/nginx/error.log. Look for errors related to proxying. - Umami logs:
docker compose logs umami. Umami might not be starting or crashing immediately after startup. - Umami port: Ensure Nginx is proxying requests to the correct port (
http://localhost:3000), and Umami is indeed listening on this port within the VPS.
How to fix: If the Umami container is not running, check its logs and try to start it manually. If the problem is with Nginx, ensure that proxy_pass in the Nginx configuration file is specified correctly. Umami might require more time to start, and Nginx is timing out; in this case, you can increase proxy_read_timeout in the Nginx configuration.
Certbot cannot obtain a Let's Encrypt certificate.
Error: certbot --nginx returns errors related to domain validation or connection.
What to check:
- DNS records: Ensure that your domain's A-record (e.g.,
analytics.yourdomain.com) correctly points to your VPS's IP address. Usedig analytics.yourdomain.comto check. DNS changes can take up to 24 hours. - UFW firewall: Ensure that ports 80 (HTTP) and 443 (HTTPS) are open.
sudo ufw status verbose. - Nginx: Ensure Nginx is running and correctly listening on port 80. Certbot uses Nginx for domain validation.
- Let's Encrypt Rate Limits: If you have tried to obtain a certificate many times, you might have hit Let's Encrypt rate limits. Wait an hour or use the
--stagingflag for test attempts.
How to fix: Correct DNS records, open ports in UFW, ensure Nginx is running. If the problem persists, try running Certbot with the --dry-run flag to simulate certificate acquisition without an actual request.
What is the minimum suitable VPS configuration?
For a basic Umami installation and tracking a small to medium website (up to 50,000 page views per month), a VPS with 1 CPU core, 2 GB of RAM, and a 40 GB SSD disk will be minimally suitable. This will be sufficient for comfortable operation of Umami and PostgreSQL, as well as for system processes. It is important that the disk is SSD to ensure good database performance.
What to choose — VPS or dedicated for this task?
The choice between a VPS and a dedicated server depends on the scale of your project and resource requirements. For most users, including developers, solo founders, and owners of medium-sized websites, a VPS is the optimal choice. It offers sufficient performance, flexibility, and cost-effectiveness. A dedicated server becomes advisable only under very high loads (millions of page views per month), when maximum performance, full control over hardware is required, or if you plan to host many other resource-intensive applications along with Umami.
How to update Umami and other components?
To update Umami and PostgreSQL (which run in Docker containers), navigate to the directory containing your docker-compose.yml and execute: docker compose pull (to download new images) and then docker compose up -d (to restart containers with new images). To update Nginx, Docker Engine, and the operating system, use standard package manager commands: sudo apt update && sudo apt upgrade -y. Always make backups before major updates.
How to reset Umami administrator password?
If you forget your Umami administrator password, you can reset it by executing a command directly in the Umami container (or via the PostgreSQL database). As of 2026, Umami will likely have a CLI tool for user management. If not, this can be done via an SQL query. Example (check current Umami documentation):
# Connect to the Umami container
docker compose exec umami bash

# Execute the command to reset the password (example, command may change)
# yarn umami-cli users reset-password admin new_strong_password
# Or if there is no direct CLI, you will have to work with the DB
Example of resetting Umami administrator password.
If there is no CLI tool, you will have to directly modify the password hash in the _User table in the PostgreSQL database. This is a more complex process and requires knowledge of SQL and the Umami database structure.
Conclusions and Next Steps
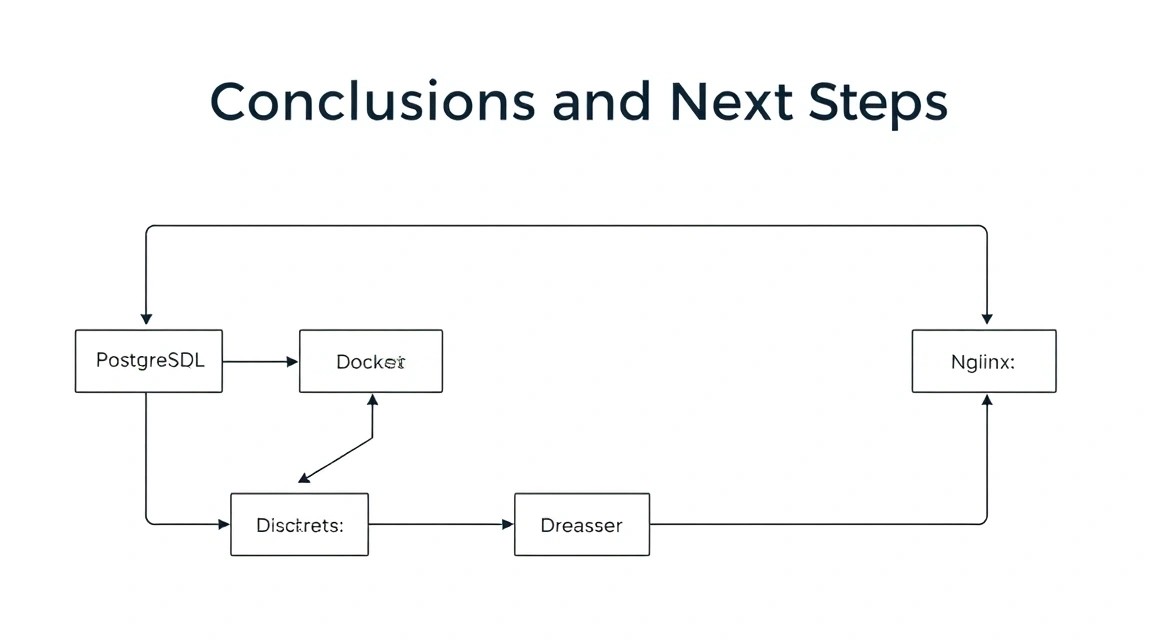
Congratulations! You have successfully installed and configured Umami Web Analytics on your VPS using Docker, PostgreSQL, and Nginx. You now have a powerful, private, and fully controlled tool for collecting your website's analytics, which respects user privacy and gives you full sovereignty over your data. You have learned not only how to deploy a complex application but also how to ensure its security, operability, and reliability through backup and maintenance.
Next Steps
To make the most of your new analytics system and continue its development:
- Add all your websites: Log in to the Umami panel, add all the projects you want to track, and insert the generated scripts onto your pages.
- Explore additional Umami features: Umami supports custom event tracking, allowing you to gain a deeper understanding of user interaction with your site. Set up tracking for button clicks, form submissions, and other key actions.
- Server Monitoring: Install monitoring tools (e.g., Prometheus + Grafana, Netdata, or Zabbix) to track CPU load, RAM usage, disk space, and network traffic of your VPS. This will help you identify potential problems in advance and plan for scaling.
- Further optimization and scaling: As traffic grows, consider optimizing PostgreSQL performance (e.g., configuring
postgresql.conf), Nginx caching, or even horizontally scaling Umami to multiple Docker instances.
Thanks to this guide, you have laid a solid foundation for your private web analytics, which can be developed and adapted to any future needs.