
Installation of Code-Server on VPS: VS Code in the browser, SSL and security
TL;DR
In this detailed guide, we will step-by-step configure Code-Server on your VPS, providing you with a full-fledged Visual Studio Code development environment right in your browser. You will learn how to secure the connection with SSL/TLS via Caddy, set up basic server protection measures, and automate backups. This will allow you to work on projects from anywhere in the world, leveraging the power of your remote server.
- Installing Code-Server on Ubuntu 24.04 LTS.
- Configuring the Caddy web server for proxying and automatic acquisition of Let's Encrypt SSL certificates.
- Basic security measures: UFW firewall, Fail2Ban, SSH key authentication.
- Ensuring remote access to your IDE via a domain name and HTTPS.
- Recommendations for choosing a VPS configuration and backup strategies.
What we are configuring and why
In this tutorial, we will focus on installing and configuring Code-Server on your own VPS. Code-Server is a powerful tool that allows you to run Visual Studio Code on a remote server and access it via a web browser. Imagine having a full-fledged IDE, accessible from any device, be it a laptop, tablet, or even a smartphone, without needing to install anything locally.
Ultimately, you will get a fully functional and secure development environment that is always available, always consistent, no matter where you are. All your projects, extensions, settings, and terminal will reside on the remote server, ensuring consistency and centralized management.
Why Code-Server on VPS?
There are several alternatives for remote development or cloud IDEs:
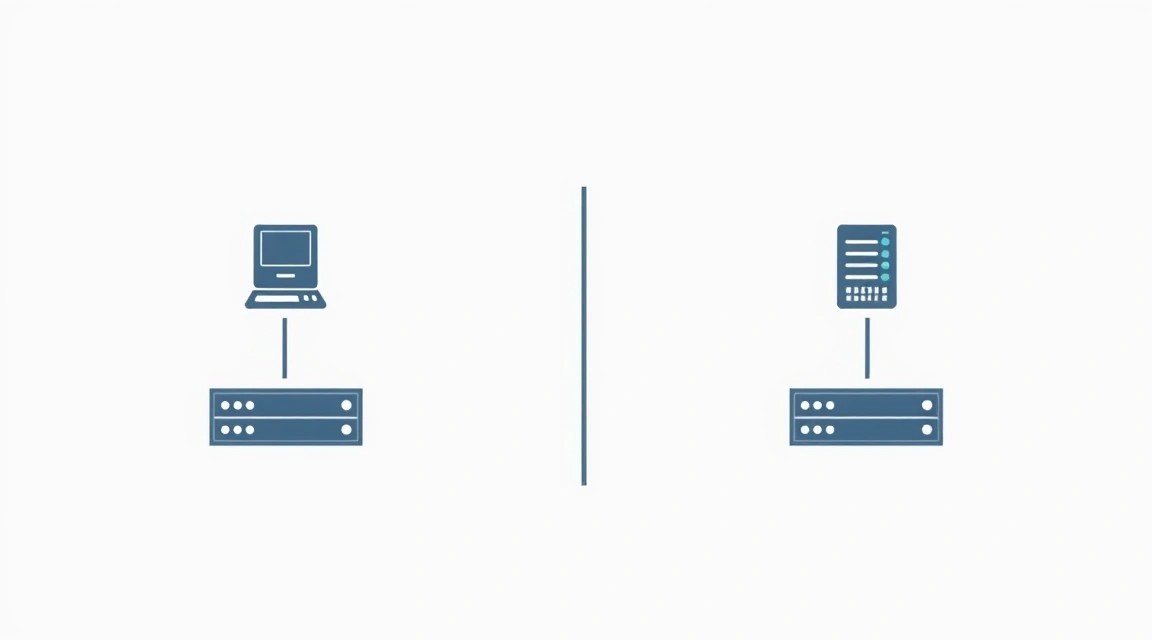
- Local VS Code with SSH Remote: An excellent option if you always have a powerful local computer. However, it ties you to a specific machine and requires VS Code to be installed on each device.
- Cloud IDEs (Gitpod, GitHub Codespaces, AWS Cloud9): These services provide ready-made development environments in the cloud. They are convenient but can be more expensive, have their limitations, and offer less control over the infrastructure. You also depend on their pricing policy and availability.
- Self-hosted Code-Server on VPS: This approach combines the flexibility of cloud solutions with full control over your infrastructure. You only pay for the VPS, can configure the server to your needs, install any tools and extensions, and fully control data security. This is an ideal option for developers, solo founders, crypto enthusiasts, and anyone who values privacy and independence.
Choosing Code-Server on a VPS allows you to own your development environment, optimize costs, and be confident in the security of your data, which is especially important for confidential projects.
What VPS config is needed for this task
Choosing the right VPS configuration is critical for comfortable work with Code-Server. Minimum requirements depend on the complexity of your projects, the number of concurrently open files, the extensions used, and compilers.
Minimum requirements for a single user and small projects:
- CPU: 2 vCPU. This will be sufficient for most tasks, including compiling small projects and running basic services.
- RAM: 2-4 GB. Code-Server itself consumes about 500 MB, plus each open extension, terminal, and language server adds to the load. For comfortable work with JavaScript, Python, or Go, 4 GB will be optimal.
- Disk: 40-60 GB NVMe SSD. SSD significantly speeds up read/write operations, which is important for loading projects, installing dependencies, and working with files. NVMe SSD will provide the best performance.
- Network: 100 Mbps or 1 Gbps Uplink. High network speed is important for fast loading of IDE pages in the browser and for working with remote repositories.
Recommended VPS plan for a single user and medium projects (relevant for 2026):
For more comfortable work, especially if you plan to run Docker containers, databases, or more resource-intensive processes in parallel with Code-Server, consider the following configuration:
- CPU: 4 vCPU
- RAM: 8 GB
- Disk: 80-160 GB NVMe SSD
- Network: 1 Gbps Uplink
Such a VPS with the specified characteristics will provide sufficient performance headroom for most development scenarios.
When is a dedicated server needed?
A dedicated server may be required if:
- You plan to use Code-Server for a large team (10+ people), where each developer will have their own isolated environment.
- Your projects are very resource-intensive (e.g., Linux kernel compilation, big data processing, machine learning) and require maximum CPU and RAM performance.
- You need complete hardware isolation and predictable performance without "neighboring" other users.
In these cases, a suitable dedicated server can be a more cost-effective and performant solution in the long run.
VPS Location: What it affects
Choose a VPS location that is geographically closer to you or your team. This minimizes latency when working with the IDE in the browser, making the Code-Server experience smoother and more responsive. For most European users, a VPS in Western or Central Europe will be the optimal choice.
Server Preparation
Before installing Code-Server, you need to perform basic configuration of your VPS to ensure security and stability. We will use Ubuntu Server 24.04 LTS (Noble Numbat), as it is a current and supported version for 2026.
1. Connecting via SSH and creating a new user
Always work as a limited user with sudo privileges, not as root. This reduces security risks.
# Connect as root (or the user provided by your provider)
ssh root@ВАШ_IP_АДРЕС

# Create a new user (replace 'youruser' with the desired name)
adduser вашпользователь

# Add the user to the sudo group
usermod -aG sudo вашпользователь

# Switch to the new user
su - вашпользователь
Now you will be working as the new user.
2. Setting up SSH key authentication
Using SSH keys is much more secure than passwords. If you don't have a key pair yet, generate them on your local machine:
# On your local machine
ssh-keygen -t ed25519 -C "ваш[email protected]"
Then copy the public key to the server:
# On your local machine
ssh-copy-id вашпользователь@ВАШ_IP_АДРЕС
After that, try connecting using the new key. Then disable password authentication for increased security. Edit the file /etc/ssh/sshd_config:
# On the server
sudo nano /etc/ssh/sshd_config
Find and change the following lines (add them if they don't exist):
PasswordAuthentication no
ChallengeResponseAuthentication no
UsePAM no
Save the file (Ctrl+O, Enter, Ctrl+X) and restart the SSH service:
sudo systemctl restart sshd
IMPORTANT: Before disconnecting from the server, make sure you can log in with your SSH key! If not, you risk losing access.
3. Configuring the UFW firewall
UFW (Uncomplicated Firewall) is a simple way to manage firewall rules.
# Allow SSH (default port 22)
sudo ufw allow OpenSSH

# Allow HTTP (port 80) and HTTPS (port 443) for Caddy
sudo ufw allow http
sudo ufw allow https

# Enable the firewall
sudo ufw enable
# Confirm 'y'
Check the firewall status:
sudo ufw status verbose
4. Installing and configuring Fail2Ban
Fail2Ban scans logs for suspicious activities (e.g., multiple failed SSH login attempts) and temporarily blocks the IP addresses of offenders.
# Install Fail2Ban
sudo apt install fail2ban -y

# Create a copy of the configuration for changes
sudo cp /etc/fail2ban/jail.conf /etc/fail2ban/jail.local

# Edit jail.local for configuration
sudo nano /etc/fail2ban/jail.local
In the jail.local file, you can configure parameters such as bantime (block time), findtime (period for searching attempts), and maxretry (maximum number of attempts). For most cases, the default settings are sufficient, but you can increase bantime, for example, to 1d (1 day).
[sshd]
enabled = true
port = ssh
logpath = %(sshd_log)s
backend = %(sshd_backend)s
bantime = 1d # Block for 1 day
maxretry = 3 # Block after 3 failed attempts
Save the file and restart Fail2Ban:
sudo systemctl restart fail2ban
sudo systemctl enable fail2ban
Check Fail2Ban status:
sudo fail2ban-client status sshd
5. System Update
Always update the system to the latest security packages.
# Update package list
sudo apt update

# Upgrade installed packages
sudo apt upgrade -y

# Remove unnecessary packages (optional)
sudo apt autoremove -y
Now your server is ready for Code-Server and Caddy installation.
Software Installation — Step-by-Step
In this step, we will install Code-Server and Caddy on our VPS. We will use the current versions available in 2026. For Code-Server, this will be version 4.20.0, and for Caddy, it will be 2.7.5.
1. Code-Server Installation
The easiest way to install Code-Server is to use the official installation script, which will handle dependencies and Systemd service setup.
# Update package index and install necessary utilities
sudo apt update && sudo apt install -y curl wget git

# Download and run the official Code-Server installation script (version 4.20.0)
# This command will download and install Code-Server, and also create a Systemd service
curl -fsSL https://code-server.dev/install.sh | sh -s -- --version 4.20.0
After the installation is complete, Code-Server will be configured as a system service. You can check its status:
# Check Code-Server service status
systemctl status code-server@вашпользователь
If the service is not running or shows an error, you may need to restart it or check the logs. By default, Code-Server runs on port 8080.
2. Caddy Web Server Installation
Caddy is a powerful, easy-to-use web server with automatic HTTPS support (Let's Encrypt). It is ideal for proxying Code-Server.
# Install packages required to add the Caddy repository
sudo apt install -y debian-keyring debian-archive-keyring apt-transport-https

# Add Caddy GPG key
curl -1sLf 'https://dl.cloudsmith.io/public/caddy/stable/gpg.key' | sudo gpg --dearmor -o /usr/share/keyrings/caddy-stable-archive-keyring.gpg

# Add Caddy repository to sources list
curl -1sLf 'https://dl.cloudsmith.io/public/caddy/stable/debian.deb.txt' | sudo tee /etc/apt/sources.list.d/caddy-stable.list

# Update package index and install Caddy (version 2.7.5)
sudo apt update
sudo apt install caddy -y
After installation, Caddy will also be configured as a system service and will start automatically. You can check its status as follows:
# Check Caddy service status
systemctl status caddy
3. Domain Name Configuration
For Caddy to work with automatic HTTPS, you will need a domain name. Register a domain if you don't have one, and create an A-record pointing to your VPS's IP address. For example: code.yourdomain.com -> YOUR_IP_ADDRESS.
Ensure that the DNS record has propagated across the network before proceeding to the next step (this can take from a few minutes to several hours).
4. Firewall Configuration for Caddy
We have already allowed HTTP and HTTPS, but make sure they are active.
# Check UFW status
sudo ufw status verbose
You should see rules for ports 80 and 443 (HTTP and HTTPS) in ALLOW status.
Configuration
Now that Code-Server and Caddy are installed, we will configure them to work together, provide access via a domain name, and automate SSL certificate acquisition.
1. Code-Server Configuration
Code-Server by default creates a configuration file or uses environment variables. For our case, we will use the configuration file created by the installation script. It is located at ~/.config/code-server/config.yaml.
# Open the Code-Server configuration file
nano ~/.config/code-server/config.yaml
In this file, you can configure parameters such as the password for IDE access. Find or add the following lines:
bind-addr: 127.0.0.1:8080
auth: password
password: "YOUR_STRONG_PASSWORD" # Be sure to replace with a strong password!
cert: false
bind-addr: 127.0.0.1:8080: Code-Server will only listen on the local interface, which is secure as Caddy will proxy requests.auth: password: Enables password authentication.password: "YOUR_STRONG_PASSWORD": Set a very strong password.cert: false: Disables Code-Server's built-in HTTPS, as Caddy will handle SSL.
Save the file (Ctrl+O, Enter, Ctrl+X) and restart Code-Server to apply the changes:
sudo systemctl restart code-server@вашпользователь
2. Caddy Configuration for Proxying and SSL
Caddy uses a Caddyfile for its configuration, located at /etc/caddy/Caddyfile.
# Open Caddyfile for editing
sudo nano /etc/caddy/Caddyfile
Remove all existing content and add the following configuration, replacing code.yourdomain.com with your actual domain:
code.yourdomain.com {
    reverse_proxy 127.0.0.1:8080 {
        # Headers required for correct functioning of WebSocket and other Code-Server features
        header_up Host {host}
        header_up X-Real-IP {remote_ip}
        header_up X-Forwarded-For {remote_ip}
        header_up X-Forwarded-Proto {scheme}
    }

    # Enable compression (gzip) for static files
    encode gzip

    # Additional security headers (optional, but recommended)
    header {
        Strict-Transport-Security "max-age=31536000; includeSubDomains; preload"
        X-Content-Type-Options "nosniff"
        X-Frame-Options "DENY"
        X-XSS-Protection "1; mode=block"
        Referrer-Policy "strict-origin-when-cross-origin"
    }
}
Save the file and restart Caddy for it to apply the new configuration and obtain an SSL certificate from Let's Encrypt:
# Check Caddyfile syntax before restarting
sudo caddy validate --config /etc/caddy/Caddyfile

# Restart Caddy to apply the new configuration
sudo systemctl reload caddy
Caddy will automatically attempt to obtain an SSL certificate for your domain. If problems arise, verify that your DNS A-record correctly points to the server's IP address and that ports 80/443 are open in UFW.
3. Functionality Check
After configuring and restarting Caddy, open your web browser and navigate to https://code.yourdomain.com. You should see the Code-Server login page. Enter the password you set in config.yaml.
If you encounter problems, check the Caddy and Code-Server logs:
# View Caddy logs
journalctl -u caddy --no-pager

# View Code-Server logs
journalctl -u code-server@вашпользователь --no-pager
You can also check if Code-Server is listening on port 8080:
sudo ss -tuln | grep 8080
And ensure that Caddy is listening on ports 80 and 443:
sudo ss -tuln | grep -E "80|443"
If everything is configured correctly, you will gain access to a full-fledged VS Code environment in your browser with a secure HTTPS connection.
Backups and Maintenance
Regular backups and timely server maintenance are key to the stable and secure operation of your development environment.
1. What to Back Up
For Code-Server and its associated development environment, it is important to back up the following components:
- Projects and working files: All your repositories, source code, data that you create or modify. This is usually located in the user's home directory (
/home/youruser/) or in specially designated folders. - Code-Server configuration: The
~/.config/code-server/config.yamlfile, as well as the~/.local/share/code-server/folder, which contains installed extensions, user settings, and cache. - Caddy configuration: The
/etc/caddy/Caddyfilefile. - System configuration: Important system configs if you have made changes to them (e.g.,
/etc/ssh/sshd_config,/etc/fail2ban/jail.local,/etc/ufw/). - Databases: If you use local databases (PostgreSQL, MySQL), be sure to dump them.
2. Simple Auto-Backup Script with Restic
Restic is a modern, fast, and secure backup program that supports encryption and data deduplication. It can save backups to various storage locations, including S3-compatible objects, SFTP, Backblaze B2, and others.
Installing Restic:
# Download the latest version of Restic (e.g., 0.17.0, current for 2026)
wget https://github.com/restic/restic/releases/download/v0.17.0/restic_0.17.0_linux_amd64.bz2
bzip2 -d restic_0.17.0_linux_amd64.bz2
sudo mv restic_0.17.0_linux_amd64 /usr/local/bin/restic
sudo chmod +x /usr/local/bin/restic
Initializing the Restic repository:
Create a directory for backup scripts and initialize the repository. For example, we will use S3-compatible storage (e.g., Backblaze B2, DigitalOcean Spaces, or another VPS with MinIO).
mkdir ~/backups
nano ~/backups/backup.sh
Contents of backup.sh (replace placeholders with your data):
#!/bin/bash

# Environment variables for Restic
export RESTIC_REPOSITORY="s3:https://s3.YOUR_S3_REGION.com/YOUR_S3_BUCKET"
export AWS_ACCESS_KEY_ID="YOUR_S3_ACCESS_KEY"
export AWS_SECRET_ACCESS_KEY="YOUR_S3_SECRET_KEY"
export RESTIC_PASSWORD="YOUR_COMPLEX_BACKUP_PASSWORD" # Separate password for backup encryption

# Initialize the repository (run once manually)
# restic init

# Create a snapshot
restic backup \
    /home/youruser \
    /etc/caddy/Caddyfile \
    /etc/ssh/sshd_config \
    --exclude-file=/home/youruser/.cache \
    --exclude-file=/home/youruser/.npm \
    --exclude-file=/home/youruser/.vscode-server \
    --tag code-server-daily

# Clean up old snapshots (keep last 7 days, 4 weeks, 12 months, 1 year)
restic forget \
    --keep-daily 7 \
    --keep-weekly 4 \
    --keep-monthly 12 \
    --keep-yearly 1 \
    --prune

# Check the repository (optional)
restic check
Make the script executable:
chmod +x ~/backups/backup.sh
IMPORTANT: Run restic init manually ONCE to create the repository. After that, comment out this line in the script.
3. Where to Store Backups
Never store backups on the same server as the original data. Use:
- External S3-compatible storage: Backblaze B2, DigitalOcean Spaces, AWS S3. This is relatively inexpensive and reliable.
- Separate VPS: You can set up a second, less powerful VPS and use it as an SFTP server for storing backups.
- Network Attached Storage (NAS): If you have your own NAS, you can configure SFTP access to it.
4. Automating Backups with Cron
Add the script to the Cron scheduler for daily execution.
crontab -e
Add the following line to the end of the file so that the script runs every day at 3:00 AM:
0 3 * * * /home/youruser/backups/backup.sh >> /home/youruser/backups/backup.log 2>&1
5. Updates: rolling vs maintenance window
- OS Updates: Regularly run
sudo apt update && sudo apt upgrade -y. Critical kernel updates may require a server reboot. Plan this for times of lowest activity. - Code-Server Updates: To update Code-Server to a new version (e.g., from 4.20.0 to 4.21.0), you can re-run the installation script with the new version:
It is recommended to check logs for errors after the update.curl -fsSL https://code-server.dev/install.sh | sh -s -- --version 4.21.0 sudo systemctl restart code-server@youruser - Caddy Updates: Caddy is updated via the package manager:
sudo apt update && sudo apt upgrade caddy -y. After the update, Caddy will automatically restart to apply changes.
Always back up before major updates, especially before updating the OS or Code-Server.
Troubleshooting + FAQ
Here are answers to frequently asked questions and solutions to common problems you may encounter when setting up Code-Server.
Code-Server does not start or is inaccessible
What to check:
- Check the Code-Server service status:
systemctl status code-server@youruser. - View Code-Server logs:
journalctl -u code-server@youruser --no-pager. - Ensure Code-Server is listening on port 8080:
sudo ss -tuln | grep 8080. - Check the configuration in
~/.config/code-server/config.yamlfor errors.
How to fix: Resolve errors found in the logs. Ensure bind-addr is set to 127.0.0.1:8080 and the password is correct. Restart the service: sudo systemctl restart code-server@youruser.
Cannot access Code-Server via domain (Caddy not working)
What to check:
- Check the Caddy service status:
systemctl status caddy. - View Caddy logs:
journalctl -u caddy --no-pager. - Ensure Caddy is listening on ports 80 and 443:
sudo ss -tuln | grep -E "80|443". - Check the correctness of your
Caddyfile:sudo caddy validate --config /etc/caddy/Caddyfile. - Ensure that the DNS A-record for your domain (e.g.,
code.yourdomain.com) points to your VPS's IP address. - Check that UFW allows ports 80 and 443:
sudo ufw status verbose.
How to fix: Correct errors in Caddyfile, update DNS records if they are incorrect, or open ports in UFW. Restart Caddy: sudo systemctl reload caddy.
SSL certificate not issued
What to check:
- Ensure your domain correctly resolves to the server's IP address (you can use
dig code.yourdomain.com). - Ensure ports 80 and 443 are open in UFW and not occupied by another application.
- Check Caddy logs for Let's Encrypt errors.
How to fix: Resolve DNS or firewall issues. Caddy will automatically attempt to obtain a certificate on restart. If the problem persists, you might have a Let's Encrypt certificate limit (rare for a new domain).
Slow Code-Server performance
What to check:
- CPU and RAM usage on the server:
htoportop. - Disk subsystem speed (if projects are large).
- VS Code extensions: some extensions can be very resource-intensive. Try disabling them.
- Network connection between your client and the VPS: check ping.
How to fix: Consider upgrading your VPS (more CPU/RAM, NVMe SSD). Optimize project code. Disable unused extensions. Check the stability of your internet connection.
What is the minimum suitable VPS configuration?
For a single user and small projects, a VPS with 2 vCPU, 2-4 GB RAM, and 40-60 GB NVMe SSD will be minimally suitable. This will be sufficient for basic work with most programming languages without running heavy background processes. However, for more comfortable work and medium-complexity projects, 4 vCPU, 8 GB RAM, and 80+ GB NVMe SSD are recommended.
What to choose – VPS or dedicated for this task?
For most individual developers, solo founders, or small teams (up to 3-5 people), a VPS is the optimal choice. It is economical and provides sufficient power. A dedicated server should be considered if you have very large and resource-intensive projects requiring maximum performance, or if you are deploying Code-Server for a large team (10+ people) where complete resource isolation and hardware customization are required. In other cases, a VPS will be a more flexible and economical solution.
Conclusions and Next Steps
Congratulations! You have successfully set up Code-Server on your VPS, providing yourself with access to a full-fledged Visual Studio Code development environment from any browser, secured with SSL/TLS. You have also implemented basic security measures and configured automatic backups, making your working environment reliable and secure.
Now you have a powerful, flexible, and fully controlled tool for remote development. But the possibilities don't end there. Here are some next steps you can take:
- Git Integration: If you haven't already, clone your Git repositories to your VPS and start actively using VS Code's built-in version control features.
- Docker Installation: For more complex projects, consider installing Docker on your VPS. This will allow you to run isolated environments for developing, testing, and deploying applications without cluttering the main system.
- Deployment Automation: Set up CI/CD pipelines (e.g., using GitLab CI/CD, GitHub Actions, or Jenkins) for automatic testing and deployment of your projects directly from the VPS.
- Server Monitoring: Install monitoring tools (e.g., Prometheus + Grafana, Netdata) to track your VPS performance and detect problems in a timely manner.