Instalación y configuración de Syncthing en un VPS para una sincronización segura de archivos
TL;DR
En esta guía, configuraremos Syncthing paso a paso en su VPS para garantizar una sincronización de archivos privada, descentralizada y segura entre sus dispositivos. Obtendrá control total sobre sus datos, evitando proveedores de la nube, y podrá mantener versiones actualizadas de archivos importantes en todas las máquinas necesarias.
Instalación de Syncthing a través del repositorio APT oficial en Debian/Ubuntu.
Configuración del firewall UFW para un acceso seguro a la interfaz web de Syncthing y a los puertos de sincronización.
Ejecución de Syncthing como un servicio del sistema usando systemd para un inicio automático y un funcionamiento estable.
Protección de la interfaz web con HTTPS, utilizando Caddy como proxy inverso con Let's Encrypt automático.
Consejos prácticos para copias de seguridad de la configuración y los datos, así como para mantener el sistema actualizado.
¿Qué configuramos y por qué?
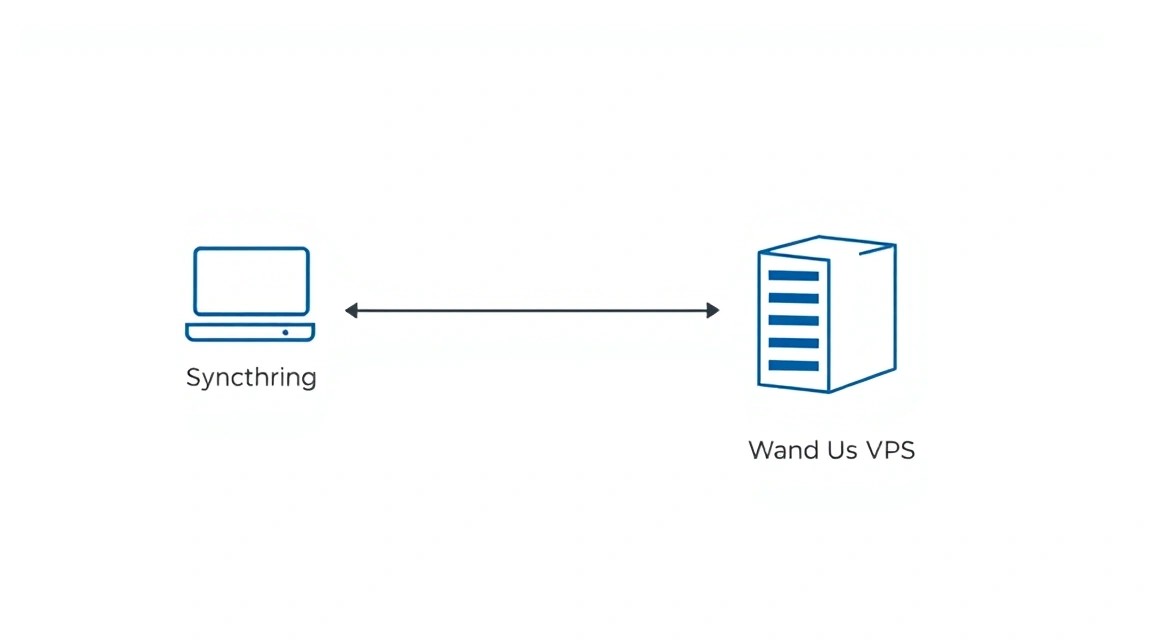
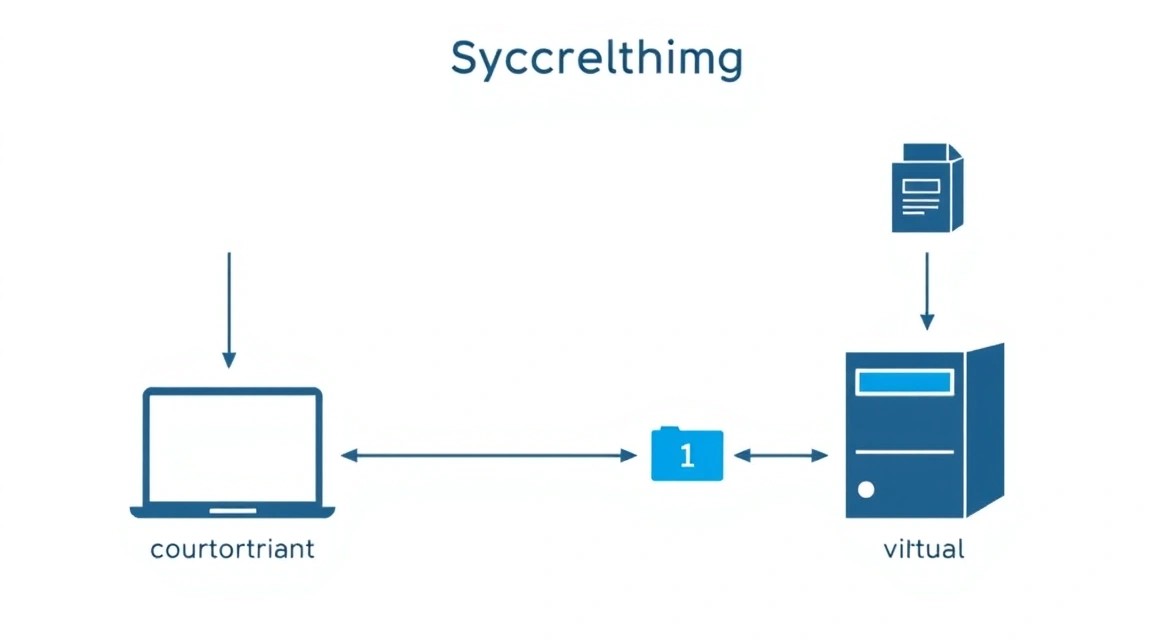
Diagrama: Qué configuramos y por qué
En el mundo moderno, donde los datos son el activo más valioso, la necesidad de una sincronización de archivos fiable y segura entre diferentes dispositivos se vuelve críticamente importante. Muchas empresas ofrecen soluciones en la nube como Dropbox, Google Drive o OneDrive, pero a menudo conllevan compromisos en cuanto a privacidad, seguridad y control sobre sus propios datos. Configuramos Syncthing, un software gratuito, descentralizado y de código abierto para la sincronización continua de archivos.
Syncthing le permite sincronizar archivos entre dos o más ordenadores en tiempo real, sin necesidad de almacenarlos en servidores de terceros. Esto significa que sus datos se mueven directamente entre sus dispositivos, utilizando cifrado de extremo a extremo. Configurar Syncthing en su propio VPS le da control total sobre uno de los nodos de sincronización, asegurando su disponibilidad y estabilidad constantes, lo cual es especialmente útil para copias de seguridad, intercambio de archivos en equipo o para mantener un entorno de trabajo actualizado.
En resumen, obtendrá su propia sincronización "en la nube" privada y segura, totalmente controlada por usted. Es la solución ideal para desarrolladores que desean sincronizar sus proyectos entre una estación de trabajo y un portátil, para fundadores en solitario que necesitan mantener documentos y configuraciones de equipo actualizados, para criptoentusiastas que desean sincronizar archivos importantes sin riesgo de filtraciones, o para cualquiera que valore la privacidad y no quiera confiar sus datos a servicios de terceros.
Alternativas y por qué autoalojado en un VPS:
Servicios gestionados en la nube (Dropbox, Google Drive): Son convenientes, pero se pierde el control sobre los datos, se almacenan en servidores de terceros, están sujetos a las políticas del proveedor y a posibles filtraciones. Esto es inaceptable para datos sensibles.
Nextcloud/ownCloud: Son soluciones más completas que ofrecen no solo sincronización, sino también muchas otras funciones (calendarios, contactos, edición de documentos). Son más potentes, pero también significativamente más complejas de instalar, configurar y mantener, y requieren más recursos. Syncthing se centra exclusivamente en la sincronización de archivos y lo hace excepcionalmente bien y de manera eficiente.
Rsync: Una excelente herramienta para la sincronización unidireccional y las copias de seguridad, pero no proporciona sincronización bidireccional continua en tiempo real como Syncthing.
La elección de Syncthing autoalojado en un VPS se debe al deseo de máxima privacidad, seguridad y control. Un VPS proporciona una plataforma estable para que uno de los nodos de Syncthing esté siempre en línea, sirva como punto central para la sincronización de todos sus dispositivos o como almacenamiento fiable para copias de seguridad.
¿Qué configuración de VPS se necesita para esta tarea?
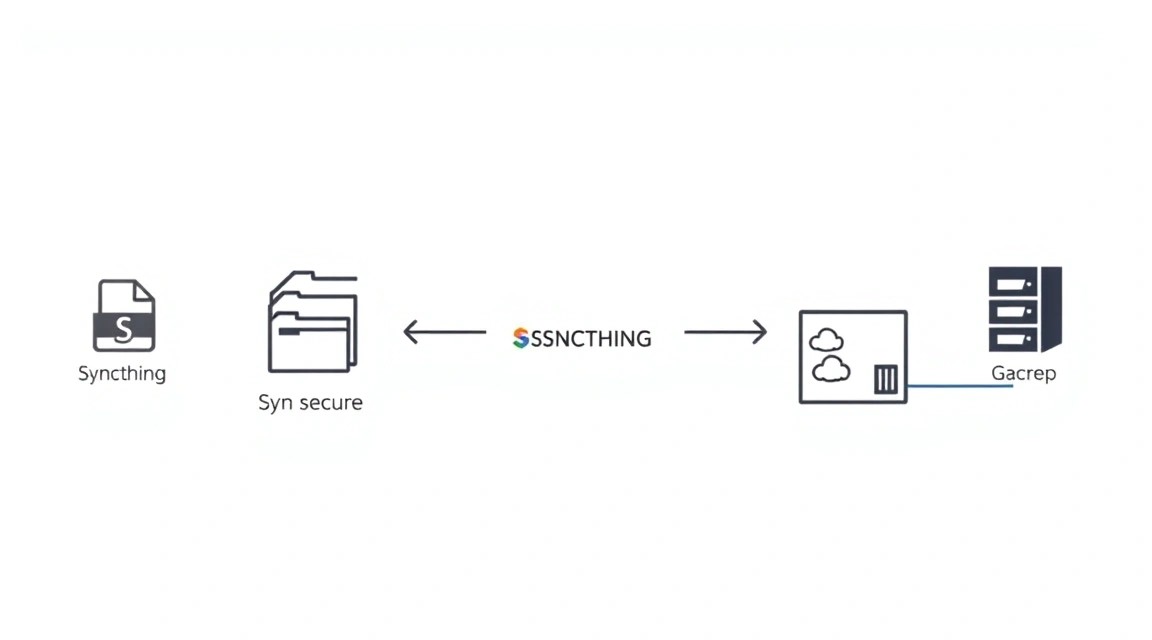
Diagrama: Qué configuración de VPS se necesita para esta tarea
La elección de un VPS adecuado para Syncthing depende de varios factores: el volumen de datos que planea sincronizar, la cantidad de archivos a sincronizar, el número de dispositivos conectados y la intensidad de las operaciones de entrada/salida (I/O).
Requisitos mínimos
Para una instalación básica de Syncthing, la sincronización de varias decenas de gigabytes de archivos y 2-3 dispositivos, necesitará un VPS bastante modesto:
CPU: 1 vCPU (Intel Xeon o AMD EPYC moderno). Syncthing utiliza activamente la CPU para el hashing de archivos y el cifrado.
RAM: 1 GB. Si planea sincronizar una gran cantidad de archivos pequeños (cientos de miles), puede que necesite 2 GB o más, ya que Syncthing mantiene los índices de archivos en la memoria.
Disco: 25-50 GB SSD. Un SSD es muy recomendable debido a las intensas operaciones de lectura/escritura e indexación de archivos. El tamaño del disco debe ser suficiente para almacenar todos los datos sincronizados, más un pequeño margen para el sistema operativo y las copias de seguridad.
Red: 100 Mbps con tráfico ilimitado o un límite alto. La sincronización de datos puede consumir bastante ancho de banda.
Plan de VPS recomendado para la mayoría de las tareas
Para un funcionamiento cómodo con Syncthing, sincronizando hasta varios cientos de gigabytes de datos y hasta 5-10 dispositivos, se recomienda la siguiente configuración:
Criterio
Recomendado
Nota
CPU
2 vCPU
Asegurará un funcionamiento estable durante la indexación y la sincronización intensiva.
RAM
2-4 GB
Suficiente para índices grandes y operaciones paralelas.
Disco
100-250 GB NVMe/SSD
La alta velocidad de I/O es crítica para Syncthing. Elija el volumen según sus datos.
Red
1 Gbps con tráfico ilimitado
Para una transferencia rápida de grandes volúmenes de datos entre nodos.
Un VPS con estas características se puede adquirir de muchos proveedores. Por ejemplo, un VPS con las características indicadas será adecuado para la mayoría de las tareas de sincronización.
Cuándo se necesita un Dedicated, no un VPS
Un servidor dedicado será necesario en los casos en que Syncthing se convierta en un componente crítico de la infraestructura con requisitos muy altos:
Volúmenes de datos muy grandes: Varios terabytes o más.
Gran cantidad de archivos: Millones de archivos que requieren indexación y verificación constantes.
Alta intensidad de I/O: El servidor actúa como nodo central para muchos dispositivos que se sincronizan activamente.
Requisitos de rendimiento: Necesidad de la máxima velocidad de sincronización, cuando los recursos del VPS se convierten en un cuello de botella.
En estos escenarios, un servidor dedicado proporcionará recursos garantizados de CPU, RAM y subsistema de disco (por ejemplo, arreglos RAID de NVMe SSD), lo cual es imposible en una plataforma virtualizada. Un servidor dedicado adecuado puede ser considerado para cargas tan exigentes.
Ubicación: qué influencia tiene
La elección de la ubicación del VPS es importante por varias razones:
Latencia: Cuanto más cerca esté el servidor de sus dispositivos principales, menor será la latencia y más rápida se establecerá la conexión entre los nodos de Syncthing. Esto es especialmente notorio durante la sincronización inicial y al trabajar con una gran cantidad de archivos pequeños.
Legislación y privacidad: Dependiendo de la jurisdicción donde se encuentre su VPS, pueden aplicarse diferentes leyes sobre el almacenamiento y acceso a los datos. Si la privacidad es su máxima prioridad, elija países con una legislación sólida en protección de datos.
Ancho de banda: Algunas regiones tienen mejor conectividad con las principales troncales de Internet, lo que puede afectar la velocidad general de sincronización, especialmente si sus dispositivos se encuentran en diferentes ubicaciones geográficas.
Para la mayoría de los usuarios, la elección óptima será una ubicación lo más cercana posible al lugar principal de uso de Syncthing.
Preparación del servidor
Diagrama: Preparación del servidor
Antes de instalar Syncthing, es necesario realizar una configuración básica de seguridad y actualizar el sistema operativo. Estos pasos son una práctica estándar para cualquier nuevo VPS.
Utilizaremos Ubuntu Server 24.04 LTS (versión actual para 2026) o Debian 12.
1. Conexión al servidor por SSH
Utilice un cliente SSH para conectarse a su VPS. Normalmente, el proveedor proporciona la dirección IP y la contraseña de root.
ssh root@ВАШ_IP_АДРЕС_VPS
Después del primer inicio de sesión, el sistema puede solicitarle que cambie la contraseña de root.
2. Creación de un nuevo usuario con permisos sudo
No se recomienda trabajar como usuario root por razones de seguridad. Crearemos un nuevo usuario y le daremos permisos sudo.
# Reemplace 'youruser' con el nombre de usuario deseado
adduser youruser
Siga las instrucciones para crear una contraseña e introducir la información del usuario (puede dejarla en blanco).
Ahora añada el usuario al grupo sudo:
usermod -aG sudo youruser
3. Configuración de la autenticación por claves SSH (recomendado)
La autenticación por claves SSH es significativamente más segura que por contraseña. Si aún no tiene una clave SSH, créela en su máquina local:
# En su máquina local
ssh-keygen -t rsa -b 4096 -C "[email protected]"
Copie la clave pública al servidor:
# En su máquina local
ssh-copy-id youruser@ВАШ_IP_АДРЕС_VPS
Ahora intente iniciar sesión con el nuevo usuario:
# En su máquina local
ssh youruser@ВАШ_IP_АДРЕС_VPS
Si el inicio de sesión es exitoso, puede deshabilitar el inicio de sesión por contraseña para el usuario root (esto aumentará la seguridad). Edite el archivo de configuración SSH:
sudo nano /etc/ssh/sshd_config
Encuentre y modifique las siguientes líneas (o añádalas si no existen):
PermitRootLogin no
PasswordAuthentication no
ChallengeResponseAuthentication no
UsePAM yes
Guarde los cambios (Ctrl+O, Enter) y salga (Ctrl+X). Reinicie el servicio SSH:
sudo systemctl restart sshd
¡Asegúrese de poder iniciar sesión con el nuevo usuario mediante clave SSH antes de cerrar la sesión root actual!
4. Configuración del firewall (UFW)
UFW (Uncomplicated Firewall) es una utilidad conveniente para gestionar iptables. Lo habilitaremos y configuraremos las reglas básicas.
sudo apt update
sudo apt install ufw -y
Permitiremos las conexiones SSH, los puertos de Syncthing y la interfaz web (Web UI):
sudo ufw allow ssh                               # Permitir SSH (normalmente puerto 22)
sudo ufw allow 22000/tcp                         # Puerto para el intercambio de datos de Syncthing
sudo ufw allow 22000/udp                         # Puerto para el intercambio de datos de Syncthing (UDP para descubrimiento)
sudo ufw allow 8384/tcp                          # Puerto para la interfaz web de Syncthing
sudo ufw enable                                  # Habilitar el firewall
sudo ufw status verbose                          # Verificar el estado del firewall
Al habilitar UFW, le pedirá confirmación. Escriba y y presione Enter.
5. Instalación de Fail2Ban
Fail2Ban ayuda a proteger contra ataques de fuerza bruta, bloqueando las direcciones IP que realizan demasiados intentos fallidos de inicio de sesión.
La configuración básica de Fail2Ban ya protege SSH. Para configuraciones más avanzadas, puede crear el archivo /etc/fail2ban/jail.local.
6. Actualización del sistema e instalación de utilidades básicas
Asegúrese de que todos los paquetes estén actualizados a las últimas versiones e instale utilidades útiles.
sudo apt update && sudo apt upgrade -y             # Actualizar la lista de paquetes y todos los paquetes instalados
sudo apt autoremove -y                             # Eliminar dependencias innecesarias
sudo apt install curl wget git htop screen -y      # Instalar utilidades útiles
El servidor ya está listo para la instalación de Syncthing.
Instalación de software — Paso a paso
Diagrama: Instalación de software — Paso a paso
Instalaremos Syncthing a través del repositorio APT oficial, que es el método recomendado para Debian/Ubuntu, ya que garantiza actualizaciones sencillas e integración con el sistema. Se supone que para 2026 este método seguirá siendo relevante y preferido.
1. Importación de la clave GPG de Syncthing
Para que el sistema confíe en los paquetes del repositorio de Syncthing, es necesario importar su clave GPG.
# Obtener la clave GPG de Syncthing
sudo curl -L -o /usr/share/keyrings/syncthing-archive-keyring.gpg https://syncthing.net/release-key.gpg
2. Adición del repositorio de Syncthing
Ahora añadiremos el repositorio oficial de Syncthing a la lista de fuentes de paquetes de su sistema. Usaremos la rama estable.
# Añadir el repositorio de Syncthing para la versión estable
echo "deb [signed-by=/usr/share/keyrings/syncthing-archive-keyring.gpg] https://apt.syncthing.net/ syncthing stable" | sudo tee /etc/apt/sources.list.d/syncthing.list
3. Actualización de la lista de paquetes e instalación de Syncthing
Después de añadir el nuevo repositorio, es necesario actualizar la lista de paquetes y luego instalar Syncthing.
# Actualizar la lista de paquetes
sudo apt update

# Instalar Syncthing
sudo apt install syncthing -y
Después de la instalación, Syncthing estará disponible en el sistema. La versión actual para 2026 será probablemente Syncthing 1.27.x o superior.
4. Verificación de la versión instalada
Asegúrese de que Syncthing esté instalado correctamente y verifique su versión:
# Verificar la versión de Syncthing
syncthing --version
La salida debería mostrar algo como syncthing v1.27.x "Fermium Flea" (go1.22.x linux-amd64) [email protected] 2026-XX-YY HH:MM:SS UTC.
5. Configuración de Syncthing como servicio del sistema (systemd)
Syncthing debe ejecutarse como un servicio del sistema para iniciarse automáticamente al arrancar el servidor y funcionar en segundo plano. Lo configuraremos para que se ejecute bajo el usuario creado anteriormente (youruser).
# Habilitar e iniciar el servicio Syncthing para su usuario
sudo systemctl enable [email protected]
sudo systemctl start [email protected]
Verificar el estado del servicio:
# Verificar el estado del servicio Syncthing
sudo systemctl status [email protected]
Debería ver el estado active (running).
Por defecto, Syncthing crea su configuración y datos en el directorio de inicio del usuario, por ejemplo, /home/youruser/.config/syncthing y /home/youruser/Sync.
Configuración
Esquema: Configuración
Después de instalar Syncthing y configurarlo como un servicio del sistema, pasaremos a su configuración. Nuestro objetivo es garantizar un acceso seguro a la interfaz de usuario web y configurar la sincronización.
1. Acceso a la interfaz de usuario web de Syncthing
Por defecto, la interfaz de usuario web de Syncthing está disponible en el puerto 8384. Ya hemos permitido este puerto en UFW. Abra un navegador y vaya a la dirección: http://SU_DIRECCIÓN_IP_VPS:8384.
Al iniciar Syncthing por primera vez, creará el archivo de configuración config.xml en el directorio /home/youruser/.config/syncthing/.
Establecer contraseña para la interfaz de usuario web:
Es extremadamente importante establecer una contraseña para acceder a la interfaz de usuario web. Hágalo inmediatamente después del primer inicio de sesión:
En la interfaz de usuario web de Syncthing, vaya a Acciones (Actions) -> Configuración (Settings).
Seleccione la pestaña GUI.
Establezca el Nombre de usuario (GUI Username) y la Contraseña (GUI Password).
Haga clic en Guardar (Save).
Después de esto, deberá volver a iniciar sesión. Esto protegerá su Syncthing del acceso no autorizado.
2. Proteger la interfaz de usuario web con HTTPS (Caddy)
El acceso a la interfaz de usuario web a través de HTTP no es seguro. Se recomienda utilizar HTTPS. Configuraremos Caddy como un proxy inverso que obtendrá y renovará automáticamente los certificados SSL de Let's Encrypt.
Se asume que tiene un nombre de dominio (por ejemplo, sync.example.com) que apunta a la dirección IP de su VPS.
2.1. Instalación de Caddy
# Instalar los paquetes necesarios
sudo apt install -y debian-keyring debian-archive-keyring apt-transport-https

# Obtener la clave GPG de Caddy
curl -1sLf 'https://dl.cloudsmith.io/public/caddy/stable/gpg.key' | sudo gpg --dearmor -o /usr/share/keyrings/caddy-stable-archive-keyring.gpg

# Añadir el repositorio de Caddy
echo "deb [signed-by=/usr/share/keyrings/caddy-stable-archive-keyring.gpg] https://dl.cloudsmith.io/public/caddy/stable/deb/debian any-version main" | sudo tee /etc/apt/sources.list.d/caddy-stable.list

# Actualizar la lista de paquetes e instalar Caddy
sudo apt update
sudo apt install caddy -y
2.2. Configuración de Caddyfile
Cree o edite el archivo /etc/caddy/Caddyfile.
sudo nano /etc/caddy/Caddyfile
Elimine todo el contenido y agregue lo siguiente, reemplazando sync.example.com por su dominio y youruser por el nombre de su usuario de Syncthing:
Guarde el archivo (Ctrl+O, Enter) y salga (Ctrl+X).
2.3. Configuración del firewall para Caddy
Caddy escucha en los puertos estándar HTTP (80) y HTTPS (443). Permítalos en UFW y elimine el permiso para el puerto 8384, ya que ahora el acceso será a través de Caddy.
Ahora podrá acceder a la interfaz de usuario web de Syncthing en https://sync.example.com. Caddy obtendrá automáticamente un certificado SSL.
3. Adición de dispositivos y carpetas
Ahora que la interfaz de usuario web está protegida, puede comenzar a configurar la sincronización.
3.1. Adición de dispositivos
Cada nodo de Syncthing tiene un ID de dispositivo único. Se puede encontrar en la interfaz de usuario web en la esquina superior derecha (Acciones (Actions) -> Mostrar ID de dispositivo (Show Device ID)).
En su VPS (en la interfaz de usuario web), haga clic en Añadir dispositivo remoto (Add Remote Device).
Ingrese el ID de su otro dispositivo Syncthing.
Dele un nombre descriptivo.
En la pestaña Compartir (Sharing), seleccione las carpetas que desea sincronizar con este dispositivo.
Repita el proceso en el otro dispositivo, agregando el ID de su VPS.
Los dispositivos deben "confirmarse" mutuamente para establecer una conexión.
3.2. Adición de carpetas
Para iniciar la sincronización, debe crear o seleccionar carpetas.
Haga clic en Añadir carpeta (Add Folder).
Especifique el ID de carpeta (Folder ID) (un identificador único, puede generarse automáticamente).
Especifique la Ruta de carpeta (Folder Path) en su VPS (por ejemplo, /home/youruser/Sync/MyProject).
En la pestaña Compartir (Sharing), seleccione los dispositivos con los que desea sincronizar esta carpeta.
En la pestaña Control de versiones de archivos (File Versioning), puede configurar la conservación de versiones antiguas de archivos (recomendado para datos importantes).
Haga clic en Guardar (Save).
Después de esto, aparecerá una solicitud en otros dispositivos para agregar esta carpeta. Confírmela, seleccione la ruta y la configuración.
4. Verificación del funcionamiento
Asegúrese de que Syncthing funciona correctamente:
Acceso a la interfaz de usuario web: Intente acceder a https://sync.example.com.
Estado de sincronización: En la interfaz de usuario web de Syncthing, asegúrese de que los dispositivos estén conectados (estado verde) y las carpetas sincronizadas (Up to Date).
Aquí puede ver la actividad de sincronización, errores y advertencias.
Copias de seguridad y mantenimiento
Esquema: Copias de seguridad y mantenimiento
Las copias de seguridad regulares y el mantenimiento oportuno son clave para garantizar la fiabilidad y seguridad de su sistema Syncthing.
1. Qué respaldar
Para Syncthing, dos tipos de datos son críticamente importantes:
Configuración de Syncthing: Son los archivos ubicados en el directorio /home/youruser/.config/syncthing/. Incluyen config.xml (con el ID del dispositivo, la configuración de la interfaz de usuario web, la lista de dispositivos y carpetas), así como los archivos de la base de datos de índices.
Datos sincronizados: Son los archivos y carpetas que usted sincroniza (por ejemplo, /home/youruser/Sync/MyProject). Este es su activo más valioso.
2. Script simple de copia de seguridad automática
Para la copia de seguridad de la configuración de Syncthing, se puede utilizar un script simple. Para los datos sincronizados, se recomienda utilizar soluciones más avanzadas como BorgBackup o Restic, que proporcionan deduplicación y cifrado.
Ejemplo de script para la copia de seguridad de la configuración (rsync)
Cree un directorio para las copias de seguridad, por ejemplo, /home/youruser/backups.
mkdir -p /home/youruser/backups/syncthing_config
Cree un script de copia de seguridad, por ejemplo, /home/youruser/backup_syncthing_config.sh:
nano /home/youruser/backup_syncthing_config.sh
Contenido del script:
#!/bin/bash

# Directorio de configuración de Syncthing
SYNCTHING_CONFIG_DIR="/home/youruser/.config/syncthing"
# Directorio para guardar copias de seguridad
BACKUP_DIR="/home/youruser/backups/syncthing_config"
# Nombre del archivo de copia de seguridad
BACKUP_FILENAME="syncthing_config_$(date +%Y%m%d_%H%M%S).tar.gz"

echo "Iniciando la copia de seguridad de la configuración de Syncthing..."

# Detener el servicio Syncthing para una copia de seguridad consistente
sudo systemctl stop [email protected]

# Crear archivo de configuración
tar -czf "$BACKUP_DIR/$BACKUP_FILENAME" -C "$(dirname "$SYNCTHING_CONFIG_DIR")" "$(basename "$SYNCTHING_CONFIG_DIR")"

# Eliminar copias de seguridad antiguas (por ejemplo, más de 7 días)
find "$BACKUP_DIR" -type f -name "syncthing_config_.tar.gz" -mtime +7 -delete

# Iniciar el servicio Syncthing
sudo systemctl start [email protected]

echo "Copia de seguridad de la configuración de Syncthing completada: $BACKUP_DIR/$BACKUP_FILENAME"
Para la copia de seguridad de los datos en sí, utilice BorgBackup o Restic en un almacenamiento separado (ver más abajo).
3. Dónde almacenar las copias de seguridad
Es extremadamente importante almacenar las copias de seguridad en un recurso separado del servidor principal. Opciones:
Almacenamiento de objetos externo compatible con S3: Muchos proveedores ofrecen almacenamiento compatible con S3 (AWS S3, DigitalOcean Spaces, Backblaze B2). Es una solución fiable y escalable. Herramientas como Restic o BorgBackup pueden trabajar directamente con S3.
VPS o NAS separado: Si tiene otro VPS o un NAS doméstico, puede configurar la sincronización de copias de seguridad allí a través de SSH (utilizando rsync o sftp).
Ejemplo de uso de Restic para la copia de seguridad de datos en un almacenamiento compatible con S3:
Instale Restic:
sudo apt install restic -y
Configure las variables de entorno para S3 (¡no las guarde en el script!):
# En el archivo ~/.bashrc o /etc/environment
export RESTIC_REPOSITORY="s3:https://s3.REGION.PROVIDER.com/bucket-name"
export AWS_ACCESS_KEY_ID="SU_CLAVE"
export AWS_SECRET_ACCESS_KEY="SU_SECRETO"
export RESTIC_PASSWORD="CONTRASEÑA_COMPLEJA_PARA_CIFRADO_DE_COPIA_DE_SEGURIDAD"
Inicialice el repositorio de Restic:
restic init
Cree un script para la copia de seguridad de datos (por ejemplo, /home/youruser/backup_data.sh):
#!/bin/bash

# Cargar variables de entorno si no están definidas
if [ -f "/home/youruser/.bashrc" ]; then
  source "/home/youruser/.bashrc"
fi

# Ruta a la carpeta de datos de Syncthing
DATA_DIR="/home/youruser/Sync"

echo "Iniciando la copia de seguridad de datos de Syncthing..."

# Crear copia de seguridad
restic backup "$DATA_DIR" --tag syncthing-data

# Limpiar instantáneas antiguas (por ejemplo, mantener 7 diarias, 4 semanales, 12 mensuales)
restic forget --prune --keep-daily 7 --keep-weekly 4 --keep-monthly 12

echo "Copia de seguridad de datos de Syncthing completada."
Agréguelo a Cron, al igual que el script de configuración.
4. Actualizaciones
Mantener el sistema y el software actualizados es crucial para la seguridad y estabilidad.
Actualización del SO y paquetes: Ejecute regularmente los comandos de actualización. Para Syncthing, instalado a través de APT, esto también lo actualizará a la última versión estable.
Actualización de Caddy: Caddy también se actualiza a través de APT.
Estrategia de actualizaciones:
Actualizaciones continuas: Para sistemas no críticos, simplemente puede ejecutar apt upgrade regularmente (por ejemplo, una vez a la semana a través de cron).
Ventana de mantenimiento: Para sistemas más importantes, se recomienda planificar una "ventana de mantenimiento" donde pueda realizar actualizaciones manualmente, probar el sistema y revertir los cambios en caso de problemas.
Siempre lea los registros de cambios antes de las actualizaciones importantes para estar al tanto de posibles cambios o problemas.
Solución de problemas + Preguntas frecuentes
Esta sección recopila respuestas a preguntas frecuentes y soluciones a problemas típicos que pueden surgir al trabajar con Syncthing en un VPS.
La interfaz web de Syncthing no está disponible
Problema: No puede abrir la interfaz web de Syncthing en https://sync.example.com o http://SU_DIRECCIÓN_IP_VPS:8384.
Qué verificar:
Servicio Syncthing: Asegúrese de que el servicio [email protected] esté activo.
Servicio Caddy (si se usa): Verifique el estado de caddy.service.
sudo systemctl status caddy
Cortafuegos (UFW): Asegúrese de que los puertos 80 y 443 (para Caddy) o 8384 (para acceso directo a Syncthing) estén abiertos.
sudo ufw status verbose
Configuración de Syncthing: Verifique el archivo /home/youruser/.config/syncthing/config.xml. Asegúrese de que en la sección <gui> la dirección de escucha esté configurada en 0.0.0.0:8384 o 127.0.0.1:8384 (si se usa un proxy).
Registros de Syncthing: Verifique los registros en busca de errores.
Cómo solucionarlo: Reinicie los servicios correspondientes si no están en ejecución. Corrija las reglas del cortafuegos. Edite config.xml y reinicie Syncthing.
Los dispositivos no se conectan o tardan mucho en hacerlo
Problema: Su dispositivo Syncthing en el VPS no puede conectarse con otros dispositivos, o la conexión es muy lenta.
Qué verificar:
Cortafuegos (UFW): Asegúrese de que el puerto 22000 (TCP y UDP) esté abierto en el VPS.
sudo ufw status verbose
ID de dispositivos: Verifique que los ID de los dispositivos se hayan introducido correctamente en todos los nodos. Son sensibles a mayúsculas y minúsculas.
Descubrimiento global: Asegúrese de que el descubrimiento global esté habilitado en todos los dispositivos (o que esté utilizando direcciones IP estáticas/DNS). En la interfaz web: Acciones (Actions) -> Configuración (Settings) -> pestaña General (General) -> Descubrimiento global (Global Discovery).
Conexión de red: Verifique que todos los dispositivos tengan acceso a Internet y puedan "verse" entre sí.
Cómo solucionarlo: Abra los puertos necesarios en el cortafuegos. Vuelva a verificar los ID de los dispositivos. Asegúrese de que no haya bloqueos en la ruta (por ejemplo, en el router). Si el descubrimiento global está deshabilitado, intente agregar las direcciones IP de los dispositivos manualmente en la configuración de los dispositivos remotos.
Baja velocidad de sincronización
Problema: Los archivos se sincronizan muy lentamente, a pesar de una buena conexión de red.
Qué verificar:
Ancho de banda de la red: Asegúrese de que el VPS y otros dispositivos tengan suficiente ancho de banda. Verifique el tráfico en la interfaz web de Syncthing.
CPU y RAM: Syncthing utiliza activamente la CPU para el hashing y el cifrado, y la RAM para los índices. Verifique la carga de la CPU y el uso de la RAM en el VPS (htop).
E/S de disco: Los discos lentos (especialmente los HDD en VPS débiles) pueden ralentizar considerablemente la sincronización, sobre todo al trabajar con una gran cantidad de archivos pequeños.
Configuración de versiones: Si el versionado complejo está habilitado, esto puede aumentar la carga en el disco y la CPU.
Cantidad de archivos: La sincronización de millones de archivos pequeños siempre será más lenta que la sincronización de unos pocos archivos grandes.
Cómo solucionarlo: Considere actualizar el VPS a uno más potente (más CPU, RAM, NVMe SSD). Optimice la configuración de versiones. Utilice patrones de ignorado para excluir archivos innecesarios. Verifique la configuración de red en todos los nodos.
¿Qué configuración mínima de VPS es adecuada?
Respuesta: Para ejecutar Syncthing y sincronizar un volumen moderado de datos (hasta 100-200 GB) con 2-3 dispositivos, un VPS mínimo debería tener 1-2 vCPU, 1-2 GB de RAM, 50-100 GB de disco SSD y un canal de red de al menos 100 Mbps. Es importante que el disco sea SSD, ya que Syncthing trabaja intensamente con E/S para la indexación de archivos. Si planea sincronizar una gran cantidad de archivos pequeños o volúmenes de datos muy grandes, se recomienda aumentar la RAM y el espacio en disco.
¿Qué elegir: VPS o dedicado para esta tarea?
Respuesta: Para la mayoría de los usuarios individuales y equipos pequeños, un VPS será más que suficiente. Es económico y proporciona recursos adecuados. Un servidor dedicado debe elegirse si trabaja con volúmenes de datos muy grandes (varios terabytes), maneja millones de archivos que requieren indexación constante, o si su nodo Syncthing atiende a muchos dispositivos activos y requiere el máximo rendimiento de E/S y CPU. En tales casos, un servidor dedicado garantiza recursos estables y no compartidos, lo cual es crítico para cargas de trabajo elevadas.
¿Cómo garantizar la máxima privacidad?
Respuesta: Syncthing utiliza cifrado de extremo a extremo por defecto para todos los datos transmitidos. Para una privacidad máxima: 1) Deshabilite el descubrimiento global (Global Discovery) en la configuración de Syncthing y agregue manualmente las direcciones IP de sus dispositivos. 2) Utilice solo dispositivos de confianza. 3) Asegúrese de que su VPS esté protegido de forma segura (claves SSH, cortafuegos, Fail2Ban). 4) Utilice HTTPS para acceder a la interfaz web (como configuramos con Caddy).
¿Cómo configurar el versionado de archivos?
Respuesta: Syncthing tiene mecanismos de versionado incorporados. En la interfaz web, al editar o agregar una carpeta, vaya a la pestaña "Versionado de archivos" (File Versioning). Puede elegir uno de varios tipos de versionado: "Papelera de reciclaje" (Simple File Versioning), "Escalonado" (Staggered File Versioning) o "Externo" (External File Versioning). El versionado "Escalonado" suele ser un buen compromiso, ya que conserva un número determinado de versiones de un archivo durante diferentes períodos de tiempo, lo que ayuda a restaurar archivos después de una eliminación o modificación accidental.
Syncthing consume muchos recursos
Problema: Syncthing utiliza mucha CPU o RAM.
Qué verificar:
Cantidad de archivos/carpetas a sincronizar: Cuantos más archivos, más memoria se requiere para su indexación.
Intensidad de los cambios: Si hay cambios constantes en las carpetas sincronizadas, Syncthing trabajará activamente, haciendo hashing y transfiriendo datos.
Patrones de ignorado: Asegúrese de excluir archivos innecesarios de la sincronización (por ejemplo, .git/, node_modules/, .DS_Store) utilizando el archivo .stignore.
Velocidad del disco: Un disco lento puede hacer que Syncthing consuma más CPU esperando E/S.
Cómo solucionarlo: Agregue patrones de ignorado para archivos innecesarios. Divida las carpetas grandes en varias más pequeñas, si es posible. Actualice el VPS a uno más potente. En la configuración de la carpeta, puede limitar la frecuencia de escaneo o establecer un escaneo menos frecuente.
Conclusiones y próximos pasos
Diagrama: Conclusiones y próximos pasos
¡Felicidades! Ha instalado y configurado Syncthing con éxito en su VPS, creando su propia solución de sincronización de archivos totalmente controlada y segura. Ahora sus datos se mueven directamente entre dispositivos, utilizando cifrado de extremo a extremo, lo que garantiza la privacidad y la independencia de los servicios en la nube de terceros. Ha obtenido una herramienta poderosa para mantener sus archivos actualizados en todas las máquinas necesarias, ya sea para desarrollo, trabajo en equipo o necesidades personales.
¿Hacia dónde ir a continuación?
Agregue más dispositivos y carpetas: Ahora que el nodo principal está configurado, puede conectar fácilmente todos sus ordenadores, portátiles, teléfonos inteligentes y otros servidores para expandir su red de sincronización.
Optimice la configuración: Explore las configuraciones avanzadas de Syncthing, como los patrones de ignorado (.stignore), el versionado de archivos, las limitaciones de ancho de banda y la programación de escaneo, para adaptar el sistema a sus necesidades únicas.
Monitoreo y escalado: Monitoree regularmente el consumo de recursos del VPS (CPU, RAM, E/S de disco) utilizando herramientas como htop o grafana/prometheus para asegurarse de que el sistema funcione de manera óptima. A medida que crezcan los volúmenes de datos o el número de dispositivos, considere escalar su VPS o migrar a un servidor dedicado más potente.
¿Te fue útil esta guía?
Tus comentarios nos ayudan a mejorar nuestras guías.
Compartir esta publicación:
Envía esta guía a alguien a quien pueda resultarle útil.