bolt Valebyte VPS from $4/mo — NVMe, 60s deploy.

Get a VPS arrow_forward
eco Beginner Tutorial/How-to

Deploying a Lightweight K3s

calendar_month Jun 15, 2026 schedule 17 min read visibility 32 views
Развёртывание легковесного Kubernetes кластера K3s на одном VPS: от установки до первого приложения
info

Need a server for this guide? We offer dedicated servers and VPS in 50+ countries with instant setup.

Need a server for this guide?

Deploy a VPS or dedicated server in minutes.

Deploying a Lightweight K3s Kubernetes Cluster on a Single VPS: From Installation to First Application

TL;DR

In this detailed guide, we will step-by-step configure a lightweight K3s Kubernetes cluster on a single Virtual Private Server (VPS). You will learn how to prepare the server, install K3s, deploy your first test application, and ensure its availability via an Ingress controller with TLS. This material is aimed at VPS owners who need a simple and efficient way to orchestrate containerized applications without excessive resources or the complexity of full-scale Kubernetes.

  • VPS Preparation: installing basic utilities, configuring security (SSH, Fail2ban, Firewall).
  • K3s Installation: deploying a K3s server version 1.31.x on Ubuntu 24.04 LTS.
  • Configuration: setting up cluster access, deploying the Traefik Ingress controller and automatic TLS with Caddy.
  • Application Deployment: launching a test web application and publishing it to the outside world.
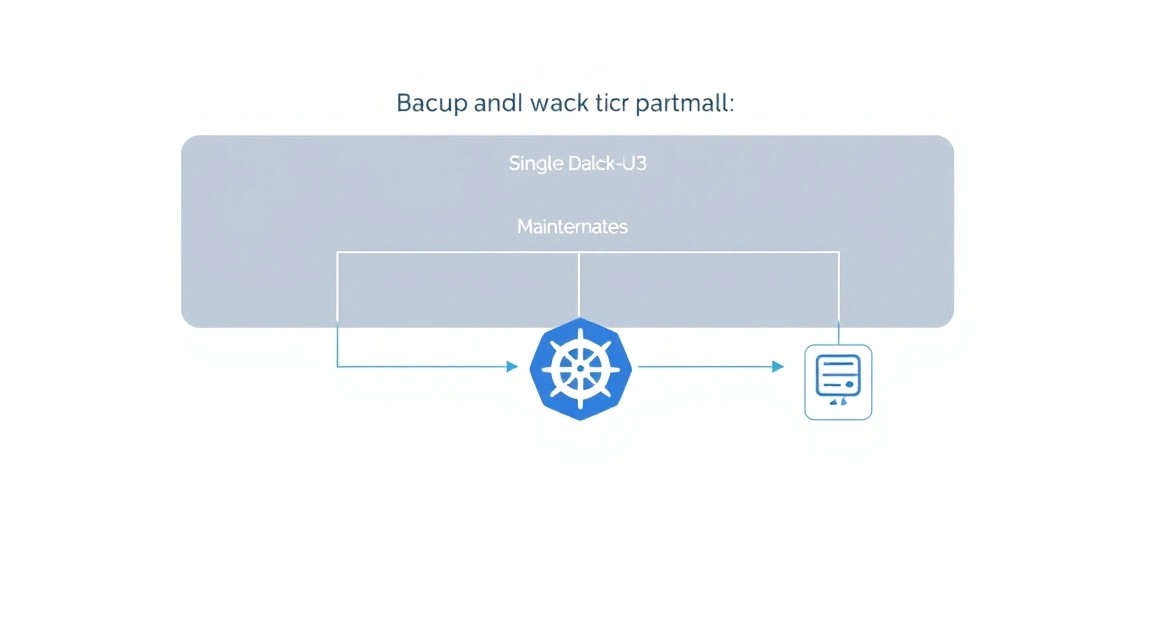
  • Maintenance: recommendations for backups, updates, and troubleshooting common issues.

What We Are Setting Up and Why

Diagram: What We Are Setting Up and Why

We will be deploying K3s — a lightweight, certified Kubernetes distribution developed by Rancher Labs. Unlike "big" Kubernetes, K3s is designed to operate in resource-constrained environments, such as IoT devices, edge computing, or, in our case, a single VPS. It is ideal for developers, startups, and enthusiasts who need a reliable tool for container orchestration without the complexity and resource intensity inherent in standard Kubernetes installations.

Ultimately, you will get a fully functional Kubernetes cluster on a single server, capable of running and managing your containerized applications. This will allow you to leverage all the benefits of Kubernetes (self-healing, declarative management, scaling) without having to invest in expensive cloud services or maintain a complex infrastructure of multiple servers. You will be able to easily deploy web services, databases, game servers, and other applications, ensuring their stable operation and availability.

Alternatives exist, such as fully managed cloud Kubernetes services (EKS, GKE, AKS) or traditional Kubernetes installations using kubeadm on multiple VPS. Cloud services are convenient but expensive and tie you to a specific provider. Traditional Kubernetes requires more resources, setup time, and deep knowledge to maintain. K3s on your own VPS offers a golden mean: you retain full control over the infrastructure, minimize costs, and get a significantly simplified, yet full-featured Kubernetes experience. This is an excellent choice for those who want to learn Kubernetes or deploy small/medium projects where every dollar and megabyte of RAM counts.

What VPS Configuration is Needed for This Task

Diagram: What VPS Configuration is Needed for This Task

Choosing the right VPS configuration is critical for the stable operation of K3s and your applications. K3s itself is quite lightweight, but the applications you run on it may require significant resources.

Minimum Requirements for K3s (without applications):

  • CPU: 1 core (e.g., Intel Xeon E3/E5).
  • RAM: 1 GB (for K3s and basic OS).
  • Disk: 20 GB NVMe/SSD (for OS, K3s, and storing basic container images).
  • Network: 100 Mbps.

Recommended VPS Plan for a Single K3s Cluster with Multiple Applications (e.g., web service + DB):

  • CPU: 2-4 cores (e.g., Intel Xeon E3/E5 or AMD EPYC).
  • RAM: 4-8 GB.
  • Disk: 50-100 GB NVMe/SSD (for OS, K3s, container images, logs, and application data).
  • Network: 1 Gbps or higher.

A VPS with the specified characteristics can be obtained from various providers. For example, VPS with the specified characteristics will suit most tasks. If you plan to run resource-intensive databases, high-load web services, or game servers with many players, consider an option with 8+ GB RAM and 4+ CPU cores.

When a dedicated server is needed, not a VPS

A dedicated server becomes justified when your applications require maximum performance, guaranteed resources, a very large amount of disk space (e.g., for storing backups or media files), or when you run many K3s clusters (e.g., for different clients). If you see that your VPS is constantly loaded at 80-90% CPU or RAM, or you need more than 100-200 GB of fast storage, then transitioning to a dedicated server, such as a suitable dedicated server, will be a logical step. For most single K3s installations, a VPS will be more than sufficient at the start.

Location: what it affects

The choice of VPS location affects the latency between your server and end-users. The closer the server is to your target audience, the faster pages will load and services will respond. For example, for users from Europe, it is better to choose a VPS in Germany, the Netherlands, or Finland. For Asia — Singapore or Hong Kong. Also, consider the legal aspects and data protection laws in the chosen country.

Server Preparation

Diagram: Server Preparation

Before installing K3s, it is necessary to perform minimal server configuration to ensure security and ease of use. We will be using Ubuntu Server 24.04 LTS.

1. SSH Connection and User Creation

Connect to your VPS as the root user, using the IP address and password provided by your provider. Then, create a new user with sudo privileges for daily operations:


# Create a new user (replace 'your_user' with your desired name)
sudo adduser ваш_пользователь

# Add the user to the sudo group
sudo usermod -aG sudo ваш_пользователь

Exit the root session and log in as the new user.

2. SSH Key Configuration

For enhanced security and convenience, use SSH keys instead of passwords. On your local machine, generate a key (if you don't have one):


# On your local machine
ssh-keygen -t rsa -b 4096

Copy the public key to the server:


# On your local machine (replace IP and username)
ssh-copy-id ваш_пользователь@ваш_ip_сервера

Now you can disable password authentication for SSH. Edit the /etc/ssh/sshd_config file:


# Open the SSH configuration file
sudo nano /etc/ssh/sshd_config

Find and change the following lines (or add them if missing):


# /etc/ssh/sshd_config
PasswordAuthentication no
PermitRootLogin no

Restart the SSH service:


# Restart the SSH service
sudo systemctl restart sshd

3. System Update and Basic Utility Installation

Be sure to update all packages and install necessary utilities such as curl, wget, git, unzip, net-tools, which may be needed for installation and debugging.


# Update package list
sudo apt update

# Upgrade all installed packages
sudo apt upgrade -y

# Install basic utilities
sudo apt install -y curl wget git unzip net-tools htop

4. Firewall Configuration (UFW)

Enable UFW (Uncomplicated Firewall) and allow only the necessary ports. For K3s and SSH:

  • SSH: 22/tcp
  • K3s Server: 6443/tcp (Kubernetes API server)
  • HTTP/HTTPS: 80/tcp, 443/tcp (for Ingress controller and applications)

# Allow SSH
sudo ufw allow ssh

# Allow K3s API port
sudo ufw allow 6443/tcp

# Allow HTTP and HTTPS for web applications
sudo ufw allow http
sudo ufw allow https

# Enable firewall
sudo ufw enable
# Confirm 'y'

Check firewall status:


# Check UFW status verbose
sudo ufw status verbose

5. Fail2ban Installation

Fail2ban protects the server from brute-force attacks by blocking IP addresses from which too many failed login attempts occur.


# Install Fail2ban
sudo apt install -y fail2ban

# Start and enable Fail2ban autostart
sudo systemctl enable fail2ban
sudo systemctl start fail2ban

The basic Fail2ban configuration is already quite effective. For more fine-grained tuning, you can copy and edit the /etc/fail2ban/jail.conf file to /etc/fail2ban/jail.local.


# Copy the base config for changes
sudo cp /etc/fail2ban/jail.conf /etc/fail2ban/jail.local

# Open for editing (optional, for configuration)
sudo nano /etc/fail2ban/jail.local

Ensure that the [sshd] section is active (enabled = true).

Software Installation — Step-by-step

Diagram: Software Installation — Step-by-step

In this section, we will install K3s on our prepared VPS. We will use the latest stable version of K3s for 2026, assuming it will be a version in the 1.31.x - 1.32.x range, compatible with Kubernetes 1.31.x - 1.32.x. For convenience, we will use the official installation script.

1. K3s Server Installation

K3s can be installed with a single command. The script will automatically download the binaries, configure system services, and start K3s. By default, K3s uses the containerd container engine, which will be installed automatically.


# Install K3s server (assuming version 1.31.x for 2026)
# Use INSTALL_K3S_VERSION to fix the version and avoid automatic updates to major versions.
# INSTALL_K3S_EXEC="--disable traefik" disables the built-in Traefik, as we will use Caddy/Ingress.
# K3S_TOKEN is the token that will be used to add agents if you decide to expand the cluster.
# Copy it after installation.
curl -sfL https://get.k3s.io | INSTALL_K3S_VERSION="v1.31.5+k3s1" K3S_TOKEN="SUPERSECRETTOKEN12345" sh -s - --disable traefik

This command will install K3s, disable the built-in Traefik Ingress controller (we will use a different one), and start all necessary components. The process may take a few minutes.

2. Checking K3s Status

After installation, ensure that K3s is running and working correctly. K3s is installed as a system service.


# Check K3s service status
sudo systemctl status k3s

You should see the status active (running).

3. Configuring KUBECONFIG Environment Variable

To interact with the Kubernetes cluster (via kubectl), you need to specify the path to the configuration file. K3s places it at /etc/rancher/k3s/k3s.yaml.


# Create directory for kubeconfig
mkdir -p ~/.kube/

# Copy kubeconfig file
sudo cp /etc/rancher/k3s/k3s.yaml ~/.kube/config

# Set correct permissions
sudo chmod 600 ~/.kube/config

# Configure KUBECONFIG environment variable for the current session
export KUBECONFIG=~/.kube/config

# Add KUBECONFIG to .bashrc for permanent use
echo "export KUBECONFIG=~/.kube/config" >> ~/.bashrc

# Apply .bashrc changes
source ~/.bashrc

4. Installing kubectl

kubectl is a command-line utility for managing Kubernetes clusters. K3s does not install kubectl in PATH by default, so it needs to be installed separately or a symbolic link created.


# Create a symbolic link to k3s kubectl
sudo ln -s /usr/local/bin/k3s /usr/local/bin/kubectl

Now you can use kubectl to interact with the cluster.

5. Checking Cluster Health

Ensure that the cluster sees the node and all system pods are running.


# Check node status
kubectl get nodes

# Check status of system pods in kube-system namespace
kubectl get pods -n kube-system

You should see one node with Ready status and all pods in kube-system with Running status.

6. Retrieving K3s Token (for adding agents, if needed)

If you decide to add other nodes to the K3s cluster in the future, you will need the token that was generated during installation.


# Get K3s token
sudo cat /var/lib/rancher/k3s/server/node-token

Save this token in a secure location. It will be needed to join new worker nodes to your K3s cluster.

Configuration

Diagram: Configuration

After K3s installation, the cluster is ready for use, but additional configuration will be required to publish applications to the outside world and ensure their security (HTTPS). We will deploy an Ingress controller and configure automatic TLS certificate acquisition using Caddy.

1. Deploying Ingress Controller (Nginx Ingress Controller)

Although K3s includes Traefik by default, we disabled it to have more control. Instead, we will install the popular Nginx Ingress Controller, which has proven to be reliable.


# Install Nginx Ingress Controller via Helm
# First, add the Helm repository
helm repo add ingress-nginx https://kubernetes.github.io/ingress-nginx
helm repo update

# Install Ingress Controller in ingress-nginx namespace
# Assuming version 4.10.x for 2026
helm install ingress-nginx ingress-nginx/ingress-nginx \
    --namespace ingress-nginx --create-namespace \
    --set controller.service.type=NodePort \
    --set controller.service.nodePorts.http=30080 \
    --set controller.service.nodePorts.https=30443 \
    --version 4.10.1

We use NodePort to expose the Ingress controller on ports 30080 (HTTP) and 30443 (HTTPS) on the VPS. This will allow us to proxy traffic through Caddy.

Check that the Ingress controller pods are running:


# Check Ingress controller pods
kubectl get pods -n ingress-nginx

Ensure that all pods are in Running status.

2. Installing Caddy as a Reverse Proxy and ACME Client

Caddy is a powerful web server with automatic HTTPS. We will use it as an external reverse proxy that will accept traffic from ports 80/443, automatically obtain and renew TLS certificates, and then proxy requests to the K3s Ingress controller.

Create the Caddy configuration file at /etc/caddy/Caddyfile:


# Create directory for Caddy config
sudo mkdir -p /etc/caddy

# Open Caddyfile for editing
sudo nano /etc/caddy/Caddyfile

Insert the following content, replacing your-domain.com with your domain:


# /etc/caddy/Caddyfile
{
    email [email protected]
    # Enable logging for debugging
    log {
        output file /var/log/caddy/caddy.log
        level INFO
    }
}

your-domain.com {
    # Automatic HTTPS
    reverse_proxy localhost:30080 {
        # Required for correct Ingress controller operation
        header_up Host {http.request.host}
        header_up X-Real-IP {http.request.remote}
        header_up X-Forwarded-For {http.request.remote}
        header_up X-Forwarded-Proto {http.request.scheme}
    }
}

Save the file (Ctrl+X, Y, Enter).

Create a directory for Caddy logs:


# Create directory for Caddy logs and set permissions
sudo mkdir -p /var/log/caddy
sudo chown caddy:caddy /var/log/caddy

Install Caddy. We will use the official repository for Ubuntu:


# Install dependencies
sudo apt install -y debian-keyring debian-archive-keyring apt-transport-https

# Add Caddy GPG key
curl -1sLf 'https://dl.cloudsmith.io/public/caddy/stable/gpg.key' | sudo gpg --dearmor -o /usr/share/keyrings/caddy-stable-archive-keyring.gpg

# Add Caddy repository
curl -1sLf 'https://dl.cloudsmith.io/public/caddy/stable/debian.deb.txt' | sudo tee /etc/apt/sources.list.d/caddy-stable.list

# Update package list and install Caddy
sudo apt update
sudo apt install -y caddy

Enable and start the Caddy service:


# Start Caddy
sudo systemctl enable caddy
sudo systemctl start caddy
sudo systemctl status caddy

Ensure that Caddy is running and not showing any errors. If there are issues, check Caddy logs: sudo journalctl -u caddy --no-pager.

Important: ensure that your domain (your-domain.com) points to your VPS's IP address in DNS records (A-record).

3. Deploying the First Application (Nginx)

Let's deploy a simple Nginx web application to test the cluster and Ingress controller.

Create the nginx-app.yaml file:


# Create Nginx manifest file
nano nginx-app.yaml

Insert the following content:


# nginx-app.yaml
apiVersion: apps/v1
kind: Deployment
metadata:
  name: nginx-deployment
  labels:
    app: nginx
spec:
  replicas: 1
  selector:
    matchLabels:
      app: nginx
  template:
    metadata:
      labels:
        app: nginx
    spec:
      containers:
      - name: nginx
        image: nginx:1.25.4-alpine # Current version for 2026
        ports:
        - containerPort: 80
---
apiVersion: v1
kind: Service
metadata:
  name: nginx-service
spec:
  selector:
    app: nginx
  ports:
    - protocol: TCP
      port: 80
      targetPort: 80
---
apiVersion: networking.k8s.io/v1
kind: Ingress
metadata:
  name: nginx-ingress
  annotations:
    nginx.ingress.kubernetes.io/rewrite-target: /
spec:
  ingressClassName: nginx # Specify that this is an Ingress for Nginx Ingress Controller
  rules:
  - host: your-domain.com # Replace with your domain
    http:
      paths:
      - path: /
        pathType: Prefix
        backend:
          service:
            name: nginx-service
            port:
              number: 80

Save the file and apply it to the cluster:


# Apply Nginx manifest
kubectl apply -f nginx-app.yaml

Check the deployment status:


# Check Nginx pods
kubectl get pods -l app=nginx

# Check Nginx service
kubectl get service nginx-service

# Check Nginx Ingress
kubectl get ingress nginx-ingress

Ensure that the Nginx pod is running, and the service and Ingress exist.

4. Checking Functionality

Now that everything is configured, open your domain (https://your-domain.com) in a browser. You should see the standard Nginx welcome page. If you see it, then K3s, Nginx Ingress Controller, and Caddy are working correctly, and the HTTPS certificate has been automatically issued and installed.

If you encounter problems, check:

  • Nginx Ingress Controller pod logs: kubectl logs -n ingress-nginx -l app.kubernetes.io/name=ingress-nginx
  • Caddy logs: sudo journalctl -u caddy --no-pager
  • Your domain's DNS records.
  • K3s status: sudo systemctl status k3s

You can also use curl to check accessibility:


# Check HTTP access
curl http://your-domain.com

# Check HTTPS access
curl -k https://your-domain.com # -k ignores certificate verification if there are issues

Backups and Maintenance

Diagram: Backups and Maintenance

Regular backups and timely maintenance are key to the stability and security of your K3s cluster.

What to Back Up

For K3s on a single node, the key data to back up:

  • K3s Configuration: Files /etc/rancher/k3s/k3s.yaml and /var/lib/rancher/k3s/server/node-token.
  • Cluster State (etcd): K3s uses SQLite by default, so the database file is located at /var/lib/rancher/k3s/server/db/state.db. If you have reconfigured K3s to use an external etcd, you need to back up etcd.
  • Application Data: If your applications use Persistent Volumes, ensure their data is backed up. K3s uses a local PV provisioner by default, which means the data is stored on the VPS's own disk. The path is usually /var/lib/rancher/k3s/storage/....
  • Caddy/Nginx Configuration Files: /etc/caddy/Caddyfile.

Simple Auto-Backup Script

You can create a simple script to back up key K3s files and the database. Example using rsync and tar:


# Create the file /usr/local/bin/backup_k3s.sh
sudo nano /usr/local/bin/backup_k3s.sh

Script content (replace /path/to/backup/destination with your path):


#!/bin/bash

BACKUP_DIR="/tmp/k3s_backup_$(date +%Y%m%d%H%M%S)"
DESTINATION="/path/to/backup/destination" # Change to a real path or S3 bucket

mkdir -p $BACKUP_DIR
mkdir -p $DESTINATION

echo "Starting K3s backup at $(date)"

# K3s configuration backup
cp /etc/rancher/k3s/k3s.yaml $BACKUP_DIR/k3s.yaml
cp /var/lib/rancher/k3s/server/node-token $BACKUP_DIR/node-token

# K3s SQLite database backup
# K3s provides a command to create a database snapshot
sudo k3s etcd-snapshot --etcd-snapshot-dir $BACKUP_DIR

# Persistent Volumes data backup (if used locally)
# Note: for real PVs, a more complex strategy is needed (e.g., Velero)
# cp -R /var/lib/rancher/k3s/storage/ $BACKUP_DIR/k3s-storage/

# Caddy configs backup
cp /etc/caddy/Caddyfile $BACKUP_DIR/Caddyfile

# Archive all backups
tar -czvf $DESTINATION/k3s_backup_$(date +%Y%m%d%H%M%S).tar.gz -C $BACKUP_DIR .

# Clean up temporary directory
rm -rf $BACKUP_DIR

echo "K3s backup finished at $(date)"

Make the script executable:


# Make the script executable
sudo chmod +x /usr/local/bin/backup_k3s.sh

Add it to cron for daily execution (e.g., at 3:00 AM):


# Open crontab for editing
sudo crontab -e

Add the line:


# Daily K3s backup at 03:00
0 3 * * * /usr/local/bin/backup_k3s.sh >> /var/log/k3s_backup.log 2>&1

Where to Store Backups

Never store backups on the same server you are backing up. Consider the following options:

  • External S3-compatible storage: An inexpensive and reliable solution (e.g., Backblaze B2, DigitalOcean Spaces). Use s3cmd or rclone for uploading.
  • Separate VPS: You can rent a small VPS solely for storing backups and use rsync with SSH keys to transfer them.
  • NFS share: If you have network storage.

Updates: rolling vs maintenance window

For K3s on a single node, the "rolling update" concept is not applicable, as there are no other nodes to shift the load to. Updating K3s will always mean cluster downtime for a short period.

  • K3s Update: Regularly check for new K3s versions (e.g., every 3-6 months). K3s is updated by re-running the installation script with a new version or by using the k3s-upgrade utility.
    
    # Example of updating K3s to a new version
    curl -sfL https://get.k3s.io | INSTALL_K3S_VERSION="v1.32.0+k3s1" sh -s - --disable traefik
    

    This will result in a K3s restart and brief downtime.

  • OS and Package Updates: Regularly update the operating system: sudo apt update && sudo apt upgrade -y. Plan these updates during low-traffic periods, as they may require a server reboot.
  • Application Updates: Update your container images and Helm charts. Kubernetes allows this without downtime by using rolling updates for Deployments.

Always test updates on a staging environment before applying them to a production server.

Troubleshooting + FAQ

In this section, we will cover common issues you might encounter when working with K3s and provide answers to frequently asked questions.

Cannot connect to the cluster using kubectl

What to check: Ensure that the KUBECONFIG environment variable is set correctly (echo $KUBECONFIG should return /home/your_user/.kube/config). Check permissions on the ~/.kube/config file (should be 600). Make sure the K3s service is running (sudo systemctl status k3s) and the firewall (UFW) allows port 6443/tcp.

How to fix: Restart K3s: sudo systemctl restart k3s. Check K3s logs: sudo journalctl -u k3s --no-pager. Ensure that the server's IP address in the ~/.kube/config file is correct.

My application is not accessible via domain, Caddy shows an error

What to check: Check the DNS record for your domain (the A-record should point to your VPS's IP). Ensure Caddy is running (sudo systemctl status caddy) and its Caddyfile is configured correctly, pointing to localhost:30080. Check Caddy logs (sudo journalctl -u caddy --no-pager) for Let's Encrypt or proxying errors. Make sure the Ingress controller is running and its pods are in Running status (kubectl get pods -n ingress-nginx).

How to fix: Correct DNS records. Validate the Caddyfile syntax with the command sudo caddy validate --config /etc/caddy/Caddyfile. Restart Caddy: sudo systemctl reload caddy. Ensure your Ingress resource in Kubernetes (kubectl get ingress) has the correct host and references an existing service and port.

Application pods are in Pending or CrashLoopBackOff status

What to check: If a pod is in Pending status, it often indicates a lack of resources (CPU/RAM) or Persistent Volume issues. If CrashLoopBackOff, it means the application inside the container is constantly crashing. Check the pod logs: kubectl logs <pod_name> and the pod description: kubectl describe pod <pod_name>.

How to fix: For Pending: increase VPS resources or reduce resource requests in the pod manifest. For CrashLoopBackOff: examine application logs; the problem might be in its configuration, environment variables, or missing dependencies.

What is the minimum suitable VPS configuration?

For K3s without heavy applications, 1 CPU core, 1 GB RAM, and 20-30 GB SSD are sufficient. This will be enough to run K3s itself and several very lightweight services. However, if you plan to run real web applications or databases, a minimum of 2 CPU cores, 4 GB RAM, and 50 GB SSD is recommended for comfortable operation and scalability.

What to choose — VPS or dedicated for this task?

For deploying K3s on a single node for most personal projects, startups, or test environments, a VPS is the optimal choice in terms of price/performance ratio. Dedicated servers are justified when maximum performance, guaranteed resources, very large disk space are required, or if you plan to run many resource-intensive clusters/applications where a VPS can no longer handle the load or CPU/RAM/IOPS limitations.

K3s does not start after server reboot

What to check: Ensure that the K3s service is enabled for autostart: sudo systemctl is-enabled k3s. If it's not enabled, run sudo systemctl enable k3s. Check service logs: sudo journalctl -u k3s --no-pager.

How to fix: If there are errors in the logs related to the firewall or network, ensure that UFW allows all necessary ports and network interfaces are up. If it's a database error, the file /var/lib/rancher/k3s/server/db/state.db might be corrupted. In such a case, recovery from a backup may be required.

How to update K3s to a new version?

What to check: Before updating, be sure to back up the cluster. Check the official K3s documentation for changes in the new version that might affect your applications or configuration.

How to fix: Updating K3s on a single node is done by re-running the installation script with the new version specified: curl -sfL https://get.k3s.io | INSTALL_K3S_VERSION="vX.Y.Z+k3s1" sh -. This will automatically download the new version, update the binaries, and restart K3s. Your applications will be temporarily unavailable during the K3s update.

Conclusion and Next Steps

Diagram: Conclusion and Next Steps

Congratulations! You have successfully deployed a lightweight Kubernetes K3s cluster on your VPS, configured an Ingress controller with automatic HTTPS, and published your first application. You now have a powerful and flexible platform for hosting your containerized applications, managed declaratively and with minimal overhead.

Where to go next?

  1. Monitoring and Logging: Install monitoring systems such as Prometheus and Grafana, as well as centralized logging (e.g., Loki or ELK stack) to track the status of the cluster and applications.
  2. Secret Management: Explore tools for securely storing and managing secrets in Kubernetes (e.g., HashiCorp Vault, Sealed Secrets) instead of using environment variables or files.
  3. Scaling and High Availability: If your project grows, consider adding additional K3s worker nodes or migrating to a full-fledged multi-node Kubernetes cluster to improve fault tolerance and performance.

Was this guide helpful?

Deployment of a lightweight Kubernetes k3s cluster on a single VPS: from installation to first application
support_agent
Valebyte Support
Usually replies within minutes
Hi there!
Send us a message and we'll reply as soon as possible.