Installing Plausible Analytics on VPS: with Docker, Caddy, and PostgreSQL
TL;DR
In this detailed guide, we will step-by-step set up Plausible Analytics on your own VPS server, using a technology stack of Docker Compose for service orchestration, PostgreSQL as the database, and Caddy as a powerful and easy-to-configure web server with automatic SSL/TLS certificate issuance and renewal. You will get a fully functional, private, and controlled web analytics system deployed on your server.
- Plausible Analytics will run on your VPS under full control.
- Docker Compose is used for easy installation and management of all components.
- Caddy will automatically configure HTTPS for your domain.
- PostgreSQL will ensure reliable storage of analytical data.
- The guide includes system security, backup, and maintenance setup.
- All steps are verifiable and ready for execution on a server with Ubuntu 24.04 LTS.
What we are setting up and why
We are setting up Plausible Analytics — a lightweight, privacy-focused alternative to Google Analytics. Unlike traditional analytics platforms, Plausible does not use cookies, does not collect personal data, and is fully compliant with GDPR, CCPA, and PECR. It is an ideal solution for those who want to get valuable data about website visitors without violating their privacy or complicating their infrastructure.
Ultimately, you will get your own Plausible Analytics instance, accessible via your domain name (e.g., analytics.yourdomain.com), fully controlled and running on your VPS. All data will be stored on your server, ensuring maximum confidentiality and security. You will be able to add an unlimited number of sites for tracking and view statistics in a convenient and intuitive interface.
Alternatives: cloud services vs. self-hosting on VPS
There are several approaches to obtaining web analytics:
- Cloud-managed services: These include Google Analytics, Yandex.Metrica, as well as paid versions of Plausible Cloud, Fathom Analytics, and Matomo Cloud. They offer "turnkey" convenience — you don't have to worry about infrastructure, updates, or backups. However, you hand over control of your data to a third-party company, which may be unacceptable from a privacy or legal standpoint.
- Self-hosted on VPS: This is our path. Deploying Plausible on your own VPS gives you full control over data, infrastructure, and configuration. You manage updates, security, and backups yourself. This requires certain technical skills and setup time but provides maximum flexibility, privacy, and cost-effectiveness in the long run, especially for a large number of tracked sites.
The choice of self-hosting on a VPS is especially relevant for developers, solo founders of SaaS projects, crypto enthusiasts who value decentralization and privacy, as well as for those who want to understand and control their server infrastructure more deeply.
What VPS configuration is needed for this task
For Plausible Analytics, especially when using Docker Compose, Caddy, and PostgreSQL, certain minimum resources are required. These requirements may vary depending on the volume of traffic you plan to track.
Minimum requirements for Plausible Analytics (as of 2026)
- CPU: Minimum 1 core. For small and medium projects (up to 1-2 million page views per month), 1-2 cores are sufficient. For more high-load systems, 2-4 cores are recommended.
- RAM: Minimum 2 GB of RAM. Plausible, PostgreSQL, and Docker containers require a significant amount of RAM. For stable operation and moderate traffic processing, 4 GB will be an optimal choice. If you plan to track many sites or millions of views, consider 8 GB.
- Disk: Minimum 20-40 GB SSD. SSD is critical for database performance. The Plausible installation itself and its dependencies will take up several gigabytes. The remaining space will be needed for PostgreSQL data storage, logs, and backups. For long-term data storage and scaling, it's better to have 80-100 GB.
- Network: 100 Mbps or 1 Gbps port. For web analytics, high network bandwidth is usually not a critical factor, as data is transmitted in small volumes. A stable connection with good bandwidth is important for overall server availability.
Specific VPS plan for the task
For most users starting with Plausible Analytics, a VPS plan with the following characteristics will be suitable:
| Criterion | Recommended minimum | Optimal for growth |
|---|---|---|
| CPU | 2 cores | 4 cores |
| RAM | 4 GB | 8 GB |
| Disk | 80 GB SSD | 160 GB SSD |
| Network | 1 Gbps | 1 Gbps |
You can consider a VPS with such characteristics to ensure stable operation of Plausible Analytics and have room for your project's growth.
When a dedicated server is needed, not a VPS
A dedicated server becomes necessary when your project reaches very large scales:
- High-load projects: If you are tracking hundreds of sites or millions of page views per day (tens and hundreds of millions per month), where database performance and query processing speed become critical.
- Strict security and isolation requirements: A dedicated server provides complete physical isolation, which may be important for some regulated industries or very sensitive data.
- Need for custom hardware: If you need specific CPU, GPU, RAID arrays, or very large amounts of RAM/disk that are not offered within standard VPS plans.
For most Plausible Analytics installations, a VPS will be more than sufficient and cost-effective. If you still decide that you need a dedicated server, then a suitable dedicated server will provide maximum performance and control.
Location: what it affects
The choice of VPS server geographical location affects several aspects:
- Latency: The closer the server is to your target audience (visitors to the sites you track) and to you (if you frequently view analytics), the lower the latency will be. This affects the loading speed of the Plausible JS script on your site and the display speed of reports in the control panel.
- Legal aspects: Some jurisdictions may have strict data storage requirements. Choosing a server in a country with favorable privacy laws (e.g., EU countries for European user data) may be preferable.
- Availability and peering: Some locations have better connectivity with major internet providers, which can provide a more stable and faster connection.
For Plausible, it is generally recommended to choose a location that is geographically close to most of your visitors or to your own location for comfortable work with the admin panel.
Server Preparation
Before installing Plausible Analytics, you need to perform basic setup and security hardening of your VPS. We will use Ubuntu Server 24.04 LTS as the base, as it is one of the most popular and stable distributions for servers.
1. SSH Access
Ensure you have SSH access to the server. Typically, the provider gives you an IP address and a login (e.g., root) with a password. It is recommended to immediately set up SSH key access and disable password login for root.
ssh root@ВАШ_IP_СЕРВЕРА
2. System Update and Sudo User Creation
First, we will update all packages and create a new user with sudo privileges to avoid working as root.
# Update package list
sudo apt update

# Upgrade installed packages to the latest versions
sudo apt upgrade -y

# Create a new user (replace 'youruser' with your desired name)
sudo adduser youruser

# Add user to sudo group
sudo usermod -aG sudo youruser

# Switch to the new user (optional, you can log out and log back in)
# su - youruser
After creating the user, log out of the root session and log in as the new user. All subsequent commands requiring administrator privileges will be executed with the sudo prefix.
exit
ssh youruser@ВАШ_IP_СЕРВЕРА
3. Configure SSH Keys for the New User (Recommended)
If you haven't already, copy your public SSH key to the server.
# Run on your local machine
ssh-copy-id youruser@ВАШ_IP_СЕРВЕРА

# If ssh-copy-id doesn't work, you can do it manually:
# ssh youruser@ВАШ_IP_СЕРВЕРА 'mkdir -p ~/.ssh && chmod 700 ~/.ssh'
# cat ~/.ssh/id_rsa.pub | ssh youruser@ВАШ_IP_СЕРВЕРА 'cat >> ~/.ssh/authorized_keys && chmod 600 ~/.ssh/authorized_keys'
After this, you can disable password authentication in SSH for increased security. Edit the /etc/ssh/sshd_config file.
sudo nano /etc/ssh/sshd_config
Find and change the following lines (or add them if they are missing):
PermitRootLogin no
PasswordAuthentication no
ChallengeResponseAuthentication no
UsePAM no
Save changes (Ctrl+O, Enter) and exit (Ctrl+X). Then restart the SSH service:
sudo systemctl restart ssh
IMPORTANT: Before closing the current SSH session, open a new terminal window and try to log in to the server as youruser using your SSH key. Make sure the login works. If not, do not close the current session so you can revert the changes.
4. Install Fail2Ban
Fail2Ban helps protect the server from brute-force attacks by blocking IP addresses that have too many failed login attempts.
# Install Fail2Ban
sudo apt install fail2ban -y

# Copy default configuration file for customization
sudo cp /etc/fail2ban/jail.conf /etc/fail2ban/jail.local

# You can configure jail.local, but for basic protection, the default settings will suffice
# sudo nano /etc/fail2ban/jail.local

# Restart Fail2Ban service
sudo systemctl enable fail2ban
sudo systemctl start fail2ban

# Check Fail2Ban status
sudo systemctl status fail2ban
5. Configure Firewall (UFW)
The UFW (Uncomplicated Firewall) firewall allows you to restrict access to server ports, permitting only necessary connections.
# Install UFW
sudo apt install ufw -y

# Allow SSH (port 22)
sudo ufw allow ssh

# Allow HTTP (port 80) and HTTPS (port 443) - for Caddy
sudo ufw allow http
sudo ufw allow https

# Enable UFW
sudo ufw enable

# Confirm enablement (type 'y')
# Check UFW status
sudo ufw status verbose
Your server is now ready for the installation of the necessary software.
Software Installation — Step-by-Step
To deploy Plausible Analytics, we will use Docker Compose, which simplifies the management of multiple containers (Plausible, PostgreSQL, ClickHouse). We will use Caddy as a reverse proxy and for automatic HTTPS configuration.
1. Install Docker and Docker Compose (valid for 2026)
Docker is a platform for developing, delivering, and running applications in containers. Docker Compose allows you to define and run multi-container Docker applications.
# Uninstall old versions of Docker (if any)
for pkg in docker.io docker-doc docker-compose podman-docker containerd runc; do sudo apt remove $pkg; done

# Install dependencies to add Docker's repository
sudo apt update
sudo apt install ca-certificates curl gnupg -y

# Add Docker's official GPG key
sudo install -m 0755 -d /etc/apt/keyrings
curl -fsSL https://download.docker.com/linux/ubuntu/gpg | sudo gpg --dearmor -o /etc/apt/keyrings/docker.gpg
sudo chmod a+r /etc/apt/keyrings/docker.gpg

# Add Docker repository to APT sources
echo \
  "deb [arch="$(dpkg --print-architecture)" signed-by=/etc/apt/keyrings/docker.gpg] https://download.docker.com/linux/ubuntu \
  "$(. /etc/os-release && echo "$VERSION_CODENAME")" stable" | \
  sudo tee /etc/apt/sources.list.d/docker.list > /dev/null

# Update APT package index
sudo apt update

# Install Docker Engine, Docker CLI, and Containerd
sudo apt install docker-ce docker-ce-cli containerd.io docker-buildx-plugin docker-compose-plugin -y

# Add current user to the docker group to run commands without sudo
sudo usermod -aG docker $USER

# Apply group changes (log out and log in again or restart the session)
# newgrp docker

# Verify Docker installation
docker run hello-world

# Check Docker Compose version (expected docker compose version 2.x.x)
docker compose version
Note: After executing sudo usermod -aG docker $USER, you need to either log out of your SSH session and log in again, or run newgrp docker for the group changes to take effect.
2. Install Caddy (valid for 2026)
Caddy is a powerful web server with automatic HTTPS support that will act as a reverse proxy for Plausible.
# Install dependencies
sudo apt install -y debian-keyring debian-archive-keyring apt-transport-https

# Add Caddy's official GPG key
curl -1sLf 'https://dl.cloudsmith.io/public/caddy/stable/gpg.key' | sudo gpg --dearmor -o /usr/share/keyrings/caddy-stable-archive-keyring.gpg

# Add Caddy repository to APT sources
curl -1sLf 'https://dl.cloudsmith.io/public/caddy/stable/debian.deb.txt' | sudo tee /etc/apt/sources.list.d/caddy-stable.list

# Update APT package index
sudo apt update

# Install Caddy
sudo apt install caddy -y

# Verify Caddy installation
caddy version
3. Prepare Directory Structure for Plausible
Create a directory for Plausible and navigate into it. All configuration files will be stored here.
# Create directory for Plausible
mkdir plausible
cd plausible
4. DNS Configuration
Before proceeding, ensure that your domain or subdomain (e.g., analytics.yourdomain.com) points to your VPS's IP address. Create an A record in your domain's DNS settings.
| Record Type | Host/Name | Value | TTL |
|---|---|---|---|
| A | analytics (or @ if main domain) | IP_ВАШЕГО_VPS | Auto (or 3600) |
Wait for some time for the DNS records to update (this can take from a few minutes to several hours). You can check if DNS has updated using ping or dig.
ping analytics.yourdomain.com
Configuration
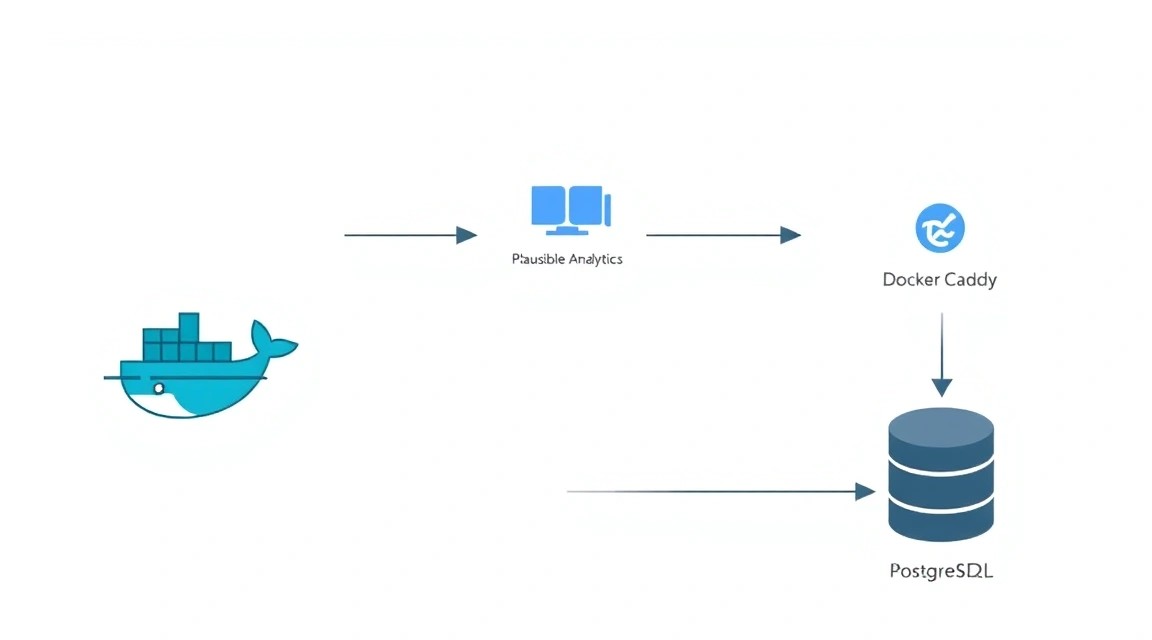
Now that all necessary components are installed, it's time to configure Plausible, PostgreSQL, and Caddy.
1. Creating the docker-compose.yml file
This file defines the services (Plausible, PostgreSQL, ClickHouse), their images, ports, and dependencies.
nano docker-compose.yml
Insert the following content:
version: '3.8'

services:
  plausible_db:
    image: postgres:16-alpine # Current PostgreSQL version for 2026
    restart: always
    environment:
      POSTGRES_DB: plausible
      POSTGRES_USER: plausible
      POSTGRES_PASSWORD: ${DB_PASSWORD} # Will be taken from .env
    volumes:
      - plausible_db_data:/var/lib/postgresql/data
    healthcheck:
      test: ["CMD-SHELL", "pg_isready -U plausible"]
      interval: 5s
      timeout: 5s
      retries: 5

  plausible_events_db:
    image: clickhouse/clickhouse-server:24.3 # Current ClickHouse version for 2026
    restart: always
    volumes:
      - plausible_events_db_data:/var/lib/clickhouse
      - ./clickhouse/config.xml:/etc/clickhouse-server/config.xml:ro
      - ./clickhouse/users.xml:/etc/clickhouse-server/users.xml:ro
    ulimits:
      nofile:
        soft: 262144
        hard: 262144
    healthcheck:
      test: ["CMD", "curl", "--fail", "http://localhost:8123/ping"]
      interval: 5s
      timeout: 5s
      retries: 5

  plausible:
    image: plausible/analytics:v2.0 # Current Plausible Analytics version for 2026
    restart: always
    command: sh -c "sleep 10 && /entrypoint.sh db createdb && /entrypoint.sh db migrate && /entrypoint.sh run"
    depends_on:
      plausible_db:
        condition: service_healthy
      plausible_events_db:
        condition: service_healthy
    environment:
      DATABASE_URL: postgresql://plausible:${DB_PASSWORD}@plausible_db:5432/plausible
      CLICKHOUSE_DATABASE_URL: http://plausible:${CLICKHOUSE_PASSWORD}@plausible_events_db:8123/plausible
      BASE_URL: https://${YOUR_DOMAIN} # Your domain
      SECRET_KEY_BASE: ${SECRET_KEY_BASE} # Generate with openssl rand -hex 64
      TOTP_SALT: ${TOTP_SALT} # Generate with openssl rand -hex 32
      ADMIN_USER_EMAIL: ${ADMIN_USER_EMAIL} # Your email for the first user
      ADMIN_USER_PASSWORD: ${ADMIN_USER_PASSWORD} # Password for the first user
      DISABLE_REGISTRATION: "true" # Disable public registration
      # For sending mail (optional, but recommended for password reset)
      # SMTP_HOST: smtp.your-provider.com
      # SMTP_PORT: 587
      # SMTP_USER: your-smtp-user
      # SMTP_PASSWORD: your-smtp-password
      # SMTP_MAIL_FROM: [email protected]
      # SMTP_AUTH_METHOD: plain
      # SMTP_TLS_MODE: :auto
    ports:
      - "127.0.0.1:8000:8000" # Bind to localhost, Caddy will proxy requests
    volumes:
      - plausible_data:/var/lib/plausible/data # For Plausible data, if any

volumes:
  plausible_db_data:
  plausible_events_db_data:
  plausible_data:
Save the file (Ctrl+O, Enter) and exit (Ctrl+X).
2. Creating the .env file for secrets
All sensitive data will be stored in the .env file, which should not be committed to version control (Git). Create it:
nano .env
Insert the following content, replacing the placeholders with your values:
YOUR_DOMAIN=analytics.yourdomain.com # Your domain or subdomain for Plausible
DB_PASSWORD=YOUR_STRONG_POSTGRES_PASSWORD # Generate a strong password for PostgreSQL
CLICKHOUSE_PASSWORD=YOUR_STRONG_CLICKHOUSE_PASSWORD # Generate a strong password for ClickHouse
SECRET_KEY_BASE=YOUR_SECRET_KEY_BASE # Generate openssl rand -hex 64
TOTP_SALT=YOUR_TOTP_SALT # Generate openssl rand -hex 32
[email protected] # Your email for the first Plausible user
ADMIN_USER_PASSWORD=YOUR_ADMIN_PASSWORD # Strong password for Plausible admin
How to generate keys:
openssl rand -hex 64 # For SECRET_KEY_BASE
openssl rand -hex 32 # For TOTP_SALT
Save the file (Ctrl+O, Enter) and exit (Ctrl+X).
3. ClickHouse Configuration Setup
Create directories and configuration files for ClickHouse. This will ensure the event database functions correctly.
mkdir -p clickhouse
nano clickhouse/config.xml
Insert the following content into clickhouse/config.xml:
        information
        true

    ::
    262144
    10000000000
    100
Save and close. Then create the users file:
nano clickhouse/users.xml
Insert the following content into clickhouse/users.xml (replace YOUR_STRONG_CLICKHOUSE_PASSWORD with the password from your .env file):
            default

                ::/0

            YOUR_STRONG_CLICKHOUSE_PASSWORD
            default
Save and close.
4. Starting Plausible with Docker Compose
Now start all Docker Compose services. The -d flag runs them in the background.
# Start all Docker Compose services
docker compose up -d

# Check the status of running containers
docker compose ps
Ensure that all containers have a running and healthy status. If any container fails to start, check the logs:
docker compose logs plausible
docker compose logs plausible_db
docker compose logs plausible_events_db
5. Caddyfile Configuration
Caddy will proxy requests to Plausible and automatically manage HTTPS. Delete the default Caddyfile and create your own.
# Deleting the default Caddyfile
sudo rm /etc/caddy/Caddyfile

# Creating a new Caddyfile
sudo nano /etc/caddy/Caddyfile
Insert the following content, replacing analytics.yourdomain.com with your domain:
analytics.yourdomain.com {
  reverse_proxy 127.0.0.1:8000
  header {
    # HSTS (for 1 year) - mandatory for security
    Strict-Transport-Security "max-age=31536000; includeSubDomains"
  }
}
Save the file (Ctrl+O, Enter) and exit (Ctrl+X).
6. Starting and Verifying Caddy
Check the Caddy configuration and restart the service.
# Validate Caddyfile configuration
sudo caddy validate --config /etc/caddy/Caddyfile

# Reload Caddy service to apply changes
sudo systemctl reload caddy

# Check Caddy service status
sudo systemctl status caddy
Ensure that Caddy is running and not showing any errors. In the Caddy logs (sudo journalctl -u caddy --no-pager), you should see that Let's Encrypt certificates were successfully issued.
7. Verifying Functionality
Open your domain (e.g., https://analytics.yourdomain.com) in your browser. You should see the Plausible Analytics login page.
Log in using the ADMIN_USER_EMAIL and ADMIN_USER_PASSWORD you specified in the .env file. After logging in, add your first site and copy the JS snippet to embed on your website.
You can also check local accessibility using curl to ensure Plausible is responding on port 8000:
# Check Plausible accessibility via localhost
curl http://127.0.0.1:8000
You should receive the HTML code of the Plausible page. If not, check the Docker Compose logs.