How to Configure Fail2Ban to Protect WordPress?
WordPress is a popular platform for creating websites, which is susceptible to hacker attacks. One way to secure your site is to use the Fail2Ban tool to protect against brute force attacks and other malicious activities.
In this article, we’ll talk about how to configure Fail2Ban to protect a WordPress site from attackers.
What is Fail2Ban?
Fail2Ban is a tool for protecting against server attacks that monitors system logs and blocks the IP addresses of attackers. When the program detects suspicious activity, it automatically adds the IP to a blacklist.
This reduces the risk of successful attacks on your server and prevents hackers from penetrating the system.
How to Configure Fail2Ban to Protect WordPress?
First, you need to install Fail2Ban on your server. You can do this by running the following commands in the terminal:
sudo apt-get update
sudo apt-get install fail2ban
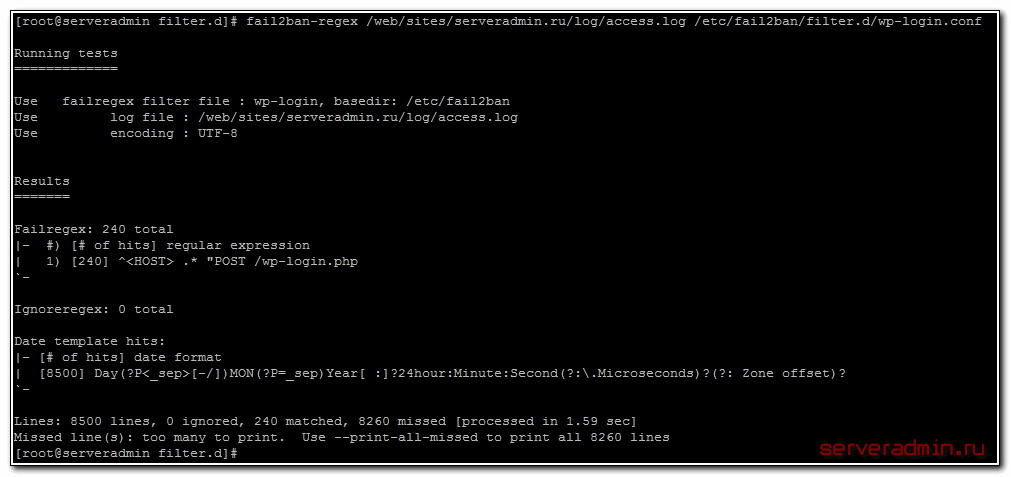
After installing Fail2Ban, you need to configure it to protect WordPress. To do this, create a file wordpress.conf in the directory /etc/fail2ban/filter.d/ and add the following code to it:
[Definition]
failregex = ^
ignoreregex =
Save the file and restart the Fail2Ban service using the command:
sudo systemctl restart fail2ban
Now Fail2Ban will monitor login attempts to your site through the WordPress login form and block the IP addresses of attackers.
Conclusion
Configuring Fail2Ban to protect WordPress is an important step in ensuring the security of your site. Monitor logs and update filtering rules to protect your site from attacks.
Be vigilant and keep your site safe!


