How to Enable DNS Encryption in Google Chrome?
To ensure the security of your data on the internet, it’s crucial to use secure DNS encryption. Google Chrome offers the ability to enable DNS encryption, which will provide you with an additional layer of security and privacy while browsing web pages. In this article, we’ll explain how to enable DNS encryption in Google Chrome.
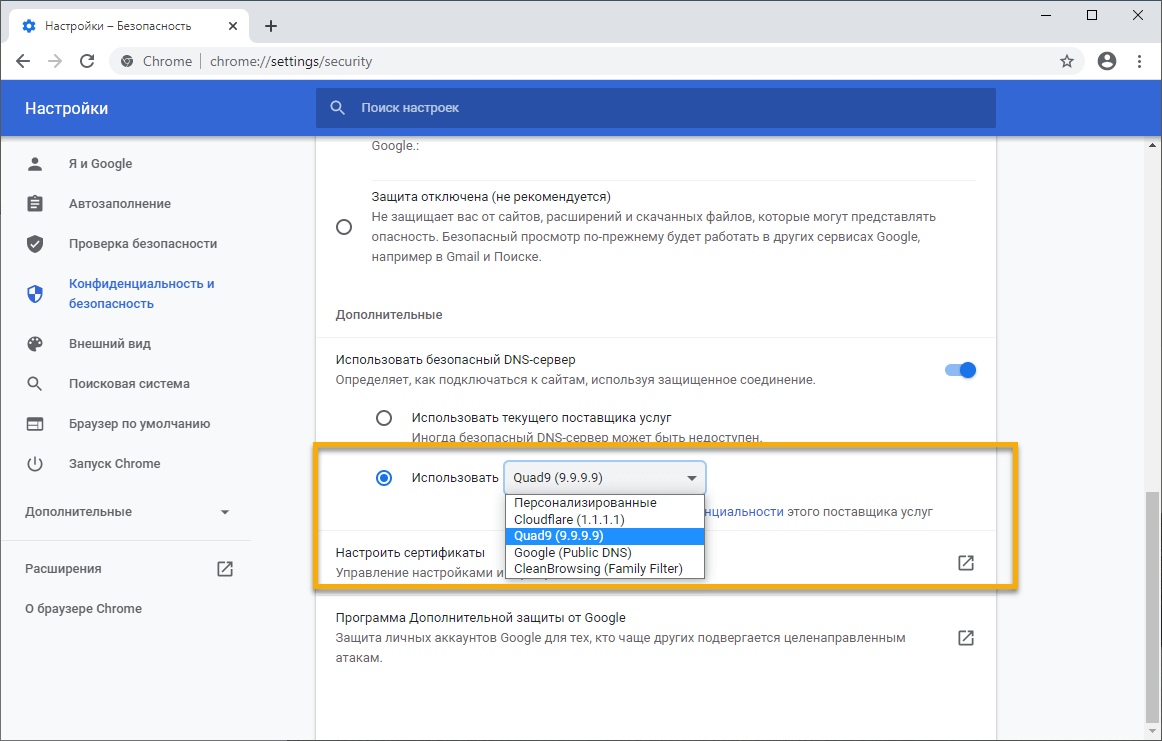
Step 1: Open Google Chrome Settings
To begin, open Google Chrome on your device. Then, navigate to the browser settings by clicking on the three dots in the upper right corner of the browser window.

Step 2: Go to the «Privacy and security» Section
In the menu that opens, go to the «Privacy and security» section.

Step 3: Configure Security Settings
In the «Privacy and security» section, find the security settings and select the «Use secure DNS» option.

Step 4: Enable DNS Encryption
Click the toggle next to the «Use secure DNS» option to enable DNS encryption in Google Chrome.

Congratulations! DNS encryption is now enabled in Google Chrome, and your privacy on the internet is protected.
Follow these simple steps to ensure the security of your data when using the Google Chrome browser. Be mindful of your online privacy!
Activate DNS encryption and be confident in the protection of your data!


