How to Configure the Firewall in Windows 10?
The Firewall in Windows 10 is an important program that protects your computer from various threats from the Internet. In this article, we’ll look at how to configure the Firewall in Windows 10 to ensure maximum security for your device.
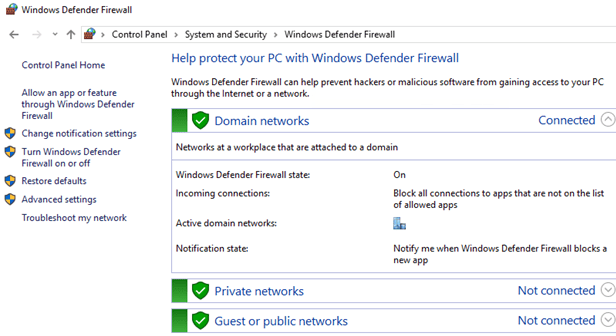
First of all, you need to open the Firewall control center. To do this, click the «Start» button and enter «Windows Defender Firewall» in the search bar. Then, click on the corresponding search result to open the Firewall management program.
When the Firewall control center opens, you will see several sections in the left panel. To start configuring the Firewall, select the «Allow an app or feature through Windows Firewall» section. Here you can choose which programs and services are allowed to have inbound connections to your computer.
To add a new inbound rule, click the «New Rule» button. Then select the rule type (program, port, protocol, etc.) and specify the rule parameters. After that, save the changes for the new rule to take effect.
You can also configure outbound rules by selecting the corresponding section in the Firewall control center. Here you can specify which programs are allowed to have outbound connections from your computer.
In addition, in the Firewall control center you will find the «Actions» section. Here you can block or allow connections for individual programs or services. This will help you manage the security of your computer even more flexibly.
Don’t forget to regularly update your Firewall settings in Windows 10 to ensure maximum protection against various threats. Follow the recommendations of security experts and do not allow violations of Firewall settings.
Now you know how to configure the Firewall in Windows 10 to ensure the security of your computer. Follow our instructions and strengthen the protection of your device from malware and Internet attacks. Be careful and keep your computer safe!


