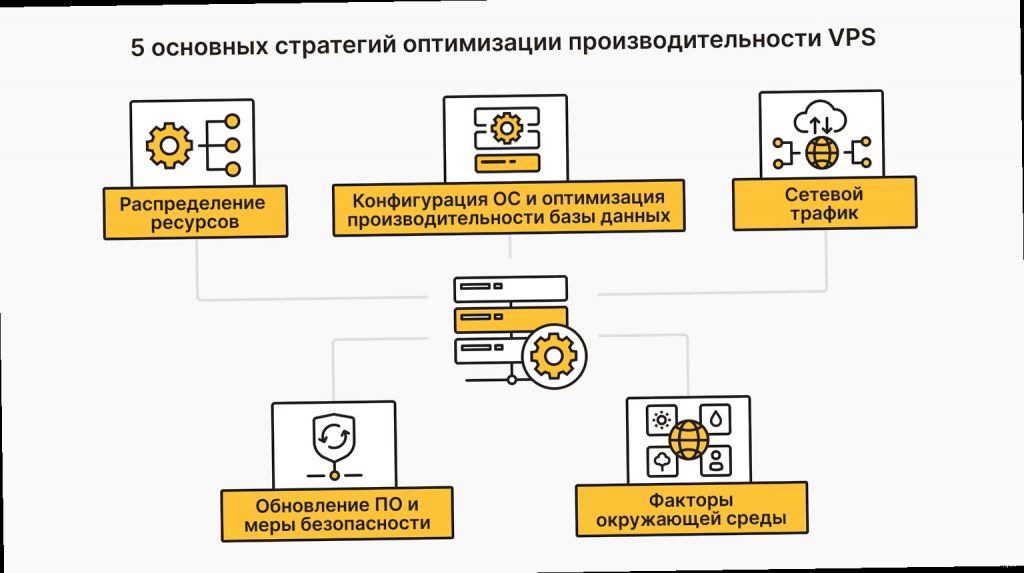
Alright, let’s dive into optimizing your VPS хостинг performance. Look, I’ve been there, staring at a slow-loading website, wondering where all my resources went. This guide isn’t just theory; it’s a collection of practical tips and tricks I’ve learned over years of battling slow servers. We’re gonna cover everything from choosing the right operating system to tweaking your web server and database. No cap, this setup is fire, and you’ll see a noticeable difference if you follow these steps. We’ll be getting hands-on with the command line, so buckle up! We are gonna focus on Ubuntu/Debian mostly, but the principles apply elsewhere. Seriously though, don’t skip the backups. I’ve learned that lesson the hard way.
Okay, so the first step to VPS optimization is choosing the right operating system. Honestly, this is more important than you might think. Ubuntu Server and Debian are my go-to choices for most web hosting scenarios, but CentOS Stream and AlmaLinux are also solid options, especially if you’re more comfortable with the Red Hat ecosystem. Ubuntu is generally easier to get started with, thanks to its huge community and abundant tutorials. CentOS/AlmaLinux provide more stability (used to be the case, given their CentOS origins). Don’t even think about using a desktop environment on your server unless you *really* need a GUI; it’s just wasted resources. Plus, updates are easier without the desktop UI weighing things down.
Here’s a comparison to chew on:
If you decide to switch, *be sure* to back up everything first! Here’s the command to create a full backup:
tar -czvf backup.tar.gz /
*Don’t* run that command blindly. Make sure you have enough space and exclude any unnecessary directories like `/proc`, `/sys`, `/dev`, `/mnt`, `/media`, and `/run`.
«The choice of operating system has a significant impact on the overall performance and security of your VPS. Consider factors such as community support, stability, and compatibility with your applications.» — *Linus Torvalds, creator of Linux*
Keeping Your OS Up-to-Date
This is a no-brainer. Always keep your OS updated. It’s not just about new features; it’s about security patches. Don’t you hate when you get hacked because you skipped a security update? Here’s how to update your system on Ubuntu/Debian:
sudo apt update && sudo apt upgrade -y
And on CentOS/AlmaLinux:
sudo dnf update -y
Pro tip: Set up automatic updates using `unattended-upgrades` on Debian/Ubuntu or `dnf-automatic` on CentOS/AlmaLinux. It’s a lifesaver.
To install `unattended-upgrades`:
Follow the prompts, usually selecting «Yes» to enable automatic security updates. Trust me on this one. This is a game changer. This frees you from the pain of remembering to manually update your system.
Оптимизация веб-сервера (Nginx)
Alright, let’s get this party started. We are gonna be optimizing the web server, focusing on Nginx, since it’s lightweight and performs like a boss, hitting different than Apache in many cases. But you can tweak Apache too, though the configs are kinda different. Look, I’ve spent hours debugging Nginx configs, so I’ll share some tricks to make your life easier. The deal is, a properly configured Nginx server can handle a *ton* of traffic with minimal resources. First, install Nginx if you haven’t already:
sudo apt update && sudo apt install nginx -y
Time for the moment of truth. Run `systemctl status nginx` and pray you see «active (running)». If not, check the logs using `journalctl -xe`.
Now, let’s tweak the config. Open `/etc/nginx/nginx.conf` with your favorite editor (I prefer `nano`, but `vim` works too). Here’s a sample config (replace the comments with the real values of your machine):
user www-data;
worker_processes auto; # Adjust based on CPU cores
pid /run/nginx.pid;
include /etc/nginx/modules-enabled/*.conf;

events {
    worker_connections 1024; # Adjust based on traffic
}

http {
    include /etc/nginx/mime.types;
    default_type application/octet-stream;

    sendfile on;
    tcp_nopush on;
    tcp_nodelay on;
    keepalive_timeout 65;

    gzip on;
    gzip_disable "msie6";
    gzip_vary on;
    gzip_proxied any;
    gzip_comp_level 6;
    gzip_buffers 16 8k;
    gzip_http_version 1.1;
    gzip_types text/plain text/css application/json application/javascript text/xml application/xml application/xml+rss text/javascript;

    include /etc/nginx/conf.d/*.conf;
    include /etc/nginx/sites-enabled/*;
}
Increase `worker_processes` to the number of CPU cores your VPS has. You can find this using `nproc`. Adjust `worker_connections` based on your expected traffic; a higher value allows more concurrent connections. Gzip compression is *essential* for reducing the size of your web pages.
Next, configure your site-specific config file (e.g., `/etc/nginx/sites-available/yourdomain.com`).
server {
    listen 80;
    listen [::]:80;
    server_name yourdomain.com www.yourdomain.com; # Replace with your domain

    root /var/www/yourdomain.com; # Replace with your web root
    index index.php index.html index.htm;

    location / {
        try_files $uri $uri/ /index.php?$args;
    }

    location ~ \.php$ {
        include snippets/fastcgi-php.conf;
        fastcgi_pass unix:/run/php/php7.4-fpm.sock; # Adjust PHP version as needed
    }

    location ~ /\.ht {
        deny all;
    }

    location = /favicon.ico {
        log_access off;
        access_log off;
    }

    location = /robots.txt {
        allow all;
        log_access off;
        access_log off;
    }

    error_log /var/log/nginx/yourdomain.com_error.log;
    access_log /var/log/nginx/yourdomain.com_access.log;
}
*Important:* Enable the site by creating a symlink:
«Nginx’s event-driven architecture allows it to handle a large number of concurrent connections efficiently, making it ideal for high-traffic websites.» — *Igor Sysoev, creator of Nginx*
Optimizing Nginx Caching
Nginx caching can significantly improve performance by serving static content directly from memory. Add these lines to your site config within the `http` block in `/etc/nginx/nginx.conf`:
Adjust the `proxy_cache_path` values to suit your needs. The `levels` parameter specifies the directory hierarchy, `keys_zone` defines the cache name and size, `max_size` sets the maximum cache size, and `inactive` determines how long cached items remain valid.
Ugh, this part always trips people up. Database optimization is crucial for any dynamic website. We’ll focus on MySQL/MariaDB, since they’re the most common choices. If you’re using something else (PostgreSQL, for example), the principles are the same, but the commands and config files will be different. First, install your database server. If you don’t have one, install MariaDB:
Secure your installation using `mysql_secure_installation`. Answer the questions carefully. It’s important to set a strong root password and remove anonymous users.
sudo mysql_secure_installation
Now, let’s tune the config. Open `/etc/mysql/mariadb.conf.d/50-server.cnf` (or `/etc/mysql/my.cnf` on some systems). I’ll be straight with you: this config is *critical*. A poorly configured database can bring your entire server to its knees.
[mysqld]
innodb_buffer_pool_size = 2G # Adjust based on RAM
innodb_log_file_size = 512M
innodb_flush_log_at_trx_commit = 1 # Use 2 for better performance, but potential data loss
query_cache_type = 1 # Deprecated in MySQL 8.0, use performance_schema instead
query_cache_size = 64M # Adjust based on RAM, deprecated in MySQL 8.0
max_connections = 500 # Adjust based on traffic
wait_timeout = 60
connect_timeout = 10
key_buffer_size = 32M
table_open_cache = 400
sort_buffer_size = 4M
read_buffer_size = 4M
read_rnd_buffer_size = 8M
thread_cache_size = 16
tmp_table_size = 32M
max_heap_table_size = 32M
slow_query_log = 1 # Enable slow query logging
slow_query_log_file = /var/log/mysql/mysql-slow.log
long_query_time = 2 # Log queries taking longer than 2 seconds
*Important notes:*
`innodb_buffer_pool_size`: This is the amount of RAM MySQL uses to cache data and indexes. Set it to about 50-70% of your available RAM.
`innodb_log_file_size`: Larger log files can improve write performance, but increase recovery time.
`innodb_flush_log_at_trx_commit`: Setting this to `2` can improve performance, but you risk losing data in case of a crash. `1` is the safest option.
`query_cache_type` and `query_cache_size`: These are deprecated in MySQL 8.0. Use `performance_schema` instead.
`max_connections`: Set this to the maximum number of concurrent connections your application needs.
`slow_query_log`: This is *essential* for identifying slow queries that are hurting performance.
Restart MySQL:
sudo systemctl restart mariadb
Now, analyze your slow query log ( `/var/log/mysql/mysql-slow.log`) and optimize those queries using `EXPLAIN`.
EXPLAIN SELECT * FROM users WHERE email = 'test@example.com';
This will show you how MySQL is executing the query. If you see «Using filesort» or «Using temporary», it means the query is not using indexes efficiently. Add indexes to the appropriate columns to speed things up.
«Proper database indexing is paramount for query performance. Analyze your slow queries and add indexes strategically to avoid full table scans.» — *Michael Widenius, co-founder of MySQL*
Optimizing Database Queries
Beyond indexes, focusing on optimizing your SQL queries themselves is crucial. Avoid `SELECT *` and only retrieve the columns you actually need. Use `JOIN` clauses efficiently and consider using stored procedures for complex logic. Regularly analyze your slow query logs and identify queries that are consistently slow. Consider using a database profiling tool to gain deeper insights into query performance.
Внедрение кеширования (Redis/Memcached)
Here’s where it gets interesting. Caching is a *huge* performance booster. Basically, it stores frequently accessed data in memory so it can be retrieved much faster. Redis and Memcached are the two most popular options. Redis is more versatile, offering data structures like lists and sets, while Memcached is simpler and generally faster for basic caching. I’ve spent hours tweaking Redis configs to squeeze every last drop of performance, and trust me, it’s worth it.
Let’s start with Redis. Install it:
The config file is located at `/etc/redis/redis.conf`. Open it and adjust these settings:
supervised systemd # Use systemd for process management
maxmemory 2G # Adjust based on RAM
maxmemory-policy allkeys-lru # Least Recently Used eviction policy
appendonly no # Disable append-only file for faster performance (if you don't need durability)
Restart Redis:
sudo systemctl restart redis-server
To test if Redis is working, use the `redis-cli` command:
redis-cli ping
If you see «PONG», you’re good to go!
Now, let’s talk about Memcached. Install it:
sudo apt update && sudo apt install memcached -y
The config file is located at `/etc/memcached.conf`. Tweak these settings:
-m 2048 # Adjust based on RAM
-l 127.0.0.1 # Listen on localhost only
-u memcached # User to run as
-c 1024 # Max concurrent connections
Restart Memcached:
sudo systemctl restart memcached
To test Memcached, you’ll need a client library. For PHP, you can use the `php-memcached` extension.
sudo apt install php-memcached -y
Then, use a simple PHP script to connect to Memcached and store/retrieve data.
«Caching is an essential technique for improving the performance of web applications by reducing the load on the backend servers and databases.» — *Brendan Eich, creator of JavaScript*
Object Caching in PHP Applications
If you’re using a PHP framework like Laravel or Symfony, leverage their built-in object caching mechanisms. Configure your cache driver (Redis or Memcached) in the `.env` file and use the `Cache` facade or service to store frequently accessed data. This is a standard best practice. Example using Laravel:
// Store a value in the cache for 60 minutes
Cache::store('redis')->put('key', 'value', 60);

// Retrieve a value from the cache
$value = Cache::store('redis')->get('key');

// Check if a value exists in the cache
if (Cache::store('redis')->has('key')) {
    // ...
}
Мониторинг и анализ производительности
The deal is: optimizing your VPS is an ongoing process. You need to monitor its performance regularly to identify bottlenecks and make adjustments. Don’t just set it and forget it! Ever wonder why your site slows down at certain times of the day? Monitoring can help you figure that out. There are several tools you can use, from simple command-line utilities to full-fledged monitoring platforms.
Here are some essential command-line tools:
`top`: Shows real-time CPU usage, memory usage, and process information.
`htop`: A more interactive version of `top`.
`vmstat`: Reports virtual memory statistics.
`iostat`: Reports I/O statistics.
`netstat`: Displays network connections.
`iftop`: Real-time network traffic monitor.
`free -m`: Shows free and used memory.
`df -h`: Shows disk space usage.
For example, to see the top CPU-consuming processes, run `top`.
top
To monitor network traffic, use `iftop`.
sudo apt install iftop -y
sudo iftop -i eth0 # Replace eth0 with your network interface
For more comprehensive monitoring, consider using a platform like Prometheus, Grafana, or New Relic. These tools allow you to collect and visualize performance metrics over time. You can set up alerts to notify you when certain thresholds are exceeded. I’ve spent countless hours setting up Prometheus and Grafana, and honestly, it’s a *huge* time saver in the long run.
Word of warning: Don’t overload your monitoring system. Collecting too many metrics can actually hurt performance. Focus on the key metrics that are most relevant to your application.
Here’s a basic example of using `sar` (System Activity Reporter) to collect CPU usage data:
sudo apt install sysstat -y
sudo sar -u 1 5 # Report CPU usage every 1 second for 5 iterations
The output will show you the CPU utilization percentages for different categories (user, system, iowait, idle).
Here’s a performance benchmark table comparing different monitoring tools:
Monitoring Tool
Pros
Cons
Best For
top/htop
Simple, built-in, real-time
Limited features, no historical data
Quickly checking resource usage
vmstat/iostat
Detailed system statistics
Can be overwhelming, command-line only
Diagnosing specific performance issues
Prometheus/Grafana
Powerful, flexible, historical data
Complex setup, requires configuration
Comprehensive monitoring and alerting
New Relic
Easy to use, cloud-based
Can be expensive, vendor lock-in
Monitoring web applications and services
«You can’t improve what you don’t measure. Monitoring and analysis are essential for identifying performance bottlenecks and optimizing your VPS.» — *Peter Drucker, management consultant*
Using `systemd-analyze` to Identify Boot Time Bottlenecks
Sometimes, slow boot times can indicate underlying performance issues. `systemd-analyze` can help identify services that are taking a long time to start. This is especially helpful if you’ve recently made changes to your system configuration.
systemd-analyze blame
This command will list services in order of their startup time. Investigate any services that are taking an unusually long time to start.
Повышение безопасности VPS
Okay, so you’ve optimized your VPS for performance. *Now*, let’s talk about security. Because what’s the point of a fast server if it’s easily hacked? Security is *not* an afterthought; it’s an integral part of VPS optimization. A compromised server can be used for malicious purposes, potentially leading to significant financial and reputational damage. I’ve seen servers get hacked due to weak passwords or outdated software, and it’s *not* pretty. Trust me on this one.
First, always use strong passwords. Don’t use «password» or «123456». Use a password manager to generate and store strong, unique passwords for all your accounts.
Next, enable a firewall. `ufw` (Uncomplicated Firewall) is a good choice for Ubuntu/Debian.
This will allow SSH, HTTP, and HTTPS traffic. Adjust the rules based on your needs. *Never* expose unnecessary ports to the internet.
Disable password-based SSH authentication and use SSH keys instead. This is *much* more secure.
ssh-keygen -t rsa -b 4096 # Generate SSH key pair
cat ~/.ssh/id_rsa.pub # Copy the public key
Copy the public key to your `~/.ssh/authorized_keys` file on the server.
nano ~/.ssh/authorized_keys
Then, disable password authentication in `/etc/ssh/sshd_config`:
PasswordAuthentication no
Restart SSH:
sudo systemctl restart ssh
Install fail2ban to protect against brute-force attacks.
sudo apt update && sudo apt install fail2ban -y
Fail2ban monitors log files for failed login attempts and automatically blocks offending IP addresses. The default configuration should be sufficient for most cases. Don’t you hate when someone tries to brute-force your SSH password? Fail2ban will stop them.
Keep your software up-to-date. We talked about this earlier, but it’s worth repeating. Security updates often contain critical patches for vulnerabilities.
Regularly audit your system for security vulnerabilities. Use tools like `Lynis` or `Nessus` to scan your system for potential weaknesses.
Lynis will perform a comprehensive security audit and provide recommendations for improving your system’s security.
Pro tip: Enable two-factor authentication (2FA) wherever possible. This adds an extra layer of security to your accounts.
«Security is a process, not a product. Continuously monitor and improve your security posture to protect against evolving threats.» — *Bruce Schneier, security technologist*
Here’s a comparison of different security tools:
Security Tool
Pros
Cons
Best For
ufw
Simple, easy to use, built-in
Basic features, limited customization
Basic firewall protection
fail2ban
Automatic brute-force protection
Requires configuration, can block legitimate users
Protecting against brute-force attacks
Lynis
Comprehensive security auditing
Can be overwhelming, requires interpretation
Identifying security vulnerabilities
Nessus
Advanced vulnerability scanning
Commercial, can be expensive
Professional security assessments
By implementing these security measures, you can significantly reduce the risk of your VPS being compromised. Remember, security is an ongoing process, so stay vigilant and keep your system up-to-date.
«`