bolt Valebyte VPS від $4/міс — NVMe, запуск за 60 секунд.

Отримати VPS arrow_forward
eco Початковий Туторіал

Install & Configure a Bitcoin

calendar_month Jul 12, 2026 schedule 19 хв. читання visibility 17 переглядів
Установка и настройка Bitcoin Full Node на VPS: безопасность и автоматические обновления
info

Потрібен сервер для цього гайду? Ми пропонуємо виділені сервери та VPS у 50+ країнах з миттєвим налаштуванням.

Потрібен сервер для цього гайду?

Розгорніть VPS або виділений сервер за хвилини.

Setting Up and Configuring a Bitcoin Full Node on a VPS: Security and Automatic Updates

TL;DR

In this guide, we will step-by-step configure a full-featured Bitcoin Core Full Node on an Ubuntu 24.04 LTS operating system hosted on a Virtual Private Server (VPS). You will learn how to install and configure the software, ensure basic server security using SSH keys, UFW firewall, and Fail2ban, and set up the system for automatic operating system updates and secure Bitcoin node maintenance to ensure its stable and reliable operation on the Bitcoin network.

  • We will configure secure VPS access and a basic firewall.
  • We will install and run Bitcoin Core as a system service.
  • We will ensure automatic updates of the operating system and its components.
  • We will set up monitoring and a maintenance strategy for the Bitcoin node.
  • We will prepare for scaling and further optimization.

What we are configuring and why

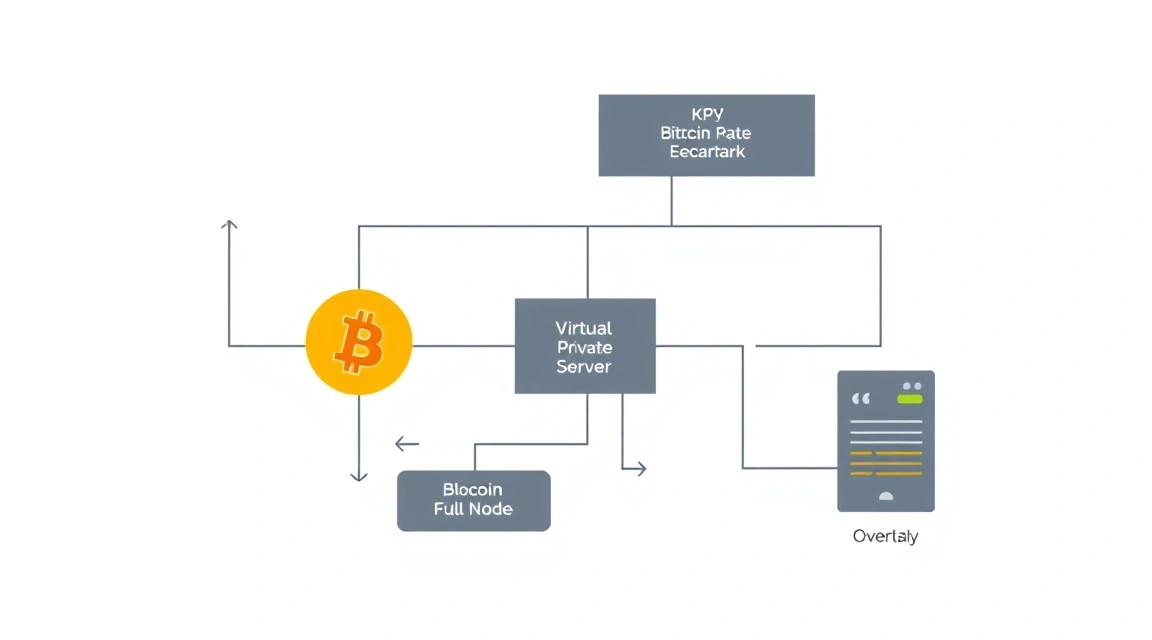
Diagram: What we are configuring and why

In this guide, we will focus on installing and configuring a Bitcoin Full Node, using the official Bitcoin Core client, on a Virtual Private Server (VPS) running Ubuntu 24.04 LTS. A full-featured node is a critically important element of the Bitcoin infrastructure, as it fully validates all transactions and blocks, ensuring the decentralization and security of the network.

What the reader will get in the end:

  • You will have your own, independent, and fully synchronized copy of the entire Bitcoin blockchain.
  • Your node will actively participate in verifying and relaying transactions, as well as in ensuring network security.
  • You will be able to use your node to connect light wallets (e.g., Electrum, Sparrow) or to develop your own decentralized applications (dApps), relying on verified data.
  • You will gain experience working with Linux servers, security configuration, and maintenance automation.

What alternatives exist and why self-hosted on a VPS:

There are alternatives to running your own node, such as using third-party APIs (e.g., Blockchair, Blockchain.com) or light wallets that rely on other people's nodes. However, these approaches have significant drawbacks:

  • Reliance on third parties: You trust someone else to verify transactions and balances, which contradicts the fundamental principles of Bitcoin decentralization. This can lead to loss of privacy and censorship.
  • Security risks: Transmitting your data to third-party services increases the attack surface and the risk of compromise.
  • Limitations and cost: Many third-party APIs have request limits or require a paid subscription for full use.

Running a self-hosted node on a VPS eliminates these problems. You fully control your data, ensure maximum privacy and security, and actively contribute to network decentralization. A VPS offers an optimal balance between dedicated server control and the flexibility of cloud solutions, making it an ideal choice for most users.

What VPS configuration is needed for this task

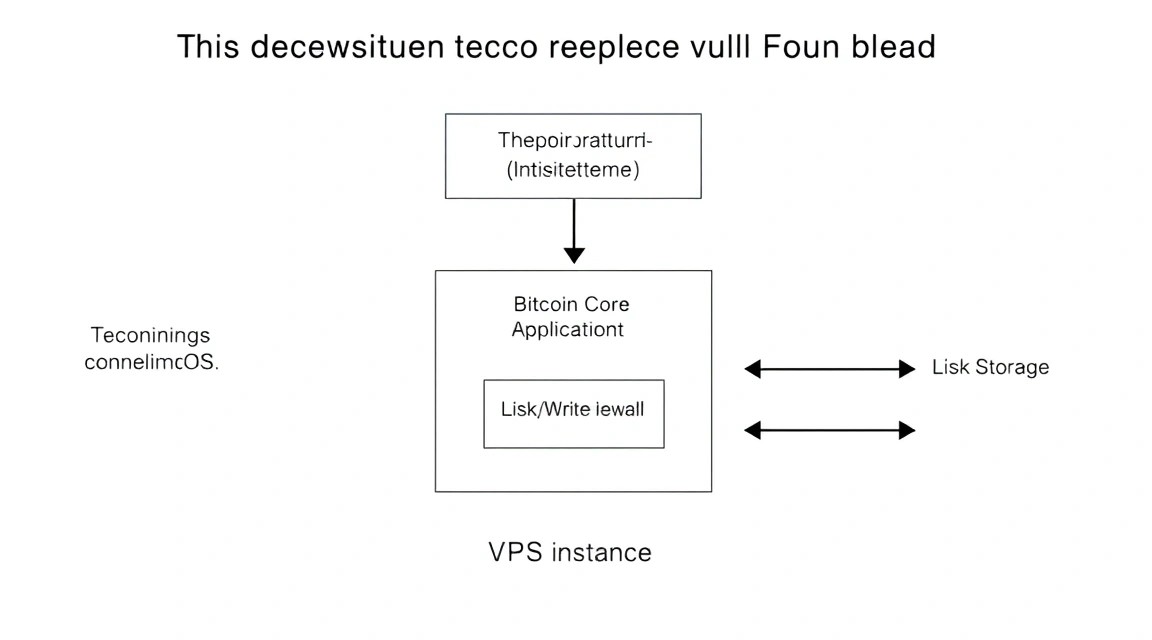
Diagram: What VPS configuration is needed for this task

Running a Bitcoin Full Node requires certain resources, mainly due to the size of the blockchain and the need for its constant synchronization. By 2026, the size of the Bitcoin blockchain will continue to grow, so it is important to choose a configuration with headroom.

Minimum requirements (current for 2026):

  • CPU: 2 cores. Bitcoin Core does not require a very powerful processor, but multiple cores are useful for transaction processing and indexing.
  • RAM: 4 GB. Although the node itself can run with 2 GB, 4 GB ensures smoother operation, especially during initial synchronization and when using additional services (e.g., ElectrumX).
  • Disk: 2 TB SSD. This is critically important. The Bitcoin blockchain already exceeds 600 GB and continues to grow. By 2026, its size could easily reach 1-1.5 TB, so a 2 TB SSD is a reasonable minimum with several years of headroom. An SSD significantly speeds up initial synchronization and daily node operation.
  • Network: 100 Mbit/s or better. Unlimited traffic or a very large limit (several TB per month). Initial synchronization will require downloading the entire blockchain, and then the node will constantly exchange data with the network.

Specific VPS plan for the task:

For stable and productive operation of a Bitcoin Full Node, especially considering blockchain growth by 2026, the following configuration is recommended:

  • CPU: 4 cores.
  • RAM: 8 GB.
  • Disk: 2 TB NVMe SSD. An NVMe SSD will provide the best performance for blockchain read/write operations.
  • Network: 1 Gbit/s port with unlimited traffic.

Such a plan will ensure comfortable node operation, fast synchronization, and resource headroom for future needs. You can get a VPS with the specified characteristics.

When a dedicated server is needed, not a VPS:

A dedicated server may be required if you plan to:

  • Run multiple resource-intensive Bitcoin services (e.g., multiple nodes, ElectrumX, blockchain explorer, Lightning Network node).
  • Handle a very large volume of requests to your node (e.g., for a large application or service).
  • Require maximum I/O performance that a VPS cannot always provide.
  • You need resource guarantees that a VPS may not always provide due to virtualization.

For most individual users and small teams, a VPS with the specified characteristics will be more than sufficient. If you decide that you need a dedicated server, you can consider a suitable dedicated server.

Location: what it affects:

  • Ping and latency: The closer the server is to you, the lower the ping. This is important if you will frequently connect to the server via SSH or use it for interactive applications.
  • Network connectivity: Locating the server in a large data center with good communication channels will ensure faster and more stable synchronization with the Bitcoin network.
  • Jurisdiction: The choice of country for hosting may be important in terms of legislation and privacy. Make sure the jurisdiction meets your requirements.

For a Bitcoin Full Node, good network connectivity and speed are critically important, so choose a location with reliable communication channels, preferably in a major internet hub.

Server Preparation

Diagram: Server Preparation

Before installing Bitcoin Core, you need to perform basic security configuration and update the operating system. We will be using Ubuntu 24.04 LTS.

1. SSH Connection and New User Creation

Initially, you will most likely connect as root. It is strongly not recommended to use root for daily operations. Let's create a new user with sudo privileges.


# Replace 'youruser' with your desired username
sudo adduser youruser

Enter a password for the new user and confirm the remaining details (you can leave them blank). Now add the user to the sudo group:


sudo usermod -aG sudo youruser

Log out of the root session and log in as the new user:


exit
# Now connect as 'youruser'
ssh youruser@your_vps_ip

2. SSH Key Configuration (Recommended)

Using SSH keys instead of a password significantly enhances security. Generate keys on your local machine (if you haven't already):


# On your local machine
ssh-keygen -t rsa -b 4096

Copy the public key to the server:


# On your local machine
ssh-copy-id youruser@your_vps_ip

Now you can connect without a password. After verifying that key-based login works, disable password login for SSH by editing the /etc/ssh/sshd_config file:


sudo nano /etc/ssh/sshd_config

Find the lines and change/add:


PasswordAuthentication no
ChallengeResponseAuthentication no
UsePAM no

It is also recommended to change the standard SSH port (22) to another, for example, 2222. Find the line #Port 22, uncomment it, and change it:


Port 2222

Save changes (Ctrl+O, Enter) and exit (Ctrl+X). Restart the SSH service:


sudo systemctl restart sshd

Now, for the next connection, use the new port: ssh -p 2222 youruser@your_vps_ip.

3. System Update and Basic Utilities Installation

Update the package list and the system itself to the latest versions. Install necessary utilities.


# Update package list
sudo apt update

# Upgrade installed system packages
sudo apt upgrade -y

# Install basic utilities, if not present
sudo apt install -y curl wget git build-essential htop screen unattended-upgrades

4. Firewall Configuration (UFW)

UFW (Uncomplicated Firewall) is a convenient utility for managing iptables. We will configure it to allow only necessary connections.


# Install UFW, if not installed
sudo apt install -y ufw

# Allow SSH (be sure to use your port if you changed it)
# For example, if you are using port 2222
sudo ufw allow 2222/tcp

# Allow incoming connections for Bitcoin P2P (port 8333)
sudo ufw allow 8333/tcp

# Deny incoming connections by default and allow outgoing (outgoing are allowed by default, but can be explicitly stated)
sudo ufw default deny incoming
sudo ufw default allow outgoing

# Enable the firewall
sudo ufw enable

Confirm the action by typing y. Check the firewall status:


sudo ufw status verbose

5. Fail2ban Installation

Fail2ban scans service logs (SSH, web servers, etc.) for suspicious activity (multiple failed login attempts) and temporarily or permanently blocks the IP addresses of offenders.


# Install Fail2ban
sudo apt install -y fail2ban

Create a local Fail2ban configuration so that your changes are not overwritten during updates:


sudo cp /etc/fail2ban/jail.conf /etc/fail2ban/jail.local
sudo nano /etc/fail2ban/jail.local

In the jail.local file, find the [sshd] section and ensure it is enabled (enabled = true). If you changed the SSH port, specify it:


[sshd]
enabled = true
port = 2222 # Your SSH port
maxretry = 3 # Number of failed attempts before blocking
bantime = 1h # Ban time (1 hour)

Save changes and restart Fail2ban:


sudo systemctl restart fail2ban

Now your server is ready for Bitcoin Core installation.

Software Installation — Step-by-Step

Diagram: Software Installation — Step-by-Step

We will install Bitcoin Core version 26.0 (or newer, current for 2026) from official binary files. This method is preferable to building from source for most users, as it is faster and less resource-intensive. For convenience, we will create a separate user bitcoin, under which the node will operate.

1. Creating the Bitcoin User

We will create a system user bitcoin who will not have shell access or a home directory, which will enhance security.


# Create system user 'bitcoin'
sudo adduser --system --group --home /var/lib/bitcoin bitcoin

Let's create a directory for blockchain data and set the correct permissions:


# Create Bitcoin data directory and set owner
sudo mkdir -p /var/lib/bitcoin/.bitcoin
sudo chown -R bitcoin:bitcoin /var/lib/bitcoin

2. Downloading Bitcoin Core

We will navigate to a temporary directory and download the Bitcoin Core binary files. For 2026, version 26.0, 27.0, or higher may be current. You can check the latest stable version on the official Bitcoin Core website or their GitHub repository.

For example, we will use version 26.0, assuming it or its minor updates will be current. Replace the URL with the one current for 2026.


# Navigate to temporary directory
cd /tmp

# Download Bitcoin Core archive (example for Linux x86_64, version 26.0)
# Check the current URL on bitcoincore.org/en/download/
wget https://bitcoincore.org/bin/bitcoin-core-26.0/bitcoin-26.0-x86_64-linux-gnu.tar.gz

# Download signatures file (SHA256SUMS)
wget https://bitcoincore.org/bin/bitcoin-core-26.0/SHA256SUMS

# Download signatures file (SHA256SUMS.asc) for verification
wget https://bitcoincore.org/bin/bitcoin-core-26.0/SHA256SUMS.asc

3. Verifying Downloaded Files

It is crucial to ensure the integrity and authenticity of the downloaded files. We will check the SHA256 sums and GPG signature.


# Check SHA256 sum
sha256sum --check --ignore-missing SHA256SUMS

You should see bitcoin-26.0-x86_64-linux-gnu.tar.gz: OK. If not, the file is corrupted.

Now, let's import the public GPG keys of the Bitcoin Core developers. A list of keys can be found on bitcoincore.org/en/download/.


# Import public GPG keys (example keys for Bitcoin Core developers)
# Use current keys from bitcoincore.org
gpg --keyserver hkps://keys.openpgp.org --recv-keys 01090831DBF626E7C4106593E20F76A000216E14
gpg --keyserver hkps://keys.openpgp.org --recv-keys 898BDDCCEB09F62EE8482A6C1167664B7AB8D654

After importing the keys, let's verify the SHA256SUMS.asc signature:


# Verify GPG signature
gpg --verify SHA256SUMS.asc

You should see a message indicating a good signature (Good signature from "..."). There might be a warning that the key is not fully trusted (This key is not certified with a trusted signature!), which is normal if you have verified the key's fingerprint.

4. Extracting and Installing Binary Files


# Unpack the archive
tar -xzvf bitcoin-26.0-x86_64-linux-gnu.tar.gz

# Copy binary files to /usr/local/bin
sudo install -m 0755 -o root -g root -t /usr/local/bin bitcoin-26.0/bin/

Remove temporary files:


# Remove temporary files
rm -rf bitcoin-26.0 bitcoin-26.0-x86_64-linux-gnu.tar.gz SHA256SUMS SHA256SUMS.asc

5. Creating a systemd Service for Bitcoin Core

We will run Bitcoin Core as a system service, which will allow it to start automatically when the server boots and be managed using systemctl.


# Create service file
sudo nano /etc/systemd/system/bitcoind.service

Insert the following content:


[Unit]
Description=Bitcoin daemon
After=network.target

[Service]
User=bitcoin
Group=bitcoin
Type=forking
PIDFile=/var/lib/bitcoin/.bitcoin/bitcoind.pid
ExecStart=/usr/local/bin/bitcoind -daemon -pid=/var/lib/bitcoin/.bitcoin/bitcoind.pid -conf=/var/lib/bitcoin/.bitcoin/bitcoin.conf -datadir=/var/lib/bitcoin/.bitcoin
ExecStop=/usr/local/bin/bitcoin-cli -conf=/var/lib/bitcoin/.bitcoin/bitcoin.conf -datadir=/var/lib/bitcoin/.bitcoin stop
Restart=on-failure
PrivateTmp=true
TimeoutStopSec=120
LimitNOFILE=8192

[Install]
WantedBy=multi-user.target

Save the file and close the editor.

Reload systemd so it recognizes the new service, and enable its autostart:


# Reload systemd
sudo systemctl daemon-reload

# Enable service autostart on system boot
sudo systemctl enable bitcoind

Bitcoin Core is now installed and ready to run.

Configuration

Diagram: Configuration

For Bitcoin Core to function correctly, you need to create and configure the bitcoin.conf file. This file will be located in the node's data directory, owned by the bitcoin user.

1. Creating and Configuring bitcoin.conf

Create the bitcoin.conf file:


sudo -u bitcoin nano /var/lib/bitcoin/.bitcoin/bitcoin.conf

Insert the following content. This is a basic configuration that will ensure the node and RPC interface work for local access. Replace with a very strong password.


# Main settings
server=1
daemon=1
txindex=1             # Enable transaction indexing (useful for ElectrumX or explorers)
prune=0               # Do not prune the blockchain (for a full node)
maxconnections=125    # Maximum number of P2P connections
rpcbind=127.0.0.1     # Allow RPC connections only from localhost
rpcallowip=127.0.0.1  # Allow RPC connections only from localhost

# RPC access settings (for local use)
rpcuser=bitcoinuser
rpcpassword= # Generate a VERY strong password
# You can also use rpccookiefile for automatic password generation
# rpccookiefile=/var/lib/bitcoin/.bitcoin/.rpcauth

# Logging settings
debuglogfile=/var/lib/bitcoin/.bitcoin/debug.log
logtimestamps=1

# Increase file descriptor limit
# maxuploadtarget=5000 # Maximum upload bandwidth in MB/day. Default is 1440.

Important: Never open the RPC port (default 8332) for external access without thorough protection (e.g., via an SSH tunnel or a secure reverse proxy with TLS). In this configuration, RPC is only accessible from localhost.

You can generate a strong password, for example, like this:


openssl rand -base64 32

Copy the generated password and paste it into bitcoin.conf.

2. Starting Bitcoin Core

Now that the configuration is ready, start the Bitcoin Core service:


sudo systemctl start bitcoind

3. Checking Operation and Synchronization

After startup, the node will require a significant amount of time for initial blockchain synchronization (from several hours to several days, depending on disk and network speed). You can monitor the status using bitcoin-cli.


# Check service status
sudo systemctl status bitcoind

# View service logs
sudo journalctl -f -u bitcoind

To interact with the node, use bitcoin-cli. Specify the path to the configuration file and data directory so that bitcoin-cli knows where to look:


# Get general node information
sudo -u bitcoin /usr/local/bin/bitcoin-cli -conf=/var/lib/bitcoin/.bitcoin/bitcoin.conf -datadir=/var/lib/bitcoin/.bitcoin getinfo

# Get blockchain information
sudo -u bitcoin /usr/local/bin/bitcoin-cli -conf=/var/lib/bitcoin/.bitcoin/bitcoin.conf -datadir=/var/lib/bitcoin/.bitcoin getblockchaininfo

Pay attention to the blocks, headers, and verificationprogress fields. verificationprogress will increase from 0 to 0.999... as synchronization progresses. When blocks equals headers and verificationprogress is close to 1, your node is fully synchronized.

If you want to check functionality externally, you can use ping to check server availability and curl to check, for example, a web interface if you have installed one (which is not directly part of this guide for Bitcoin Core).


# Example of checking server availability (from your local machine)
ping your_vps_ip

4. Configuring TLS/HTTPS (for RPC interfaces)

Bitcoin Core itself does not provide HTTPS for its RPC interface. If you plan to run services that will remotely access RPC (e.g., ElectrumX, blockchain explorer) and want to secure this traffic, you will need to set up a reverse proxy (e.g., Nginx or Caddy) with TLS support. However, for most users who access RPC only from localhost (as configured above), this is not required.

If you still need remote access to RPC, it is highly recommended to use an SSH tunnel. This is much more secure than exposing the RPC port externally via a reverse proxy without proper security configuration.

Example of creating an SSH tunnel from your local machine:


# On your local machine
ssh -L 8332:127.0.0.1:8332 -N -p 2222 youruser@your_vps_ip

This command will redirect your local port 8332 to port 8332 on the server (localhost on the server). After this, you will be able to access the node's RPC interface as localhost:8332 from your local machine, and all traffic will be encrypted by the SSH tunnel.

Backups and Maintenance

Diagram: Backups and Maintenance

Maintaining a Bitcoin Full Node in working order involves regular maintenance and a backup strategy. The main data to back up are the wallet file (if you use one) and configuration files. The blockchain itself can be restored, but it will take a long time.

1. What to Back Up

  • wallet.dat: If you use the built-in Bitcoin Core wallet, this is the most important file. It contains your private keys. It is crucial to back it up regularly and store it in a secure location!
  • bitcoin.conf: The node's configuration file. While it's easy to recreate, having a backup simplifies recovery.
  • peers.dat: Contains a list of known peers, which can speed up network connection after a restart, but is not critically important.

Important: Do not back up the entire blockchain data directory /var/lib/bitcoin/.bitcoin/blocks or /var/lib/bitcoin/.bitcoin/chainstate, as this is a huge amount of data that quickly becomes outdated. It's simpler to resynchronize the blockchain from scratch.

2. Simple Auto-Backup Script (for wallet.dat and configs)

Let's create a simple script to back up wallet.dat and bitcoin.conf. We assume you store wallet.dat in the standard location /var/lib/bitcoin/.bitcoin/wallet.dat. If you are not using a wallet on the node, skip backing up wallet.dat.

Create a directory for backups:


sudo mkdir -p /var/backups/bitcoin
sudo chown youruser:youruser /var/backups/bitcoin

Create the script backup_bitcoin_node.sh:


nano ~/backup_bitcoin_node.sh

Insert the following content:


#!/bin/bash

# Path to Bitcoin Core data directory
BITCOIN_DATADIR="/var/lib/bitcoin/.bitcoin"
# Path to backup directory
BACKUP_DIR="/var/backups/bitcoin"
# Backup file name
TIMESTAMP=$(date +%Y%m%d%H%M%S)
BACKUP_FILE="${BACKUP_DIR}/bitcoin_config_wallet_${TIMESTAMP}.tar.gz"

echo "Starting Bitcoin Core backup..."

# Stop bitcoind before backing up wallet.dat to ensure integrity
# If you are not using the built-in wallet, this step can be skipped
sudo systemctl stop bitcoind

# Archiving wallet.dat and bitcoin.conf
sudo tar -czvf "${BACKUP_FILE}" -C "${BITCOIN_DATADIR}" wallet.dat bitcoin.conf

# Start bitcoind
sudo systemctl start bitcoind

# Delete old backups (e.g., older than 7 days)
find "${BACKUP_DIR}" -name "bitcoin_config_wallet_*.tar.gz" -mtime +7 -delete

echo "Backup completed: ${BACKUP_FILE}"

Make the script executable:


chmod +x ~/backup_bitcoin_node.sh

3. Scheduling Backups with Cron

Add the script to Cron for automatic execution. For example, daily at 3:00 AM.


crontab -e

Add the following line to the end of the file:


0 3 * * * /home/youruser/backup_bitcoin_node.sh >> /var/log/bitcoin_backup.log 2>&1

Save and exit. The backup will now run automatically.

4. Where to Store Backups

Storing backups on the same server as the original data is insecure. In case of disk failure or server compromise, you will lose both data and backups. It is recommended to:

  • External S3-compatible object storage: Reliable and relatively inexpensive. Use tools like rclone for automatic synchronization.
  • Separate VPS or home server: You can use rsync or scp to transfer backups to another server.
  • Encrypted cloud storage: Use services like Mega, Proton Drive with local encryption.

Example of sending backups to S3 using rclone:

Install rclone and configure it for your S3 provider. Then, add the following line to your backup script for copying:


# After the line "echo "Backup completed: ${BACKUP_FILE}""
rclone copy "${BACKUP_FILE}" "s3_remote_name:bucket_name/backups/"

5. Updates: rolling vs maintenance window

Operating System Updates:

For Ubuntu, it is recommended to configure automatic security updates (unattended-upgrades). This will allow your system to receive critical patches without your intervention, which enhances security.


# Open the unattended-upgrades configuration file
sudo nano /etc/apt/apt.conf.d/50unattended-upgrades

Ensure that the lines for automatic updates are uncommented and configured: Unattended-Upgrade::AllowedOrigins { "${distro_id}:${distro_codename}"; "${distro_id}:${distro_codename}-security"; // "${distro_id}:${distro_codename}-updates"; // "${distro_id}:${distro_codename}-proposed"; // "${distro_id}:${distro_codename}-backports"; };

Enable automatic reboot if required:


Unattended-Upgrade::AutomaticReboot "true";
Unattended-Upgrade::AutomaticRebootInterval "7"; # Reboot every 7 days if required

Save and close. Then enable auto-updates:


sudo dpkg-reconfigure -plow unattended-upgrades

Bitcoin Core Updates:

Updating Bitcoin Core is best done manually or with semi-automatic control. Fully automatic updates can lead to unpredictable problems or incompatibilities. It is recommended to:

  1. Monitor announcements: Subscribe to mailing lists or follow official Bitcoin Core channels for new version announcements.
  2. Maintenance window: Plan time for the update. This usually involves stopping the service, downloading and verifying new binary files, replacing old ones, and starting the service.
  3. Testing: For critically important nodes, it is recommended to first update and test the new version on a test node.

Bitcoin Core Update Process (example):


# 1. Stop Bitcoin Core service
sudo systemctl stop bitcoind

# 2. Download and verify new binary files (as in the "Software Installation" section)
#    For example, for version 27.0:
cd /tmp
wget https://bitcoincore.org/bin/bitcoin-core-27.0/bitcoin-27.0-x86_64-linux-gnu.tar.gz
# ... verification ...
tar -xzvf bitcoin-27.0-x86_64-linux-gnu.tar.gz

# 3. Replace old binary files
sudo rm /usr/local/bin/bitcoind /usr/local/bin/bitcoin-cli /usr/local/bin/bitcoin-tx /usr/local/bin/bitcoin-util /usr/local/bin/test_bitcoin
sudo install -m 0755 -o root -g root -t /usr/local/bin bitcoin-27.0/bin/*

# 4. Delete temporary files
rm -rf bitcoin-27.0 bitcoin-27.0-x86_64-linux-gnu.tar.gz SHA256SUMS SHA256SUMS.asc

# 5. Start Bitcoin Core service
sudo systemctl start bitcoind

# 6. Check status
sudo systemctl status bitcoind
sudo -u bitcoin /usr/local/bin/bitcoin-cli -conf=/var/lib/bitcoin/.bitcoin/bitcoin.conf -datadir=/var/lib/bitcoin/.bitcoin getinfo

Troubleshooting + FAQ

What to do if the node doesn't start?

First of all, check the Bitcoin Core service logs. Use the command sudo journalctl -f -u bitcoind to see the latest messages. Common causes include: incorrect bitcoin.conf (syntax errors, wrong paths), permission issues with the data directory /var/lib/bitcoin/.bitcoin, or insufficient disk space. Ensure that the bitcoin user owns all files in /var/lib/bitcoin.

Is it normal for the node to take a very long time to synchronize?

Yes, the initial synchronization of a Bitcoin Full Node takes a long time. This can range from 12-24 hours to several days, depending on your disk speed (SSD is mandatory), network bandwidth, and overall server load. Check progress using sudo -u bitcoin bitcoin-cli getblockchaininfo and monitor verificationprogress. If progress is not moving at all, check your network connection and ensure that port 8333 is open in the firewall.

What is the minimum VPS configuration suitable for a Bitcoin Full Node in 2026?

Minimally, for stable operation of a Bitcoin Full Node by 2026, a VPS with 2 CPU cores, 4 GB RAM, and 2 TB NVMe SSD will be required. Disk space is the most critical resource due to the continuous growth of the blockchain. The network should be at least 100 Mbps with unlimited traffic or a very high limit.

What to choose — VPS or dedicated for this task?

For running a single Bitcoin Full Node, especially for personal use or a small team, a VPS with recommended specifications (4 CPU cores, 8 GB RAM, 2 TB NVMe SSD) will be more than sufficient and cost-effective. A dedicated server is justified if you plan to run multiple nodes, provide public services requiring high I/O performance, or handle a very large volume of requests to your node.

How to check if my node is actually participating in the network?

Use the command sudo -u bitcoin bitcoin-cli getconnectioncount to see the number of active connections to other nodes. The value should be significantly greater than zero (usually 8-125). Also, sudo -u bitcoin bitcoin-cli getpeerinfo will show detailed information about connected peers, their IP addresses, and protocol versions.

What to do if disk space runs out?

If disk space runs out, the node will stop synchronizing and may shut down. You need to either increase the disk size on your VPS (if possible with your provider) or migrate the node to a new VPS with a larger disk. As a last resort, you can try running the node in "pruning" mode (blockchain trimming), but this will reduce its functionality as a Full Node, as it will not store the entire blockchain.

Can other services be run on the same VPS as the Bitcoin Node?

Yes, you can, but with caution. If you have sufficient resources (CPU, RAM, especially disk I/O), you can run other lightweight services. However, avoid resource-intensive applications that might compete with Bitcoin Core for disk operations or network bandwidth, especially during initial synchronization or active use. Always monitor resource usage with htop or grafana/prometheus.

Conclusion and Next Steps

Diagram: Conclusion and Next Steps

Congratulations! You have successfully installed and configured a Bitcoin Full Node on your VPS, ensuring its basic security and preparing it for automatic maintenance. Now your node actively participates in maintaining the decentralization and security of the Bitcoin network, providing you with an independent and verified source of blockchain data.

Next steps for developing your infrastructure:

  1. Resource Monitoring: Set up a monitoring system (e.g., Prometheus + Grafana) to track CPU, RAM, disk, and network usage. This will help identify potential problems before they arise and understand when scaling will be required.
  2. Lightning Network Node: Consider installing a Lightning Network node (LND or Core Lightning) on the same or a separate VPS. This will allow you to participate in the Bitcoin micropayment network, open channels, and route transactions.
  3. ElectrumX Server: If you plan to use lightweight wallets (e.g., Electrum, Sparrow) for yourself or your team, installing your own ElectrumX server will provide maximum privacy and speed, as it will use your own node.

Поділитися цим записом:

Installation and configuration of Bitcoin full node on VPS: security and automatic updates
support_agent
Valebyte Support
Usually replies within minutes
Hi there!
Send us a message and we'll reply as soon as possible.