
Налаштування приватного Docker Registry (Harbor) на VPS: безпека та керування образами
TL;DR
У цьому докладному посібнику ми крок за кроком налаштуємо приватний Docker Registry з використанням Harbor на вашому віртуальному або виділеному сервері. Harbor — це потужна платформа з відкритим вихідним кодом, яка надає не лише сховище для образів Docker, а й розширені функції безпеки, сканування вразливостей, керування політиками та контроль доступу. У підсумку ви отримаєте повністю контрольоване, безпечне та масштабоване рішення для зберігання та розповсюдження ваших контейнерних образів, критично важливе для CI/CD пайплайнів та забезпечення приватності.
- Встановлення та налаштування Harbor на Ubuntu 24.04 LTS.
- Забезпечення HTTPS-доступу до Registry за допомогою Caddy для автоматичного отримання та оновлення TLS-сертифікатів.
- Конфігурація базових політик безпеки та керування доступом.
- Рекомендації щодо вибору VPS-конфігурації та оптимізації ресурсів.
- Стратегії резервного копіювання та обслуговування для довгострокової стабільності.
- Вирішення типових проблем та відповіді на поширені запитання.
Що ми налаштовуємо і навіщо
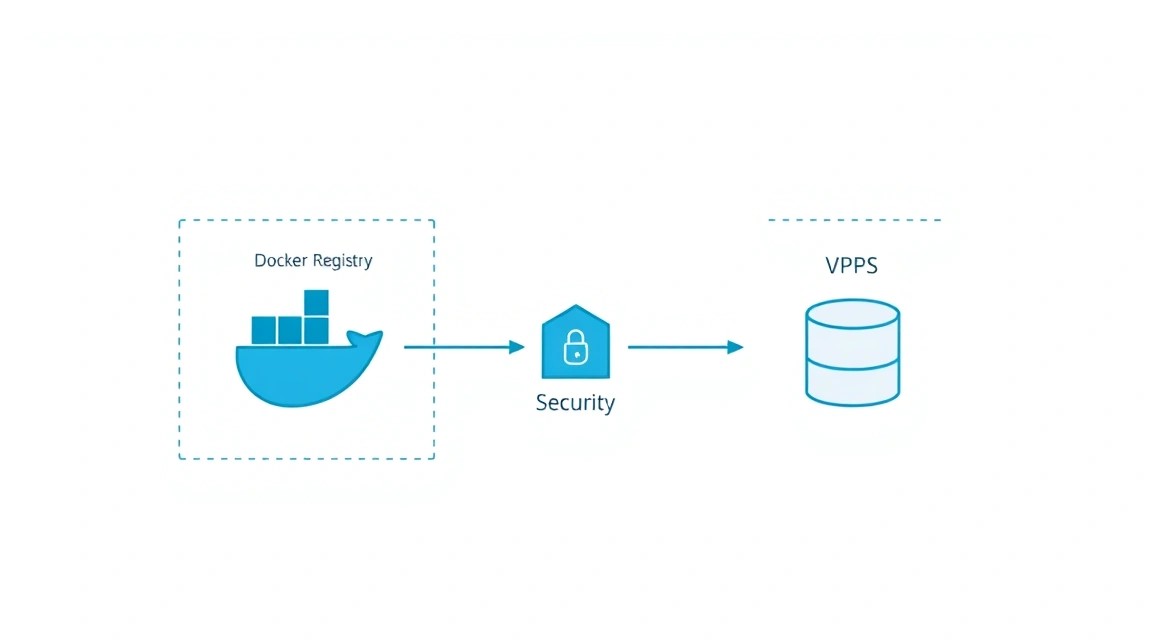
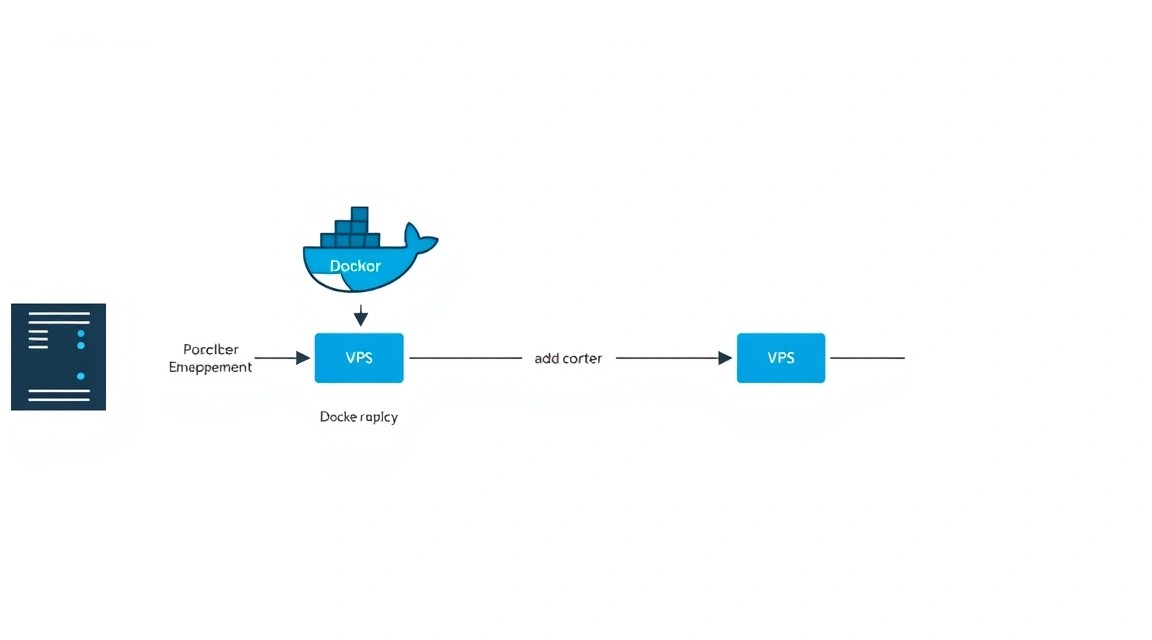
Ми будемо налаштовувати Harbor — потужний, хмарний, приватний реєстр контейнерів з відкритим вихідним кодом, який зберігає, підписує та сканує образи. Harbor розширює функціональність стандартного Docker Registry, додаючи до нього корпоративні функції, такі як безпека, керування проєктами, контроль доступу на основі ролей (RBAC), сканування вразливостей, реплікацію образів та інтеграцію з LDAP/AD. Це рішення дозволяє командам розробників безпечно керувати своїми контейнерними образами, забезпечуючи їх цілісність та відповідність корпоративним стандартам.
У підсумку, ви отримаєте повністю функціональний, безпечний та керований приватний Docker Registry, який слугуватиме центральним сховищем для всіх ваших контейнерних образів. Це особливо важливо для CI/CD пайплайнів, де образи повинні бути доступні швидко та надійно, а також для середовищ, де потрібен суворий контроль над тим, що розгортається. Ви зможете зберігати пропрієтарні образи, захищати їх від несанкціонованого доступу, сканувати на наявність вразливостей до розгортання та контролювати, хто може публікувати або витягувати образи.
Які альтернативи існують? Можна використовувати хмарні managed-сервіси, такі як AWS ECR, Google Container Registry (GCR) / Artifact Registry, Azure Container Registry (ACR) або GitLab Container Registry. Вони пропонують зручність, масштабованість і часто інтегровані з іншими хмарними сервісами. Однак, self-hosted рішення на VPS має свої переваги:
- Повний контроль: Ви повністю контролюєте дані, безпеку та інфраструктуру. Це критично важливо для компаній із жорсткими регуляторними вимогами або для тих, хто не хоче залежати від конкретного хмарного провайдера.
- Економічна ефективність: Для середніх та великих обсягів зберігання та трафіку self-hosted рішення може виявитися значно дешевшим за хмарні аналоги, особливо якщо у вас вже є вільні ресурси на VPS/dedicated сервері.
- Кастомізація: Можливість тонкого налаштування під специфічні потреби вашої інфраструктури, інтеграція з внутрішніми системами автентифікації або унікальними інструментами безпеки.
- Приватність: Образи зберігаються на вашій інфраструктурі, що знижує ризики витоку даних через сторонні сервіси.
Вибір self-hosted Harbor на VPS ідеально підходить для команд, яким потрібен баланс між контролем, безпекою та вартістю, а також для тих, хто хоче уникнути вендор-лока.
Який VPS-конфіг потрібен для цього завдання
Вибір правильної конфігурації сервера критично важливий для стабільної та продуктивної роботи Harbor. Harbor — це не просто сховище, а цілий комплекс сервісів (PostgreSQL, Redis, Notary, Clair, Trivy, Portal), які споживають ресурси.
Мінімальні вимоги (для невеликих команд / тестових середовищ):
- CPU: 2 ядра. Harbor виконує багато фонових завдань, таких як сканування вразливостей, що може бути ресурсоємним.
- RAM: 4 ГБ. Це абсолютний мінімум, рекомендується 6-8 ГБ для стабільної роботи всіх компонентів.
- Диск: 100 ГБ SSD. Основне споживання дискового простору припадає на зберігання образів. SSD значно прискорює операції з файлами та базами даних.
- Мережа: 100 Мбіт/с. Для початкового використання цього достатньо, але для активної роботи CI/CD або великої кількості користувачів знадобиться ширший канал.
Рекомендований VPS-план (для продакшн-середовища середнього навантаження):
- CPU: 4 ядра. Забезпечить достатню продуктивність для обробки запитів, сканування та фонових завдань.
- RAM: 8-16 ГБ. Дозволить усім компонентам Harbor працювати без свопінгу, що критично для продуктивності.
- Диск: 250-500 ГБ NVMe/SSD. Обсяг залежить від кількості та розміру збережених образів. NVMe пропонує максимальну швидкість введення-виведення. Важливо вибирати диск з можливістю розширення або використовувати зовнішнє сховище, якщо планується дуже багато образів.
- Мережа: 1 Гбіт/с. Високошвидкісний канал необхідний для швидкого завантаження та завантаження образів, що суттєво впливає на час збирання та розгортання.
Для оренди VPS із зазначеними характеристиками, наприклад, 4 ядра CPU, 8-16 ГБ RAM, 250-500 ГБ NVMe/SSD та 1 Гбіт/с мережею, можна розглянути VPS із зазначеними характеристиками.
Коли потрібен dedicated, а не VPS
Виділений сервер (dedicated server) стає кращим вибором, коли:
- Дуже високе навантаження: Якщо ви плануєте зберігати тисячі образів, обслуговувати сотні розробників, або ваш CI/CD пайплайн постійно пушить/пулить образи.
- Вимоги до продуктивності: Коли потрібна гарантована продуктивність CPU, RAM та дискової підсистеми без "ефекту сусіда" (noisy neighbor) від інших користувачів на тому ж гіпервізорі.
- Великий обсяг сховища: Якщо вам потрібно кілька терабайт для образів та довгострокового зберігання.
- Суворі SLA та ізоляція: Для критично важливих систем, де потрібна максимальна ізоляція та контроль над апаратним забезпеченням.
У таких випадках, відповідний dedicated сервер забезпечить необхідну потужність та надійність.
Локація: на що впливає
Розташування вашого VPS або dedicated сервера впливає на кілька факторів:
- Латентність (ping): Чим ближче сервер до ваших розробників та CI/CD агентів, тим менша затримка при завантаженні/вивантаженні образів. Це безпосередньо впливає на швидкість роботи.
- Регіональні регуляції: У деяких випадках, через законодавство (наприклад, GDPR), дані повинні зберігатися в певному географічному регіоні.
- Вартість: Ціни на VPS можуть варіюватися залежно від регіону.
Вибирайте локацію, яка мінімізує затримку для більшості ваших користувачів та відповідає всім законодавчим вимогам.
Підготовка сервера

Передбачається, що ви використовуєте свіжовстановлений сервер з Ubuntu 24.04 LTS. Ці кроки забезпечать базову безпеку та підготують систему до встановлення Harbor.
1. Оновлення системи
Завжди починайте з оновлення пакетного менеджера та встановлених пакетів, щоб переконатися в актуальності системи та доступності останніх виправлень безпеки.
sudo apt update             # Оновлення списку пакетів
sudo apt upgrade -y         # Оновлення всіх встановлених пакетів
sudo apt autoremove -y      # Видалення невикористовуваних пакетів
2. Створення нового користувача та налаштування SSH-ключів
Не рекомендується працювати під обліковим записом root. Створіть нового користувача з правами sudo та налаштуйте автентифікацію за SSH-ключами для підвищення безпеки.
sudo adduser harboradmin    # Створення нового користувача "harboradmin"
sudo usermod -aG sudo harboradmin # Додавання користувача до групи sudo
sudo mkdir /home/harboradmin/.ssh # Створення директорії для SSH-ключів
sudo chmod 700 /home/harboradmin/.ssh # Встановлення правильних прав доступу
sudo cp ~/.ssh/authorized_keys /home/harboradmin/.ssh/ # Копіювання вашого публічного ключа
sudo chown -R harboradmin:harboradmin /home/harboradmin/.ssh # Встановлення власника для директорії
Важливо: Після виконання цих кроків вийдіть з поточної сесії root та увійдіть під новим користувачем harboradmin, використовуючи ваш SSH-ключ. Потім вимкніть вхід за паролем для root та звичайним користувачам у файлі /etc/ssh/sshd_config.
sudo nano /etc/ssh/sshd_config
Знайдіть та змініть наступні рядки:
PermitRootLogin no
PasswordAuthentication no
ChallengeResponseAuthentication no
UsePAM no
Перезапустіть SSH-сервіс для застосування змін:
sudo systemctl restart sshd
3. Встановлення та налаштування Firewall (UFW)
Налаштуйте базовий файрвол для дозволу лише необхідних портів. Harbor використовуватиме порти 80 (HTTP, для редиректу), 443 (HTTPS) та, можливо, інші для внутрішніх сервісів.
sudo apt install ufw -y     # Встановлення UFW
sudo ufw default deny incoming # Заборонити всі вхідні з'єднання за замовчуванням
sudo ufw default allow outgoing # Дозволити всі вихідні з'єднання за замовчуванням
sudo ufw allow OpenSSH      # Дозволити SSH (порт 22)
sudo ufw allow http         # Дозволити HTTP (порт 80)
sudo ufw allow https        # Дозволити HTTPS (порт 443)
sudo ufw enable             # Увімкнути UFW
sudo ufw status verbose     # Перевірити статус UFW
4. Встановлення Fail2Ban
Fail2Ban допомагає захиститися від атак перебору паролів (brute-force) на SSH та інші сервіси.
sudo apt install fail2ban -y # Встановлення Fail2Ban
sudo systemctl enable fail2ban # Увімкнення автозапуску Fail2Ban
sudo systemctl start fail2ban  # Запуск Fail2Ban
sudo cp /etc/fail2ban/jail.conf /etc/fail2ban/jail.local # Створення локальної конфігурації
Відкрийте /etc/fail2ban/jail.local та переконайтеся, що секція [sshd] активна (enabled = true) і налаштуйте параметри на свій розсуд (наприклад, bantime, findtime, maxretry).
sudo nano /etc/fail2ban/jail.local
Приклад налаштування:
[sshd]
enabled = true
port = ssh
logpath = %(sshd_log)s
backend = %(sshd_backend)s
bantime = 1h
findtime = 10m
maxretry = 5
Перезапустіть Fail2Ban для застосування змін:
sudo systemctl restart fail2ban
sudo fail2ban-client status sshd # Перевірити статус SSH-фільтра
5. Встановлення базових утиліт
Деякі утиліти можуть бути корисними в процесі встановлення та налагодження.
sudo apt install curl wget git nano htop net-tools -y # Встановлення корисних утиліт
Тепер ваш сервер готовий до встановлення Docker та Harbor.
Встановлення ПЗ — покроково
На цьому етапі ми встановимо Docker Engine, Docker Compose та Harbor. Ми будемо використовувати актуальні версії, доступні у 2026 році. Для Ubuntu 24.04 LTS це, швидше за все, буде Docker Engine 25.x/26.x та Docker Compose v2.x, а Harbor версії 2.x або 3.x.
1. Встановлення Docker Engine
Встановимо Docker з офіційного репозиторію Docker, щоб завжди мати актуальні версії.
# Видаляємо старі версії Docker, якщо вони є
for pkg in docker.io docker-doc docker-compose podman-docker containerd runc; do sudo apt remove $pkg; done

# Встановлюємо необхідні пакети для використання репозиторію HTTPS
sudo apt install ca-certificates curl gnupg lsb-release -y

# Додаємо офіційний GPG ключ Docker
sudo install -m 0755 -d /etc/apt/keyrings
curl -fsSL https://download.docker.com/linux/ubuntu/gpg | sudo gpg --dearmor -o /etc/apt/keyrings/docker.gpg
sudo chmod a+r /etc/apt/keyrings/docker.gpg

# Додаємо репозиторій Docker до APT sources
echo \
  "deb [arch="$(dpkg --print-architecture)" signed-by=/etc/apt/keyrings/docker.gpg] https://download.docker.com/linux/ubuntu \
  "$(. /etc/os-release && echo "$VERSION_CODENAME")" stable" | \
  sudo tee /etc/apt/sources.list.d/docker.list > /dev/null

# Оновлюємо список пакетів та встановлюємо Docker Engine
sudo apt update
sudo apt install docker-ce docker-ce-cli containerd.io docker-buildx-plugin docker-compose-plugin -y
Перевіримо, що Docker встановлено та запущено:
sudo systemctl status docker # Перевірка статусу Docker
sudo docker run hello-world  # Запуск тестового контейнера
Додамо вашого користувача до групи docker, щоб не використовувати sudo при кожній команді Docker (необхідно перелогінитися після цього кроку):
sudo usermod -aG docker harboradmin # Додавання користувача до групи docker
Вийдіть і знову увійдіть до системи, щоб зміни набули чинності. Потім перевірте:
docker run hello-world # Запуск тестового контейнера без sudo
2. Встановлення Docker Compose
Плагін Docker Compose вже встановлено разом з Docker Engine, але для зручності можна створити символічне посилання на docker compose як docker-compose.
sudo ln -s /usr/libexec/docker/cli-plugins/docker-compose /usr/local/bin/docker-compose # Створення символічного посилання
docker-compose version # Перевірка версії Docker Compose
3. Завантаження та підготовка Harbor
Harbor розповсюджується у вигляді архіву з файлами Docker Compose. Ми завантажимо останню стабільну версію (припускаємо Harbor 2.x або 3.x для 2026 року) з GitHub releases.
# Створюємо директорію для Harbor
mkdir -p ~/harbor && cd ~/harbor

# Завантажуємо останню стабільну версію Harbor installer (наприклад, v2.10.x або v3.x)
# Перевірте актуальну версію на GitHub Releases: https://github.com/goharbor/harbor/releases
# Припустимо, що у 2026 році актуальною є версія 2.10.0
HARBOR_VERSION="2.10.0" # Замініть на актуальну версію
wget https://github.com/goharbor/harbor/releases/download/v${HARBOR_VERSION}/harbor-offline-installer-v${HARBOR_VERSION}.tgz

# Розпаковуємо архів
tar xvf harbor-offline-installer-v${HARBOR_VERSION}.tgz

# Переходимо до директорії з розпакованим Harbor
cd harbor
4. Конфігурація Harbor Installer
Основний файл конфігурації Harbor — harbor.yml.tmpl. Ми скопіюємо його до harbor.yml та відредагуємо.
cp harbor.yml.tmpl harbor.yml # Створення файлу конфігурації з шаблону
nano harbor.yml               # Редагування файлу конфігурації
У файлі harbor.yml необхідно змінити наступні параметри (приклади):
hostname: your.domain.com— вкажіть доменне ім'я, за яким буде доступний ваш Harbor Registry. Переконайтеся, що для цього домену налаштовано A-запис, який вказує на IP-адресу вашого VPS.http.port: 80— порт для HTTP-доступу (буде перенаправлено на HTTPS).https.port: 443— порт для HTTPS-доступу.harbor_admin_password: YourSecurePassword123— задайте надійний пароль для адміністратора Harbor.data_volume: /data/harbor— шлях, де будуть зберігатися всі дані Harbor (образи, база даних тощо). Рекомендується використовувати окремий диск або розділ для даних.external_url: https://your.domain.com— URL, який буде використовуватися для доступу до Harbor.
Приклад фрагмента harbor.yml:
hostname: your.domain.com

http:
  port: 80

https:
  port: 443
  # Вкажемо, що TLS буде керуватися Caddy, а Harbor працюватиме без прямого TLS
  # Для цього ми налаштуємо Caddy як зворотний проксі.
  # Поки залишимо ці поля закоментованими або порожніми, якщо Caddy оброблятиме TLS.
  # Якби Harbor сам генерував сертифікати, то тут були б шляхи до них.
  # certificate: /your/path/to/server.crt
  # private_key: /your/path/to/server.key

harbor_admin_password: YourSecurePassword123

data_volume: /data/harbor

external_url: https://your.domain.com
Важливо: Для продакшн-середовища рекомендується використовувати зовнішню базу даних PostgreSQL та Redis для кращої масштабованості та керованості, але для цього посібника ми будемо використовувати вбудовані в Harbor контейнери.
5. Встановлення Harbor
Після збереження harbor.yml можна запустити встановлення. Інсталятор налаштує всі необхідні файли Docker Compose та запустить сервіси.
# Запускаємо скрипт встановлення
sudo ./install.sh --with-clair --with-chartmuseum --with-trivy # Встановлення з модулями сканування та ChartMuseum
Скрипт install.sh виконає наступні дії:
- Згенерує необхідні файли Docker Compose.
- Створить та запустить усі контейнери Harbor.
- Налаштує базову конфігурацію.
Процес може зайняти кілька хвилин, оскільки Docker завантажуватиме всі необхідні образи.
Після завершення встановлення ви можете перевірити статус запущених контейнерів:
docker-compose ps # Перевірка статусу всіх контейнерів Harbor
Переконайтеся, що всі контейнери перебувають у стані "Up".
Конфігурація
Тепер, коли Harbor встановлено, нам потрібно налаштувати HTTPS доступ та переконатися, що все працює коректно. Ми будемо використовувати Caddy як зворотний проксі з автоматичним отриманням TLS-сертифікатів від Let's Encrypt.
1. Налаштування DNS
Перш ніж налаштовувати Caddy, переконайтеся, що ваш домен (наприклад, your.domain.com) має A-запис, який вказує на публічну IP-адресу вашого VPS. Це критично важливо для роботи Let's Encrypt.
2. Встановлення Caddy
Caddy — це потужний веб-сервер, який спрощує налаштування HTTPS завдяки вбудованій підтримці Let's Encrypt.
# Встановлюємо Caddy з офіційного репозиторію
sudo apt install -y debian-keyring debian-archive-keyring apt-transport-https
curl -1sLf 'https://dl.cloudsmith.io/public/caddy/stable/gpg.key' | sudo gpg --dearmor -o /usr/share/keyrings/caddy-stable-archive-keyring.gpg
curl -1sLf 'https://dl.cloudsmith.io/public/caddy/stable/debian.deb.txt' | sudo tee /etc/apt/sources.list.d/caddy-stable.list
sudo apt update
sudo apt install caddy -y
3. Конфігурація Caddy для Harbor
Створимо файл конфігурації Caddy (Caddyfile) для роботи з Harbor. Caddy буде проксіювати запити до Harbor та автоматично керувати TLS.
sudo nano /etc/caddy/Caddyfile
Видаліть наявний вміст та додайте наступне, замінивши your.domain.com на ваше доменне ім'я:
your.domain.com {
    reverse_proxy 127.0.0.1:8080 { # Harbor за замовчуванням працює на 8080 всередині контейнера
        header_up Host {host}
        header_up X-Real-IP {remote_ip}
        header_up X-Forwarded-For {remote_ip}
        header_up X-Forwarded-Proto {scheme}
    }
    # Опціонально: увімкнення стиснення Gzip
    encode gzip
    # Опціонально: логування
    log {
        output file /var/log/caddy/harbor_access.log
        format json
    }
    # Опціонально: базовий Rate Limiting для захисту від DoS
    # rate_limit {
    #     burst 10
    #     rate 5r/s
    # }
}
Створіть директорію для логів Caddy, якщо ви увімкнули логування:
sudo mkdir -p /var/log/caddy
sudo chown caddy:caddy /var/log/caddy
Перезапустіть Caddy для застосування змін:
sudo systemctl restart caddy
sudo systemctl enable caddy # Увімкнути автозапуск Caddy
sudo systemctl status caddy # Перевірити статус Caddy
Переконайтеся, що Caddy успішно запустився та отримав TLS-сертифікати. Ви можете перевірити логи Caddy: sudo journalctl -u caddy --no-pager.
4. Перевірка працездатності Harbor
Тепер, коли Caddy налаштовано, Harbor має бути доступний за HTTPS.
- Доступ через браузер: Відкрийте
https://your.domain.comу браузері. Ви маєте побачити інтерфейс Harbor. Увійдіть з іменем користувачаadminта паролем, який ви вказали уharbor.yml(harbor_admin_password). - Перевірка через
curl:
curl -I https://your.domain.com/api/v2.0/health # Перевірка доступності API Harbor
Ви маєте отримати HTTP-статус 200 OK. Якщо ні, перевірте логи Caddy та Harbor.
5. Налаштування Docker клієнта
Для роботи з вашим приватним реєстром Docker на локальній машині або CI/CD агентах, вам потрібно увійти до нього:
docker login your.domain.com # Введіть ім'я користувача (наприклад, admin) та пароль
Після успішного входу ви зможете пушити та пулити образи:
# Приклад: позначимо існуючий образ та завантажимо його до Harbor
docker tag hello-world your.domain.com/myproject/hello-world:latest
docker push your.domain.com/myproject/hello-world:latest

# Приклад: завантажимо образ з Harbor
docker pull your.domain.com/myproject/hello-world:latest
Важливо: Створіть проєкт myproject у веб-інтерфейсі Harbor перед тим, як намагатися завантажити до нього образи.
6. Секрети та змінні оточення
Пароль адміністратора Harbor, який ви вказали у harbor.yml, є чутливою інформацією. У продакшн-середовищах рекомендується використовувати Docker Secrets або зовнішні системи керування секретами. Для Harbor, який запускається через docker-compose, можна використовувати файл .env. Хоча Harbor installer не використовує його безпосередньо, ви можете відредагувати згенерований docker-compose.yml та використовувати змінні оточення для чутливих даних. Однак, для простоти цього посібника ми залишили пароль у harbor.yml.
Приклад використання .env для пароля адміністратора (не застосовується автоматично Harbor installer, але демонструє принцип):
# У вашому .env файлі (поруч із docker-compose.yml)
HARBOR_ADMIN_PASSWORD=MySuperSecurePassword123

# У docker-compose.yml або harbor.yml (якби він підтримував)
# harbor_admin_password: ${HARBOR_ADMIN_PASSWORD}
Для Harbor безпечнішим підходом є зміна пароля адміністратора через веб-інтерфейс після встановлення, а також використання LDAP/OIDC для автентифікації користувачів замість локальних облікових записів.
Резервні копії та обслуговування

Регулярне резервне копіювання та обслуговування — це основа надійної роботи будь-якого сервісу, включно з Harbor. Втрата даних образів або конфігурації може призвести до серйозних проблем.
1. Що резервувати
Для Harbor критично важливі наступні дані:
- Дані реєстру: Самі образи Docker, що зберігаються в
/data/harbor/registry(або іншому шляху, вказаному вdata_volume). - База даних PostgreSQL: Містить метадані образів, користувачів, проєктів, політики тощо. Зберігається в
/data/harbor/database. - Конфігураційні файли:
harbor.ymlта інші файли в директорії встановлення Harbor (~/harbor/harbor). - Сертифікати TLS: Якщо ви керуєте ними вручну. У нашому випадку Caddy керує ними автоматично, але якщо ви використовуєте Harbor з власними сертифікатами, їх потрібно резервувати.
2. Простий скрипт авторезервування
Ми створимо простий скрипт, який зупинить Harbor, зробить резервну копію даних і знову запустить Harbor. Для цього знадобиться утиліта rsync або tar.
sudo nano /usr/local/bin/backup_harbor.sh
Вміст скрипта (замініть your.domain.com та /path/to/backup/destination):
#!/bin/bash

# Шлях до директорії Harbor
HARBOR_DIR="/home/harboradmin/harbor/harbor" # Переконайтеся, що це правильний шлях до розпакованої директорії Harbor
HARBOR_DATA_VOLUME="/data/harbor" # Шлях до тому даних Harbor

# Директорія для зберігання резервних копій
BACKUP_DESTINATION="/path/to/backup/destination" # Наприклад, /mnt/backup/harbor_backups
BACKUP_TIMESTAMP=$(date +%Y%m%d%H%M%S)
FULL_BACKUP_PATH="${BACKUP_DESTINATION}/harbor_backup_${BACKUP_TIMESTAMP}"

echo "Запуск резервного копіювання Harbor о ${BACKUP_TIMESTAMP}..."

# 1. Зупиняємо сервіси Harbor
echo "Зупинка сервісів Harbor..."
cd ${HARBOR_DIR}
docker-compose down # Зупиняємо всі контейнери Harbor

# 2. Створюємо директорію для поточної резервної копії
echo "Створення директорії резервної копії: ${FULL_BACKUP_PATH}"
mkdir -p ${FULL_BACKUP_PATH}

# 3. Копіюємо конфігураційні файли
echo "Резервне копіювання конфігураційних файлів Harbor..."
cp ${HARBOR_DIR}/harbor.yml ${FULL_BACKUP_PATH}/
cp ${HARBOR_DIR}/docker-compose.yml ${FULL_BACKUP_PATH}/ # Можна додати інші конфігурації, якщо є

# 4. Копіюємо дані Harbor (образи, БД)
echo "Резервне копіювання тому даних Harbor: ${HARBOR_DATA_VOLUME}"
# Використовуємо rsync для інкрементальних резервних копій або tar для повного архіву
# rsync -avh --delete ${HARBOR_DATA_VOLUME}/ ${FULL_BACKUP_PATH}/data/
tar -czvf ${FULL_BACKUP_PATH}/harbor_data.tar.gz ${HARBOR_DATA_VOLUME}

# 5. Запускаємо сервіси Harbor
echo "Запуск сервісів Harbor..."
docker-compose up -d # Запускаємо контейнери Harbor у фоновому режимі

echo "Резервне копіювання Harbor завершено. Копія збережена в ${FULL_BACKUP_PATH}"
Зробимо скрипт виконуваним:
sudo chmod +x /usr/local/bin/backup_harbor.sh
Увага: Зупинка Harbor призведе до тимчасової недоступності реєстру. Плануйте резервне копіювання на час найменшої активності або розгляньте складніші методи резервного копіювання без простою, якщо Harbor критичний 24/7.
3. Куди зберігати резервні копії
Резервні копії повинні зберігатися окремо від основного сервера, щоб уникнути втрати даних у разі відмови сервера.
- Зовнішнє S3-сумісне об'єктне сховище: AWS S3, MinIO, DigitalOcean Spaces тощо. Це надійний і масштабований варіант. Для цього можна використовувати утиліти типу
awscliабоs3cmdв скрипті резервного копіювання. - Окремий VPS: Виділений невеликий VPS для зберігання резервних копій, доступний по SSH/SFTP. Можна використовувати
rsyncдля копіювання резервних копій на нього. - NFS/SMB сховище: Якщо у вас є централізоване мережеве сховище.
Приклад додавання відправки резервної копії на S3 (потребує налаштування awscli):
# Додати до скрипта після tar -czvf ...
echo "Завантаження резервної копії на S3..."
aws s3 cp ${FULL_BACKUP_PATH}/harbor_data.tar.gz s3://your-s3-bucket-name/harbor_backups/ --recursive
aws s3 cp ${FULL_BACKUP_PATH}/harbor.yml s3://your-s3-bucket-name/harbor_backups/ --recursive
4. Налаштування Cron для автоматичного резервного копіювання
Додамо скрипт до планувальника Cron для щоденного виконання (наприклад, о 3 годині ночі).
sudo crontab -e
Додайте наступний рядок у кінець файлу:
0 3 * * * /usr/local/bin/backup_harbor.sh >> /var/log/harbor_backup.log 2>&1
Це запускатиме скрипт щодня о 03:00 і перенаправлятиме вивід у лог-файл /var/log/harbor_backup.log.
5. Оновлення: rolling vs maintenance window
Підтримка ПЗ в актуальному стані критично важлива для безпеки та стабільності. Оновлювати потрібно:
- Операційну систему: Регулярно запускайте
sudo apt update && sudo apt upgrade -y. - Docker Engine та Docker Compose: Оновлюйте їх з офіційного репозиторію Docker.
- Harbor: Оновлення Harbor зазвичай вимагають використання нового інсталятора та виконання процедури міграції. Це часто призводить до простою сервісу.
Стратегії оновлення Harbor:
- Maintenance Window: Найпростіший підхід для більшості self-hosted інсталяцій. Плануйте вікно обслуговування (наприклад, раз на місяць або квартал), під час якого Harbor буде недоступний. Це дозволяє виконати оновлення, протестувати його та відкотитися у разі проблем.
- Rolling Updates (для кластерних розгортань): Якщо Harbor розгорнуто в кластері (наприклад, Kubernetes), можна виконувати rolling updates без простою. Однак це значно ускладнює архітектуру та виходить за рамки цього гайду.
Завжди читайте офіційну документацію Harbor перед оновленням, оскільки процедура може змінюватися між версіями.
Усунення несправностей + FAQ
Що робити, якщо Harbor не запускається після встановлення?
Насамперед перевірте логи Docker-контейнерів Harbor. Перейдіть до директорії встановлення Harbor (~/harbor/harbor) і виконайте docker-compose logs. Це покаже логи всіх сервісів. Якщо проблема з конкретним сервісом (наприклад, core або registry), можна переглянути його логи окремо: docker-compose logs core. Часті проблеми включають конфлікти портів, неправильну конфігурацію доменного імені або проблеми з доступом до даних.
Чому я не можу отримати доступ до Harbor за доменним ім'ям?
Перевірте наступні пункти: 1) Переконайтеся, що DNS-запис (A-запис) для вашого домену коректно вказує на IP-адресу вашого VPS. 2) Перевірте статус Caddy (sudo systemctl status caddy) та його логи (sudo journalctl -u caddy --no-pager) — можливо, Caddy не зміг отримати TLS-сертифікат. 3) Переконайтеся, що порти 80 і 443 відкриті у вашому фаєрволі (UFW: sudo ufw status). 4) Перевірте, що hostname у harbor.yml збігається з вашим доменним ім'ям.
Не можу увійти в Harbor через Docker CLI (docker login)
Переконайтеся, що ви використовуєте правильне доменне ім'я (наприклад, your.domain.com) та облікові дані (за замовчуванням admin і пароль, вказаний у harbor.yml). Якщо Harbor використовує самопідписані сертифікати (чого ми уникли з Caddy), вам може знадобитися додати сертифікат Harbor до списку довірених сертифікатів Docker на вашій клієнтській машині. Також перевірте, що Harbor запущений і доступний по HTTPS.
Який VPS-конфіг мінімально підійде?
Для тестових середовищ або дуже невеликих команд з мінімальною кількістю образів та користувачів, мінімальний конфіг повинен включати 2 ядра CPU, 4 ГБ RAM та щонайменше 100 ГБ SSD диска. Однак, такої конфігурації може не вистачити при активному скануванні вразливостей або високому навантаженні. Для стабільної роботи в продуктивному середовищі рекомендується 4 ядра CPU, 8-16 ГБ RAM та 250-500 ГБ NVMe/SSD.
Що обрати — VPS чи dedicated для цього завдання?
Вибір між VPS та dedicated сервером залежить від масштабу вашого завдання. VPS достатній для більшості середніх команд та проєктів, пропонуючи хороший баланс вартості та продуктивності. Dedicated сервер слід обирати, якщо у вас дуже великий обсяг образів (терабайти), високе та постійне навантаження від сотень користувачів або CI/CD агентів, а також якщо потрібні максимальна продуктивність, ізоляція ресурсів та суворі SLA, які можуть бути не гарантовані на VPS через "сусідський ефект".
Як оновити Harbor до нової версії?
Оновлення Harbor зазвичай включає завантаження нового інсталятора для цільової версії, зупинку поточних сервісів Harbor, резервне копіювання даних, запуск скрипта prepare з нового інсталятора для міграції бази даних і потім запуск install.sh. Завжди уважно читайте офіційну документацію щодо оновлення для конкретної версії Harbor, оскільки кроки можуть відрізнятися.
Harbor видає помилку "no such host" при спробі пушу/пулу образів.
Ця помилка зазвичай означає, що Docker клієнт не може розв'язати доменне ім'я вашого Harbor Registry. Переконайтеся, що DNS-сервери, які використовуються вашою клієнтською машиною, правильно розв'язують ваш домен. Перевірте це командою ping your.domain.com або nslookup your.domain.com. Якщо домен не розв'язується, проблема в DNS. Якщо розв'язується, перевірте, що порт 443 відкритий і Caddy/Harbor доступні.
Висновки та наступні кроки
Вітаємо! Ви успішно налаштували приватний Docker Registry (Harbor) на вашому VPS. Тепер у вас є безпечне та кероване сховище для ваших контейнерних образів, що забезпечує контроль доступу, сканування вразливостей та можливості аудиту. Це значно покращить ваш CI/CD пайплайн та загальну безпеку розгортань.
Наступні кроки для подальшого розвитку вашої інфраструктури Harbor:
- Інтеграція з CI/CD: Налаштуйте ваші CI/CD системи (Jenkins, GitLab CI, GitHub Actions) для автоматичного складання, пушу та пулу образів з вашого приватного Harbor Registry.
- Управління користувачами та RBAC: Налаштуйте інтеграцію Harbor з вашою корпоративною системою автентифікації (LDAP/AD, OIDC) та створіть проєкти з відповідними ролями для команд розробників, щоб забезпечити гранулярний контроль доступу.
- Реплікація та висока доступність: Для критично важливих продакшн-середовищ розгляньте налаштування реплікації образів між кількома інсталяціями Harbor або розгортання Harbor у кластері Kubernetes для забезпечення високої доступності та стійкості до відмов.