Встановлення HestiaCP на VPS: комплексна панель для веб-хостингу, пошти та DNS
TL;DR
У цьому докладному посібнику ми крок за кроком налаштуємо HestiaCP на вашому віртуальному або виділеному сервері, перетворивши його на потужну та зручну платформу для керування веб-сайтами, електронною поштою, базами даних та DNS-записами. Ви навчитеся готувати сервер, встановлювати HestiaCP з актуальними версіями ПЗ 2026 року, конфігурувати основні сервіси, забезпечувати безпеку за допомогою TLS та налаштовувати резервне копіювання.
- HestiaCP буде встановлена на Ubuntu 24.04 LTS або Debian 13.
- Будуть налаштовані Nginx/Apache2, PHP, MySQL/PostgreSQL, Exim4, Dovecot, Bind9/PowerDNS.
- Автоматична видача та оновлення SSL/TLS сертифікатів Let's Encrypt.
- Докладні інструкції з підготовки сервера, включаючи SSH-ключі, sudo та базовий файрвол.
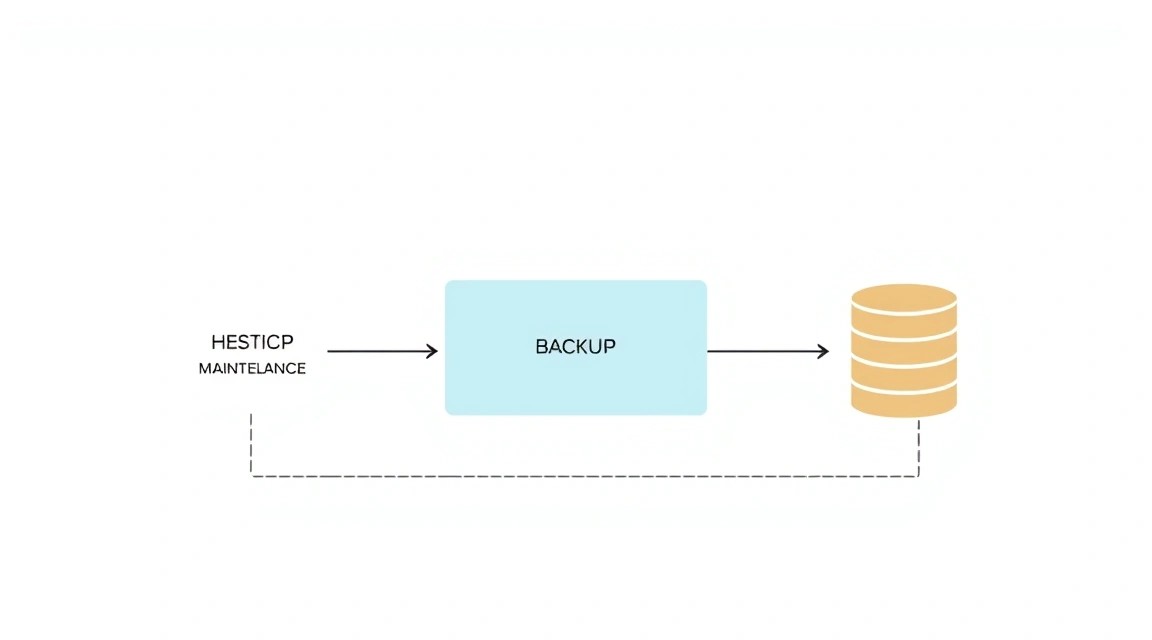
- Рекомендації щодо резервного копіювання та обслуговування системи для довгострокової стабільності.
- Актуальні команди та конфігурації, що перевіряються на кожному кроці.
Що ми налаштовуємо і навіщо
У цьому посібнику ми займемося встановленням та комплексною настройкою HestiaCP — відкритої панелі керування веб-хостингом. HestiaCP є легким та потужним рішенням для автоматизації безлічі завдань, пов'язаних з керуванням сервером та розгортанням веб-додатків. Вона дозволяє зручно керувати веб-сайтами (Nginx/Apache2 + PHP-FPM), базами даних (MySQL/PostgreSQL), поштовими серверами (Exim4/Dovecot), DNS-серверами (Bind9/PowerDNS), FTP-акаунтами (Pure-FTPd) та SSL-сертифікатами (Let's Encrypt) через інтуїтивно зрозумілий веб-інтерфейс.
У підсумку, ви отримаєте повністю налаштований VPS або виділений сервер, готовий до розміщення кількох веб-сайтів, обробки електронної пошти для доменів та керування їхніми DNS-записами. Це ідеальне рішення для розробників, яким потрібно швидко розгорнути тестове або продакшн-середовище, для соло-фаундерів, що керують кількома проєктами, або для тих, хто хоче мати повний контроль над своєю інфраструктурою без необхідності вручну налаштовувати кожен компонент.
HestiaCP особливо приваблива своєю ефективністю та мінімалістичним підходом, пропонуючи відмінну продуктивність навіть на скромних VPS. Вона побудована на базі стандартних Linux-компонентів, що спрощує подальше обслуговування та розширення системи. Панель не перевантажена надлишковими функціями, фокусуючись на ключових завданнях веб-хостингу та пошти.
Існують різні підходи до розгортання веб-сервісів. Можна вибрати хмарні керовані сервіси (наприклад, AWS Amplify, Google App Engine, Heroku), які пропонують високу абстракцію від інфраструктури, автоматичне масштабування та мінімальне адміністрування. Однак вони часто мають вищу вартість, меншу гнучкість і можуть прив'язувати вас до конкретного провайдера. Інший варіант — використання контейнеризації (Docker, Kubernetes), який забезпечує переносимість та масштабованість, але вимагає глибших знань у DevOps.
Чому ж self-hosted на VPS з HestiaCP? Цей підхід пропонує оптимальний баланс між контролем, вартістю та зручністю. Ви отримуєте повний root-доступ до сервера, що дозволяє тонко налаштовувати кожен аспект системи під свої потреби. Вартість VPS значно нижча, ніж у більшості керованих хмарних сервісів, особливо при стабільному навантаженні. HestiaCP бере на себе рутину з налаштування та інтеграції різних компонентів, дозволяючи вам зосередитися на своїх проєктах, а не на адмініструванні. Це ідеальний вибір для тих, хто цінує незалежність, хоче оптимізувати витрати і при цьому мати сучасну, функціональну та легко керовану платформу.
Який VPS-конфіг потрібен для цього завдання
Вибір відповідного VPS або виділеного сервера критично важливий для стабільної та продуктивної роботи HestiaCP. Вимоги можуть варіюватися залежно від кількості розміщуваних сайтів, очікуваного трафіку та використання поштових/DNS-серверів.
Мінімальні вимоги для HestiaCP (станом на 2026 рік):
- Процесор (CPU): 1 ядро. Сучасні процесори з тактовою частотою від 2.0 ГГц. Для невеликих проєктів цього достатньо.
- Оперативна пам'ять (RAM): 1 ГБ. HestiaCP сама по собі досить легка, але для стабільної роботи всіх компонентів (веб-сервер, PHP, база даних, пошта) 1 ГБ є абсолютним мінімумом.
- Диск: 20 ГБ NVMe/SSD. Швидкий диск значно покращує продуктивність веб-сервера та баз даних. 20 ГБ вистачить для системи та кількох невеликих сайтів.
- Мережа: 100 Мбіт/с. Для більшості завдань цього достатньо. Наявність IPv4 адреси обов'язкова, IPv6 вкрай бажана.
- Операційна система: Ubuntu 24.04 LTS (рекомендується) або Debian 13.
Рекомендований VPS-план для середніх проєктів (кілька сайтів, помірний трафік):
Для комфортної роботи з кількома сайтами, активним використанням пошти та помірним трафіком рекомендується вибирати наступні характеристики:
- Процесор (CPU): 2 ядра. Забезпечить кращу продуктивність при паралельній обробці запитів.
- Оперативна пам'ять (RAM): 2-4 ГБ. Дозволить комфортно працювати кільком PHP-процесам, кешам бази даних та поштовому серверу без свопінгу.
- Диск: 50-100 ГБ NVMe/SSD. Надасть достатньо місця для файлів сайтів, баз даних, поштових скриньок та бекапів. NVMe диски значно швидші за SSD та забезпечують кращу чуйність.
- Мережа: 1 Гбіт/с. Для проєктів з очікуваним зростанням трафіку або для швидшої синхронізації даних.
Ви можете знайти VPS із зазначеними характеристиками, які підійдуть для розгортання HestiaCP та ваших проєктів.
Коли потрібен dedicated сервер, а не VPS?
Виділений сервер стає необхідним, коли ваш проєкт досягає масштабів, за яких VPS перестає справлятися, або коли потрібні максимальна продуктивність та ізоляція. Це може бути:
- Високонавантажені веб-додатки: Тисячі одночасних користувачів, інтенсивні операції з базами даних.
- Велика кількість сайтів: Якщо ви плануєте хостити сотні сайтів або надавати хостинг іншим користувачам.
- Стримінгові сервіси або ігрові сервери: Вимагають стабільної продуктивності CPU та високої пропускної здатності мережі.
- Специфічні вимоги до безпеки або відповідності: Деякі регуляторні норми можуть вимагати фізичної ізоляції.
- Потреба у значному обсязі дискового простору: Понад 1 ТБ або специфічні RAID-конфігурації.
У таких випадках варто розглянути відповідний dedicated сервер, який надасть вам усі ресурси фізичної машини.
Локація VPS: на що впливає
Вибір локації сервера впливає на кілька ключових факторів:
- Затримка (Latency): Чим ближче сервер до вашої цільової аудиторії, тим менша затримка та швидше завантаження сторінок для користувачів. Це особливо критично для інтерактивних додатків та ігрових серверів.
- Відповідність законодавству: Розміщення даних у певній країні може бути обов'язковим відповідно до місцевих законів (наприклад, GDPR у Європі).
- Ціни: Вартість VPS може незначно відрізнятися залежно від регіону дата-центру.
- Доступність сервісів: Деякі сервіси можуть бути обмежені або недоступні в певних регіонах.
Завжди намагайтеся вибирати локацію, максимально близьку до основної аудиторії вашого проєкту.
Підготовка сервера
Підготовка сервера
Після отримання доступу до свіжого VPS або виділеного сервера, необхідно провести низку базових налаштувань для забезпечення безпеки та зручності роботи. Ми припускаємо, що ви отримали доступ по SSH як користувач root.
1. Оновлення системи
Насамперед оновіть усі встановлені пакети до актуальних версій. Це забезпечить стабільність та безпеку системи.
sudo apt update             # Оновлення списку пакетів
sudo apt upgrade -y         # Оновлення встановлених пакетів до останніх версій
sudo apt autoremove -y      # Видалення непотрібних пакетів, що залишилися після оновлення
2. Створення нового користувача з правами sudo
Робота під користувачем root небезпечна. Створіть нового користувача та надайте йому права sudo.
# Створення нового користувача (замініть 'youruser' на бажане ім'я)
adduser youruser

# Додавання користувача до групи sudo (для Ubuntu/Debian)
usermod -aG sudo youruser
Тепер вийдіть із сесії root та увійдіть під новим користувачем:
exit
ssh youruser@your_server_ip
3. Налаштування автентифікації за SSH-ключами
Автентифікація за SSH-ключами набагато безпечніша, ніж за паролем. Якщо у вас ще немає SSH-ключа, згенеруйте його на вашій локальній машині:
# На вашій ЛОКАЛЬНІЙ машині
ssh-keygen -t ed25519 -C "[email protected]"
Потім скопіюйте публічний ключ на сервер:
# На вашій ЛОКАЛЬНІЙ машині (замініть 'youruser' та 'your_server_ip')
ssh-copy-id youruser@your_server_ip
Якщо ssh-copy-id недоступний, зробіть це вручну:
# На вашій ЛОКАЛЬНІЙ машині
cat ~/.ssh/id_ed25519.pub

# Скопіюйте вивід, потім на СЕРВЕРІ виконайте:
mkdir -p ~/.ssh
chmod 700 ~/.ssh
nano ~/.ssh/authorized_keys
# Вставте скопійований публічний ключ у цей файл
chmod 600 ~/.ssh/authorized_keys
4. Вимкнення автентифікації за паролем для SSH (Опціонально, але рекомендується)
Після успішного налаштування SSH-ключів, вимкніть вхід за паролем для SSH. Це значно підвищить безпеку.
# На СЕРВЕРІ, під вашим новим sudo-користувачем
sudo nano /etc/ssh/sshd_config
Знайдіть наступні рядки та змініть їх (або додайте, якщо відсутні):
# ...
PasswordAuthentication no
ChallengeResponseAuthentication no
UsePAM no
PermitRootLogin no # Якщо ви хочете заборонити вхід для root навіть за ключем
# ...
Збережіть файл та перезапустіть SSH-сервіс:
sudo systemctl restart sshd
ВАЖЛИВО: Перед вимкненням парольної автентифікації переконайтеся, що ви можете увійти за SSH-ключем! Відкрийте нову сесію SSH і спробуйте увійти, не закриваючи поточну. Якщо вхід не вдався, поверніть зміни.
5. Встановлення та налаштування Fail2Ban
Fail2Ban допомагає захистити сервер від атак методом перебору паролів, блокуючи IP-адреси, з яких відбуваються численні невдалі спроби входу.
sudo apt install fail2ban -y

# Створення копії конфігураційного файлу для модифікації
sudo cp /etc/fail2ban/jail.conf /etc/fail2ban/jail.local

# Редагування jail.local (приклад базових налаштувань)
sudo nano /etc/fail2ban/jail.local
У файлі jail.local переконайтеся, що наступні рядки налаштовані:
# ...
[DEFAULT]
bantime = 10m           # Час блокування (10 хвилин)
findtime = 10m          # Час, за який мають відбутися спроби (10 хвилин)
maxretry = 5            # Максимальна кількість спроб до блокування

# Enable SSH protection
[sshd]
enabled = true
port = ssh
logpath = %(sshd_log)s
backend = %(sshd_backend)s
# ...
Збережіть файл та перезапустіть Fail2Ban:
sudo systemctl enable fail2ban
sudo systemctl start fail2ban
sudo systemctl status fail2ban # Перевірка статусу
6. Налаштування файрволу (UFW)
UFW (Uncomplicated Firewall) — це простий у використанні інтерфейс для iptables. Налаштуємо його, щоб дозволити лише необхідні порти.
sudo apt install ufw -y

# Дозволити SSH (порт 22, якщо ви його не змінювали)
sudo ufw allow ssh

# Дозволити HTTP (порт 80)
sudo ufw allow http

# Дозволити HTTPS (порт 443)
sudo ufw allow https

# Увімкнути UFW
sudo ufw enable
# Введіть 'y' та натисніть Enter

# Перевірити статус файрволу
sudo ufw status verbose
На цьому базова підготовка сервера завершена. Тепер можна приступати до встановлення HestiaCP.
Встановлення ПЗ — покроково
Встановлення HestiaCP відносно просте, оскільки вона надає зручний інсталяційний скрипт. Ми будемо використовувати актуальну версію HestiaCP, яка підтримуватиметься у 2026 році, та встановимо її на Ubuntu 24.04 LTS.
1. Завантаження інсталяційного скрипта HestiaCP
Спочатку завантажте інсталяційний скрипт з офіційного репозиторію HestiaCP на GitHub. Переконайтеся, що ви використовуєте curl для завантаження.
# Переходимо до тимчасової директорії
cd /tmp

# Завантажуємо інсталяційний скрипт HestiaCP версії 1.9.10 (актуальна на кінець 2025/початок 2026)
# Завжди перевіряйте актуальну версію на офіційному сайті HestiaCP.
wget https://raw.githubusercontent.com/hestiacp/hestiacp/release/1.9.10/install/hst-install.sh
2. Запуск інсталяційного скрипта
Після завантаження скрипта, зробіть його виконуваним та запустіть. Скрипт проведе вас через процес встановлення, пропонуючи вибрати компоненти та ввести облікові дані.
# Робимо скрипт виконуваним
chmod +x hst-install.sh

# Запускаємо скрипт встановлення з правами суперкористувача
sudo ./hst-install.sh
Під час встановлення скрипт поставить кілька запитань:
- Would you like to continue? [y/n]: Введіть
yта натисніть Enter. - Please enter admin email address: Введіть вашу адресу електронної пошти, яка використовуватиметься для облікового запису адміністратора HestiaCP. Наприклад,
[email protected]. - Please enter hostname: Введіть повне доменне ім'я вашого сервера (FQDN). Наприклад,
panel.yourdomain.com. Переконайтеся, що цей домен вказує на IP-адресу вашого сервера.
Встановлення займе деякий час (10-30 хвилин) залежно від продуктивності вашого сервера та швидкості інтернет-з'єднання. Скрипт автоматично встановить та налаштує:
- Веб-сервер (Nginx + Apache2 або Nginx + Nginx)
- PHP-FPM (кілька версій, наприклад, 8.1, 8.2, 8.3)
- Систему керування базами даних (MySQL/MariaDB або PostgreSQL)
- Поштовий сервер (Exim4, Dovecot, SpamAssassin, ClamAV)
- DNS-сервер (Bind9 або PowerDNS)
- FTP-сервер (Pure-FTPd)
- Let's Encrypt для автоматичних SSL-сертифікатів
- Брандмауер (UFW)
- Fail2Ban
3. Порти, що використовуються HestiaCP
HestiaCP використовує кілька портів для своїх служб. Переконайтеся, що вони дозволені у вашому файрволі UFW:
# Якщо ви встановлювали UFW до HestiaCP, HestiaCP може додати свої правила.
# Перевірте їх. Якщо ні, додайте вручну.

# Панель HestiaCP (за замовчуванням 8083)
sudo ufw allow 8083/tcp

# SSH (зазвичай 22, вже дозволено)
sudo ufw allow 22/tcp

# HTTP (веб-сайти, 80, вже дозволено)
sudo ufw allow 80/tcp

# HTTPS (веб-сайти, 443, вже дозволено)
sudo ufw allow 443/tcp

# FTP (21)
sudo ufw allow 21/tcp

# SFTP (22, через SSH, вже дозволено)

# DNS (53)
sudo ufw allow 53/tcp
sudo ufw allow 53/udp

# SMTP (25, 465, 587)
sudo ufw allow 25/tcp
sudo ufw allow 465/tcp
sudo ufw allow 587/tcp

# IMAP/POP3 (110, 143, 993, 995)
sudo ufw allow 110/tcp
sudo ufw allow 143/tcp
sudo ufw allow 993/tcp
sudo ufw allow 995/tcp

# Перезавантаження UFW для застосування змін
sudo ufw reload
4. Отримання даних для входу
Після успішного встановлення скрипт виведе на екран облікові дані для входу в панель HestiaCP:
-------------------------------------------------------------------------------
Congratulations! You have successfully installed Hestia Control Panel.
Go to https://your_server_ip:8083 to get started!

Username: admin
Password: YOUR_GENERATED_PASSWORD
-------------------------------------------------------------------------------
Обов'язково збережіть цей пароль! Він буде потрібен для першого входу. Якщо ви його втратили, можна скинути пароль для користувача admin пізніше.
5. Перший вхід до HestiaCP
Відкрийте веб-браузер і перейдіть за адресою https://your_server_ip:8083 або https://panel.yourdomain.com:8083 (якщо ви вказали FQDN і DNS вже оновився). Можливо, ви побачите попередження про небезпечне з'єднання, оскільки за замовчуванням використовується самопідписаний SSL-сертифікат. Проігноруйте його та продовжіть. Введіть admin як ім'я користувача та згенерований пароль. Після входу ви потрапите до панелі керування HestiaCP.
На цьому етапі HestiaCP успішно встановлена та готова до подальшої конфігурації.
Конфігурація
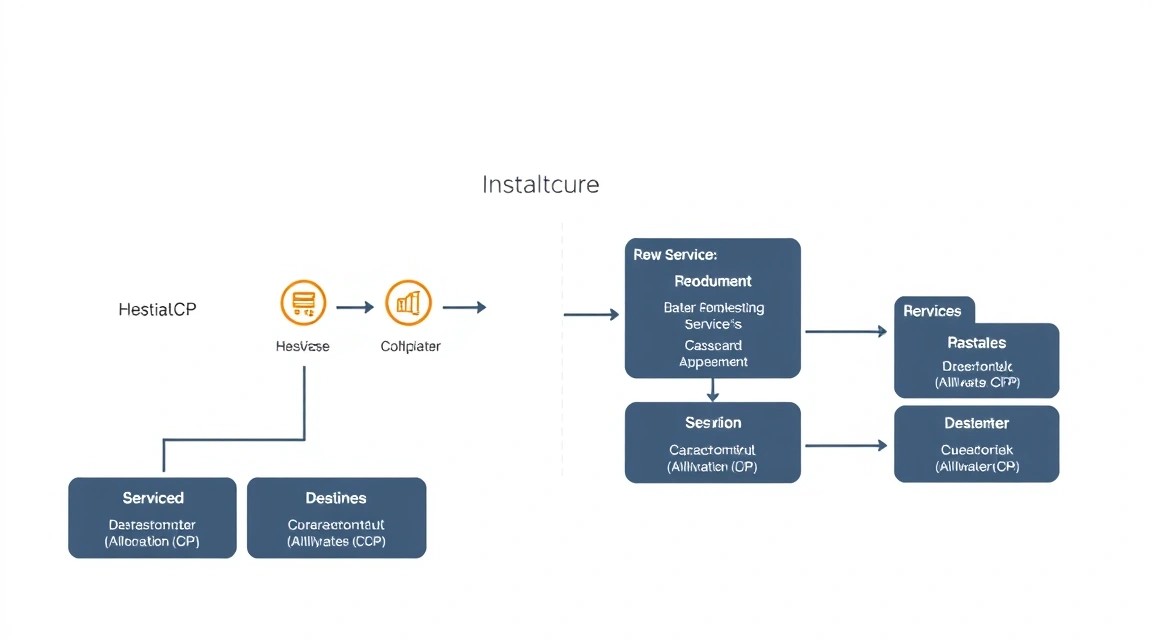
Після встановлення HestiaCP необхідно виконати базову конфігурацію для ваших веб-сайтів, пошти та DNS. Все це робиться через веб-інтерфейс HestiaCP, але ми також розглянемо деякі важливі аспекти та ручні перевірки.
1. Додавання домену та веб-сайту
1. Увійдіть до панелі HestiaCP як admin.
2. Перейдіть до розділу WEB.
3. Натисніть кнопку + Add Web Domain.
4. Введіть ім'я вашого домену (наприклад, example.com).
5. Переконайтеся, що встановлено прапорець Enable SSL for this domain та Use Let's Encrypt to obtain SSL certificate. Це автоматично налаштує HTTPS.
6. Виберіть потрібні шаблони (Nginx, Apache, PHP). Для більшості PHP-додатків стандартні налаштування підходять.
7. Натисніть Save.
HestiaCP автоматично створить всі необхідні конфігураційні файли для Nginx та Apache, налаштує PHP-FPM та запросить SSL-сертифікат у Let's Encrypt. Це може зайняти кілька хвилин.
Приклад конфігурації Nginx (після створення домену через панель):
Ви можете переглянути згенерований конфіг Nginx у HestiaCP або на сервері за шляхом:
# /home/admin/conf/web/nginx.conf
server {
    listen      XXX.XXX.XXX.XXX:80;
    listen      XXX.XXX.XXX.XXX:443 ssl http2;
    server_name example.com www.example.com;
    root        /home/admin/web/example.com/public_html;

    index       index.php index.html index.htm;

    # SSL Configuration (generated by Let's Encrypt)
    ssl_certificate         /home/admin/conf/web/ssl.example.com.pem;
    ssl_certificate_key     /home/admin/conf/web/ssl.example.com.key;
    # ... інші SSL-налаштування ...

    # PHP-FPM Configuration
    location ~ \.php$ {
        try_files $uri =404;
        fastcgi_pass    unix:/run/php/php8.3-fpm.sock; # Версія PHP може відрізнятися
        fastcgi_index   index.php;
        include         fastcgi_params;
        fastcgi_param   SCRIPT_FILENAME $document_root$fastcgi_script_name;
        fastcgi_param   PATH_INFO $fastcgi_path_info;
    }

    # ... інші налаштування (gzip, security headers тощо) ...
}
2. Налаштування DNS
Для того щоб ваш сайт був доступний, необхідно налаштувати DNS-записи домену. Ви можете використовувати DNS-сервер HestiaCP (Bind9/PowerDNS) або зовнішній DNS-провайдер.
Використання DNS-сервера HestiaCP:
1. У панелі HestiaCP перейдіть до розділу DNS.
2. Натисніть + Add DNS Domain.
3. Введіть ваш домен (example.com) та IP-адресу вашого сервера.
4. HestiaCP автоматично створить стандартні A, NS, MX, TXT записи.
5. ВАЖЛИВО: Вам необхідно змінити NS-сервери вашого домену у вашого реєстратора доменів (наприклад, GoDaddy, Namecheap) на ns1.example.com та ns2.example.com (або на ті, що вказані в HestiaCP). Для цього на самому сервері HestiaCP вам потрібно створити записи A для ns1.example.com та ns2.example.com, що вказують на IP вашого сервера. Якщо у вас один IP, обидва NS-сервери будуть вказувати на нього.
# Приклад DNS-записів у HestiaCP для example.com
# Запис A для example.com
example.com.      A    XXX.XXX.XXX.XXX

# Запис A для www.example.com
www.example.com.  A    XXX.XXX.XXX.XXX

# Записи NS для example.com (вказують на ваш сервер)
example.com.      NS   ns1.example.com.
example.com.      NS   ns2.example.com.

# Записи A для NS-серверів (Glue Records, якщо NS-сервери знаходяться на тому ж домені)
ns1.example.com.  A    XXX.XXX.XXX.XXX
ns2.example.com.  A    XXX.XXX.XXX.XXX

# MX запис для пошти
example.com.      MX   10 example.com.
Використання зовнішнього DNS-провайдера:
Якщо ви використовуєте Cloudflare, Google DNS або іншого провайдера, просто додайте A-запис для вашого домену (example.com та www.example.com), що вказує на IP-адресу вашого сервера HestiaCP.
3. Налаштування поштової скриньки
1. У панелі HestiaCP перейдіть до розділу MAIL.
2. Виберіть домен, для якого хочете створити поштову скриньку (наприклад, example.com).
3. Натисніть + Add Mail Account.
4. Введіть ім'я користувача (наприклад, info) та придумайте надійний пароль. Повна адреса буде [email protected].
5. Натисніть Save.
HestiaCP автоматично налаштує Exim4 (SMTP) та Dovecot (IMAP/POP3) для цієї поштової скриньки. Ви зможете налаштувати поштовий клієнт (Outlook, Thunderbird) або використовувати веб-пошту (Roundcube, якщо встановлена) для доступу до скриньки. Порти для пошти: IMAP (143/993), POP3 (110/995), SMTP (25/465/587).
4. Налаштування бази даних
1. У панелі HestiaCP перейдіть до розділу DB.
2. Натисніть + Add Database.
3. Виберіть тип бази даних (MySQL або PostgreSQL).
4. Введіть ім'я бази даних (наприклад, wp_database), ім'я користувача (wp_user) та надійний пароль.
5. Натисніть Save.
HestiaCP створить базу даних та користувача. Ви зможете використовувати ці дані в конфігураційних файлах ваших веб-додатків (наприклад, wp-config.php для WordPress).
5. Перевірка працездатності
Після всіх налаштувань важливо переконатися, що все працює коректно.
- Перевірка веб-сайту: Відкрийте ваш домен (
https://example.com) у браузері. Ви повинні побачити стандартну заглушку HestiaCP або ваш сайт, якщо ви вже завантажили файли. Перевірте наявність SSL-сертифіката (замочок в адресному рядку). - Перевірка DNS: Використовуйте онлайн-інструменти, такі як DNS Checker, щоб переконатися, що ваші A-записи та NS-сервери коректно розповсюдилися по світу.
# На вашій локальній машині dig example.com A dig ns1.example.com A dig example.com NS - Перевірка пошти: Надішліть тестовий лист з вашої нової поштової скриньки на зовнішню адресу і навпаки. Перевірте логи поштового сервера, якщо є проблеми:
sudo tail -f /var/log/exim4/mainlog sudo tail -f /var/log/mail.log - Перевірка портів: Переконайтеся, що необхідні порти відкриті та доступні ззовні.
# З локальної машини
curl -v telnet://your_server_ip:8083 # HestiaCP panel
curl -v telnet://your_server_ip:443  # HTTPS
curl -v telnet://your_server_ip:25   # SMTP
6. Управління секретами та змінними оточення
Для веб-додатків, особливо тих, що використовують бази даних або зовнішні API, важливо правильно зберігати секретні дані (паролі, ключі API). HestiaCP не має вбудованої системи управління секретами для додатків, але ви можете використовувати стандартні підходи:
- Файли .env: Для PHP-додатків (Laravel, Symfony) використовуйте файл
.envу корені проекту. Він повинен бути виключений із системи контролю версій і не повинен бути доступний ззовні (Nginx/Apache повинні бути налаштовані на це).# Приклад .env файлу DB_DATABASE=wp_database DB_USERNAME=wp_user DB_PASSWORD=YOUR_DB_PASSWORD APP_KEY=YOUR_APP_KEY - Змінні оточення: Ви можете встановити змінні оточення для PHP-FPM процесів через HestiaCP. У розділі WEB, виберіть домен, потім "Edit". У секції "Advanced Options" ви знайдете "Custom Nginx Configuration" та "Custom PHP-FPM Configuration". Для PHP-FPM можна додати рядки типу:
# У Custom PHP-FPM Configuration
env[DB_PASSWORD] = "YOUR_DB_PASSWORD"
Це зробить змінну доступною через
getenv('DB_PASSWORD')або$_ENV['DB_PASSWORD']у PHP. Будьте обережні, щоб не розкрити ці змінні в логах або звітах про помилки.
Ніколи не зберігайте паролі та API-ключі безпосередньо в коді програми або в публічно доступних конфігураційних файлах.