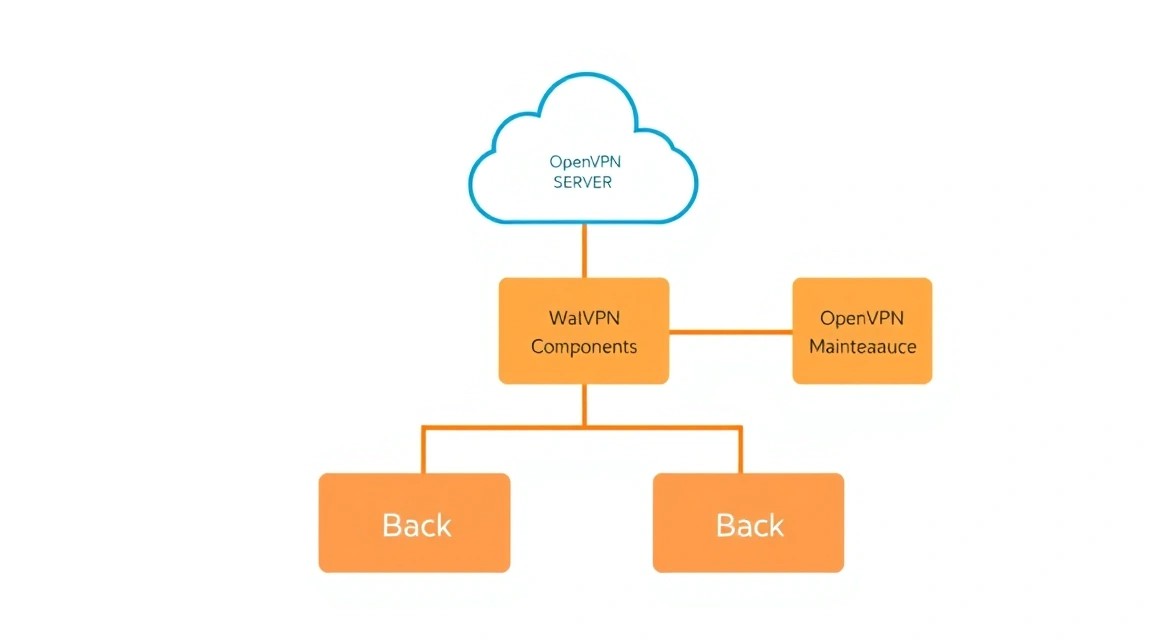
Instalación y configuración de OpenVPN Server en un VPS: despliegue de un servidor VPN corporativo
TL;DR
En esta guía detallada, configuraremos paso a paso un servidor OpenVPN de alto rendimiento y seguro en su VPS con Ubuntu 24.04 LTS. Obtendrá una VPN corporativa completamente funcional que proporcionará acceso cifrado a su red interna y protegerá los datos de sus empleados que trabajan de forma remota.
Desplegaremos un servidor OpenVPN en Ubuntu 24.04 LTS utilizando Easy-RSA 3.x para la gestión de PKI.
Configuraremos las configuraciones de servidor y cliente, asegurando un cifrado robusto (AES-256-GCM) y autenticación (TLS-Auth).
Instalaremos y configuraremos el firewall UFW, así como las reglas NAT para enrutar el tráfico a través de la VPN.
Implementaremos medidas básicas de seguridad del servidor, como claves SSH, Fail2ban y actualizaciones automáticas.
Desarrollaremos una estrategia de copia de seguridad para los componentes clave de OpenVPN y proporcionaremos un script para la automatización.
Revisaremos problemas típicos y sus soluciones, y responderemos a preguntas frecuentes sobre OpenVPN.
¿Qué configuramos y por qué?
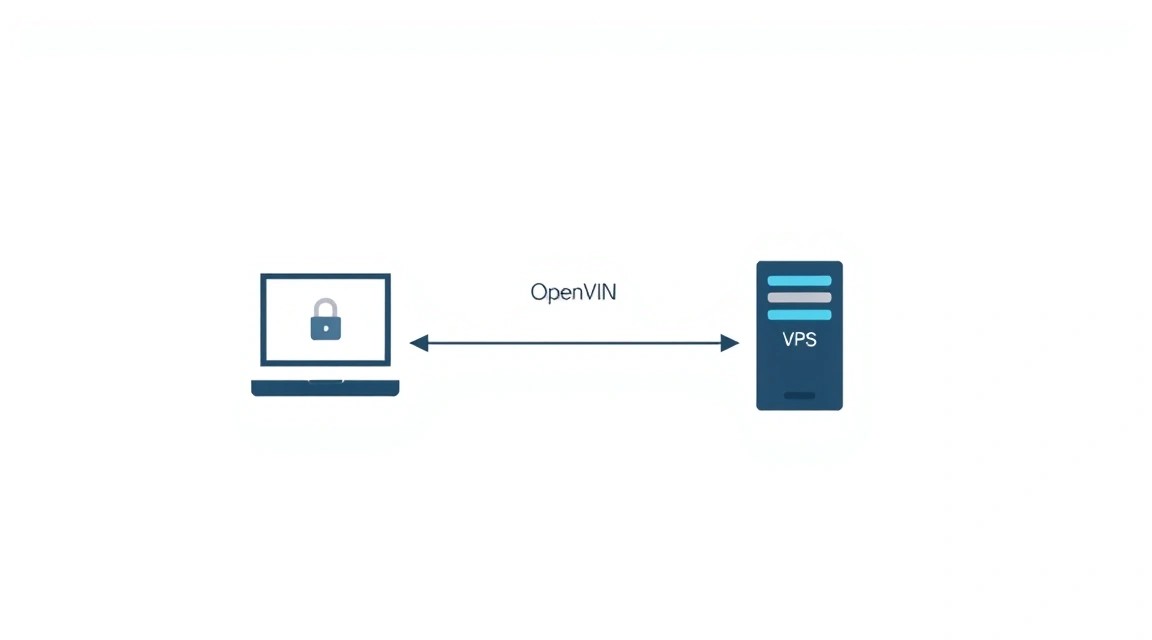
Esquema: ¿Qué configuramos y por qué?
En esta guía, configuraremos un servidor OpenVPN en un servidor privado virtual (VPS). OpenVPN es una solución robusta y flexible para crear redes privadas virtuales (VPN), ampliamente utilizada para proporcionar acceso remoto seguro a recursos corporativos, proteger el tráfico de interceptaciones y sortear restricciones geográficas.
La tarea principal que abordamos es el despliegue de un servidor VPN corporativo. Esto permitirá a sus empleados conectarse de forma segura a la red interna de la empresa desde cualquier parte del mundo, como si estuvieran en la oficina. Todo el tráfico entre el dispositivo cliente y el servidor estará cifrado, lo que evitará el acceso no autorizado a datos confidenciales.
Al final, el lector obtendrá un servidor OpenVPN completamente funcional, capaz de aceptar conexiones de múltiples clientes, con cifrado, autenticación y reglas de enrutamiento configurados. Cubriremos todas las etapas: desde la preparación del servidor hasta la creación de configuraciones de cliente y recomendaciones de mantenimiento.
Alternativas y por qué Self-Hosted en un VPS
Existen varios enfoques para organizar una VPN:
Servicios VPN gestionados en la nube (Cloud-Managed VPN): Proveedores como AWS VPN Client, Google Cloud VPN o Azure VPN Gateway ofrecen soluciones listas para usar. Son fáciles de gestionar, escalables y no requieren conocimientos profundos de configuración. Sin embargo, pueden ser más caros, ofrecen menos flexibilidad en la personalización y usted depende de la política e infraestructura de un proveedor externo.
Otras soluciones Self-Hosted:
WireGuard: Un protocolo VPN moderno, rápido y fácil de configurar. Tiene una base de código más pequeña, lo que teóricamente aumenta la seguridad. Ideal para escenarios sencillos y alto rendimiento.
IPsec/IKEv2: Frecuentemente utilizado en redes corporativas, compatible con la mayoría de los sistemas operativos. Más complejo de configurar, pero ofrece un alto grado de seguridad y rendimiento.
SoftEther VPN: Servidor VPN multiprotocolo, compatible con los protocolos OpenVPN, L2TP/IPsec, MS-SSTP, EtherIP y SoftEther VPN.
¿Por qué OpenVPN Self-Hosted en un VPS?
La elección de OpenVPN en un VPS está justificada por varias razones:
Control total: Usted controla completamente el servidor, su configuración, datos y seguridad. Esto es crucial para los datos corporativos y el cumplimiento de las políticas de privacidad.
Rentabilidad: El costo de alquilar un VPS suele ser significativamente menor que los pagos mensuales por servicios VPN gestionados en la nube, especialmente para un número pequeño o mediano de usuarios.
Flexibilidad y personalización: OpenVPN es extremadamente flexible. Puede configurarlo para cualquier requisito específico de su red, utilizar varios métodos de autenticación (certificados, nombre de usuario/contraseña, PAM), enrutamiento y mucho más.
Fiabilidad probada: OpenVPN existe desde hace muchos años, cuenta con una enorme comunidad y se considera uno de los protocolos VPN más fiables y seguros. Su seguridad ha sido probada y confirmada en numerosas ocasiones.
Multiplataforma: Los clientes OpenVPN están disponibles para prácticamente todos los sistemas operativos (Windows, macOS, Linux, Android, iOS), lo que simplifica la conexión de empleados con cualquier dispositivo.
La configuración de OpenVPN en un VPS es el equilibrio ideal entre control, seguridad, flexibilidad y costo para la mayoría de las pequeñas y medianas empresas, así como para usuarios individuales que necesitan una protección fiable.
¿Qué configuración de VPS se necesita para esta tarea?
Esquema: ¿Qué configuración de VPS se necesita para esta tarea?
La elección de la configuración de VPS correcta es clave para garantizar un funcionamiento estable y eficiente del servidor OpenVPN. Los requisitos dependen del número previsto de usuarios simultáneos, el volumen de tráfico transmitido y la intensidad de su uso.
Requisitos mínimos para un servidor OpenVPN (hasta 10-20 usuarios)
CPU: 1 núcleo (x86-64). OpenVPN no depende en gran medida del procesador, pero el cifrado requiere cierta potencia. Los procesadores modernos con instrucciones AES-NI aceleran significativamente el proceso.
RAM: 512 MB - 1 GB. Esto será suficiente para el sistema operativo y OpenVPN. Con un gran número de clientes o un registro intensivo, podría ser necesario más.
Disco: 10-20 GB SSD. El SSD acelera significativamente el funcionamiento del SO y la lectura/escritura de registros. El espacio principal lo ocupará el SO; OpenVPN y sus configuraciones ocupan muy poco espacio.
Red: 100 Mbps con tráfico ilimitado (o un límite muy grande). El ancho de banda de la red es el factor principal para una VPN. Asegúrese de que su plan de tarifas no tenga restricciones estrictas de tráfico o velocidad.
Plan de VPS recomendado para uso corporativo (20-50+ usuarios)
Para un uso corporativo más serio, donde se requiere estabilidad y un alto ancho de banda para un mayor número de usuarios, se recomienda la siguiente configuración:
CPU: 2 vCPU (núcleos virtuales).
RAM: 2 GB - 4 GB. Esto proporcionará un margen para el sistema operativo, OpenVPN y posibles servicios adicionales (monitoreo, registros extendidos).
Disco: 40 GB - 80 GB SSD. Suficiente para el SO, registros, copias de seguridad y otras utilidades.
Red: 1 Gbps con tráfico ilimitado. Esto es crucial para garantizar una alta velocidad de transferencia de datos para todos los clientes conectados.
Cuándo se necesita un servidor dedicado y no un VPS
Un servidor dedicado (dedicated server) se vuelve necesario cuando:
Un número muy grande de usuarios: Más de 100-200 clientes conectados simultáneamente, utilizando activamente la VPN.
Ancho de banda extremadamente alto: Si la VPN se utiliza para transferir volúmenes muy grandes de datos (por ejemplo, streaming de video, grandes intercambios de archivos) de forma constante, y 1 Gbps en un VPS resulta insuficiente.
Requisitos específicos de seguridad o hardware: Si necesita control físico sobre el hardware, módulos de seguridad de hardware especiales (HSM) o un rendimiento muy alto del subsistema de disco.
Rendimiento garantizado: En un servidor dedicado, no comparte recursos con otros usuarios, lo que proporciona un rendimiento predecible y estable.
La elección de la ubicación del VPS tiene una importancia significativa:
Latencia: Cuanto más cerca esté el servidor de la mayoría de sus usuarios, menor será la latencia (ping), lo que afecta directamente la velocidad de respuesta y la comodidad general del trabajo. Para una VPN corporativa, elija una ubicación lo más cercana posible a la ubicación principal de sus empleados.
Legislación: Las leyes sobre el almacenamiento de datos y la confidencialidad de la información varían en diferentes países. Asegúrese de que la ubicación elegida cumpla con los requisitos de su empresa y las regulaciones aplicables (por ejemplo, GDPR).
Disponibilidad y ancho de banda: Algunas regiones tienen una mejor infraestructura de red y un mayor ancho de banda hacia otras partes del mundo.
Elija siempre una ubicación que optimice el rendimiento para sus usuarios y cumpla con sus requisitos legales.
Preparación del servidor
Esquema: Preparación del servidor
Antes de proceder con la instalación de OpenVPN, es necesario realizar la configuración inicial de su VPS para garantizar la seguridad y estabilidad. Utilizaremos Ubuntu 24.04 LTS (Noble Numbat) como base, ya que es una versión actual y compatible para el año 2026.
1. Conexión al servidor
Conéctese a su VPS por SSH, utilizando los datos proporcionados por el proveedor (normalmente el login root y la contraseña o una clave SSH).
ssh root@ВАШ_IP_АДРЕС_VPS
2. Actualización del sistema
Primero, actualice la lista de paquetes y los paquetes instalados a las últimas versiones. Esto garantizará que tenga todas las correcciones de seguridad y estabilidad más recientes.
sudo apt update && sudo apt upgrade -y
Si el kernel u otros componentes críticos han sido actualizados, puede ser necesario reiniciar:
sudo reboot
Después del reinicio, vuelva a conectarse al servidor.
3. Creación de un nuevo usuario con permisos sudo
Trabajar como usuario root no es seguro. Crearemos un nuevo usuario y le daremos permisos sudo.
# Reemplace 'your_username' con el nombre de usuario deseado
sudo adduser ваш_пользователь
Siga las instrucciones para establecer una contraseña y completar (o omitir) la información adicional.
Agregue el nuevo usuario al grupo sudo para que pueda ejecutar comandos con privilegios de administrador:
sudo usermod -aG sudo ваш_пользователь
Ahora, salga de la sesión root e inicie sesión con el nuevo usuario:
exit
ssh ваш_пользователь@ВАШ_IP_АДРЕС_VPS
4. Configuración de claves SSH (recomendado)
Para mejorar la seguridad, se recomienda utilizar claves SSH en lugar de contraseñas. Si aún no tiene un par de claves SSH, genérelas en su computadora local:
# En su computadora local
ssh-keygen -t rsa -b 4096 -C "ваш[email protected]"
Copie la clave pública al servidor:
# En su computadora local
ssh-copy-id ваш_пользователь@ВАШ_IP_АДРЕС_VPS
Si ssh-copy-id no está disponible, copie la clave manualmente:
Pegue la clave pública copiada en el archivo authorized_keys, guarde y cierre. Establezca los permisos correctos:
chmod 600 ~/.ssh/authorized_keys
Ahora puede deshabilitar la autenticación por contraseña para SSH (opcional, pero recomendado). Edite el archivo de configuración del demonio SSH:
sudo nano /etc/ssh/sshd_config
Encuentre y modifique las siguientes líneas (o agréguelas si no existen):
# Deshabilitar el inicio de sesión para root (si ha creado un usuario)
PermitRootLogin no
# Deshabilitar la autenticación por contraseña (¡después de verificar el inicio de sesión con clave!)
PasswordAuthentication no
# Permitir la autenticación por clave
PubkeyAuthentication yes
Reinicie el servicio SSH:
sudo systemctl restart sshd
IMPORTANTE: Antes de salir de la sesión actual, abra una nueva sesión de terminal y asegúrese de que puede iniciar sesión con la clave SSH como el nuevo usuario. Si algo sale mal, aún tendrá la sesión antigua abierta para corregir errores.
5. Configuración del firewall (UFW)
UFW (Uncomplicated Firewall) es una interfaz conveniente para iptables. Lo configuraremos para la protección básica del servidor.
sudo apt install ufw -y
Permita las conexiones SSH (puerto 22 por defecto). Si utiliza un puerto diferente para SSH, especifíquelo:
sudo ufw allow OpenSSH
# O, si ha cambiado el puerto SSH a, por ejemplo, 2222:
# sudo ufw allow 2222/tcp
Permita las conexiones para OpenVPN. Por defecto, OpenVPN utiliza el puerto UDP 1194. Utilizaremos este puerto.
sudo ufw allow 1194/udp
Habilite UFW:
sudo ufw enable
Confirme la acción introduciendo y. Verifique el estado del firewall:
sudo ufw status verbose
6. Instalación de Fail2ban
Fail2ban escanea los archivos de registro en busca de actividad sospechosa (por ejemplo, intentos fallidos de inicio de sesión SSH) y bloquea las direcciones IP de los atacantes utilizando reglas de firewall.
sudo apt install fail2ban -y
Cree una copia del archivo de configuración predeterminado para no perder los cambios durante las actualizaciones:
Edite jail.local para configurar los parámetros. Para la mayoría de los casos, la configuración predeterminada para SSH (sección [sshd]) es suficiente, pero puede cambiar bantime (tiempo de bloqueo) y findtime (período para detectar intentos) según lo desee.
sudo nano /etc/fail2ban/jail.local
Asegúrese de que la sección [sshd] tenga enabled = true:
sudo systemctl status fail2ban
sudo fail2ban-client status sshd
Ahora su servidor está preparado de forma segura para la instalación de OpenVPN.
Instalación de software — paso a paso
Esquema: Instalación de software — paso a paso
En esta sección, instalaremos OpenVPN y Easy-RSA, y luego configuraremos la infraestructura de clave pública (PKI) para una autenticación segura. Utilizaremos Easy-RSA versión 3.x, que es actual para el año 2026 y proporciona una gestión fiable de certificados.
1. Instalación de OpenVPN y Easy-RSA
Instalaremos los paquetes necesarios desde los repositorios oficiales de Ubuntu 24.04 LTS.
# Actualizamos la lista de paquetes
sudo apt update
# Instalamos OpenVPN y Easy-RSA
sudo apt install openvpn easy-rsa -y
Para el año 2026, lo más probable es que OpenVPN versión 2.6.x o posterior, y Easy-RSA 3.x estén disponibles.
2. Preparación de PKI con Easy-RSA
Easy-RSA es un conjunto de scripts para crear y gestionar una infraestructura de clave pública (PKI), que es necesaria para OpenVPN. Todos los certificados y claves se almacenarán en un directorio separado.
# Creamos el directorio para PKI
sudo make-cadir /etc/openvpn/easy-rsa
# Nos movemos al directorio Easy-RSA
cd /etc/openvpn/easy-rsa
3. Inicialización de PKI
Inicializamos la PKI. Esto creará los subdirectorios y archivos necesarios.
# Inicialización de PKI
sudo ./easyrsa init-pki
4. Creación de la Autoridad Certificadora (CA)
La Autoridad Certificadora (Certificate Authority, CA) es el certificado raíz que firmará todos los demás certificados (del servidor y de los clientes). Es la base de la confianza en su red VPN.
# Creamos la CA. Cuando se le solicite el Common Name (CN), introduzca algo significativo, por ejemplo "Corporate OpenVPN CA"
sudo ./easyrsa build-ca nopass
nopass significa que no se establecerá una contraseña para la clave raíz. Para máxima seguridad, se puede establecer una contraseña, pero entonces tendrá que introducirla en cada acción con la CA.
5. Generación del certificado y clave del servidor
Ahora crearemos una solicitud de certificado para nuestro servidor OpenVPN, la firmaremos con la CA y generaremos la clave.
# Generamos la solicitud de certificado del servidor. Cuando se le solicite el Common Name (CN), introduzca "server"
sudo ./easyrsa gen-req server nopass
# Firmamos la solicitud de certificado del servidor con la CA
sudo ./easyrsa sign-req server server
Cuando se le solicite confirmación, introduzca yes.
6. Generación de parámetros Diffie-Hellman (DH)
Los parámetros Diffie-Hellman se utilizan para un intercambio seguro de claves entre el servidor y los clientes. Este proceso puede tardar algún tiempo (hasta varios minutos, dependiendo de la potencia de su VPS).
# Generamos los parámetros Diffie-Hellman
sudo ./easyrsa gen-dh
7. Creación de la clave HMAC (tls-auth)
La clave HMAC (o tls-auth) añade una capa adicional de seguridad, protegiendo el handshake TLS de ataques de denegación de servicio (DoS) y escaneo de puertos. Se utiliza para la autenticación previa de paquetes.
# Generamos la clave HMAC
openvpn --genkey --secret /etc/openvpn/easy-rsa/pki/ta.key
8. Copia de archivos PKI al servidor OpenVPN
Moveremos todos los archivos generados, necesarios para el funcionamiento del servidor OpenVPN, a su directorio de configuración.
# Creamos el directorio para las configuraciones del servidor OpenVPN
sudo mkdir -p /etc/openvpn/server
# Copiamos el certificado CA
sudo cp pki/ca.crt /etc/openvpn/server/
# Copiamos el certificado y la clave del servidor
sudo cp pki/issued/server.crt /etc/openvpn/server/
sudo cp pki/private/server.key /etc/openvpn/server/
# Copiamos los parámetros Diffie-Hellman
sudo cp pki/dh.pem /etc/openvpn/server/dh.pem
# Copiamos la clave HMAC
sudo cp pki/ta.key /etc/openvpn/server/ta.key
9. Generación del certificado y clave del cliente (ejemplo para un cliente)
Para cada cliente que se conecte a la VPN, es necesario generar un par único de certificado/clave. Aquí mostraremos un ejemplo para un cliente llamado client1.
# Generamos la solicitud de certificado del cliente. Cuando se le solicite el Common Name (CN), introduzca "client1"
sudo ./easyrsa gen-req client1 nopass
# Firmamos la solicitud de certificado del cliente con la CA
sudo ./easyrsa sign-req client client1
Cuando se le solicite confirmación, introduzca yes. Estos archivos (client1.crt, client1.key, ca.crt, ta.key) serán necesarios para que el cliente se conecte. Los reuniremos en un solo archivo .ovpn más tarde.
En este punto, los componentes principales de OpenVPN están instalados y la PKI está configurada. Ahora pasaremos a la configuración del servidor.
Configuración
Diagrama: Configuración
Después de instalar OpenVPN y generar todas las claves y certificados necesarios, el siguiente paso es configurar el archivo de configuración del servidor, las reglas de enrutamiento y el firewall.
1. Creación del archivo de configuración del servidor OpenVPN
Crearemos el archivo server.conf en el directorio /etc/openvpn/server/. Este archivo definirá cómo funciona su servidor OpenVPN.
sudo nano /etc/openvpn/server/server.conf
Pegue el siguiente contenido. Esta es una configuración bien equilibrada para la mayoría de las necesidades corporativas. Los comentarios explican cada opción.
# Indicamos que este es el servidor
port 1194
proto udp
dev tun

# Archivos CA, certificado del servidor, clave del servidor
ca ca.crt
cert server.crt
key server.key
# Parámetros Diffie-Hellman
dh dh.pem
# Clave HMAC para protección contra ataques DoS y escaneo de puertos
tls-auth ta.key 0

# Rango de direcciones IP desde el cual OpenVPN asignará direcciones a los clientes
# Importante: este rango no debe superponerse con su red local
server 10.8.0.0 255.255.255.0

# Redirigir todo el tráfico de los clientes a través de la VPN.
# Si desea que los clientes solo tengan acceso a su red corporativa,
# pero no usen la VPN para todo el tráfico de internet, comente esta línea.
push "redirect-gateway def1 bypass-dhcp"

# Servidores DNS que serán utilizados por los clientes.
# Aquí se especifican los DNS públicos de Cloudflare y Google.
# Se pueden especificar los DNS internos de su red corporativa.
push "dhcp-option DNS 1.1.1.1"
push "dhcp-option DNS 8.8.8.8"

# Permite que los clientes se vean entre sí (necesario si desea
# que los clientes interactúen entre sí a través de la VPN)
client-to-client

# Guarda el estado de las claves y el dispositivo tun/tap en los reinicios,
# lo que ayuda a evitar interrupciones de conexión en caso de problemas temporales.
keepalive 10 120
persist-key
persist-tun

# Tipo de cifrado y autenticación. AES-256-GCM es moderno y seguro.
# SHA256 - para hashing.
cipher AES-256-GCM
auth SHA256

# Compresión de datos (lz4-v2 es moderno y eficiente).
# Si tiene problemas de rendimiento, intente comentar esta línea.
compress lz4-v2

# Desactiva los privilegios de root después del inicio
user nobody
group nogroup

# Revocación de certificados (Certificate Revocation List).
# Necesario para revocar certificados de cliente comprometidos o caducados.
# Crearemos este archivo más tarde.
crl-verify crl.pem

# Nivel de detalle de los logs (0-9). 3 es un buen equilibrio para la depuración.
verb 3
# Archivo de estado y logs
status /var/log/openvpn-status.log
log /var/log/openvpn.log
Guarde el archivo (Ctrl+O, Enter, Ctrl+X).
2. Habilitar el reenvío de IP (IP Forwarding)
Para que OpenVPN pueda enrutar el tráfico entre los clientes e internet (o su red interna), es necesario habilitar el reenvío de IP en el servidor.
sudo nano /etc/sysctl.conf
Busque la línea #net.ipv4.ip_forward=1, descoméntela (elimine #) o agréguela si no existe:
net.ipv4.ip_forward=1
Aplique los cambios sin reiniciar:
sudo sysctl -p
3. Configuración de reglas NAT (Masquerading) para UFW
Para que los clientes de OpenVPN puedan acceder a internet a través de su VPS, es necesario configurar NAT (Network Address Translation) o "mascarada". UFW no soporta NAT directamente por defecto, por lo que editaremos sus archivos de configuración.
Primero, averigüe el nombre de su interfaz de red principal. Normalmente es eth0 o ens3.
ip a
En la salida, encuentre la interfaz que tiene su dirección IP pública (por ejemplo, eth0).
# Reemplace 'eth0' con el nombre de su interfaz de red principal
sudo nano /etc/ufw/before.rules
Agregue las siguientes líneas al principio del archivo, antes de la línea filter:
# INICIO DE LAS REGLAS DE OPENVPN
# Permitir tráfico del cliente OpenVPN a eth0 (reemplace eth0 con su interfaz de red principal)
nat
:POSTROUTING ACCEPT [0:0]
-A POSTROUTING -s 10.8.0.0/24 -o eth0 -j MASQUERADE
COMMIT
# FIN DE LAS REGLAS DE OPENVPN
No olvide reemplazar eth0 con el nombre de su interfaz de red principal, si es diferente. 10.8.0.0/24 es la subred de OpenVPN que especificamos en server.conf.
Ahora edite el archivo /etc/default/ufw para permitir el reenvío por defecto.
sudo nano /etc/default/ufw
Busque la línea DEFAULT_FORWARD_POLICY="DROP" y cámbiela a:
DEFAULT_FORWARD_POLICY="ACCEPT"
Reinicie UFW para aplicar todos los cambios:
sudo ufw disable
sudo ufw enable
Verifique el estado de UFW. Ahora los puertos permitidos deberían mostrarse en las reglas.
sudo ufw status verbose
4. Inicio y verificación del servidor OpenVPN
Ahora que todo está configurado, puede iniciar el servidor OpenVPN.
# Iniciamos el servicio OpenVPN, especificando el nombre de nuestra configuración (server.conf)
sudo systemctl start openvpn-server@server
# Habilitamos el inicio automático de OpenVPN al arrancar el sistema
sudo systemctl enable openvpn-server@server
Verifique el estado del servicio para asegurarse de que se haya iniciado sin errores:
sudo systemctl status openvpn-server@server
La salida debe contener Active: active (running). Si hay errores, revise los logs:
sudo journalctl -u openvpn-server@server
También asegúrese de que OpenVPN esté escuchando en el puerto 1194 UDP:
sudo ss -tulnp | grep 1194
Debería ver una línea que indique que el proceso OpenVPN está escuchando en el puerto 1194.
5. Creación de un archivo de configuración de cliente
Para la conexión de clientes, necesitará un archivo .ovpn que contenga toda la información necesaria: certificados, claves y configuraciones del servidor. Crearemos un script para generar dichos archivos.
Ahora puede generar archivos de cliente .ovpn ejecutando el script con el nombre del cliente:
cd /etc/openvpn/easy-rsa
sudo ./generate_client_config.sh client1
Después de crear el archivo, debe copiarlo al dispositivo cliente (por ejemplo, usando scp).
# En su computadora local
scp su_usuario@SU_DIRECCION_IP_VPS:/etc/openvpn/client_configs/client1.ovpn ~/Downloads/
Ahora puede usar este archivo client1.ovpn con el cliente OpenVPN en su dispositivo.
6. Verificación del funcionamiento
Conéctese a la VPN desde el dispositivo cliente, utilizando el archivo client1.ovpn generado. Después de la conexión:
Verifique la dirección IP: Abra un sitio web como whatismyip.com. Debería ver la dirección IP de su VPS.
Verifique el enrutamiento: Intente hacer ping a algún recurso público (por ejemplo, ping google.com) y a recursos internos, si están disponibles a través de la VPN.
Verifique el DNS: Asegúrese de que se estén utilizando los servidores DNS que especificó en server.conf (por ejemplo, 1.1.1.1).
En el lado del servidor, puede verificar las conexiones activas:
sudo cat /var/log/openvpn-status.log
Esto mostrará una lista de los clientes conectados.
Copias de seguridad y mantenimiento
Esquema: Copias de seguridad y mantenimiento
Las copias de seguridad regulares y el mantenimiento oportuno del servidor OpenVPN son cruciales para garantizar su fiabilidad, seguridad y funcionamiento continuo.
Qué respaldar
Para el servidor OpenVPN, los componentes más importantes son los siguientes:
Directorio PKI:/etc/openvpn/easy-rsa/. Contiene su Autoridad de Certificación (CA), todos los certificados y claves generados (del servidor y de los clientes), así como la base de datos PKI. Este es el componente más importante, sin el cual no podrá emitir nuevos certificados ni revocar los antiguos.
Configuraciones del servidor:/etc/openvpn/server/. Contiene server.conf, copias de ca.crt, server.crt, server.key, dh.pem, ta.key.
CRL (Certificate Revocation List):/etc/openvpn/server/crl.pem (si lo ha creado). Lista de certificados revocados.
Configuraciones de cliente:/etc/openvpn/client_configs/. Contiene los archivos .ovpn de cliente generados.
Para una recuperación completa, es suficiente tener una copia de seguridad del directorio /etc/openvpn/.
Script simple de copia de seguridad automática
Crearemos un script simple que archivará los directorios importantes y los guardará en un lugar seguro.
sudo nano /usr/local/bin/backup_openvpn.sh
Pegue el siguiente contenido:
#!/bin/bash

# Directorios para la copia de seguridad
BACKUP_DIRS="/etc/openvpn"
# Directorio para almacenar las copias de seguridad en el servidor (se puede cambiar)
LOCAL_BACKUP_DIR="/var/backups/openvpn"
# Nombre del archivo
TIMESTAMP=$(date +%Y%m%d_%H%M%S)
ARCHIVE_NAME="openvpn_backup_${TIMESTAMP}.tar.gz"

echo "Iniciando copia de seguridad de OpenVPN en ${LOCAL_BACKUP_DIR}/${ARCHIVE_NAME}"

# Creamos el directorio para las copias de seguridad, si no existe
mkdir -p "$LOCAL_BACKUP_DIR"

# Creamos el archivo
sudo tar -czf "${LOCAL_BACKUP_DIR}/${ARCHIVE_NAME}" "$BACKUP_DIRS"

# Eliminamos las copias de seguridad antiguas (conservamos solo las de los últimos 7 días)
find "$LOCAL_BACKUP_DIR" -type f -name "openvpn_backup_*.tar.gz" -mtime +7 -delete

echo "Copia de seguridad completada. Archivo: ${LOCAL_BACKUP_DIR}/${ARCHIVE_NAME}"

# Opcional: copiar la copia de seguridad a un S3 remoto u otro servidor
# Ejemplo para rclone (requiere instalación y configuración de rclone)
# rclone copy "${LOCAL_BACKUP_DIR}/${ARCHIVE_NAME}" "my-s3-remote:openvpn-backups/"

# Ejemplo para SCP a otro VPS (requiere configuración de claves SSH sin contraseña)
# scp "${LOCAL_BACKUP_DIR}/${ARCHIVE_NAME}" user@another_vps:/path/to/remote/backups/
Haga el script ejecutable:
sudo chmod +x /usr/local/bin/backup_openvpn.sh
Ahora configuraremos cron para la ejecución automática del script. Por ejemplo, diariamente a las 3:00 de la madrugada.
Guarde y cierre. Ahora las copias de seguridad se crearán automáticamente.
Dónde almacenar las copias de seguridad
Almacenar las copias de seguridad en el mismo servidor que los datos originales no es seguro. En caso de fallo del VPS, perderá todo. Se recomienda utilizar un almacenamiento externo:
Almacenamiento en la nube compatible con S3: AWS S3, Backblaze B2, DigitalOcean Spaces, MinIO. Estas son soluciones fiables y escalables. Utilice utilidades como rclone para la sincronización.
VPS separado: Puede alquilar un VPS pequeño y económico en otra ubicación específicamente para almacenar copias de seguridad. La sincronización se puede configurar a través de rsync por SSH.
Almacenamiento local (para pequeñas empresas): Si tiene un almacenamiento local fiable (NAS, servidor) con una buena conexión a Internet, puede configurar scp o rsync para copiar las copias de seguridad allí.
Importante: Siempre cifre las copias de seguridad antes de enviarlas a un almacenamiento externo, si este no ofrece cifrado del lado del servidor (por ejemplo, usando gpg o restic/borg).
Actualizaciones: Continuas vs. Ventana de Mantenimiento
Mantener el sistema y OpenVPN actualizados es crítico para la seguridad.
Actualizaciones Continuas (Rolling Updates):
SO: Para Ubuntu LTS, se recomienda utilizar actualizaciones de seguridad automáticas.
Seleccione "Yes" para la instalación automática de actualizaciones.
OpenVPN: Por lo general, OpenVPN se actualiza junto con el sistema a través de apt upgrade. Sin embargo, si utiliza repositorios de terceros o compila desde el código fuente, deberá monitorear las actualizaciones manualmente.
Ventana de Mantenimiento (Maintenance Window):
Para actualizaciones importantes del SO, cambios de versión de OpenVPN u otros componentes críticos, se recomienda planificar una ventana de mantenimiento. Esto permite probar los cambios en un servidor de prueba, realizar una copia de seguridad, ejecutar la actualización y verificar la funcionalidad antes de que los usuarios se vean afectados.
Asegúrese de informar a los usuarios sobre las ventanas de mantenimiento programadas.
Gestión de CRL (Certificate Revocation List):
Si el certificado de un cliente ha sido comprometido o el usuario ya no debe tener acceso, su certificado debe ser revocado. Para ello se utiliza la CRL. Después de revocar un certificado, la CRL debe actualizarse y copiarse al servidor OpenVPN.
# Nos movemos al directorio Easy-RSA
cd /etc/openvpn/easy-rsa
# Revocamos el certificado del cliente (por ejemplo, client1)
sudo ./easyrsa revoke client1
# Generamos una nueva CRL
sudo ./easyrsa gen-crl
# Copiamos la CRL al servidor OpenVPN
sudo cp pki/crl.pem /etc/openvpn/server/
# Reiniciamos OpenVPN para que cargue la CRL actualizada
sudo systemctl restart openvpn-server@server
Verifique regularmente la validez de la CRL y actualícela si es necesario.
Solución de problemas + Preguntas frecuentes
En esta sección, analizaremos los problemas típicos que pueden surgir al configurar y operar un servidor OpenVPN, y responderemos a las preguntas más frecuentes.
El cliente no puede conectarse al servidor VPN. ¿Qué verificar?
Problema: El cliente OpenVPN intenta conectarse, pero la conexión no se establece o se interrumpe constantemente.
Qué verificar:
Disponibilidad del servidor: Asegúrese de que su VPS sea accesible desde internet. Intente ping SU_DIRECCIÓN_IP_DEL_VPS desde su máquina local.
Firewall UFW: Verifique si el puerto OpenVPN (por defecto UDP 1194) está permitido en UFW en el servidor.
sudo ufw status verbose
Asegúrese de que exista una regla 1194/udp ALLOW IN Anywhere.
Servicio OpenVPN: Verifique si el servicio OpenVPN está ejecutándose en el servidor y si hay errores en sus registros.
sudo systemctl status openvpn-server@server
sudo journalctl -u openvpn-server@server -f
Busque errores relacionados con archivos de certificados, claves o configuración.
Configuración del cliente: Asegúrese de que el archivo .ovpn del cliente especifique la dirección IP y el puerto correctos del servidor. Verifique que todas las secciones (<ca>, <cert>, <key>, <tls-auth>) contengan datos correctos.
Sincronización de la hora: Una gran diferencia horaria entre el cliente y el servidor puede causar problemas con el handshake TLS. Asegúrese de que la hora esté sincronizada en ambas máquinas.
Baja velocidad de conexión VPN. ¿Cómo diagnosticar?
Problema: La conexión se establece, pero la velocidad de transferencia de datos es muy baja.
Qué verificar y cómo solucionar:
Carga del VPS: Verifique la carga de CPU y RAM en su VPS. Una carga alta puede ralentizar el cifrado.
top
o
htop
Si la CPU está constantemente cargada, es posible que su VPS no sea lo suficientemente potente para la cantidad actual de usuarios.
Ancho de banda de red del VPS: Verifique el ancho de banda de red de su VPS. Utilice herramientas como iperf3 para realizar pruebas.
sudo apt install iperf3 -y
Ejecute iperf3 -s en el servidor y iperf3 -c SU_DIRECCIÓN_IP_DEL_VPS en el cliente.
Cifrado: Asegúrese de que su servidor OpenVPN utilice cifrados modernos y rápidos (por ejemplo, AES-256-GCM). Los cifrados obsoletos o demasiado "pesados" pueden ralentizar el tráfico.
Compresión: Si está utilizando compresión (compress lz4-v2), intente deshabilitarla comentando la línea en server.conf y reiniciando OpenVPN. En algunos casos, la compresión puede reducir el rendimiento, especialmente para datos ya comprimidos.
Distancia al servidor: Cuanto mayor sea la distancia física entre el cliente y el servidor, mayor será la latencia y menor el ancho de banda potencial.
No hay acceso a internet o a la red local detrás del servidor después de conectarse a la VPN.
Problema: El cliente se conecta a la VPN, pero no puede acceder a internet o a los recursos de la red corporativa.
Qué verificar y cómo solucionar:
Reenvío de IP: Asegúrese de que el reenvío de IP esté habilitado en el servidor.
sysctl net.ipv4.ip_forward
Debe ser net.ipv4.ip_forward = 1. Si no, modifique /etc/sysctl.conf y ejecute sudo sysctl -p.
Reglas NAT/Masquerading: Verifique las reglas NAT en /etc/ufw/before.rules. Asegúrese de que la línea -A POSTROUTING -s 10.8.0.0/24 -o eth0 -j MASQUERADE esté presente y que eth0 haya sido reemplazado por su interfaz de red real. Después de los cambios, reinicie UFW.
Opciones DHCP (DNS/Rutas): Asegúrese de que push "redirect-gateway def1 bypass-dhcp" (para todo el tráfico) y push "dhcp-option DNS ..." estén configurados correctamente en server.conf.
UFW para tráfico saliente: Asegúrese de que DEFAULT_FORWARD_POLICY="ACCEPT" en /etc/default/ufw.
Rutas a la red interna: Si necesita acceso a una red corporativa interna, y no solo a internet, debe agregar las push "route X.X.X.X Y.Y.Y.Y" correspondientes en server.conf y asegurarse de que el servidor OpenVPN tenga una ruta a esa red interna.
¿Qué configuración mínima de VPS es adecuada para un servidor OpenVPN?
Para un servidor OpenVPN que atienda hasta 10-20 usuarios, una configuración mínima de VPS adecuada sería 1 vCPU, 512 MB - 1 GB de RAM, 10-20 GB de disco SSD y un canal de red de 100 Mbps con tráfico ilimitado. Esto será suficiente para tareas básicas y una carga de trabajo baja.
¿Qué elegir: VPS o dedicado para esta tarea?
La elección entre un VPS y un servidor dedicado depende de la escala de su tarea:
VPS: Ideal para la mayoría de las necesidades corporativas (hasta 50-100 usuarios), si no requiere el máximo rendimiento o hardware específico. Es una solución más económica y flexible, adecuada para una implementación rápida.
Servidor Dedicado: Necesario para un número muy grande de usuarios (más de 100-200), un ancho de banda extremadamente alto (varios Gbit/s), requisitos estrictos de control físico del hardware o si necesita un rendimiento garantizado sin la influencia de los "vecinos" del hipervisor.
¿Cómo añadir un nuevo usuario en OpenVPN?
Para añadir un nuevo usuario, es necesario generar un nuevo par certificado/clave y ensamblar el archivo .ovpn del cliente. Puede utilizar el script generate_client_config.sh que creamos anteriormente:
cd /etc/openvpn/easy-rsa
sudo ./generate_client_config.sh nombre_del_nuevo_cliente
Luego, copie el archivo generado /etc/openvpn/client_configs/nombre_del_nuevo_cliente.ovpn al dispositivo del nuevo usuario.
¿Cómo revocar el certificado de un usuario?
Si el certificado de un usuario ha sido comprometido o el usuario ya no debe tener acceso a la VPN, su certificado debe ser revocado. Esto se hace usando Easy-RSA:
Después de esto, el cliente con el certificado revocado ya no podrá conectarse a la VPN.
OpenVPN no se inicia o funciona con errores. ¿Dónde buscar primero?
Si OpenVPN no se inicia o observa un comportamiento extraño, siempre comience revisando los registros. Las fuentes principales son:
Registros de systemd:sudo journalctl -u openvpn-server@server -f (para visualización en tiempo real).
Archivo de registro de OpenVPN:sudo tail -f /var/log/openvpn.log (la ruta se especifica en server.conf).
Examine cuidadosamente las últimas líneas en busca de errores, advertencias o mensajes sobre problemas con los archivos de configuración o certificados. A menudo, el problema radica en una ruta de archivo incorrecta, permisos de acceso incorrectos o un error de sintaxis en server.conf.
Conclusiones y próximos pasos
Diagrama: Conclusiones y próximos pasos
En esta guía, hemos implementado y configurado con éxito un servidor OpenVPN en su VPS, proporcionando acceso remoto fiable y seguro para las necesidades corporativas. Ahora su equipo puede conectarse de forma segura a los recursos internos, y todo su tráfico estará protegido con cifrado. Ha obtenido control total sobre su infraestructura VPN, lo cual es una ventaja clave de una solución autoalojada.
Los siguientes pasos para optimizar y expandir su infraestructura VPN pueden incluir:
Monitoreo y registro: Configure sistemas de monitoreo más avanzados (por ejemplo, Prometheus + Grafana) para rastrear el rendimiento del servidor, el tráfico de red y la cantidad de clientes conectados. El registro centralizado (ELK Stack o Graylog) ayudará a identificar y resolver rápidamente problemas de seguridad.
Autenticación avanzada: Considere la integración con LDAP/Active Directory o el uso de autenticación de dos factores (2FA) para mejorar la seguridad del acceso a la VPN.
Automatización de la gestión de clientes: Para equipos grandes, se pueden desarrollar scripts o utilizar interfaces web para la generación, revocación y distribución automática de certificados de cliente, lo que simplificará significativamente la administración.
Optimización del rendimiento: Explore las opciones de ajuste del kernel de Linux y la configuración de OpenVPN para obtener el máximo rendimiento, especialmente si tiene muchos usuarios o un alto tráfico.
¿Te fue útil esta guía?
Tus comentarios nos ayudan a mejorar nuestras guías.
Compartir esta publicación:
Envía esta guía a alguien a quien pueda resultarle útil.