Instalación y Configuración de Outline Wiki en un VPS: Guía Completa para Expertos
TL;DR
En esta guía detallada, configuraremos paso a paso Outline Wiki —una base de conocimientos moderna, fácil de usar y autoalojada— en su servidor privado virtual (VPS). Aprenderá cómo preparar el servidor, instalar todos los componentes necesarios (Docker, PostgreSQL, Redis), desplegar Outline, asegurar su acceso con HTTPS a través de Caddy, y configurar la copia de seguridad y el mantenimiento. Al final de la guía, tendrá una wiki completamente funcional y segura para su equipo o necesidades personales.
- Instalación completa de Outline Wiki utilizando Docker Compose.
- Configuración de acceso seguro a través de HTTPS con certificados automáticos de Caddy.
- Requisitos óptimos de VPS y elección del proveedor.
- Protección básica del servidor con Fail2ban y UFW.
- Configuración de la copia de seguridad automática de los datos de Outline.
- Consejos para la resolución de problemas y el mantenimiento del sistema.
Qué configuramos y por qué
Instalaremos y configuraremos Outline Wiki — una base de conocimientos de código abierto, moderna e intuitiva, diseñada para el trabajo en equipo. Outline se posiciona como una alternativa a Notion, Confluence o Google Docs, pero con énfasis en el autoalojamiento y el control total sobre los datos. Es una solución ideal para desarrolladores, startups y equipos pequeños que necesitan una plataforma centralizada para documentación, notas, actas de reuniones e intercambio de conocimientos.
Al final, obtendrá una wiki completamente funcional, accesible a través de su propio nombre de dominio, donde su equipo podrá crear, editar y organizar información de forma colaborativa. Outline Wiki ofrece una interfaz de usuario limpia, soporte para Markdown, integración con Slack (u otros mensajeros), así como una potente búsqueda, lo que la convierte en una excelente herramienta para aumentar la productividad y preservar el conocimiento corporativo.
Existen muchas alternativas en el mercado, tanto en la nube (Notion, Confluence Cloud, Coda) como autoalojadas (Wiki.js, BookStack, DokuWiki). Las soluciones en la nube son convenientes porque no requieren configuración ni mantenimiento del servidor, pero usted está atado al proveedor, a su política de precios y a su política de seguridad de datos. Las soluciones autoalojadas, como Outline en un VPS, le dan control total sobre sus datos, seguridad y rendimiento. Esto es especialmente importante para proyectos donde la confidencialidad de la información es crítica, o para equipos que desean evitar los pagos mensuales por servicios SaaS. Usted gestiona la infraestructura de forma independiente, lo que requiere ciertos conocimientos técnicos, pero ofrece la máxima flexibilidad e independencia.
Qué configuración de VPS se necesita para esta tarea
La elección de un VPS adecuado para Outline Wiki depende de la carga prevista, el número de usuarios y el volumen de datos almacenados. Outline es una aplicación bastante intensiva en recursos, especialmente si tiene muchos usuarios y los índices de búsqueda se utilizan activamente.
Requisitos mínimos
- Procesador (CPU): 1-2 núcleos. Para equipos pequeños (hasta 5-10 usuarios activos), un núcleo será suficiente. Para un trabajo activo y un mayor número de usuarios, se recomiendan 2 núcleos.
- Memoria RAM: Mínimo 2 GB. Outline, PostgreSQL y Redis juntos consumen una cantidad significativa de RAM. 2 GB es el mínimo absoluto, 4 GB es un inicio cómodo para un equipo pequeño.
- Disco (SSD): 20-40 GB SSD. El SSD es crítico para el rendimiento de la base de datos y el acceso rápido a los archivos. 20 GB serán suficientes para el sistema y el volumen inicial de datos, pero a medida que el contenido crezca, se necesitará más. Se recomiendan 40 GB para tener margen.
- Red: 100 Mbps o 1 Gbps. Un canal estable con suficiente ancho de banda es importante para la carga rápida de páginas y el intercambio de datos.
Plan de VPS específico para la tarea
Para la mayoría de los equipos pequeños y medianos (hasta 20-30 usuarios activos), un VPS con las siguientes características será óptimo:
- 2x vCPU
- 4 GB RAM
- 50-80 GB de disco NVMe/SSD
- Puerto de red de 100 Mbps - 1 Gbps
Encontrar un VPS con las características indicadas no será difícil con la mayoría de los proveedores. Es importante elegir un proveedor confiable con buena reputación y soporte.
Cuándo se necesita un servidor dedicado y no un VPS
Un servidor dedicado puede ser necesario en varios casos:
- Equipo muy grande: Si tiene cientos o miles de usuarios activos, y Outline se convierte en el repositorio central de conocimientos para toda la empresa.
- Alta carga: Uso intensivo, búsquedas frecuentes, gran volumen de archivos e imágenes adjuntas.
- Integración con otros servicios: Si Outline formará parte de una infraestructura más grande con muchas dependencias y alta necesidad de recursos.
- Requisitos de seguridad y aislamiento: Un servidor dedicado proporciona un aislamiento completo de los "vecinos" de hardware, lo que puede ser crítico para ciertos tipos de datos.
En la mayoría de los casos, un VPS será más que suficiente y económicamente más ventajoso para Outline Wiki.
Ubicación: qué factores influyen
La elección de la ubicación del servidor influye en varios factores:
- Latencia: Cuanto más cerca esté el servidor de los usuarios principales, menor será la latencia y más rápida la respuesta de la aplicación. Si su equipo está distribuido en diferentes continentes, elija una ubicación que sea óptima para la mayoría de los usuarios.
- Legislación: La ubicación del servidor determina la jurisdicción del país a la que están sujetos sus datos. Esto puede ser crítico para el cumplimiento de GDPR, HIPAA u otras regulaciones.
- Costo: Los precios de los VPS pueden variar ligeramente según la ubicación.
Generalmente se recomienda elegir una ubicación geográficamente cercana a la mayoría de sus usuarios para garantizar la mejor experiencia de usuario.
Preparación del servidor
Antes de instalar Outline Wiki, es necesario realizar una configuración básica de un VPS nuevo para garantizar la seguridad y preparar el entorno para el despliegue posterior. Utilizaremos Ubuntu Server 24.04 LTS.
1. Conexión por SSH
Conéctese a su servidor como usuario root, utilizando la dirección IP proporcionada por su proveedor:
ssh root@SU_DIRECCIÓN_IP
Si utiliza una contraseña, introdúzcala. Se recomienda encarecidamente utilizar claves SSH para mayor seguridad.
2. Actualización del sistema
Actualice la lista de paquetes y los paquetes instalados a las versiones más recientes:
sudo apt update && sudo apt upgrade -y
Esto garantiza que tendrá las últimas correcciones de seguridad y versiones estables de todos los componentes del sistema.
3. Creación de un nuevo usuario con permisos sudo
Trabajar como root no es seguro. Crearemos un nuevo usuario y le otorgaremos permisos sudo.
adduser outlineadmin
Siga las instrucciones para establecer la contraseña y la información del usuario. Luego, añada el usuario al grupo sudo:
usermod -aG sudo outlineadmin
Ahora puede cambiar al nuevo usuario:
su - outlineadmin
En adelante, todos los comandos que requieran privilegios de superusuario se ejecutarán con el prefijo sudo.
4. Configuración de claves SSH para el nuevo usuario
Si aún no utiliza claves SSH, créelas en su máquina local (si no las tiene):
ssh-keygen -t rsa -b 4096 -C "[email protected]"
Luego, copie la clave pública al servidor para el nuevo usuario outlineadmin:
ssh-copy-id outlineadmin@SU_DIRECCIÓN_IP
Ahora puede iniciar sesión sin contraseña. Después de verificar, se recomienda deshabilitar el inicio de sesión con contraseña para root y para todos los usuarios en el archivo /etc/ssh/sshd_config. Busque las líneas:
sudo nano /etc/ssh/sshd_config
PermitRootLogin no
PasswordAuthentication no
Guarde los cambios (Ctrl+O, Enter) y salga (Ctrl+X). Reinicie el servicio SSH:
sudo systemctl restart sshd
Asegúrese de poder iniciar sesión con la clave SSH antes de cerrar la sesión actual.
5. Configuración del firewall (UFW)
UFW (Uncomplicated Firewall) es una utilidad conveniente para gestionar iptables. Por defecto, está deshabilitado.
sudo apt install ufw -y # Instala UFW si no está instalado
sudo ufw allow OpenSSH # Permite SSH para no perder el acceso
sudo ufw allow http    # Permite HTTP (puerto 80)
sudo ufw allow https   # Permite HTTPS (puerto 443)
sudo ufw enable        # Habilita el firewall
sudo ufw status verbose # Verifica el estado
Se le pedirá que confirme la activación de UFW. Introduzca y. Ahora su servidor está protegido contra tráfico no deseado, excepto SSH, HTTP y HTTPS.
6. Instalación de Fail2ban
Fail2ban escanea los registros y bloquea automáticamente las direcciones IP que muestran signos de ataques maliciosos (por ejemplo, múltiples intentos fallidos de inicio de sesión SSH).
sudo apt install fail2ban -y
sudo systemctl enable fail2ban
sudo systemctl start fail2ban
Cree un archivo de configuración para Fail2ban:
sudo cp /etc/fail2ban/jail.conf /etc/fail2ban/jail.local
sudo nano /etc/fail2ban/jail.local
En el archivo jail.local, puede configurar los parámetros. Asegúrese de que la sección [sshd] esté activa (enabled = true) y, si lo desea, cambie bantime (tiempo de bloqueo) y maxretry (número de intentos).
[DEFAULT]
bantime = 10m
findtime = 10m
maxretry = 5

[sshd]
enabled = true
port = ssh
logpath = %(sshd_log)s
backend = %(sshd_backend)s
Guarde los cambios y reinicie Fail2ban:
sudo systemctl restart fail2ban
sudo fail2ban-client status # Verifique el estado
sudo fail2ban-client status sshd # Verifique el estado para SSH
Ahora su servidor tiene protección básica contra ataques de fuerza bruta.
Instalación de software — paso a paso
Instalación de software — paso a paso
Outline Wiki se implementa mejor utilizando Docker y Docker Compose. Esto asegura el aislamiento de los componentes, simplifica la gestión de dependencias y las actualizaciones.
1. Instalación de Docker Engine (versión 26.x para 2026)
Primero, elimine las versiones antiguas de Docker, si las hay:
for pkg in docker.io docker-doc docker-compose docker-ce docker-ce-cli containerd.io docker-buildx-plugin docker-compose-plugin; do sudo apt remove $pkg; done
Instale los paquetes necesarios para instalar Docker a través del repositorio:
sudo apt update
sudo apt install ca-certificates curl gnupg -y
Agregue la clave GPG oficial de Docker:
sudo install -m 0755 -d /etc/apt/keyrings
curl -fsSL https://download.docker.com/linux/ubuntu/gpg | sudo gpg --dearmor -o /etc/apt/keyrings/docker.gpg
sudo chmod a+r /etc/apt/keyrings/docker.gpg
Agregue el repositorio de Docker a las fuentes de APT:
echo \
  "deb [arch="$(dpkg --print-architecture)" signed-by=/etc/apt/keyrings/docker.gpg] https://download.docker.com/linux/ubuntu \
  "$(. /etc/os-release && echo "$VERSION_CODENAME")" stable" | \
  sudo tee /etc/apt/sources.list.d/docker.list > /dev/null
Actualice la lista de paquetes e instale Docker Engine, Docker CLI y Containerd:
sudo apt update
sudo apt install docker-ce docker-ce-cli containerd.io docker-buildx-plugin docker-compose-plugin -y
Agregue su usuario al grupo docker para evitar usar sudo en cada comando de Docker:
sudo usermod -aG docker $USER
newgrp docker # Aplique los cambios de grupo inmediatamente
Verifique la instalación de Docker:
docker run hello-world # Ejecute un contenedor de prueba
La salida debería confirmar una instalación exitosa.
2. Instalación de Docker Compose (versión 2.24.x para 2026)
Docker Compose generalmente se instala junto con Docker Engine como docker-compose-plugin. Verifiquemos su versión:
docker compose version # Verificación de la versión de Docker Compose
Si el comando docker compose no funciona, es posible que tenga una instalación antigua de Docker o que el complemento no se haya instalado. En ese caso, instálelo manualmente:
sudo apt install docker-compose-plugin -y
3. Creación de un directorio para Outline Wiki
Cree un directorio donde se almacenarán todos los archivos de configuración de Outline:
mkdir -p ~/outline
cd ~/outline
4. Configuración del archivo Docker Compose
Outline requiere varios servicios: la aplicación Outline en sí, PostgreSQL (base de datos) y Redis (caché/colas). Cree el archivo docker-compose.yml:
nano docker-compose.yml
Pegue el siguiente contenido. Tenga en cuenta las versiones actuales de las imágenes (PostgreSQL 16, Redis 7, Outline la última estable).
version: '3.8'

services:
  outline:
    image: outlines/outline:latest
    container_name: outline
    restart: always
    env_file:
      - ./.env
    ports:
      - "3000:3000" # Puerto en el que Outline escucha dentro del contenedor
    depends_on:
      - postgres
      - redis
    volumes:
      - ./data/uploads:/opt/outline/public/uploads # Para archivos subidos

  postgres:
    image: postgres:16-alpine
    container_name: outline_postgres
    restart: always
    env_file:
      - ./.env
    volumes:
      - ./data/postgres:/var/lib/postgresql/data # Almacenamiento persistente para la base de datos

  redis:
    image: redis:7-alpine
    container_name: outline_redis
    restart: always
    env_file:
      - ./.env
    volumes:
      - ./data/redis:/data # Almacenamiento persistente para Redis (si se usa persistencia)

volumes:
  postgres:
  redis:
  uploads:
Guarde el archivo (Ctrl+O, Enter) y salga (Ctrl+X).
5. Creación del archivo de variables de entorno (.env)
Este archivo contendrá todos los datos sensibles y los parámetros de configuración. Créelo:
nano .env
Pegue el siguiente contenido. Asegúrese de reemplazar YOUR_DOMAIN.COM con su dominio real y genere contraseñas y claves seguras.
# Configuración de la aplicación Outline
URL=https://YOUR_DOMAIN.COM # Dominio donde Outline Wiki estará disponible
PORT=3000
SECRET_KEY=ВАШ_СЕКРЕТНЫЙ_КЛЮЧ_ДЛЯ_OUTLINE # Se genera con una cadena aleatoria, por ejemplo, openssl rand -base64 32
DATABASE_URL=postgres://outline_user:ВАШ_ПАРОЛЬ_ДЛЯ_БД@postgres:5432/outline_db
REDIS_URL=redis://redis:6379

# Configuración de la base de datos PostgreSQL
POSTGRES_USER=outline_user
POSTGRES_PASSWORD=ВАШ_ПАРОЛЬ_ДЛЯ_БД # Diferente de SECRET_KEY
POSTGRES_DB=outline_db

# Configuración de Redis (generalmente no requiere cambios si Redis se usa solo para caché)
REDIS_HOST=redis
REDIS_PORT=6379

# Configuración de correo electrónico (para invitaciones, restablecimiento de contraseñas, etc.)
# Ejemplo para Mailgun, se puede usar SendGrid, Postmark, AWS SES o SMTP
# MAIL_SERVICE_PROVIDER=mailgun
# MAIL_FROM_EMAIL=wiki@YOUR_DOMAIN.COM
# MAILGUN_API_KEY=mg-ваш-api-ключ
# MAILGUN_DOMAIN=mg.YOUR_DOMAIN.COM

# O para SMTP (reemplace con sus datos)
# SMTP_HOST=smtp.gmail.com
# SMTP_PORT=587
# [email protected]
# SMTP_PASSWORD=your_email_password
# SMTP_SECURE=false # true para SSL/TLS, false para STARTTLS

# Proveedores de autenticación (seleccione los necesarios, comente el resto)
# GOOGLE_CLIENT_ID=
# GOOGLE_CLIENT_SECRET=
# SLACK_CLIENT_ID=
# SLACK_CLIENT_SECRET=
# SLACK_SIGNING_SECRET=
# MICROSOFT_CLIENT_ID=
# MICROSOFT_CLIENT_SECRET=
# OIDC_CLIENT_ID=
# OIDC_CLIENT_SECRET=
# OIDC_AUTH_URL=
# OIDC_TOKEN_URL=
# OIDC_USERINFO_URL=
# OIDC_DISPLAY_NAME=
# OIDC_SCOPES=
# OIDC_USERNAME_CLAIM=
# OIDC_GROUPS_CLAIM=
Importante:
SECRET_KEY: Genere una cadena aleatoria larga, por ejemplo, usandoopenssl rand -base64 32.POSTGRES_PASSWORD: También genere una contraseña segura.URL: Especifique la URL HTTPS completa de su dominio.- Configure la sección de Configuración de correo electrónico para que Outline pueda enviar invitaciones y notificaciones.
- Configure las secciones de Proveedores de autenticación si planea usar Google, Slack, Microsoft u OIDC para iniciar sesión. Para empezar, puede dejarlas comentadas.
Guarde el archivo (Ctrl+O, Enter) y salga (Ctrl+X).
6. Inicio de Outline Wiki
Ahora que todo está listo, inicie Outline Wiki con Docker Compose:
docker compose up -d # Inicio de contenedores en segundo plano
Este comando creará y ejecutará tres contenedores: Outline, PostgreSQL y Redis. El proceso puede tardar varios minutos mientras se descargan las imágenes y se inicializa la base de datos.
Verifique el estado de los contenedores:
docker compose ps
Todos los contenedores deben estar en estado running.
En este punto, Outline Wiki se ejecuta en el puerto 3000 de su servidor. Sin embargo, aún no es accesible desde el exterior y no tiene HTTPS. Nos ocuparemos de esto en la siguiente sección.
Configuración
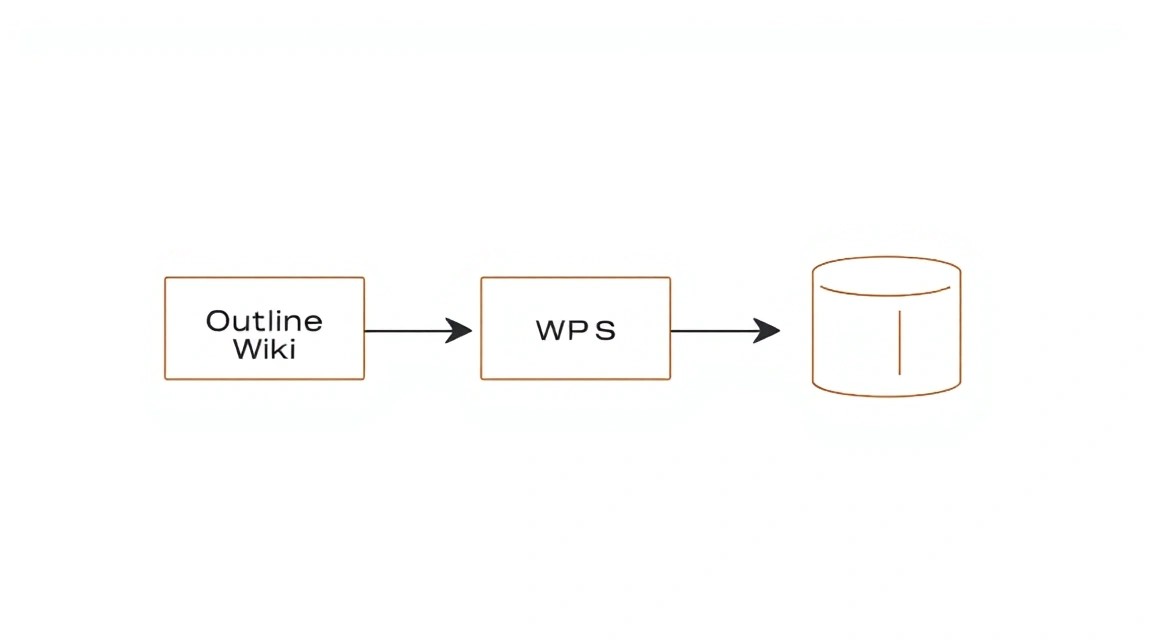
Después de instalar los componentes, es necesario configurar un servidor web para proxyar las solicitudes a Outline y proporcionar HTTPS. Usaremos Caddy, un servidor web moderno que gestiona automáticamente los certificados de Let's Encrypt.
1. Instalación de Caddy (versión 2.7.x para 2026)
Caddy se puede instalar desde el repositorio oficial. Primero, agregue la clave GPG:
sudo apt install -y debian-keyring debian-archive-keyring apt-transport-https
curl -1sLf 'https://dl.cloudsmith.io/public/caddy/stable/gpg.key' | sudo gpg --dearmor -o /usr/share/keyrings/caddy-stable-archive-keyring.gpg
curl -1sLf 'https://dl.cloudsmith.io/public/caddy/stable/debian.deb.txt' | sudo tee /etc/apt/sources.list.d/caddy-stable.list
Luego, actualice la lista de paquetes e instale Caddy:
sudo apt update
sudo apt install caddy -y
Verifique que Caddy esté instalado y en ejecución:
sudo systemctl status caddy
Debería estar activo (active (running)).
2. Configuración del Caddyfile
Caddy utiliza un archivo de configuración llamado Caddyfile. Lo configuraremos para que actúe como un proxy inverso para Outline Wiki y obtenga automáticamente certificados HTTPS.
sudo nano /etc/caddy/Caddyfile
Elimine todo el contenido del archivo y pegue lo siguiente, reemplazando YOUR_DOMAIN.COM con su dominio real:
YOUR_DOMAIN.COM {
  # Habilitar certificados HTTPS automáticos de Let's Encrypt
  tls {
    dns cloudflare ВАШ_КЛЮЧ_API_CLOUDFLARE
    # Si no usa Cloudflare DNS, simplemente use "tls [email protected]"
    # Caddy usará el desafío HTTP-01, que requiere el puerto 80 abierto.
    # Si el puerto 80 está ocupado, o está detrás de un NAT, el desafío DNS es preferible.
  }

  # Proxy de solicitudes al contenedor Docker de Outline
  reverse_proxy localhost:3000 {
    # Encabezados adicionales necesarios para Outline
    header_up Host {host}
    header_up X-Real-IP {remote_ip}
    header_up X-Forwarded-For {remote_ip}
    header_up X-Forwarded-Proto {scheme}
  }

  # Opcional: compresión para acelerar la carga
  encode gzip zstd

  # Opcional: registro
  log {
    output file /var/log/caddy/outline.log
  }
}
Importante:
- Proveedor de DNS: Si su dominio se gestiona a través de Cloudflare (u otro proveedor de DNS compatible con Caddy), puede usar el desafío DNS para obtener certificados. Esto es útil si tiene una configuración de red compleja o el puerto 80 no está disponible. Reemplace
ВАШ_КЛЮЧ_API_CLOUDFLAREcon su token de API de Cloudflare. También deberá instalar el complemento de Caddy para Cloudflare si no está incluido por defecto (sudo apt install caddy-dns-cloudflare). - Desafío HTTP-01: Si no usa el desafío DNS, simplemente especifique
tls [email protected](reemplace con su correo electrónico). Caddy intentará obtener un certificado a través del desafío HTTP-01, lo que requiere que el puerto 80 esté abierto y accesible desde el exterior. - Registro: Cree un directorio para los registros:
sudo mkdir -p /var/log/caddy && sudo chown caddy:caddy /var/log/caddy.
Guarde los cambios (Ctrl+O, Enter) y salga (Ctrl+X).
3. Verificación y recarga de Caddy
Verifique la sintaxis del Caddyfile:
sudo caddy validate --config /etc/caddy/Caddyfile
Si no hay errores, recargue Caddy para aplicar la nueva configuración:
sudo systemctl reload caddy
Caddy obtendrá e instalará automáticamente un certificado SSL para su dominio. Esto puede tardar unos segundos.
4. Configuración de DNS
Asegúrese de que su dominio (YOUR_DOMAIN.COM) apunte a la dirección IP de su VPS. Cree un registro A en su proveedor de DNS, por ejemplo:
Tipo: A
Nombre: @ (o su subdominio, por ejemplo, wiki)
Valor: SU_DIRECCIÓN_IP_VPS
La propagación de los registros DNS puede tardar un tiempo (desde unos minutos hasta varias horas).
5. Verificación de la funcionalidad
Una vez que el DNS se actualice, abra su dominio (https://YOUR_DOMAIN.COM) en un navegador. Debería ver la página de bienvenida de Outline Wiki. Registre al primer usuario (se convertirá en el administrador).
También puede verificar la disponibilidad desde el servidor:
curl -I https://YOUR_DOMAIN.COM # Verificación de encabezados HTTP
Debería ver el estado HTTP/2 200 y los encabezados que indican una respuesta exitosa.
Si surgen problemas, verifique los registros de Caddy:
sudo journalctl -u caddy -f
Y los registros del contenedor Outline:
docker compose logs -f outline
En este punto, Outline Wiki está completamente configurado, accesible a través de HTTPS y listo para usar.
Copias de seguridad y mantenimiento
La copia de seguridad regular es una parte críticamente importante de la operación de cualquier servicio. Para Outline Wiki, es necesario hacer una copia de seguridad de la base de datos, los archivos subidos y los archivos de configuración.
1. Qué respaldar
- Base de datos PostgreSQL: Contiene toda la información de texto, la estructura de la wiki, los usuarios y sus permisos. Este es el componente más importante.
- Archivos subidos: El directorio
./data/uploadscontiene imágenes, documentos y otros archivos adjuntos a las páginas de la wiki. - Archivos de configuración: Los archivos
docker-compose.ymly.env. Aunque se pueden restaurar, guardar las versiones actuales simplificará la recuperación.
2. Script simple de copia de seguridad automática
Crearemos un script simple que realizará una copia de seguridad y la guardará en un directorio separado. Vaya al directorio raíz de Outline (~/outline).
mkdir -p ~/outline/backups
nano ~/outline/backup_outline.sh
Inserte el siguiente contenido:
#!/bin/bash

# Directorio para copias de seguridad
BACKUP_DIR="/home/outlineadmin/outline/backups"
TIMESTAMP=$(date +"%Y%m%d%H%M%S")
DB_BACKUP_FILE="$BACKUP_DIR/outline_db_backup_$TIMESTAMP.sql.gz"
UPLOADS_BACKUP_FILE="$BACKUP_DIR/outline_uploads_backup_$TIMESTAMP.tar.gz"
CONFIG_BACKUP_FILE="$BACKUP_DIR/outline_config_backup_$TIMESTAMP.tar.gz"

# Cambiar al directorio de Outline para que docker compose funcione correctamente
cd /home/outlineadmin/outline || { echo "Failed to change directory to ~/outline"; exit 1; }

echo "Starting Outline Wiki backup at $TIMESTAMP..."

# 1. Copia de seguridad de la base de datos PostgreSQL
echo "Backing up PostgreSQL database..."
# Uso de docker exec para ejecutar pg_dump dentro del contenedor postgres
# Obtenemos el nombre del contenedor postgres de docker-compose.yml
POSTGRES_CONTAINER=$(docker compose ps -q postgres)
if [ -z "$POSTGRES_CONTAINER" ]; then
    echo "Error: PostgreSQL container not found."
    exit 1
fi

# Obtenemos las variables de entorno de .env
source ./.env

docker exec "$POSTGRES_CONTAINER" pg_dump -U "$POSTGRES_USER" -d "$POSTGRES_DB" | gzip > "$DB_BACKUP_FILE"
if [ $? -eq 0 ]; then
    echo "PostgreSQL database backup created: $DB_BACKUP_FILE"
else
    echo "Error backing up PostgreSQL database."
    exit 1
fi

# 2. Copia de seguridad de los archivos subidos
echo "Backing up uploaded files..."
tar -czf "$UPLOADS_BACKUP_FILE" ./data/uploads
if [ $? -eq 0 ]; then
    echo "Uploaded files backup created: $UPLOADS_BACKUP_FILE"
else
    echo "Error backing up uploaded files."
    exit 1
fi

# 3. Copia de seguridad de los archivos de configuración
echo "Backing up configuration files..."
tar -czf "$CONFIG_BACKUP_FILE" ./.env ./docker-compose.yml
if [ $? -eq 0 ]; then
    echo "Configuration files backup created: $CONFIG_BACKUP_FILE"
else
    echo "Error backing up configuration files."
    exit 1
fi

# 4. Eliminación de copias de seguridad antiguas (conservamos las últimas 7 días)
echo "Cleaning up old backups..."
find "$BACKUP_DIR" -type f -name "outline_*.gz" -mtime +7 -delete
echo "Old backups cleaned up."

echo "Outline Wiki backup completed."
Guarde el archivo y hágalo ejecutable:
chmod +x ~/outline/backup_outline.sh
Verifique el funcionamiento del script ejecutándolo manualmente:
~/outline/backup_outline.sh
ls ~/outline/backups/
Debería ver los archivos de copia de seguridad creados.
3. Automatización de copias de seguridad con Cron
Agregue el script al programador Cron para su ejecución diaria. Por ejemplo, todos los días a las 3:00 de la madrugada:
crontab -e
Agregue la siguiente línea al final del archivo (asegúrese de que la ruta al script sea correcta):
0 3 * * * /home/outlineadmin/outline/backup_outline.sh >> /var/log/outline_backup.log 2>&1
Esta línea ejecutará el script todos los días a las 3 de la mañana y registrará la salida en el archivo de registro /var/log/outline_backup.log.
4. Dónde almacenar las copias de seguridad
Almacenar las copias de seguridad en el mismo servidor que el servicio principal es extremadamente arriesgado. Si el servidor falla, perderá tanto los datos como las copias de seguridad. Se recomienda utilizar:
- Almacenamiento externo compatible con S3: AWS S3, DigitalOcean Spaces, Backblaze B2. Es una forma fiable y relativamente económica de almacenamiento. Se puede configurar el script para subir automáticamente las copias de seguridad a S3.
- Un VPS separado: Un VPS pequeño y económico, destinado exclusivamente al almacenamiento de copias de seguridad, al que se pueden copiar archivos a través de rsync/scp.
- NAS/servidor local: Si dispone de su propio hardware.
Para la carga automática a S3, se puede usar s3cmd o aws cli. Ejemplo de adición al script después de crear las copias de seguridad:
# Instalación de aws cli (si no está instalado)
# sudo apt install awscli -y
# aws configure # Configure sus claves de AWS

# ... (después de crear las copias de seguridad) ...

echo "Uploading backups to S3..."
aws s3 cp "$DB_BACKUP_FILE" s3://your-s3-bucket/outline/db/
aws s3 cp "$UPLOADS_BACKUP_FILE" s3://your-s3-bucket/outline/uploads/
aws s3 cp "$CONFIG_BACKUP_FILE" s3://your-s3-bucket/outline/config/
echo "Backups uploaded to S3."
5. Actualizaciones: rolling vs ventana de mantenimiento
La actualización de Outline Wiki y sus componentes (PostgreSQL, Redis, Docker) requiere atención.
- Actualización de Outline Wiki: La forma más sencilla es actualizar la imagen de Docker. Vaya al directorio
~/outliney ejecute:docker compose pull outline # Descargar la nueva imagen de Outline docker compose up -d outline # Recrear el contenedor de Outline con la nueva imagenLea siempre el changelog de Outline antes de actualizar para conocer posibles cambios en los requisitos o migraciones de la base de datos.
- Actualización de paquetes del sistema (Ubuntu): Ejecute regularmente
sudo apt update && sudo apt upgrade -y. Esto se puede hacer una vez a la semana o una vez al mes. - Actualización de Docker Engine: Hágalo con menos frecuencia y con precaución, ya que puede afectar a todos los contenedores. Se recomienda hacerlo dentro de una "ventana de mantenimiento".
Estrategia de actualizaciones:
- Actualizaciones continuas (para Outline): Si no hay cambios críticos en la base de datos, la actualización de la imagen de Outline puede considerarse "continua" (sin tiempo de inactividad).
- Ventana de mantenimiento (para Docker, SO, actualizaciones importantes de Outline): Para actualizaciones más grandes que puedan interrumpir potencialmente el servicio, asigne una ventana de mantenimiento, avise a los usuarios y realice la actualización, teniendo a mano una copia de seguridad reciente.