Despliegue de Headscale en un VPS: creación de su propia red Mesh privada (VPN)
TL;DR
En esta guía, desplegaremos Headscale —una implementación de código abierto del servidor de control de Tailscale— en un servidor virtual (VPS) con Ubuntu 24.04/Debian 12. Como resultado, obtendrá su propia red mesh, donde todos sus dispositivos (portátiles, servidores, smartphones) estarán conectados directamente a través de WireGuard sin intermediarios externos. Configuraremos TLS automático mediante Caddy, analizaremos la configuración de ACL para la seguridad y garantizaremos la resiliencia del sistema mediante copias de seguridad periódicas. Esta solución es ideal para quienes valoran la privacidad y desean tener un control total sobre su infraestructura de red en 2026.
- Tecnología: WireGuard + Headscale (Control Plane).
- Dificultad: Media (se requieren habilidades básicas de terminal).
- Tiempo de configuración: 40-60 minutos.
- Resultado: Red segura con acceso a recursos internos desde cualquier lugar del mundo.
¿Buscas un servidor que simplemente funcione?
Valebyte VPS — NVMe, soporte 24/7, despliegue en 60 segundos.
1. Qué estamos configurando y por qué: La evolución de las VPN en 2026
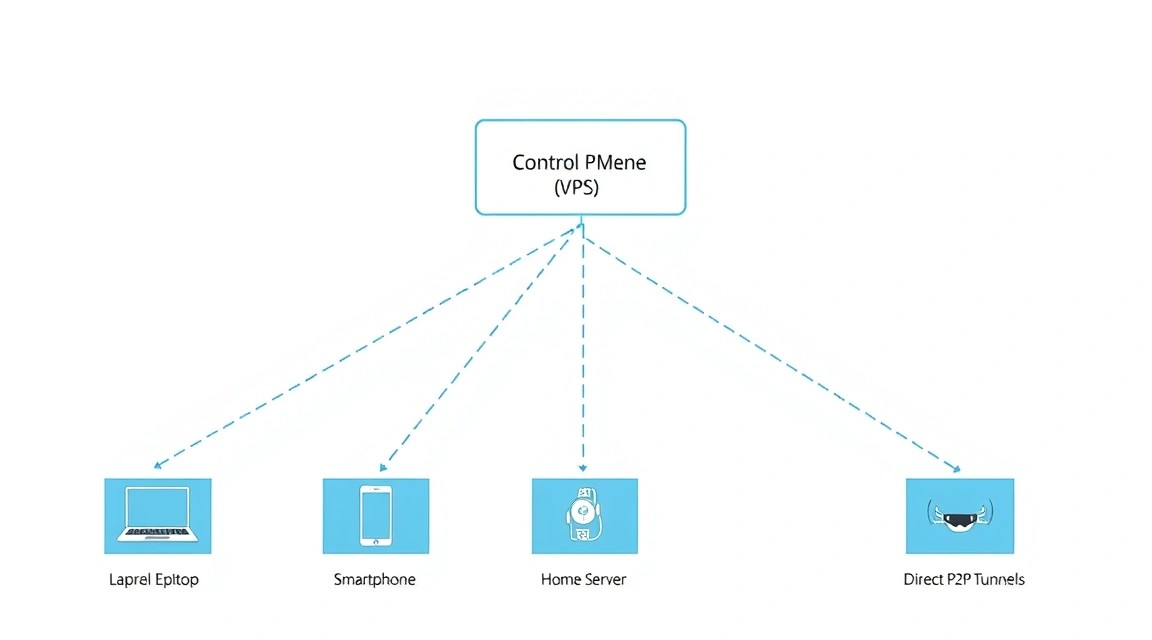
Las soluciones VPN tradicionales (OpenVPN, WireGuard clásico) funcionan con una topología de "Estrella" (Star). Todos los clientes se conectan a un servidor central y todo el tráfico pasa a través de él. Esto crea un "cuello de botella": si el servidor está en Alemania y dos clientes en Japón, su tráfico seguirá pasando por Europa, generando latencias enormes.
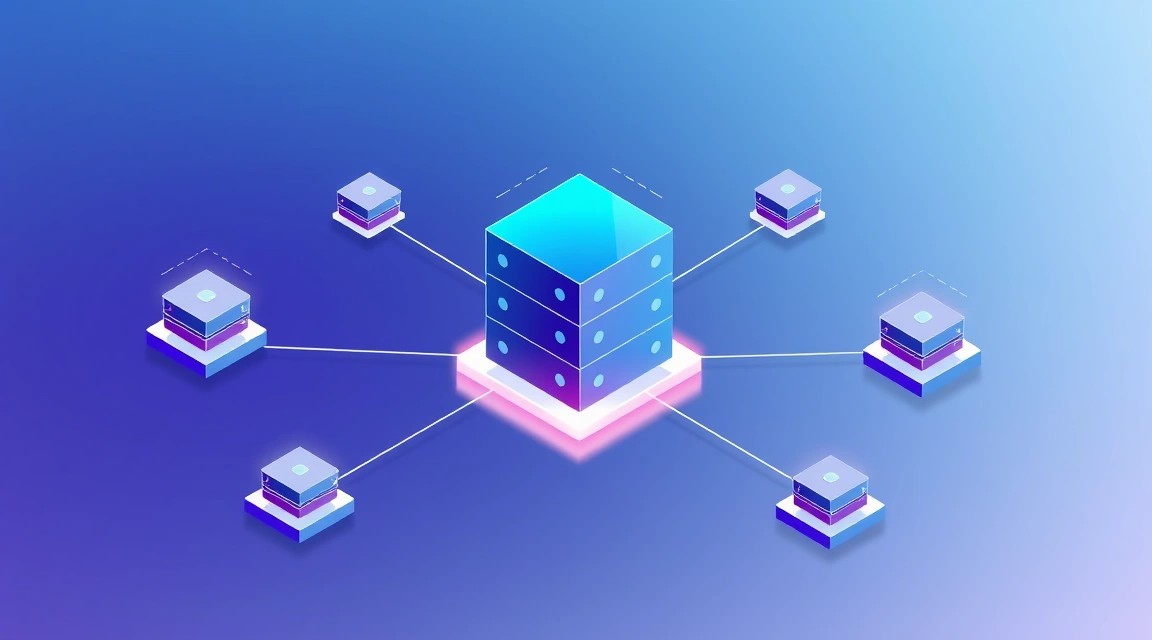
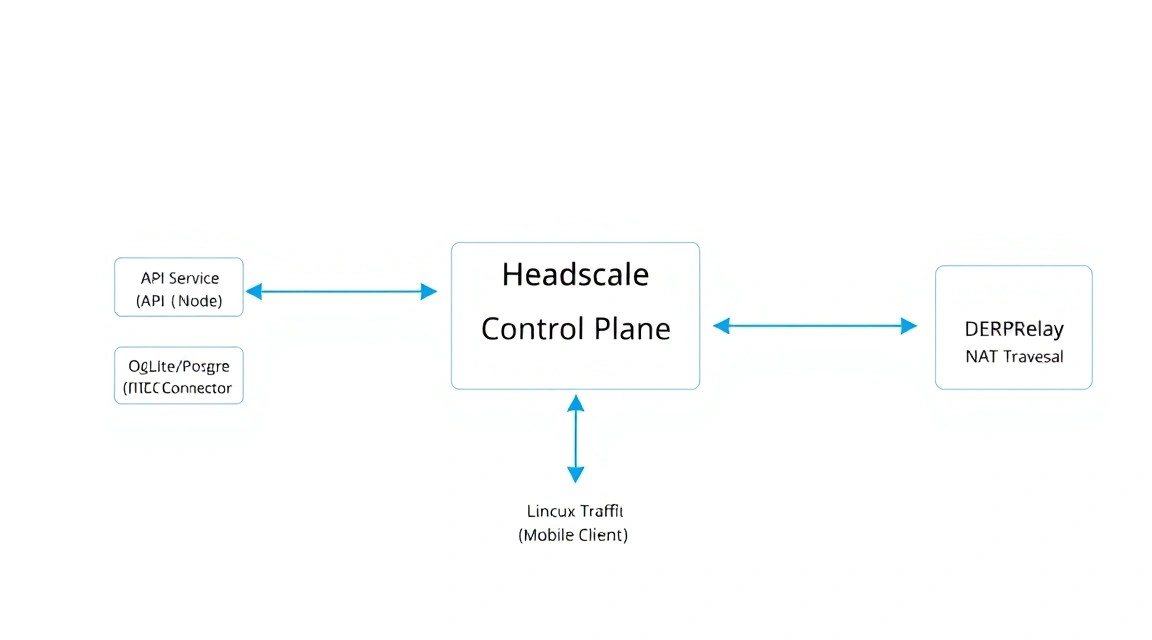
Las redes Mesh (redes de malla) resuelven este problema. En una red de este tipo, los dispositivos se conectan directamente entre sí (punto a punto). El servidor de control solo es necesario para ayudar a los dispositivos a "encontrarse" entre sí detrás de NAT e intercambiar claves de cifrado. Tailscale popularizó este enfoque utilizando el protocolo WireGuard, pero su servidor de control es propietario y está basado en la nube.
Headscale es una implementación de código abierto completa del servidor de administración de Tailscale. Al instalarlo en su VPS, obtiene:
- Privacidad total: los registros de conexión y las claves se almacenan solo en su servidor.
- Sin límites en el número de dispositivos (la versión gratuita de Tailscale tiene límites).
- Posibilidad de configurar sus propias reglas de acceso (ACL).
- Soporte para MagicDNS: acceso a los dispositivos por nombre en lugar de por IP.
En 2026, cuando las cuestiones de soberanía digital son especialmente críticas, una Mesh-VPN autoalojada se convierte en el estándar para desarrolladores y pequeñas empresas.
2. Qué configuración de VPS se necesita para Headscale
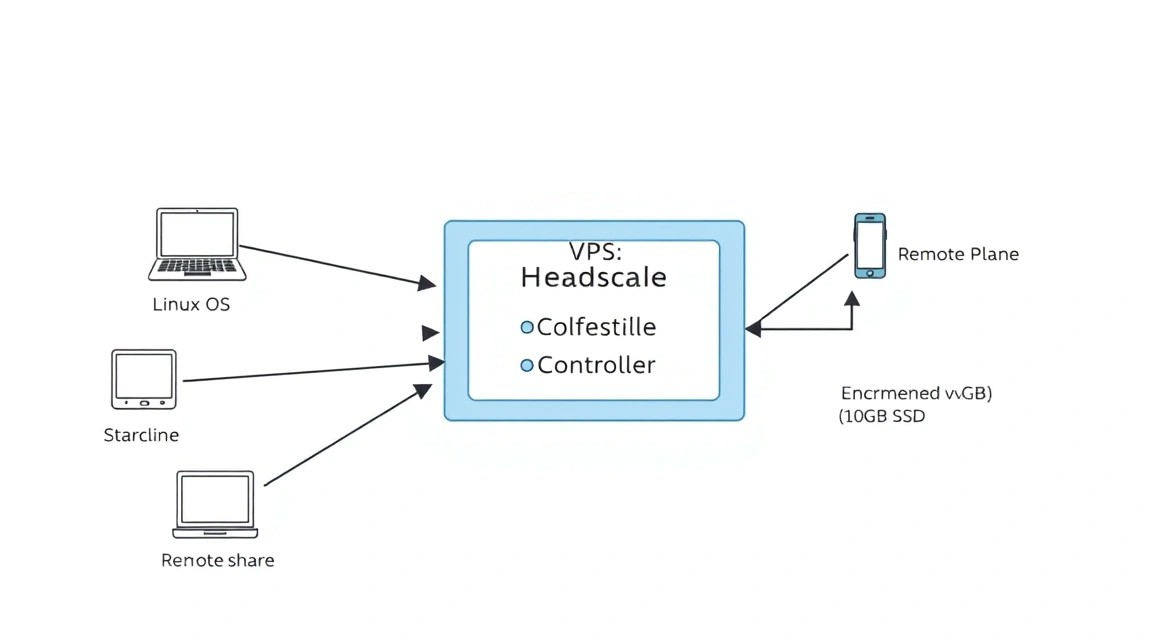
Headscale es una aplicación extremadamente poco exigente en cuanto a recursos. Dado que solo actúa como "coordinador" (Control Plane) y no actúa como proxy para todo el tráfico (en la mayoría de los casos), no necesita procesadores potentes. Sin embargo, la estabilidad de la red depende directamente del tiempo de actividad y la conectividad de red de su proveedor.
| Parámetro | Requisitos mínimos | Recomendados (para equipos) |
|---|---|---|
| Procesador (vCPU) | 1 núcleo | 2 núcleos |
| Memoria RAM | 1 GB | 2-4 GB |
| Disco (NVMe SSD) | 10 GB | 40 GB |
| Ancho de banda | 100 Mbps | 1 Gbps |
| SO | Ubuntu 24.04 / Debian 12 | Ubuntu 24.04 LTS |
Para un funcionamiento estable en Europa o EE. UU., recomendamos utilizar Valebyte. Para uso personal, el plan VPS-1 (1 vCPU / 2 GB RAM / 30 GB NVMe) es ideal por solo unos pocos dólares al mes. Si planea usar Headscale como un Exit Node (nodo de salida a Internet) para toda la familia o una pequeña empresa, es mejor elegir VPS-2 de Valebyte para tener un margen de memoria RAM para el almacenamiento en caché y la pila de red.
Importante: Elija la ubicación del servidor lo más cerca posible de su ubicación principal para minimizar la latencia al establecer la conexión inicial entre los nodos.
3. Preparación del servidor: Seguridad y base
Antes de instalar Headscale, es necesario proteger básicamente nuestro servidor. Suponemos que tiene un servidor limpio con Ubuntu 24.04.
Actualizaremos el sistema e instalaremos las utilidades necesarias:
sudo apt update && sudo apt upgrade -y
sudo apt install -y curl wget git vim ufw software-properties-common
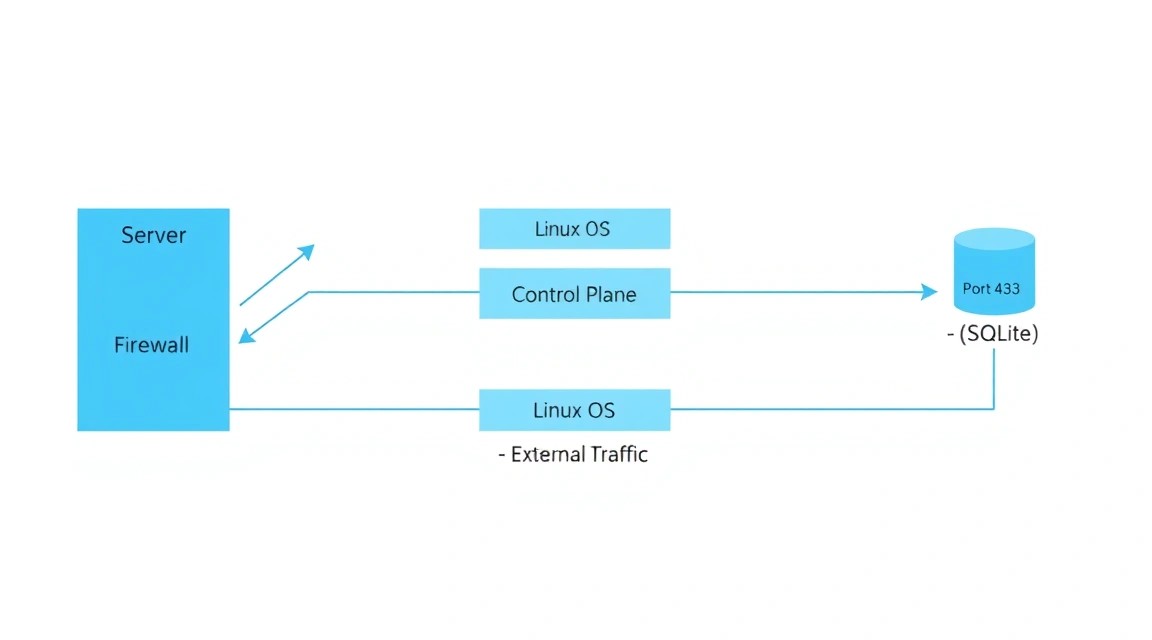
Configuraremos el cortafuegos (Firewall). Headscale requiere abrir un puerto para la coordinación (generalmente 8080 o 443 a través de un proxy) y un puerto para WireGuard (si va a utilizar el servidor DERP integrado):
# Permitimos SSH (¡obligatorio!)
sudo ufw allow ssh
# Permitimos HTTP/HTTPS para Caddy
sudo ufw allow 80/tcp
sudo ufw allow 443/tcp
sudo ufw allow 443/udp
# Activamos el Firewall
sudo ufw enable
Se recomienda crear un usuario independiente con privilegios sudo y desactivar el inicio de sesión con contraseña para SSH, utilizando solo claves. Este es el estándar de la industria en 2026 para prevenir ataques de fuerza bruta.
¿Buscas un servidor que simplemente funcione?
Valebyte VPS — NVMe, soporte 24/7, despliegue en 60 segundos.
4. Instalación de Headscale: Algoritmo paso a paso
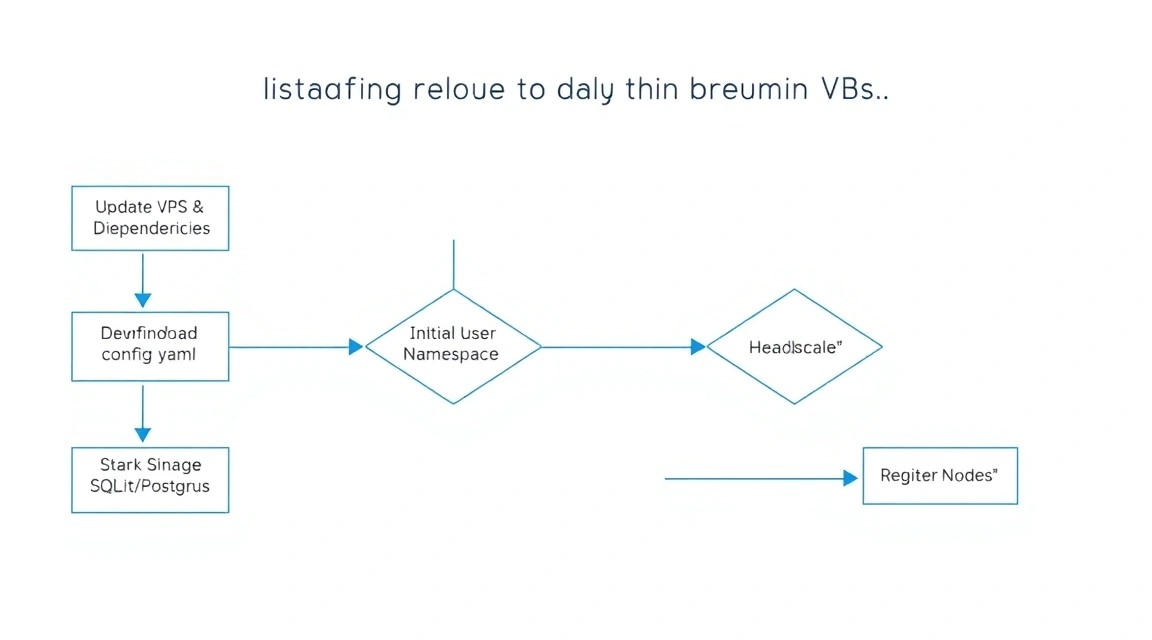
Utilizaremos Docker para el despliegue, ya que simplifica significativamente el proceso de actualización y el aislamiento de dependencias. Instalaremos Docker y Docker Compose:
# Instalación de Docker
curl -fsSL https://get.docker.com -o get-docker.sh
sudo sh get-docker.sh
Crearemos la estructura de directorios para el proyecto:
mkdir -p ~/headscale/config
mkdir -p ~/headscale/data
cd ~/headscale
Crearemos un archivo de base de datos SQLite vacío (Headscale lo utiliza por defecto):
touch ./data/db.sqlite
Ahora crearemos el archivo docker-compose.yaml. Utilizaremos la imagen actual de Headscale versión 0.23+ (actual a 2026):
version: '3.8'
services:
  headscale:
    image: headscale/headscale:latest
    container_name: headscale
    volumes:
      - ./config:/etc/headscale
      - ./data:/var/lib/headscale
    ports:
      - "127.0.0.1:8080:8080"
    command: headscale serve
    restart: always
Tenga en cuenta que estamos redirigiendo el puerto 8080 a 127.0.0.1. Esto se hace para que Headscale no sea accesible directamente desde el exterior, sino que funcione solo a través de nuestro Reverse Proxy (Caddy), que proporcionará el cifrado.
5. Configuración de Reverse Proxy y SSL (Caddy)
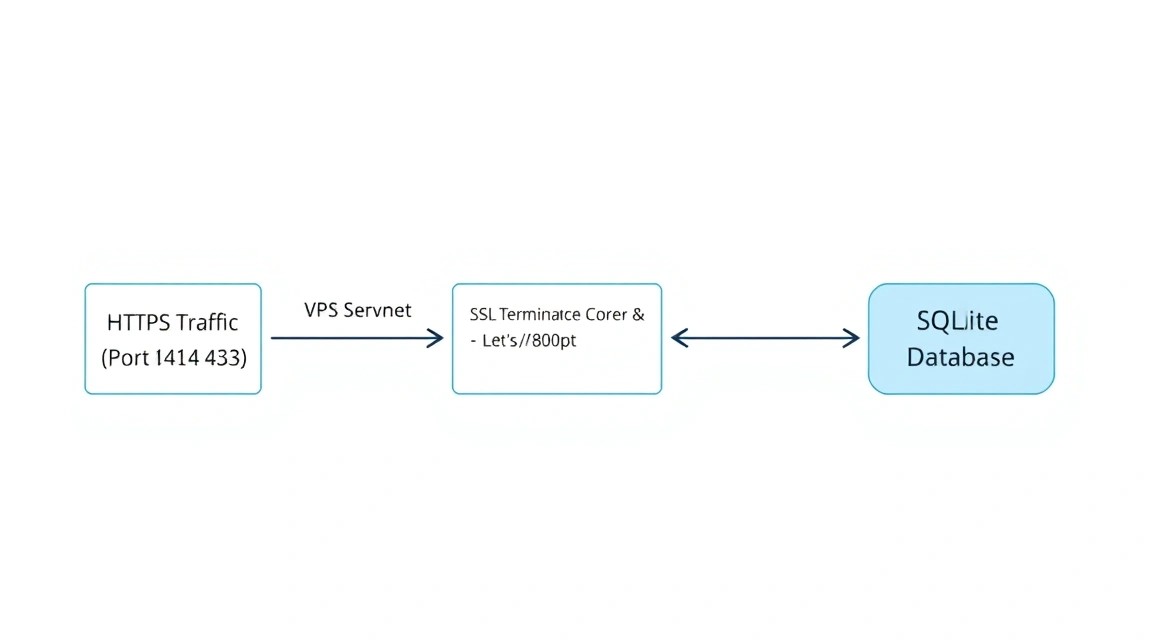
Headscale debe funcionar a través de HTTPS. La forma más sencilla de obtener y renovar automáticamente los certificados SSL de Let's Encrypt es utilizar Caddy.
Añadiremos el servicio Caddy a nuestro docker-compose.yaml:
  caddy:
    image: caddy:latest
    container_name: caddy
    restart: always
    ports:
      - "80:80"
      - "443:443"
      - "443:443/udp"
    volumes:
      - ./Caddyfile:/etc/caddy/Caddyfile
      - caddy_data:/data
      - caddy_config:/config

volumes:
  caddy_data:
  caddy_config:
Crearemos el archivo Caddyfile en el directorio ~/headscale. Reemplace vpn.yourdomain.com con su dominio real (debe apuntar a la IP de su VPS de Valebyte):
vpn.yourdomain.com {
    reverse_proxy headscale:8080
}
6. Configuración profunda de Headscale
Ahora necesitamos crear el archivo de configuración principal config.yaml en la carpeta ./config. Puede descargar una plantilla del repositorio oficial, pero aquí están los parámetros clave que deben cambiarse:
# Descargamos la configuración por defecto
wget https://raw.githubusercontent.com/juanfont/headscale/main/config-example.yaml -O ./config/config.yaml
Edite ./config/config.yaml, prestando atención a las siguientes líneas:
server_url: https://vpn.yourdomain.com— su URL externa.listen_addr: 0.0.0.0:8080— dirección dentro del contenedor.ip_prefixes: - 100.64.0.0/10— rango estándar de Tailscale.magic_dns: true— activación de DNS interno.
Después de la configuración, inicie los contenedores:
sudo docker compose up -d
Verifique los registros para asegurarse de que todo se haya iniciado correctamente:
sudo docker compose logs -f headscale
¿Buscas un servidor que simplemente funcione?
Valebyte VPS — NVMe, soporte 24/7, despliegue en 60 segundos.
7. Conexión de clientes (Linux, Windows, Android)
7. Conexión de clientes (Linux, Windows, Android)
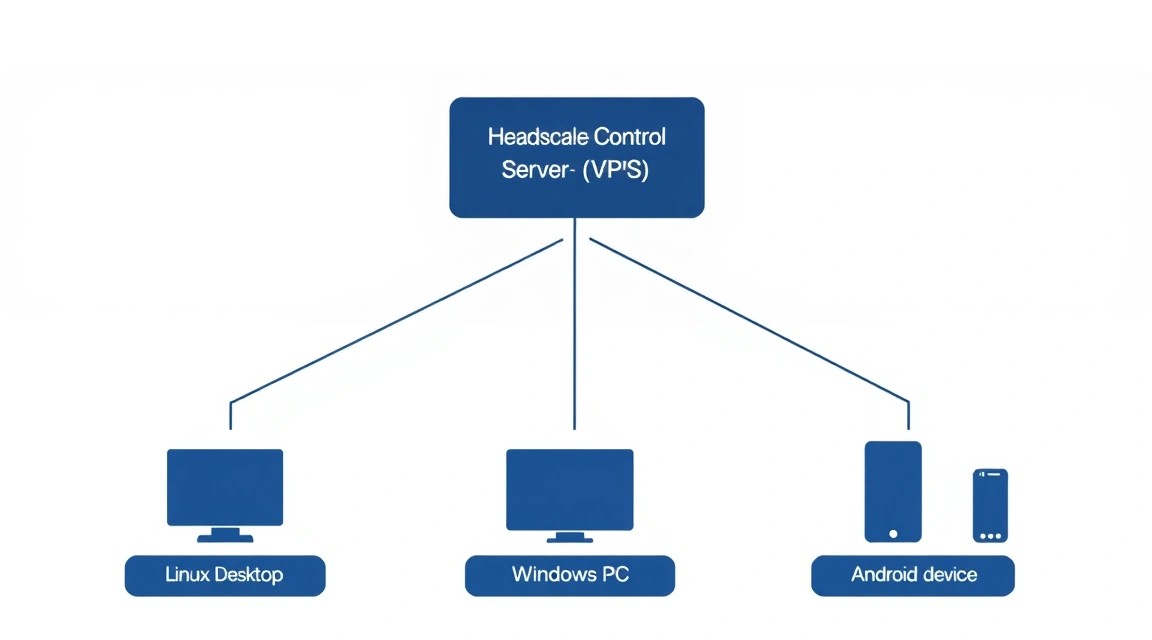
Para conectar dispositivos, necesitará el cliente oficial de Tailscale. Sin embargo, por defecto intenta conectarse a la nube de Tailscale. Necesitamos redirigirlo a nuestro Headscale.
Creación de usuario (User)
En Headscale, los dispositivos se agrupan por usuarios. Crearemos el primer usuario "admin":
sudo docker exec headscale headscale users create admin
Conexión del cliente Linux
# Instalamos Tailscale
curl -fsSL https://tailscale.com/install.sh | sh

# Nos autenticamos en nuestro Headscale
tailscale up --login-server https://vpn.yourdomain.com
El comando mostrará un enlace único. Ábralo (o copie el código) y ejecute el comando de registro en el servidor:
sudo docker exec headscale headscale nodes register --user admin --key [SU_CLAVE_DEL_ENLACE]
Conexión Windows/macOS
Para Windows, debe iniciar Tailscale e ir a la dirección de su panel de control en el navegador, o usar parámetros de registro especiales para cambiar el LoginURL. En 2026, en el cliente Tailscale basta con mantener presionada la tecla Alt al hacer clic en el icono de la bandeja para seleccionar la opción "Change Server".
Conexión Android/iOS
En la aplicación móvil, debe presionar rápidamente 3 veces el logotipo de "Tailscale" en el menú de configuración. Esto abrirá el campo oculto "Server URL", donde debe ingresar https://vpn.yourdomain.com.
8. Copias de seguridad y mantenimiento del sistema
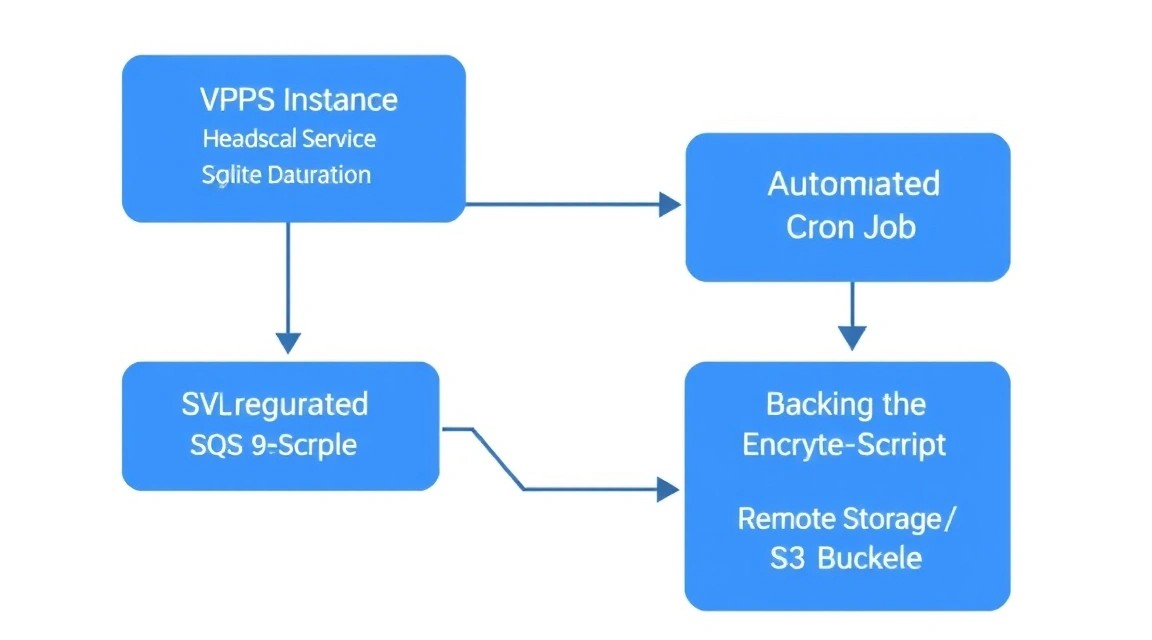
Su servidor Headscale es ahora un punto crítico de la infraestructura. Si pierde la base de datos, tendrá que volver a configurar todos los clientes desde cero.
Qué se debe respaldar:
~/headscale/data/db.sqlite(lo más importante).~/headscale/config/config.yaml.- Claves privadas del servidor (ubicadas en
./config).
Ejemplo de un script de respaldo simple (backup.sh):
#!/bin/bash
BACKUP_DIR="/backups/headscale"
TIMESTAMP=$(date +"%Y%m%d_%H%M%S")
mkdir -p $BACKUP_DIR

# Detener el contenedor para la integridad de la BD
docker stop headscale
cp ~/headscale/data/db.sqlite $BACKUP_DIR/db_$TIMESTAMP.sqlite
docker start headscale

# Eliminar respaldos antiguos (más de 30 días)
find $BACKUP_DIR -type f -mtime +30 -delete
Se recomienda configurar el envío de estos respaldos a un almacenamiento externo u otro VPS de Valebyte para una máxima seguridad.
¿Buscas un servidor que simplemente funcione?
Valebyte VPS — NVMe, soporte 24/7, despliegue en 60 segundos.
9. Solución de problemas + FAQ
Qué error → qué comprobar → cómo solucionar
Problema: Los clientes no se ven entre sí (el ping falla).
Solución: Verifique el estado de los nodos con el comando headscale nodes list. Asegúrese de que los clientes no tengan un Firewall estricto activado que bloquee el tráfico UDP de WireGuard. Intente ejecutar tailscale ping [dirección_IP] para diagnosticar la ruta.
Problema: Caddy no puede obtener el certificado SSL.
Solución: Asegúrese de que los puertos 80 y 443 estén abiertos en ufw y que su dominio realmente apunte a la IP de su VPS. Verifique los límites de Let's Encrypt.
¿Qué configuración de Valebyte es la mínima adecuada?
Para Headscale con 10-20 dispositivos, el plan más básico VPS-1 es suficiente. Headscale consume alrededor de 50-100 MB de memoria RAM. El recurso principal que podría ser necesario con un uso activo es el tráfico de red, si utiliza el servidor como Exit Node.
¿Qué elegir: VPS o dedicado para esta tarea?
Para el servidor de control Headscale, un VPS es la opción ideal. Un servidor dedicado (Dedicated) sería excesivo, ya que el procesador estará inactivo el 99% del tiempo. El dedicado solo debe considerarse si planea desplegar en la misma máquina un potente relé DERP para miles de dispositivos conectados simultáneamente con un tráfico enorme.
¿Se puede ocultar el hecho de usar una VPN?
Dado que Headscale utiliza WireGuard, su tráfico puede ser identificado mediante DPI. Sin embargo, gracias a la estructura Mesh, la mayor parte del tráfico va directamente entre sus dispositivos, lo que dificulta el bloqueo de toda la red. Para evadir la inspección profunda de paquetes en 2026, a menudo se utiliza una combinación con Shadowsocks o VLESS.
¿Cómo actualizar Headscale?
Basta con ejecutar:
docker compose pull
docker compose up -d
Docker actualizará automáticamente la imagen a la última versión y reiniciará el contenedor conservando todos los datos.
10. Conclusiones y próximos pasos
Hemos desplegado con éxito Headscale en un VPS, configurado SSL automático y conectado los primeros dispositivos. Ahora tiene su propia red Mesh, totalmente bajo su control, que funciona de manera más rápida y estable que las VPN tradicionales.
Sus próximos pasos:
- Configure ACL (Access Control Lists) en
config.yamlpara restringir el acceso entre dispositivos (por ejemplo, prohibir que un smartphone acceda al servidor de respaldos). - Levante su propio servidor DERP (Relay) si sus dispositivos se encuentran a menudo detrás de firewalls corporativos estrictos.
- Configure un Exit Node en el servidor de Valebyte para acceder a Internet a través de la IP del servidor cuando esté en una red Wi-Fi pública.
Si aún no ha elegido un servidor para su Headscale, eche un vistazo a los planes VPS de Valebyte. La alta velocidad de los discos NVMe y la excelente conectividad en Europa garantizarán el establecimiento instantáneo de conexiones en su nueva red Mesh.