XCP-ng and Xen Orchestra on Dedicated: A Free VMware ESXi Alternative
TL;DR
In this detailed guide, we will set up the powerful and free XCP-ng virtualization platform on a dedicated server, then deploy and configure Xen Orchestra for intuitive virtual machine management. You will get a reliable infrastructure for running any services—from web applications and databases to game servers and blockchain nodes—with full control over resources and data, avoiding vendor lock-in to proprietary solutions.
- Installing XCP-ng 8.4 LTS on a dedicated server to create a high-performance hypervisor.
- Deploying Xen Orchestra Community Edition (XOCE) in a virtual machine for centralized management.
- Configuring secure remote access and basic network settings.
- Integrating TLS/HTTPS for Xen Orchestra using Caddy for secure access to the web interface.
- Recommendations for virtual machine backups and maintenance of the entire infrastructure.
- Practical advice on hardware selection and troubleshooting common issues.
What We Are Setting Up and Why
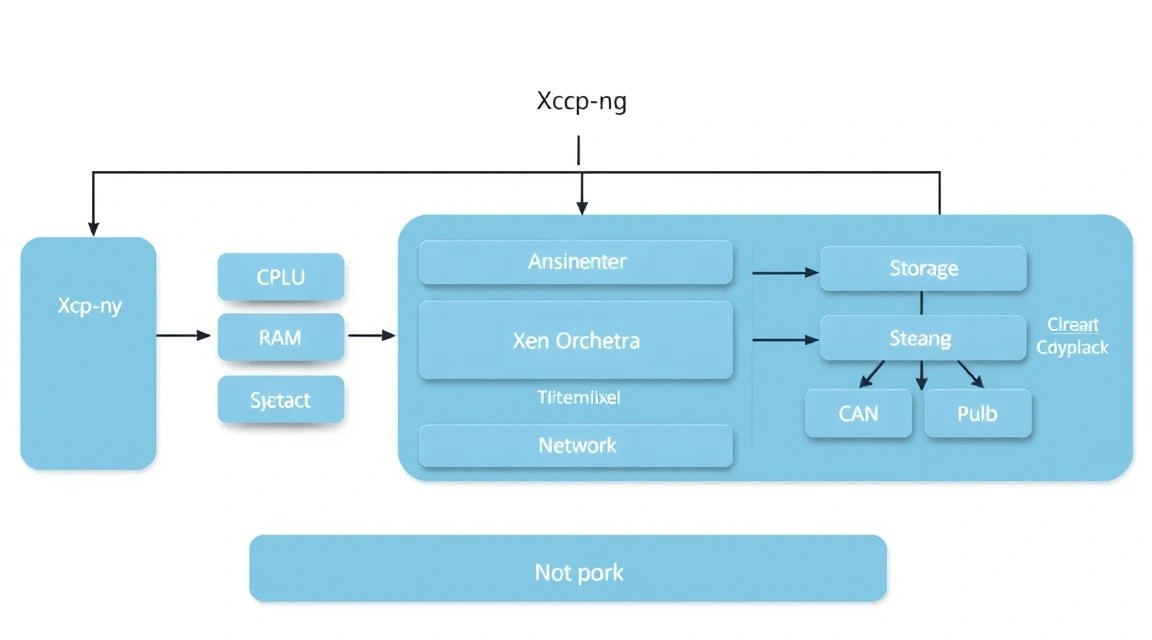
In this guide, we will create a complete virtualization platform using XCP-ng and Xen Orchestra. XCP-ng (Xen Cloud Platform - next generation) is a powerful open-source hypervisor based on XenProject that transforms your dedicated server into a powerful machine for running multiple virtual machines. It is a direct and fully functional alternative to commercial solutions such as VMware ESXi or Microsoft Hyper-V, while being completely free and fully open.
Xen Orchestra (XO) is a web-based management interface for XCP-ng (and XenServer) that provides intuitive tools for creating, starting, monitoring, and administering virtual machines. With it, you can easily manage your entire virtual infrastructure from anywhere in the world through a web browser, without having to use the XCP-ng command line directly.
What will the reader get in the end? You will gain full control over your hardware, the ability to efficiently allocate resources among different projects, run isolated environments for development, testing, or production, and build fault-tolerant solutions. This is an ideal choice for developers, startups, crypto enthusiasts, and anyone who values the independence and performance of their server.
Alternatives: Cloud-Managed vs Self-Hosted
There are two main approaches to infrastructure deployment: using cloud services (cloud-managed) or self-hosting (self-hosted) on a VPS/dedicated server.
- Cloud-managed (for example, AWS EC2, Google Compute Engine, Azure Virtual Machines): This is convenient, scales quickly, and does not require extensive infrastructure administration expertise. You pay for the resources you use, while the provider handles the hardware, network, and base software. However, this can be significantly more expensive under sustained workloads, and you are limited by the capabilities and API of a specific provider.
- Self-hosted on a VPS: A more cost-effective option that provides greater control. You rent a virtual server and fully manage its software. It is suitable for one or two tasks, but can be inefficient for full virtualization with several VMs, since a VPS is already a virtual machine itself, and running a hypervisor inside it (nested virtualization) is possible but less performant and not always supported.
- Self-hosted on a Dedicated Server (our case): Maximum control, performance, and flexibility. You rent a physical server on which you can install XCP-ng as the base operating system. This allows you to use all hardware resources without host-level virtualization overhead, create numerous virtual machines, and configure complex networks and storage systems. It is the most cost-effective option for scalable and resource-intensive projects in the long term, especially when high I/O performance or specific hardware is required.
What Dedicated Configuration Is Needed for This Task
Choosing hardware for XCP-ng is critically important, as it will be the foundation for all your virtual machines. XCP-ng is installed directly on bare metal, turning your dedicated server into a hypervisor.
Minimum Requirements (for home or testing workloads):
- CPU: A 4-core processor (for example, Intel Xeon E3-12xx v5/v6 or AMD Ryzen 3xxx/5xxx) with hardware virtualization support (Intel VT-x/EPT or AMD-V/RVI).
- RAM: At least 16 GB of ECC RAM. The more VMs you plan to run, the more RAM you will need.
- Disk: 2x 240 GB SSD in RAID1 for the XCP-ng operating system and basic VMs. Additional storage will be required for VM data. NVMe is preferable for high I/O performance.
- Network: 1x Gigabit Ethernet port.
Recommended Dedicated Plan (for production and scaling):
For most production workloads, such as running GitLab, multiple Mattermost instances, game servers, or Bitcoin/Ethereum nodes, you will need a more powerful configuration:
- CPU: 8-16 cores (for example, Intel Xeon E5-26xx v3/v4 or AMD EPYC 7xxx) with hardware virtualization support. Core frequency is more important than core count for some workloads.
- RAM: 64-128 GB ECC RAM. This will allow you to comfortably host several resource-intensive VMs.
- Disk:
- 2x 480 GB NVMe SSD in RAID1 for the XCP-ng OS and high-performance VMs.
- Additionally: 2-4 TB NVMe/SSD or HDD (depending on capacity and speed requirements) for shared data and less critical VMs, also in RAID1 or RAID10.
- Network: 2x 10 Gigabit Ethernet ports to ensure high bandwidth and fault tolerance.
To rent a suitable dedicated server with these specifications, make sure to select a configuration with sufficient RAM and fast NVMe drives. This will ensure stable and high-performance operation of your virtual infrastructure.
When You Need a Dedicated Server Instead of a VPS
A dedicated server is needed when:
- Maximum performance and minimal I/O latency, unattainable on a VPS, are required.
- Full control over hardware is needed, including the choice of RAID controllers, network cards, and GPUs.
- You plan to run a large number of virtual machines or containers requiring significant resources.
- Hardware virtualization (Intel VT-x/AMD-V) is needed for the hypervisor, which is not always available or efficient on a VPS (nested virtualization).
- Your budget allows investment in a more powerful solution that is more cost-effective per unit of resource in the long term.
- Specific regulatory requirements must be met where physical isolation is necessary.
Location: What It Affects
The choice of a dedicated server's geographical location affects several key factors:
- Latency: The closer the server is to your main audience or to you, the lower the latency will be. This is critical for interactive applications, game servers, or remote desktops.
- Legislation: Data protection laws (for example, GDPR in Europe) can be an important factor when choosing a server location.
- Cost: Dedicated server prices can vary by region due to differences in electricity costs, data center rental costs, and taxes.
For XCP-ng and Xen Orchestra, choose a location that provides the best connectivity to your users and meets your legal requirements.
Server Preparation
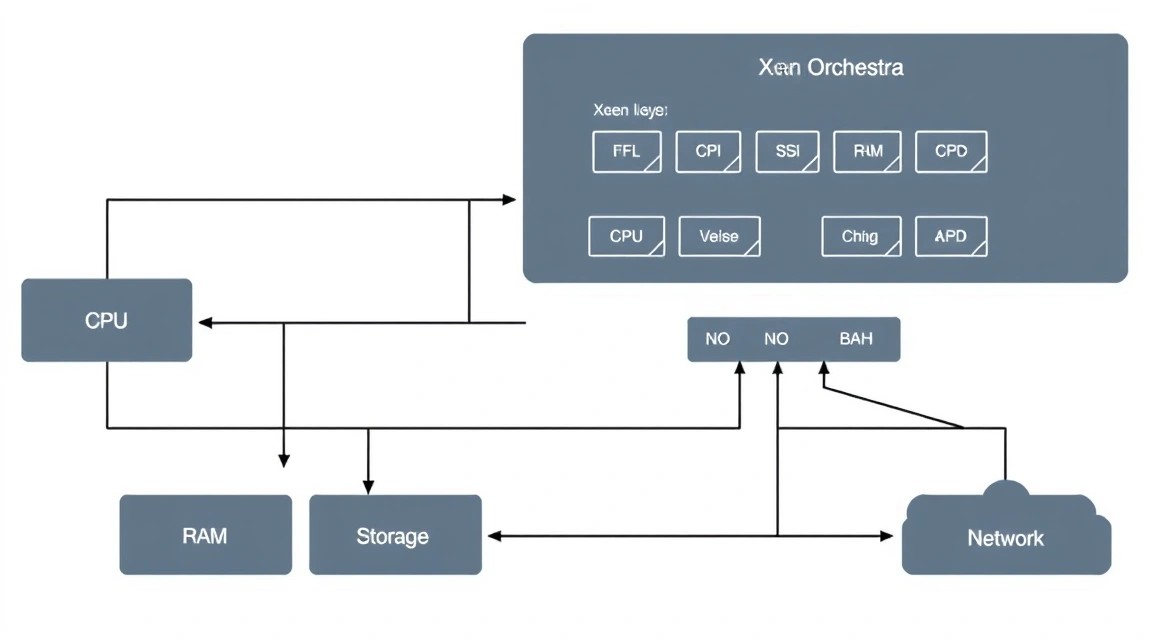
Preparing a dedicated server for XCP-ng installation differs from preparing a typical Linux server, because XCP-ng is a hypervisor operating system. The main preparation involves accessing the server console (IPMI/KVM) to boot the ISO image and perform the initial installation. After XCP-ng is installed, most basic security and management settings will be configured within XCP-ng or Xen Orchestra.
IPMI/KVM Access
Your dedicated server provider will give you access to a control panel where you can access IPMI (Intelligent Platform Management Interface) or KVM (Keyboard, Video, Mouse) over IP. This is critical for installing XCP-ng, as installation takes place through a graphical interface rather than via SSH.
Steps:
- Log in to your dedicated server control panel.
- Find the "IPMI", "KVM", or "Remote Console" section.
- Launch the KVM console. It may be a Java applet, an HTML5 client, or a VNC client.
- Make sure you can boot the XCP-ng ISO image through KVM (for example, by mounting an ISO from a local file or via URL).
Firmware Update (optional, but recommended)
Before installing XCP-ng, it is recommended to update your server's firmware (BIOS/UEFI, RAID controllers, network cards) to the latest stable versions. This can improve compatibility, performance, and stability. The update process depends on the server manufacturer (Dell, HP, Supermicro, etc.) and is usually performed through IPMI or a bootable USB drive.
Warning: Updating firmware is a risky operation. Perform it strictly according to the manufacturer's instructions.
RAID Configuration (if applicable)
If your server has a hardware RAID controller, configure it before installing XCP-ng. RAID1 (mirroring) is typically used for the disks on which XCP-ng will be installed to provide fault tolerance. RAID10 can be used for virtual machine storage disks to ensure performance and fault tolerance, or RAID5/6 for greater capacity at a lower cost.
Example RAID configuration (through KVM, in the RAID controller BIOS/UEFI):
- Restart the server and enter the RAID controller setup menu (usually by pressing Ctrl+R, Ctrl+M, or Fx during boot).
- Create a new "Virtual Disk" (VD) or "Logical Drive" (LD) for XCP-ng (for example, from two SSDs in RAID1).
- Create additional VD/LD for virtual machine storage (for example, from NVMe drives in RAID1 or RAID10).
- Save the settings and exit the RAID configuration utility.
Your server is now ready to install XCP-ng.
Software Installation — Step by Step
This section covers installing XCP-ng on a dedicated server and then installing Xen Orchestra in a virtual machine running under XCP-ng.
1. Installing XCP-ng 8.4 LTS on a Dedicated Server
We assume that by 2026, XCP-ng 8.4 LTS will be the current stable version. XCP-ng is installed through an interactive graphical installer, which we access via KVM/IPMI.
-
Downloading the XCP-ng ISO image:
Download the current XCP-ng 8.4 LTS ISO image from the official XCP-ng.com website. Through your provider's KVM console, mount this ISO image as a virtual drive or specify a URL to download it.
-
Booting the server from the ISO image:
Restart the dedicated server and ensure that it boots from the mounted ISO image. You may need to change the boot order in BIOS/UEFI through KVM.
-
Starting the XCP-ng installation:
After booting, you will see the installer menu. Select "install" or "Install XCP-ng".
# Выберите "Install XCP-ng" в загрузочном менюWhat the command does: Starts the XCP-ng hypervisor installation process.
-
Selecting the language and keyboard layout:
Follow the on-screen instructions and select your preferred language and keyboard layout.
-
Accepting the license agreement:
Read and accept the End User License Agreement (EULA).
-
Selecting the installation disk:
Select the disk (or RAID logical volume) on which XCP-ng will be installed. Ensure that this is the correct disk, as all data on it will be erased.
# Выберите диск/RAID-том для установки XCP-ng OS
# Например: /dev/sda или /dev/mapper/vg_xcpng-lv_root
What the command does: Defines the target storage for the hypervisor installation.
-
Selecting the storage type (Thin Provisioning):
You will be prompted to choose whether to use thin provisioning. For most cases, this is a good choice because it allows disk space to be used more efficiently.
# Выберите "Enable thin provisioning"What the command does: Configures flexible disk space management for VMs.
-
Configuring the network interface:
Select the network adapter to be used for XCP-ng management. Configure the IP address, subnet mask, gateway, and DNS servers. Using a static IP address is recommended.
# Настройте статический IP-адрес, маску, шлюз, DNS
# Например: IP 192.168.1.100, Netmask 255.255.255.0, Gateway 192.168.1.1, DNS 8.8.8.8
What the command does: Defines network settings for accessing XCP-ng.
-
Selecting the time zone and configuring NTP:
Set the correct time zone and configure NTP servers for time synchronization (for example,
pool.ntp.org). -
Setting the root password:
Set a strong password for the
rootuser. This password will be used to access the XCP-ng console and via SSH. -
Confirming and starting installation:
Review the configuration summary and confirm the start of the installation.
# Подтвердите, чтобы начать установкуWhat the command does: Starts file copying and system configuration.
-
Rebooting:
After the installation is complete, remove the installation media (disconnect the ISO in KVM) and reboot the server.
# Перезагрузите сервер после установкиWhat the command does: Completes the installation and starts XCP-ng.
After rebooting, XCP-ng will be running. You will be able to access its console through KVM as well as via SSH using the IP address you configured.
2. Installing Xen Orchestra Community Edition (XOCE) in a VM
We will install XOCE from source code in a separate virtual machine on XCP-ng. This is the recommended approach because it isolates management from the hypervisor.
-
Creating a VM for Xen Orchestra:
Log in to the XCP-ng console via SSH or KVM. Use the
xe vm-installcommand to create a new VM. Debian 12 (Bookworm) or Ubuntu 24.04 LTS is recommended for Xen Orchestra.# Подключитесь к XCP-ng по SSH ssh root@# Создайте VM с 2 vCPU, 4GB RAM и 40GB диском # Используем шаблон для Ubuntu 24.04 LTS (или Debian 12) # Сначала найдем UUID шаблона TEMPLATE_UUID=$(xe template-list name-label="Ubuntu 24.04 (64-bit)" --minimal) # Если шаблон не найден, попробуйте "Debian 12 (64-bit)" if [ -z "$TEMPLATE_UUID" ]; then TEMPLATE_UUID=$(xe template-list name-label="Debian 12 (64-bit)" --minimal) fi VM_UUID=$(xe vm-install template="$TEMPLATE_UUID" new-name-label="Xen Orchestra VM") xe vm-param-set uuid=$VM_UUID memory-static-max=4294967296 xe vm-param-set uuid=$VM_UUID memory-dynamic-max=4294967296 xe vm-param-set uuid=$VM_UUID memory-static-min=4294967296 xe vm-param-set uuid=$VM_UUID memory-dynamic-min=4294967296 xe vm-param-set uuid=$VM_UUID VCPUs-max=2 xe vm-param-set uuid=$VM_UUID VCPUs-at-startup=2 # Создайте новый VDI (виртуальный диск) для VM SR_UUID=$(xe sr-list content-type=user device-config:device=/dev/sdb --minimal) # Замените /dev/sdb на ваш SR if [ -z "$SR_UUID" ]; then SR_UUID=$(xe sr-list content-type=user --minimal) # Если есть только один SR fi VDI_UUID=$(xe vdi-create sr-uuid=$SR_UUID name-label="Xen Orchestra Disk" virtual-size=40GiB type=system) VBD_UUID=$(xe vbd-create vm-uuid=$VM_UUID vdi-uuid=$VDI_UUID device=0) xe vbd-param-set uuid=$VBD_UUID bootable=true # Подключите ISO-образ Ubuntu 24.04 LTS (или Debian 12) # Сначала загрузите ISO на XCP-ng, если еще не сделали # Например, через SCP: scp ubuntu-24.04-live-server-amd64.iso root@ :/var/run/sr-mount/YOUR_SR_UUID/ # Затем создайте ISO SR, если его нет, или используйте существующий # Либо просто укажите URL в KVM или Xen Orchestra после установки # В данном случае, мы будем использовать сетевую установку или загрузку ISO через Xen Orchestra после его настройки. # Для начала просто запустим VM и подключимся через KVM XCP-ng, чтобы установить ОС. # Запустите VM xe vm-start uuid=$VM_UUID What the command does: Creates a new virtual machine with the specified resource and disk parameters, then starts it.
-
Installing the OS (Ubuntu 24.04 LTS) in the Xen Orchestra VM:
Connect to the console of the created VM through XCP-ng KVM (
xe console vm-uuid=$VM_UUID) or through the Xen Orchestra web interface after deployment. Perform a standard Ubuntu 24.04 LTS (Server) installation. Create a non-root user, configure SSH access, and update the system.# В консоли VM выполните: sudo apt update && sudo apt upgrade -y sudo apt install -y git curl build-essentialWhat the command does: Updates packages and installs the basic utilities required to build Xen Orchestra.
-
Installing Xen Orchestra Community Edition (XOCE):
To simplify the installation of XOCE from source, you can use the
xo-installscript. It automates the installation of all dependencies and the XOCE build process.# Внутри Xen Orchestra VM (как обычный пользователь, не root): sudo apt install -y nodejs npm # Node.js 20.x или выше для 2026 года sudo npm install -g yarn # Установка Yarn git clone -b master https://github.com/vatesfr/xo-web.git git clone -b master https://github.com/vatesfr/xo-server.git git clone -b master https://github.com/vatesfr/xen-orchestra-web.git # Это старый репозиторий, используем xo-web # А лучше использовать готовый скрипт, чтобы не мучиться с зависимостями: # Установка скрипта xo-install (актуально для 2026 года) # Убедитесь, что у вас установленgitgit clone https://github.com/ronivay/XenOrchestraInstaller.git cd XenOrchestraInstaller chmod +x xo-install.sh sudo ./xo-install.sh --install # Следуйте инструкциям скрипта. Он установит все необходимые зависимости (Node.js, Yarn и т.д.) # и скомпилирует Xen Orchestra.What the command does: Downloads and runs a script that automates the installation of Node.js, Yarn, cloning Xen Orchestra repositories, and compiling all XOCE components.
-
Starting and verifying Xen Orchestra:
After the script finishes, Xen Orchestra should be running as a system service. Check its status.
# Внутри Xen Orchestra VM:
sudo systemctl status xo-server
sudo systemctl status xo-web
What the command does: Verifies that the Xen Orchestra services are started and running.
If everything is in order, Xen Orchestra will be available at your VM's IP address on port 80 (HTTP) or 443 (HTTPS, if configured). Enter the VM's IP address in your browser (for example,
http://192.168.1.101). -
Connecting the XCP-ng host to Xen Orchestra:
When you first log in to the Xen Orchestra web interface, you will be prompted to create an administrator account. After that, you can add your XCP-ng host.
- Go to the "Settings" -> "Servers" section.
- Click "Add server".
- Enter your XCP-ng host IP address, username (root), and password.
- Click "Connect".
You can now manage your XCP-ng host and all VMs through Xen Orchestra.
Configuration
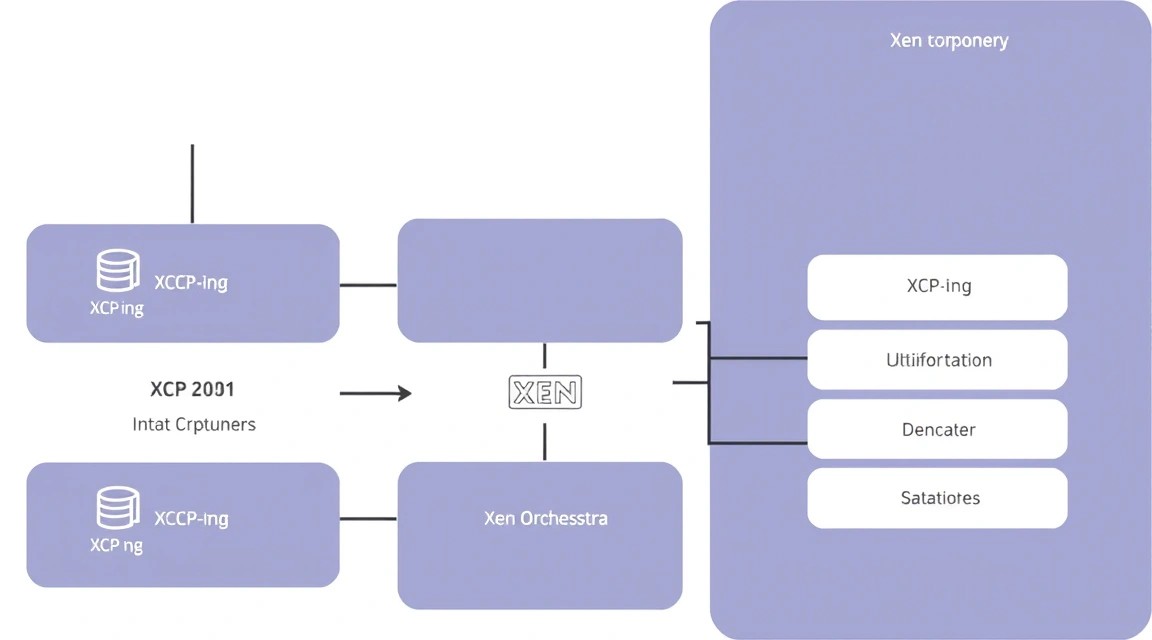
After installing XCP-ng and Xen Orchestra, you need to perform basic configuration to ensure security, availability, and ease of use.
1. Configuring XCP-ng Network Settings
Although you configured the network during installation, additional setup may be required, such as creating separate networks for different VMs or VLANs. These settings are best configured through Xen Orchestra.
- Adding a network: In Xen Orchestra, go to "Network" -> "New Network". You can create an "External network" (connected to a physical adapter) or an "Internal network" (for VMs within the host only).
- VLANs: If your switch supports VLANs, you can create VLAN networks in XCP-ng by specifying the appropriate VLAN ID.
2. Xen Orchestra Configuration (TLS/HTTPS)
Accessing the Xen Orchestra web interface over HTTP is insecure. Let's configure HTTPS using Caddy, which automatically obtains and renews Let's Encrypt SSL certificates.
Prerequisites:
- Make sure your Xen Orchestra VM has a domain name (for example,
xo.yourdomain.com) and that the DNS record (A record) points to your VM's public IP address. If the VM is behind NAT, you will need to forward ports (80 and 443) on the router to the VM's IP address. - If you use the
xo-install.shscript, it may have already configured Nginx or Caddy. Check the configuration if so. If not, or if you want to use Caddy instead of Nginx, follow the instructions below.
Installing Caddy (on the Xen Orchestra VM):
# Add the Caddy repository
sudo apt install -y debian-keyring debian-archive-keyring apt-transport-https
curl -1sLf 'https://dl.cloudsmith.io/public/caddy/stable/gpg.key' | sudo gpg --dearmor -o /usr/share/keyrings/caddy-stable-archive-keyring.gpg
curl -1sLf 'https://dl.cloudsmith.io/public/caddy/stable/debian.deb.txt' | sudo tee /etc/apt/sources.list.d/caddy-stable.list
sudo apt update
sudo apt install -y caddy
What the command does: Installs the Caddy web server, which will act as a reverse proxy and handle TLS certificates.
Configuring the Caddyfile (on the Xen Orchestra VM):
Create or edit the /etc/caddy/Caddyfile file. Remove all existing content and add the following:
# Open the Caddyfile
sudo nano /etc/caddy/Caddyfile
What the command does: Opens the Caddy configuration file for editing.
Contents of /etc/caddy/Caddyfile:
xo.yourdomain.com {
    reverse_proxy localhost:8000 # Port on which xo-server listens
    # If xo-web listens on a different port, change it here
    # For example, if xo-web listens on 8080
    # reverse_proxy localhost:8080

    # Recommended security settings (for 2026)
    header {
        Strict-Transport-Security "max-age=31536000; includeSubDomains; preload"
        X-Frame-Options "DENY"
        X-Content-Type-Options "nosniff"
        Referrer-Policy "strict-origin-when-cross-origin"
        Permissions-Policy "geolocation=(), microphone=(), camera=()"
    }
}
What the command does: Configures Caddy to proxy requests from the xo.yourdomain.com domain name to the local Xen Orchestra port (usually 8000 for xo-server or 8080 for xo-web) and automatically obtains/renews SSL certificates.
Checking and starting Caddy:
# Check Caddyfile syntax
sudo caddy validate --config /etc/caddy/Caddyfile

# Restart Caddy to apply changes
sudo systemctl reload caddy
What the command does: Checks the Caddy configuration and reloads the service to enable HTTPS.
Xen Orchestra should now be available at https://xo.yourdomain.com.
3. Configuring NTP Synchronization for XCP-ng
Make sure your XCP-ng host synchronizes its time; this is important for the proper operation of VMs and backups.
# In the XCP-ng console (via SSH)
xe host-param-set uuid= ntp-servers="0.pool.ntp.org,1.pool.ntp.org,2.pool.ntp.org"
# To get the host UUID: xe host-list --minimal
What the command does: Sets the list of NTP servers for the XCP-ng host.
4. Verifying Operation
- Access to Xen Orchestra: Open
https://xo.yourdomain.comin a browser. Make sure you can see the web interface and log in. - XCP-ng connection: In Xen Orchestra, verify that your XCP-ng host is connected and displays the correct status, resources, and list of VMs.
- Creating a test VM: Try creating a simple VM (for example, with Ubuntu Server), starting it, and connecting to it through the console in Xen Orchestra. This will confirm that the entire virtualization chain is working.
- Checking networking in the VM: Inside the test VM, make sure it receives an IP address and has Internet access (
ping google.com).
Backups and Maintenance
Reliable backup and regular maintenance are key aspects of any production infrastructure. Xen Orchestra provides powerful built-in tools for managing XCP-ng backups.
What to Back Up
- Virtual machines (VMs): These are the most important data. VM backups include the operating system, applications, configurations, and user data.
- XCP-ng configuration: Although XCP-ng is relatively easy to reinstall, preserving its configuration (network settings, SRs, pools) can save time during recovery.
- Xen Orchestra configuration: Settings, users, connected servers, and backup schedules.
Backups with Xen Orchestra
Xen Orchestra offers "Backup jobs" functionality, which allows you to automate the process. XOCE supports various backup types (full backups, delta backups, snapshots) and storage options (SMB/NFS shares, S3-compatible storage).
Example of configuring a backup job in Xen Orchestra:
-
Adding Remote Storage:
In Xen Orchestra, go to "Settings" -> "Remote Storage". Add new storage. You can use:
- NFS/SMB Share: This requires a separate server (NAS, another VPS) with an NFS/SMB share configured.
- S3-compatible storage: For example, MinIO on a separate VPS, or cloud S3 services.
-
Creating a backup job:
Go to "Backups" -> "New Backup".
- Name: Give the job a name (for example, "Daily Critical VMs Backup").
- Mode: Choose "Delta backup" (recommended to save space and time) or "Full backup".
- Type: Choose "VM backup" or "VM snapshot".
- Schedule: Configure the schedule (for example, daily at 02:00).
- Target: Select the previously configured remote storage.
- VMs: Select the virtual machines to back up. You can select them by tags, pools, or individual VMs.
- Retention: Configure the retention policy (for example, keep the last 7 backups).
Save the job. Xen Orchestra will automatically run backups according to the schedule.
Simple XCP-ng Configuration Auto-Backup Script (Optional)
Although Xen Orchestra backs up VMs, it is useful to have a separate copy of critical XCP-ng files. This script can be run via cron on the Xen Orchestra VM or another server that has SSH access to XCP-ng.
#!/bin/bash

# Settings
XCPNG_HOST=""
BACKUP_DIR="/mnt/backup_xcpng_configs" # Path to the NFS/SMB/S3FS mount on your XO VM
TIMESTAMP=$(date +%Y%m%d%H%M%S)
CONFIG_FILE="xcpng_config_${TIMESTAMP}.tar.gz"

# Create the backup directory if it does not exist
mkdir -p "$BACKUP_DIR"

echo "Starting XCP-ng configuration backup..."

# Export the XAPI database
ssh root@$XCPNG_HOST "xe pool-dump-database file=/tmp/pool_database.bak"
ssh root@$XCPNG_HOST "tar -czf /tmp/xcpng_config.tar.gz /etc/xensource /etc/network/interfaces /etc/hosts /tmp/pool_database.bak"
ssh root@$XCPNG_HOST "rm /tmp/pool_database.bak"

# Copy the archive to local Xen Orchestra VM storage
scp root@$XCPNG_HOST:/tmp/xcpng_config.tar.gz "$BACKUP_DIR/$CONFIG_FILE"
ssh root@$XCPNG_HOST "rm /tmp/xcpng_config.tar.gz"

echo "XCP-ng configuration backup completed: $BACKUP_DIR/$CONFIG_FILE"

# Delete old backups (for example, older than 30 days)
find "$BACKUP_DIR" -name "xcpng_config_*.tar.gz" -mtime +30 -delete
echo "Old backups deleted."
What the command does: Connects to the XCP-ng host, exports its database, archives key configuration files, copies them to remote storage, and deletes old copies.
Where to store backups: It is recommended to use external S3-compatible storage (for example, Backblaze B2, DigitalOcean Spaces, or your own MinIO on another VPS) or a separate NAS/VPS with an NFS/SMB share. Never store the only backup copies on the same server as the original data.
Updates: Rolling vs Maintenance Window
- XCP-ng: XCP-ng updates (so-called "hotfixes" or new versions) require a host reboot. For production environments, it is recommended to schedule a "maintenance window" during which VMs will be shut down or migrated to another host (if you have an XCP-ng pool). XCP-ng Center (Windows client) or Xen Orchestra can be used to apply updates.
- Xen Orchestra VM: Regularly update the VM operating system (Ubuntu/Debian) and Xen Orchestra itself. For XOCE installed from source, this usually involves
git pullin thexo-serverandxo-webrepositories, followed by rebuilding and restarting the services.
# Update Xen Orchestra (on the Xen Orchestra VM)
cd /opt/xen-orchestra/packages/xo-server # Or the path where xo-server is installed
git pull origin master
yarn
yarn build
sudo systemctl restart xo-server

cd /opt/xen-orchestra/packages/xo-web # Or the path where xo-web is installed
git pull origin master
yarn
yarn build
sudo systemctl restart xo-web
What the command does: Updates Xen Orchestra source code from GitHub, rebuilds it, and restarts the relevant services.
Important: Always back up the Xen Orchestra VM before significant updates.
Troubleshooting + FAQ
XCP-ng does not boot after installation. What should I do?
Check the boot order in BIOS/UEFI via KVM/IPMI. Make sure the server is attempting to boot from the disk where XCP-ng was installed. The issue may be related to RAID controller configuration or a corrupted boot record. Try reinstalling XCP-ng, carefully selecting the correct disk.
I cannot connect to XCP-ng via SSH.
Make sure the XCP-ng host has the correct IP address and is on the same network as your machine. Check that the SSH server is running on XCP-ng (it is enabled by default). If you changed the SSH port, use the new port. Make sure there is no firewall blocking access on your computer or between your network and XCP-ng. As a last resort, access it through KVM and check the network settings and SSH service status.
Xen Orchestra cannot see the XCP-ng host or cannot connect to it.
Check the XCP-ng host IP address and credentials (root and password) you enter in Xen Orchestra. Make sure there is network connectivity between the Xen Orchestra VM and the XCP-ng host (ping from the XO VM). Check that port 443 (HTTPS) or 80 (HTTP) for XAPI is not blocked on the XCP-ng host. Restarting XCP-ng (reboot) or Xen Orchestra services (sudo systemctl restart xo-server xo-web) can sometimes help.
The Xen Orchestra web interface is unavailable via HTTPS after configuring Caddy.
Check that the DNS record for your domain (for example, xo.yourdomain.com) correctly points to the public IP address of your Xen Orchestra VM. Make sure ports 80 and 443 are open in your VM firewall (if present) and on the router/provider side (if the VM is behind NAT). Check the Caddy logs (sudo journalctl -u caddy --since "5 minutes ago") for errors when obtaining a Let's Encrypt certificate. Make sure the Caddyfile is configured correctly and Caddy has been restarted.
What is the minimum dedicated configuration suitable for XCP-ng and Xen Orchestra?
For basic operation with several lightweight virtual machines (for example, for development), you can start with a dedicated server with a 4-core processor (for example, Intel Xeon E3-12xx), 16-32 GB of ECC RAM, and a pair of 240-480 GB SSDs in RAID1. This will allow you to run XCP-ng, a Xen Orchestra VM, and 2-3 other VMs with moderate workloads.
What should I choose for this task — VPS or dedicated?
For deploying XCP-ng and Xen Orchestra, always choose a dedicated server. XCP-ng is a hypervisor that is installed directly on physical hardware. Although "nested virtualization" is theoretically possible on some VPSs, it significantly reduces performance, is not always supported by providers, and is not a recommended solution for production environments. A dedicated server provides full control over the hardware, maximum performance, and allows you to use all resources efficiently to create multiple virtual machines.
The VM is running slowly or freezing.
Check VM resource usage in Xen Orchestra: CPU, RAM, and disk I/O. The VM may not have enough allocated resources. Also check the load on the XCP-ng host. Make sure the disks hosting the VMs are not overloaded (high I/O latency). For Linux VMs, make sure Xen Tools (xe-guest-utilities) are installed; they improve performance and allow you to manage VMs from Xen Orchestra.
Conclusions and next steps
You have successfully deployed a powerful and flexible virtualization platform based on XCP-ng and Xen Orchestra on your dedicated server. You now have full control over your infrastructure, allowing you to manage resources efficiently and run any required services in isolated and scalable virtual environments. This free alternative to VMware ESXi provides enterprise-level functionality without licensing fees.
Where to go next:
- Performance optimization: Explore XCP-ng tuning options (for example, CPU scheduler and I/O configuration) and guest operating systems. Make sure Xen Tools are installed for all your VMs to achieve maximum performance.
- High availability and clustering: If you have several dedicated servers, consider creating an XCP-ng pool to provide high availability (HA) and live migration of virtual machines between hosts.
- Advanced network configuration: Experiment with more complex network configurations, such as creating virtual switches, link aggregation (LACP), or configuring software-defined networking (SDN) to isolate traffic and improve security.
- Automation and infrastructure as code: Integrate Xen Orchestra with automation tools such as Ansible, Terraform, or Packer to manage your virtual infrastructure programmatically and deploy VMs.