
Deploying Cachet on a VPS to Create a Public Service Status Page
TL;DR
In this detailed guide, we will step-by-step configure Cachet — a powerful and flexible solution for creating a public status page for your services. You will learn how to install and configure Cachet on a VPS running Ubuntu 24.04 LTS, using Nginx, PHP 8.4, and MySQL 8.0, as well as ensure security with HTTPS and organize a backup system. As a result, you will get a fully functional status page that will help effectively inform users about the availability of your services, planned maintenance, and incidents.
- Configuring Ubuntu 24.04 LTS, including SSH, firewall, and basic utilities.
- Step-by-step installation of all necessary components: Nginx, PHP 8.4, MySQL 8.0, and Composer.
- Detailed configuration of Cachet, including the database, environment variables, and Nginx web server.
- Enabling HTTPS using Caddy to ensure a secure connection.
- Creating a backup system to protect Cachet data and configurations.
- Solving typical problems and answering frequently asked questions.
What we are configuring and why
In the modern world, the stability and availability of online services are critical. Whether it's a SaaS platform, a game server, or a personal project, users expect uninterrupted operation. However, incidents, planned maintenance, or unforeseen failures are inevitable. In such situations, it is crucial to have an effective way to inform your audience. This is precisely what Cachet is designed for.
Cachet is an elegant and powerful open-source solution for creating a public status page. It allows you to transparently report the status of your services, publish notifications about planned maintenance, log incidents, and show their resolution history. By using Cachet, you increase user trust, reduce the load on support during outages, and demonstrate a professional approach to infrastructure management.
Ultimately, upon completing this guide, you will have a fully functional, secure, and maintainable status page hosted on your own VPS. You will be able to create components (e.g., "Web Server", "Database", "API"), link them to metrics, publish incidents with real-time updates, and inform subscribers through various channels.
There are various approaches to creating status pages. Some prefer to use cloud-managed services such as Statuspage.io (Atlassian), Instatus, Better Uptime, or Atlassian Opsgenie. These solutions offer convenience, ready-made integrations, and minimal setup costs, but often come with monthly payments, limitations on the number of components or subscribers, and less control over data and customization. For many projects, especially in early stages or with limited budgets, these costs can be significant.
An alternative approach is a self-hosted solution on your own VPS. This gives you full control over the infrastructure, data, and customization options. You only pay for the VPS, which often turns out to be significantly cheaper in the long run, especially if you already have a server. It also provides greater privacy, as all data is stored on your machine. Cachet is one of the best open-source solutions for self-hosting, offering rich functionality and an active community. This is the path we will choose in this guide, deploying Cachet on a VPS.
What VPS configuration is needed for this task
Choosing the right VPS for Cachet depends on the expected load, number of components, incidents, and subscribers. Cachet is not a resource-intensive application for most scenarios, but it is important to ensure stable operation of the web server, PHP-FPM, and the database.
Minimum requirements for Cachet (valid for 2026):
- Processor (CPU): 1-2 vCPU. For Cachet, one core of a modern processor (e.g., Intel Xeon E-series or AMD EPYC) is sufficient. If you plan to run other services on the same VPS or expect very high traffic, 2 vCPUs can be considered.
- Random Access Memory (RAM): 2 GB. This amount will be sufficient for the operating system (Ubuntu 24.04 LTS), Nginx web server, PHP-FPM, MySQL 8.0, and the Cachet application itself. For active use or a large number of visitors to the status page, 4 GB RAM will ensure more comfortable operation.
- Disk (Storage): 40 GB SSD. The main space will be occupied by the operating system (about 10-15 GB), Cachet files (several hundred megabytes), and the database. An SSD is critical for good database performance. For long-term perspective and backup storage, 60-80 GB is recommended. NVMe SSD will be an ideal choice for maximum performance.
- Network: 100 Mbps - 1 Gbps. For a status page that primarily serves static content and small amounts of data from the DB, 100 Mbps is usually sufficient. However, modern VPS often offer 1 Gbps ports, which is preferable for overall performance and scalability.
- Operating System: Ubuntu Server 24.04 LTS (or another modern LTS version of a Debian-based distribution).
Specific VPS plan for the task:
For a typical Cachet installation, capable of serving several thousand visitors per day and monitoring up to 20-30 components, a VPS with the following characteristics will be suitable: 2 vCPU, 4 GB RAM, 80 GB NVMe SSD, 1 Gbps port. This configuration will be more than sufficient for stable Cachet operation and potential functional expansion.
You can consider a VPS with the specified characteristics or similar offers from other providers.
When a dedicated server is needed, not a VPS:
Dedicated servers are usually required for much larger tasks than just a Cachet status page. Consider a dedicated server if:
- You plan to host Cachet along with dozens of other high-load services on a single machine.
- Very high I/O performance or specific hardware not available on a VPS is required.
- You have thousands or tens of thousands of active subscribers, and you expect very high traffic to the status page during major incidents.
- You have strict regulatory compliance requirements that demand physical isolation of hardware.
- You want full control over the hardware, including the choice of specific CPU models, RAM, RAID controllers, and network cards.
For most users deploying Cachet, a VPS will be more than sufficient and a cost-effective solution.
Location: what it affects
The choice of VPS location matters for several reasons:
- Latency: Place the server as close as possible to your primary audience or to the servers whose status you are monitoring. Lower latency means faster access to the status page for your users.
- Data Legislation: Depending on the jurisdiction of your company and your users, there may be requirements for data storage in a specific country or region (e.g., GDPR in Europe). Ensure that the chosen location complies with these requirements.
- Price: The cost of a VPS may vary slightly across different regions.
- Geopolitical Risks: In some cases, the choice of location may be dictated by the desire to avoid certain geopolitical risks.
It is usually recommended to choose a location that is in the same geographical region as your primary audience. For example, if your users are in Europe, choose a server in Germany, the Netherlands, or Finland.
Server Preparation
Server Preparation
Before proceeding with Cachet installation, you need to perform basic preparation of your fresh VPS. We will use Ubuntu Server 24.04 LTS, as it is a current and stable version of the operating system, supported until 2029.
1. SSH Connection and User Creation
After receiving your VPS access details (IP address, root password), connect to it via SSH. It is recommended not to use the root user for daily operations. Create a new user with sudo privileges and set up SSH key authentication.
ssh root@YOUR_IP_ADDRESS # Connect as root
adduser username # Create a new user
usermod -aG sudo username # Add user to sudo group
Now, copy your public SSH key to the server for the new user. If you don't have an SSH key, create one on your local machine using ssh-keygen.
# On your local machine:
ssh-copy-id username@YOUR_IP_ADDRESS
After this, exit the root session and log in as the new user:
exit
ssh username@YOUR_IP_ADDRESS
2. Disabling Password Authentication for root and SSH Password (Optional, but Recommended)
To enhance security, it is recommended to disable password login for root and, possibly, for all users, allowing only SSH key authentication. Edit the /etc/ssh/sshd_config file.
sudo nano /etc/ssh/sshd_config
Find and modify the following lines:
# PermitRootLogin yes # Comment out or set to no
PermitRootLogin no
PasswordAuthentication no # Disable password login for all users
ChallengeResponseAuthentication no
Restart the SSH service:
sudo systemctl restart sshd
IMPORTANT: Make sure you can log in as the new user with an SSH key before disabling PasswordAuthentication. Otherwise, you will lose access to the server.
3. System Update and Basic Utilities Installation
Always start by updating the package manager and installed packages.
sudo apt update # Update the list of available packages
sudo apt upgrade -y # Install updates for all packages
sudo apt install -y curl wget git unzip htop # Install useful utilities
4. Firewall Configuration (UFW)
Uncomplicated Firewall (UFW) is an easy-to-use interface for netfilter. Configure it to allow only necessary connections: SSH (port 22), HTTP (port 80), and HTTPS (port 443).
sudo ufw allow OpenSSH # Allow SSH connection
sudo ufw allow http # Allow HTTP (port 80)
sudo ufw allow https # Allow HTTPS (port 443)
sudo ufw enable # Enable firewall (confirm 'y')
sudo ufw status # Check firewall status
5. Fail2Ban Installation
Fail2Ban scans server logs (e.g., SSH logs) for suspicious activity (numerous failed login attempts) and temporarily blocks the IP addresses of attackers. This significantly enhances your server's security.
sudo apt install -y fail2ban # Install Fail2Ban
sudo systemctl enable fail2ban # Enable autostart on boot
sudo systemctl start fail2ban # Start the service
sudo cp /etc/fail2ban/jail.conf /etc/fail2ban/jail.local # Create a local copy for settings
sudo nano /etc/fail2ban/jail.local # Edit configuration
In the jail.local file, ensure that the [sshd] section is active (enabled = true). You can also configure bantime (block time) and findtime (period for detecting attempts) as desired.
# Example configuration in jail.local:
[DEFAULT]
bantime = 1h # Block for 1 hour
findtime = 10m # Scan for 10 minutes
maxretry = 5 # Block after 5 failed attempts

[sshd]
enabled = true
port = ssh
logpath = %(sshd_log)s
backend = %(sshd_backend)s
After making changes, restart Fail2Ban:
sudo systemctl restart fail2ban
sudo fail2ban-client status # Check status
sudo fail2ban-client status sshd # Check status for SSH
Your server is now ready for the installation of the main software.
Software Installation — Step-by-Step
Cachet is built on the Laravel framework, so we will need a web server (Nginx), a PHP interpreter with the necessary extensions, the Composer dependency manager, and a database (MySQL). We will use current software versions for 2026.
1. Nginx 1.28.x Installation
Nginx will act as the web server, serving requests to Cachet.
sudo apt install -y nginx # Install Nginx
sudo systemctl enable nginx # Enable Nginx autostart
sudo systemctl start nginx # Start Nginx
sudo systemctl status nginx # Check Nginx status
After installation, Nginx should be accessible via your VPS's IP address (you will see the Nginx placeholder page).
2. PHP 8.4 and Required Extensions Installation
Cachet requires PHP 8.1 or higher. We will install PHP 8.4, which will be current in 2026, along with PHP-FPM (FastCGI Process Manager) and all necessary extensions.
sudo apt install -y software-properties-common # Install utilities for repository management
sudo add-apt-repository ppa:ondrej/php -y # Add Ondrej PPA repository for current PHP versions
sudo apt update # Update package list after adding PPA
sudo apt install -y php8.4 php8.4-fpm php8.4-mysql php8.4-gd php8.4-mbstring php8.4-xml php8.4-bcmath php8.4-curl php8.4-zip php8.4-tokenizer php8.4-json # Install PHP 8.4 and all necessary extensions
sudo systemctl enable php8.4-fpm # Enable PHP-FPM autostart
sudo systemctl start php8.4-fpm # Start PHP-FPM
sudo systemctl status php8.4-fpm # Check PHP-FPM status
The Ondrej PPA repository provides access to the latest PHP versions on Ubuntu.
3. MySQL Server 8.0.x Installation
Cachet uses a database to store all information about components, incidents, subscribers, and settings. We will install MySQL 8.0.
sudo apt install -y mysql-server # Install MySQL Server
sudo systemctl enable mysql # Enable MySQL autostart
sudo systemctl start mysql # Start MySQL
sudo systemctl status mysql # Check MySQL status
After installation, it is recommended to run the MySQL security script to set the root password, remove anonymous users, and the test database.
sudo mysql_secure_installation # Run MySQL security script
Follow the on-screen instructions: set a strong password for the root user, remove anonymous users, disallow remote root login, and remove the test database.
4. Creating a Database and User for Cachet
Connect to MySQL as root and create a new database and user for Cachet with appropriate privileges.
sudo mysql -u root -p # Connect to MySQL as root (enter the password set earlier)
Inside the MySQL console, execute the following commands, replacing cachet_db, cachet_user, and YOUR_DATABASE_PASSWORD with your own values:
CREATE DATABASE cachet_db CHARACTER SET utf8mb4 COLLATE utf8mb4_unicode_ci; # Create the database
CREATE USER 'cachet_user'@'localhost' IDENTIFIED BY 'YOUR_DATABASE_PASSWORD'; # Create the user
GRANT ALL PRIVILEGES ON cachet_db. TO 'cachet_user'@'localhost'; # Grant privileges on the database
FLUSH PRIVILEGES; # Refresh privileges
EXIT; # Exit the MySQL console
IMPORTANT: Use a strong and unique password for the database.
5. Composer 2.7.x Installation
Composer is a dependency manager for PHP that Cachet uses to install its libraries.
curl -sS https://getcomposer.org/installer -o composer-setup.php # Download Composer installation script
sudo php composer-setup.php --install-dir=/usr/local/bin --filename=composer # Install Composer globally
rm composer-setup.php # Remove installation script
composer --version # Check installed version (should be 2.7.x or higher)
6. Downloading and Installing Cachet
We will download the latest stable version of Cachet from the official GitHub repository.
cd /var/www/ # Navigate to the web directory
sudo git clone https://github.com/CachetHQ/Cachet.git cachet # Clone the Cachet repository
cd cachet # Navigate to the Cachet directory
sudo git checkout v2.4.0 # Switch to the latest stable version (current for 2026, possibly v2.5.x)
sudo cp .env.example .env # Create .env file from example
sudo chown -R www-data:www-data /var/www/cachet # Set directory owner
sudo chmod -R 775 /var/www/cachet/storage # Set permissions for the storage directory
sudo chmod -R 775 /var/www/cachet/bootstrap/cache # Set permissions for the bootstrap/cache directory
Now, install all PHP dependencies using Composer.
sudo composer install --no-dev -o # Install dependencies, optimize autoloader
Generate the Laravel application key (for encrypting sessions and other data).
sudo php artisan key:generate # Generate application key
Run database migrations to create the necessary tables.
sudo php artisan migrate --force # Run database migrations
When running migrations for the first time, Cachet might offer to create a user. If you want to create an administrator immediately, use php artisan app:install. Otherwise, you can register via the web interface after configuring Nginx.
Configuration
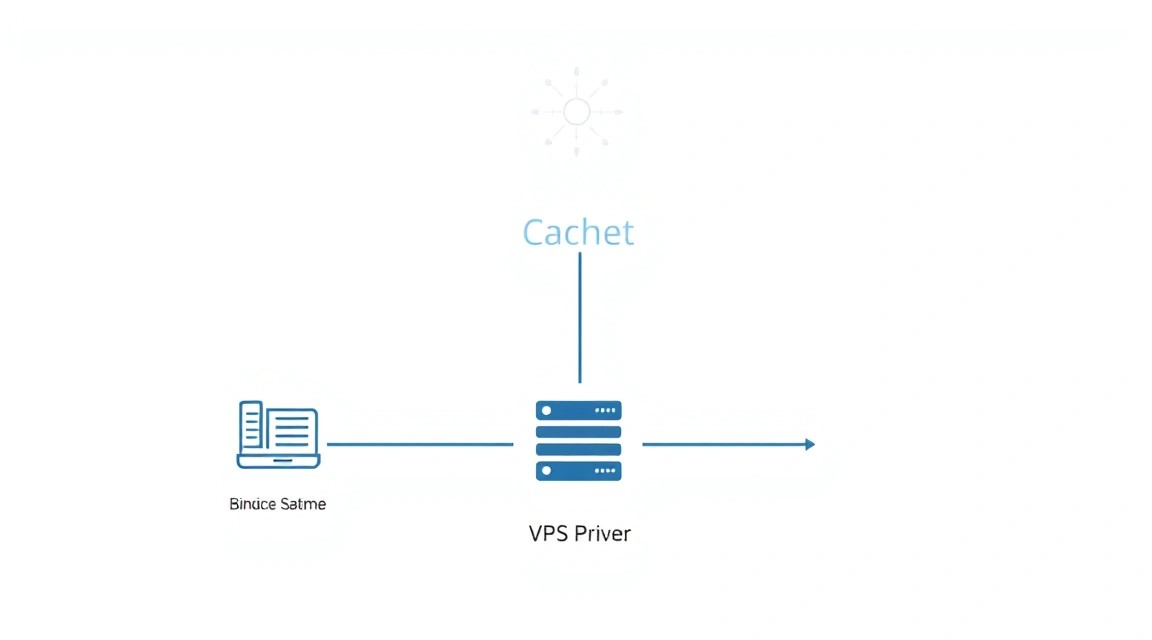
After installing all components, you need to configure them correctly so that Cachet can operate properly and securely.
1. Configuring the .env file
The .env file contains all environment variables for the Laravel application, including database settings, application URL, and other important parameters. Edit it so that Cachet can connect to your database and correctly generate links.
sudo nano /var/www/cachet/.env
Find and modify the following lines, using the data you created earlier:
APP_NAME="Cachet"
APP_ENV=production
APP_KEY=YOUR_GENERATED_KEY # Already generated by the key:generate command
APP_DEBUG=false # Always false in production
APP_URL=https://status.yourdomain.com # Specify your domain with HTTPS

DB_CONNECTION=mysql
DB_HOST=127.0.0.1
DB_PORT=3306
DB_DATABASE=cachet_db # Your database name
DB_USERNAME=cachet_user # Database username
DB_PASSWORD=YOUR_DB_PASSWORD # Database user password

CACHE_DRIVER=file
SESSION_DRIVER=file
QUEUE_DRIVER=database # Use the database for queues
Save changes (Ctrl+O, Enter, Ctrl+X).
2. Configuring Nginx for Cachet
Let's create a new Nginx configuration file for your domain. Replace status.yourdomain.com with your actual domain.
sudo nano /etc/nginx/sites-available/status.yourdomain.com.conf
Insert the following configuration block:
server {
    listen 80;
    listen [::]:80;
    server_name status.yourdomain.com; # Your domain

    root /var/www/cachet/public; # Path to Cachet's public directory

    add_header X-Frame-Options "SAMEORIGIN";
    add_header X-XSS-Protection "1; mode=block";
    add_header X-Content-Type-Options "nosniff";

    index index.php index.html index.htm;

    charset utf-8;

    location / {
        try_files $uri $uri/ /index.php?$query_string;
    }

    location = /favicon.ico { access_log off; log_not_found off; }
    location = /robots.txt  { access_log off; log_not_found off; }

    error_page 404 /index.php;

    location ~ \.php$ {
        fastcgi_pass unix:/run/php/php8.4-fpm.sock; # Specify the PHP-FPM socket
        fastcgi_index index.php;
        fastcgi_param SCRIPT_FILENAME $realpath_root$fastcgi_script_name;
        include fastcgi_params;
    }

    location ~ /\.(?!well-known). {
        deny all;
    }
}
Save the file, then create a symbolic link to it in sites-enabled and check the Nginx configuration.
sudo ln -s /etc/nginx/sites-available/status.yourdomain.com.conf /etc/nginx/sites-enabled/ # Create symlink
sudo nginx -t # Check Nginx configuration syntax
sudo systemctl reload nginx # Reload Nginx to apply changes
3. Configuring HTTPS with Caddy
Using HTTPS is mandatory for any public page. Caddy is a modern web server that automatically manages Let's Encrypt certificates, making it ideal for quick HTTPS setup. If you prefer Nginx + Certbot, you can skip this step and proceed to the next one.
3.1. Installing Caddy:
sudo apt install -y debian-keyring debian-archive-keyring apt-transport-https # Install necessary packages
curl -1sLf 'https://dl.cloudsmith.io/public/caddy/stable/gpg.key' | sudo gpg --dearmor -o /usr/share/keyrings/caddy-stable-archive-keyring.gpg # Add GPG key
curl -1sLf 'https://dl.cloudsmith.io/public/caddy/stable/debian.deb.txt' | sudo tee /etc/apt/sources.list.d/caddy-stable.list # Add Caddy repository
sudo apt update # Update package list
sudo apt install -y caddy # Install Caddy
sudo systemctl stop nginx # Stop Nginx, as Caddy will use ports 80 and 443
sudo systemctl disable nginx # Disable Nginx autostart
3.2. Configuring Caddyfile:
sudo nano /etc/caddy/Caddyfile
Remove the existing content and insert the following, replacing status.yourdomain.com with your domain:
status.yourdomain.com {
    root * /var/www/cachet/public
    file_server

    php_fastcgi unix//run/php/php8.4-fpm.sock

    # Error handling for Laravel
    handle_errors {
        rewrite * /index.php
    }

    # Enable automatic HTTPS
    tls {
        dns cloudflare {env.CLOUDFLARE_API_TOKEN} # Example for Cloudflare DNS, if your domain is there.
                                                 # If you use regular A/AAAA records, just leave 'tls'
    }

    log {
        output file /var/log/caddy/cachet_access.log
        format json
    }

    # Additional security headers
    header {
        X-Frame-Options "SAMEORIGIN"
        X-XSS-Protection "1; mode=block"
        X-Content-Type-Options "nosniff"
        Referrer-Policy "strict-origin-when-cross-origin"
    }
}
If you are using Cloudflare for DNS, you will need to create a Cloudflare API token and add it to Caddy's environment variables (e.g., via systemd override or /etc/environment) or use tls internal for self-signed certificates (not recommended for public services). For most users, simply tls is sufficient, and Caddy will obtain the certificate via an HTTP-01 challenge.
sudo systemctl restart caddy # Restart Caddy
sudo systemctl status caddy # Check Caddy status
4. Configuring HTTPS with Certbot (for Nginx)
If you decided to use Nginx, you will need Certbot from Let's Encrypt for HTTPS.
sudo snap install core # Ensure snap is installed
sudo snap refresh core # Update snap
sudo snap install --classic certbot # Install Certbot
sudo ln -s /snap/bin/certbot /usr/bin/certbot # Create symlink
sudo certbot --nginx -d status.yourdomain.com # Run Certbot for Nginx
Certbot will automatically configure Nginx for HTTPS and create cron jobs for automatic certificate renewal. Follow the on-screen instructions.
5. Configuring Cron Jobs for Cachet
Cachet requires cron jobs to perform background tasks such as sending notifications and updating metrics.
sudo crontab -e -u www-data # Open crontab for www-data user (or the user PHP-FPM runs under)
Add the following line to the end of the file:
* * * * * php /var/www/cachet/artisan schedule:run >> /dev/null 2>&1
This command will run the Laravel scheduler every minute.
6. Verifying Functionality
Your Cachet should now be accessible at https://status.yourdomain.com. Open it in your browser and complete the installation by creating an administrator account.
Check that all services are running:
sudo systemctl status php8.4-fpm # Check PHP-FPM
sudo systemctl status mysql # Check MySQL
sudo systemctl status nginx # Check Nginx (if you are using it)
sudo systemctl status caddy # Check Caddy (if you are using it)
Use curl to check page accessibility:
curl -I https://status.yourdomain.com # Check HTTP headers
You should see an HTTP/2 200 OK status and headers indicating a successful page load.
Backups and Maintenance
Backup is a critically important part of any infrastructure. Data loss can have catastrophic consequences. For Cachet, it is necessary to regularly back up the database and application files.
1. What to back up
- Database: This is the most important. It contains all components, incidents, metrics, subscribers, and Cachet settings.
- Application files:
.env: Cachet configuration file with sensitive data (keys, DB passwords).storage/: Directory where Cachet stores various files such as logs, cache, sessions, and uploaded files (if any).public/uploads/: If you allow image or other file uploads.
- Web server configurations: Nginx configuration files (
/etc/nginx/sites-available/status.yourdomain.com.conf) or Caddy (/etc/caddy/Caddyfile).
2. Simple auto-backup script
Let's create a simple script that will dump the database and archive important files.
sudo mkdir -p /opt/backups/cachet # Create a directory for backups
sudo chown your_username:your_username /opt/backups/cachet # Grant permissions to your user
nano /opt/backups/cachet/backup_cachet.sh
Insert the following script, replacing variables with your values:
#!/bin/bash

# Database settings
DB_NAME="cachet_db"
DB_USER="cachet_user"
DB_PASS="YOUR_DB_PASSWORD"

# Paths
BACKUP_DIR="/opt/backups/cachet"
CACHET_APP_DIR="/var/www/cachet"
NGINX_CONF_DIR="/etc/nginx/sites-available" # Or /etc/caddy for Caddy

DATE=$(date +%Y%m%d_%H%M%S)
BACKUP_FILE="${BACKUP_DIR}/cachet_backup_${DATE}.tar.gz"
DB_DUMP_FILE="${BACKUP_DIR}/cachet_db_dump_${DATE}.sql"

# 1. Database dump
echo "Dumping database..."
mysqldump -u "${DB_USER}" -p"${DB_PASS}" "${DB_NAME}" > "${DB_DUMP_FILE}"
if [ $? -eq 0 ]; then
    echo "Database dump successful."
else
    echo "Database dump failed!"
    exit 1
fi

# 2. Archiving Cachet files and configs
echo "Archiving Cachet files and configs..."
tar -czf "${BACKUP_FILE}" \
    "${CACHET_APP_DIR}/.env" \
    "${CACHET_APP_DIR}/storage" \
    "${CACHET_APP_DIR}/public/uploads" \
    "${NGINX_CONF_DIR}/status.yourdomain.com.conf" \ # Or /etc/caddy/Caddyfile
    "${DB_DUMP_FILE}"
if [ $? -eq 0 ]; then
    echo "File archiving successful."
else
    echo "File archiving failed!"
    exit 1
fi

# 3. Deleting old backups (e.g., older than 7 days)
echo "Cleaning up old backups..."
find "${BACKUP_DIR}" -type f -name "cachet_backup_*.tar.gz" -mtime +7 -delete
find "${BACKUP_DIR}" -type f -name "cachet_db_dump_*.sql" -mtime +7 -delete
echo "Backup process finished."
Make the script executable:
sudo chmod +x /opt/backups/cachet/backup_cachet.sh
3. Configuring Cron for automatic backup execution
Add the script to cron for daily execution. For example, at 03:00 AM.
sudo crontab -e # Open crontab for your user
Add the following line:
0 3 * * * /opt/backups/cachet/backup_cachet.sh >> /var/log/cachet_backup.log 2>&1
This command will run the script every day at 03:00 and write the output to a log file.
4. Where to store backups
Storing backups on the same server as the main service is extremely risky. If the server fails (disk failure, data center fire), you will lose both the service and the backups. It is recommended to use remote storage:
- S3-compatible cloud storage: Amazon S3, DigitalOcean Spaces, Backblaze B2. This is a reliable and relatively inexpensive storage method. Use utilities like
s3cmd,rclone, orawsclito upload backups. - Separate VPS: You can set up a second, small VPS and use
rsyncorscpto copy backups to it. This provides geographical distribution. - Local storage with synchronization: If you have a NAS or another server on your local network, you can synchronize backups there.
For greater reliability, consider using tools for incremental and deduplicated backups, such as Restic or BorgBackup. They can efficiently store multiple versions of backups, saving space and ensuring fast recovery.
5. Updates: rolling vs maintenance window
Keeping software up-to-date is critical for security and stability. There are two main approaches to updates:
- Rolling updates: Applied to server clusters where updates occur sequentially, without overall service downtime. This is not applicable for a single VPS.
- Maintenance Window: A scheduled period when the service may be unavailable or operate with limitations for updates. This is the most realistic approach for Cachet on a single VPS.
Update recommendations:
- OS and package updates: Regularly (monthly or quarterly) run
sudo apt update && sudo apt upgrade -y. Schedule this during times of lowest load. - Cachet updates: Monitor Cachet releases on GitHub. Updating usually requires:
- Put Cachet into maintenance mode (
php artisan down). - Create a backup.
- Perform
git pullor download the new version. - Run
composer install --no-dev -o. - Execute database migrations (
php artisan migrate --force). - Clear cache (
php artisan cache:clear && php artisan config:clear). - Bring Cachet out of maintenance mode (
php artisan up).
- Put Cachet into maintenance mode (
- Monitoring: After any updates, thoroughly check the functionality of Cachet and all its features.
Always inform your users about planned work through the status page itself (if it's still working) or through other communication channels.
Troubleshooting + FAQ
During the installation and operation of Cachet, various issues may arise. Here we will cover typical scenarios and offer solutions, as well as answer frequently asked questions.
1. Cachet returns a 500 Internal Server Error
What to check: This is the most common error. It indicates a problem on the server or PHP side.
- PHP-FPM Logs: Check PHP-FPM logs for errors. They are usually located in
/var/log/php8.4-fpm.logor/var/log/nginx/error.log(if Nginx cannot connect to PHP-FPM). - Laravel Logs: Cachet, as a Laravel application, writes errors to
/var/www/cachet/storage/logs/laravel.log. This is the most informative source. - Permissions: Ensure that the
www-datauser (or the user under which PHP-FPM runs) has read/write permissions for the/var/www/cachet/storageand/var/www/cachet/bootstrap/cachedirectories. - .env file: Check the correctness of database settings and
APP_KEYin the/var/www/cachet/.envfile. - PHP Extensions: Make sure all necessary PHP extensions are installed and enabled.
sudo chown -R www-data:www-data /var/www/cachet && sudo chmod -R 775 /var/www/cachet/storage /var/www/cachet/bootstrap/cache), incorrect database connection details, or missing PHP extensions (sudo apt install -y php8.4-extension_name).
2. Page does not load, Nginx/Caddy returns 403 Forbidden
What to check: This means the web server is denied access to files.
- Root directory permissions: Ensure that the
/var/www/cachet/publicdirectory and its contents belong towww-dataand have the correct permissions. - Nginx/Caddy Configuration: Check that the
rootin your Nginx server block or Caddyfile points to/var/www/cachet/public. - SELinux/AppArmor: On some systems, these security modules may block access. Ubuntu uses AppArmor by default. Check the logs (
sudo journalctl -xe) for blocking messages. Usually, no additional AppArmor settings are required for Nginx or Caddy.
sudo chown -R www-data:www-data /var/www/cachet and sudo chmod -R 755 /var/www/cachet/public. Check the Nginx configuration syntax (sudo nginx -t) or Caddy (sudo caddy validate) and restart the service.
3. Database connection issues
What to check: If Cachet cannot connect to MySQL.
- MySQL Status: Make sure MySQL is running:
sudo systemctl status mysql. - .env Settings: Check
DB_HOST,DB_PORT,DB_DATABASE,DB_USERNAME,DB_PASSWORDin the.envfile. - User and Permissions: Ensure that the database user
cachet_userexists and has permissions for thecachet_dbdatabase. Try connecting to MySQL as this user from the command line:mysql -u cachet_user -p cachet_db. - Firewall: Make sure MySQL is not blocked by a firewall (by default, MySQL only listens on localhost, which is correct).
.env. If the user or database is not created, create them as described in the installation section. Restart PHP-FPM after changing .env: sudo systemctl restart php8.4-fpm.
4. Cachet is not sending notifications
What to check: If subscribers are not receiving email or other notifications.
- Mail settings in .env: Check the
MAIL_DRIVER,MAIL_HOST,MAIL_PORT,MAIL_USERNAME,MAIL_PASSWORD,MAIL_ENCRYPTION,MAIL_FROM_ADDRESS,MAIL_FROM_NAMEsection in.env. - Cron job: Ensure that the cron job for the Laravel scheduler (
php artisan schedule:run) is configured and runs every minute. Check cron logs. - Queues: Cachet uses queues to send notifications. Make sure
QUEUE_DRIVER=databasein.envand thejobstable in the database is created (php artisan migrate). - Laravel Logs: Check
laravel.logfor errors related to email sending.
www-data) and has access to the PHP executable and the artisan script.
5. What is the minimum suitable VPS configuration?
For a minimal Cachet installation capable of serving a small project or test environment, a VPS with 1 vCPU, 2 GB RAM, 40 GB SSD is sufficient. This configuration will be enough for the operating system, web server (Nginx or Caddy), PHP-FPM, and MySQL. However, for more stable operation and future scalability, it is recommended to use 2 vCPU, 4 GB RAM, 80 GB NVMe SSD, as described in the section "What VPS configuration is needed for this task".
6. What to choose — VPS or dedicated for this task?
For deploying a public Cachet status page, in the vast majority of cases, a VPS is the optimal choice. It offers sufficient performance, flexibility, and cost-effectiveness. Dedicated servers are overkill for Cachet unless you plan to host many other high-load services on it, have strict physical isolation requirements, or expect extremely high traffic (tens of thousands of concurrent users during global outages). Most projects successfully use Cachet on a medium-configuration VPS.
7. How to update Cachet to a new version?
The Cachet update process involves several steps. First, always make a full backup of the database and application files. Then, put Cachet into maintenance mode using the command php artisan down. After that, navigate to the Cachet directory (/var/www/cachet), get the latest code version (e.g., git pull or download a new archive). Update Composer dependencies with the command composer install --no-dev -o. Run database migrations with the command php artisan migrate --force, and also clear the cache: php artisan cache:clear && php artisan config:clear. Finally, take Cachet out of maintenance mode with the command php artisan up and check its functionality.
8. How to configure metrics and graphs in Cachet?
Cachet allows you to add metrics to track various service parameters, such as response time, CPU usage, or memory. To do this, after logging into the administrator panel, go to the "Metrics" section and create a new metric. You can manually enter data or use the Cachet API to automatically send data from your monitoring systems (e.g., Prometheus, Zabbix, Grafana). Cachet provides an API token in the settings that can be used for POST requests with metric data. For example, you can write a small script that will parse data from your monitoring system and send it to Cachet on a schedule.
Conclusions and Next Steps
Congratulations! You have successfully deployed and configured Cachet on your VPS, creating a reliable and professional public status page for your services. Now you can effectively communicate with your audience, increasing transparency and trust in the event of incidents or planned maintenance. You have gained full control over your status page, its data, and customization options.
Further steps to optimize and expand the functionality of your status page include:
- Integration with monitoring systems: Use the Cachet API to automatically publish incidents and update metrics from your existing monitoring systems, such as Prometheus, Zabbix, or Grafana. This will automate the notification process and reduce reaction time.
- Notification setup: Configure various notification channels (Slack, Telegram, Webhooks) for your team to receive timely alerts about new incidents or status changes.
- Appearance customization: Explore Cachet's theme customization options to ensure your status page matches your project's branding. You can change colors, fonts, and add your logo.
- Regular audit and maintenance: Keep your VPS and Cachet up-to-date by regularly applying security updates and performing backups. This will ensure the long-term stability and security of your status page.