Deploying PocketBase on a VPS for Rapid Application Development
TL;DR
In this detailed guide, we will step-by-step configure and deploy PocketBase on your VPS, transforming it into a powerful and flexible platform for rapid web and mobile application development. You will learn how to install, configure, secure, and maintain PocketBase, using current software versions and best practices.
Installing PocketBase on Ubuntu 24.04 LTS using systemd.
Configuring secure access via Caddy with automatic HTTPS.
Ensuring basic server security with UFW and Fail2ban.
Creating a backup system for PocketBase data.
Understanding the necessary VPS configuration and choosing a suitable plan.
What we are setting up and why
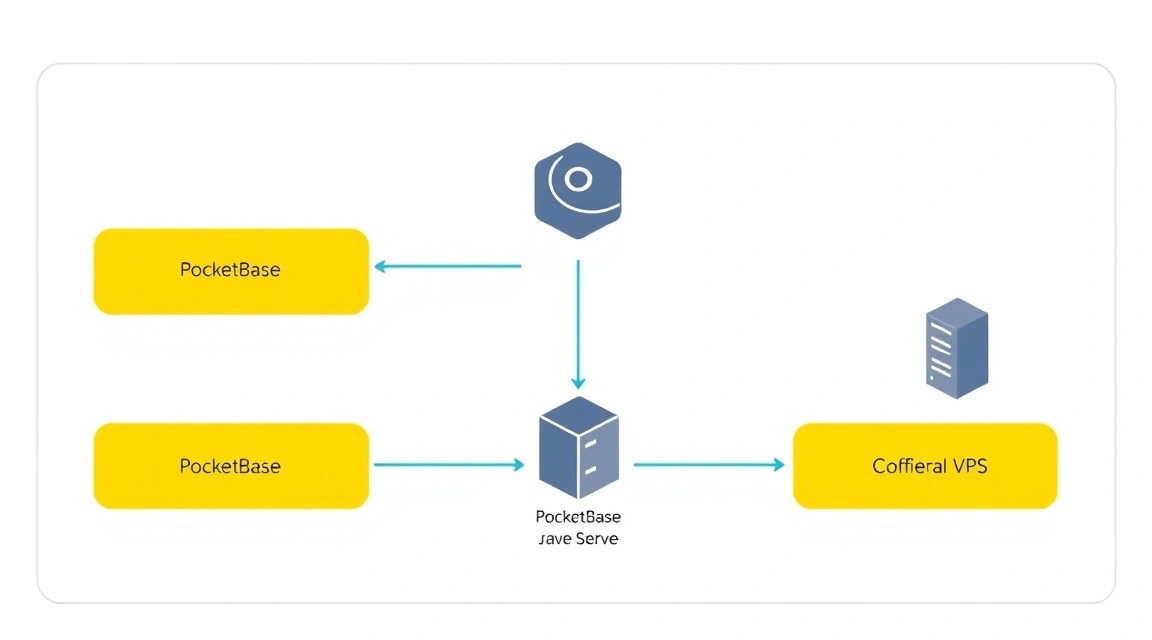
Diagram: What we are setting up and why
PocketBase is an incredibly powerful and lightweight open-source backend written in Go, which includes an embedded SQLite database, an API (REST and Realtime), and an intuitive admin panel. It is designed for developers who need a quick start for their projects without the need to deploy and manage a complex technology stack. Imagine a full-fledged backend that can be run as a single executable file!
By the end of this tutorial, you will have a fully functional, secure, and internet-accessible PocketBase instance, ready to work with your web or mobile applications. This will allow you to focus on frontend development, using ready-made APIs for user authentication, data management, and real-time operations.
There are many alternatives to PocketBase, such as Firebase, Supabase, Strapi, Appwrite, and others. Cloud-managed solutions like Firebase or Supabase offer convenience and scalability without the need for infrastructure management, but often limit your flexibility, tie you to a specific vendor, and can become expensive as your project grows. Self-hosted options, such as Strapi or Appwrite, require more complex setup and often consume more resources.
Deploying PocketBase on your own VPS offers a golden mean: you retain full control over data and infrastructure, get high performance with minimal resource costs, and at the same time enjoy the simplicity of deployment that approaches cloud-managed solutions. This is an ideal choice for indie developers, early-stage startups, or those who want to quickly prototype an idea without worrying about backend complexity.
What VPS configuration is needed for this task
Diagram: What VPS configuration is needed for this task
PocketBase is known for its efficiency and minimal resource requirements, especially for small and medium-sized projects. However, to ensure stable operation and future headroom, it is important to choose a suitable VPS configuration.
Minimum requirements for PocketBase:
CPU: 1 vCore (modern processor, 2.5+ GHz)
RAM: 1 GB (for PocketBase and OS, without excess)
Disk: 20 GB SSD (for OS, PocketBase, and initial data. If many files are planned, more will be needed)
Network: 100 Mbps (sufficient for most tasks)
Recommended VPS plan for most cases (current for 2026):
For comfortable work, especially if you plan to store files or expect moderate load, the following configuration is recommended:
Network: 200-500 Mbps or 1 Gbps port (with reasonable traffic volume)
For example, you can consider a VPS with the specified characteristics. Such a plan will provide sufficient performance for most development scenarios and small production applications.
When a dedicated server is needed, not a VPS:
Dedicated servers become necessary when your project reaches a very high load requiring guaranteed resources, or if you have specific requirements for security, regulatory compliance (e.g., PCI DSS), or if you need maximum I/O performance that virtualized environments cannot provide. For PocketBase, this usually means millions of requests per day, huge amounts of data (terabytes), or the need to run many other resource-intensive services on the same machine. For most PocketBase tasks, a VPS will be more than sufficient.
Location: what it affects
The choice of VPS location affects several key aspects:
Latency: The closer the server is to your target audience, the lower the latency and faster the application response.
Legislation: Different countries have different data privacy laws. Ensure that the chosen location complies with your legal requirements.
Availability: Some regions may have better connectivity to certain parts of the world.
Choose a location that is geographically closer to most of your users or to you, if you are the sole user.
Server Preparation
Diagram: Server Preparation
Before proceeding with PocketBase installation, it is necessary to perform basic security configuration and update the operating system. We will use Ubuntu Server 24.04 LTS, as the most current and stable version for 2026.
1. Connecting via SSH
Connect to your new VPS using SSH. Replace your_user with your username (often root or ubuntu) and your_vps_ip with your server's IP address.
ssh your_user@your_vps_ip
If you are using a password, enter it when prompted. It is highly recommended to use SSH keys for increased security.
2. Updating the System
Always start by updating the package list and upgrading them to the latest versions.
sudo apt update             # Update the list of available packages
sudo apt upgrade -y         # Install the latest versions of all packages
sudo apt autoremove -y      # Remove unused packages
3. Creating a new user with sudo privileges (if you are working as root)
Working as the root user is strongly discouraged. Create a new user and grant them sudo privileges.
sudo adduser your_new_user           # Create a new user
sudo usermod -aG sudo your_new_user  # Add the user to the sudo group
After this, exit the current SSH session and log in as the new user.
exit
ssh your_new_user@your_vps_ip
4. Configuring the UFW Firewall
UFW (Uncomplicated Firewall) is a convenient interface for managing iptables. We will configure it to allow SSH, HTTP, and HTTPS traffic.
Fail2ban is configured by default to protect SSH. For more advanced configuration, you can copy and edit the /etc/fail2ban/jail.conf file to /etc/fail2ban/jail.local.
6. Installing Basic Utilities
For convenience and further PocketBase installation, we will need some utilities.
Now your server is ready for PocketBase installation.
Software Installation — Step-by-Step
Diagram: Software Installation — Step-by-Step
In this section, we will install PocketBase and Caddy — a powerful web server that will act as a reverse proxy and automatically manage Let's Encrypt HTTPS certificates.
1. Installing PocketBase
PocketBase is distributed as a single executable file. We will download it directly from GitHub.
# Determine your server's architecture
ARCH=$(dpkg --print-architecture)

# Determine the current PocketBase version (e.g., v0.23.10 for 2026)
PB_VERSION="0.23.10"

# Download the PocketBase archive
wget -O pocketbase.zip "https://github.com/pocketbase/pocketbase/releases/download/v${PB_VERSION}/pocketbase_${PB_VERSION}_linux_${ARCH}.zip"

# Create a directory for PocketBase
sudo mkdir -p /opt/pocketbase

# Unzip the archive into the created directory
sudo unzip pocketbase.zip -d /opt/pocketbase/

# Remove the downloaded archive
rm pocketbase.zip

# Grant execution rights to the executable file
sudo chmod +x /opt/pocketbase/pocketbase

# Create a directory for PocketBase data
sudo mkdir -p /opt/pocketbase/pb_data
2. Creating a System Service for PocketBase
To ensure PocketBase starts automatically on server boot and can be managed via systemctl, we will create a systemd unit file.
sudo nano /etc/systemd/system/pocketbase.service
Insert the following content, replacing your_new_user with the name of your user under which PocketBase will run.
Now, let's enable and start the PocketBase service:
sudo systemctl daemon-reload       # Reload systemd configuration
sudo systemctl enable pocketbase   # Enable PocketBase autostart on boot
sudo systemctl start pocketbase    # Start the PocketBase service
sudo systemctl status pocketbase   # Check the service status
Ensure that the service is running and active (Active: active (running)).
3. Installing Caddy
Caddy will listen on ports 80 and 443, redirect traffic to PocketBase (which runs on port 8090), and automatically manage HTTPS certificates.
Caddy will be installed as a system service and automatically started. We will configure it in the next section.
Configuration
Diagram: Configuration
After installing PocketBase and Caddy, you need to configure them to work together. The main task is to set up Caddy as a reverse proxy for PocketBase and ensure a secure HTTPS connection.
1. Configuring the Caddyfile
Caddy uses a configuration file called Caddyfile. We will edit it to route traffic to PocketBase.
sudo nano /etc/caddy/Caddyfile
Replace the entire file content with the following, specifying your domain (e.g., api.example.com). If you don't have a domain, you can use an IP address, but HTTPS will only work with a domain.
Listen for requests for your_domain.com (or your IP if there's no domain).
Automatically obtain and renew HTTPS certificates for this domain.
Forward all incoming requests to localhost:8090, where PocketBase is running.
Handle errors by returning a standard HTTP status.
2. Applying Caddy Configuration
After modifying the Caddyfile, you need to reload the Caddy service for the changes to take effect.
sudo systemctl reload caddy        # Reload Caddy configuration
sudo systemctl status caddy        # Check Caddy status
Ensure that Caddy is active and successfully reloaded.
3. Initial PocketBase Launch and Admin User Creation
PocketBase is now accessible via your domain. Open your browser and navigate to https://your_domain.com/_/. This is the path to the PocketBase admin panel. Upon first access, you will be prompted to create an administrator user. This is a critical step for managing your database and API.
Enter your desired email and password for the admin. After creation, you will be redirected to the PocketBase control panel.
4. Configuring Secrets via Environment Variables (Optional, but Recommended)
For more secure storage of sensitive data, such as API keys or other secrets, use environment variables. PocketBase supports them. You can edit the systemd service file:
sudo nano /etc/systemd/system/pocketbase.service
Add the line Environment="YOUR_SECRET_KEY=your_value" to the [Service] section.
Inside PocketBase, you will be able to access these environment variables through code or, if supported, through plugin settings.
5. Verifying Functionality
You can verify the functionality of PocketBase and Caddy in several ways:
Via browser: Open https://your_domain.com (for API) and https://your_domain.com/_/ (for the admin panel).
Via curl:
curl -v https://your_domain.com/api/health # Check PocketBase API status
You should receive an HTTP 200 OK and a JSON response from PocketBase. If you see errors or cannot connect, check the Caddy logs (sudo journalctl -u caddy --since "1 hour ago") and PocketBase logs (sudo journalctl -u pocketbase --since "1 hour ago").
Backups and Maintenance
Diagram: Backups and Maintenance
Backups are a critically important part of any production service. PocketBase stores all its data in a single SQLite file (data.db) and optionally in the files directory, which significantly simplifies the backup process.
1. What to Back Up
Database:/opt/pocketbase/pb_data/data.db – this is the main SQLite file containing all your collections, records, users, and settings.
Files: If you use PocketBase for file storage, they will be located in the /opt/pocketbase/pb_data/files/ directory. Backing up this directory is mandatory.
PocketBase Configuration: Although PocketBase does not have a complex configuration file, any changes to the code (if you use custom hooks or plugins) or to the systemd service file (/etc/systemd/system/pocketbase.service) should also be saved.
Caddy Configuration:/etc/caddy/Caddyfile – for quick reverse proxy recovery.
2. Simple Auto-Backup Script
We will create a simple script that will archive PocketBase data, save it to a temporary location, and then synchronize it with remote storage. For example, we will use tar and rclone (which will need to be installed and configured for S3 or another cloud storage).
# Install rclone if not already installed
# sudo apt install rclone -y
# rclone config # Configure S3-compatible storage or another provider

sudo nano /usr/local/bin/backup_pocketbase.sh
Paste the following script, replacing your_new_user and your_rclone_remote (the name of your configured rclone storage).
#!/bin/bash

# Paths
POCKETBASE_DIR="/opt/pocketbase"
PB_DATA_DIR="${POCKETBASE_DIR}/pb_data"
BACKUP_DIR="/tmp/pocketbase_backups"
RCLONE_REMOTE="your_rclone_remote:pocketbase-backups" # Example: s3_valebyte:pocketbase-backups
DATE=$(date +%Y%m%d_%H%M%S)
BACKUP_ARCHIVE="${BACKUP_DIR}/pocketbase_backup_${DATE}.tar.gz"
LOG_FILE="/var/log/pocketbase_backup.log"

# Create temporary backup directory if it doesn't exist
mkdir -p "${BACKUP_DIR}"

# Logging
echo "--- Backup started at $(date) ---" >> "${LOG_FILE}"

# Stop PocketBase to ensure DB integrity
echo "Stopping PocketBase service..." >> "${LOG_FILE}"
sudo systemctl stop pocketbase
sleep 5 # Give time to stop

# Create archive
echo "Creating backup archive: ${BACKUP_ARCHIVE}" >> "${LOG_FILE}"
sudo tar -czf "${BACKUP_ARCHIVE}" -C "${POCKETBASE_DIR}" pb_data >> "${LOG_FILE}" 2>&1

# Start PocketBase
echo "Starting PocketBase service..." >> "${LOG_FILE}"
sudo systemctl start pocketbase

# Copy archive to remote storage using rclone
echo "Uploading backup to remote: ${RCLONE_REMOTE}" >> "${LOG_FILE}"
rclone copy "${BACKUP_ARCHIVE}" "${RCLONE_REMOTE}" >> "${LOG_FILE}" 2>&1

# Delete old local backups (keep the last 7 days)
find "${BACKUP_DIR}" -type f -name ".tar.gz" -mtime +7 -delete >> "${LOG_FILE}" 2>&1
echo "Old local backups cleaned." >> "${LOG_FILE}"

echo "Backup finished at $(date)" >> "${LOG_FILE}"
echo "---" >> "${LOG_FILE}"
Make the script executable:
sudo chmod +x /usr/local/bin/backup_pocketbase.sh
3. Setting Up Cron for Automatic Execution
Let's add a cron job to run the backup script daily.
sudo crontab -e
Choose an editor (if prompted) and add the following line to the end of the file so that the script runs every day at 3:00 AM.
Save and close the file. Now your data will be backed up regularly.
4. Where to Store (External S3 / Separate VPS)
It is crucial to store backups separately from the main server. This will protect you from data loss in case of a VPS failure or other disasters. Recommended options:
S3-compatible storage: Amazon S3, DigitalOcean Spaces, Backblaze B2, MinIO. These are reliable and relatively inexpensive solutions.
Separate VPS: You can set up a second, less powerful VPS exclusively for storing backups and use rsync or SCP to transfer files.
NAS/Local Storage: For personal projects, you can use a home NAS or cloud storage synchronized with a local machine.
5. Updates: Rolling vs. Maintenance Window
PocketBase Update: PocketBase does not have a built-in update mechanism via a package manager. To update, you need to download the new executable from GitHub, stop the service, replace the old file with the new one, and then start the service. This can be done during a "maintenance window" to minimize downtime.
# Example commands for updating PocketBase
sudo systemctl stop pocketbase
# Download the new version, as in step 6.1, but to /tmp, then:
# sudo cp /tmp/pocketbase_new_version /opt/pocketbase/pocketbase
sudo systemctl start pocketbase
Caddy and OS Updates: Caddy, like other system packages, is updated via the Ubuntu package manager. Regularly run sudo apt update && sudo apt upgrade -y to keep the system and Caddy up to date. These updates can usually be performed without stopping services, but sometimes a reboot is required to apply kernel updates.
Always test updates on a staging server, if possible, before applying them to production.
Troubleshooting + FAQ
PocketBase Does Not Start or Is Inaccessible
What to check: Make sure the PocketBase service is running (sudo systemctl status pocketbase). Check the service logs (sudo journalctl -u pocketbase --since "1 hour ago"). Ensure that port 8090 is not occupied by another process (sudo lsof -i :8090) and that UFW allows outgoing connections for PocketBase.
How to fix: If the service has crashed, the logs will show the reason. Common issues: incorrect path to the executable, incorrect permissions for the pb_data directory, port conflict. Ensure that the user under which PocketBase is running (specified in pocketbase.service) has read/write permissions to /opt/pocketbase/pb_data.
HTTPS Not Working or Domain Not Opening
What to check: Check Caddy's status (sudo systemctl status caddy) and its logs (sudo journalctl -u caddy --since "1 hour ago"). Ensure that your domain correctly points to the VPS IP address (A-record in DNS). Verify that UFW allows ports 80 and 443. Make sure the correct domain is specified in the Caddyfile and there are no typos.
How to fix: Common issues: DNS record not updated (wait), typo in the domain, Caddy cannot obtain a certificate due to incorrect DNS or firewall configuration. Try temporarily disabling UFW (sudo ufw disable) for diagnosis, then re-enable it.
What is the minimum suitable VPS configuration?
For small projects, prototypes, or personal needs, PocketBase can run even on a VPS with 1 vCore CPU, 1 GB RAM, and 20-25 GB SSD. This is sufficient for PocketBase itself and the operating system. However, if you plan to store many files or anticipate even a small amount of traffic, 2 vCore CPU, 2 GB RAM, and 50 GB NVMe SSD are recommended for better database performance and overall system responsiveness.
What to choose — VPS or dedicated for this task?
For deploying PocketBase, a VPS is sufficient in the vast majority of cases. PocketBase is very efficient and does not require huge resources. Dedicated servers are only needed for very large projects with high loads (millions of requests per day), specific isolation requirements, or when many other resource-intensive services are running simultaneously on the server. For most developers and small/medium businesses, a VPS will be the optimal choice in terms of price/performance ratio.
How to update PocketBase to a new version?
Updating PocketBase is done manually. You need to stop the PocketBase service (sudo systemctl stop pocketbase), download the new version of the executable from the official GitHub repository, replace the old file in /opt/pocketbase/ with the new one, and then restart the service (sudo systemctl start pocketbase). Always back up the pb_data folder before updating in case of unforeseen compatibility issues.
Where is PocketBase data stored?
All PocketBase data is stored by default in the directory specified when launching with the --dir flag. In our case, this is /opt/pocketbase/pb_data/. Inside this directory, you will find the SQLite database file data.db and, if you use PocketBase's file storage features, a subdirectory files/.
How to change the port PocketBase runs on?
The PocketBase port can be changed in the systemd service file: /etc/systemd/system/pocketbase.service. Find the line ExecStart=/opt/pocketbase/pocketbase serve --http "0.0.0.0:8090" --dir "/opt/pocketbase/pb_data" and change 8090 to the desired port. After saving the file, run sudo systemctl daemon-reload and sudo systemctl restart pocketbase. Don't forget to also update your Caddy configuration if you are using it as a reverse proxy, so it points to the new port.
Conclusion and Next Steps
Diagram: Conclusion and Next Steps
Congratulations! You have successfully deployed PocketBase on your VPS, configured secure HTTPS access with Caddy, and set up a basic backup system. You now have a powerful, flexible, and fully controlled backend for your applications, allowing you to quickly create and iterate on ideas.
Here are some next steps you can take to further develop your project:
Custom Domain Setup: If you haven't already, link your own domain to the VPS and update your Caddyfile to use it for your PocketBase instance.
Frontend Integration: Start developing your web or mobile frontend using PocketBase client SDKs (JavaScript, Dart/Flutter) or directly via the REST/Realtime API.
Monitoring and Logging: Set up a monitoring system (e.g., Prometheus + Grafana) to track the performance of your VPS and PocketBase, as well as centralized logging for more effective problem detection and troubleshooting.
Scaling: As your project grows, explore horizontal scaling options (e.g., using SQLite replicas or migrating to a more powerful database if PocketBase adds such support in the future) or vertical scaling by upgrading your VPS plan.
Was this guide helpful?
Your feedback helps us improve our guides.
Share this post:
Send this guide to someone who may find it useful.