Installing and Configuring Plex Media Server on VPS: Access Your Media Library From Anywhere
TL;DR
In this detailed guide, we will set up Plex Media Server on a Virtual Private Server (VPS), allowing you to organize and stream your personal media library (movies, TV shows, music, photos) to any device from anywhere in the world. You will gain full control over your media content, ensuring its security and accessibility, while avoiding the limitations and subscriptions of third-party services.
- Plex Media Server will be installed on the current version of Ubuntu Server 24.04 LTS.
- We will configure secure server access, including SSH keys, a firewall, and Fail2ban.
- Secure access to the Plex web interface via HTTPS will be ensured using Caddy.
- You will learn about VPS requirements, backup, and maintenance of Plex.
- You will receive ready-to-execute commands and example configuration files.
What We Are Setting Up and Why
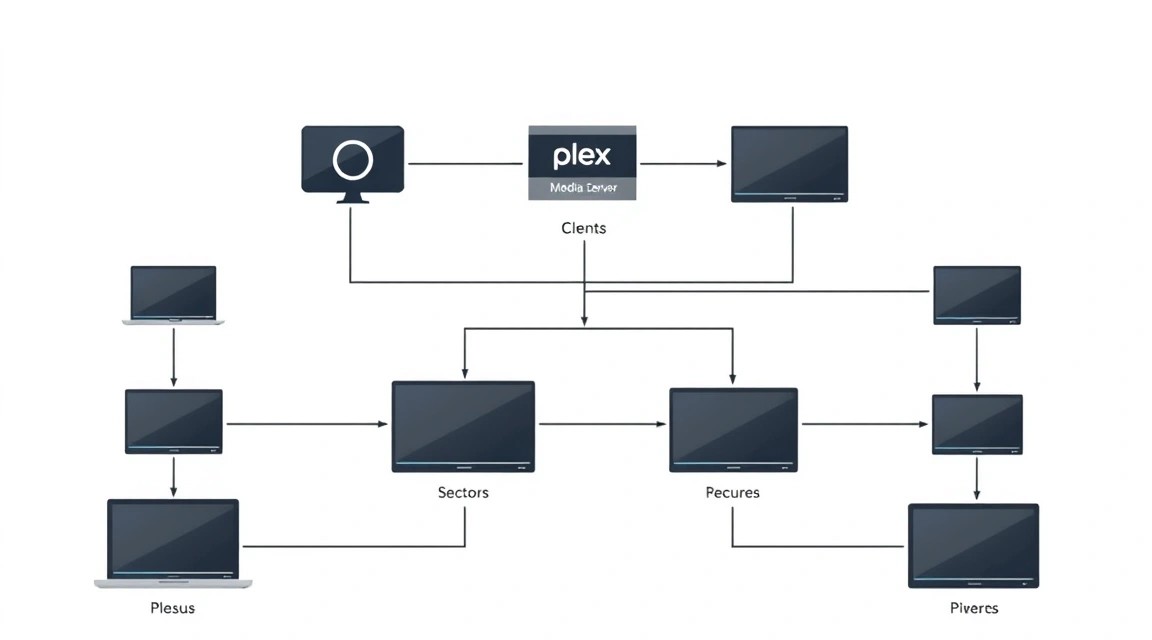
Plex Media Server is a powerful software solution that allows you to create your own streaming service for your personal collection of media files. Imagine having a vast library of movies, TV shows, music, and photos stored on your own server. Plex organizes this media library, automatically downloading covers, descriptions, ratings, and metadata, and then streams it to any of your devices: smartphone, tablet, Smart TV, game console, or web browser, wherever you are. It's your personal Netflix, completely under your control.
Ultimately, upon completing this guide, you will have a fully functional Plex Media Server, accessible from anywhere in the world. Your media library will be beautifully organized, easily accessible, and securely stored on your VPS. You will be able to share access with friends and family, control stream quality, and manage the entire system yourself.
There are various approaches to media content management. On one hand, there are cloud-managed services like Netflix, Spotify, YouTube Premium. They are convenient but limit you to their catalog, require a monthly subscription, and do not give full control over your data. On the other hand, there are self-hosted solutions like Plex, Jellyfin, Emby. By choosing a self-hosted option on a VPS, you gain the following advantages:
- Full Control: You own your data and decide how it is stored and who has access to it.
- Cost Savings: For a large media library, the one-time cost of a VPS can be lower than continuous subscriptions to multiple streaming services.
- Privacy: Your media files are not scanned or analyzed by third parties.
- Availability: Your media library is accessible 24/7 from anywhere in the world with an internet connection.
- Flexibility: You can customize Plex to your needs, integrate it with other services, and extend its functionality.
Installing Plex on a VPS is especially relevant if you don't have a stable home internet connection with high upload speed, or you don't want to keep your home computer constantly on. A VPS provides the stable connection, high bandwidth, and reliability needed for uninterrupted streaming.
What VPS Configuration is Needed for This Task
Choosing the right VPS for Plex Media Server is critical, as it directly impacts streaming performance, especially during transcoding. Transcoding is the process of converting a media file into a format compatible with the playback device, often changing resolution or bitrate "on the fly."
Minimum Requirements for Plex Media Server (current as of 2026):
- Processor (CPU):
- For direct play (no transcoding): 1-2 cores, 2 GHz. Most modern devices support H.264, so transcoding is often not required.
- For one 1080p transcoding stream: Intel Core i3 (7th generation or newer) or equivalent AMD Ryzen, or 2-4 vCPUs on a VPS. Hardware acceleration (Intel Quick Sync Video or NVENC/AMF) is desirable.
- For one 4K HDR transcoding stream: Intel Core i7 (7th generation or newer) or a powerful AMD Ryzen, or 4-6+ vCPUs. Hardware acceleration is highly recommended.
- Random Access Memory (RAM):
- Minimum: 2 GB. This is sufficient for basic operation and one or two streams without transcoding.
- Recommended: 4-8 GB. This will allow comfortable operation with multiple streams and transcoding, as well as for caching metadata.
- For 4K and many users: 8 GB or more.
- Disk Space:
- For OS and Plex metadata: 20-40 GB SSD. Plex metadata (covers, descriptions, databases) can take up significant space, especially for large libraries (hundreds of gigabytes). SSD will ensure fast access to them.
- For media files: There is no universal answer here. Media files can be stored directly on the VPS (if volume allows), on attached block storage, in cloud storage (e.g., S3-compatible), or on a remote NAS connected via FUSE. For significant libraries (terabytes of data), storing them directly on the VPS becomes impractical and expensive.
- Network:
- Bandwidth: 1 Gbit/s. This is standard for most VPS and more than sufficient for streaming.
- Outgoing traffic: The more, the better. A 1080p stream requires about 8-12 Mbit/s, for 4K — 25-50 Mbit/s. If you have multiple users, traffic will sum up. Make sure your VPS plan includes sufficient outgoing traffic (e.g., 2-5 TB per month).
Specific VPS Plan for the Task (example):
For comfortable operation of Plex Media Server, capable of handling multiple 1080p streams (including one transcoding) and an extensive media library, we recommend the following minimum set of characteristics:
- CPU: 4 vCPUs (e.g., AMD EPYC or Intel Xeon Gold), preferably with hardware acceleration support (although this is not always directly available on a VPS, the provider may offer options).
- RAM: 8 GB.
- Disk: 100 GB NVMe SSD (for OS and Plex metadata). Media files are recommended to be stored on external storage or attached drives.
- Network: 1 Gbit/s port, 5 TB outgoing traffic per month.
You can rent a VPS with such characteristics, ensuring that the chosen provider offers stable performance and sufficient traffic volume. Always pay attention to the processor type and the availability of hardware transcoding if it is critical for your tasks.
When a dedicated server is needed, not a VPS
A dedicated server becomes necessary when:
- You plan to serve a large number of simultaneous users (10+).
- You need stable 4K HDR transcoding for multiple streams, which requires significantly more computing power and often specialized hardware (GPU with NVENC/AMF).
- Your media library measures in tens and hundreds of terabytes, and you want to store it directly on the server using RAID arrays.
- You need full control over the hardware, including the ability to install specialized video cards for transcoding.
For most home users and small teams, a VPS will be more than sufficient.
Location: What it affects
The choice of VPS location matters for access speed:
- Latency: The closer the server is to you and your primary users, the lower the latency. Low latency is important for quick playback startup and navigation through the Plex interface.
- Connection speed: Physical proximity also affects the maximum data transfer speed. Choose a data center that is geographically located closer to most of your viewers.
- Geo-restrictions: Some regions may have restrictions on accessing certain content or services, although this rarely applies to Plex.
It is usually recommended to choose a data center in your country or in the nearest major country with good network infrastructure.
Server Preparation
Before installing Plex, you need to perform basic security configuration and update the operating system. We will use Ubuntu Server 24.04 LTS, as it is a current and stable version for 2026.
1. Connecting to the server via SSH
Use an SSH client to connect to your VPS. Replace your_vps_ip with your server's IP address.
ssh root@your_vps_ip
Upon first connection, you may be asked to confirm the server's key fingerprint and enter the root password.
2. System Update
Always start by updating the package list and installing all available updates. This ensures that you have the latest versions of system utilities and security patches.
sudo apt update && sudo apt upgrade -y
If a reboot is required after a kernel update, perform it:
sudo reboot
After rebooting, reconnect via SSH.
3. Creating a new user with sudo privileges
Working as the root user is insecure. Let's create a new user and grant them sudo privileges.
sudo adduser plexuser # Create a new user named plexuser
sudo usermod -aG sudo plexuser # Add the user to the sudo group
Exit the root session and log in as the new user:
exit
ssh plexuser@your_vps_ip
Now, all subsequent commands requiring root privileges will be executed via sudo.
4. Configuring SSH Keys (recommended)
SSH keys provide a more secure authentication method than passwords. If you are not already using them, generate a key pair on your local machine:
ssh-keygen -t rsa -b 4096 # On your local machine
Then copy the public key to the server for the user plexuser:
ssh-copy-id plexuser@your_vps_ip # On your local machine
After this, you will be able to log in without a password. To enhance security, disable password login for SSH:
sudo nano /etc/ssh/sshd_config
Find the lines:
#PasswordAuthentication yes
#PermitRootLogin yes
Change them to:
PasswordAuthentication no
PermitRootLogin no
Save the changes (Ctrl+O, Enter, Ctrl+X) and restart the SSH service:
sudo systemctl restart sshd
Make sure you can log in with your SSH key before disabling password login!
5. Firewall Configuration (UFW)
UFW (Uncomplicated Firewall) is a convenient utility for managing the Netfilter firewall. Let's configure it to allow only the necessary ports.
sudo apt install ufw -y # Install UFW
sudo ufw allow OpenSSH # Allow SSH (port 22)
sudo ufw allow 32400/tcp # Plex Media Server port
sudo ufw allow 80/tcp # For HTTP (later for Caddy/Let's Encrypt)
sudo ufw allow 443/tcp # For HTTPS (later for Caddy/Let's Encrypt)
sudo ufw enable # Enable firewall
sudo ufw status # Check status
Ensure that SSH (port 22) is allowed, otherwise you will lose access to the server.
6. Installing Fail2ban
Fail2ban scans server logs for suspicious activity (e.g., multiple failed SSH login attempts) and temporarily blocks the IP addresses of attackers.
sudo apt install fail2ban -y # Install Fail2ban
sudo systemctl enable fail2ban # Enable autostart
sudo systemctl start fail2ban # Start the service
Fail2ban already protects SSH by default. You can configure it further by copying the configuration file:
sudo cp /etc/fail2ban/jail.conf /etc/fail2ban/jail.local
sudo nano /etc/fail2ban/jail.local
In the jail.local file, you can change bantime (ban time) and findtime (period for detecting attempts). For most cases, the default settings are sufficient.
Software Installation — Step-by-Step
Now that the server is prepared, let's proceed with the installation of Plex Media Server. We will use the official Plex repository for Ubuntu, which will ensure easy updates in the future.
1. Adding the official Plex repository
Plex provides its own repository for Debian/Ubuntu. This ensures that you will always receive the latest stable versions of Plex Media Server.
# Install necessary packages for working with HTTPS repositories
sudo apt install -y apt-transport-https curl gnupg2

# Add the Plex repository GPG key
curl https://downloads.plex.tv/plex-media-server/pool/dists/public/Release.gpg | sudo gpg --dearmor -o /etc/apt/trusted.gpg.d/plex.gpg

# Add the Plex repository to the apt sources list
echo "deb [arch=amd64] https://downloads.plex.tv/plex-media-server/debian/ public main" | sudo tee /etc/apt/sources.list.d/plex.list
These commands first install utilities for working with HTTPS repositories, then download and add the Plex public key to verify package authenticity, and finally, add the Plex repository URL to the APT sources list.
2. Updating the package list and installing Plex Media Server
After adding the repository, you need to update the apt package list so that it recognizes the new packages available from the Plex repository, and then install Plex Media Server itself.
# Update the package list
sudo apt update

# Install Plex Media Server
sudo apt install -y plexmediaserver
Plex Media Server will be installed and automatically started as a system service. The current version of Plex Media Server for 2026 will be automatically selected from the repository (e.g., Plex Media Server 1.40.x or newer).
3. Checking Plex service status
Let's ensure that the Plex Media Server service is successfully started and running.
# Check the status of the Plex Media Server service
sudo systemctl status plexmediaserver
The output should show active (running). If the service is not running, you can try to start it manually:
# Start the service if it's not active
sudo systemctl start plexmediaserver

# Enable autostart on system boot (if not already enabled)
sudo systemctl enable plexmediaserver
4. Configuring media file permissions (if they already exist or will be mounted)
Plex Media Server runs as the plex user. Ensure that this user has read permissions for the directories where your media files will be stored. This is especially important if you plan to store media files on separate drives or in cloud storage connected to your VPS.
Example: if your media files are in /mnt/media:
# Create media directories (if they don't exist)
sudo mkdir -p /mnt/media/movies
sudo mkdir -p /mnt/media/tvshows

# Set the owner of media directories to the plex user
sudo chown -R plex:plex /mnt/media

# Set read and execute permissions for directories
sudo chmod -R 755 /mnt/media
These commands ensure that the plex user can read the contents of your media directories. If you will be adding files via SFTP or other methods, ensure they also have the correct permissions.
5. Additional Utilities (optional, but useful)
The following utilities can be useful for file management and diagnostics:
# Install mc (Midnight Commander) for a convenient file manager
sudo apt install -y mc

# Install htop for system resource monitoring
sudo apt install -y htop

# Install ffmpeg if it wasn't installed as a dependency (Plex usually comes with its own version, but a system-wide one might be needed for other tasks)
sudo apt install -y ffmpeg
Plex Media Server is now installed and ready for initial configuration via the web interface.
Configuration
After installing Plex Media Server, you need to perform the initial setup via the web interface and ensure secure access to it via HTTPS. We will use Caddy as a simple and powerful reverse proxy with automatic acquisition of Let's Encrypt SSL certificates.
1. Accessing the Plex Web Interface
Initially, Plex is accessible via your VPS's IP address and port 32400. Open in your browser:
http://your_vps_ip:32400/web
You will see the Plex login page. Log in with your Plex account (if you don't have one, create it on plex.tv). After logging in, Plex will discover a new server.
- Name your server: Choose a descriptive name, for example, "MyPlexVPS".
- Check "Allow access outside your home network": This is critical for accessing the server from anywhere in the world.
- Click "DONE".
Next, you can add media libraries:
- Click "ADD LIBRARY".
- Select media type (Movies, TV Shows, Music, etc.).
- Click "BROWSE FOR MEDIA FOLDERS" and specify the path to your media files on the VPS (e.g.,
/mnt/media/movies). - Click "ADD LIBRARY".
Plex will start scanning the specified folders, downloading metadata, and organizing your library. This process may take some time depending on the size of your collection.
2. Domain Name and DNS Configuration (Pre-requisite for HTTPS)
To use HTTPS and for convenient access, you will need a domain name (e.g., plex.yourdomain.com). Create an A-record in your domain's DNS settings, pointing to your VPS's IP address.
Example DNS record:
Type: A
Name: plex
Value: your_vps_ip
TTL: Automatic
Wait some time for the DNS record to update (usually from a few minutes to several hours).
3. Installing and Configuring Caddy for HTTPS
Caddy is a powerful, easy-to-use web server that automatically obtains and renews Let's Encrypt SSL certificates. It's an ideal solution for providing HTTPS access to Plex.
3.1. Installing Caddy
# Install dependencies
sudo apt install -y debian-keyring debian-archive-keyring apt-transport-https

# Download Caddy GPG key
curl -1sLf 'https://dl.cloudsmith.io/public/caddy/stable/gpg.key' | sudo gpg --dearmor -o /usr/share/keyrings/caddy-stable-archive-keyring.gpg

# Add Caddy repository
curl -1sLf 'https://dl.cloudsmith.io/public/caddy/stable/debian.deb.txt' | sudo tee /etc/apt/sources.list.d/caddy-stable.list

# Update package list and install Caddy
sudo apt update
sudo apt install -y caddy
Caddy will be installed as a system service and will start automatically.
3.2. Caddyfile Configuration for Plex
Let's create or edit the Caddy configuration file (Caddyfile) to proxy requests to Plex Media Server.
sudo nano /etc/caddy/Caddyfile
Delete or comment out the existing content and add the following, replacing plex.yourdomain.com with your domain name:
plex.yourdomain.com {
    # Proxy all requests to Plex Media Server
    reverse_proxy localhost:32400

    # Additional headers required for Plex
    header_up X-Plex-Product "Plex Web"
    header_up X-Plex-Version "4.x" # Current Plex Web version for 2026
    header_up X-Plex-Client-Identifier "{http.request.header.X-Plex-Client-Identifier}"
    header_up X-Plex-Platform "Web"
    header_up X-Plex-Platform-Version "{http.request.header.X-Plex-Platform-Version}"
    header_up X-Plex-Device "Browser"
    header_up X-Plex-Device-Name "{http.request.header.X-Plex-Device-Name}"
    header_up X-Plex-Device-Screen-Resolution "{http.request.header.X-Plex-Device-Screen-Resolution}"
    header_up X-Plex-Token "{http.request.header.X-Plex-Token}"
    header_up X-Plex-DTS "1"

    # Enable compression if needed
    # encode gzip zstd

    # Logging (optional)
    # log {
    #     output file /var/log/caddy/plex_access.log
    # }
}
Save the file (Ctrl+O, Enter, Ctrl+X).
3.3. Verifying and Reloading Caddy
Let's check the Caddyfile syntax and reload the Caddy service.
sudo caddy validate --config /etc/caddy/Caddyfile # Check syntax
sudo systemctl reload caddy # Reload Caddy
If the validation is successful, Caddy will automatically obtain an SSL certificate from Let's Encrypt and start proxying requests. You can now access Plex via https://plex.yourdomain.com.
4. Configuring Plex for Remote Access via Caddy
In the Plex web interface (accessible at https://plex.yourdomain.com/web):
- Go to Settings -> Remote Access.
- Ensure remote access is enabled. If Plex reports "Failed to fully access your server from outside", this is normal as we are using a reverse proxy.
- Click "Show Advanced".
- In the "Custom server access URLs" field, add
https://plex.yourdomain.com. - In the "Custom public port" field, leave it blank or specify
443. - Save changes.
5. Verifying Functionality
Open your domain in a browser:
https://plex.yourdomain.com
You should see the Plex web interface, accessible via HTTPS, with a valid SSL certificate. Verify that media files play and that you can access the server from different devices and networks.
You can also check port accessibility from your local computer:
curl -v https://plex.yourdomain.com/web # Check HTTPS access
If you see a successful response with HTML code, it means Caddy is working and proxying requests to Plex.