
Installing Formbricks on a VPS: Your Own Form and Survey Builder
TL;DR
In this detailed technical guide, we will step-by-step set up Formbricks — a powerful open-source form and survey builder — on your own virtual or dedicated server (VPS/dedicated). You will learn how to prepare the server, install all necessary components via Docker Compose, configure the domain and HTTPS using Caddy, and ensure regular backups and maintenance. As a result, you will get a fully controlled, private, and scalable data collection platform, independent of third-party cloud services.
- Formbricks will be installed on your VPS/dedicated server using Docker Compose for maximum isolation and ease of management.
- We will configure secure access via HTTPS with automatic issuance and renewal of Let's Encrypt certificates thanks to Caddy.
- Basic steps to strengthen server security will be covered, including firewall configuration and SSH keys.
- You will receive recommendations on choosing a suitable VPS configuration and learn when to consider a dedicated server.
- We will develop a data backup and recovery strategy, and provide tips for system maintenance.
What We Are Setting Up and Why
We will be installing Formbricks — a modern open-source tool for creating forms, surveys, and collecting feedback. It allows you to create interactive surveys, embed them on websites, send them via email, and analyze responses. The main feature of Formbricks that we will be using is the ability for self-hosting on your own server.
Ultimately, you will get a fully functional platform for creating and managing surveys that will run on your VPS. This will give you full control over your data, its security, and confidentiality, which is especially important given the growing demands for privacy and data protection.
Why is this needed? Imagine you are a developer, a startup founder, or a small business owner. You regularly need to collect user feedback, conduct market research, or simply create contact forms. Many cloud services (Google Forms, Typeform, SurveyMonkey) are convenient, but they host your data on their servers, often in jurisdictions that are not suitable for you, and with limitations on functionality or the number of responses on free plans. Furthermore, their cost can quickly increase with usage.
Self-hosted Formbricks on a VPS offers the following advantages:
- Full Data Control: All data is stored on your server, and only you decide how to manage it. This is critical for compliance with GDPR, HIPAA, and other regulations.
- Cost Savings: After the initial setup, you only pay for the VPS, which is often significantly cheaper than subscriptions to commercial services, especially with high usage volumes.
- Flexibility and Customization: You can modify Formbricks' source code, integrate it with your other systems, and customize branding without limitations.
- Performance: You can optimize the server for your needs, ensuring high operating speed and service availability.
- Independence: You are not dependent on changes in policies, prices, or availability of third-party services.
Of course, a self-hosted solution requires certain technical knowledge and time for setup and maintenance. However, this guide aims to simplify this process as much as possible by providing you with all the necessary steps and commands.
What VPS Configuration is Needed for This Task
Formbricks, being a modern web application, uses Docker Compose to orchestrate several services: Node.js backend, Next.js frontend, PostgreSQL for the database, and Redis for caching. This means that a non-minimal VPS configuration is required for its stable operation.
Minimum Requirements (for a small project, up to 1000 responses per month):
- Processor (CPU): 2 cores (vCPU). Formbricks can be quite resource-intensive during build time and when processing a large number of requests.
- Random Access Memory (RAM): 4 GB. This is critical. PostgreSQL, Redis, Node.js processes, and Docker itself consume a significant portion of memory. Less than 4 GB can lead to slowdowns or failures.
- Disk Space: 50 GB NVMe SSD. SSD significantly speeds up database operations and Docker images. NVMe is preferred for better performance. 50 GB is a good starting point for the OS, Docker images, and Formbricks data.
- Network: 100 Mbps or 1 Gbps port. For most purposes, 100 Mbps will be sufficient, but 1 Gbps is always better for faster loading.
Recommended VPS Plan (for medium projects, up to 10,000 responses per month and several active users):
- Processor (CPU): 4 cores (vCPU).
- Random Access Memory (RAM): 8 GB.
- Disk Space: 100-150 GB NVMe SSD.
- Network: 1 Gbps port.
For such specifications, you can consider a VPS with the specified characteristics. It is important to choose a provider offering reliable SSD storage and a stable network.
When a dedicated server is needed, not a VPS:
A dedicated server becomes advisable if:
- Very High Load: You expect tens or hundreds of thousands of responses per month, thousands of active users simultaneously.
- Strict Performance Requirements: You need guaranteed performance without "noisy neighbors" (when other VPSs on the same physical server affect your work).
- Specific Hardware Requirements: You need special CPUs, GPUs, very large amounts of RAM (32 GB+) or disk space (several TB), which are difficult to obtain on a VPS.
- Full Control over Hardware: For special security or audit requirements, when access to physical hardware is needed.
In most cases for Formbricks, especially at the start, a VPS with 4-8 GB RAM and 2-4 vCPU will be more than sufficient. If you encounter the need for a dedicated server, consider a suitable dedicated server.
Location: What It Affects
Choosing a VPS location has several key aspects:
- Latency: The closer the server is to your target audience (users who will fill out forms), the lower the latency and faster the form loading will be.
- Legislation: If you collect personal data, ensure that the server's location complies with the legal requirements of your country or the countries where your users are located (e.g., GDPR in Europe).
- Cost: VPS prices can vary depending on the location.
It is recommended to choose a location that is geographically close to most of your users to ensure the best user experience.
Server Preparation
Server Preparation
Before installing Formbricks, you need to perform basic setup and security hardening of your VPS. We will use the Ubuntu 24.04 LTS (Noble Numbat) distribution, which will be current and supported until 2026. If you are using a different distribution, the commands may vary slightly.
1. Connecting via SSH
Connect to your new VPS as the root user, using the IP address provided by your hosting provider:
ssh root@ВАШ_IP_АДРЕС
The first time you connect, the system may ask if you trust the host. Type yes.
2. System Update
Always start by updating the package manager and installed packages to their latest versions. This ensures you have all current security and stability fixes.
sudo apt update && sudo apt upgrade -y
This command updates the list of available packages and then installs all updates without prompting for confirmation.
3. Creating a New User with Sudo Privileges
Working as the root user is insecure. Let's create a new user and grant them the right to execute commands with sudo.
adduser formbricksuser # Create a new user named formbricksuser
usermod -aG sudo formbricksuser # Add the user to the sudo group so they can execute commands as root
During user creation, you will be prompted to set a password and enter additional information (which can be skipped by pressing Enter).
4. Setting Up SSH Keys for the New User
For increased security, it is recommended to use SSH keys instead of passwords for login. First, generate an SSH key on your local machine if you don't have one yet:
ssh-keygen -t ed25519 -C "[email protected]" # On your local machine
Then, copy the public key to the server for the new user. Replace formbricksuser and ВАШ_IP_АДРЕС with your values.
ssh-copy-id formbricksuser@ВАШ_IP_АДРЕС # On your local machine
If ssh-copy-id is unavailable or not working, you can copy the key manually. First, log in to the server as formbricksuser (still using a password for now):
ssh formbricksuser@ВАШ_IP_АДРЕС # Connect as the new user
mkdir -p ~/.ssh # Create the .ssh directory if it doesn't exist
chmod 700 ~/.ssh # Set correct permissions for the directory
nano ~/.ssh/authorized_keys # Open the file for editing
Paste the content of your public key (usually from the ~/.ssh/id_ed25519.pub file on your local machine) into the opened authorized_keys file and save (Ctrl+X, Y, Enter). Then, set the correct permissions for the file:
chmod 600 ~/.ssh/authorized_keys
exit # Exit the server
5. Disabling Password Login for Root and Password Login Entirely (Optional, but Recommended)
Once you have confirmed that you can log in as the new user with an SSH key, disable password login for root and, preferably, completely disable password login for all users, allowing only SSH keys. This significantly enhances security.
sudo nano /etc/ssh/sshd_config # Open the SSH server configuration file
Find and change the following lines (or add them if they are missing):
# Forbid root login with password
PermitRootLogin prohibit-password

# Disable password login for all users
PasswordAuthentication no

# Enable SSH key authentication
PubkeyAuthentication yes
Save the changes and restart the SSH server:
sudo systemctl restart sshd
IMPORTANT: Before exiting the current SSH session, open a new terminal window and try to connect to the server as formbricksuser using your SSH key. If the login is successful, everything is configured correctly, and you can safely close the root session.
6. Firewall Configuration (UFW)
Uncomplicated Firewall (UFW) is an easy-to-use firewall for Linux. Let's configure it to allow only the necessary ports.
sudo apt install ufw -y # Install UFW if it's not already installed
sudo ufw allow OpenSSH # Allow SSH (port 22)
sudo ufw allow http # Allow HTTP (port 80)
sudo ufw allow https # Allow HTTPS (port 443)
sudo ufw enable # Enable the firewall
sudo ufw status # Check firewall status
The firewall will now allow incoming connections only on ports 22 (SSH), 80 (HTTP), and 443 (HTTPS), blocking all others by default.
7. Installing Fail2Ban
Fail2Ban helps protect against brute-force attacks by temporarily blocking IP addresses from which numerous failed login attempts originate.
sudo apt install fail2ban -y # Install Fail2Ban
sudo cp /etc/fail2ban/jail.conf /etc/fail2ban/jail.local # Create a local copy of the config for modifications
sudo nano /etc/fail2ban/jail.local # Open the file for editing
In the jail.local file, ensure that the [sshd] section is active (enabled = true) and, optionally, configure bantime (block time) and findtime (period over which failed attempts are counted) as desired. Default settings are generally good enough for most cases.
# Example configuration in jail.local
[sshd]
enabled = true
port = ssh
logpath = %(sshd_log)s
maxretry = 3 # Maximum number of failed attempts before blocking
bantime = 1h # IP address block time (1 hour)
Save the changes and restart Fail2Ban:
sudo systemctl restart fail2ban
sudo systemctl enable fail2ban # Enable Fail2Ban autostart on system boot
Your server is now ready for Formbricks installation with basic security settings.
Software Installation — Step-by-Step
Formbricks will be installed using Docker and Docker Compose. This allows for easy deployment of all necessary components (database, cache, the application itself) in isolated containers, simplifying management and updates.
1. Installing Docker Engine
Docker Engine is the foundation for running containers. We will install it from the official Docker repository.
# Update package manager and install necessary utilities
sudo apt update
sudo apt install ca-certificates curl gnupg lsb-release -y

# Add Docker's official GPG key
sudo install -m 0755 -d /etc/apt/keyrings
curl -fsSL https://download.docker.com/linux/ubuntu/gpg | sudo gpg --dearmor -o /etc/apt/keyrings/docker.gpg

# Add Docker repository to APT sources
echo \
  "deb [arch="$(dpkg --print-architecture)" signed-by=/etc/apt/keyrings/docker.gpg] https://download.docker.com/linux/ubuntu \
  "$(. /etc/os-release && echo "$VERSION_CODENAME")" stable" | \
  sudo tee /etc/apt/sources.list.d/docker.list > /dev/null

# Update package list with the new repository
sudo apt update

# Install Docker Engine, Docker CLI, and containerd (current versions for 2026)
sudo apt install docker-ce docker-ce-cli containerd.io -y

# Add current user to the docker group to execute commands without sudo
sudo usermod -aG docker $USER

# Reload group for changes to apply (or simply reconnect via SSH)
newgrp docker
Verify that Docker is installed correctly by running a test container:
docker run hello-world
If you see the message "Hello from Docker!", then the installation was successful.
2. Installing Docker Compose
Docker Compose allows you to define and run multi-container Docker applications. We will install the current version of Docker Compose V2.
# Docker Compose V2 is usually installed with Docker Engine as a plugin.
# Check for its presence:
docker compose version

# If Docker Compose V2 is not installed, it can be installed separately:
sudo apt install docker-compose-plugin -y # Install Docker Compose plugin
Ensure that the command docker compose (with a space) works, and not docker-compose (with a hyphen), as this indicates V2.
3. Cloning the Formbricks Repository
Formbricks provides a ready-to-use Docker Compose file for deployment. We will clone the official Formbricks repository, which contains all necessary files.
# Create a directory for Formbricks
mkdir ~/formbricks
cd ~/formbricks

# Clone the Formbricks repository (use a stable branch or release if specified)
# For 2026, we will assume that the main repository contains the current docker-compose
git clone https://github.com/formbricks/formbricks.git .

# Verify that necessary files, such as docker-compose.yml, are in the directory
ls -la docker-compose.yml
This command clones the contents of the Formbricks repository into the current directory ~/formbricks.
4. Configuring the Environment Variables File (.env)
Formbricks uses a .env file to store configuration variables such as database settings, secret keys, domain, and SMTP data. Copy the template and edit it.
cp .env.example .env
nano .env
In the .env file, you will need to configure the following variables:
DATABASE_URL: PostgreSQL connection string. By default, Docker Compose will already configure PostgreSQL, and this variable will look approximately like this:postgresql://formbricks:formbricks@formbricks-database:5432/formbricks?schema=public. Change the passwordformbricksto something more secure.REDIS_URL: Redis connection string. Default:redis://formbricks-redis:6379.NEXTAUTH_SECRET: A very important secret key. Generate a long random string (e.g., usingopenssl rand -base64 32).WEBAPP_URL: The URL where your Formbricks instance will be accessible. For example,https://forms.yourdomain.com. Ensure you have a domain name and it points to your VPS.SENDER_EMAIL_ID: The email address from which system emails (e.g., confirmations) will be sent.SMTP_HOST,SMTP_PORT,SMTP_USER,SMTP_PASSWORD: Settings for your SMTP server, through which Formbricks will send emails. If you do not plan to send emails, these can be left empty, but for full functionality (e.g., user invitations), they are necessary.PRIMARY_APP_NAME: The name of your Formbricks instance (e.g., "My Surveys").NEXT_PUBLIC_FORMBRICKS_API_HOST: Must matchWEBAPP_URL.SERVER_URL: Must also matchWEBAPP_URL.TELEMETRY_DISABLED=1: It is recommended to add this line if you do not want to send anonymous usage data to Formbricks developers.
Example of modified lines in .env (generate your unique secrets!):
# ... other variables ...

DATABASE_URL="postgresql://formbricks_user_secure:YOUR_SECURE_DB_PASSWORD@formbricks-database:5432/formbricks_db?schema=public"
REDIS_URL="redis://formbricks-redis:6379"

# Generate your unique secret: openssl rand -base64 32
NEXTAUTH_SECRET="your_very_long_and_secure_random_string_here_for_nextauth"

WEBAPP_URL="https://forms.example.com"
NEXT_PUBLIC_FORMBRICKS_API_HOST="https://forms.example.com"
SERVER_URL="https://forms.example.com"

SENDER_EMAIL_ID="[email protected]"
SMTP_HOST="smtp.mailgun.org" # Example: your SMTP provider
SMTP_PORT="587"
SMTP_USER="[email protected]"
SMTP_PASSWORD="YOUR_SMTP_PASSWORD"
SMTP_SECURE_ENABLED="true" # If your SMTP supports TLS

PRIMARY_APP_NAME="My Surveys"

TELEMETRY_DISABLED=1
# ... remaining variables ...
Save the changes to the .env file.
5. Running Formbricks with Docker Compose
After configuring .env, you can start all Formbricks services.
# Ensure you are in the ~/formbricks directory
cd ~/formbricks

# Start Formbricks in the background
docker compose up -d

# Check the status of running containers
docker compose ps
The docker compose up -d command will download the necessary Docker images, create containers, and run them in the background. This may take some time on the first run, as Docker will download the images.
docker compose ps will show a list of running containers and their status. Ensure that all containers have an Up status.
6. Database Initialization
After the initial container startup, it is necessary to initialize the Formbricks database. This is done through migrations.
# Execute database migrations inside the app container
docker compose exec app npx prisma migrate deploy

# Generate Prisma client
docker compose exec app npx prisma generate
These commands ensure that the Formbricks database structure is created and updated to the latest version. After this, Formbricks is ready for use, but currently only accessible via IP address without HTTPS.
Formbricks and Domain Configuration
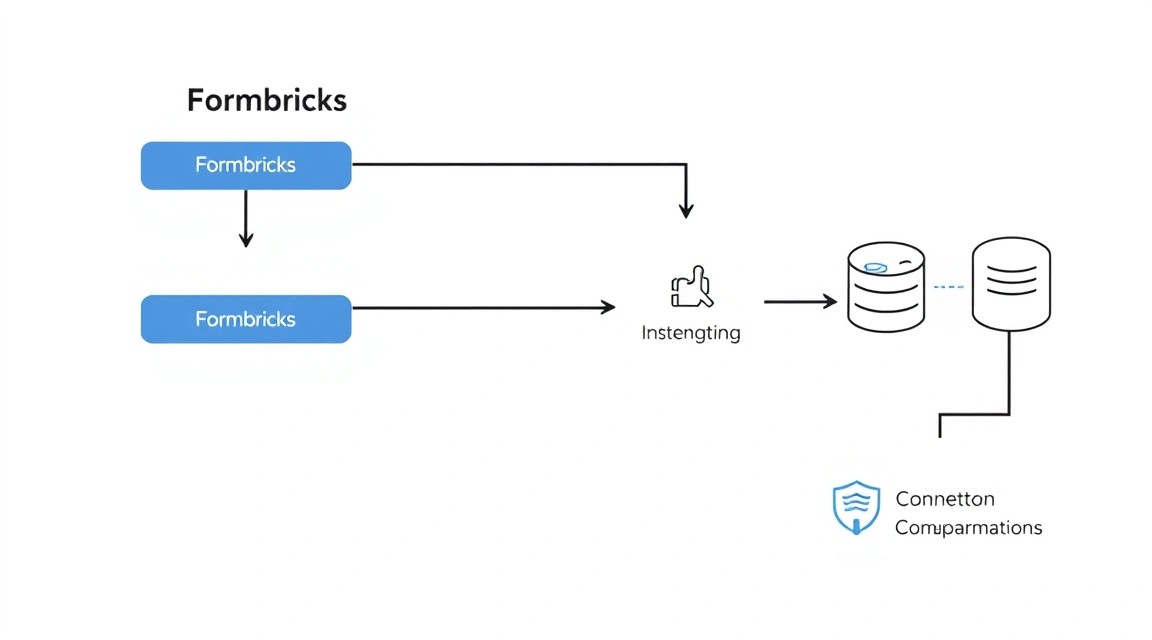
Now that Formbricks is running, you need to configure access to it via a domain name and ensure a secure HTTPS connection. We will use Caddy as a reverse proxy server, which automatically manages Let's Encrypt SSL certificates.
1. Domain Name Configuration
Before proceeding, ensure you have a domain name (e.g., forms.example.com) and that its A-record in DNS points to your VPS's IP address. This is critical for Caddy and HTTPS to function.
Example DNS record:
| Type | Name/Host | Value |
|---|---|---|
| A | forms | YOUR_VPS_IP_ADDRESS |
Allow some time for DNS records to propagate (usually a few minutes, but can take up to several hours).
2. Installing Caddy
Caddy is a powerful yet easy-to-configure web server that is excellent for reverse proxying and automatic HTTPS certificate issuance.
# Устанавливаем необходимые пакеты
sudo apt install -y debian-keyring debian-archive-keyring apt-transport-https

# Добавляем ключ GPG Caddy
curl -1sLf 'https://dl.cloudsmith.io/public/caddy/stable/gpg.key' | sudo gpg --dearmor -o /usr/share/keyrings/caddy-stable-archive-keyring.gpg

# Добавляем репозиторий Caddy
curl -1sLf 'https://dl.cloudsmith.io/public/caddy/stable/debian.deb.txt' | sudo tee /etc/apt/sources.list.d/caddy-stable.list

# Обновляем список пакетов и устанавливаем Caddy
sudo apt update
sudo apt install caddy -y
3. Configuring the Caddyfile
Caddy uses a configuration file called Caddyfile. We will configure it to act as a reverse proxy for Formbricks.
sudo nano /etc/caddy/Caddyfile
Remove all file content and insert the following configuration, replacing forms.example.com with your domain name:
forms.example.com {
    # Сжимаем ответы для более быстрой загрузки
    encode gzip zstd

    # Настройки для автоматического HTTPS
    tls {
        dns cloudflare {env.CLOUDFLARE_API_TOKEN} # Если используете Cloudflare DNS
        # Или просто оставьте пустым для HTTP-01 challenge, если порт 80 открыт
    }

    # Обратный прокси к Formbricks (Docker Compose сервис 'app' слушает на порту 3000)
    reverse_proxy formbricks-app:3000 {
        # Добавляем заголовки для корректной работы WebSocket и прокси
        header_up Host {host}
        header_up X-Real-IP {remote_ip}
        header_up X-Forwarded-For {remote_ip}
        header_up X-Forwarded-Proto {scheme}
        header_up X-Forwarded-Ssl on
        header_up Upgrade {header.Upgrade}
        header_up Connection {header.Connection}
    }

    # Включить логирование (опционально, полезно для отладки)
    log {
        output file /var/log/caddy/formbricks_access.log
        format json
    }
}
Caddyfile Explanations:
forms.example.com: Specifies the domain for which this configuration will work. Caddy will automatically obtain an SSL certificate for it.tls { dns cloudflare {env.CLOUDFLARE_API_TOKEN} }: This is optional. If your domain is managed via Cloudflare DNS and you want to use the DNS-01 challenge for certificate issuance (useful if port 80 is blocked or you want a wildcard certificate), you need to create a Cloudflare API token and set it as an environment variable. If you have simply opened ports 80 and 443 on your firewall, Caddy will use the HTTP-01 challenge, and this line can be removed.reverse_proxy formbricks-app:3000: Redirects all incoming requests to the Formbricksappservice within the Docker Compose network, which listens on port 3000. It is important to use the service name fromdocker-compose.yml(usuallyapp) for resolution within the Docker network.
If you decide to use a DNS challenge (e.g., with Cloudflare), you will need to create an environment variable file for Caddy.
sudo mkdir -p /etc/caddy/conf.d # Создаем директорию для переменных
sudo nano /etc/caddy/conf.d/caddy.env
Add your Cloudflare API token:
CLOUDFLARE_API_TOKEN="ВАШ_API_ТОКЕН_CLOUDFLARE"
Then, edit the /etc/systemd/system/caddy.service file (or create it if it doesn't exist) and add the line EnvironmentFile=/etc/caddy/conf.d/caddy.env to the [Service] section.
# ...
[Service]
EnvironmentFile=/etc/caddy/conf.d/caddy.env
# ...
Save the Caddyfile. Then, check the syntax and reload Caddy:
sudo caddy validate # Проверяем синтаксис Caddyfile
sudo systemctl reload caddy # Перезагружаем Caddy для применения изменений
Caddy will automatically request and install an SSL certificate for your domain.
4. Verifying Functionality
Open your domain (e.g., https://forms.example.com) in a browser. You should see the Formbricks registration/login page. Verify that the connection is secure (padlock icon in the browser).
You can also check accessibility using curl from your VPS:
curl -I https://forms.example.com
You should see HTTP headers, including HTTP/2 200 OK, indicating a successful connection.
If you encounter issues, check Caddy logs:
sudo journalctl -u caddy --no-pager
And Formbricks container logs:
cd ~/formbricks
docker compose logs app
docker compose logs database
5. Registering the First User
After successfully configuring the domain and HTTPS, navigate to your Formbricks URL. You will see a welcome page where you can register the first user and create your organization. This will be the administrator account for your Formbricks instance.
Backups and Maintenance
Backup is a critically important part of operating any service. Formbricks stores all its data in a PostgreSQL database and also uses Redis for caching (Redis data typically does not require backup as it can be recreated).
1. What to Back Up
You need to regularly back up:
- PostgreSQL Database: Contains all Formbricks surveys, responses, users, settings, and metadata. This is the most critical component.
- Configuration Files: The Formbricks
.envfile, as well as theCaddyfileand any custom server settings. - Docker Compose Files:
docker-compose.ymland other related files, so that the environment can be easily restored.
2. Simple PostgreSQL Auto-Backup Script
Let's create a simple script that will dump the database and save it. For storage, we will use local storage, but it is highly recommended to send backups to external storage (S3-compatible cloud storage, another VPS, Google Drive, etc.).
# Создаем директорию для бэкапов
sudo mkdir -p /var/backups/formbricks
sudo chown $USER:$USER /var/backups/formbricks # Даем права текущему пользователю

# Создаем скрипт бэкапа
nano ~/formbricks_backup.sh
Insert the following content into the formbricks_backup.sh file, replacing the variables with your actual values from .env:
#!/bin/bash

# --- Конфигурация ---
BACKUP_DIR="/var/backups/formbricks"
DATE=$(date +%Y%m%d_%H%M%S)
DB_NAME="formbricks_db" # Название вашей БД из .env
DB_USER="formbricks_user_secure" # Пользователь БД из .env
DB_PASSWORD="YOUR_SECURE_DB_PASSWORD" # Пароль БД из .env
DB_HOST="formbricks-database" # Имя хоста БД внутри Docker-сети
DB_PORT="5432"

# --- Выполнение бэкапа БД ---
echo "[$DATE] Starting Formbricks PostgreSQL database backup..."
docker compose exec -T database pg_dump -U "$DB_USER" -d "$DB_NAME" -h "$DB_HOST" -p "$DB_PORT" > "$BACKUP_DIR/formbricks_db_backup_$DATE.sql"

if [ $? -eq 0 ]; then
    echo "[$DATE] PostgreSQL database backup completed successfully: $BACKUP_DIR/formbricks_db_backup_$DATE.sql"
else
    echo "[$DATE] ERROR: PostgreSQL database backup failed!"
    exit 1
fi

# --- Копирование конфигурационных файлов ---
echo "[$DATE] Copying configuration files..."
cp ~/formbricks/.env "$BACKUP_DIR/formbricks_env_$DATE.bak"
cp /etc/caddy/Caddyfile "$BACKUP_DIR/caddyfile_$DATE.bak"
cp ~/formbricks/docker-compose.yml "$BACKUP_DIR/docker_compose_$DATE.bak"

echo "[$DATE] Configuration files copied."

# --- Очистка старых бэкапов (оставляем последние 7 дней) ---
echo "[$DATE] Cleaning up old backups..."
find "$BACKUP_DIR" -type f -name "formbricks_db_backup_*.sql" -mtime +7 -delete
find "$BACKUP_DIR" -type f -name "formbricks_env_*.bak" -mtime +7 -delete
find "$BACKUP_DIR" -type f -name "caddyfile_*.bak" -mtime +7 -delete
find "$BACKUP_DIR" -type f -name "docker_compose_*.bak" -mtime +7 -delete

echo "[$DATE] Old backups cleaned up."
echo "[$DATE] Backup script finished."
Make the script executable:
chmod +x ~/formbricks_backup.sh
Test the script by running it manually:
~/formbricks_backup.sh
ls -la /var/backups/formbricks/
3. Automating Backups with Cron
Let's add the script to the Cron scheduler for daily execution (e.g., at 3:00 AM).
crontab -e
Add the following line to the end of the file (if this is your first time, choose an editor, e.g., nano):
0 3 * * * /home/formbricksuser/formbricks_backup.sh >> /var/log/formbricks_backup.log 2>&1
This line will run the script every day at 3 AM and redirect the output to the log file /var/log/formbricks_backup.log.
4. Where to Store Backups (External Storage)
Storing backups on the same server as the main service is extremely risky. If the server fails or is compromised, you will lose both the service and the backups. It is highly recommended to configure automatic sending of backups to external storage:
- S3-compatible cloud storage: AWS S3, Backblaze B2, DigitalOcean Spaces, etc. Use utilities like
rcloneors3cmdfor synchronization. - Separate VPS: Configure
rsyncorscpto copy backups to another VPS. - Encrypted backups: Consider using
resticorborgbackupto create encrypted, deduplicated backups that can be stored anywhere.
For example, for rclone, after installing and configuring it, you can add a synchronization command to the backup script:
# Добавить в скрипт formbricks_backup.sh после очистки старых бэкапов
echo "[$DATE] Syncing backups to remote storage..."
rclone sync "$BACKUP_DIR" "your_rclone_remote_name:formbricks-backups" --progress
if [ $? -eq 0 ]; then
    echo "[$DATE] Backups synced to remote storage successfully."
else
    echo "[$DATE] ERROR: Failed to sync backups to remote storage!"
fi
5. Updates: Rolling vs. Maintenance Window
Formbricks and its components are regularly updated. The update strategy depends on your tolerance for downtime:
- Rolling updates: Applied to individual components without a complete service shutdown. In the context of Docker Compose, this might mean updating individual containers without rebuilding the entire stack. Formbricks usually requires stopping the entire stack to apply migrations and update code.
- Maintenance window: The preferred approach for Formbricks. Schedule a time when traffic is lowest and perform the update.
Formbricks Update Process:
cd ~/formbricks

# 1. Останавливаем сервис Formbricks
docker compose down

# 2. Обновляем исходный код Formbricks
git pull origin main # Или используйте конкретную ветку/тег релиза

# 3. Пересобираем Docker-образы и запускаем сервисы
docker compose build
docker compose up -d

# 4. Выполняем миграции базы данных (если были изменения)
docker compose exec app npx prisma migrate deploy
docker compose exec app npx prisma generate

# 5. Очищаем кэш Formbricks (если применимо, обычно не требуется явно)
# docker compose exec app npx formbricks-cli cache clear # Пример, если есть такая команда

echo "Formbricks updated successfully!"
Always check the official Formbricks documentation before updating, as the process may change between major versions.
Troubleshooting + FAQ
What is the minimum suitable VPS configuration?
The minimum recommended configuration for Formbricks is 2 CPU cores, 4 GB RAM, and 50 GB NVMe SSD. However, for stable operation and processing a moderate number of surveys, especially if you plan to actively use Formbricks, 4 CPU cores, 8 GB RAM, and 100 GB NVMe SSD will be a much more reliable choice. Less RAM (e.g., 2 GB) is almost guaranteed to lead to performance and stability issues due to the requirements of PostgreSQL, Redis, and Node.js.
What to choose – VPS or dedicated for this task?
For most users starting with Formbricks, a VPS is the optimal choice. It offers sufficient performance, flexibility, and cost-effectiveness. A dedicated server is only needed under very high load (tens of thousands of responses per hour, hundreds of thousands per month) when maximum and guaranteed performance is required, or if you have specific hardware requirements that cannot be met on a VPS. Start with a VPS and consider switching to a dedicated server only when there is a clear need for scaling.
docker compose up -d is not working or containers are not starting. What to do?
docker compose up -d is not working or containers are not starting. What to do?First, check the container logs to understand the cause of the failure. Navigate to the Formbricks directory (cd ~/formbricks) and execute:
docker compose ps -a # Show all containers, including stopped ones
docker compose logs # Show logs of all services
docker compose logs app # Show logs of a specific service (e.g., 'app')
Typical problems: insufficient memory (check docker stats), incorrect variables in .env (especially DATABASE_URL, NEXTAUTH_SECRET, WEBAPP_URL), port conflicts, corrupted images (try docker compose pull and docker compose build --no-cache).
HTTPS is not working or Caddy is not getting a certificate.
Ensure that your domain (e.g., forms.example.com) is correctly configured in DNS and points to your VPS's IP address. Check the firewall (UFW): ports 80 (HTTP) and 443 (HTTPS) must be open (sudo ufw status). Check the Caddyfile syntax (sudo caddy validate) and Caddy logs (sudo journalctl -u caddy --no-pager) for ACME (Let's Encrypt) related errors.
Formbricks is not sending emails.
Check the SMTP settings in your .env file. Ensure that SMTP_HOST, SMTP_PORT, SMTP_USER, SMTP_PASSWORD, and SENDER_EMAIL_ID are correctly specified and match your SMTP provider. Also, check if the SMTP port is open on your VPS firewall (usually 587 or 465). Check the logs of the Formbricks app container for email sending related errors.
Database connection error.
Ensure that the formbricks-database container is running (docker compose ps). Check DATABASE_URL in the .env file for typos in the username, password, database name, or host. Make sure the hostname formbricks-database resolves correctly within the Docker network. Sometimes restarting the entire stack with docker compose restart helps.
Formbricks is running slowly.
Check server resource usage: top, htop, free -h. If RAM or CPU are consistently loaded at 90%+, you will likely need to upgrade your VPS to a more powerful plan. Ensure you are using SSDs, not HDDs. Check Formbricks logs for recurring errors that might be causing excessive load. Also, consider optimizing Formbricks queries if you have a very large amount of data or active users.
Conclusions and Next Steps
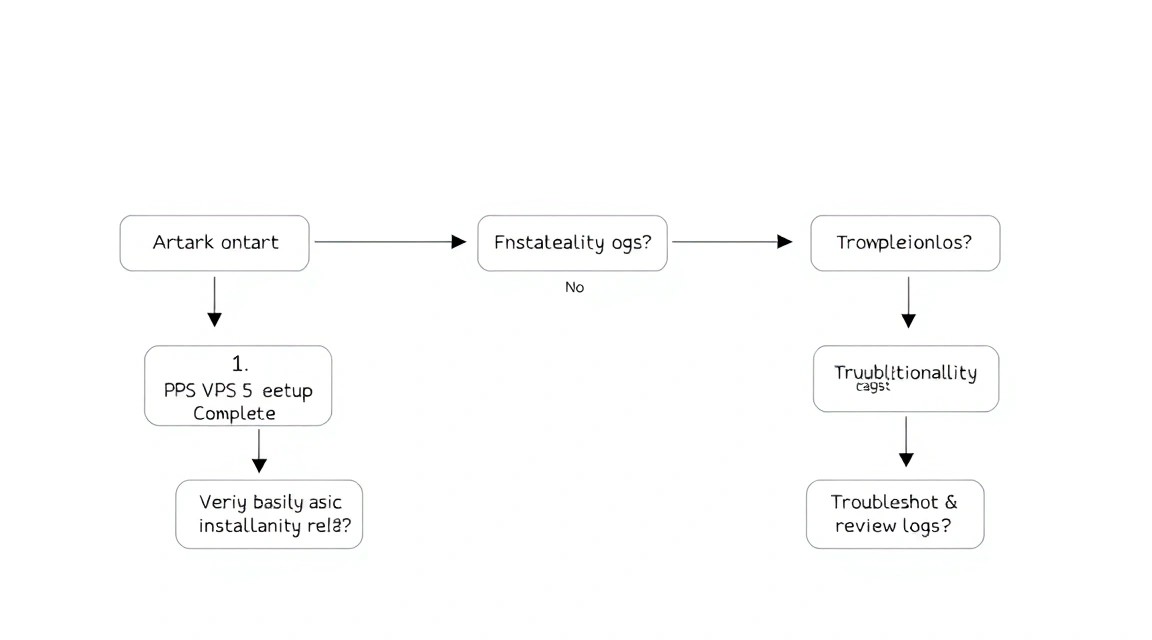
Congratulations! You have successfully deployed and configured your own Formbricks instance on a VPS, gaining full control over data and functionality. You have mastered key aspects of working with Docker Compose, configuring the Caddy web server for HTTPS, and organizing basic backups. This setup provides a reliable and private platform for collecting feedback, surveys, and forms, fully meeting your requirements.
Where to go next?
- Configure Notifications: Integrate Formbricks with your notification systems (Slack, Email, Webhooks) to promptly receive information about new responses.
- Resource Monitoring: Install a monitoring system (e.g., Prometheus + Grafana or Netdata) to track CPU, RAM, disk, and network usage of your VPS, as well as the status of Formbricks containers.
- Further Optimization: Depending on the load, you may consider optimizing PostgreSQL or Redis configurations, as well as fine-tuning Caddy to improve performance and security.
- Scaling: If your project grows significantly, explore Formbricks scaling options, possibly using more advanced orchestrators like Kubernetes, or transitioning to a dedicated server.