bolt Valebyte VPS from $4/mo — NVMe, 60s deploy.

Get a VPS arrow_forward
eco Beginner Tutorial/How-to

Setting Up Fail2Ban on

calendar_month Aug 03, 2026 schedule 17 min read visibility 22 views
Настройка Fail2Ban на VPS: автоматическая защита от брутфорс-атак
info

Need a server for this guide? We offer dedicated servers and VPS in 50+ countries with instant setup.

Need a server for this guide?

Deploy a VPS or dedicated server in minutes.

Configuring Fail2Ban on VPS: Automatic Protection Against Brute-Force Attacks

TL;DR

In this guide, we will step-by-step configure Fail2Ban on your VPS for automatic protection against brute-force attacks on various services such as SSH, web servers (Nginx/Apache), mail services, and others. You will learn how to install, configure, and verify Fail2Ban's operation, significantly enhancing your server's security and preventing unauthorized access.

  • Automatic blocking of attackers by IP address based on log analysis.
  • Protection of key services: SSH, Nginx, Apache, Postfix, Docker containers.
  • Detailed configuration of rules (jails), blocking time, and trigger conditions.
  • Reduced server load and increased stability by cutting off malicious traffic.
  • Step-by-step instructions with current commands and configuration examples for 2026.
  • The guide includes sections on server preparation, installation, configuration, maintenance, and troubleshooting.

What we configure and why
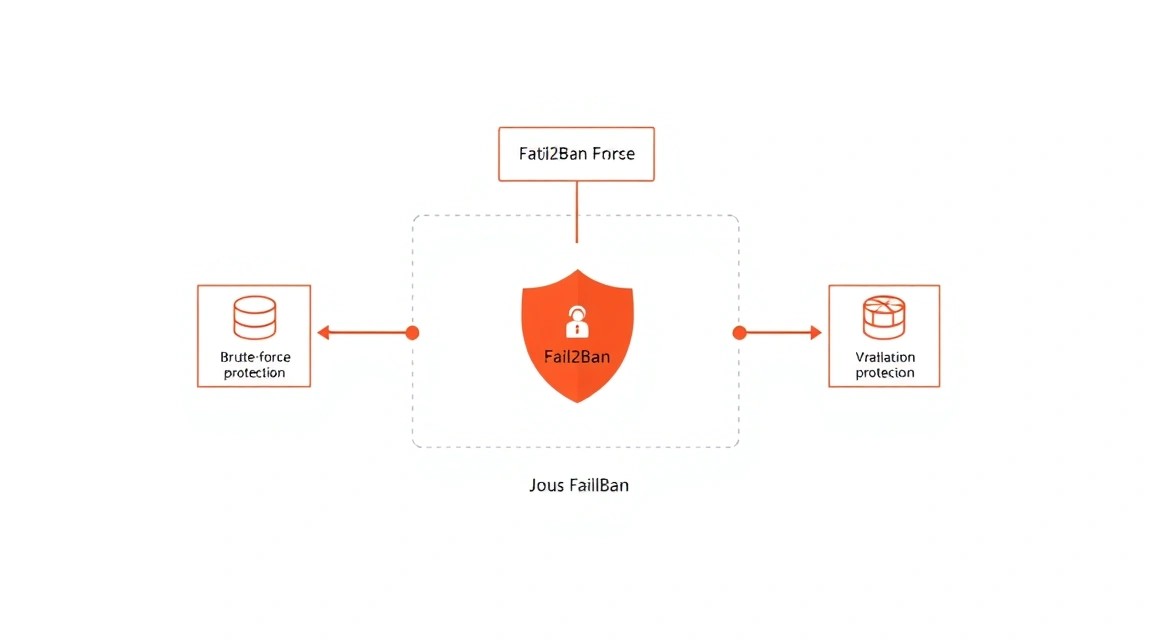
Diagram: What we configure and why

In the modern internet, your server is constantly subjected to unauthorized access attempts. One of the most common threats is brute-force attacks, where attackers try to guess passwords for your services (e.g., SSH, FTP, web control panels) by repeatedly trying combinations. These attacks not only pose a security threat but can also significantly strain server resources, slowing down its operation or even making it unavailable.

We will configure Fail2Ban — a powerful tool for automatic protection against such attacks. Fail2Ban scans log files of various services (SSH, Apache, Nginx, Postfix, etc.) for suspicious entries indicating login attempts with incorrect credentials. Upon detecting multiple failed attempts from a single IP address within a specified time, Fail2Ban automatically blocks that IP address for a defined period, using firewall rules (e.g., via iptables or ufw).

As a result of the configuration, you will have a significantly more secure and stable server. Fail2Ban will operate in the background, continuously monitoring activity and automatically thwarting hacking attempts. This will free you from manual log monitoring and constant blocking of suspicious IP addresses, allowing you to focus on core tasks.

Alternatives: Cloud-managed vs Self-hosted

For many tasks, both cloud-managed solutions and the option of self-hosting on a VPS exist. For example, for hosting websites, you can use SaaS platforms or PaaS services, and for databases, managed cloud databases. However, when it comes to complete flexibility, data control, and cost optimization, self-hosted solutions on a VPS are often preferred.

  • Full Control: You have complete control over the operating system, installed software, and configurations. This is critical for specific security, performance, or compatibility requirements.
  • Cost-effectiveness: For many tasks, a VPS can be significantly cheaper in the long run compared to constantly rising cloud service bills, especially with stable loads.
  • Confidentiality: You host your data on your own server, which can be important for projects with high privacy requirements or regulatory compliance.
  • Learning and Experience: Setting up your own server is an excellent way to deepen technical knowledge, which is useful for developers and system administrators.

Configuring Fail2Ban is one of the fundamental steps in securing any self-hosted solution on a VPS, complementing standard measures such as using SSH keys and strong passwords.

What VPS configuration is needed for this task
Diagram: What VPS configuration is needed for this task

Fail2Ban itself is a fairly lightweight application and does not require significant resources. The main load will depend on the number of services being protected, the volume of logs they generate, and the intensity of attacks. However, for comfortable operation and the ability to host other services on the same VPS, the following minimum configuration is recommended:

  • CPU: 1 core. Modern processors with a clock speed of 2.0 GHz or higher will be more than sufficient.
  • RAM: 1-2 GB. Fail2Ban consumes from several tens to 100-200 MB of RAM depending on the number of active "jails" and the volume of logs processed. Additional memory will be needed for the operating system and your other services.
  • Disk: 20-40 GB NVMe/SSD. NVMe or SSD drives are significantly faster than traditional HDDs, which is important for fast operating system performance and log access. 20 GB is enough for the OS and Fail2Ban, but 40 GB will provide a reserve for logs and other applications.
  • Network: 100 Mbit/s or 1 Gbit/s. A stable channel with good bandwidth is important for overall server operation, but for Fail2Ban, stability is more critical than raw speed.

For most scenarios where a VPS is planned to host several websites, a mail server, or light containers, a plan with 2 CPU cores, 4 GB RAM, and 80 GB NVMe/SSD will be optimal. This will provide sufficient performance and stability headroom.

You can consider a VPS with the specified characteristics for hosting your project. The main thing is to ensure that the provider offers reliable infrastructure and support.

When a dedicated server is needed, not a VPS

A dedicated server should be considered if:

  • You require maximum performance and stability without any "neighboring" with other users.
  • Your project generates very high load (e.g., a large game server, a high-load SaaS with thousands of users, big data processing).
  • Specific hardware or configuration is required that is not available on a VPS.
  • Maximum isolation and compliance with strict security/regulatory requirements are needed, where virtualization could be a potential risk.

For the task of protecting against brute-force attacks on typical services, a VPS will be more than sufficient. Upgrading to a dedicated server is justified if the project you are protecting has already outgrown the capabilities of a VPS.

Location: What it affects

The choice of VPS location affects several key aspects:

  • Latency: The closer the server is to your target audience or to you, the lower the latency. This is critical for interactive applications, game servers, and websites where every millisecond matters.
  • Legal aspects: The laws of the country where the server is located determine data processing rules, confidentiality, and other legal matters.
  • Availability: Some regions may have better connectivity to certain parts of the world.

For protection against attacks, Fail2Ban's location does not play a direct role, but for the overall performance of your services, choose a location as close as possible to your main users.

Server preparation
Diagram: Server preparation

Before proceeding with Fail2Ban installation, it is necessary to perform basic setup of a fresh VPS. These steps will enhance security and ease of administration.

1. Connecting via SSH

Connect to your VPS as the root user, using the IP address provided by your hosting provider:


ssh root@YOUR_IP_ADDRESS

Replace ВАШ_IP_АДРЕС with your server's actual IP.

2. System Update

Always start by updating the package manager and installed packages to the latest versions. This ensures you have current security patches and stable library versions. For Debian/Ubuntu-based systems (current for 2026):


sudo apt update && sudo apt upgrade -y

This command updates the list of available packages and then installs all available updates without prompting for confirmation.

3. Creating a new user with sudo privileges

Working as root is insecure. Let's create a new user and grant them sudo privileges:


adduser your_user # Creates a new user
usermod -aG sudo your_user # Adds the user to the sudo group

Replace ваш_пользователь with your desired name. After this, set a strong password for the new user.

4. Configuring SSH keys for the new user

Using SSH keys instead of a password significantly enhances security. First, generate keys on your local machine if you don't have them:


ssh-keygen -t ed25519 -C "[email protected]"

Then copy the public key to the server:


ssh-copy-id your_user@YOUR_IP_ADDRESS

Now you can connect as your_user:


ssh your_user@YOUR_IP_ADDRESS

5. Disabling SSH login for root and password authentication

After successfully logging in with the new user and SSH key, disable root login and password authentication in the SSH server. This will significantly enhance security:


sudo nano /etc/ssh/sshd_config

Find and change the following lines (or add them if missing):


PermitRootLogin no
PasswordAuthentication no
ChallengeResponseAuthentication no
UsePAM no

Save the changes (Ctrl+X, Y, Enter) and restart the SSH service:


sudo systemctl restart sshd

IMPORTANT: Before disabling, make sure you can log in with the new user and SSH key! Keep the current root session open until you verify login via the new user.

6. Configuring the firewall (UFW)

A firewall is necessary to restrict access to server ports. UFW (Uncomplicated Firewall) is easy to configure. Install it if it's not already installed:


sudo apt install ufw -y # Install UFW
sudo ufw allow OpenSSH # Allow SSH (port 22 by default)
sudo ufw allow 80/tcp # Allow HTTP
sudo ufw allow 443/tcp # Allow HTTPS
sudo ufw enable # Enable the firewall
sudo ufw status # Check status

Be sure to allow SSH, otherwise you will lose access to the server after enabling UFW. Also add rules for any other services you plan to use (e.g., 25/tcp for SMTP, 53/udp for DNS, etc.).

Software Installation — Step-by-Step
Diagram: Software Installation — Step-by-Step

Now that the server is prepared, let's proceed with Fail2Ban installation. We will use the official repositories for Debian/Ubuntu, which ensures stability and ease of updates.

1. Fail2Ban Installation

Fail2Ban is available in the standard repositories of most Linux distributions. For Debian/Ubuntu (current as of 2026, Fail2Ban version 1.0+):


sudo apt update # Update package list
sudo apt install fail2ban -y # Install Fail2Ban

After installation, Fail2Ban will automatically start and be enabled on system boot.

2. Checking Fail2Ban Status

Ensure that the Fail2Ban service is running:


sudo systemctl status fail2ban # Check service status

The output should show active (running). If not, try starting it manually:


sudo systemctl start fail2ban # Start the service
sudo systemctl enable fail2ban # Enable autostart on boot

3. Installing Additional Tools (Optional, but Recommended)

For more convenient log monitoring and working with text files, htop and nano might be useful (if not installed):


sudo apt install htop nano -y

htop is an improved interactive process manager, and nano is a simple text editor.

4. Fail2Ban Structure Overview

Fail2Ban stores its configurations in the /etc/fail2ban/ directory. Key files:

  • jail.conf: The main configuration file with default settings. It should not be modified directly.
  • jail.d/: Directory for custom configurations. This is where we will create our .conf files.
  • jail.local: A custom file that overrides settings from jail.conf. It is recommended to use it or files in jail.d/.
  • filter.d/: Contains predefined filters for various services.
  • action.d/: Contains predefined actions (e.g., blocking via iptables).

We will work with the jail.local file or create new files in jail.d/ to avoid losing changes during Fail2Ban updates.
Configuration

Diagram: Configuration

The main configuration of Fail2Ban is done via the jail.local file. We will copy the base config and then modify it to suit our needs.

1. Creating jail.local

Copy the jail.conf file to jail.local to begin configuration:


sudo cp /etc/fail2ban/jail.conf /etc/fail2ban/jail.local

Now, all changes will be made in jail.local.

2. Basic jail.local Configuration

Open the jail.local file for editing:


sudo nano /etc/fail2ban/jail.local

At the beginning of the file, you will find the [DEFAULT] section. Here you can set global parameters. Recommended settings:


[DEFAULT]
# Time for which an IP address is banned (in seconds). 1 hour.
bantime = 3600

# Time window during which attempts are counted (in seconds). 10 minutes.
findtime = 600

# Maximum number of failed attempts before banning.
maxretry = 5

# IP addresses that will never be banned (your IP, local networks).
# Multiple IPs can be specified, separated by spaces.
ignoreip = 127.0.0.1/8 ::1 192.168.0.0/16 172.16.0.0/12 10.0.0.0/8

# Default action upon banning. 'iptables-multiport' - blocks IP
# on all ports specified in the jail.
banaction = iptables-multiport

# Email notifications (optional, requires mail server setup)
# destemail = [email protected]
# sendername = Fail2Ban
# mta = sendmail
# action = %(action_mw)s # Sends an email with Whois information

Explanations:

  • bantime: Sets the duration for which an IP address is banned. 3600 seconds = 1 hour. Can be increased to 86400 (24 hours) or even -1 for permanent banning (use with caution).
  • findtime: The time window during which Fail2Ban monitors failed attempts. If maxretry attempts occur within findtime, the IP will be banned.
  • maxretry: The number of failed login attempts after which an IP address will be banned.
  • ignoreip: A list of IP addresses or subnets that will never be banned. Be sure to add your static IP address here!
  • banaction: The action that will be performed to ban an IP. iptables-multiport is standard and effective.

3. Configuring "Jails"

Below the [DEFAULT] section are separate sections for each service, called "jails". By default, many of them are disabled. To enable protection for a service, set enabled = true.

3.1. SSH Protection

This is one of the most important protections. Find the [sshd] section and enable it:


[sshd]
enabled = true
port = ssh # or your custom SSH port, if changed (e.g., 2222)
filter = sshd
logpath = /var/log/auth.log # or /var/log/secure for CentOS/RHEL
maxretry = 3 # Can be made smaller for SSH
bantime = 86400 # Ban SSH for 24 hours

If you have changed the standard SSH port (from 22 to another), remember to specify it in the port parameter. It is recommended to use a longer ban time (e.g., 24 hours) for SSH, as password brute-force attempts often come from bots.

3.2. Nginx Protection (HTTP/HTTPS)

To protect the Nginx web server from authentication attacks (e.g., on the /admin panel) or DoS-like attacks (too many requests), you can use the nginx-http-auth and nginx-dos filters.

First, ensure that Nginx logs errors. If you are using Nginx, install it:


sudo apt install nginx -y

Then add the following sections to jail.local:


[nginx-http-auth]
enabled = true
port = http,https
filter = nginx-http-auth
logpath = /var/log/nginx/error.log
maxretry = 6
bantime = 1200

[nginx-dos]
enabled = true
port = http,https
filter = nginx-dos
logpath = /var/log/nginx/access.log
maxretry = 300 # For example, 300 requests in 5 minutes
findtime = 300 # 5 minutes
bantime = 600 # Ban for 10 minutes

Note: For nginx-dos, filter = nginx-dos might be missing by default. You may need to create the file /etc/fail2ban/filter.d/nginx-dos.conf with the following content:


[Definition]
failregex = ^ -."(GET|POST|HEAD).HTTP/" (403|404|401)
ignoreregex =

This is a very simple filter. More complex filters for Nginx can be found in the official Fail2Ban documentation or on GitHub.

3.3. Postfix Protection (SMTP)

If you are using Postfix for sending mail:


[postfix]
enabled = true
port = smtp,ssmtp,submission,imap,imaps,pop3,pop3s
filter = postfix
logpath = /var/log/mail.log
maxretry = 5
bantime = 1800

4. Syntax Check and Fail2Ban Restart

After making all changes, save the jail.local file. Before restarting the service, it is recommended to check the configuration for errors:


sudo fail2ban-client -d # Checks configuration without applying

If there are no errors, restart Fail2Ban to apply the new settings:


sudo systemctl restart fail2ban

5. Checking Fail2Ban Functionality

To ensure that Fail2Ban is working correctly, you can check the status of active "jails":


sudo fail2ban-client status # General Fail2Ban status
sudo fail2ban-client status sshd # Status of a specific jail (e.g., sshd)

The output for sshd should show the number of banned IP addresses, if any. To test, try entering an incorrect password several times (more than maxretry) when connecting via SSH from another IP address (or from yours, if it's not in ignoreip). Then check the status of the sshd jail.


Status for jail sshd:
|- Filter
|  |- Currently failed: 0
|  |- Total failed:     5
|  `- File list:        /var/log/auth.log
`- Actions
   |- Currently banned: 1
   |- Total banned:     1
   `- Banned IP list:   192.168.1.100 (example of a banned IP)

This means that Fail2Ban successfully banned the IP address 192.168.1.100 after 5 failed attempts.

6. Docker Integration (Optional)

If you are using Docker, container logs might not be directly accessible to Fail2Ban from /var/log/. To protect Docker containers, you will need to configure containers to output logs in a format understandable by Fail2Ban, or use specialized solutions. One approach is to configure Docker containers to use the syslog or json-file log driver, subsequently forwarding them to a centralized log file that Fail2Ban can read. For example, for Nginx in Docker:

Add to docker-compose.yml for your service:


services:
  nginx:
    image: nginx:stable-alpine
    # ... other settings ...
    logging:
      driver: "json-file"
      options:
        max-size: "10m"
        max-file: "3"
    volumes:
      - /var/log/nginx-docker:/var/log/nginx # Mapping Nginx logs from the container

Then change the logpath in the corresponding Nginx jail to /var/log/nginx-docker/error.log and /var/log/nginx-docker/access.log respectively.

Another option is to use log-driver: syslog and configure rsyslog on the host to write Docker logs to separate files that Fail2Ban can monitor.

Backups and Maintenance

Diagram: Backups and Maintenance

Even with Fail2Ban configured, backups remain a critically important element of security and fault tolerance. Additionally, the system needs regular maintenance.

1. What to Back Up

For Fail2Ban and overall server stability, it's important to back up the following:

  • Fail2Ban configuration files: /etc/fail2ban/jail.local and any .conf files you created in /etc/fail2ban/jail.d/, as well as custom filters in /etc/fail2ban/filter.d/.
  • Other important configs: /etc/ssh/sshd_config, web server configurations (Nginx: /etc/nginx/, Apache: /etc/apache2/), firewall (/etc/ufw/).
  • Your application data: Databases, website files, user data, if any.

2. Simple Auto-Backup Script

To create regular backups, you can use a combination of rsync and cron. For more reliable and incremental backups, consider tools like BorgBackup or Restic.

Example of a simple script for backing up Fail2Ban and SSH configurations:


#!/bin/bash
BACKUP_DIR="/var/backups/configs"
DATE=$(date +%Y%m%d_%H%M%S)
TAR_FILE="$BACKUP_DIR/fail2ban_configs_$DATE.tar.gz"

mkdir -p "$BACKUP_DIR"

# Create an archive with important configurations
tar -czvf "$TAR_FILE" \
    /etc/fail2ban/jail.local \
    /etc/fail2ban/jail.d/ \
    /etc/fail2ban/filter.d/ \
    /etc/ssh/sshd_config \
    --exclude='.swp'

# Delete old backups (keep the last 7 days)
find "$BACKUP_DIR" -type f -name "fail2ban_configs_.tar.gz" -mtime +7 -delete

echo "Backup created: $TAR_FILE"

Save this script as /usr/local/bin/backup_fail2ban.sh and make it executable:


sudo chmod +x /usr/local/bin/backup_fail2ban.sh

Then add it to cron for daily execution. Open crontab:


sudo crontab -e

And add a line to execute the script daily at 3:00 AM:


0 3   * /usr/local/bin/backup_fail2ban.sh > /dev/null 2>&1

3. Where to Store Backups

Never store backups on the same server as the original data. If the server fails, you will lose both data and backups. Recommended options:

  • External S3-compatible storage: Services like AWS S3, Backblaze B2, DigitalOcean Spaces, or other cloud storage solutions offer reliable and scalable storage.
  • Separate VPS: You can use another, less powerful VPS as a backup storage, using rsync over SSH.
  • Local storage: For small projects, you can use a local disk on your workstation, but this requires manual synchronization.

For automatic sending of backups to S3, you can use s3cmd or rclone.

4. Updates: Rolling vs Maintenance Window

Regular software updates are critical for security. You can choose one of the following strategies:

  • Rolling updates: Applied as they are released, typically for non-critical services. For Fail2Ban, which is not updated frequently, this can be acceptable.
  • Maintenance window: Updates are performed at a predetermined time, usually at night or on weekends when the load is minimal. This allows for process control and risk minimization.

For Fail2Ban, it's sufficient to run sudo apt update && sudo apt upgrade -y once a week or once a month. Always check logs after updates. For Fail2Ban, it's also important to keep its filters up-to-date. Periodically check the official Fail2Ban GitHub repository for new or updated filters, especially if you are using specific services.

Troubleshooting + FAQ

This section contains answers to frequently asked questions and solutions to common problems that may arise when working with Fail2Ban.

Fail2Ban is not blocking IP addresses, even though there are errors in the logs. What should I check?

Make sure Fail2Ban actually "sees" the logs. Check the log path in the jail.local file (logpath parameter) for the corresponding "jail". Ensure that the filter (filter) is correctly configured and matches your log format. You can test the filter manually using the command fail2ban-regex /path/to/log /etc/fail2ban/filter.d/your_filter.conf. Also, check that maxretry and findtime are set correctly and the IP address is not in the ignoreip list.

How to unblock an IP address manually?

If you accidentally blocked your IP address or need to unblock a legitimate one, use the command: sudo fail2ban-client set JAIL_NAME unbanip IP_ADDRESS. For example, for SSH: sudo fail2ban-client set sshd unbanip 1.2.3.4. After this, the IP address will be immediately unblocked.

How to check which IP addresses are blocked?

To view all active "jails" and blocked IP addresses, use: sudo fail2ban-client status. To view the status of a specific "jail" (e.g., sshd): sudo fail2ban-client status sshd. The output will show a list of blocked IP addresses and their count.

What is the minimum VPS configuration suitable for Fail2Ban?

For Fail2Ban itself, a minimal VPS with 1 CPU core, 1 GB RAM, and 20 GB NVMe/SSD disk is sufficient. However, if other services (web server, database, mail) will also be running on the server, then 2 CPU cores, 2-4 GB RAM, and 40-80 GB NVMe/SSD are recommended to ensure stable operation of all applications and have resource headroom.

What to choose — VPS or dedicated for this task?

For configuring Fail2Ban and protecting most typical services (several websites, a mail server for a small team, a game server for friends), a VPS will be an optimal and cost-effective choice. A dedicated server is justified only for high-load projects requiring maximum performance, complete isolation, or specific hardware where virtualization may be undesirable.

Fail2Ban consumes too many resources. What to do?

Check which "jails" are active and how often they trigger. Overly aggressive filters or monitoring very large log files can increase resource consumption. Try increasing findtime and bantime, and decreasing maxretry for less critical services. Ensure Fail2Ban uses an optimal backend (auto by default, which is usually good). If the problem is due to a very large number of logs, consider log rotation (logrotate) for more efficient file management.

Can Docker containers be protected with Fail2Ban?

Yes, this is possible but requires additional configuration. Fail2Ban works with logs, so containers must output their logs to the host system where Fail2Ban can read them. The most common approach is to map log files from the container to the host system via Docker volumes or configure the Docker logging driver to syslog so that logs are sent to the host's system journal. Fail2Ban is then configured to read these files or the system journal.

How to update Fail2Ban?

For Debian/Ubuntu-based systems, it is sufficient to execute the standard package update commands: sudo apt update && sudo apt upgrade -y. Fail2Ban will be updated along with the rest of the system. After the update, it is recommended to restart the service sudo systemctl restart fail2ban to ensure that new component versions are applied.

Conclusion and Next Steps

Diagram: Conclusion and Next Steps

Congratulations! You have successfully configured Fail2Ban on your VPS, significantly increasing its resilience to brute-force attacks. Your server now automatically monitors suspicious activity and blocks attackers, freeing you from routine monitoring and allowing you to focus on developing your projects. This is a fundamental step in ensuring the basic security of any self-managed server.

Further steps to strengthen your server's security and optimization may include:

  • Monitoring and Logging: Set up a centralized logging system (e.g., ELK Stack or Grafana Loki) for deeper analysis of security and performance events.
  • Regular Security Audits: Use vulnerability scanning tools (e.g., Nessus, OpenVAS) and regularly check configurations for compliance with best practices.
  • Scaling and High Availability: As your project grows, consider migrating to cluster solutions, load balancers, and redundant servers to ensure uninterrupted operation.
  • Deployment Automation: Use tools like Ansible, Puppet, or Chef to automate the setup of new servers and configuration management, which will save time and reduce the likelihood of errors.

Was this guide helpful?

Your feedback helps us improve our guides.

Share this post:

Send this guide to someone who may find it useful.

Telegram VKVK WhatsApp Facebook LinkedIn XX

fail2ban setup on VPS: automatic bruteforce attack protection
support_agent
Valebyte Support
Usually replies within minutes
Hi there!
Send us a message and we'll reply as soon as possible.