Deploying Wiki.js on VPS: Installation with Docker Compose, PostgreSQL, and Nginx Proxy
TL;DR
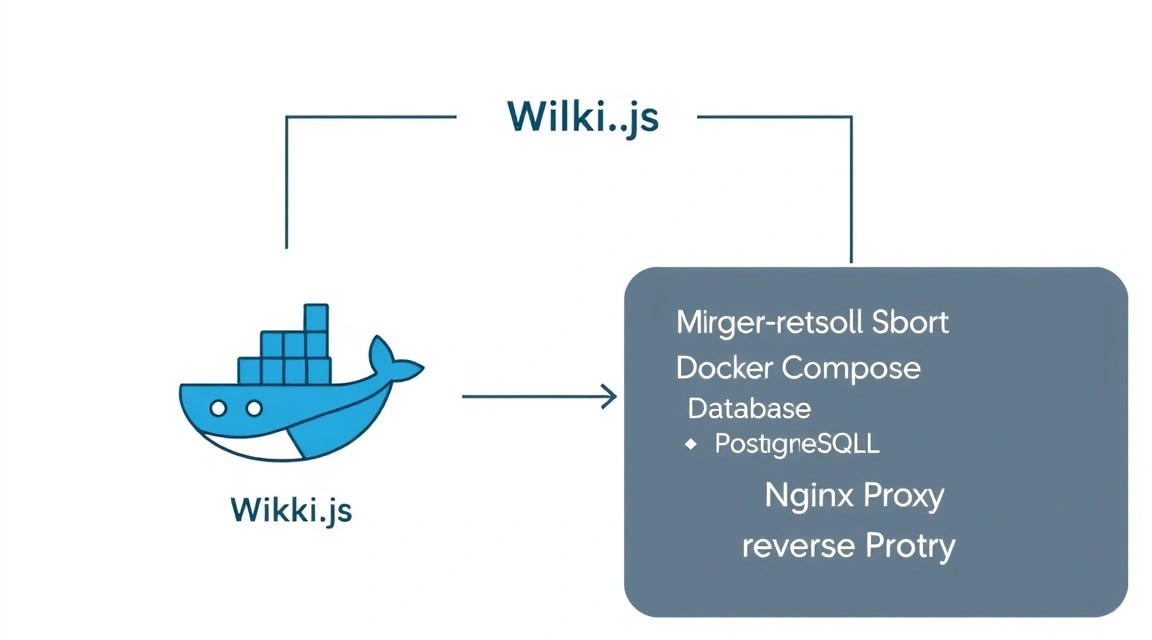
In this detailed guide, we will set up the modern and powerful Wiki.js wiki system on your own VPS, step by step. You will learn how to use Docker Compose to orchestrate services, including a PostgreSQL database and Nginx Proxy Manager reverse proxy with automatic Let's Encrypt SSL certificate issuance, ensuring secure and scalable access to your documentation or knowledge.
- Setting up a secure and optimized VPS with Ubuntu 24.04 LTS.
- Installing Docker and Docker Compose for application containerization.
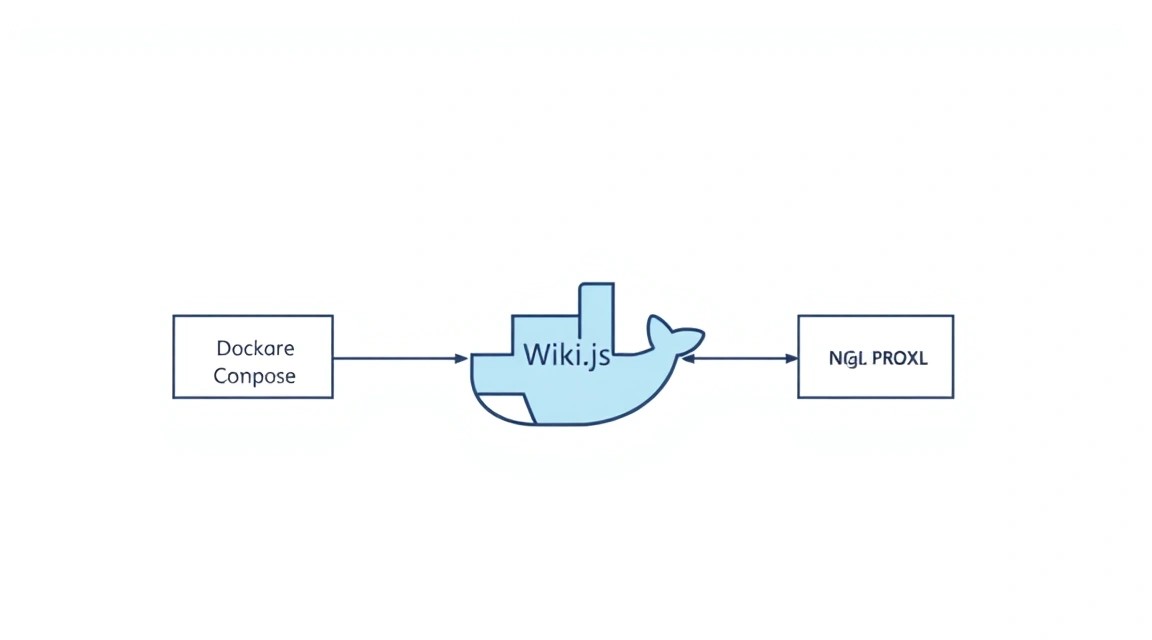
- Deploying Wiki.js, PostgreSQL, and Nginx Proxy Manager using a single file
docker-compose.yml. - Automatic HTTPS configuration via Let's Encrypt for Wiki.js.
- Creating an effective backup strategy for Wiki.js and PostgreSQL data.
- Troubleshooting common issues and optimizing performance.
What we are setting up and why
In this guide, we will deploy Wiki.js — a modern, powerful, and flexible wiki system designed for teamwork, project documentation, knowledge base creation, or personal notes. Wiki.js offers an intuitive user interface, support for various editors (Markdown, AsciiDoc, WYSIWYG), integration with external authentication services (LDAP, OAuth, SAML), and extensive customization options. It is an ideal solution for developers, startups, and anyone who needs a centralized and easily accessible information repository.
Ultimately, you will get a fully functional wiki system, accessible via your domain name over HTTPS, running in isolated containers on your VPS. This will ensure high stability, security, and ease of maintenance. All components — Wiki.js, the PostgreSQL database, and the Nginx Proxy Manager reverse proxy — will be managed using Docker Compose, which significantly simplifies their deployment and scaling.
There are various approaches to creating knowledge bases. You can use cloud services such as Notion, Confluence Cloud, GitBook, or even Google Docs. These solutions offer "turnkey" convenience with minimal administration effort. However, they often come with a subscription model, limitations on functionality or data volume, and privacy concerns, as your data is stored on third-party servers. For small teams or personal projects, monthly payments might be unjustifiably high, and data control insufficient.
Self-hosting Wiki.js on a VPS provides full control over data, security, and configuration. You are not dependent on third-party provider pricing plans, you can customize the system to your unique needs, and be confident in the confidentiality of your information. Furthermore, it's an excellent opportunity to deepen your knowledge in server administration and containerization, which is a valuable skill for any technical specialist.
What VPS configuration is needed for this task
Choosing the right VPS configuration is critical for the stable and fast operation of Wiki.js. While Wiki.js is relatively lightweight, the database and reverse proxy also consume resources. We will focus on the current requirements for 2026, considering the increasing complexity of web applications and operating systems.
Minimum Requirements
- CPU: 2 cores. Modern processors with a clock speed of 2.5 GHz and higher will ensure good responsiveness. One core might be sufficient for very small installations (1-2 users), but for stable operation and handling background tasks (search, indexing), two are better.
- RAM: 2 GB. This will be sufficient for Wiki.js, PostgreSQL, and Nginx Proxy Manager. Wiki.js itself can consume 300-500 MB, PostgreSQL — 200-400 MB, plus the OS and Docker daemon. If active use or a large number of articles is planned, it's better to consider 4 GB.
- Disk: 40 GB SSD. SSD is critically important for database performance and page load speed. 40 GB will provide room for the operating system, Docker images, Wiki.js data, and potential backups. If you plan to store many images or files in the wiki, consider 80-100 GB.
- Network: 100 Mbps symmetric channel. For most cases, this is more than enough. Channel stability and low ping are more important.
Specific VPS Plan for the Task
For deploying Wiki.js with Docker Compose, PostgreSQL, and Nginx Proxy Manager, the optimal configuration will be the following:
- CPU: 2-4 vCPUs (virtual cores)
- RAM: 4 GB
- Disk: 80 GB NVMe SSD (preferred) or high-performance SATA SSD
- Network: 200-500 Mbps guaranteed channel
Such a configuration will be sufficient for a team of 10-30 active users, with the ability to store thousands of pages and hundreds of media files. For stable operation, you can consider a VPS with the specified characteristics.
When a dedicated server is needed, not a VPS
A dedicated server becomes necessary in the following cases:
- Very high load: If your Wiki.js will serve hundreds or thousands of concurrent users, process huge volumes of data, or you plan to host other resource-intensive applications on the same server.
- Strict performance requirements: For applications critical to latency or requiring maximum disk subsystem performance (e.g., large databases with high read/write frequency).
- Specialized hardware: If you need specific hardware components, such as GPUs for machine learning, RAID controllers for increased disk fault tolerance, or very large amounts of RAM (64 GB or more).
- Full control over hardware: A dedicated server provides full physical control over the hardware, which can be important for some specific tasks or security policies.
For most Wiki.js installations, a VPS will be more than sufficient and cost-effective. If in doubt, start with a VPS and scale up to a dedicated server when a real need arises. For very large projects, you can consider a suitable dedicated server.
Location: What it affects
The choice of VPS location affects several key factors:
- Latency/Ping: The closer the server is to your primary users, the lower the ping and faster page loading will be. For a team working in one city/region, choose a server in that same region. For distributed teams, choose a central location or use a CDN (Content Delivery Network).
- Legislation: Data storage and privacy laws can vary greatly depending on the country. Ensure that the chosen location complies with your business requirements or personal preferences.
- Cost: VPS prices can vary depending on the location due to differences in electricity costs, infrastructure, and taxes.
Always choose a location that is as close as possible to the majority of your users to ensure the best user experience.
Server Preparation

Before proceeding with the Wiki.js installation, it is necessary to perform basic setup and security hardening of your VPS. We will use Ubuntu 24.04 LTS (Noble Numbat), current for 2026, as the foundation for our server.
1. Connecting to the Server and System Update
Connect to your server via SSH using the credentials provided by your VPS provider. This usually includes the IP address, username (root), and password.
ssh root@YOUR_VPS_IP_ADDRESS
After successful login, update the package list and installed packages to their latest versions.
sudo apt update && sudo apt upgrade -y
This will ensure that all system components are up-to-date and include the latest security fixes.
2. Creating a New User with Sudo Privileges
Working as the root user is insecure. Let's create a new user and grant them sudo privileges.
sudo adduser wikiuser
Follow the on-screen instructions to set a password and user information. Then, add the user to the sudo group.
sudo usermod -aG sudo wikiuser
Now you can switch to the new user and continue.
su - wikiuser
Or open a new SSH session as this user.
ssh wikiuser@YOUR_VPS_IP_ADDRESS
3. Setting up SSH Key Authentication (Recommended)
To enhance security, it is recommended to use SSH keys instead of passwords. Generate a key pair on your local machine if you don't have one already.
# On your local machine
ssh-keygen -t rsa -b 4096
Then copy the public key to the server for the wikiuser.
# On your local machine
ssh-copy-id wikiuser@YOUR_VPS_IP_ADDRESS
After this, disable password authentication for SSH. Edit the file /etc/ssh/sshd_config.
sudo nano /etc/ssh/sshd_config
Find and change the following lines (or add them if missing):
PasswordAuthentication no
ChallengeResponseAuthentication no
UsePAM no
PermitRootLogin no
Restart the SSH service.
sudo systemctl restart sshd
Now you will only be able to connect via SSH keys, and the root user will not be able to log in directly.
4. Firewall Configuration (UFW)
UFW (Uncomplicated Firewall) is an easy-to-use interface for configuring iptables rules. Let's allow only the necessary ports.
sudo apt install ufw -y # Install UFW if not already installed
sudo ufw default deny incoming # Deny all incoming connections by default
sudo ufw default allow outgoing # Allow all outgoing connections by default
sudo ufw allow ssh # Allow SSH (port 22)
sudo ufw allow http # Allow HTTP (port 80)
sudo ufw allow https # Allow HTTPS (port 443)
sudo ufw enable # Enable firewall
sudo ufw status verbose # Check firewall status
Now your server is protected from unwanted incoming connections.
5. Installing Fail2Ban
Fail2Ban scans logs for suspicious activity (e.g., multiple failed SSH login attempts) and automatically blocks the IP addresses of attackers. This is an additional layer of protection.
sudo apt install fail2ban -y
sudo systemctl enable fail2ban # Enable Fail2Ban autostart on system boot
sudo systemctl start fail2ban # Start Fail2Ban
Fail2Ban is configured by default to protect SSH. You can check its status:
sudo fail2ban-client status
sudo fail2ban-client status sshd
Basic server preparation is now complete. You can now proceed with software installation.
Software Installation — Step-by-step
Software Installation — Step-by-Step
We will use Docker and Docker Compose to deploy Wiki.js, PostgreSQL, and Nginx Proxy Manager. This ensures application isolation, simplifies dependency management, and facilitates scaling.
1. Install Docker Engine
First, let's install the necessary packages for Docker.
sudo apt update # Update package list
sudo apt install ca-certificates curl gnupg lsb-release -y # Install dependencies
Let's add Docker's official GPG key.
sudo install -m 0755 -d /etc/apt/keyrings # Create directory for keys if it doesn't exist
curl -fsSL https://download.docker.com/linux/ubuntu/gpg | sudo gpg --dearmor -o /etc/apt/keyrings/docker.gpg # Download and add GPG key
sudo chmod a+r /etc/apt/keyrings/docker.gpg # Set correct permissions
Let's add the Docker repository to APT sources.
echo \
  "deb [arch="$(dpkg --print-architecture)" signed-by=/etc/apt/keyrings/docker.gpg] https://download.docker.com/linux/ubuntu \
  "$(. /etc/os-release && echo "$VERSION_CODENAME")" stable" | sudo tee /etc/apt/sources.list.d/docker.list > /dev/null
Let's update the package list again and install Docker Engine, Docker CLI, and containerd.
sudo apt update # Update package list after adding the repository
sudo apt install docker-ce docker-ce-cli containerd.io -y # Install Docker Engine (version will be current for 2026, e.g., 25.0.x or 26.0.x)
Let's check the status of the Docker service.
sudo systemctl status docker # Ensure Docker is running and active
Let's add your user to the docker group to avoid using sudo with every Docker command.
sudo usermod -aG docker ${USER} # Add current user to the docker group
newgrp docker # Apply group changes without re-logging (or simply restart your SSH session)
Let's verify the Docker installation by running a test container.
docker run hello-world # Run a test container to verify Docker installation
2. Install Docker Compose
Docker Compose is a tool for defining and running multi-container Docker applications. We will install it as a Docker CLI plugin.
sudo apt install docker-compose-plugin -y # Install Docker Compose as a plugin for Docker CLI (version will be current for 2026)
Let's check the Docker Compose version.
docker compose version # Verify that Docker Compose is installed correctly
3. Prepare Directory Structure
Let's create a directory for our Wiki.js project and subdirectories for data.
mkdir -p ~/wiki # Create main directory for the project
cd ~/wiki # Navigate to the created directory
mkdir -p data/wiki # Directory for Wiki.js data (files, uploads)
mkdir -p data/db # Directory for PostgreSQL data
4. Create docker-compose.yml File
This file will define our services: Wiki.js, PostgreSQL, and Nginx Proxy Manager.
nano docker-compose.yml # Open editor to create the file
Paste the following content (current image versions will be selected for 2026):
version: '3.8'

services:
  wiki:
    image: ghcr.io/requarks/wiki:2.5.300 # Current stable version of Wiki.js for 2026
    container_name: wiki-js
    restart: unless-stopped
    environment:
      NODE_ENV: production
      DB_TYPE: postgres
      DB_HOST: db
      DB_PORT: 5432
      DB_USER: wikiuser
      DB_PASS: ${DB_PASSWORD} # Password from .env
      DB_NAME: wiki
      DB_SSL: 'false' # Use SSL only if the database is on a separate server or in another Docker network
      # Additional Wiki.js settings, e.g., URL
      WIKI_URL: https://wiki.example.com # Replace with your domain
    volumes:
      - ./data/wiki:/var/wiki # Persist Wiki.js data on the host
    depends_on:
      - db
    networks:
      - wiki-network
      - npm-network # Network for Nginx Proxy Manager

  db:
    image: postgres:16-alpine # Current stable version of PostgreSQL for 2026
    container_name: wiki-db
    restart: unless-stopped
    environment:
      POSTGRES_DB: wiki
      POSTGRES_USER: wikiuser
      POSTGRES_PASSWORD: ${DB_PASSWORD} # Password from .env
    volumes:
      - ./data/db:/var/lib/postgresql/data # Persist DB data on the host
    networks:
      - wiki-network

  npm:
    image: 'jc21/nginx-proxy-manager:latest' # Nginx Proxy Manager (version will be current for 2026)
    container_name: nginx-proxy-manager
    restart: unless-stopped
    ports:
      - '80:80' # HTTP port for Let's Encrypt and redirection
      - '443:443' # HTTPS port
      - '81:81' # Port for Nginx Proxy Manager admin panel
    volumes:
      - ./data/npm/data:/data # Nginx Proxy Manager data
      - ./data/npm/letsencrypt:/etc/letsencrypt # Let's Encrypt certificates
    networks:
      - npm-network

networks:
  wiki-network:
    driver: bridge
  npm-network:
    driver: bridge
Save the file (Ctrl+O, Enter, Ctrl+X).
5. Create .env File for Secrets
To store passwords and other sensitive data, we will use the .env file, which Docker Compose automatically loads.
nano .env # Open editor to create the file
Paste the following content, replacing YOUR_STRONG_DB_PASSWORD with a strong password.
DB_PASSWORD=YOUR_STRONG_DB_PASSWORD_12345
Save the file (Ctrl+O, Enter, Ctrl+X). Make sure the .env file is not added to your version control system if you are using Git.
6. Start Docker Compose Services
Now that all files are ready, we can start our services.
docker compose up -d # Start all services in the background
This command will download the necessary Docker images (Wiki.js, PostgreSQL, Nginx Proxy Manager), create containers, and start them. The process may take several minutes depending on your internet connection speed.
Let's check the status of the running containers.
docker compose ps # Show status of running containers
You should see that all three containers (wiki-js, wiki-db, nginx-proxy-manager) are in running status.
At this stage, the main components are installed and running. Next, we will proceed to their configuration.
Configuration
After installing the containers, you need to configure Nginx Proxy Manager to route traffic to Wiki.js and obtain an SSL certificate, as well as perform the initial setup of Wiki.js itself.
1. Configure Nginx Proxy Manager
Nginx Proxy Manager (NPM) provides a convenient web interface for managing reverse proxies and Let's Encrypt SSL certificates. Access to the NPM admin panel is via port 81 of your VPS.
Open in your browser: http://YOUR_VPS_IP_ADDRESS:81
Initial Login
Upon first login, you will be provided with the default credentials:
- Email:
[email protected] - Password:
changeme
After logging in, the system will prompt you to change these details. Be sure to set a strong password and your real email address.
Add Proxy Host for Wiki.js
Go to "Hosts" -> "Proxy Hosts" and click "Add Proxy Host".
- Domain Names:
wiki.example.com(replace with your actual domain, which you have configured in DNS records to point to your VPS IP). - Scheme:
http - Forward Hostname / IP:
wiki-js(this is the Wiki.js service name from thedocker-compose.ymlfile) - Forward Port:
3000(standard Wiki.js port) - Block Common Exploits: Enable (recommended)
- Websockets Support: Enable (required for Wiki.js)
Go to the "SSL" tab.
- SSL Certificate: Select "Request a new SSL Certificate".
- Force SSL: Enable.
- Email Address for Let's Encrypt: Enter your email.
- I Agree to the Let's Encrypt Terms of Service: Check.
Click "Save". NPM will attempt to obtain an SSL certificate for your domain. Ensure that the DNS record (A type) for wiki.example.com points to your VPS's IP address before starting this step.
After successfully obtaining the certificate, your Wiki.js will be accessible via HTTPS.
2. Initial Wiki.js Setup
Now open your domain in the browser: https://wiki.example.com
Wiki.js will prompt you to go through the initial setup process.
- Database Type: PostgreSQL (should be selected by default)
- Database Host:
db - Database Port:
5432 - Database Name:
wiki - Database User:
wikiuser - Database Password: Enter the same password you specified in the
.envfile (DB_PASSWORD).
Click "Connect". Wiki.js will test the database connection.
Next, you will be prompted to create a Wiki.js administrator account:
- Email: Enter your email.
- Password: Set a strong password for the Wiki.js administrator.
- Name: Your name.
Complete the installation. After this, you will be redirected to the Wiki.js login page.
3. Verify Functionality
After all configurations, let's ensure everything is working correctly.
Container Check
docker compose ps # Ensure all containers are running
All containers should be in running status.
Wiki.js Log Check
docker compose logs wiki # View Wiki.js container logs
Ensure there are no critical errors and Wiki.js has successfully connected to the database.
Check Accessibility via curl
Execute a request to your domain from the server to ensure Nginx Proxy Manager is redirecting traffic.
curl -I https://wiki.example.com # Replace with your domain
You should see HTTP headers indicating a successful response (e.g., HTTP/2 200).
At this stage, your Wiki.js is fully configured and accessible via HTTPS. You can start creating pages and inviting users.
Backups and Maintenance
Regular backups and timely maintenance are key aspects to ensure the reliability and availability of your Wiki.js. Data loss can be catastrophic, so it's important to have a proven backup strategy.
What to Back Up
For Wiki.js, two main components need to be backed up:
- PostgreSQL Database: Contains all Wiki.js articles, users, settings, and metadata. This is the most critical component.
- Wiki.js Files: Include uploaded images, files, and potentially custom themes or plugins. In our case, this is the
./data/wikidirectory on the host. - Nginx Proxy Manager Configuration: Although NPM can be reconfigured from scratch, backing up its data (certificates, proxy settings) will significantly speed up recovery. This is the
./data/npmdirectory on the host.
Simple Auto-Backup Script
Let's create a simple script that will back up the database and files, and then archive them. For storage, you can use a local disk and then transfer them to remote storage.
Create a directory for backups on the server, for example, /var/backups/wiki.
sudo mkdir -p /var/backups/wiki
sudo chown wikiuser:wikiuser /var/backups/wiki # Grant permissions to your user
Create the script file backup_wiki.sh in the home directory of the user wikiuser:
nano ~/backup_wiki.sh
Insert the following content:
#!/bin/bash

# --- Settings ---
BACKUP_DIR="/var/backups/wiki"
TIMESTAMP=$(date +%Y%m%d_%H%M%S)
COMPOSE_PROJECT_DIR="/home/wikiuser/wiki" # Path to your docker-compose.yml directory
DB_CONTAINER_NAME="wiki-db"
DB_USER="wikiuser"
DB_NAME="wiki"
WIKI_DATA_DIR="${COMPOSE_PROJECT_DIR}/data/wiki"
NPM_DATA_DIR="${COMPOSE_PROJECT_DIR}/data/npm"
RETENTION_DAYS=7 # How many days to keep backups

# --- Check backup directory ---
if [ ! -d "$BACKUP_DIR" ]; then
  echo "Backup directory $BACKUP_DIR does not exist. Creating..."
  sudo mkdir -p "$BACKUP_DIR"
  sudo chown wikiuser:wikiuser "$BACKUP_DIR"
fi

echo "Starting Wiki.js backup process at $TIMESTAMP"

# --- 1. PostgreSQL Database Backup ---
echo "Backing up PostgreSQL database..."
docker exec $DB_CONTAINER_NAME pg_dump -U $DB_USER -d $DB_NAME > "$BACKUP_DIR/wiki_db_$TIMESTAMP.sql"
if [ $? -eq 0 ]; then
  echo "DB backup successfully created: $BACKUP_DIR/wiki_db_$TIMESTAMP.sql"
else
  echo "ERROR: Failed to create DB backup."
  exit 1
fi

# --- 2. Wiki.js and Nginx Proxy Manager Files Backup ---
echo "Archiving Wiki.js and NPM data..."
tar -czf "$BACKUP_DIR/wiki_data_$TIMESTAMP.tar.gz" -C "$WIKI_DATA_DIR" .
if [ $? -eq 0 ]; then
  echo "Wiki.js data archive successfully created: $BACKUP_DIR/wiki_data_$TIMESTAMP.tar.gz"
else
  echo "ERROR: Failed to create Wiki.js data archive."
  exit 1
fi

tar -czf "$BACKUP_DIR/npm_data_$TIMESTAMP.tar.gz" -C "$NPM_DATA_DIR" .
if [ $? -eq 0 ]; then
  echo "NPM data archive successfully created: $BACKUP_DIR/npm_data_$TIMESTAMP.tar.gz"
else
  echo "ERROR: Failed to create NPM data archive."
  exit 1
fi

# --- 3. Deleting old backups ---
echo "Deleting old backups (older than $RETENTION_DAYS days)..."
find "$BACKUP_DIR" -type f -name "wiki_db_*.sql" -mtime +$RETENTION_DAYS -delete
find "$BACKUP_DIR" -type f -name "wiki_data_*.tar.gz" -mtime +$RETENTION_DAYS -delete
find "$BACKUP_DIR" -type f -name "npm_data_*.tar.gz" -mtime +$RETENTION_DAYS -delete
echo "Old backups cleanup complete."

echo "Backup process finished."
Make the script executable:
chmod +x ~/backup_wiki.sh
You can test the script manually:
~/backup_wiki.sh
Automating Backups with Cron
To automatically run the backup script, we will set up Cron. For example, for a daily backup at 03:00 AM:
crontab -e
Add the following line to the end of the file:
0 3 * * * /home/wikiuser/backup_wiki.sh >> /var/log/wiki_backup.log 2>&1
This line runs the script every day at 03:00 and redirects the output to the log file /var/log/wiki_backup.log.
Where to Store Backups (External Storage)
Storing backups on the same server as your production data does not provide full protection. In case of a VPS failure, you will lose both your data and your backups. It is recommended to use external storage:
- S3-compatible storage: Cloud services such as AWS S3, Backblaze B2, DigitalOcean Spaces provide reliable and inexpensive storage. You can use utilities like
s3cmd,rclone, oraws clito automatically synchronize local backups with S3. - Separate VPS: You can set up a second, less powerful VPS and use
rsyncorscpto copy backups to it. This provides geographical separation. - Network Attached Storage (NAS): If you have your own network storage, you can configure NFS/SMB mounting and copy backups there.
Extend the backup_wiki.sh script to automatically upload backups to the chosen external storage after they are created.
Updates: rolling vs maintenance window
Keeping software up-to-date is critically important for security and receiving new features.
- Updating Docker images (Wiki.js, PostgreSQL, Nginx Proxy Manager):
- Maintenance window: This is the recommended approach. Allocate a specific time (e.g., once a month) to stop services, update images, and test.
cd ~/wiki # Go to the directory with docker-compose.yml docker compose pull # Pull the latest image versions docker compose down # Stop and remove current containers docker compose up -d # Start new containers with updated images - Testing: Always check Wiki.js functionality after an update. New versions may contain changes requiring manual adaptation, although this is rare for minor versions.
- Maintenance window: This is the recommended approach. Allocate a specific time (e.g., once a month) to stop services, update images, and test.
- OS Update (Ubuntu):
- Every few months, perform a full system update:
sudo apt update && sudo apt upgrade -y. This is also best done during a "maintenance window," as a server reboot may be required.
- Every few months, perform a full system update:
Avoid "rolling updates" for production systems without proper automation and testing, as this can lead to unexpected downtime.
Troubleshooting + FAQ
In this section, we will cover common issues that may arise when deploying Wiki.js and provide answers to frequently asked questions.
Cannot connect to Wiki.js by domain name (502 Bad Gateway or Connection Refused error)
What to check:
- DNS record: Make sure your A-record for
wiki.example.com(or your domain) correctly points to your VPS's IP address. Usedig wiki.example.comornslookup wiki.example.com. - Docker Containers: Check that all containers (
wiki-js,wiki-db,nginx-proxy-manager) are running and in "running" status.docker compose ps - Nginx Proxy Manager Logs: Check NPM logs for errors.
Errors related to Let's Encrypt often indicate DNS or firewall issues.docker compose logs npm - Proxy Host Configuration in NPM: Ensure that "Forward Hostname / IP" is set to
wiki-jsand "Forward Port" to3000. Also, check if "Websockets Support" option is enabled. - Firewall (UFW): Make sure ports 80 and 443 are open.
sudo ufw status verbose
How to fix: Correct the DNS record, restart containers if they crashed, or adjust settings in NPM and the firewall.
Wiki.js cannot connect to the database ("Database connection failed" error)
What to check:
- Wiki.js Logs: Check the Wiki.js container logs.
Look for database connection error messages.docker compose logs wiki - Database Container: Make sure the
wiki-dbcontainer is running and there are no errors in its logs.docker compose logs db - Environment Variables: Check the
.envfile and theenvironmentsection for thewikiservice indocker-compose.yml. Ensure thatDB_HOSTis set todb, andDB_USER,DB_PASS, andDB_NAMEmatch the data used in PostgreSQL. - Password: Make sure the password in
.envexactly matches the one you entered during the initial Wiki.js setup.
How to fix: Correct typos in environment variables or the password. If you have changed .env or docker-compose.yml, you need to restart the services: docker compose down && docker compose up -d.
What is the minimum suitable VPS configuration?
For a small team (up to 5-10 people) or personal use, a VPS with 2 vCPU, 2 GB RAM, and 40 GB SSD will be minimally sufficient. This will be enough for stable operation of Wiki.js, PostgreSQL, and Nginx Proxy Manager. However, if you plan active use, storing a large number of media files, or team growth, it is recommended to immediately consider a configuration with 4 GB RAM and 80 GB SSD. This will provide a better performance margin and reduce the likelihood of slowdowns in the future.
What to choose — VPS or dedicated for this task?
For deploying Wiki.js, a VPS is almost always sufficient. Dedicated servers are required for very large projects with hundreds or thousands of active users, extremely high demands on disk subsystem performance, or if you need full physical control over the hardware and its specific components. For most teams and businesses, a VPS is a more economical and flexible solution that is easy to scale as needs grow. Start with a VPS, and if you encounter persistent resource shortages, then consider switching to a dedicated server.
Cannot obtain Let's Encrypt SSL certificate in Nginx Proxy Manager
What to check:
- DNS record: The domain for which you are requesting a certificate must be correctly configured in DNS and point to your VPS's IP. Check this using
digor online tools. - Firewall: Ports 80 and 443 must be open for incoming connections. Let's Encrypt uses port 80 for the HTTP-01 challenge.
- NPM Logs: Review the Nginx Proxy Manager container logs. Errors from Certbot (used by Let's Encrypt) will be there.
- Let's Encrypt Limits: If you have frequently requested certificates for the same domain, you might have hit Let's Encrypt's rate limits. Wait for some time.
How to fix: Ensure correct DNS and open ports. If the problem is with rate limits, use the Let's Encrypt test server (Staging) in NPM for debugging before attempting to obtain a real certificate again.
How to update Wiki.js to a new version?
What to check:
- New version availability: Check the official Wiki.js repository on GitHub or Docker Hub for current versions.
- Backup: Always perform a full backup of the database and Wiki.js data before updating.
How to fix: Go to the ~/wiki directory on your server, change the Wiki.js image version number in the docker-compose.yml file (e.g., from 2.5.300 to 2.5.301 or 3.0.0). Then execute:
docker compose pull # Pull the new image
docker compose up -d # Recreate the container with the new version
After the update, check Wiki.js logs and ensure everything is working correctly. Sometimes additional migration steps, described in the Wiki.js release notes, may be required.
Conclusions and Next Steps
Congratulations! You have successfully deployed Wiki.js on your VPS, using Docker Compose for service orchestration. You now have a powerful, secure, and easily manageable wiki system, accessible via HTTPS, ready to become a central knowledge repository for your team or personal projects. You have gained full control over your data and infrastructure, which is a significant advantage compared to cloud solutions.
Here are some next steps you can take to further develop your Wiki.js:
- Authentication Setup: Integrate Wiki.js with your existing LDAP, Active Directory, GitHub, Google OAuth, or other authentication providers for convenient user management.
- Performance Monitoring: Install monitoring tools (e.g., Prometheus + Grafana) to track server status, Docker container resource usage, and Wiki.js performance.
- Storage Scaling: If you plan to store very large volumes of files, consider integrating Wiki.js with external object storage (S3-compatible) for media files to avoid overloading your VPS disk space.
- Exploring Wiki.js Features: Dive into the rich functionality of Wiki.js, configure themes, plugins, access rights, and workflows for maximum adaptation to your needs.