
Deploying OnlyOffice Document Server on a VPS: Your Own Cloud Document Editor
TL;DR
In this detailed guide, we will step-by-step set up and deploy OnlyOffice Document Server on your own VPS, transforming it into a powerful platform for collaborative editing of documents, spreadsheets, and presentations, entirely under your control. You will learn how to choose the right VPS configuration, prepare the server, install and configure OnlyOffice using Docker, ensure secure access via HTTPS with Nginx and Certbot, and implement a robust backup and maintenance strategy.
- We will choose the optimal VPS configuration, considering load and budget.
- We will prepare a server based on Ubuntu 24.04 LTS with basic security measures.
- We will install and configure OnlyOffice Document Server version 8.x/9.x (current for 2026) using Docker.
- We will secure access to OnlyOffice via Nginx as a reverse proxy and configure HTTPS with free Let's Encrypt certificates.
- We will develop a backup strategy to preserve data and configurations, as well as a plan for regular maintenance.
- We will get a fully functional, secure, and self-managed platform for collaborative document work.
What we are setting up and why
In the modern world, collaborative document work has become an integral part of any project, be it software development, startup management, or organizing a gaming community. Many are accustomed to cloud solutions from Google or Microsoft, but these often come with data privacy concerns, functional limitations, or high costs when scaling. OnlyOffice Document Server offers a powerful alternative: it's a suite of online editors for text documents, spreadsheets, and presentations that you can deploy on your own server.
By deploying OnlyOffice Document Server on your VPS, you gain full control over your data and infrastructure. This allows for a high level of security, adaptation of the system to specific requirements, and avoidance of dependence on third-party providers. Ultimately, you will get a functional analogue of Google Docs or Microsoft Office Online, accessible via a web browser, with real-time collaborative editing capabilities, support for popular formats (DOCX, XLSX, PPTX), and integration with various file storage platforms such as Nextcloud, ownCloud, or SharePoint. This is an ideal solution for a solo SaaS founder who wants to set up Mattermost for their team, or for a developer who needs to spin up GitLab and ensure collaborative work on documentation.
Among the main alternatives to OnlyOffice Document Server are:
- Google Workspace (Google Docs, Sheets, Slides): Convenient, widely used, but data is stored on Google's servers, and the cost can be significant for large teams. There are concerns regarding data privacy.
- Microsoft 365 (Office Online): Similar to Google Workspace, tied to the Microsoft ecosystem, concerns about data sovereignty and infrastructure control.
- Collabora Online (based on LibreOffice): Another open-source option, also requiring server deployment. It has its own peculiarities in integration and format support, sometimes lagging behind OnlyOffice in compatibility with MS Office formats.
The choice in favor of a self-hosted solution on a VPS is driven by several key advantages. Firstly, it's independence. You are not tied to the policy of a single provider and have full control over the lifecycle of your data. Secondly, it's security and confidentiality. All data remains on your server, which is critically important for sensitive information or for those who care about privacy. Thirdly, it's flexibility. You can customize the system to your needs, integrate it with internal services, and scale resources as your needs grow. Finally, for many tasks, it can be more economically advantageous in the long run, especially if you already have a VPS that is idle or not fully utilized, for example, for running a Bitcoin/Ethereum node or a Minecraft server.
What VPS configuration is needed for this task
Choosing the right VPS for OnlyOffice Document Server depends on the anticipated load, the number of concurrent users, and the intensity of document work. OnlyOffice is a fairly resource-intensive application, especially with active collaborative editing of large files. It requires significant CPU and RAM resources for real-time document processing.
Minimum Requirements (for 1-5 concurrent users, infrequent use):
This configuration is suitable for personal use or a very small team that doesn't work with documents constantly.
- Processor (CPU): 2 cores (x64 architecture). Modern cores with good performance.
- Random Access Memory (RAM): 4 GB. For OnlyOffice Document Server only. If other services (e.g., Nextcloud, database) will run on the server, more will be required.
- Disk: 50 GB SSD. SSD is critically important for I/O performance, as OnlyOffice actively works with temporary files.
- Network: 100 Mbps. Sufficient for basic operation, but can be a bottleneck for intensive data exchange.
Recommended Requirements (for 5-20 concurrent users, active use):
This configuration will ensure comfortable and stable operation for most small and medium-sized teams.
- Processor (CPU): 4 cores. This will provide sufficient computing power for simultaneous processing of multiple documents.
- Random Access Memory (RAM): 8-16 GB. This will ensure comfortable work when editing complex documents, working with many tabs, and with multiple users simultaneously. OnlyOffice actively uses RAM for caching.
- Disk: 100-200 GB SSD. Sufficient for the operating system, Docker images, storing OnlyOffice temporary files, and potential integration with other services.
- Network: 1 Gbps. High network bandwidth is important for fast data exchange between clients and the server, especially during collaborative editing.
For comfortable work with OnlyOffice Document Server for a small team, consider a VPS with the specified characteristics. Make sure the chosen plan meets your needs for CPU, RAM, and disk space to avoid performance issues.
When is a dedicated server needed, not a VPS?
A dedicated server becomes necessary when:
- Large number of users: More than 50-100 concurrent users working intensively with documents, or thousands of users with periodic access.
- High performance requirements: Regular work with very large documents (hundreds of pages, complex spreadsheets with thousands of rows, macros), complex presentations with a lot of media or specific fonts.
- Specific security or compliance requirements: Some regulatory requirements (e.g., GDPR, HIPAA) may mandate the use of physically isolated hardware where you are the sole tenant.
- Need for full hardware customization: For example, using specialized RAID controllers, GPUs for specific image or video processing tasks (though rare for OnlyOffice), or specific network cards.
- Integration with heavy corporate systems: If OnlyOffice is part of a large corporate infrastructure with high uptime and performance requirements, a dedicated server may be preferable.
In most cases, for small and medium-sized businesses, as well as for personal needs, a well-configured VPS will be more than sufficient. If you plan to run OnlyOffice along with other resource-intensive services (e.g., a large GitLab instance or multiple game servers), then a dedicated server might be justified.
VPS Location: What does it affect?
The choice of your VPS's geographical location also matters:
- Latency: The closer the server is to the main users, the lower the latency and faster the response. This is especially important for interactive collaborative editing, where every millisecond affects the user experience. High latency can make collaborative work uncomfortable.
- Legislation and Data Sovereignty: Strict rules for data storage and processing exist in some jurisdictions. Choosing the server's location allows compliance with these requirements and staying within the legal framework. This is critical for projects involving confidential information.
- Network Peering: The quality of the provider's network connections in the chosen location can affect overall access speed and connection stability. Good peering with major providers ensures fast and reliable access.
- Cost: In some regions, the cost of a VPS may be higher or lower due to differences in electricity prices, real estate, and taxes.
It is recommended to choose a location as close as possible to your primary audience or team's workplace to minimize latency and ensure maximum performance.
Server Preparation
Before proceeding with the installation of OnlyOffice Document Server, you need to perform basic setup of your new VPS. We will use Ubuntu Server 24.04 LTS, as it is a popular, stable, and well-supported operating system that will remain relevant in 2026, offering long-term support and security updates.
1. System Update
First, connect to the server via SSH (usually as the root user or a user provided by your provider) and update all packages to their latest versions. This will ensure that you are running with the latest security fixes and stable software versions.
sudo apt update && sudo apt upgrade -y
This command will update the list of available packages from the repositories and install all available updates. The -y flag automatically confirms the installation, so you won't be prompted for confirmation for each package.
2. Creating a New User with Sudo Privileges
Working as the root user is unsafe, as it grants unlimited privileges and increases the risk of accidental or malicious system damage. Let's create a new user and grant them sudo privileges for performing administrative tasks.
sudo adduser onlyuser
Follow the on-screen instructions to set a strong password and (optionally) fill in user information. Then, add the new user to the sudo group so they can execute commands with administrative privileges:
sudo usermod -aG sudo onlyuser
Exit the current root session and log in as the new user onlyuser to ensure that the permissions are set correctly.
exit
ssh onlyuser@your_vps_ip
Now, all subsequent actions will be performed as the onlyuser user using sudo.
3. Configuring SSH Keys (Recommended)
To enhance security and convenience, it is recommended to use SSH keys instead of passwords for logging into the server. This significantly reduces the risk of brute-force attacks. If you haven't set them up yet, do so now.
On your local machine, generate an SSH key pair (if you don't already have one):
ssh-keygen -t rsa -b 4096 -C "[email protected]"
Follow the instructions to save the key (usually in ~/.ssh/id_rsa) and set a passphrase for additional protection. Then, copy the public key to the server:
ssh-copy-id onlyuser@your_vps_ip
This command will copy your public key to the ~/.ssh/authorized_keys file on the server. After this, you will be able to log in without a password (or using a passphrase, if you set one). To completely disable password login on the server, edit the SSH server configuration file:
sudo nano /etc/ssh/sshd_config
Find the line #PasswordAuthentication yes (or simply PasswordAuthentication yes) and change it to:
PasswordAuthentication no
It is also recommended to ensure that the line PubkeyAuthentication yes is not commented out. Save the changes and restart the SSH service for them to take effect:
sudo systemctl restart sshd
Important: Before disabling password authentication, ensure that you can log in using an SSH key. Otherwise, you risk losing access to the server.
4. Firewall Configuration (UFW)
UFW (Uncomplicated Firewall) is an easy-to-use interface for managing the netfilter firewall in Linux. We will configure it to allow access only to necessary ports and block all other traffic, thereby enhancing server security.
sudo apt install ufw -y
Let's allow access to SSH (port 22), HTTP (port 80), and HTTPS (port 443). These ports are necessary for remote server management and web services operation.
sudo ufw allow OpenSSH       # Allows SSH on port 22
sudo ufw allow http          # Allows HTTP on port 80
sudo ufw allow https         # Allows HTTPS on port 443
sudo ufw enable              # Enables the firewall
Confirm enabling the firewall (by typing y if prompted). Check the firewall status to ensure that the rules are applied:
sudo ufw status verbose
The output should show that SSH, HTTP, and HTTPS are allowed.
5. Installing Fail2Ban
Fail2Ban is a service that scans log files (e.g., /var/log/auth.log) for suspicious activity, such as multiple failed login attempts. Upon detecting such activity, Fail2Ban automatically blocks the IP addresses of attackers for a specified period, which helps protect against brute-force attacks.
sudo apt install fail2ban -y
Fail2Ban starts working immediately after installation with default settings, which include SSH protection. For more granular configuration, you can copy the configuration file /etc/fail2ban/jail.conf to /etc/fail2ban/jail.local and make changes there, so they are not overwritten when the Fail2Ban package is updated.
sudo systemctl enable fail2ban # Enables Fail2Ban autostart on system boot
sudo systemctl start fail2ban  # Starts the Fail2Ban service
Now your server is ready for OnlyOffice Document Server installation. It is updated, protected with basic security measures, and ready for application deployment.
Software Installation — Step-by-Step
We will install OnlyOffice Document Server using Docker and Docker Compose. This is the most flexible, scalable, and recommended method, allowing you to isolate the application from the main system, easily manage its versions and dependencies. We will use a version of OnlyOffice Document Server relevant for 2026, which will correspond to the latest stable releases (presumably v8.x or v9.x).
1. Installing Docker Engine and Docker Compose
First, let's install Docker Engine — the container runtime environment, and Docker Compose — a tool for defining and running multi-container Docker applications. We will follow the official Docker installation recommendations.
# Step 1: Remove old Docker versions (if any) to avoid conflicts
for pkg in docker.io docker-doc docker-compose docker-ce docker-ce-cli containerd.io docker-buildx-plugin docker-compose-plugin; do sudo apt remove $pkg; done

# Step 2: Update the package list
sudo apt update

# Step 3: Install necessary dependencies for working with HTTPS repositories
sudo apt install ca-certificates curl gnupg -y

# Step 4: Add Docker's official GPG key. This is necessary to verify the authenticity of Docker packages.
sudo install -m 0755 -d /etc/apt/keyrings
curl -fsSL https://download.docker.com/linux/ubuntu/gpg | sudo gpg --dearmor -o /etc/apt/keyrings/docker.gpg
sudo chmod a+r /etc/apt/keyrings/docker.gpg

# Step 5: Add the Docker repository to the APT sources list
echo \
  "deb [arch="$(dpkg --print-architecture)" signed-by=/etc/apt/keyrings/docker.gpg] https://download.docker.com/linux/ubuntu \
  "$(. /etc/os-release && echo "$VERSION_CODENAME")" stable" | \
  sudo tee /etc/apt/sources.list.d/docker.list > /dev/null

# Step 6: Update the package list with the new Docker repository
sudo apt update

# Step 7: Install Docker Engine, Docker CLI, containerd, and Docker Compose Plugin
sudo apt install docker-ce docker-ce-cli containerd.io docker-buildx-plugin docker-compose-plugin -y
After installation, add your user (onlyuser) to the docker group to execute Docker commands without needing sudo:
sudo usermod -aG docker ${USER}
Exit your current SSH session and log back in for the user group changes to take effect:
exit
ssh onlyuser@your_vps_ip
Verify that Docker is installed and working correctly by running the "hello-world" test container:
docker run hello-world
You should see a welcome message from Docker, confirming a successful installation.
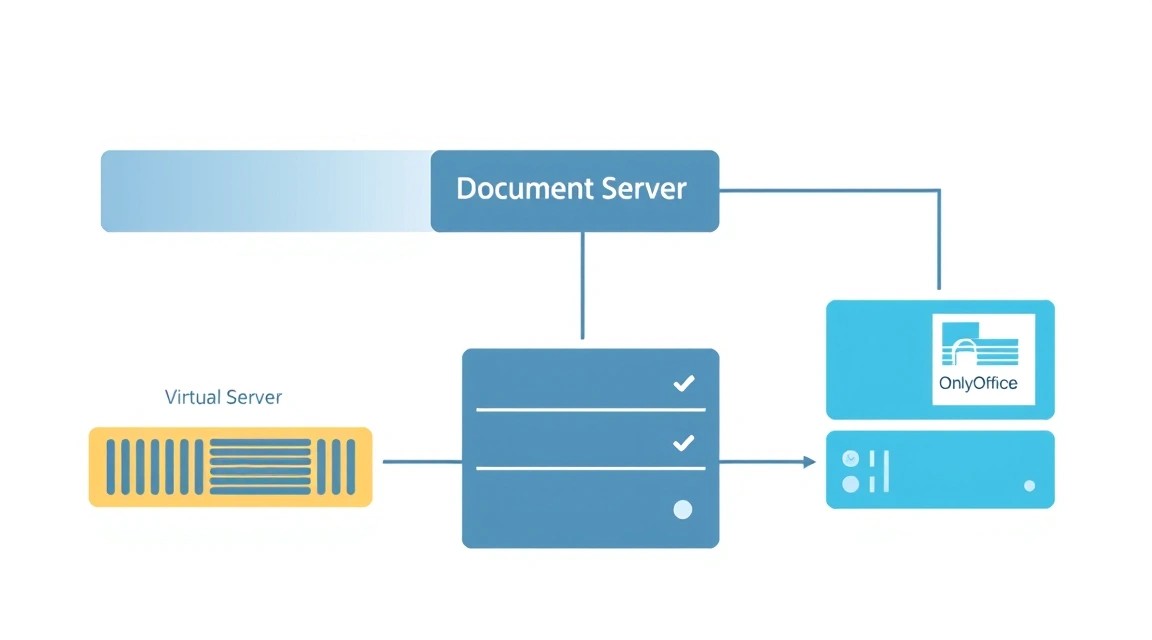
2. Deploying OnlyOffice Document Server with Docker Compose
Now that Docker is installed, we can deploy OnlyOffice Document Server. Let's create a separate directory for our project and a docker-compose.yml file, which will describe the OnlyOffice container configuration.
mkdir -p ~/onlyoffice # Create a directory for the project
cd ~/onlyoffice        # Navigate to the created directory
nano docker-compose.yml # Create and open the docker-compose.yml file for editing
Paste the following content into the docker-compose.yml file. We are using the onlyoffice/documentserver:latest image, which will always point to the freshest stable version, relevant even in 2026. In this example, OnlyOffice will listen on ports 80 (HTTP) and 443 (HTTPS) inside the container, which we proxy to ports 8000 and 8443 of your VPS, respectively. This helps avoid conflicts with Nginx, which will listen on ports 80 and 443 on the host.
version: '3.8'

services:
  documentserver:
    image: onlyoffice/documentserver:latest
    container_name: onlyoffice-documentserver
    hostname: onlyoffice
    environment:
      # IMPORTANT: REPLACE 'YOUR_VERY_STRONG_SECRET_KEY' with a long and complex random string.
      # This key is used to protect JWT (JSON Web Token), which OnlyOffice uses to authenticate requests
      # from client applications (e.g., Nextcloud). Without this key, your installation will be vulnerable.
      - JWT_SECRET=YOUR_VERY_STRONG_SECRET_KEY
      - JWT_ENABLED=true
      - JWT_HEADER=Authorization
      - JWT_IN_BODY=false
      # Additional environment variables for OnlyOffice configuration (uncomment if needed)
      # - DB_TYPE=postgres          # If you want to use an external PostgreSQL database
      # - DB_HOST=localhost         # Your DB host
      # - - DB_PORT=5432            # DB port
      # - DB_NAME=onlyoffice        # Database name
      # - DB_USER=onlyoffice        # DB user
      # - DB_PWD=your_db_password   # DB user password
    ports:
      - "8000:80"  # Proxy OnlyOffice's internal HTTP port to host port 8000
      - "8443:443" # Proxy OnlyOffice's internal HTTPS port to host port 8443 (for direct HTTPS access if Nginx is not used)
    volumes:
      - /app/onlyoffice/DocumentServer/data:/var/www/onlyoffice/Data       # For OnlyOffice data (cache, temporary files)
      - /app/onlyoffice/DocumentServer/logs:/var/log/onlyoffice            # For OnlyOffice logs
      - /app/onlyoffice/DocumentServer/lib:/var/lib/onlyoffice             # For libraries and service files
      - /app/onlyoffice/DocumentServer/fonts:/usr/share/fonts/truetype     # For custom fonts
    restart: always # Automatic container restart on failures or server reboot
    healthcheck: # Container health check
      test: ["CMD-SHELL", "wget -q --no-check-certificate https://localhost/healthcheck || exit 1"]
      interval: 30s
      timeout: 10s
      retries: 5
IMPORTANT: Do not forget to replace YOUR_VERY_STRONG_SECRET_KEY with a long, random, and complex secret string. You can generate it, for example, using openssl rand -base64 32. This key is critically important for the security of your OnlyOffice installation and protection against unauthorized access. Record it in a secure location.
Save the file (press Ctrl+X, then Y, then Enter).
3. Starting OnlyOffice Document Server
Now that the docker-compose.yml file is ready, start the Docker Compose container:
docker compose up -d
This command will download the OnlyOffice Document Server image (if not already local), create the volumes defined in the file, and start the container in the background (-d). The process may take several minutes depending on your internet connection speed and VPS performance.
Verify that the container is running correctly:
docker ps
You should see a container named onlyoffice-documentserver with a status of Up, along with information about the forwarded ports.
4. Basic Accessibility Check
OnlyOffice Document Server should now be accessible via your VPS's IP address on port 8000 (for HTTP). Open http://your_vps_ip:8000 in your browser. You should see the OnlyOffice Document Server welcome page with integration instructions. This indicates that the server is running and responding to requests.
At this stage, OnlyOffice Document Server is installed and running, but it is not yet secured with HTTPS and not accessible via a domain name. We will address this in the next section.
Configuration
After successfully installing OnlyOffice Document Server in a Docker container, the next critically important step is its proper configuration for secure and convenient access. This includes setting up a reverse proxy for domain name access, ensuring HTTPS encryption with Let's Encrypt, and basic security.
1. Domain Name and DNS Configuration
Before configuring HTTPS, you will need a domain name (e.g., docs.yourdomain.com) pointing to your VPS's IP address. Add the corresponding A-record in your domain's DNS settings. Make sure the record has fully propagated across DNS servers (this can take from a few minutes to several hours) before proceeding to the next step.
Example DNS record:
| Record Type | Name/Host | Value | TTL |
|---|---|---|---|
| A | docs | Your_VPS_IP_address | 3600 |
2. Installing and Configuring Nginx as a Reverse Proxy
Nginx will act as a reverse proxy server. It will accept requests on standard ports (80 for HTTP and 443 for HTTPS) for your domain name and forward them to the OnlyOffice Docker container (which we configured on ports 8000 and 8443). This will allow us to use a single domain name, configure HTTPS, and improve security by hiding OnlyOffice's internal ports.
# Install Nginx
sudo apt install nginx -y
Create a new Nginx configuration file for your domain. This will be the virtual host for OnlyOffice:
sudo nano /etc/nginx/sites-available/onlyoffice.conf
Paste the following content into the file, replacing docs.yourdomain.com with your actual domain name. This config initially handles HTTP requests and will then be updated by Certbot for HTTPS.
server {
    listen 80;
    server_name docs.yourdomain.com; # Replace with your domain name

    # HTTP to HTTPS redirection will be configured by Certbot automatically
    # location / {
    #     return 301 https://$host$request_uri;
    # }

    location / {
        proxy_pass http://localhost:8000; # Forward to OnlyOffice Docker HTTP port
        proxy_http_version 1.1;
        proxy_set_header Upgrade $http_upgrade;
        proxy_set_header Connection $connection_upgrade; # Important for WebSocket
        proxy_set_header Host $host;
        proxy_set_header X-Real-IP $remote_addr;
        proxy_set_header X-Forwarded-For $proxy_add_x_forwarded_for;
        proxy_set_header X-Forwarded-Proto $scheme;
        proxy_set_header X-Forwarded-Host $host;

        # OnlyOffice specific headers
        proxy_read_timeout 1800s; # Increase timeout for large files
        proxy_send_timeout 1800s;
    }

    # Add a map for the Connection header to correctly handle WebSocket
    map $http_upgrade $connection_upgrade {
        default upgrade;
        '' close;
    }
}
Create a symbolic link to this file from the sites-enabled directory to activate the new configuration:
sudo ln -s /etc/nginx/sites-available/onlyoffice.conf /etc/nginx/sites-enabled/
Remove the default Nginx configuration to avoid potential conflicts with your new one:
sudo rm /etc/nginx/sites-enabled/default
Check the Nginx configuration syntax for errors and restart Nginx to apply the changes:
sudo nginx -t # Check syntax
sudo systemctl restart nginx # Restart Nginx
Now you can access OnlyOffice via your domain name over HTTP (http://docs.yourdomain.com). However, for security and integration with other services, we need HTTPS.
3. Configuring HTTPS with Certbot (Let's Encrypt)
We will use Certbot to automatically obtain and install free SSL/TLS certificates from Let's Encrypt. Certbot integrates with Nginx and automatically configures it to work with HTTPS.
# Install Certbot and the Nginx plugin
sudo apt install certbot python3-certbot-nginx -y
Run Certbot for your domain. Certbot will automatically modify the Nginx configuration to use HTTPS, create new server blocks for port 443, and set up HTTP to HTTPS redirection.
sudo certbot --nginx -d docs.yourdomain.com
Follow Certbot's instructions:
- Enter an email address for certificate expiration notifications.
- Agree to the Let's Encrypt terms of service.
- Choose how Certbot should redirect HTTP traffic to HTTPS (option "2: Redirect" is recommended - this will automatically redirect all HTTP traffic to HTTPS).
After Certbot successfully completes, your Nginx config will be updated, and OnlyOffice will be accessible via HTTPS.
Check the automatic renewal of Let's Encrypt certificates. Certbot adds a cron job that automatically renews certificates before they expire. You can test this process:
sudo certbot renew --dry-run
If the command executes without errors, automatic renewal is working correctly.
4. Configuring JWT_SECRET in OnlyOffice (Re-check)
In the docker-compose.yml file, we have already set the JWT_SECRET environment variable. Ensure that this secret matches the one that will be used in your document management system (e.g., Nextcloud) if you plan to integrate. This is critically important for security and proper integration functionality. If you decide to change the secret, remember to update it in both the docker-compose.yml file (by restarting the container) and in the settings of the integrated platform.
To update the secret in the Docker container, edit docker-compose.yml and restart the container:
cd ~/onlyoffice
nano docker-compose.yml # Change the JWT_SECRET value
docker compose down      # Stop the current container
docker compose up -d     # Start a new container with the updated config
5. Verifying Functionality
Open https://docs.yourdomain.com in your browser. You should see the OnlyOffice Document Server welcome page. Make sure the connection is secure (this is usually displayed in the browser as a "green padlock" or "Secure").
For a more in-depth check, you can use the curl utility on your VPS:
curl -I https://docs.yourdomain.com/healthcheck
In the response headers, you should see HTTP/1.1 200 OK, which indicates that the OnlyOffice server is running successfully and is accessible via Nginx and HTTPS.
At this stage, your OnlyOffice Document Server is fully configured, secured, and ready for integration with your preferred document management system.
Backups and Maintenance
Reliable functioning of any service is impossible without a well-thought-out backup strategy and regular maintenance. OnlyOffice Document Server is no exception. In this section, we will cover what exactly needs to be backed up, how to do it, and how to keep the system up-to-date to ensure its stability, security, and the ability to quickly recover in case of failures.
1. What to Back Up?
The following components are critically important for OnlyOffice Document Server:
- OnlyOffice Document Server Data: These are temporary files, cache, fonts, and other service information stored in the Docker volumes we mounted:
/app/onlyoffice/DocumentServer/data: Core OnlyOffice data, including document cache, fonts, and other important files./app/onlyoffice/DocumentServer/logs: OnlyOffice operation logs, useful for debugging./app/onlyoffice/DocumentServer/lib: OnlyOffice libraries and service files./app/onlyoffice/DocumentServer/fonts: Directory for custom fonts.
- Nginx Configuration: Files
/etc/nginx/sites-available/onlyoffice.confand/etc/nginx/nginx.conf. These files define how Nginx processes requests and redirects them to OnlyOffice. - Let's Encrypt Certificates: Usually stored in
/etc/letsencrypt. These certificates provide an HTTPS connection. - docker-compose.yml File: Contains all information about your OnlyOffice container deployment, including environment variables and mounted volumes. Stored in
~/onlyoffice/docker-compose.yml.
2. Simple Auto-Backup Script
We will create a simple script that will archive all important files and, optionally, send them to remote storage. As remote storage, you can use another VPS, S3-compatible storage (e.g., MinIO, Wasabi), or even a local computer using rsync or scp.
Create the script file backup_onlyoffice.sh in the home directory of your onlyuser user:
nano ~/backup_onlyoffice.sh
Paste the following content. Replace YOUR_REMOTE_USER, YOUR_REMOTE_HOST, and /path/to/remote/backups with your actual data. Make sure you have an SSH key configured for scp for passwordless access to the remote server.
#!/bin/bash

# --- Backup Settings ---
BACKUP_DIR="/tmp/onlyoffice_backup_$(date +%Y%m%d%H%M%S)" # Temporary directory for backups
COMPOSE_PROJECT_DIR="/home/onlyuser/onlyoffice"             # Path to the directory with docker-compose.yml
ONLYOFFICE_DATA_ROOT="/app/onlyoffice/DocumentServer"       # Root directory for OnlyOffice volumes

# --- Remote Storage Settings (SCP example) ---
REMOTE_USER="YOUR_REMOTE_USER"                           # User on the remote server
REMOTE_HOST="YOUR_REMOTE_HOST"                           # IP or domain of the remote server
REMOTE_PATH="/path/to/remote/backups/$(hostname)"        # Path on the remote server where backups will be saved

# Create temporary directory for backups
echo "Creating temporary backup directory: $BACKUP_DIR"
mkdir -p "$BACKUP_DIR"

# 1. OnlyOffice Docker volumes backup
echo "Stopping OnlyOffice Document Server to ensure data consistency..."
docker compose -f "$COMPOSE_PROJECT_DIR/docker-compose.yml" stop documentserver

echo "Archiving OnlyOffice Document Server volumes..."
tar -cvpzf "$BACKUP_DIR/onlyoffice_data.tar.gz" -C "$ONLYOFFICE_DATA_ROOT" data logs lib fonts

echo "Starting OnlyOffice Document Server..."
docker compose -f "$COMPOSE_PROJECT_DIR/docker-compose.yml" start documentserver

# 2. Nginx configuration backup
echo "Archiving Nginx configuration..."
tar -cvpzf "$BACKUP_DIR/nginx_config.tar.gz" /etc/nginx/sites-available/onlyoffice.conf /etc/nginx/nginx.conf

# 3. Let's Encrypt certificates backup
echo "Archiving Let's Encrypt certificates..."
tar -cvpzf "$BACKUP_DIR/letsencrypt_certs.tar.gz" /etc/letsencrypt

# 4. docker-compose.yml backup
echo "Copying docker-compose.yml file..."
cp "$COMPOSE_PROJECT_DIR/docker-compose.yml" "$BACKUP_DIR/docker-compose.yml"

# Archive all backups into a temporary file
FINAL_BACKUP_FILE="/tmp/onlyoffice_full_backup_$(date +%Y%m%d%H%M%S).tar.gz"
echo "Creating final archive: $FINAL_BACKUP_FILE"
tar -cvpzf "$FINAL_BACKUP_FILE" -C "$BACKUP_DIR" .

# Where to store backups (SCP example to another server)
# Ensure you have an SSH key configured for passwordless access to the remote server
if [ -n "$REMOTE_USER" ] && [ -n "$REMOTE_HOST" ] && [ -n "$REMOTE_PATH" ]; then
    echo "Uploading backup to remote server: $REMOTE_USER@$REMOTE_HOST:$REMOTE_PATH"
    ssh "$REMOTE_USER@$REMOTE_HOST" "mkdir -p $REMOTE_PATH" # Create directory on the remote host
    scp "$FINAL_BACKUP_FILE" "$REMOTE_USER@$REMOTE_HOST:$REMOTE_PATH"
    if [ $? -eq 0 ]; then
        echo "Backup successfully uploaded to remote server."
    else
        echo "ERROR: Failed to upload backup to remote server." >&2
    fi
else
    echo "Remote backup parameters are not set. Backup will remain local."
fi

# Clean up temporary files
echo "Cleaning up temporary files..."
rm -rf "$BACKUP_DIR" "$FINAL_BACKUP_FILE"

echo "Backup process completed!"
Make the script executable:
chmod +x ~/backup_onlyoffice.sh
Test the script manually to ensure it works correctly and backups are successfully transferred to remote storage. Never trust a backup you haven't tested!
3. Scheduling Backups with Cron
To automate regular backups, use the system scheduler cron. For example, for a daily backup at 03:00 AM, when server load is minimal:
crontab -e
Add the following line to the end of the crontab file:
0 3 * * * /home/onlyuser/backup_onlyoffice.sh > /dev/null 2>&1
This line runs the script every day at 3 AM. The script's output is redirected to /dev/null to avoid cluttering the user's mailbox with system messages. If you want to receive notifications about errors or successful completion, remove > /dev/null 2>&1.
4. Maintenance and Updates
Regular updates are critically important for maintaining the security, performance, and stability of your OnlyOffice Document Server installation. Always create a backup before major updates!
- Operating System Updates: Monthly or as important security patches are released.
sudo apt update && sudo apt upgrade -y && sudo apt autoremove -yAfter updating the kernel or important system components, a server reboot may be required:
sudo reboot. - OnlyOffice Document Server Docker Image Update:
It is recommended to update OnlyOffice Document Server to new stable versions. Always make a backup before updating!
cd ~/onlyoffice
docker compose pull documentserver # Download the latest image version
docker compose down                # Stop the current container
docker compose up -d               # Start a new container with the updated image
Always check official OnlyOffice releases for compatibility information, important changes, and update instructions.
- Certbot (Let's Encrypt) Update: Certificates are renewed automatically, but ensure that Certbot and its dependencies are also updated along with the OS.
- Resource Monitoring: Monitor server resource usage (CPU, RAM, disk space) using tools like
htop,glances, or more advanced monitoring systems (e.g., Prometheus + Grafana). This will allow you to promptly react to potential performance issues or resource shortages.
Plan "maintenance windows" for major updates or migrations when temporary service interruptions are possible. Inform users in advance, if applicable.
Troubleshooting + FAQ
Various issues may arise during the deployment and operation of OnlyOffice Document Server. Below are typical questions and their solutions, which will help you quickly diagnose and troubleshoot problems.
OnlyOffice Document Server is inaccessible by domain name or IP
Problem description: When attempting to open https://docs.yourdomain.com (or http://your_vps_ip:8000), the browser shows a connection error or a "page not found" message.
What to check:
- Ensure the OnlyOffice Docker container is running: execute the command
docker ps. The output should show theonlyoffice-documentservercontainer with aUpstatus. - Check that Nginx is running:
sudo systemctl status nginx. Ensure the service is active (active (running)). - Check Nginx configuration for syntax errors:
sudo nginx -t. If there are errors, correct them. - Ensure the firewall (UFW) allows ports 80 (HTTP) and 443 (HTTPS):
sudo ufw status verbose. - Check the domain's DNS records: does
docs.yourdomain.compoint to your VPS's IP address? Usedig docs.yourdomain.comornslookup docs.yourdomain.com. - Verify that the VPS is accessible from outside (e.g., via SSH).
How to fix: Restart the corresponding services (docker compose restart documentserver, sudo systemctl restart nginx). Correct any errors in the Nginx configuration. Open the necessary ports in UFW if they are blocked.
HTTPS/SSL Certificate Issues
Problem description: The browser displays a warning about an insecure connection, or the certificate has expired.
What to check:
- Has the certificate expired? Check the status of Certbot certificates:
sudo certbot certificates. - Is Nginx correctly configured to use SSL? Check the file
/etc/nginx/sites-available/onlyoffice.conf, especially thelisten 443 sslsections. - Is Certbot's automatic renewal working? Test it:
sudo certbot renew --dry-run. - Ensure port 443 is open in the firewall.
How to fix: Try to force certificate renewal: sudo certbot renew. If this doesn't help or the certificate is invalid, try reinstalling the certificate: sudo certbot --nginx -d docs.yourdomain.com --force-renewal. Ensure the domain correctly points to your VPS.
"Error while downloading the document" or saving issues
Problem description: When attempting to open or save a document in an integrated system (e.g., Nextcloud), a download/save error occurs.
What to check:
- Ensure that the
JWT_SECRETindocker-compose.yml(OnlyOffice) and in the settings of your document management system (e.g., the OnlyOffice plugin in Nextcloud) match. This is the most common cause. - Check OnlyOffice Document Server logs:
docker compose logs documentserver. Look for errors related to file access or OnlyOffice's internal operations. - Ensure OnlyOffice has sufficient disk space and that write permissions for mounted volumes (
/app/onlyoffice/DocumentServer/data, etc.) are correct. - Check the network connection between OnlyOffice Document Server and your document management system.
How to fix: Correct the JWT_SECRET. Check access permissions for Docker volume directories; if necessary, change them (e.g., sudo chown -R 1001:1001 /app/onlyoffice/DocumentServer, where 1001 is the user ID under which OnlyOffice runs in Docker). Ensure the disk is not full.
What is the minimum suitable VPS configuration?
For basic use of OnlyOffice Document Server (1-5 concurrent users, infrequent use), a VPS with a minimum of 2 CPU cores, 4 GB RAM, and 50 GB SSD will be required. However, for more comfortable operation and scalability, especially for active team use, it is recommended to have 4 CPU cores, 8-16 GB RAM, and 100-200 GB SSD. The choice of SSD is critically important for performance due to intensive work with temporary files.
What to choose — VPS or dedicated for this task?
For most OnlyOffice Document Server use cases (up to 50-100 concurrent users), a well-configured VPS will be the optimal choice. It offers good performance at a reasonable price, scalability flexibility, and ease of management. Dedicated servers become necessary for very high loads (hundreds of users), specific hardware requirements (e.g., GPU for processing), maximum performance, or strict regulatory requirements for physical data isolation.
How to integrate OnlyOffice with Nextcloud/ownCloud?
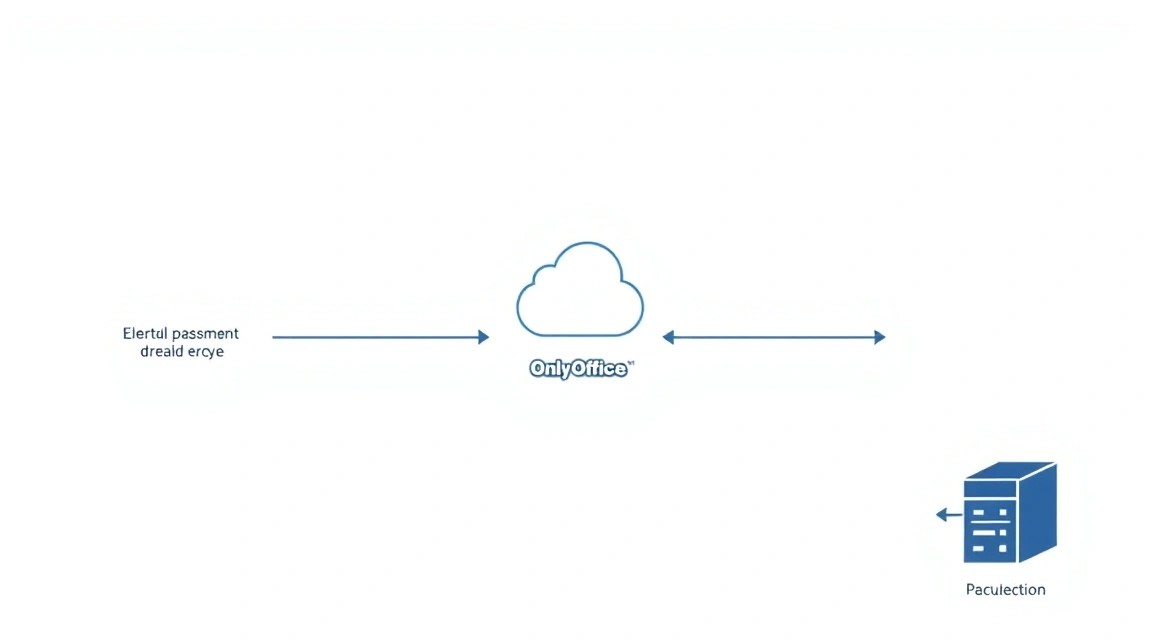
After successfully deploying OnlyOffice Document Server, to integrate with Nextcloud or ownCloud, you need to install the corresponding application (e.g., "ONLYOFFICE" from the official Nextcloud app store). In the settings of this application, specify the address of your OnlyOffice Document Server (https://docs.yourdomain.com) and the same JWT_SECRET that you used in the docker-compose.yml file. After this, you will be able to open and edit documents directly from the Nextcloud/ownCloud interface, using your own cloud editor.
Can I use OnlyOffice without a domain and HTTPS?
Technically, you can access OnlyOffice Document Server via an IP address and HTTP (e.g., http://your_vps_ip:8000) for testing or within a very closed local network. However, for production use, especially when integrating with other services (Nextcloud, Mattermost, GitLab) and accessing from the internet, it is highly not recommended to use OnlyOffice without a domain name and HTTPS. This is critically important for security, as data is transmitted in plain text, and many modern browsers and applications may block or incorrectly work with unsecured connections. Furthermore, Let's Encrypt requires a domain name to issue certificates.
OnlyOffice Performance Issues
Problem description: Documents open slowly, collaborative editing "lags," or the server responds with a delay.
What to check:
- CPU and RAM usage on the VPS: use
htoportopcommands for monitoring. OnlyOffice can be resource-intensive. - Disk subsystem speed: use
iostat -x 5to check disk I/O performance. Low SSD speed can be a bottleneck. - Network latency between users and the VPS: use
pingortraceroute. - OnlyOffice logs:
docker compose logs documentservermay indicate internal issues.
How to fix: If VPS resources are exhausted, consider upgrading your VPS plan (increasing CPU/RAM). Ensure you are using SSDs. Optimize OnlyOffice settings if possible (e.g., limit the number of concurrently open documents, if applicable to your integration). Ensure the VPS is in an optimal geographical location relative to users to minimize latency.
Conclusions and Next Steps
Congratulations! You have successfully deployed and configured OnlyOffice Document Server on your VPS. You now have a powerful, fully controlled cloud document editor that provides privacy, security, and flexibility unavailable in most commercial cloud solutions. You have mastered not only the installation of the service itself but also critically important aspects such as server preparation, HTTPS configuration, security, and creating a backup system. This gives you complete control over your data and infrastructure, which is especially valuable for developers, SaaS solo founders, crypto enthusiasts, and everyone who values their privacy.
Further steps to improve and expand your OnlyOffice installation may include:
- Integration with a Document Management System (DMS): Connect OnlyOffice to Nextcloud, ownCloud, Seafile, or another DMS for full-fledged file storage and management. This will allow you to use all collaborative editing features directly from your file storage, creating a complete alternative to Google Workspace.
- Monitoring and Logging: Set up more advanced monitoring systems (e.g., Prometheus + Grafana) to track server and OnlyOffice performance, as well as a centralized logging system (e.g., ELK Stack or Loki + Grafana) for quick identification and resolution of issues.
- Performance Optimization and Scaling: For large teams or high loads, consider fine-tuning OnlyOffice configuration, using a separate database (PostgreSQL) on another server, or even scaling to multiple servers with load balancing to ensure maximum availability and performance.