Deploying Dokku on a VPS: Heroku-like PaaS for Rapid Application Deployment
TL;DR
In this comprehensive guide, we will set up Dokku on your Virtual Private Server (VPS), transforming it into a powerful Heroku-like Platform as a Service (PaaS). Dokku allows developers to easily deploy, scale, and manage applications with a simple git push command, utilizing Docker containers. You will gain full control over your infrastructure, cost savings compared to cloud PaaS, and the ability to quickly launch projects.
- Dokku Installation: Transforming a clean VPS into a full-fledged PaaS with Docker support.
- Automatic Deployment: Deploy applications by simply pushing code to a Git repository on your server.
- Application Management: Easily add databases, caches, configure environment variables, and SSL certificates.
- Full Control: You own all infrastructure, data, and configurations, avoiding vendor lock-in to a specific cloud provider.
- Resource Efficiency: Optimal utilization of your VPS resources for multiple applications.
- Up-to-date: All steps and software versions are current for 2026, ensuring long-term applicability.
What We Are Setting Up and Why
In this guide, we will set up Dokku — a lightweight PaaS (Platform as a Service) that allows you to run and manage applications on your own server, leveraging the benefits of Docker. Dokku is often called "Heroku for VPS" because it provides a similar deployment experience: you simply push your code to a Git repository on the server, and Dokku automatically builds it into a Docker image, runs, and manages it.
Ultimately, you will get a fully functional platform for deploying web applications in various programming languages (Node.js, Python, Ruby, Go, PHP, and others) with minimal effort. This is an ideal solution for developers, startups, and small teams who need the simplicity of Heroku, but with full control over the infrastructure and lower costs.
Why Dokku?
- Deployment Simplicity: Application deployment is reduced to a
git pushcommand. - Resource Efficiency: Dokku runs on a single server, making it a cost-effective solution.
- Flexibility: Support for many languages and frameworks thanks to Buildpacks and Dockerfiles.
- Extensibility: A rich ecosystem of plugins for databases (PostgreSQL, MySQL, Redis), message brokers, and other services.
- Control: You retain full control over your server, data, and configurations, unlike fully managed cloud PaaS.
Alternatives: Cloud-managed vs. Self-hosted
There are several approaches to deploying applications:
-
Cloud-managed PaaS (e.g., Heroku, Render, Netlify):
- Pros: Maximum simplicity, no need to manage infrastructure, automatic scaling.
- Cons: High cost, less control, vendor lock-in, limited customization options.
-
Self-hosted PaaS (e.g., Dokku, CapRover, Coolify):
- Pros: Significant cost savings, full control over the server and data, flexibility in configuration choice, ability to install on any VPS.
- Cons: Requires initial setup and minimal server maintenance, scaling can be more complex than in cloud-managed solutions.
-
Manual Deployment on VPS (without PaaS):
- Pros: Maximum control and flexibility, suitable for very specific tasks.
- Cons: Most labor-intensive process, requires deep knowledge of system administration, manual management of each component (web server, database, CI/CD).
Dokku strikes a golden mean, providing the simplicity of PaaS with the control and savings of a self-hosted solution. It's an ideal choice for those who want to quickly deploy applications without delving into the complexities of Kubernetes or manual Docker container management.
What VPS Configuration is Needed for This Task
Choosing the right VPS configuration for Dokku depends on the number and type of applications you plan to deploy. Dokku itself is quite lightweight, but each deployed application and its accompanying services (databases, caches) consume resources.
Minimum Requirements (for 1-2 small applications, without heavy databases):
- CPU: 2 vCPU
- RAM: 4 GB
- Disk: 80 GB SSD (for the system, Dokku, and several applications)
- Network: 1 Gbit/s port, unlimited traffic or a large limit (e.g., 1 TB/month)
Recommended Configuration (for 3-5 medium applications, with multiple databases):
- CPU: 4 vCPU
- RAM: 8 GB
- Disk: 160 GB NVMe SSD (for better disk I/O performance)
- Network: 1 Gbit/s port, unlimited traffic
For comfortable work with multiple applications and databases, consider a VPS with 4 vCPU, 8 GB RAM, and 160 GB SSD. This will provide sufficient performance headroom for most development tasks and small production projects.
When a Dedicated Server is Needed, Not a VPS
A dedicated server should be considered if:
- High Load: Your applications expect thousands of concurrent users or require significant computational resources.
- Large Data Volume: You need to store hundreds of gigabytes or terabytes of data, which can be expensive or inefficient on a VPS.
- Specific Performance Requirements: Direct access to hardware is needed for maximum disk, network, or CPU performance, which a VPS cannot always guarantee due to virtualization.
- Security and Compliance Requirements: Some regulations may require physical server isolation.
- Scaling: If you plan to deploy more than 10-15 medium applications or several very large ones, a single dedicated server can be a more economical and performant solution than multiple powerful VPS. In this case, a suitable dedicated server might be needed.
For most Dokku-related tasks, a powerful VPS will be more than sufficient, offering an excellent balance between performance and cost.
Location: What It Affects
Choosing a VPS location has several key aspects:
- Latency: Place the server as close as possible to your primary audience or users to minimize delays in accessing the application.
- Legislation: If your application handles sensitive data, it's important to consider data protection laws (e.g., GDPR in Europe) of the country where the server is physically located.
- Price: The cost of a VPS may vary slightly across different regions.
- Availability: Some providers offer a wider range of services or more stable infrastructure in certain data centers.
It is usually recommended to choose a data center in the same geographical region as most of your users, or in an adjacent one.
Server Preparation
Before installing Dokku, you need to perform basic setup and security hardening of your VPS. We will use Ubuntu Server 24.04 LTS (Noble Numbat) as the most current and stable version for 2026.
1. Connecting to the Server
Connect to your VPS via SSH using the credentials provided by your provider. This is usually the root user and password, or an SSH key.
ssh root@ВАШ_IP_АДРЕС_VPS
Replace ВАШ_IP_АДРЕС_VPS with your server's actual IP address.
2. System Update
Always start by updating the package list and installed packages to their latest versions. This ensures you have the most recent security fixes and functionality.
sudo apt update && sudo apt upgrade -y
Updates the list of available packages and installs all updates without prompting for confirmation.
3. Creating a New User with Sudo Privileges
Operating as the root user is not recommended for daily tasks due to security reasons. Create a new user and grant them sudo privileges.
adduser dokkuadmin
Creates a new user dokkuadmin and prompts for a password and additional information.
usermod -aG sudo dokkuadmin
Adds the user dokkuadmin to the sudo group, giving them the ability to execute commands with superuser privileges.
4. Setting up SSH Keys for the New User
It is recommended to use SSH keys for authentication instead of passwords. This significantly enhances security.
On your local machine, if you don't already have an SSH key pair, generate them:
ssh-keygen -t rsa -b 4096 -C "[email protected]"
Then, copy the public key to the server for the new user:
ssh-copy-id dokkuadmin@ВАШ_IP_АДРЕС_VPS
This command will add your public key to the ~/.ssh/authorized_keys file on the server. After this, you will be able to log in as dokkuadmin without a password.
Now, exit the root session and log in as dokkuadmin:
exit
ssh dokkuadmin@ВАШ_IP_АДРЕС_VPS
5. SSH Security Hardening
Edit the SSH server configuration file to disable root login and password authentication (if you are sure that SSH keys are working).
sudo nano /etc/ssh/sshd_config
Find and change (or add) the following lines:
PermitRootLogin no
PasswordAuthentication no
Save changes (Ctrl+O, Enter) and exit (Ctrl+X). Then restart the SSH service:
sudo systemctl restart ssh
Important: Make sure you can log in as dokkuadmin with an SSH key before disabling PermitRootLogin and PasswordAuthentication, otherwise you risk losing access to the server.
6. Firewall Configuration (UFW)
UFW (Uncomplicated Firewall) is a convenient interface for managing iptables. Configure it to allow only the necessary ports.
sudo apt install ufw -y
Installs the UFW utility.
sudo ufw allow OpenSSH
Allows incoming connections on the SSH port (default 22).
sudo ufw allow http
Allows incoming connections on the HTTP port (80).
sudo ufw allow https
Allows incoming connections on the HTTPS port (443).
sudo ufw enable
Enables the firewall. Confirm the action by pressing y.
sudo ufw status
Checks the firewall status and the list of allowed rules.
7. Installing Fail2ban
Fail2ban helps protect against brute-force attacks by blocking IP addresses from which numerous failed login attempts originate.
sudo apt install fail2ban -y
Installs Fail2ban.
Fail2ban is configured by default to protect SSH. Additional configuration can be done by copying the default configuration file:
sudo cp /etc/fail2ban/jail.conf /etc/fail2ban/jail.local
Now you can edit /etc/fail2ban/jail.local to change parameters such as ban time or number of attempts.
sudo systemctl enable fail2ban
sudo systemctl start fail2ban
Enables Fail2ban to start automatically on boot and starts it.
8. Hostname Configuration
Set a descriptive hostname for your server. This will help with identification.
sudo hostnamectl set-hostname dokku-server
Sets the hostname to dokku-server.
echo "127.0.0.1 dokku-server" | sudo tee -a /etc/hosts
Adds an entry to the /etc/hosts file for correct resolution of the new hostname.
Your VPS is now ready for Dokku installation.
Dokku Software Installation
After preparing the server, you can proceed with Dokku installation. We will use the official Dokku repository, which ensures you get the latest and stable versions.
1. Adding the Dokku Repository
First, install the necessary utilities for working with repositories and add the Dokku GPG key.
# Устанавливаем необходимые пакеты для работы с HTTPS-репозиториями
sudo apt install -y apt-transport-https ca-certificates curl gnupg lsb-release
Installs utilities for working with secure repositories and determining the distribution version.
# Добавляем GPG-ключ Dokku
curl -fsSL https://packagecloud.io/dokku/dokku/gpgkey | sudo gpg --dearmor -o /usr/share/keyrings/dokku-archive-keyring.gpg
Downloads the Dokku public GPG key and saves it for package authenticity verification.
# Добавляем репозиторий Dokku в список источников
echo "deb [signed-by=/usr/share/keyrings/dokku-archive-keyring.gpg] https://packagecloud.io/dokku/dokku/ubuntu/ $(lsb_release -cs) main" | sudo tee /etc/apt/sources.list.d/dokku.list
Adds the official Dokku repository for Ubuntu 24.04 LTS (Noble Numbat) to the package sources list.
# Обновляем список пакетов после добавления нового репозитория
sudo apt update
Updates the package cache so the system is aware of new packages from the Dokku repository.
2. Installing Dokku
Now that the repository has been added, you can install Dokku. As of 2026, Dokku will be version 0.30.x or newer.
# Устанавливаем Dokku. Это также установит Docker и все необходимые зависимости.
sudo apt install dokku -y
Installs Dokku and all its dependencies, including Docker Engine, which is the foundation of Dokku's operation.
3. Initial Dokku Setup (via Web Interface)
After installation, Dokku requires initial setup. This can be done via the web interface, which is available immediately after installation.
Open http://ВАШ_IP_АДРЕС_VPS in your browser. You will see the Dokku setup page.
On this page, you will need to:
- Public Key: Paste your public SSH key that you used to log in to the server (
cat ~/.ssh/id_rsa.pubon your local machine). This will allow you to deploy applications via Git. - Hostname: Enter the domain name you want to use for Dokku (e.g.,
dokku.yourdomain.com). Make sure you have configured a DNS record (A-record or CNAME) for this domain, pointing to your VPS's IP address. - Use Virtual Host Naming: Leave this option enabled. It allows Dokku to automatically route requests to your applications based on the domain name.
Click "Finish Setup". After this, Dokku will be ready for use.
4. Verifying Dokku Installation (via SSH)
You can verify that Dokku is installed and working correctly by running the command:
dokku version
The output should show the current Dokku version, for example: dokku version 0.30.x.
Also check the status of Dokku and Docker:
sudo systemctl status dokku
sudo systemctl status docker
Both services should be in an active (running) state.
5. Adding Your SSH Key to Dokku (if not done via Web Interface)
If you skipped the step of adding the SSH key in the web interface, you can do it manually:
# On your local machine:
cat ~/.ssh/id_rsa.pub
Copy the output of this command.
# On the Dokku server (via SSH):
dokku ssh-keys:add my_local_key "ssh-rsa AAAAB3NzaC..."
Replace my_local_key with any name for your key and "ssh-rsa AAAAB3NzaC..." with your copied public key.
Dokku is now fully installed and ready to deploy your first applications.
Application Configuration and Deployment
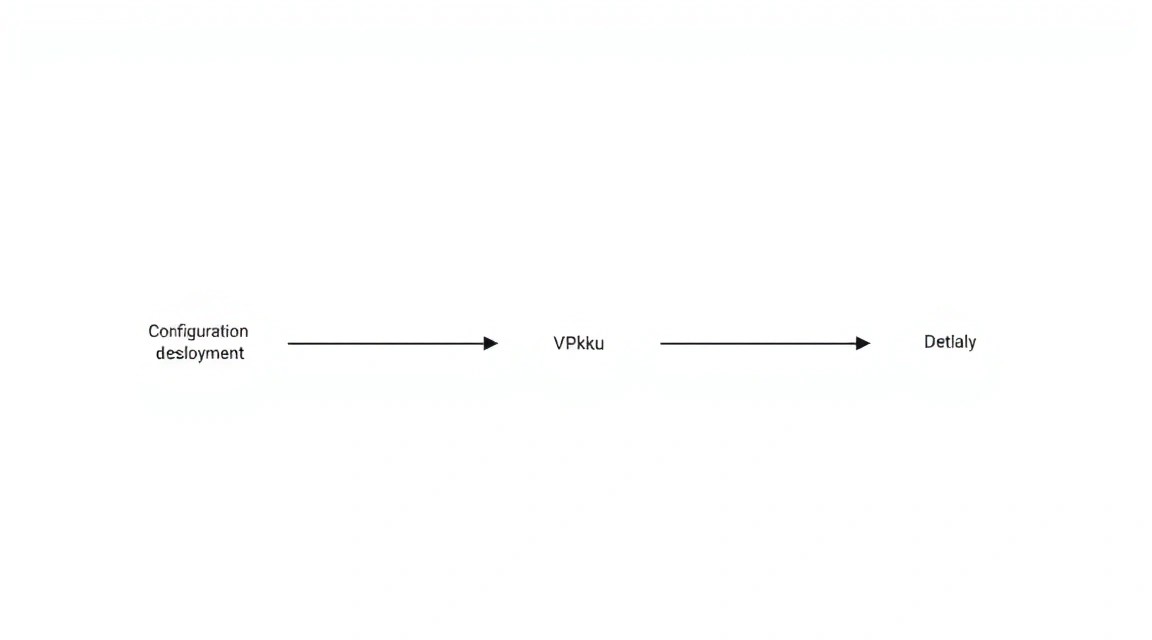
After installing Dokku, the next step is to deploy your first application and configure it. Dokku makes this process as simple as possible by using the concept of Git deployment.
1. Creating a New Application
Before deploying your code, you need to create a "slot" for your application in Dokku.
dokku apps:create my-web-app
Creates a new application named my-web-app. This name will be used in subsequent commands.
2. Configuring DNS for the Application
If you want your application to be accessible via its own domain name (e.g., app.yourdomain.com), you need to configure a DNS record. In your domain registrar's control panel, create an A-record (or CNAME, if you are using a Dokku subdomain) pointing to your VPS's IP address.
Then, inform Dokku about your application's domain:
dokku domains:add my-web-app app.yourdomain.com
Adds the domain app.yourdomain.com to the my-web-app application. Dokku will now route traffic for this domain to your application.
3. Deploying the Application
The deployment process in Dokku is very similar to Heroku. You add a remote Git repository and push your code to it.
On your local machine, in your project directory:
# Initialize a Git repository if you haven't already
git init

# Add the Dokku remote repository
git remote add dokku dokku@YOUR_DOKKU_IP_OR_DOMAIN:my-web-app

# Push your code to Dokku
git push dokku master
The command git push dokku master will send your code to the Dokku server. Dokku will automatically detect your application type (Node.js, Python, PHP, etc.) using Buildpacks, build a Docker image, run it, and make it accessible.
4. Managing Environment Variables
For sensitive data such as API keys, database credentials, and other secrets, use environment variables. Dokku allows you to manage them easily.
dokku config:set my-web-app MY_API_KEY="your_secret_api_key_here" DATABASE_URL="postgres://user:pass@host:port/db"
Sets environment variables for the my-web-app application. These variables will be available to your application at runtime.
dokku config:unset my-web-app MY_API_KEY
Removes an environment variable.
dokku config:get my-web-app MY_API_KEY
Retrieves the value of a specific variable (unless it's a secret variable, which is hidden by default).
dokku config my-web-app
View all environment variables for the application.
5. Installing and Connecting Databases (Dokku Plugins)
Dokku supports many plugins for various services, including databases. For example, for PostgreSQL:
# Install the PostgreSQL plugin
sudo dokku plugin:install https://github.com/dokku/dokku-postgres.git postgres
Installs the Dokku plugin for managing PostgreSQL databases.
# Create a new database
dokku postgres:create my-web-app-db
Creates a PostgreSQL database instance named my-web-app-db.
# Link the database to the application
dokku postgres:link my-web-app-db my-web-app
Links the database to the my-web-app application. This automatically sets the DATABASE_URL environment variable in the application, containing the connection details.
Similarly, you can install plugins for MySQL, Redis, MongoDB, and other services.
6. Configuring TLS/HTTPS with Let's Encrypt
To ensure the security and trustworthiness of your application, it is crucial to use HTTPS. Dokku has excellent integration with Let's Encrypt for automatic SSL certificate acquisition and renewal.
# Install the Let's Encrypt plugin
sudo dokku plugin:install https://github.com/dokku/dokku-letsencrypt.git letsencrypt
Installs the Dokku plugin for working with Let's Encrypt certificates.
# Set email for Let's Encrypt notifications
dokku letsencrypt:set my-web-app email [email protected]
Specifies your email address, which Let's Encrypt will use for important certificate notifications.
# Enable Let's Encrypt for the application
dokku letsencrypt:enable my-web-app
Requests and installs an SSL certificate for my-web-app. Ensure that the DNS record for app.yourdomain.com already points to your VPS, otherwise the certificate request will fail.
Dokku will automatically configure Nginx (or Caddy, if you are using the corresponding plugin) to use the certificate and redirect HTTP to HTTPS.
7. Checking Application Health
After deployment and configuration, ensure that your application is working correctly.
dokku apps:report my-web-app
Shows a detailed report on the application's status, its URL, domains, used ports, etc.
dokku logs my-web-app --tail 100
View the last 100 lines of application logs. This is extremely useful for debugging.
curl -I https://app.yourdomain.com
Performs an HTTP HEAD request to your application to check its availability and response status (e.g., HTTP/1.1 200 OK).
ping app.yourdomain.com
Checks the network accessibility of your application's domain.
You can also set custom health-checks for Dokku to more intelligently determine application health after deployment:
dokku ps:set my-web-app deploy-wait-period 30
dokku ps:set my-web-app deploy-wait-healthcheck /health
These commands set a wait period of 30 seconds after a new container starts and specify the URL /health for health checking. If the application does not respond to this URL within 30 seconds, the deployment will be considered unsuccessful.