
NetBird on Your Own Server: mesh-VPN Like Tailscale Without the Cloud
TL;DR
NetBird lets you deploy your own mesh-VPN network on a VPS: devices receive secure WireGuard tunnels, see each other via private IP addresses, and are managed through a single server without relying on a public SaaS account.
- For a small team, a VPS with 2 vCPU, 4 GB RAM, 40 GB SSD, and a public IPv4 address is sufficient.
- NetBird uses WireGuard to transmit traffic, while the management server coordinates participants, groups, routes, and access policies.
- The most practical self-hosted installation method in 2026 is the official Docker Compose stack with PostgreSQL, coturn, Signal, and a web dashboard.
- For operation through NAT, it is important to open the WireGuard and TURN UDP ports, while the management dashboard requires an HTTPS certificate.
- You need to back up PostgreSQL, the environment file, the Docker Compose configuration, and the identity provider keys/secrets.
- After installation, you can connect Linux, macOS, Windows, Android, and iOS, and configure private DNS, an exit node, site-to-site routing, and ACL policies.
What we are configuring and why
NetBird is a self-hosted platform for building a mesh-VPN. In purpose, it is similar to Tailscale, ZeroTier, and Headscale: you install an agent on servers, laptops, and other devices, authorize them within a single network, and get secure connectivity between participants.
WireGuard is at the core of data transmission. This means that user traffic goes directly between two nodes whenever possible. The central NetBird server does not have to proxy every packet: it stores the network state, issues configurations to peer nodes, applies ACL policies, helps discover participants, and provides an administrative dashboard.
If a direct connection is impossible due to CGNAT, symmetric NAT, or a corporate firewall, NetBird can send traffic through a TURN relay. In a self-hosted setup, this relay is usually coturn running on the same VPS. This does not remove WireGuard encryption: TURN sees the transport stream but does not decrypt VPN traffic.
What you will have after following this guide
As a result, you will have a domain such as netbird.example.com with an HTTPS management dashboard. In the dashboard, you can invite users, create setup keys for servers without interactive login, combine peers into groups, add routes to local subnets, and restrict access with rules.
Each connected device will receive an address from the internal NetBird network, such as 100.64.0.0/10 or a range of your choice. You will be able to connect to private services over SSH, access internal databases, link multiple VPS instances, grant developers access only to staging infrastructure, or publish a home network without port forwarding on every device.
Why not just WireGuard
Standard WireGuard is excellent for a “client — server” setup, but starts requiring manual administration with dozens of nodes. You need to create keys, add peer blocks to the configuration of every machine, coordinate AllowedIPs, update files when a device is revoked, and solve NAT issues.
NetBird automates this work. The administrator manages logical objects: users, groups, routes, and policies. The agent receives the current configuration automatically. When a laptop is removed from the network, its key stops receiving a working configuration, and when a new server is added, you do not need to manually edit the configuration on every existing node.
Cloud-managed and self-hosted: which to choose
| Criterion | Cloud service | NetBird on your own VPS |
|---|---|---|
| Getting started | Faster: sign up and install the agent | Requires a domain, VPS, TLS, and maintenance |
| Metadata control | Part of the control plane is hosted by the provider | The database, logs, and identity provider are under your control |
| Flexibility | Limited by the plan and platform settings | You can change domains, backups, SSO, and the network design |
| Operations | The service handles updates and fault tolerance | The owner is responsible for updates and backups |
| Cost | May increase along with the number of users | Predictable server and backup storage costs |
Self-hosted NetBird makes sense when independence from an external account, control over network metadata, your own data retention policy, or integration with corporate SSO are important. For a team of several people, it is also a good way to learn modern mesh-VPN architecture without manually maintaining dozens of WireGuard configurations.
NetBird does not automatically make a VPS invisible to the internet. Public services still need to be protected with a firewall, updates, strong passwords, and separate ACLs. A mesh-VPN should be considered a layer of secure connectivity, not a replacement for basic server security.
What VPS configuration is needed for this task
NetBird load depends not so much on the number of registered peers as on the number of active relayed connections through TURN. If devices connect directly, the VPS mainly serves the web dashboard, API, PostgreSQL, and signaling. If many clients constantly operate behind complex NAT, coturn may consume substantial traffic and CPU resources.
| Scenario | CPU | RAM | Disk | Network |
|---|---|---|---|---|
| Test network with up to 10 devices | 1 vCPU | 2 GB | 25 GB SSD | 100 Mbps, public IPv4 |
| Team of 10–50 devices | 2 vCPU | 4 GB | 40–60 GB NVMe/SSD | 1 Gbps, IPv4, 2–5 TB of traffic |
| 50–200 devices or active TURN | 4 vCPU | 8 GB | 80 GB NVMe | 1 Gbps, high or unlimited traffic |
| Several hundred devices, heavy relay traffic | 8 vCPU | 16 GB | 160 GB NVMe | 1–10 Gbps, separate TURN server |
For most personal infrastructures and small teams, a practical starting option is 2 vCPU, 4 GB RAM, 50 GB NVMe, a dedicated IPv4 address, and a 1 Gbps port. For example, you can choose a VPS with these specifications, install Ubuntu Server 24.04 LTS, and leave memory headroom for PostgreSQL, Docker, and future monitoring.
Why a public IPv4 address is needed
A public IPv4 address simplifies TURN operation and access to the management dashboard. IPv6 is useful, but it does not replace IPv4: some mobile and home providers still operate through IPv4 NAT, and some clients may not have full IPv6 connectivity. Ideally, the server should have both addresses.
Check whether the provider allows inbound UDP traffic. NetBird usually requires WireGuard and TURN UDP ports. If UDP is filtered at the hosting level, some clients will connect unreliably or may not be able to use the relay at all.
When you need dedicated rather than VPS
A dedicated server is justified not by the control plane itself, but by network load and isolation requirements. It is useful if TURN regularly transfers hundreds of megabits per second, the network is used as a gateway for a large number of employees, guaranteed CPU performance is required, or the security policy prohibits shared virtualization.
For 5–100 peers, a dedicated server is usually unnecessary. It is much more efficient to start with a VPS, enable load monitoring, and move coturn separately to a second VPS if relay traffic becomes a bottleneck. This separation is easier to scale and maintain than a premature migration to a large server.
How to choose a location
Location primarily affects latency to the control plane and TURN relay. Direct WireGuard connections between peers do not have to pass through the VPS, so two clients in the same city will exchange data with low latency regardless of the country where the control plane is located. However, with a relay connection, all traffic will pass through TURN.
Place the VPS closer to most users or critical networks. If the team is distributed between Europe and Asia, choose a neutral location for the dashboard and, if necessary, add a second TURN relay in another region. For access to a home server, choose a location with good routing to the home ISP, not merely the lowest price.
Server Preparation
This guide is designed for a clean server running Ubuntu Server 24.04 LTS x86_64. This version has long-term support, a modern kernel, and stable Docker packages. Before you begin, create an A-type DNS record: netbird.example.com must point to the VPS public IPv4 address. If IPv6 is used, also add an AAAA record.
Do not install NetBird directly as root. Create a separate administrator account, add an SSH key, and only disable password login after testing it. Keep the current root session open until you confirm that login with the new user works.
Operating System Update
Connect to the server via SSH and install the latest updates. The command updates the package index, applies security patches, and reboots the server only when necessary.
sudo apt update && sudo apt full-upgrade -y
sudo reboot
After the reboot, connect again and check the system version.
cat /etc/os-release
uname -r
Creating a User and Configuring SSH
Replace vpnadmin with your own username. On your workstation, first create a key with ssh-keygen -t ed25519 if you do not already have one.
sudo adduser vpnadmin
sudo usermod -aG sudo vpnadmin
sudo install -d -m 700 -o vpnadmin -g vpnadmin /home/vpnadmin/.ssh
Copy the public key to the authorized_keys file. Replace the example with a single line starting with ssh-ed25519.
sudo nano /home/vpnadmin/.ssh/authorized_keys
sudo chown vpnadmin:vpnadmin /home/vpnadmin/.ssh/authorized_keys
sudo chmod 600 /home/vpnadmin/.ssh/authorized_keys
Open a second terminal window and test login: ssh vpnadmin@SERVER_IP. Only change the SSH daemon settings after a successful test.
sudo cp /etc/ssh/sshd_config /etc/ssh/sshd_config.bak
sudo nano /etc/ssh/sshd_config
Add or modify the following settings. If you change the SSH port, remember to open it in the firewall before restarting the service.
PermitRootLogin no
PasswordAuthentication no
KbdInteractiveAuthentication no
PubkeyAuthentication yes
X11Forwarding no
AllowUsers vpnadmin
sudo sshd -t
sudo systemctl restart sshBasic Utilities, Firewall, and fail2ban
Install diagnostic tools, a firewall, and protection against SSH password brute-force attacks. Even with password authentication disabled, fail2ban is useful for reducing log noise and blocking suspicious sources.
sudo apt install -y ca-certificates curl gnupg git jq vim \
  ufw fail2ban unattended-upgrades dnsutils htop
Open only the required ports. In this example, SSH runs on standard TCP 22, the web dashboard uses 80 and 443, NetBird WireGuard uses UDP 51820, and coturn uses UDP/TCP 3478 and the UDP relay port range 49152–49200. A narrow range simplifies the firewall but limits the number of simultaneous relay sessions; it is sufficient for a small team.
sudo ufw default deny incoming
sudo ufw default allow outgoing
sudo ufw allow 22/tcp comment 'SSH'
sudo ufw allow 80/tcp comment 'HTTP ACME'
sudo ufw allow 443/tcp comment 'HTTPS'
sudo ufw allow 51820/udp comment 'NetBird WireGuard'
sudo ufw allow 3478/tcp comment 'TURN TCP'
sudo ufw allow 3478/udp comment 'TURN UDP'
sudo ufw allow 49152:49200/udp comment 'TURN relay range'
sudo ufw enable
sudo ufw status verbose
Create a minimal fail2ban configuration. The bantime value is one hour, and an address will be temporarily blocked after five failed attempts.
sudo tee /etc/fail2ban/jail.d/sshd.local > /dev/null <<'EOF'
[sshd]
enabled = true
maxretry = 5
findtime = 10m
bantime = 1h
EOF

sudo systemctl enable --now fail2ban
sudo fail2ban-client status sshd
Also enable automatic Ubuntu security updates. Docker images should not be updated automatically: it is better to update them manually during a scheduled maintenance window, after backup and review of the release notes.
sudo dpkg-reconfigure --priority=low unattended-upgrades
sudo systemctl status unattended-upgrades --no-pager
Software Installation — Step by Step
In 2026, the most convenient way to deploy self-hosted NetBird is through the official Docker Compose package. It installs a coordinated set of containers: management, signal, dashboard, PostgreSQL, coturn, and an identity provider. Do not build images from random third-party repositories: the control plane contains keys, tokens, and data about your internal network.
Before starting, check the current stable version in the official NetBird GitHub release. The commands below use the official getting-started.sh installation script, which downloads the current release stack. This is safer than pinning a version number that may be outdated by the time you read this article.
Installing Docker Engine
First, remove old conflicting Docker packages if they were installed from the Ubuntu repository. The command does not remove your Docker data in /var/lib/docker, but it is usually absent on a new server.
sudo apt remove -y docker.io docker-compose docker-compose-v2 \
  docker-doc podman-docker containerd runc 2>/dev/null || true
Add the official GPG key and Docker repository for Ubuntu 24.04.
sudo install -m 0755 -d /etc/apt/keyrings
curl -fsSL https://download.docker.com/linux/ubuntu/gpg | \
  sudo gpg --dearmor -o /etc/apt/keyrings/docker.gpg
sudo chmod a+r /etc/apt/keyrings/docker.gpg

echo "deb [arch=$(dpkg --print-architecture) signed-by=/etc/apt/keyrings/docker.gpg] https://download.docker.com/linux/ubuntu $(. /etc/os-release && echo "$VERSION_CODENAME") stable" | \
  sudo tee /etc/apt/sources.list.d/docker.list > /dev/null
Install Docker Engine and the Compose plugin. As of early 2026, use the current stable Docker Engine branch from the official repository; the check below will show the version actually installed.
sudo apt update
sudo apt install -y docker-ce docker-ce-cli containerd.io \
  docker-buildx-plugin docker-compose-plugin
sudo systemctl enable --now docker
docker version
docker compose version
Allow the vpnadmin user to run Docker without sudo. After adding the user to the group, log out of the SSH session and log in again; otherwise, the group change will not apply.
sudo usermod -aG docker vpnadmin
exit
After logging in again, run the test. The container should print a greeting and exit without a permission error.
docker run --rm hello-worldObtaining the Official Self-Hosted Package
Create a directory for infrastructure files. Do not use /tmp: it may be cleared by the system. The /opt/netbird directory is convenient for services, but the administrator will be made its owner to avoid working as root.
sudo install -d -m 750 -o vpnadmin -g vpnadmin /opt/netbird
cd /opt/netbird
Set the fully qualified domain name. It must already resolve to the VPS IP address; otherwise, automatic TLS certificate issuance through Let's Encrypt will not work.
export NETBIRD_DOMAIN="netbird.example.com"
getent ahostsv4 "$NETBIRD_DOMAIN"
Download the official installer from the latest release and first review the opening lines of the script. Reviewing scripts before running them is especially important when they receive permission to run Docker containers.
curl -fsSL https://github.com/netbirdio/netbird/releases/latest/download/getting-started.sh \
  -o getting-started.sh
less getting-started.sh
chmod 700 getting-started.sh
Run the script with the domain variable. The official bootstrap creates the Compose configuration, environment file, and initial self-hosted NetBird settings. If the upstream installer requests identity provider settings or an email address for ACME, provide a working address and store all issued secrets in a secure password manager.
NETBIRD_DOMAIN="$NETBIRD_DOMAIN" ./getting-started.shAfter installation is complete, check which files were created. Names may differ slightly between NetBird versions, so follow the actual script output rather than manually creating a second Compose stack.
cd /opt/netbird
find . -maxdepth 2 -type f | sort
docker compose ps
Checking Containers and Logs
All critical containers must be in the running or healthy state. Initial TLS certificate issuance may take one or two minutes. If containers are restarting, check the logs immediately instead of repeatedly attempting installation over the existing configuration.
docker compose ps
docker compose logs --tail=100
docker compose logs --tail=100 management
docker compose logs --tail=100 coturn
Check HTTPS availability. The -I flag requests HTTP headers only. A 200, 302, or 307 response usually means that the reverse proxy and dashboard are available.
curl -I https://netbird.example.com
curl -fsS https://netbird.example.com/ > /dev/null && echo "HTTPS OK"
Configuration
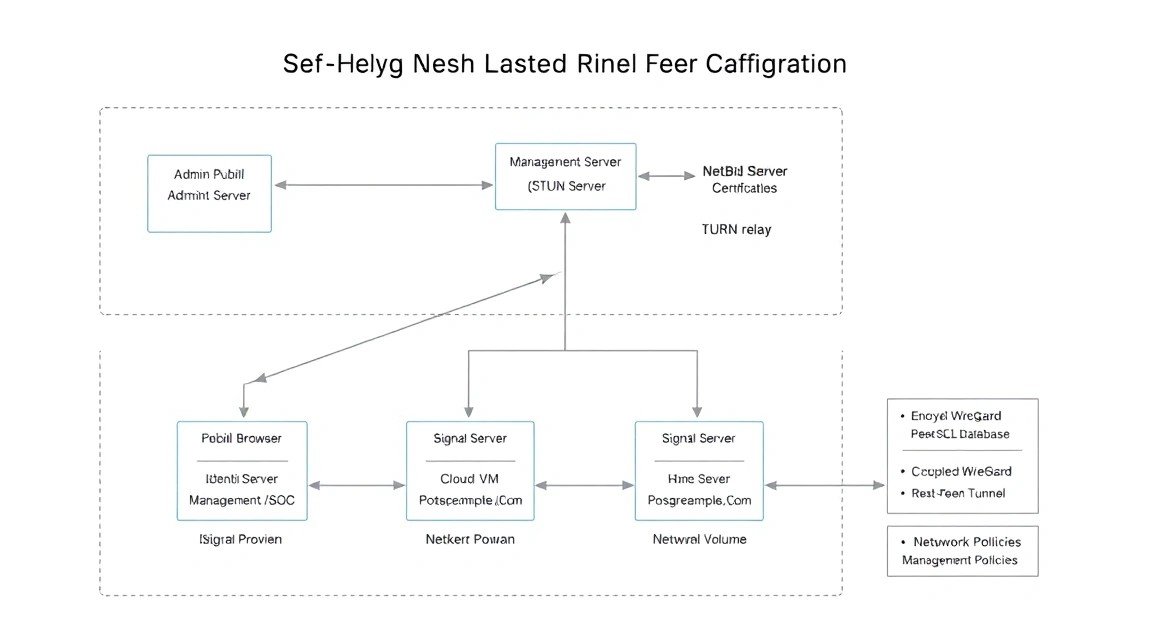
After bootstrap, do not rush to connect all servers. First, lock down the configuration, ensure TLS is in place, and create a separate administrative account. Depending on the version of the self-hosted NetBird package, the login screen may use built-in Zitadel or an external OpenID Connect provider. The logic is the same: the identity provider is responsible for authentication, while NetBird management handles peers and network policies.
Working with the environment file
The official installer usually creates a file such as setup.env, .env, or a similar one. It contains the domain, service URLs, PostgreSQL passwords, OIDC secrets, and TURN credentials. Restrict access to this file: 600 permissions are mandatory because leaked variables can compromise the control plane.
cd /opt/netbird
ls -la
find . -maxdepth 2 -type f \( -name ".env" -o -name "setup.env" \) -print
chmod 600 .env 2>/dev/null || true
chmod 600 setup.env 2>/dev/null || true
Below is a typical fragment, not a file for blind replacement. Variable names may differ in a specific release. Do not publish real values, store them in Git, or send them to chatbots or tickets.
NETBIRD_DOMAIN=netbird.example.com
NETBIRD_MGMT_API_ENDPOINT=https://netbird.example.com:443
NETBIRD_MGMT_GRPC_API_ENDPOINT=https://netbird.example.com:443
NETBIRD_AUTH_AUDIENCE=netbird
POSTGRES_DB=netbird
POSTGRES_USER=netbird
POSTGRES_PASSWORD=CHANGE_TO_A_LONG_RANDOM_SECRET
TURN_MIN_PORT=49152
TURN_MAX_PORT=49200
You can generate a secure secret locally on the server. Do not use short passwords or repeated values for PostgreSQL, Zitadel, and TURN.
openssl rand -base64 48TLS/HTTPS and Caddy
The official NetBird quickstart usually includes a reverse proxy and automatic TLS. Many releases use Caddy for this purpose; it listens on ports 80 and 443 and obtains a Let's Encrypt certificate. If the installer has already started Caddy, do not install a second Caddy or Nginx instance on the host: two processes cannot occupy TCP ports 80 and 443 simultaneously.
Check which container publishes the web ports. The output should include a service with bindings 0.0.0.0:80->80 and 0.0.0.0:443->443.
docker compose ps
sudo ss -lntup | grep -E ':(80|443|3478|51820)\b'
If you intentionally manage the reverse proxy yourself, an example of a minimal Caddyfile for the dashboard and management API is shown below. Obtain the actual internal container names and ports from the supplied NetBird Compose file. Do not copy the example until you verify them using docker compose config.
netbird.example.com {
    encode zstd gzip

    handle /api/ {
        reverse_proxy management:33073
    }

    handle /ws-proxy/ {
        reverse_proxy signal:10000
    }

    handle {
        reverse_proxy dashboard:80
    }
}
Check the certificate date and the name in the Subject Alternative Name. A certificate error almost always means an incorrect DNS record, blocked TCP 80/443, another proxy being present, or an attempt to request a certificate for a domain that has not yet propagated in DNS.
echo | openssl s_client -connect netbird.example.com:443 \
  -servername netbird.example.com 2>/dev/null | \
  openssl x509 -noout -subject -issuer -dates
Creating the first administrator
Open https://netbird.example.com in a browser. Create the first user through the built-in identity provider or configured OIDC. After logging in, verify that your user has the administrator role in the NetBird dashboard. Enable MFA in the identity provider immediately, especially if the panel is accessible from the public internet.
For servers, it is more convenient not to use personal interactive login. In the NetBird panel, create a Setup Key and limit its number of uses and expiration time. For example, for a single production server, create a one-time key and delete it after the node is registered.
Connecting a Linux peer
On the server you want to add to the mesh VPN, install the official NetBird client. Before running it, verify the package repository and command against the documentation for your release. For Ubuntu/Debian, the typical option uses the NetBird install script, which adds the official repository.
curl -fsSL https://pkgs.netbird.io/install.sh | sudo bash
sudo apt update
sudo apt install -y netbird
netbird version
Replace SETUP_KEY with a one-time or restricted setup key from the panel. The --management-url parameter instructs your agent to use your own control plane rather than the cloud endpoint.
sudo netbird up \
  --management-url https://netbird.example.com \
  --setup-key SETUP_KEY
Check the agent status. In a healthy configuration, the command shows the Connected status, the assigned NetBird IP, and the number of peers. In some versions, the command may display additional information about the signal server and relay.
sudo netbird status
ip addr show wt0 2>/dev/null || ip addr | grep -A2 -B2 netbird
Groups, policies, and minimum ACL
Do not leave the network in a “everyone can see everyone” mode if it includes production servers. Create admins, developers, prod-servers, and staging groups. Add peers to groups based on their purpose, not the employee's name: this makes it easier to maintain rules when devices and roles change.
A minimum policy can allow administrators access to all servers via SSH, developers access only to staging, and production servers outbound connections to each other only on required ports. Policies are created in the Dashboard under Access Control. Start with a network-level rule, then gradually narrow it down to groups and ports.
| Source | Destination | Protocol/port | Rule purpose |
|---|---|---|---|
| admins | prod-servers | TCP 22 | SSH administration |
| developers | staging | TCP 22, 80, 443 | Development and testing |
| prod-servers | prod-servers | Required ports only | Service communication without full access |
| all | all | Any | Do not use in production unless necessary |
Testing the mesh connection
Connect at least two peer devices. In the dashboard, find the NetBird IP of the second device, then run ping and SSH through the tunnel. If ping is blocked by policy, check the required application port using nc or curl.
ping -c 4 100.64.0.10
nc -vz 100.64.0.10 22
ssh [email protected]
To verify that access goes specifically through the VPN, connect to a service whose firewall allows traffic only through the NetBird interface. On the target machine, you can inspect incoming connections and the route interface.
ip route get 100.64.0.10
sudo ss -tnp | grep ':22'
Route to a local subnet and exit node
NetBird can advertise routes to networks behind a peer. For example, an office server with access to 192.168.50.0/24 can become a routing peer. To do this, enable IP forwarding on it, then add the route in the Dashboard and assign it to a recipient group.
sudo tee /etc/sysctl.d/99-netbird-forwarding.conf > /dev/null <<'EOF'
net.ipv4.ip_forward=1
net.ipv6.conf.all.forwarding=1
EOF

sudo sysctl --system
After enabling forwarding, configure the firewall/NAT according to your topology. Do not advertise the entire home subnet without ACLs: first allow access only to the administrators group. An exit node, through which a client sends all internet traffic, requires especially careful NAT configuration, traffic monitoring, and an understanding of the legal implications of using a public IP.
Backups and maintenance
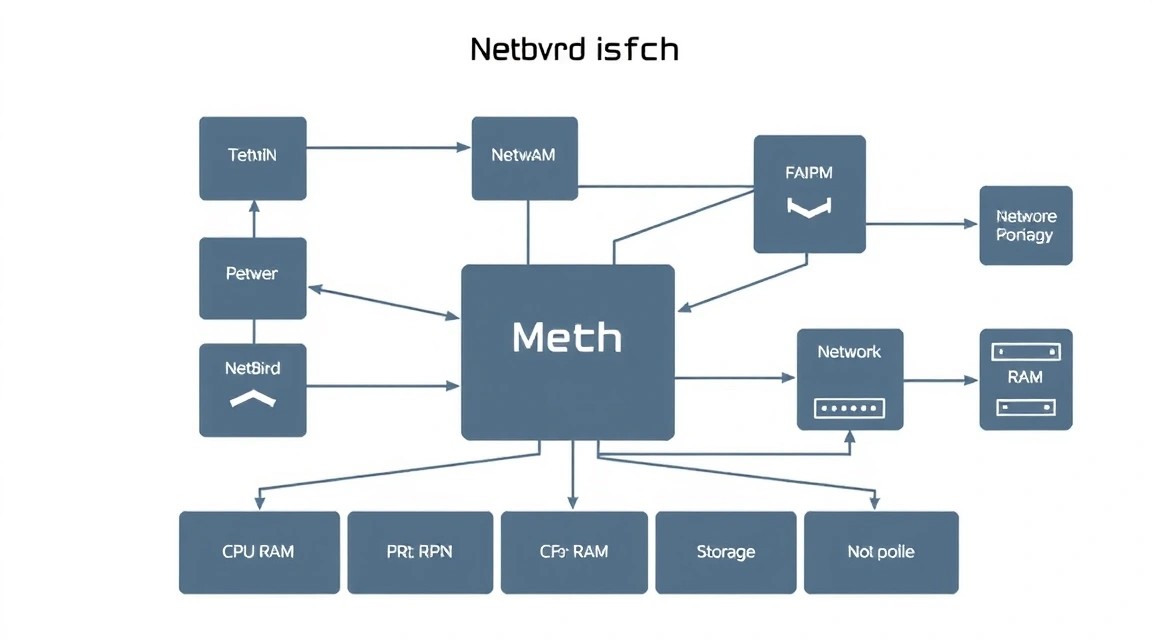
NetBird containers can be recreated, but control plane data is difficult to recover without a backup. The main asset is PostgreSQL: it contains users, peers, policies, routes, settings, and related identity provider data. Save Compose files, environment files, Caddy data, and all OIDC/TURN keys separately.
What to back up
- A PostgreSQL dump in the logical
pg_dumpformat. - The
/opt/netbirddirectory without temporary files and Docker image layers. - Docker volumes if they contain PostgreSQL, Zitadel, and Caddy data.
.env,setup.env, Compose YAML, and Caddyfile files.- Identity provider secrets, MFA recovery codes, and documentation for DNS records.
- A list of setup keys and administrative users, but not active keys in plain text.
Before setting up automation, determine the names of the PostgreSQL container and volume. This is important: the name may not simply be postgres. The command below will show services and attached volumes.
cd /opt/netbird
docker compose ps
docker compose config --services
docker volume ls
Installing restic and preparing storage
Keeping the only copy on the same VPS is pointless: if the server is deleted, a disk fails, or root access is compromised, it may be lost along with the data. Use S3-compatible object storage, a separate backup VPS over SFTP, or another independent server.
The example below uses restic with S3. Replace the values with your storage credentials. The restic repository password must be stored outside the VPS itself, for example in a password manager. After initialization, remove exported variables from interactive shell history or use a protected root-only file.
sudo apt install -y restic
sudo install -d -m 700 /root/.config/restic
sudo nano /root/.config/restic/netbird.env
sudo chmod 600 /root/.config/restic/netbird.env
export RESTIC_REPOSITORY="s3:https://s3.example.com/netbird-backups"
export RESTIC_PASSWORD="REPLACE_WITH_LONG_UNIQUE_RESTIC_PASSWORD"
export AWS_ACCESS_KEY_ID="REPLACE_WITH_ACCESS_KEY"
export AWS_SECRET_ACCESS_KEY="REPLACE_WITH_SECRET_KEY"Initialize the repository once. The command will create an encrypted backup repository structure.
sudo bash -c 'source /root/.config/restic/netbird.env && restic init'Automatic backup script
Create the script. It creates a PostgreSQL dump in a temporary directory, saves the configuration, sends data to restic, and cleans up local dumps older than seven days. Replace postgres and netbird with the actual service name and database name from your Compose file.
sudo tee /usr/local/sbin/backup-netbird.sh > /dev/null <<'EOF'
#!/usr/bin/env bash
set -euo pipefail

source /root/.config/restic/netbird.env

STACK_DIR="/opt/netbird"
BACKUP_DIR="/var/backups/netbird"
DATE="$(date +%F_%H-%M-%S)"
PG_SERVICE="postgres"
PG_DATABASE="netbird"
PG_USER="netbird"

mkdir -p "$BACKUP_DIR"
chmod 700 "$BACKUP_DIR"

cd "$STACK_DIR"

docker compose exec -T "$PG_SERVICE" \
  pg_dump -U "$PG_USER" -Fc "$PG_DATABASE" \
  > "$BACKUP_DIR/postgres_${DATE}.dump"

restic backup \
  "$BACKUP_DIR" \
  "$STACK_DIR/.env" \
  "$STACK_DIR/setup.env" \
  "$STACK_DIR/docker-compose.yml" \
  --tag netbird --tag postgres

restic forget --tag netbird \
  --keep-daily 7 --keep-weekly 4 --keep-monthly 6 --prune

find "$BACKUP_DIR" -type f -name '.dump' -mtime +7 -delete
EOF

sudo chmod 700 /usr/local/sbin/backup-netbird.sh
Run the script manually before adding it to cron. Then check the list of snapshots. If the command returns an error about a nonexistent service, check docker compose config --services and correct PG_SERVICE.
sudo /usr/local/sbin/backup-netbird.sh
sudo bash -c 'source /root/.config/restic/netbird.env && restic snapshots'
Add a daily run at 03:25. Choose the time based on the server's time zone and the period of lowest load.
sudo tee /etc/cron.d/netbird-backup > /dev/null <<'EOF'
25 3    root /usr/local/sbin/backup-netbird.sh >> /var/log/netbird-backup.log 2>&1
EOF
Recovery testing
A backup that has not been tested through recovery cannot be considered functional. Once per quarter, start a temporary VM, download a snapshot, restore the configurations, and try importing PostgreSQL into a test container. Do not test recovery on the production database.
sudo bash -c 'source /root/.config/restic/netbird.env && restic check'
sudo bash -c 'source /root/.config/restic/netbird.env && restic restore latest --target /tmp/netbird-restore'
NetBird updates
For a small network, use a maintenance window: notify users, make a backup, read the release notes, update the containers, and verify connectivity between two peers. A rolling update only makes sense with multiple control plane instances and a planned external database; on a single VPS, a brief interruption is usually safer and simpler.
cd /opt/netbird
sudo /usr/local/sbin/backup-netbird.sh
docker compose pull
docker compose up -d
docker compose ps
docker compose logs --tail=100
Do not blindly run docker system prune -a on a production server: the command may remove images needed for a quick rollback. Keep previous image versions until verification is complete. After updating, check dashboard login, test peer registration, the status of an existing client, and TURN connectivity from a network with NAT.
Troubleshooting + FAQ
Why does the browser show a TLS certificate error or the site does not open?
First, check DNS: the dig +short netbird.example.com A command should return your VPS IP. Then make sure TCP 80 and 443 are open and not used by another Nginx, Apache, or Caddy: sudo ss -lntp. Check reverse proxy logs with docker compose logs. For Let's Encrypt, the domain must be publicly accessible during the HTTP-01 challenge. If DNS/CDN proxying is used, temporarily disable it or configure a DNS challenge.
The peer is registered, but its status remains Disconnected. What should I check?
On the client, run sudo netbird status and ensure that the management URL points to your domain. Check DNS resolution and HTTPS availability: curl -I https://netbird.example.com. On the server, open the management and signal container logs. A common cause is an incorrect external URL in the environment file, an expired setup key, or a policy/firewall blocking the client's outgoing HTTPS. After fixing it, run sudo netbird down and then sudo netbird up again.
Devices can see each other in the dashboard, but ping and SSH do not work. Why?
Check the ACL policy in the Dashboard: having a peer on the network does not automatically allow all traffic. Then check the target server's local firewall: UFW may allow SSH only from the public interface or only from a specific subnet. Check the NetBird IPs of both peers and the route with ip route get PEER_IP. For diagnostics, temporarily create a narrow rule that allows TCP 22 between two test groups rather than a global all-to-all rule.
Why is the connection slow or routed through a relay?
This usually means peers could not establish a direct UDP path and are using TURN. Check the availability of UDP 3478, UDP 51820, and the UDP relay range 49152–49200 on the VPS, including the provider's external firewall. On home and corporate networks, the cause may be symmetric NAT or blocked UDP. Check the client status and coturn logs. Relay is a normal fallback, but its speed depends on the VPS connection and distance to users.
What is the minimum suitable VPS configuration?
For a personal network of 3–10 devices, 1 vCPU, 2 GB RAM, 25 GB SSD, and a public IPv4 address will be sufficient. For stable operation with PostgreSQL, dashboard, coturn, and room for updates, it is better to choose 2 vCPU, 4 GB RAM, and 40–50 GB NVMe. If many clients behind NAT are expected, disk size is less important than bandwidth and enabled UDP traffic. Monitor RAM, CPU, and outgoing traffic after launch.
Which should I choose for this task: VPS or dedicated?
A VPS is sufficient for most self-hosted NetBird networks. The control plane consumes few resources, and dozens of peers rarely require dedicated hardware. Dedicated hardware is needed for high sustained TURN traffic, hardware isolation requirements, several hundred active users, or the need for guaranteed bandwidth. A practical approach is to start with a VPS with 2–4 vCPU and move TURN to a separate machine if metrics show that relay has become a bottleneck.
How do I add a route to a home or office subnet?
Choose a peer that is connected both to NetBird and to the local network, for example 192.168.50.0/24. Enable net.ipv4.ip_forward=1 on it, then add the route in the Dashboard and assign the groups that can access it. Make sure a return route exists: either the local router knows the path to the NetBird subnet, or the routing peer performs NAT. Start with one host or a small subnet and verify access using ACL rules.
Can I remove a peer if a laptop is lost?
Yes. Open the Dashboard, find the device in the Peers list, and remove or disable it. The management server will stop issuing its current configuration, and access to network resources will be revoked according to policy. Additionally, disable the user's sessions in the identity provider, rotate setup keys if they may have been stored on the device, and check audit events. Do not use permanent setup keys with an unlimited number of registrations.
Conclusions and next steps
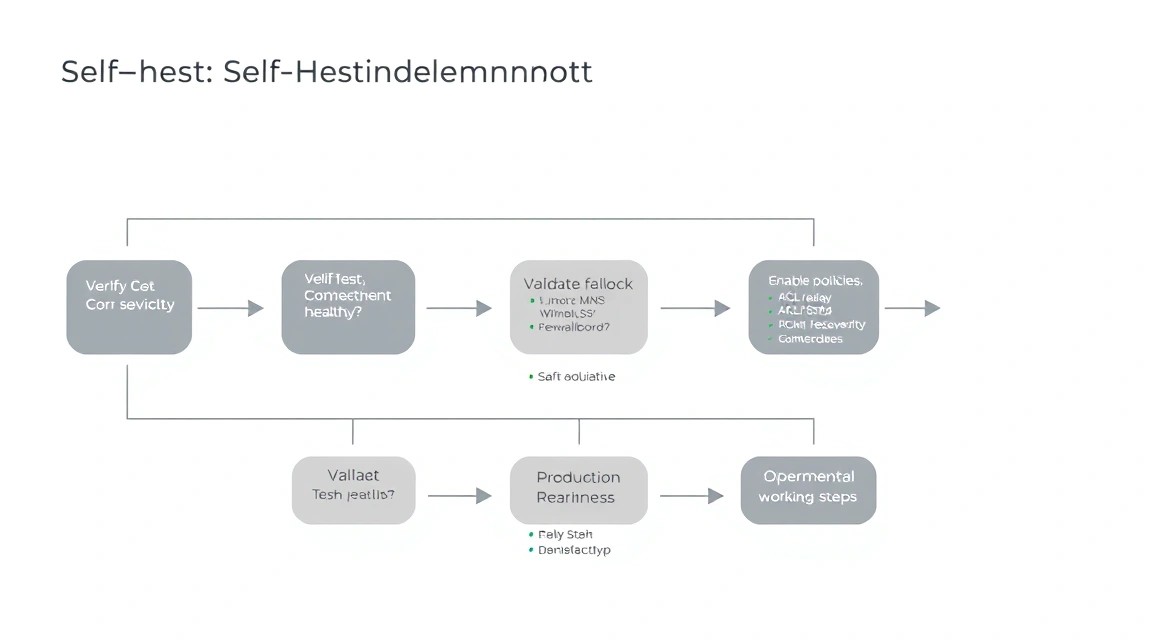
You now have a self-hosted NetBird control plane with HTTPS, WireGuard mesh VPN, TURN fallback, a basic firewall, and PostgreSQL backups. This setup allows you to combine VPS instances, home servers, and team devices into one private network without permanent dependence on an external cloud control plane.
- Create groups by role and replace broad access rules with the minimum necessary ACLs.
- Set up monitoring for Docker, disk space, TLS certificates, and TURN traffic volume.
- As load grows, move coturn to a separate server, add a second relay region, and regularly test backup recovery.