Deploying SigNoz on VPS: Comprehensive Application Monitoring (logs, metrics, traces)
TL;DR
In this guide, we will step-by-step set up SigNoz — a powerful open-source platform for collecting and analyzing application logs, metrics, and traces — on your own VPS or dedicated server. You will learn how to install Docker, deploy SigNoz using Docker Compose, secure the connection via HTTPS with Caddy, and configure basic backup mechanisms to gain full control over your infrastructure's observability.
Installing SigNoz using Docker Compose on Ubuntu 24.04 LTS.
Configuring secure access to SigNoz via HTTPS with Caddy.
Examples of sending telemetry from applications to SigNoz via OpenTelemetry.
Ensuring basic server security and data fault tolerance.
Recommendations for choosing the optimal VPS configuration for various workloads.
What we are setting up and why
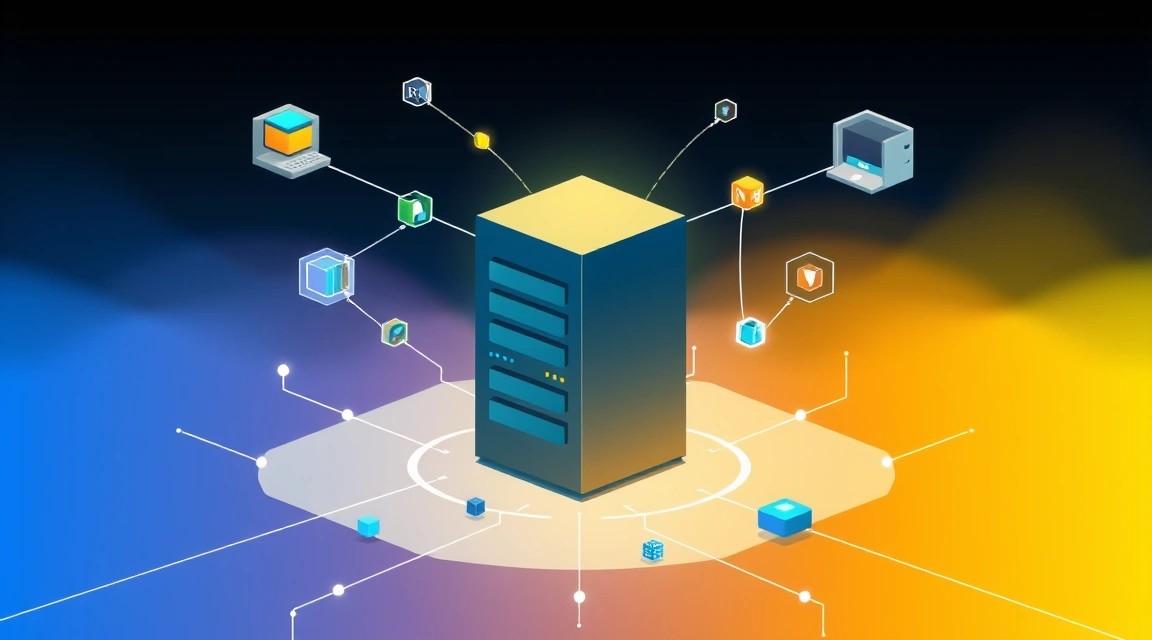
Diagram: What we are setting up and why
In the modern world of software development and operations, it is critically important to have a complete understanding of what is happening with your applications and infrastructure. This is precisely why monitoring and telemetry collection systems exist. We will be deploying SigNoz — a comprehensive open-source solution that combines functionality for collecting and analyzing logs, metrics, and traces.
Logs provide detailed information about events within an application, helping to debug errors and understand the sequence of actions. Metrics are numerical data that show system performance and state (e.g., CPU load, memory usage, requests per second). Traces (or distributed tracing) allow you to track the path of a request through multiple microservices, identifying bottlenecks and delays in a complex architecture.
Ultimately, by deploying SigNoz, you will get a unified control panel where you can:
Collect and centrally store logs from all your applications.
Visualize performance metrics and create custom dashboards.
Track requests throughout their journey through distributed systems, identifying delays.
Configure alerts based on metric thresholds or log patterns.
Quickly diagnose problems and reduce downtime.
Alternatives and why self-hosted on VPS
There are many monitoring solutions. Popular commercial cloud services include Datadog, New Relic, Dynatrace. They offer rich functionality, but their cost can be very high, especially for startups or projects with limited budgets. Moreover, you are completely dependent on their infrastructure and pricing policy.
Among open-source solutions, ELK Stack (Elasticsearch, Logstash, Kibana) for logs, as well as Prometheus and Grafana for metrics, are widely known. These systems are powerful but require more complex setup and integration, as they are not initially a single "out-of-the-box" solution for all three pillars of observability. SigNoz, on the other hand, aims to provide an integrated "out-of-the-box" experience for logs, metrics, and traces, using popular standards such as OpenTelemetry.
Deploying SigNoz on your own VPS or dedicated server gives you full control over data, security, and costs. You only pay for server resources, avoiding expensive data volume tariffs. This is an ideal choice for developers, startups, and companies that need a powerful yet economical monitoring system without being tied to a specific cloud provider.
What VPS config is needed for this task
Diagram: What VPS config is needed for this task
Choosing the right VPS or dedicated server for SigNoz depends on the volume of data you plan to collect and the number of applications/services that will send telemetry. SigNoz, like any observability system, can be quite resource-intensive, especially concerning disk subsystem and RAM.
Minimum requirements
For small projects where you monitor 1-5 applications with a moderate volume of logs and metrics (up to several tens of GB of data per month), the minimum requirements will be as follows:
CPU: 2 cores (modern Intel Xeon or AMD EPYC).
RAM: 4-8 GB. SigNoz uses ClickHouse for data storage, which loves RAM.
Disk: 100-200 GB NVMe SSD. Disk speed is critically important for writing and querying telemetry data. Regular SATA SSDs may be too slow for intensive loads.
Network: 100 Mbps - 1 Gbps. For data collection and UI access.
Recommended VPS plan for most tasks
For most medium-sized projects, including up to 10-20 applications, collecting data from several servers, and storing history for 1-3 months, the following characteristics are recommended:
CPU: 4 cores.
RAM: 16-32 GB. This will allow ClickHouse to effectively cache data and process complex queries.
Disk: 400-800 GB NVMe SSD. Larger volume for long-term storage and high speed for performance.
Network: 1 Gbps.
Such a VPS with the specified characteristics will ensure comfortable work with SigNoz and room for growth. Make sure that the chosen provider offers NVMe SSD, as this significantly affects the performance of the monitoring system.
When a dedicated server is needed, not a VPS
A dedicated server becomes necessary if you plan to monitor dozens or hundreds of services generating huge volumes of data (terabytes per month), or if you require very long-term history storage (more than 3-6 months). In this case, you will need:
CPU: 8+ cores.
RAM: 64 GB or more.
Disk: Several terabytes of NVMe SSD in a RAID array for fault tolerance and performance, or hybrid solutions with fast SSDs for hot data and HDDs for cold data.
Network: 10 Gbps.
For such tasks, you can consider a suitable dedicated server, which will provide maximum performance and flexibility.
Location: what it affects
The choice of server location for SigNoz is important for several reasons:
Latency: The closer the SigNoz server is to your applications, the lower the latency when sending telemetry. This is especially important for traces and metrics, where data timeliness is critical.
Legislation: If you are working with sensitive data, ensure that the server's location complies with local data storage regulations.
Cost: VPS prices can vary depending on the region.
It is generally recommended to host SigNoz in the same geographical region as most of your monitored services.
Server preparation
Diagram: Server preparation
Before installing SigNoz, you need to perform basic preparation of your VPS. As the operating system, we will use Ubuntu 24.04 LTS (current version for 2026), as it offers excellent stability and broad community support. It is assumed that you have SSH access to the server with root privileges or a user with sudo.
1. System update
Always start by updating the package list and upgrading them to the latest stable versions. This will ensure you have current security patches and compatibility.
Working directly as root is insecure. Let's create a new user, add them to the sudo group, and configure SSH access.
# Replace 'youruser' with your desired username
sudo adduser youruser
sudo usermod -aG sudo youruser # Add user to sudo group
Switch to the new user and configure SSH keys for more secure login:
su - youruser # Switch to the new user

# Create the .ssh directory if it doesn't exist, and set permissions
mkdir -p ~/.ssh
chmod 700 ~/.ssh

# Copy your public SSH key (id_rsa.pub)
# Replace 'ВАШ_ПУБЛИЧНЫЙ_КЛЮЧ' with the content of your key
echo "ВАШ_ПУБЛИЧНЫЙ_КЛЮЧ" > ~/.ssh/authorized_keys
chmod 600 ~/.ssh/authorized_keys

# Disable password login for root and allow only key-based login
# Edit the /etc/ssh/sshd_config file (execute as root or via sudo)
# Open a new SSH session with the new user to ensure login works before closing the current root session!
3. Firewall configuration (UFW)
UFW (Uncomplicated Firewall) is a convenient interface for iptables. We will configure it to allow only the necessary ports.
SigNoz is deployed using Docker and Docker Compose, which significantly simplifies the installation process and management of all its components. We will use the latest versions of Docker Engine and Docker Compose, as well as the latest stable version of SigNoz (we assume this will be version 0.30+ by 2026).
1. Docker Engine Installation
First, let's install Docker Engine on your server. It is recommended to use the official Docker repository to get the latest versions.
# Remove old Docker versions (if any)
for pkg in docker.io docker-doc docker-compose docker-ce docker-ce-cli containerd.io docker-buildx-plugin docker-compose-plugin; do sudo apt remove $pkg; done

# Install dependencies
sudo apt update
sudo apt install ca-certificates curl gnupg lsb-release -y

# Add Docker's official GPG key
sudo install -m 0755 -d /etc/apt/keyrings
curl -fsSL https://download.docker.com/linux/ubuntu/gpg | sudo gpg --dearmor -o /etc/apt/keyrings/docker.gpg
sudo chmod a+r /etc/apt/keyrings/docker.gpg

# Add Docker repository to APT sources
echo \
  "deb [arch="$(dpkg --print-architecture)" signed-by=/etc/apt/keyrings/docker.gpg] https://download.docker.com/linux/ubuntu \
  "$(. /etc/os-release && echo "$VERSION_CODENAME")" stable" | \
  sudo tee /etc/apt/sources.list.d/docker.list > /dev/null

# Update package list and install Docker Engine
sudo apt update
sudo apt install docker-ce docker-ce-cli containerd.io docker-buildx-plugin docker-compose-plugin -y

# Add the current user to the docker group to run Docker commands without sudo
sudo usermod -aG docker youruser # Replace 'youruser' with your username
newgrp docker # Apply changes to the current session or re-login
Check Docker installation:
docker run hello-world # Run a test container
You should see a welcome message from Docker.
2. Install SigNoz using Docker Compose
SigNoz provides ready-to-use Docker Compose files for easy deployment.
# Create directory for SigNoz
mkdir -p ~/signoz
cd ~/signoz

# Clone SigNoz repository
git clone -b main https://github.com/SigNoz/signoz.git

# Navigate to the deployment directory
cd signoz/deploy/

# Start SigNoz using Docker Compose
docker compose -f docker-compose.yaml up -d # Start all SigNoz services in the background
This process may take a few minutes while Docker downloads all necessary images and starts the containers. After completion, you can check the status of the containers:
docker compose -f docker-compose.yaml ps # Check the status of running SigNoz containers
You should see a list of running services, such as ClickHouse, Query Service, Frontend, OpenTelemetry Collector, and others.
By default, SigNoz will be available on port 3301 of your VPS. Now you can proceed to access configuration.
SigNoz and Application Configuration
Diagram: SigNoz and Application Configuration
After successfully installing SigNoz, you need to configure access to it and start sending data from your applications. We will also ensure a secure connection to the SigNoz UI via HTTPS.
1. Initial Access to SigNoz UI
By default, the SigNoz UI is available at http://YOUR_IP_ADDRESS:3301. Open it in your browser. Upon first login, you will be prompted to create an administrator account. Set a username and a strong password.
2. Configure HTTPS using Caddy
Using HTTP to access the monitoring dashboard is highly undesirable. We will configure Caddy — an easy-to-use web server with automatic issuance and renewal of Let's Encrypt TLS certificates — to provide HTTPS access.
Preliminary steps:
Ensure your domain (e.g., signoz.yourdomain.com) points to your VPS's IP address.
Ensure ports 80 (HTTP) and 443 (HTTPS) are open in your UFW (we already opened them in the "Server Preparation" section).
Now you can access SigNoz at https://signoz.yourdomain.com.
3. Sending Data to SigNoz using OpenTelemetry
SigNoz actively uses OpenTelemetry (OTel) — an open standard for telemetry collection. To send logs, metrics, and traces from your applications, you will need to integrate the OTel SDK into your code or use the OTel Collector.
For other programming languages and for sending metrics/logs, the process is similar: use the corresponding OTel SDKs and exporters. The OpenTelemetry Collector in SigNoz by default listens on ports 4317 (gRPC) and 4318 (HTTP) for traces, as well as 4317/4318 for metrics and 4317 for logs. When sending data from your application, specify the address localhost:4318 or localhost:4317, as the OTel Collector runs in the same Docker Compose stack as the SigNoz application itself.
To collect logs from the host or from other containers, you can configure a separate OpenTelemetry Collector or use a Docker log driver that sends logs to SigNoz.
4. Verifying Functionality
After configuring applications and sending data, access the SigNoz UI (https://signoz.yourdomain.com). Navigate to the "Traces", "Metrics", or "Logs" section. You should see incoming data. If there is no data, check:
Correct OTel SDK configuration in your application.
Port availability between your application and the SigNoz OTel Collector.
Backups and Maintenance
Diagram: Backups and Maintenance
Backup and regular maintenance are critically important aspects for any production system, especially for a monitoring system that stores valuable data. Loss of telemetry data can lead to the inability to analyze incidents and regressions.
What to Back Up
For SigNoz, the following components need to be backed up:
ClickHouse Data: This is the primary storage for all logs, metrics, and traces. It is the largest and most important component.
SigNoz Configuration Files:docker-compose.yaml, .env files, any custom OpenTelemetry Collector configurations, or other parameters you might have changed.
Caddy Configuration: The /etc/caddy/Caddyfile file and the directory with TLS certificates (usually /var/lib/caddy).
Simple Auto-Backup Script
We will create a simple script that will archive the main configuration files and perform a "hot" backup of ClickHouse data. For storing ClickHouse data, docker exec commands can be used.
Create the file ~/signoz/backup_signoz.sh:
#!/bin/bash

# --- Backup Configuration ---
BACKUP_DIR="/var/backups/signoz_$(date +%Y%m%d%H%M%S)"
SIGNOZ_DEPLOY_PATH="/root/signoz/signoz/deploy" # Path to your SigNoz deploy/ directory
CLICKHOUSE_CONTAINER="signoz-clickhouse" # ClickHouse container name, can be found via docker ps
CLICKHOUSE_DATABASE="signoz" # ClickHouse database name
RETENTION_DAYS=7 # How many days to keep backups

# --- Create backup directory ---
echo "Creating backup directory: $BACKUP_DIR"
sudo mkdir -p "$BACKUP_DIR"
if [ $? -ne 0 ]; then
    echo "Error: Failed to create backup directory. Check permissions."
    exit 1
fi

# --- Backup configuration files ---
echo "Backing up configuration files..."
sudo cp -r "$SIGNOZ_DEPLOY_PATH" "$BACKUP_DIR/signoz_config"
sudo cp /etc/caddy/Caddyfile "$BACKUP_DIR/Caddyfile"
sudo cp -r /var/lib/caddy "$BACKUP_DIR/caddy_data" # Backup Caddy certificates

# --- Backup ClickHouse data ---
echo "Backing up ClickHouse data..."
# ClickHouse supports "hot" backup using the ATTACH TABLE FROM DISK command
# This method copies data from active partitions, which can be resource-intensive
# A more reliable way is to use the clickhouse-backup tool
# For this example, we will dump the schema and important tables
# For a full ClickHouse backup, it is better to use specialized tools:
# https://clickhouse.com/docs/en/operations/backup

# Example: dump database schema
sudo docker exec "$CLICKHOUSE_CONTAINER" clickhouse-client --query="SHOW CREATE DATABASE $CLICKHOUSE_DATABASE" > "$BACKUP_DIR/clickhouse_schema.sql"

# Example: dump data from small but important tables (e.g., metadata)
# This is inefficient for large tables.
# sudo docker exec "$CLICKHOUSE_CONTAINER" clickhouse-client --query="SELECT  FROM signoz.traces ORDER BY timestamp LIMIT 1000 FORMAT CSV" > "$BACKUP_DIR/traces_sample.csv"

# For a full ClickHouse backup, it is recommended to use clickhouse-backup:
# 1. Install clickhouse-backup on the host: https://github.com/Altinity/clickhouse-backup
# 2. Configure it to work with the ClickHouse container.
# Example command with clickhouse-backup:
# sudo clickhouse-backup -c /etc/clickhouse-backup.yaml create --name signoz_full_backup

echo "Archiving backup..."
sudo tar -czvf "$BACKUP_DIR.tar.gz" -C "$(dirname "$BACKUP_DIR")" "$(basename "$BACKUP_DIR")"
if [ $? -ne 0 ]; then
    echo "Error: Failed to archive backup."
    exit 1
fi
sudo rm -rf "$BACKUP_DIR" # Delete temporary directory

echo "Backup successfully created: $BACKUP_DIR.tar.gz"

# --- Delete old backups ---
echo "Deleting old backups (older than $RETENTION_DAYS days)..."
sudo find /var/backups/signoz_ -type f -mtime +"$RETENTION_DAYS" -delete
echo "Completed."
Make the script executable:
chmod +x ~/signoz/backup_signoz.sh
Where to Store Backups
Storing backups on the same server as the original data is extremely risky. If the server fails, you will lose both data and backups. It is recommended to use:
External S3-compatible storage: Amazon S3, MinIO, Wasabi, Backblaze B2. This is an economical and reliable solution. You can use s3cmd or rclone to upload archives.
Separate VPS: An inexpensive VPS with a large disk volume, located in a different data center.
Local NAS/server: If you have your own infrastructure.
For automatic upload to S3, you can add the command aws s3 cp "$BACKUP_DIR.tar.gz" s3://your-backup-bucket/ to the backup script (after configuring AWS CLI).
Automating Backups with Cron
Add a task to Cron so that the script runs regularly (e.g., daily at 3 AM).
This will run the script every day at 03:00 and record the output to a log file.
Updates: rolling vs maintenance window
Updating SigNoz:
SigNoz is constantly evolving. To update to a new version:
cd ~/signoz/signoz/deploy/
git pull # Get the latest changes from the repository
docker compose -f docker-compose.yaml pull # Download new container images
docker compose -f docker-compose.yaml up -d # Recreate containers with new images
docker image prune -f # Clean up old unused images
It is recommended to perform updates during a "maintenance window" when system load is minimal, as updating may cause temporary unavailability of some SigNoz services. Always read the release notes before updating to be aware of possible breaking changes.
Updating OS and Docker:
Regularly update the operating system and Docker Engine:
Application settings: Check that your application is correctly configured to send data to the SigNoz OTel Collector (usually http://localhost:4318 or http://localhost:4317 from other containers in the same Docker Compose network).
curl -v -X POST http://localhost:4318/v1/traces -d '{"resourceSpans":[]}'
This is a simple test for OTLP endpoint availability.
Network accessibility: If the application is on a different host, ensure its network can reach the OTel Collector ports on your VPS.
Application log errors: Check the logs of the application that should be sending telemetry for OTel export errors.
How to fix: Correct the application or OTel Collector configuration. Check network connectivity between components.
3. SigNoz is running slowly or consuming too many resources.
What to check:
Server resources: Check CPU load, RAM usage, and disk speed on your VPS.
htop
df -h
iostat -x 1 10
ClickHouse: ClickHouse is the primary resource consumer. Check its logs for errors or warnings.
Data volume: Evaluate the volume of incoming data. Your VPS might simply not be able to handle the current load.
How to fix: Increase VPS resources (CPU, RAM, NVMe SSD). Optimize applications to reduce the volume of telemetry sent (e.g., trace sampling). Configure data retention policy in SigNoz for automatic deletion of old data.
4. What is the minimum suitable VPS configuration?
For testing purposes or very small projects (1-2 applications, low data volume), you can start with 2 CPU, 4 GB RAM, and 100 GB NVMe SSD. However, for any serious operation, even for small teams, a minimum of 4 CPU, 8-16 GB RAM, and 200 GB NVMe SSD is recommended for stable operation and the ability to store data for several weeks.
5. What to choose — VPS or dedicated for this task?
The choice between a VPS and a dedicated server depends on the scale and performance requirements. A VPS is suitable for most medium-sized projects (up to 10-20 services, several hundred GB of data per month) due to its flexibility and cost. A dedicated server is necessary for large installations where terabytes of data are processed, maximum ClickHouse performance is required, long-term storage, or strict resource isolation requirements. If in doubt, start with a VPS and scale up to a dedicated server as needs grow.
6. How to update SigNoz to a new version?
To update SigNoz, execute the following commands in the ~/signoz/signoz/deploy/ directory:
git pull                       # Get the latest changes from the SigNoz repository
docker compose -f docker-compose.yaml pull # Download new Docker image versions
docker compose -f docker-compose.yaml up -d # Recreate containers with new images
docker image prune -f          # Clean up unused old Docker images
Always check the official SigNoz documentation for specific update instructions for a particular version, as additional steps may sometimes be required.
Conclusions and Next Steps
Diagram: Conclusions and Next Steps
Congratulations! You have successfully deployed SigNoz on your VPS, configured secure access via HTTPS, and are ready to start collecting telemetry from your applications. You now have a powerful tool for comprehensive monitoring that provides deep insights into the performance and behavior of your systems, helping you respond promptly to issues and make informed decisions.
Further steps to maximize the benefits of SigNoz include:
Integrate all applications: Gradually integrate all your microservices and monoliths with the OpenTelemetry SDK to send logs, metrics, and traces to SigNoz.
Configure alerts: Create alerting rules based on key metrics (e.g., high CPU usage, low disk space, increased errors in logs) or anomalies in traces to proactively respond to potential issues.
Advanced dashboards: Utilize SigNoz's capabilities to create customized dashboards that visualize the most important metrics for you and help monitor system status at a glance.
Optimize data storage: Regularly review your data retention policy in ClickHouse to balance the need for historical information with available disk resources.