Setting up LXD on a VPS for Service Isolation and Lightweight Container Deployment
TL;DR
In this detailed guide, we will set up LXD on your VPS to create and manage isolated, lightweight containers. LXD allows you to run multiple applications or services, each in its own clean environment, minimizing conflicts and enhancing security while efficiently utilizing server resources. You will learn how to install LXD, configure its network and storage, launch containers, and ensure their stable operation and backup.
LXD Installation and Initialization: Detailed steps for installing LXD on Ubuntu 24.04 LTS and its basic configuration.
Isolation and Security: Creating isolated containers for each service, leveraging the benefits of LXD's lightweight virtualization.
Resource Management: Configuring container profiles with CPU, RAM, and disk space limits.
Network Configuration: Setting up a bridged network for containers, ensuring external access and internal communication.
Backup: Implementing a backup strategy using LXD snapshots and external storage.
Maintenance: Recommendations for LXD updates and container lifecycle management.
What We Are Setting Up and Why
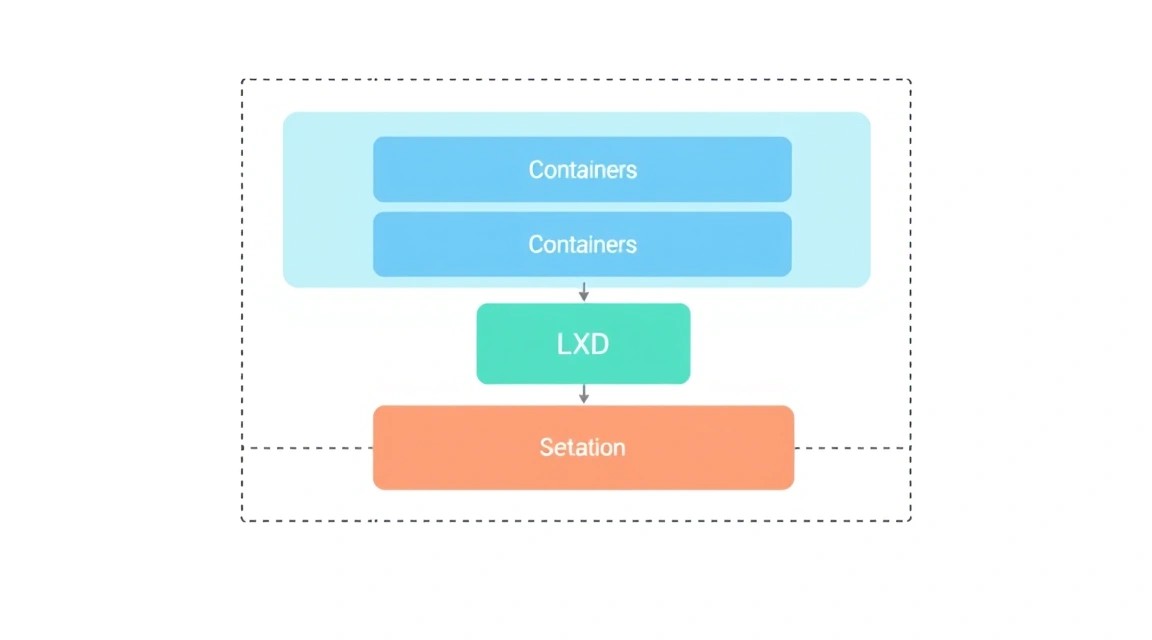
Diagram: What We Are Setting Up and Why
In this guide, we will focus on setting up LXD — a system container manager — on your Virtual Private Server (VPS). LXD allows you to run full-fledged operating systems (e.g., Ubuntu, Debian, Alpine) inside lightweight containers which, unlike virtual machines (such as KVM), utilize the host's main operating system kernel. This provides significantly lower overhead, faster startup, and high service density on a single server, while maintaining a high level of isolation.
What the reader will gain: You will learn to effectively utilize your VPS resources by running various services (web servers, databases, game servers, blockchain nodes) in separate, fully isolated containers. Each container will have its own file system, network stack, and set of processes, which will prevent dependency conflicts and simplify management. This is an ideal solution for developers, SaaS founders, and enthusiasts who need flexibility and control over their infrastructure without the need to rent multiple separate VPS instances.
What alternatives exist and why self-hosted on a VPS:
Virtual Machines (KVM, VMware): Provide full hardware isolation but have significant resource overhead (each VM requires its own OS kernel, more RAM, and CPU). LXD is more efficient for tasks requiring OS-level isolation rather than hardware isolation.
Docker: An excellent tool for application containerization, but focused on running individual processes or microservices, not full-fledged operating systems. LXD, in contrast, allows running "virtual machines" at the container level, which is more convenient for migrating existing applications or running services that require a full init system (systemd).
Cloud-managed services (AWS EC2, Google Cloud Compute): Convenient and scalable, but often more expensive and less flexible for those who want full control over their environment. Self-hosting LXD on a VPS gives you full system access, allows you to optimize costs, and tailor the configuration to your unique needs.
Choosing self-hosted LXD on a VPS is justified when you need flexibility, isolation, and efficient resource utilization, while also wanting to avoid the high costs and limitations of cloud providers.
What VPS Configuration is Needed for This Task
Diagram: What VPS Configuration is Needed for This Task
Choosing the right VPS for LXD depends on the number and type of containers you plan to run. LXD itself is very lightweight, but each running container consumes resources.
Minimum Requirements for an LXD Host (excluding containers):
CPU: 1-2 vCPU (for the host and a few lightweight containers). Modern processors with virtualization instructions (VT-x/AMD-V) are desirable, but LXD can work without them, albeit with lower performance.
RAM: 2 GB (for the host and basic LXD operations). If you plan to run containers with databases or web servers, more will be needed.
Disk: 40-60 GB NVMe SSD. LXD can work with HDDs, but SSDs significantly improve I/O performance, which is critical for containers. NVMe provides maximum speed.
Network: 1 Gbps port (standard for most VPS).
Specific VPS Plan for the Task (e.g., for 3-5 containers: web server, database, VPN server):
CPU: 4 vCPU
RAM: 8 GB
Disk: 160-200 GB NVMe SSD (including space for container data and snapshots)
Network: 1 Gbps, unlimited traffic or with a high limit.
To rent a VPS with the specified characteristics, ensure that the provider offers NVMe SSD and sufficient cores/RAM for your needs. Most modern VPS providers offer such configurations.
When a dedicated server is needed, not a VPS:
If you plan to run dozens of containers, high-load databases, game servers with many players, or have very specific hardware requirements (e.g., GPU for machine learning), then you should consider a dedicated server. Dedicated servers provide you with all the physical resources of the machine, which eliminates "noisy neighbor" issues and delivers maximum performance. Dedicated servers also often have more flexible disk subsystem options (RAID, HDD+SSD).
Location: What it affects
The choice of VPS location plays an important role, especially for services critical to latency:
Latency: The closer the server is to your target audience, the lower the latency and faster the response. For websites, this affects page load speed; for game servers, it affects ping.
Geopolitical Factors and Legislation: Some countries have stricter laws regarding data storage or censorship. Consider this when choosing a location for sensitive data or services requiring a high degree of privacy.
Cost: VPS prices can vary depending on the location due to differences in electricity costs, data center rent, and taxes.
Always choose a location that is geographically closer to the majority of your users or to you, if you are the primary consumer of the service.
Server Preparation
Diagram: Server Preparation
Before installing LXD, you need to perform basic configuration of your VPS to ensure security and stability. We will use Ubuntu Server 24.04 LTS as the main host operating system.
1. SSH Connection
Connect to your server as the root user or the user provided by your provider:
ssh root@YOUR_IP_ADDRESS
2. System Update
First, update all packages to their latest versions:
Later, if your containers will use other ports, they will also need to be opened.
6. Installing Fail2Ban
Fail2Ban helps protect the server from brute-force attacks by blocking IP addresses from which numerous failed login attempts occur.
sudo apt install fail2ban -y         # Install Fail2Ban
sudo systemctl enable fail2ban       # Enable service autostart
sudo systemctl start fail2ban        # Start the service
sudo cp /etc/fail2ban/jail.conf /etc/fail2ban/jail.local # Create local config
You can edit /etc/fail2ban/jail.local to configure rules, but the default settings for SSH are already quite good.
sudo systemctl restart fail2ban # Restart Fail2Ban after changes
Your server is now basically secured and ready for LXD installation.
Software Installation — Step-by-Step
Software Installation — Step-by-Step
Diagram: Software Installation — Step-by-Step
Now that the server is prepared, let's proceed with LXD installation. We will use the snap package, as it is the recommended and most up-to-date method for installing LXD on Ubuntu.
1. Installing LXD via Snap
LXD on Ubuntu is delivered as a snap package, ensuring its up-to-dateness and isolation. For Ubuntu 24.04 LTS, snap is already installed by default.
sudo snap install lxd --channel=6.0/stable # Install LXD 6.0 LTS (current version for 2026)
After installation, add your user to the lxd group so you can manage LXD without sudo:
sudo usermod -aG lxd your_username # Add user to lxd group
newgrp lxd                            # Apply group changes without re-login (or just re-login)
Ensure that LXD is installed and accessible:
lxd --version # Check LXD version
2. Initializing LXD
After installing LXD, you need to initialize it by setting up basic storage and network configurations. This is an interactive process.
lxd init # Start interactive LXD initialization
During initialization, you will be asked the following questions. Here are the recommended answers for most VPS scenarios:
Would you like to use LXD clustering? (yes/no) [default=no]:no (clustering is not needed for a single VPS)
Do you want to setup a new storage pool? (yes/no) [default=yes]:yes
Name of the new storage pool [default=default]:default (or any other name)
Would you like to use an existing block device? (yes/no) [default=no]:no (if you don't have a separate disk)
Would you like to use a new loop device? (yes/no) [default=yes]:yes (will create an image file for container storage)
Size in GiB of the new loop device (minimum 4GiB) [default=100GiB]:50GiB (or more, depending on your disk size and plans. Leave some space for the host)
Would you like to connect to a remote LXD daemon? (yes/no) [default=no]:no
Would you like to setup a new network bridge? (yes/no) [default=yes]:yes
What should the new bridge be called? [default=lxdbr0]:lxdbr0 (standard name)
What IPv4 address should be used? (CIDR format, e.g. 10.0.0.1/24) [default=10.200.200.1/24]:10.200.200.1/24 (or any other private range that does not overlap with your local network)
Would you like LXD to NAT traffic on its own? (yes/no) [default=yes]:yes (for containers to access the internet)
What IPv6 address should be used? (CIDR format, e.g. fd42:42:42:42::1/64) [default=none]:none (if IPv6 is not needed)
Would you like the LXD daemon to be available over the network? (yes/no) [default=no]:no (if you do not plan to manage LXD remotely)
Would you like stale cached images to be updated automatically? (yes/no) [default=yes]:yes
Would you like a YAML summary of your configuration? (yes/no) [default=yes]:yes
After initialization is complete, LXD is ready for use. You can check the network status:
lxc network list # View configured LXD networks
3. Launching the First Container
Now let's launch our first container. For example, Ubuntu 22.04 LTS.
lxc launch ubuntu:22.04 my-first-container # Launch a container with Ubuntu 22.04 LTS image named my-first-container
Check the container status:
lxc list # List all running containers
You will see the RUNNING status and the IP address assigned to the container on the lxdbr0 network.
Inside the container, you can work as on a regular Ubuntu system. Update it:
apt update && apt upgrade -y          # Update packages inside the container
exit                                  # Exit the container
5. Configuring a Profile for Containers (Example)
LXD profiles allow you to apply standard settings (resources, network) to multiple containers. Let's create a profile for a web server.
lxc profile copy default webserver    # Copy the default profile to a new 'webserver' profile
lxc profile edit webserver            # Edit the new profile
In the opened YAML file, add or modify the limits section:
config:
  limits.cpu: "2"                     # Limit CPU to 2 cores
  limits.memory: "2GB"                # Limit RAM to 2GB
  limits.disk: "50GB"                 # Limit disk to 50GB (if using a pool with quotas)
  user.user-data: |                   # Example cloud-init for initial setup
    #cloud-config
    runcmd:
      - echo "Hello from cloud-init!" > /root/cloud-init-test.txt
    packages:
      - nginx
    users:
      - name: myuser
        sudo: ALL=(ALL) NOPASSWD:ALL
        groups: users, sudo
        shell: /bin/bash
        ssh_authorized_keys:
          - ssh-rsa AAAAB3NzaC... your_public_key_here
Save and close the file. Now you can launch containers with this profile:
lxc launch ubuntu:22.04 my-web-server --profile webserver # Launch a container with the webserver profile
This ensures standardization and simplifies resource management.
6. Port Forwarding on the Host for Container Access
By default, containers have private IP addresses. To make a service inside a container accessible from the internet, you need to forward a port from the host to the container. For example, if Nginx in the my-web-server container listens on port 80, and you want it to be accessible on port 80 of your VPS:
lxc config device add my-web-server myport80 proxy listen=tcp:0.0.0.0:80 connect=tcp:10.200.200.X:80 # Forward port 80 from host to container
Replace 10.200.200.X with the actual IP address of your container (you can find it using lxc list). Don't forget to open port 80 in the host's UFW, if it's not already open.
Configuration
Diagram: Configuration
After installing LXD and launching a basic container, the next step is more detailed configuration. This includes setting up storage, networking, as well as deploying and securing services within containers.
1. LXD Storage Management
When initializing LXD, you selected a storage type (defaulting to loop device). LXD supports various drivers: dir (directory), zfs, btrfs, ceph. For most VPS, dir or zfs are the most suitable.
dir: Simple and reliable, it stores container data in the host's regular file system. It does not support file system-level snapshots.
zfs: Recommended for more advanced scenarios. ZFS provides powerful features such as instant snapshots, cloning, compression, and data deduplication. It requires more RAM on the host.
If you want to switch to ZFS, first install the packages:
Then you can create a new ZFS pool or use an existing one. If you want to use ZFS for LXD, it's best to do this during the initial LXD initialization or create a new pool and assign it:
lxc storage create myzfs zfs source=/var/snap/lxd/common/lxd/disks/myzfs.img size=100GiB # Create ZFS pool on a file
# Or, if there is a separate disk:
# lxc storage create myzfs zfs source=/dev/sdb
lxc profile device add default root disk path=/ pool=myzfs # Bind pool to profile
Now all new containers using the default profile will use the myzfs storage.
2. Container Network Configuration
LXD by default creates a bridged network (lxdbr0). Each container receives an IP address from this subnet. To access containers from outside, as shown previously, port proxying is used.
For more complex scenarios, for example, if you want containers to have public IP addresses (if your provider offers additional IPs), you can configure a bridge with the host interface. This is an advanced setup requiring manual host network configuration.
Example of static IP configuration inside a container (if DHCP is not suitable):
Log into the container and edit the netplan configuration (for Ubuntu):
Replace your_domain.com with your domain. Ensure that the domain's DNS record points to your VPS's IP address. After that, forward ports 80 and 443 from the host to the container:
Follow Certbot's instructions. It will automatically modify the Nginx configuration. Don't forget to forward ports 80 and 443 from the host to the container, as described above.
5. Secrets and Environment Variables
Never store passwords, API keys, and other secrets directly in configuration files that could be accidentally compromised. Use environment variables or specialized secret management tools.
Inside the container, you can use .env files for applications or set environment variables when starting services via systemd unit files.
# Example systemd unit file for an application using environment variables
# /etc/systemd/system/my-app.service
[Unit]
Description=My Application
After=network.target

[Service]
Environment="DB_HOST=localhost"
Environment="DB_USER=myapp"
Environment="DB_PASSWORD=mysecretpassword"
ExecStart=/usr/local/bin/my-app-binary
Restart=always

[Install]
WantedBy=multi-user.target
For LXD, you can pass environment variables to the container when it starts or when its configuration changes:
lxc config set my-container environment.MY_SECRET_KEY="supersecret"
Or, more securely, use cloud-init to inject secrets during the container's first boot.
6. Health Check
After deploying services, always check their health.
lxc list: Check that containers are running.
lxc exec my-web-server systemctl status nginx: Check the service status inside the container.
curl http://YOUR_IP_ADDRESS or curl https://your_domain.com: Check service availability from outside.
ping 10.200.200.X: Check network connectivity between the host and the container.
Backups and Maintenance
Diagram: Backups and Maintenance
Regular backups and timely maintenance are critically important for any production environment. LXD provides convenient tools for creating container snapshots, which significantly simplifies this process.
1. What to Back Up
LXD Containers: Full snapshots of container state (file system, configuration).
Data Inside Containers: Databases, user files, uploaded media files. Even with container snapshots, critically important data may require a separate backup for more frequent intervals or for restoring individual files.
LXD Configuration Files: Profiles, network settings, global LXD settings.
Host Configuration Files:/etc/fstab, /etc/network/interfaces (or netplan), /etc/ssh/sshd_config, firewall configuration, etc.
2. Simple Auto-Backup Script for LXD Containers
LXD allows creating snapshots (instantaneous images of the container's state). These can then be exported and stored in a secure location.
Let's create a script that will take snapshots, delete old ones, and export them.
#!/bin/bash

# Directory for temporary storage of exported snapshots
BACKUP_DIR="/var/backups/lxd_containers"
RETENTION_DAYS=7 # How many days to keep snapshots

mkdir -p "$BACKUP_DIR"

echo "=== LXD Container Backup Script ==="
echo "Starting backup at $(date)"

# Get a list of all running containers
CONTAINERS=$(lxc list --format csv --columns n)

for CONTAINER_NAME in $CONTAINERS; do
    echo "Processing container: $CONTAINER_NAME"

    # 1. Create a snapshot
    SNAPSHOT_NAME="backup-$(date +%Y%m%d%H%M%S)"
    echo "  - Creating snapshot '$SNAPSHOT_NAME'..."
    lxc snapshot "$CONTAINER_NAME" "$SNAPSHOT_NAME"

    # 2. Delete old snapshots
    echo "  - Cleaning up old snapshots for $CONTAINER_NAME..."
    lxc info "$CONTAINER_NAME" | grep "Snapshots:" | awk '{print $2}' | while read -r SNAP; do
        SNAPSHOT_DATE=$(echo "$SNAP" | cut -d'-' -f2 | cut -d'(' -f1) # Extract date from name
        if [[ -n "$SNAPSHOT_DATE" ]]; then
            SNAPSHOT_TIMESTAMP=$(date -d "$SNAPSHOT_DATE" +%s)
            CURRENT_TIMESTAMP=$(date +%s)
            DIFF_SECONDS=$((CURRENT_TIMESTAMP - SNAPSHOT_TIMESTAMP))
            DIFF_DAYS=$((DIFF_SECONDS / 86400))

            if (( DIFF_DAYS > RETENTION_DAYS )); then
                echo "    - Deleting old snapshot: $SNAP ($DIFF_DAYS days old)"
                lxc delete "$CONTAINER_NAME/$SNAP"
            fi
        fi
    done

    # 3. Export the latest snapshot (or all, if needed)
    # For simplicity, we export the current snapshot
    echo "  - Exporting snapshot '$SNAPSHOT_NAME' to $BACKUP_DIR/${CONTAINER_NAME}_${SNAPSHOT_NAME}.tar.gz"
    lxc publish "$CONTAINER_NAME/$SNAPSHOT_NAME" --alias "${CONTAINER_NAME}_${SNAPSHOT_NAME}"
    lxc image export "${CONTAINER_NAME}_${SNAPSHOT_NAME}" -o "$BACKUP_DIR/${CONTAINER_NAME}_${SNAPSHOT_NAME}.tar.gz"
    lxc image delete "${CONTAINER_NAME}_${SNAPSHOT_NAME}" # Delete temporary image

done

echo "Backup finished at $(date)"
Save this script as /usr/local/bin/lxd-backup.sh and make it executable:
Storing backups on the same server as the original data is strongly discouraged. In case of hardware failure or server compromise, you will lose both the data and its copies. Use external storage:
Cloud S3-compatible storage: Amazon S3, DigitalOcean Spaces, Backblaze B2. Use utilities like rclone for synchronization.
Separate VPS or dedicated server: If you have another server, you can use rsync or scp to transfer backups.
Network Attached Storage (NAS): If feasible in your infrastructure.
After configuration, add a line for synchronization to the lxd-backup.sh script:
# Add to the end of lxd-backup.sh script
echo "  - Syncing backups to S3..."
rclone sync "$BACKUP_DIR" "s3_remote_name:bucket_name/lxd_backups" --delete-excluded --exclude="*.tmp"
5. Updates: Rolling vs. Maintenance Window
Host Updates: It is recommended to perform these during a "maintenance window" when the load is minimal. Before updating, take a snapshot of the entire VPS (if supported by the provider) or at least an lxd export for all critical containers.
Always test updates on non-critical containers or in a test environment before applying them to production services.
Troubleshooting + FAQ
How to Check LXD and Container Status?
To check the overall status of LXD, use lxc info. To see a list of running containers and their statuses, use lxc list. If a container fails to start, check the logs with lxc monitor --type=lifecycle or lxc info CONTAINER_NAME.
My container is not getting an IP address or has no internet access. What should I do?
Ensure that the lxdbr0 bridge is running and configured correctly. Check lxc network list and ip a on the host. Make sure that IP forwarding is enabled on the host (sysctl net.ipv4.ip_forward should be 1) and that NAT rules for lxdbr0 are present in iptables. If you are using UFW, ensure it is not blocking traffic on lxdbr0. You might need to add rules for lxdbr0 to /etc/ufw/before.rules.
How to forward a port from the host to multiple containers?
You cannot forward the same host port to multiple containers. Each container that needs external access must use a unique host port. For example, Container 1: listen=tcp:0.0.0.0:8080 connect=tcp:10.200.200.X:80, Container 2: listen=tcp:0.0.0.0:8081 connect=tcp:10.200.200.Y:80. Alternatively, use a reverse proxy server (e.g., Nginx or Caddy) on the host to route traffic to the desired containers based on domain name or URL path.
Why use LXD instead of Docker?
LXD is designed to run full system containers that behave like lightweight virtual machines with their own init system (systemd, OpenRC). Docker focuses on containerizing individual applications or microservices. If you need to run several traditional applications, each with its own stack and dependencies, or migrate an existing VM, LXD is often a more suitable choice. Docker is better suited for developing and deploying cloud-native applications.
How to limit resources for a container?
Use LXD profiles. Create or edit a profile with the command lxc profile edit PROFILE_NAME and add limits.cpu, limits.memory, limits.disk parameters to the config section. For example: limits.cpu: "2", limits.memory: "4GB", limits.disk: "50GB". Then apply this profile to the container (lxc profile assign CONTAINER PROFILE_NAME) or launch new containers with it.
What is the minimum suitable VPS configuration?
For running LXD and one or two lightweight containers (e.g., a VPN server and a small website), the minimum configuration might be: 2 vCPU, 2-4 GB RAM, 40-60 GB NVMe SSD. However, for more serious tasks, such as running multiple web applications, databases, or game servers, 4 vCPU, 8 GB RAM, 160-200 GB NVMe SSD is recommended.
What to choose — VPS or dedicated for this task?
For most tasks, such as running personal projects, small SaaS applications, game servers for friends, or several blockchain nodes, a VPS is perfectly sufficient. It is economical and easily scalable. A dedicated server becomes necessary if you encounter VPS performance limitations (e.g., due to "noisy neighbors"), require maximum isolation and resource guarantees, or if you plan to run many containers and services that demand full control over the physical hardware.
How to access container files from the host?
You can use the command lxc file pull CONTAINER/path/to/file /local/path to copy files from the container to the host, or lxc file push /local/path CONTAINER/path/to/file to copy from the host to the container. Also, if you are using dir storage, container files are located in /var/snap/lxd/common/lxd/storage-pools/default/containers/CONTAINER_NAME/rootfs/, but direct editing here is not recommended.
Conclusion and Next Steps
Diagram: Conclusion and Next Steps
You have successfully set up LXD on your VPS, created and configured containers, ensured their basic security, and set up a backup system. Your VPS is now a powerful, flexible, and efficient platform for hosting various services in isolated environments, which significantly simplifies management and enhances the reliability of your applications.
Where to go next:
Resource Monitoring: Install monitoring tools (e.g., Netdata, Prometheus with Grafana) on the host and in key containers to track CPU, RAM, disk, and network usage. This will help identify bottlenecks and optimize performance.
Deployment Automation: Explore automation tools such as Ansible, Puppet, or SaltStack. They will allow you to automatically deploy new containers, configure services, and manage configurations, which is especially useful when scaling.
Enhanced Network Configuration: For more complex network scenarios, consider using OVN (Open Virtual Network) with LXD to create software-defined networks, or configuring L3 routing to provide containers with public IP addresses if your provider offers them.
Was this guide helpful?
Your feedback helps us improve our guides.
Share this post:
Send this guide to someone who may find it useful.