
Self-hosted Mattermost on VPS: Installation with Docker, Nginx, Push Notifications, and S3 Backups
TL;DR
In this detailed guide, we will set up Mattermost — a powerful team communication platform that serves as an excellent alternative to Slack, but is fully controlled by you. We will deploy it on a virtual or dedicated server (VPS/Dedicated) using Docker and Docker Compose for simplified management, configure Nginx as a reverse proxy with SSL certificates from Let's Encrypt, ensure mobile push notifications work, and implement a reliable system for automatic data backup to S3-compatible storage.
- Fully self-managed Mattermost on Ubuntu Server 24.04 LTS.
- Using Docker and Docker Compose for isolation and ease of deployment.
- Configuring Nginx for secure HTTPS access with automatic SSL certificates.
- Support for mobile push notifications for all users.
- Automatic daily database and file backups to S3 storage.
- Up-to-date software versions, instructions for 2026.
What We Are Setting Up and Why
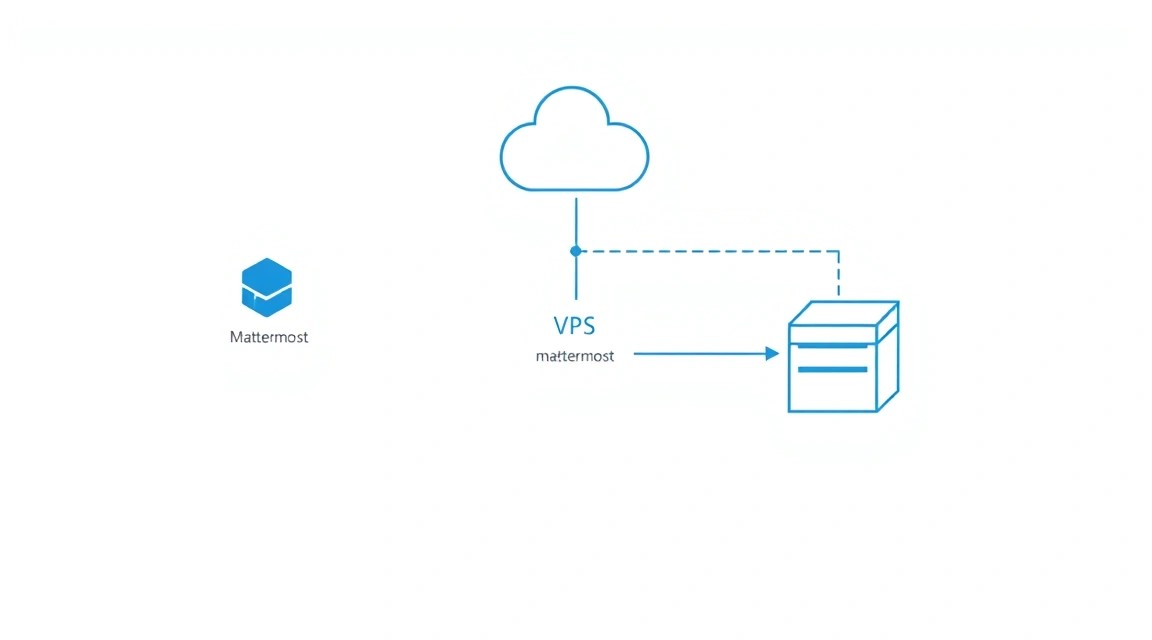
Mattermost is a modern team messaging platform designed as an open-source alternative to commercial products like Slack or Microsoft Teams. It provides all the necessary features for effective communication: public and private channels, direct messages, file sharing, integrations with external services, voice and video calls (via plugins), and much more. Self-hosting Mattermost on your own VPS or dedicated server gives you full control over data, security, and the ability to deeply customize it to the unique needs of your team or company.
In this guide, we will go from an empty server to a fully functional Mattermost instance, accessible from anywhere in the world via a secure HTTPS connection. We will focus on using Docker and Docker Compose — these tools allow easy deployment, management, and updating of applications in isolated containers, which significantly simplifies operations. Nginx will act as a reverse proxy, processing incoming requests and directing them to the Mattermost container, as well as ensuring traffic encryption with free SSL certificates from Let's Encrypt. Special attention will be paid to configuring push notifications for mobile clients and implementing a reliable system for automatic data backup to S3-compatible storage, which is critical for any production system.
Ultimately, you will get a fault-tolerant and secure communication system that is independent of third-party cloud providers and fully under your control. This is an ideal solution for developers, startups, crypto enthusiasts, and anyone who values privacy and sovereignty over their data.
Alternatives: Cloud-managed vs Self-hosted
When choosing a team communication platform, there are usually two main options:
- Cloud-managed solutions (Slack, Microsoft Teams, Mattermost Cloud): These services offer "turnkey" convenience, requiring no technical knowledge from you for installation and maintenance. You simply register, pay a monthly subscription fee, and everything works. However, you fully entrust your data to a third-party provider, lose control over its location and security, and are limited in customization and integrations. Costs can quickly rise with an increasing number of users.
- Self-hosted solutions (Mattermost on VPS): You deploy and manage the application yourself on your own server. This requires certain technical skills but offers undeniable advantages:
- Full data control: Your data remains on your server, under your control. This is critical for companies with high security and confidentiality requirements.
- Flexibility and customization: You can install any plugins, modify the source code (if it's open-source), and integrate with internal systems without API limitations.
- Cost savings: In the long term, a self-hosted solution is often cheaper, especially for large teams, as you only pay for the server, not per user.
- Independence: You are not dependent on the pricing policy or potential outages of a third-party provider.
We choose the self-hosted approach on a VPS to gain maximum benefits at reasonable costs and with full control.
What VPS Configuration is Needed for This Task
Server requirements for Mattermost depend on the number of users and intensity of use. The recommendations below are relevant for installing Mattermost Team Edition.
Minimum Requirements (up to 50 active users)
- CPU: 2 cores (x86-64)
- RAM: 4 GB
- Disk: 80 GB SSD (for OS, Docker images, DB, and user files)
- Network: 100 Mbps, unlimited traffic
Recommended Configuration (up to 200 active users)
- CPU: 4 cores (x86-64)
- RAM: 8 GB
- Disk: 160-200 GB NVMe SSD (for maximum disk subsystem performance)
- Network: 1 Gbps, unlimited traffic
For our task of deploying Mattermost with Nginx, Docker, and backups, we recommend aiming for the configuration: 4 vCPU, 8 GB RAM, 160 GB NVMe SSD, 1 Gbps network. Such a server will ensure comfortable operation for a team of up to 200 people and leave room for growth. A VPS with the specified characteristics will be an optimal choice for most teams.
When a Dedicated Server is Needed, Not a VPS
A dedicated server becomes preferable in the following cases:
- Very large teams: If you expect 500+ active users or thousands of simultaneous connections.
- High performance requirements: For mission-critical systems where delays are unacceptable, and maximum disk and CPU performance is required without the influence of "neighbors" on the VPS.
- Specific security/compliance requirements: When complete physical isolation is required, or custom hardware/software installation is needed that is not possible on a VPS.
- Intensive use of plugins and integrations: Some resource-intensive plugins may require more resources than an average VPS can provide.
For most scenarios described in this guide, a powerful VPS will be more than sufficient.
Location: What it Affects
The choice of VPS location matters for:
- Latency: The closer the server is to the majority of your users, the lower the ping and faster the response. For an international team, choose a central location or use a CDN.
- Legislation: The server's location determines the jurisdiction under which your data falls. This is important for compliance with GDPR, HIPAA, and other regulations.
- Cost: VPS prices can vary depending on the location.
It is recommended to choose a location that is geographically close to the majority of Mattermost users.
Server Preparation
It is assumed that you have a freshly installed VPS with Ubuntu Server 24.04 LTS. All commands will be executed as a user with sudo privileges.
1. System Update and Basic Utility Installation
First, let's update the system and install the necessary packages.
sudo apt update && sudo apt upgrade -y # Update package list and upgrade packages
sudo apt install -y curl wget git nano htop ufw fail2ban # Install useful utilities and security tools
2. Creating a New User with Sudo Privileges (if not already done)
Working as the root user is insecure. Let's create a new user and grant them sudo privileges.
sudo adduser mattermostuser # Create a new user
sudo usermod -aG sudo mattermostuser # Add the user to the sudo group
Now log out of the root session and log in as the new user mattermostuser.
exit
# Log in again: ssh mattermostuser@your_vps_ip
3. Configuring SSH Keys (recommended)
Using SSH keys instead of passwords significantly increases security.
On your local machine:
ssh-keygen -t rsa -b 4096 # Generate a new SSH key (if you don't have one)
ssh-copy-id mattermostuser@your_vps_ip # Copy the public key to the server
Now you can disable password authentication for SSH on the server. Edit the file /etc/ssh/sshd_config:
sudo nano /etc/ssh/sshd_config
Find and change the following lines (or add them if they are missing):
#...
PasswordAuthentication no
ChallengeResponseAuthentication no
PermitRootLogin no
#...
Restart the SSH service:
sudo systemctl restart sshd
4. Configuring the Firewall (UFW)
UFW (Uncomplicated Firewall) is an easy-to-use firewall for Linux.
sudo ufw allow OpenSSH # Allow SSH connections
sudo ufw allow http # Allow HTTP (port 80)
sudo ufw allow https # Allow HTTPS (port 443)
sudo ufw enable # Enable UFW
sudo ufw status # Check firewall status
Make sure SSH is allowed before enabling UFW, otherwise you might lose access to the server.
5. Configuring Fail2ban
Fail2ban protects the server from brute-force attacks by blocking IP addresses from which multiple failed login attempts occur.
After installation, it works "out of the box" with SSH. To configure additional rules, you can create the file /etc/fail2ban/jail.local:
sudo nano /etc/fail2ban/jail.local
Example content (for SSH):
[sshd]
enabled = true
port = ssh
filter = sshd
logpath = /var/log/auth.log
maxretry = 3
bantime = 1h
Restart Fail2ban:
sudo systemctl restart fail2ban
sudo fail2ban-client status # Check status
Basic server preparation is now complete.
Software Installation — Step-by-Step
In this section, we will install Docker, Docker Compose, Nginx, and configure them to work with Mattermost. All software versions are current as of 2026, implying the use of the latest stable releases.
1. Installing Docker Engine and Docker Compose
Docker is a platform for developing, delivering, and running applications in containers. Docker Compose allows you to define and run multi-container Docker applications.
# Добавляем репозиторий Docker
sudo apt update
sudo apt install -y ca-certificates curl gnupg
sudo install -m 0755 -d /etc/apt/keyrings
curl -fsSL https://download.docker.com/linux/ubuntu/gpg | sudo gpg --dearmor -o /etc/apt/keyrings/docker.gpg
sudo chmod a+r /etc/apt/keyrings/docker.gpg
echo \
  "deb [arch="$(dpkg --print-architecture)" signed-by=/etc/apt/keyrings/docker.gpg] https://download.docker.com/linux/ubuntu \
  "$(. /etc/os-release && echo "$VERSION_CODENAME")" stable" | \
  sudo tee /etc/apt/sources.list.d/docker.list > /dev/null

# Устанавливаем Docker Engine
sudo apt update
sudo apt install -y docker-ce docker-ce-cli containerd.io docker-buildx-plugin docker-compose-plugin # Установка Docker и Docker Compose (v2)

# Добавляем текущего пользователя в группу docker для работы без sudo
sudo usermod -aG docker mattermostuser # Замените mattermostuser на ваше имя пользователя
newgrp docker # Применяем изменения для текущей сессии, либо перелогиньтесь

# Проверяем установку Docker
docker run hello-world # Запуск тестового контейнера
docker compose version # Проверка версии Docker Compose
As of 2026, docker-compose-plugin is the preferred way to install Docker Compose v2, which is integrated into the Docker CLI.
2. Installing Nginx
Nginx will act as a reverse proxy for Mattermost, handling SSL certificates and directing traffic.
sudo apt update
sudo apt install -y nginx # Установка Nginx (версия ~1.26.x на 2026 год для Ubuntu 24.04 LTS)

sudo systemctl enable nginx # Включаем автозапуск Nginx
sudo systemctl start nginx # Запускаем Nginx
sudo systemctl status nginx # Проверяем статус Nginx
Check Nginx availability by opening your server's IP address in a browser. You should see the "Welcome to Nginx!" page.
3. Installing Certbot (for Let's Encrypt SSL)
Certbot is a client for automatically obtaining and renewing SSL certificates from Let's Encrypt.
sudo apt install -y certbot python3-certbot-nginx # Установка Certbot и плагина для Nginx
For Certbot to work, you will need a domain name pointing to your VPS's IP address. For example, chat.yourdomain.com.
4. Creating Directories for Mattermost
Let's create the directory structure for storing Mattermost configuration, data, and PostgreSQL database.
sudo mkdir -p /opt/mattermost/{app,data,db,logs,config,plugins,client/plugins} # Создание основной структуры
sudo chown -R mattermostuser:mattermostuser /opt/mattermost # Назначение прав текущему пользователю
sudo chmod -R 770 /opt/mattermost # Установка прав доступа
Ensure that your user mattermostuser has write permissions to these directories.
Configuration
This section is dedicated to configuring all components: Docker Compose for Mattermost and PostgreSQL, Nginx for proxying and SSL, and Mattermost for push notifications and S3 backups.
1. Preparing the .env file for secrets
We will create a .env file to store environment variables and secrets, to avoid hardcoding them in docker-compose.yml.
nano /opt/mattermost/.env
Example content of /opt/mattermost/.env:
# Mattermost
MM_HOSTNAME=chat.yourdomain.com # Replace with your domain
MM_SITEURL=https://chat.yourdomain.com # Replace with your domain
MM_DB_USERNAME=mmuser
MM_DB_PASSWORD=your_strong_db_password # Generate a strong password
MM_DB_NAME=mattermost

# PostgreSQL
POSTGRES_USER=mmuser
POSTGRES_PASSWORD=your_strong_db_password
POSTGRES_DB=mattermost
Important: Generate truly strong passwords for the database. Use online generators or a command like openssl rand -base64 32.
2. Creating the docker-compose.yml file
We will create the main docker-compose.yml file, which will define the Mattermost, PostgreSQL, and Nginx services.
nano /opt/mattermost/docker-compose.yml
Example content of /opt/mattermost/docker-compose.yml:
version: '3.8'
services:
app:
container_name: mattermost-app
image: mattermost/mattermost-team-edition:9.6 # Current version for 2026, or use latest
restart: unless-stopped
environment:
MM_SQLSETTINGS_DRIVERNAME: postgres
MM_SQLSETTINGS_DATASOURCE: postgres://${MM_DB_USERNAME}:${MM_DB_PASSWORD}@db:5432/${MM_DB_NAME}?sslmode=disable&connect_timeout=10
MM_SERVICESETTINGS_SITEURL: ${MM_SITEURL}
MM_LOGSETTINGS_FILELOCATION: /mattermost/logs/mattermost.log
MM_FILESETTINGS_DIRECTORY: /mattermost/data
MM_EMAILSETTINGS_SENDEMAILNOTIFICATIONS: "true" # Enable after SMTP configuration
MM_EMAILSETTINGS_FEEDBACKEMAIL: "[email protected]"
MM_EMAILSETTINGS_SMTPUSERNAME: "smtp_user" # Replace with your SMTP details
MM_EMAILSETTINGS_SMTPPASSWORD: "smtp_password"
MM_EMAILSETTINGS_SMTPSERVER: "smtp.yourprovider.com"
MM_EMAILSETTINGS_SMTPPORT: "587"
MM_EMAILSETTINGS_CONNECTIONSECURITY: "STARTTLS"
MM_EMAILSETTINGS_ENABLESMTPAUTH: "true"
MM_MESSAGINGSETTINGS_ENABLEEMAILBATCHING: "true"
MM_MESSAGINGSETTINGS_EMAILBATCHINGBUFFERSIZE: "256"
MM_MESSAGINGSETTINGS_EMAILBATCHINGINTERVAL: "30" # Seconds
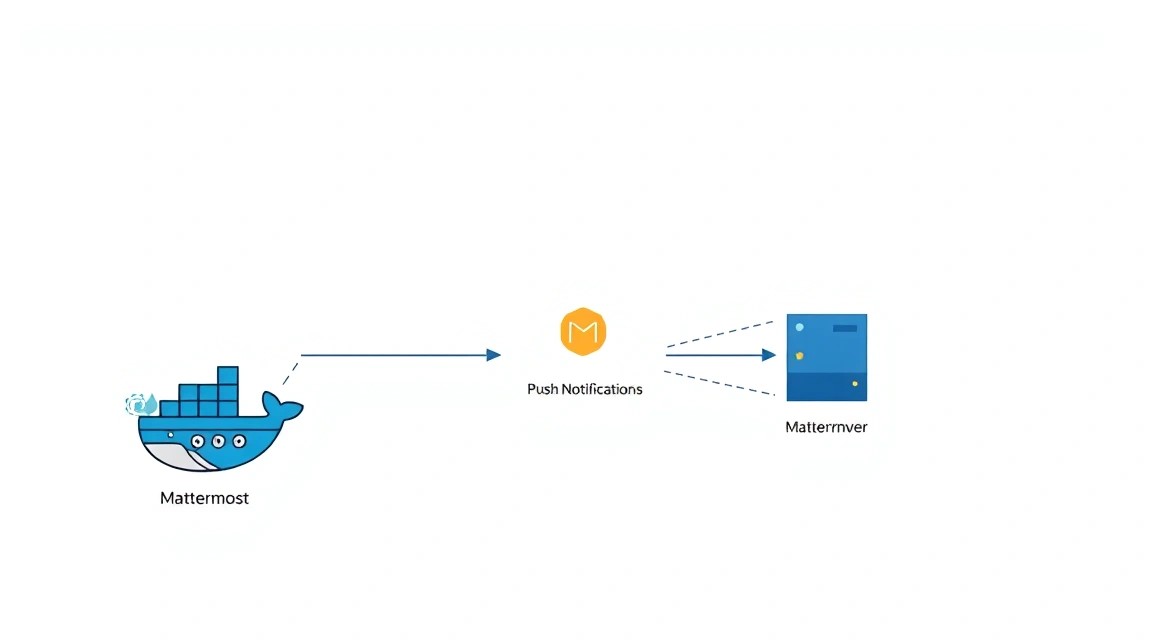
MM_PUSHNOTIFICATIONSSETTINGS_ENABLEEXTENSIBLESERVICE: "true"
MM_PUSHNOTIFICATIONSSETTINGS_GATEWAYURL: "https://push.mattermost.com" # Using the official gateway
# MM_PUSHNOTIFICATIONSSETTINGS_ANDROIDPUSHPROXYURL: "http://localhost:8065" # For your own MPNS
# MM_PUSHNOTIFICATIONSSETTINGS_IOSPUSHPROXYURL: "http://localhost:8065" # For your own MPNS
volumes:
- /opt/mattermost/app:/mattermost:rw
- /opt/mattermost/data:/mattermost/data:rw
- /opt/mattermost/config:/mattermost/config:rw
- /opt/mattermost/logs:/mattermost/logs:rw
- /opt/mattermost/plugins:/mattermost/plugins:rw
- /opt/mattermost/client/plugins:/mattermost/client/plugins:rw
ports:
- "8065:8065" # Mattermost listens on 8065, Nginx will proxy
depends_on:
- db
networks:
- mattermost-bridge
db:
container_name: mattermost-db
image: postgres:16-alpine # Current PostgreSQL version for 2026
restart: unless-stopped
environment:
POSTGRES_USER: ${POSTGRES_USER}
POSTGRES_PASSWORD: ${POSTGRES_PASSWORD}
POSTGRES_DB: ${POSTGRES_DB}
volumes:
- /opt/mattermost/db:/var/lib/postgresql/data:rw
networks:
- mattermost-bridge
networks:
mattermost-bridge:
driver: bridge
Explanations:
mattermost-team-edition:9.6: This is an example of the current Mattermost version for 2026. Always use the latest stable version.postgres:16-alpine: The latest stable version of PostgreSQL.MM_SQLSETTINGS_DATASOURCE: Database connection string. Uses variables from.env.MM_SERVICESETTINGS_SITEURL: An important parameter that defines the base URL of your Mattermost instance. Must be HTTPS.volumes: Mounting local server directories into containers so that data (configs, files, DB) is preserved after container restarts.networks: We create an internal Docker network for secure inter-container communication.- SMTP settings: Replace with your SMTP provider's details for sending email notifications.
- Push notifications: By default, we use the official Mattermost gateway (
https://push.mattermost.com), which is the simplest method. Setting up your own MPNS (Mattermost Push Notification Service) will require significantly more effort and a separate server or container.
3. Nginx Configuration
We will create an Nginx configuration file for Mattermost. First, remove the default config:
sudo rm /etc/nginx/sites-enabled/default
Then, create a new configuration file for your domain:
sudo nano /etc/nginx/sites-available/mattermost.conf
Example content of /etc/nginx/sites-available/mattermost.conf:
server {
    listen 80;
    server_name chat.yourdomain.com; # Replace with your domain

    location / {
        return 301 https://$host$request_uri; # Redirect all HTTP traffic to HTTPS
    }
}

server {
    listen 443 ssl http2;
    server_name chat.yourdomain.com; # Replace with your domain

    ssl_certificate /etc/letsencrypt/live/chat.yourdomain.com/fullchain.pem; # Path to your SSL certificate
    ssl_certificate_key /etc/letsencrypt/live/chat.yourdomain.com/privkey.pem; # Path to the private key
    ssl_trusted_certificate /etc/letsencrypt/live/chat.yourdomain.com/chain.pem;

    # SSL settings for security
    ssl_session_cache shared:SSL:10m;
    ssl_session_timeout 1h;
    ssl_session_tickets off;
    ssl_protocols TLSv1.2 TLSv1.3;
    ssl_prefer_server_ciphers on;
    ssl_ciphers "ECDHE-ECDSA-AES128-GCM-SHA256:ECDHE-RSA-AES128-GCM-SHA256:ECDHE-ECDSA-AES256-GCM-SHA384:ECDHE-RSA-AES256-GCM-SHA384:DHE-RSA-AES128-GCM-SHA256:DHE-RSA-AES256-GCM-SHA384";
    ssl_dhparam /etc/ssl/certs/dhparam.pem; # We will generate it later

    # OCSP Stapling
    ssl_stapling on;
    ssl_stapling_verify on;
    resolver 8.8.8.8 8.8.4.4 valid=300s;
    resolver_timeout 5s;

    # Add security headers
    add_header X-Frame-Options "SAMEORIGIN";
    add_header X-Content-Type-Options "nosniff";
    add_header X-XSS-Protection "1; mode=block";
    add_header Referrer-Policy "no-referrer-when-downgrade";
    add_header Content-Security-Policy "frame-ancestors 'self'";

    client_max_body_size 50M; # Increase the limit for uploaded file size
    client_body_buffer_size 128k;

    location ~ /api/v[0-9]+/(users/)?websocket$ {
        proxy_pass http://localhost:8065; # Mattermost listens on 8065
        proxy_http_version 1.1;
        proxy_set_header Upgrade $http_upgrade;
        proxy_set_header Connection "upgrade";
        proxy_set_header Host $host;
        proxy_set_header X-Real-IP $remote_addr;
        proxy_set_header X-Forwarded-For $proxy_add_x_forwarded_for;
        proxy_set_header X-Forwarded-Proto $scheme;
        proxy_set_header X-Frame-Options SAMEORIGIN;
        proxy_buffering off; # Disable buffering for WebSocket
    }

    location / {
        proxy_pass http://localhost:8065; # Mattermost listens on 8065
        proxy_set_header Host $host;
        proxy_set_header X-Real-IP $remote_addr;
        proxy_set_header X-Forwarded-For $proxy_add_x_forwarded_for;
        proxy_set_header X-Forwarded-Proto $scheme;
        proxy_set_header X-Frame-Options SAMEORIGIN;
        proxy_buffers 256 16k; # Increase proxy buffers
        proxy_buffer_size 16k;
        proxy_read_timeout 300s;
        proxy_send_timeout 300s;
    }
}
Create a symbolic link to this file in sites-enabled:
sudo ln -s /etc/nginx/sites-available/mattermost.conf /etc/nginx/sites-enabled/mattermost.conf
Generate the dhparam.pem file to strengthen SSL security. This may take a few minutes:
sudo openssl dhparam -out /etc/ssl/certs/dhparam.pem 2048 # Or 4096 for greater security
Check Nginx syntax and restart it:
sudo nginx -t # Check syntax
sudo systemctl restart nginx # Restart Nginx
4. Obtaining SSL Certificates with Certbot
Now that Nginx is configured and listening on port 80, you can obtain Let's Encrypt certificates.
sudo certbot --nginx -d chat.yourdomain.com # Replace with your domain
Certbot will ask a few questions (email, agreement to terms, HTTP to HTTPS redirection). Choose automatic redirection (option 2, if offered). Certbot will automatically update your Nginx config and install the certificates.
Verify that automatic renewal is working:
sudo systemctl status certbot.timer # Check systemd timer for Certbot
sudo certbot renew --dry-run # Test renewal
5. Starting Mattermost with Docker Compose
Navigate to the directory containing docker-compose.yml and start the services.
cd /opt/mattermost
docker compose up -d # Start containers in detached mode
Check the status of the containers:
docker compose ps
You should see that the mattermost-app and mattermost-db containers are in running status.
6. Verifying Functionality
Open your domain in a browser (e.g., https://chat.yourdomain.com). You should see the Mattermost welcome page and the option to create an administrator account.
You can also check accessibility using curl on the server:
curl -I https://chat.yourdomain.com # Check HTTPS access
curl http://localhost:8065/api/v4/system/ping # Check direct access to Mattermost API from inside the server
If everything is configured correctly, the first request will show HTTP/200 OK, and the second will show {"status":"OK"} or a similar response.
Backups and Maintenance
Reliable backup is a critical aspect of any production system. We will set up automatic backups of the Mattermost database and files to S3-compatible storage.
1. What to Back Up
For Mattermost, three main groups of data need to be backed up:
- PostgreSQL Database: Contains all information about users, channels, messages, settings, etc. This is the most important part.
- User Files: All files uploaded by users (images, documents, etc.) are stored in the directory
/opt/mattermost/data. - Configuration Files: The
config.jsonfile (in/opt/mattermost/config) anddocker-compose.yml,.env.
2. Installing AWS CLI and Configuring S3
We will use AWS CLI to interact with S3-compatible storage. This can be Amazon S3 or any other provider that supports the S3 API (e.g., MinIO, DigitalOcean Spaces, Vultr Object Storage).
sudo apt install -y python3-pip # Install pip if it's not present
pip install awscli # Install AWS CLI
Configure AWS CLI by providing your S3 credentials. You will need Access Key ID, Secret Access Key, and region.
aws configure # Run and enter your details
# AWS Access Key ID [None]: YOUR_ACCESS_KEY_ID
# AWS Secret Access Key [None]: YOUR_SECRET_ACCESS_KEY
# Default region name [None]: YOUR_S3_REGION (e.g., us-east-1 or ru-central1)
# Default output format [None]: json
3. Automatic Backup Script
Let's create a script that will dump the database, archive files, and upload everything to S3.
nano /opt/mattermost/backup_mattermost.sh
Example content of /opt/mattermost/backup_mattermost.sh:
#!/bin/bash

# Load environment variables
source /opt/mattermost/.env

# --- Configuration ---
BACKUP_DIR="/opt/mattermost/backups"
S3_BUCKET="s3://your-mattermost-backup-bucket" # Replace with your S3 bucket name
DATE=$(date +%Y-%m-%d-%H%M%S)
DB_BACKUP_FILE="${BACKUP_DIR}/mattermost_db_${DATE}.sql"
FILES_BACKUP_FILE="${BACKUP_DIR}/mattermost_files_${DATE}.tar.gz"
CONFIG_BACKUP_FILE="${BACKUP_DIR}/mattermost_config_${DATE}.tar.gz"
LOG_FILE="/var/log/mattermost_backup.log"

# --- Create backup directory ---
mkdir -p "$BACKUP_DIR" >> "$LOG_FILE" 2>&1
echo "--- Starting Mattermost backup at ${DATE} ---" >> "$LOG_FILE"

# --- 1. Database Backup ---
echo "Dumping PostgreSQL database..." >> "$LOG_FILE"
docker compose exec -T db pg_dump -U "${POSTGRES_USER}" -d "${POSTGRES_DB}" > "${DB_BACKUP_FILE}" >> "$LOG_FILE" 2>&1
if [ $? -eq 0 ]; then
    echo "Database dump successful: ${DB_BACKUP_FILE}" >> "$LOG_FILE"
else
    echo "Database dump FAILED!" >> "$LOG_FILE"
fi

# --- 2. Files Backup ---
echo "Archiving Mattermost data files..." >> "$LOG_FILE"
tar -czf "${FILES_BACKUP_FILE}" -C /opt/mattermost data >> "$LOG_FILE" 2>&1
if [ $? -eq 0 ]; then
    echo "Files archive successful: ${FILES_BACKUP_FILE}" >> "$LOG_FILE"
else
    echo "Files archive FAILED!" >> "$LOG_FILE"
fi

# --- 3. Configuration Files Backup ---
echo "Archiving Mattermost configuration files..." >> "$LOG_FILE"
tar -czf "${CONFIG_BACKUP_FILE}" -C /opt/mattermost config docker-compose.yml .env >> "$LOG_FILE" 2>&1
if [ $? -eq 0 ]; then
    echo "Config archive successful: ${CONFIG_BACKUP_FILE}" >> "$LOG_FILE"
else
    echo "Config archive FAILED!" >> "$LOG_FILE"
fi

# --- Upload to S3 ---
echo "Uploading backups to S3 bucket: ${S3_BUCKET}..." >> "$LOG_FILE"
aws s3 cp "${DB_BACKUP_FILE}" "${S3_BUCKET}/db/" --region YOUR_S3_REGION >> "$LOG_FILE" 2>&1
aws s3 cp "${FILES_BACKUP_FILE}" "${S3_BUCKET}/files/" --region YOUR_S3_REGION >> "$LOG_FILE" 2>&1
aws s3 cp "${CONFIG_BACKUP_FILE}" "${S3_BUCKET}/config/" --region YOUR_S3_REGION >> "$LOG_FILE" 2>&1

if [ $? -eq 0 ]; then
    echo "S3 upload successful." >> "$LOG_FILE"
else
    echo "S3 upload FAILED!" >> "$LOG_FILE"
fi

# --- Cleanup local backups (optional) ---
echo "Cleaning up local backup files older than 7 days..." >> "$LOG_FILE"
find "${BACKUP_DIR}" -type f -name "mattermost_*.sql" -mtime +7 -delete >> "$LOG_FILE" 2>&1
find "${BACKUP_DIR}" -type f -name "mattermost_*.tar.gz" -mtime +7 -delete >> "$LOG_FILE" 2>&1
echo "Cleanup complete." >> "$LOG_FILE"

echo "--- Mattermost backup finished at $(date +%Y-%m-%d-%H%M%S) ---" >> "$LOG_FILE"
echo "" >> "$LOG_FILE" # Add a newline for readability
Make the script executable:
chmod +x /opt/mattermost/backup_mattermost.sh
Test the script manually:
/opt/mattermost/backup_mattermost.sh
Check the content of /var/log/mattermost_backup.log and your S3 bucket.
4. Configuring Cron for Automatic Execution
Let's add the script to the Cron scheduler for daily execution, for example, at 3 AM.
crontab -e
Add the following line to the end of the file:
0 3 * * * /opt/mattermost/backup_mattermost.sh >> /var/log/cron.log 2>&1
This line means: "Every day at 3:00 AM, execute the backup_mattermost.sh script."
5. Maintenance and Updates
- OS Update: Regularly run
sudo apt update && sudo apt upgrade -yto keep your operating system up to date. - Docker and Docker Compose Update: They are updated along with the OS if installed from repositories.
- Mattermost Update: To update the Mattermost container, change the image tag in
docker-compose.ymlto the new version (e.g., from9.6to9.7), then execute:cd /opt/mattermost docker compose pull app # Download new image docker compose up -d # Recreate container with new imageAlways read the official Mattermost documentation before updating, as there might be database changes requiring migration.
- Nginx Update: Updated along with the OS.
- Monitoring: Monitor server resource usage (CPU, RAM, disk) using
htopor more advanced monitoring systems. - Logs: Regularly review Mattermost logs (
/opt/mattermost/logs/mattermost.log) and Docker container logs (docker compose logs app) for errors.
Troubleshooting + FAQ
Here are answers to frequently asked questions and solutions to common problems that may arise during Mattermost installation and operation.
Mattermost is not starting, database connection error. What to do?
What to check: Make sure the mattermost-db container is running and accessible. Check the database container logs for errors. Also, verify the .env file for correct username, password, and database name. Ensure that ports are not occupied by other processes. It's possible that the Mattermost container started before PostgreSQL was fully initialized.
How to fix:
        cd /opt/mattermost
        docker compose logs db # View DB logs
        docker compose restart db app # Restart DB first, then the application
Ensure that MM_SQLSETTINGS_DATASOURCE in docker-compose.yml correctly references the db service (postgres://user:pass@db:5432/dbname).
What is the minimum suitable VPS configuration?
For a small team of up to 50 active users, a VPS with 2 vCPU, 4 GB RAM, and 80 GB SSD will be minimally suitable. This will allow running Docker, Mattermost, PostgreSQL, and Nginx, and provide basic performance. However, for comfortable operation and room for growth, especially when using plugins, 4 vCPU, 8 GB RAM, and 160 GB NVMe SSD are recommended.
Nginx returns a 502 Bad Gateway error.
What to check: A 502 error usually means that Nginx could not connect to the backend service (in our case, the Mattermost container on port 8065). Check if the mattermost-app container is running: docker compose ps. Ensure that Mattermost is listening on port 8065 inside the container and that the port is correctly mapped in docker-compose.yml (8065:8065).
How to fix:
        docker compose logs app # View Mattermost logs
        sudo systemctl restart nginx # Restart Nginx
Ensure that the line proxy_pass http://localhost:8065; in the /etc/nginx/sites-available/mattermost.conf file is correct.
What to choose — VPS or dedicated for this task?
For most teams up to 500 users and moderate loads, a VPS will be an optimal and cost-effective solution. A dedicated server should be chosen if you have a very large team (more than 500 active users), critically high performance requirements without any delays, specific hardware isolation requirements, or if you plan to run many other resource-intensive applications on the same server.
Mobile push notifications are not arriving.
What to check: Ensure that in Mattermost's config.json (which can be edited via the web interface under "System Console" -> "Notifications" -> "Push Notifications"), "Enable Push Notifications" is enabled and "Push Notification Server" is set to https://push.mattermost.com (or the address of your own MPNS). Verify that your server has outbound access to this URL. Also, ensure that environment variables for push notifications are set in docker-compose.yml, as specified in the "Configuration" section.
How to fix: Check Mattermost logs for push notification-related errors. If you are using your own MPNS, ensure it is correctly configured and accessible. Verify that outbound traffic on port 443 to push.mattermost.com is open on your server. If you have just configured it, try re-logging into the mobile application.
SSL certificate is not working or has expired.
What to check: Ensure that Certbot has correctly configured automatic renewal. Check the status of the Certbot timer: sudo systemctl status certbot.timer. Make sure that the domain name chat.yourdomain.com (or yours) is correctly specified in the Nginx configuration and in the Certbot command. Check Certbot logs for renewal errors.
How to fix: Try to manually renew certificates: sudo certbot renew --force-renewal. If this doesn't help, verify that the DNS records for your domain correctly point to your server's IP. Ensure that port 80 is open for Certbot during the renewal process.
Conclusions and Next Steps
Congratulations! You have successfully deployed a fully functional Mattermost server on your VPS. You now have a powerful, secure, and fully controlled platform for team communication, running on Docker, protected by Nginx with SSL, and supporting mobile push notifications, as well as automatic backup to S3-compatible storage. This gives you full sovereignty over your data and flexibility in configuration.
Further steps for optimization and expanding functionality:
- SMTP Settings: Be sure to configure email sending (SMTP) in the Mattermost System Console for user registration, password resets, and notifications.
- Integrations and Plugins: Explore Mattermost's rich ecosystem of plugins and integrations. You can add support for voice/video calls (Jitsi, Zoom), integrations with version control systems (GitHub, GitLab), CI/CD systems, and many other services.
- Monitoring and Logging: For production systems, it is recommended to set up more advanced monitoring (Prometheus, Grafana) and centralized logging (ELK Stack or Graylog) to track performance and quickly respond to issues.
- Scaling: If your team grows significantly, consider scaling Mattermost by separating the database and file storage onto separate servers or by using clustering solutions for Mattermost.