Installing Netdata on VPS: Real-time Resource Monitoring with Alerts
TL;DR
In this detailed guide, we will step-by-step configure Netdata on your VPS, a powerful tool for real-time server performance monitoring. You will learn how to install Netdata, configure it to collect metrics, and set up alerts to always stay informed about your system's status and quickly react to potential issues.
- Real-time Monitoring: Netdata provides per-second graphs for all aspects of your server.
- Easy Installation: Quick and easy installation using the official script.
- Flexible Configuration: Ability to fine-tune metric collection and alert thresholds.
- Automatic Alerts: Set up notifications via email, Slack, Telegram, and other channels.
- Lightweight: Netdata is designed to be maximally efficient and consume minimal resources, even on a modest VPS.
What We Are Setting Up and Why
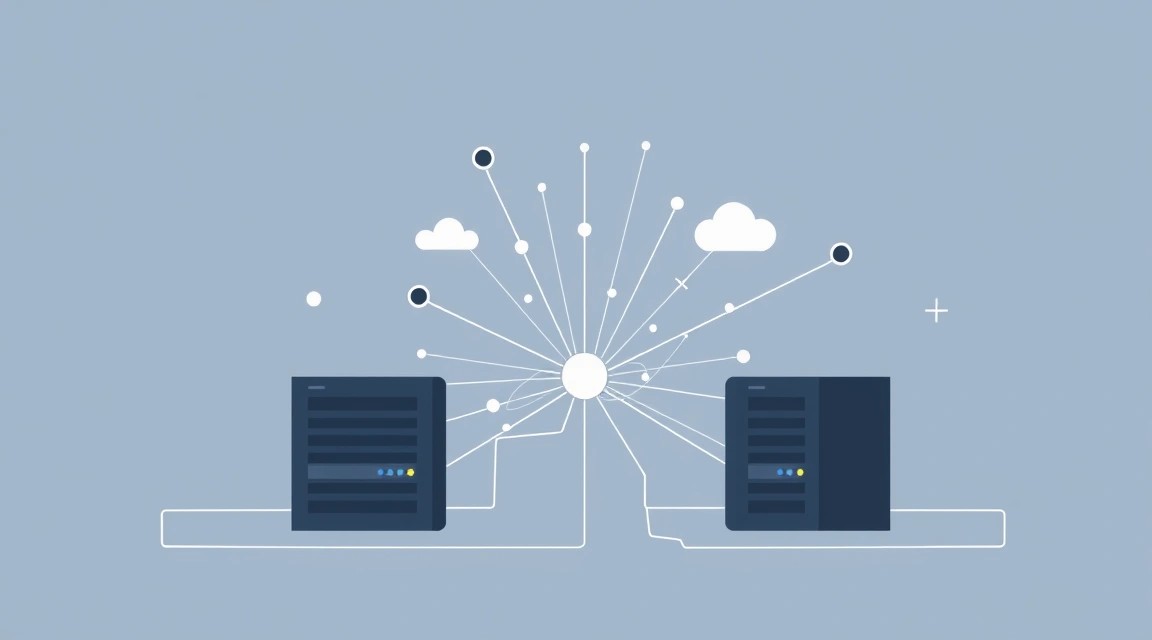
We will be setting up Netdata — a free, open-source tool that collects real-time metrics (per-second) and visualizes them on interactive web dashboards. It is designed for monitoring system and application performance, as well as for detecting anomalies and alerting about problems.
Ultimately, you will get a complete picture of your VPS's status: CPU load, RAM usage, disk operations, network traffic, processes, kernel activity, as well as metrics for hundreds of other services and applications. All of this will be available through an intuitive web interface that updates in real time.
The main value of Netdata lies in its ability to quickly identify bottlenecks and performance issues. When something goes wrong — be it a sudden spike in CPU load, disk overflow, or unusual network activity — Netdata will show it immediately. With configured alerts, you will receive notifications via email, Slack, or Telegram, allowing you to react promptly before the problem affects your users or services.
Alternatives and Why Netdata on VPS
There are many monitoring solutions on the market, which can be divided into several categories:
- Cloud-managed services (e.g., Datadog, New Relic, Amazon CloudWatch): These solutions offer powerful features, centralized management, and minimal setup effort. However, they are often expensive, especially for small projects or a single VPS, and can create vendor lock-in. Furthermore, sensitive monitoring data is stored on third-party servers, which may be unacceptable for projects with high privacy requirements.
- Self-hosted comprehensive systems (e.g., Prometheus + Grafana, Zabbix): These are very powerful and flexible platforms capable of monitoring huge infrastructures. However, their installation and configuration require significantly more time, expert knowledge, and resources. Prometheus and Grafana, while popular, have a steep learning curve and require deploying multiple components. Zabbix can be quite resource-intensive and complex to manage for a single server.
Netdata occupies a unique niche between these categories. It offers functionality comparable to some paid solutions, yet it is lightweight, easy to install and manage, and completely free. For a VPS owner who needs a fast, efficient, and reliable monitoring method without unnecessary costs and complexity, Netdata is an ideal choice. You gain full control over your data and infrastructure, avoiding reliance on third-party services and their pricing policies.
What VPS Configuration is Needed for This Task
Netdata is designed to be very lightweight and efficient. It consumes a minimal amount of resources, making it ideal for installation even on modest VPS. However, server requirements will depend not so much on Netdata itself, but on the main workload you plan to monitor.
Minimum Requirements for Netdata (in addition to the main workload):
- CPU: 1 vCPU. Netdata is optimized for multi-core systems, but it will also run stably on a single-core system, adding only a negligible load.
- RAM: 50-100 MB. This is the minimum amount Netdata consumes for basic monitoring. If you plan to store metric history for a longer period or monitor many services, more RAM may be required (up to 200-500 MB).
- Disk: 200-500 MB for installation and configuration storage. If you use a disk engine to store metric history, this volume may increase, but by default, Netdata stores data in RAM.
- Network: Minimal requirements. Netdata uses port 19999 for its web interface.
Recommended VPS Plan for Typical Tasks (GitLab, Mattermost, Minecraft, Bitcoin node):
For most scenarios where Netdata will run alongside another resource-intensive application, the following configuration is recommended:
- CPU: 2-4 vCPU (4 is better for GitLab or a Bitcoin node).
- RAM: 4-8 GB (8 GB is better for GitLab or a Bitcoin node).
- Disk: 100-200 GB SSD (NVMe is preferable for high I/O performance, which is critical for databases or nodes).
- Network: 100-200 Mbps channel. A wider channel (up to 1 Gbps) may be required for a Bitcoin node or a game server.
For example, a VPS with the specified characteristics will be an excellent choice for most of the listed tasks, providing sufficient resource headroom for stable operation of both the main application and Netdata.
When a dedicated server is needed, not a VPS
Dedicated servers become necessary when:
- Maximum performance is required: If your application demands all resources of a physical CPU core, huge amounts of RAM (64 GB or more), or extremely high disk subsystem performance (NVMe RAID).
- High I/O requirements: For very active databases, large file storage, or high-load game servers, where a VPS might encounter IOPS limitations.
- Specific hardware requirements: For example, for GPU computing, specific network cards, or other specialized hardware components.
- Large-scale projects: When a single VPS is no longer sufficient, and you want to avoid virtualization for maximum efficiency.
For running a Bitcoin/Ethereum node with a large amount of data, or if you plan to host several high-load services, it might be worth considering a suitable dedicated server.
Location: What it affects
Choosing a VPS location plays an important role:
- Latency: The closer the server is to your target audience or to you, the lower the latency. This is critical for web applications, game servers, and any interactive services.
- Legal compliance: Storing data in certain jurisdictions may be mandatory to comply with local laws (GDPR, HIPAA, etc.).
- Cost: VPS prices can vary depending on location due to the cost of electricity, real estate, and network infrastructure.
- Network access: Some locations may offer better peering with specific regions of the world, providing more stable and faster access.
For Netdata monitoring, location is not as critical as for the main service, but you will appreciate low latency for accessing the web interface.
Server Preparation
Before installing Netdata, you need to perform basic preparation of your VPS. We will use Ubuntu Server 22.04 LTS, as it is one of the most popular and stable operating systems for servers.
1. Connecting via SSH
Connect to your VPS using SSH. If you are using macOS/Linux, open a terminal; for Windows, you can use PuTTY or WSL.
ssh user@your_vps_ip_address
Replace user with your VPS username (usually root or the name provided by your provider) and your_vps_ip_address with your server's IP address.
2. System Update
Always start by updating the package list and upgrading them to the latest versions to ensure system security and stability. This will also help avoid dependency conflicts.
sudo apt update          # Update the list of available packages
sudo apt upgrade -y      # Upgrade all installed packages to their latest versions
sudo apt autoremove -y   # Remove unnecessary packages that were installed as dependencies and are no longer used
3. Creating a New User with Sudo Privileges (if you are working as root)
Working as the root user is insecure. It is recommended to create a regular user and grant them sudo privileges.
sudo adduser username               # Create a new user. Replace 'username' with the desired name.
sudo usermod -aG sudo username      # Add the user to the sudo group so they can execute commands with sudo
Now, exit the root session and log in as the new user:
exit
ssh username@your_vps_ip_address
4. Configuring a Basic Firewall (UFW)
UFW (Uncomplicated Firewall) is a convenient tool for managing iptables. We will configure it to allow SSH and Netdata access.
sudo apt install ufw -y                 # Install UFW
sudo ufw allow OpenSSH                  # Allow SSH connections (port 22)
sudo ufw allow 19999/tcp                # Allow access to Netdata port (19999)
sudo ufw enable                         # Enable the firewall. Confirm with 'y'.
sudo ufw status                         # Check firewall status
The ufw status output should show that OpenSSH and port 19999/tcp are allowed.
5. Installing Fail2Ban (for brute-force protection)
Fail2Ban scans logs and blocks IP addresses that show signs of malicious activity (e.g., multiple failed SSH login attempts).
sudo apt install fail2ban -y            # Install Fail2Ban
sudo cp /etc/fail2ban/jail.conf /etc/fail2ban/jail.local # Copy the default configuration
sudo systemctl enable fail2ban          # Enable Fail2Ban autostart on boot
sudo systemctl start fail2ban           # Start the Fail2Ban service
sudo systemctl status fail2ban          # Check Fail2Ban status
Fail2Ban protects SSH by default. For Netdata, additional Fail2Ban protection is usually not required, as access to it is often done via a reverse proxy with HTTPS authorization.
6. Installing Necessary Utilities
Let's install a few useful utilities that may come in handy when working with the server.
sudo apt install git curl wget htop screen -y # Install Git, cURL, Wget, htop (process monitor), Screen (terminal multiplexer)
Your server is now ready for Netdata installation.
Software Installation — Step-by-Step
Software Installation — Step-by-Step
Installing Netdata on Ubuntu is very straightforward thanks to the official installation script. It automatically detects your operating system, installs the necessary dependencies, and compiles Netdata from source.
1. Installing Dependencies
Although the official script attempts to install most dependencies, it's best to ensure that the core build packages are present on your system. These packages are essential for compiling Netdata from source code.
sudo apt install -y curl git build-essential autoconf automake libtool pkg-config zlib1g-dev libssl-dev libmnl-dev libprotobuf-dev protobuf-compiler libxxhash-dev liblz4-dev libjudy-dev python3 python3-pip python3-dev
This command installs:
curl,git: For downloading source code.build-essential,autoconf,automake,libtool,pkg-config: Essential tools for software compilation.- Various
lib-devpackages: Libraries and their header files, necessary for compiling Netdata with support for various features (e.g., SSL, compression, protobuf). python3,python3-pip,python3-dev: For Netdata's Python plugins.
2. Downloading and Running the Netdata Installation Script
Netdata provides a universal installation script that will do all the work for you. We will use the current version, which will be stable in 2026 (e.g., v1.48.0, although Netdata is constantly updated, and the script always downloads the latest stable version).
# Navigate to a temporary directory
cd /tmp

# Download the Netdata installation script (using the latest stable version)
# The script always fetches the latest version from GitHub, so there's no need to specify a particular tag, but for illustration, let's assume it's 1.48.0
wget -O netdata-installer.sh https://my-netdata.io/kickstart.sh

# Make the script executable
chmod +x netdata-installer.sh

# Run the installation script
# Use the --non-interactive option to avoid prompts during installation.
# You can also specify --disable-telemetry if you do not wish to send anonymous usage data.
sudo ./netdata-installer.sh --non-interactive
This script will perform the following actions:
- Clones the Netdata repository to
/opt/netdata. - Installs all necessary system dependencies.
- Compiles Netdata from source code.
- Configures Netdata as a system service (systemd).
- Starts Netdata.
The installation process may take several minutes depending on your VPS's performance.
3. Checking Netdata Status
After the installation is complete, ensure that the Netdata service is running correctly.
sudo systemctl status netdata
The output should show that the netdata.service is active (active (running)) and enabled for autostart on system boot.
# Example output
# ● netdata.service - Real-time performance monitoring
#      Loaded: loaded (/etc/systemd/system/netdata.service; enabled; vendor preset: enabled)
#      Active: active (running) since Mon 2026-01-01 10:00:00 UTC; 10s ago
#    Main PID: 1234 (netdata)
#       Tasks: 35 (limit: 1109)
#      Memory: 45.0M
#         CPU: 1.234s
#      CGroup: /system.slice/netdata.service
#              └─1234 /usr/sbin/netdata -P /var/run/netdata -D
4. Enabling Netdata Autostart
The installation script usually does this automatically, but for certainty, you can run the command:
sudo systemctl enable netdata
This ensures that Netdata will start every time the server reboots.
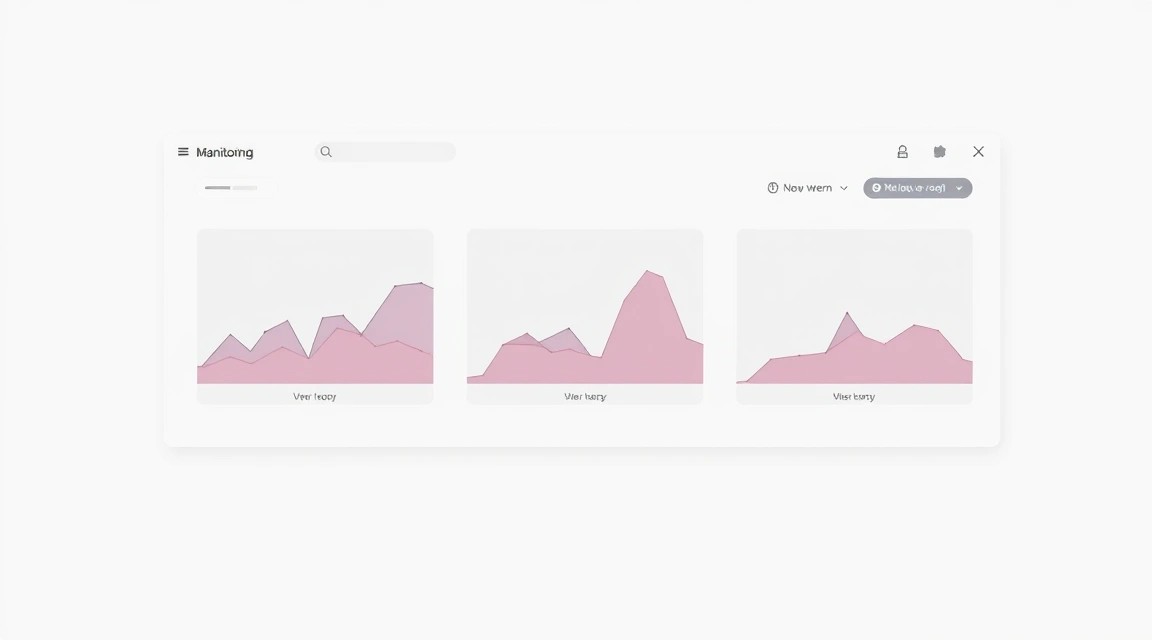
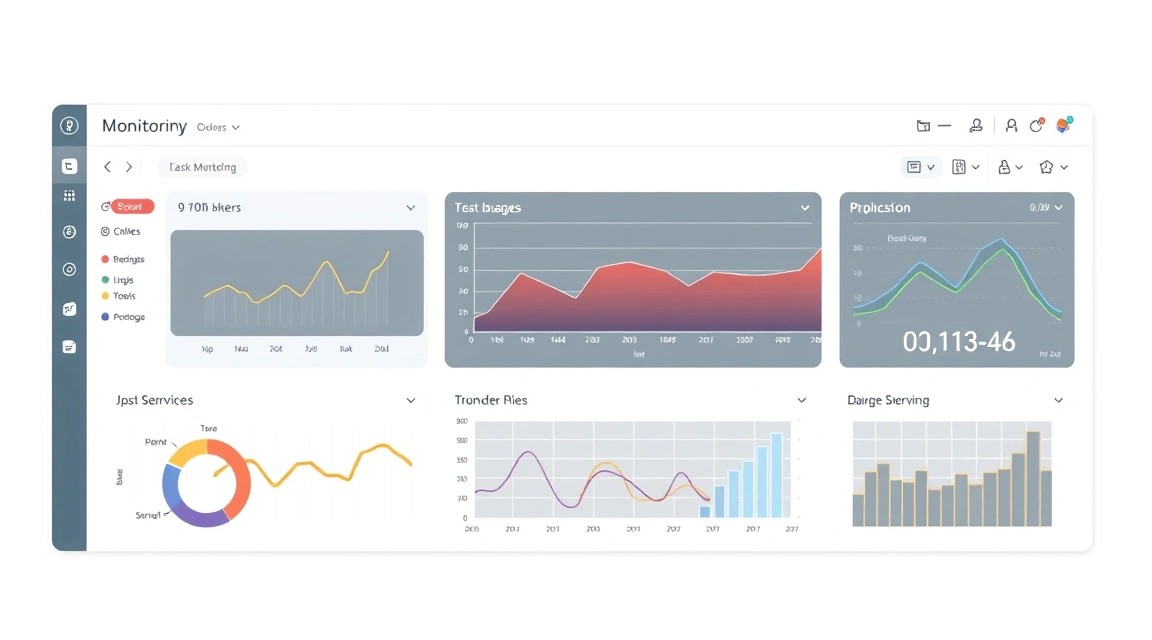
5. Accessing the Netdata Web Interface
Now you can access the Netdata web interface by opening your web browser and navigating to:
http://your_vps_ip_address:19999
Replace your_vps_ip_address with your actual VPS IP address. You should see the interactive Netdata dashboard, displaying your system's real-time metrics.
At this stage, the HTTP connection is unencrypted. For production systems, it is highly recommended to configure HTTPS, which we will do in the "Configuration" section.
Configuration

After installation, Netdata works "out of the box", but for more fine-grained tuning, security, and alert integration, configuration is required. The main Netdata configuration file is located at /etc/netdata/netdata.conf. Additionally, /etc/netdata/health/health_alarm_notify.conf is used for alerts, and files in /etc/netdata/conf.d/ are used for modules.
1. Main Netdata Configuration File (netdata.conf)
Open the netdata.conf file for editing. Always make a backup before making changes.
sudo cp /etc/netdata/netdata.conf /etc/netdata/netdata.conf.bak
sudo nano /etc/netdata/netdata.conf
Important Settings:
[web]section:bind to = 127.0.0.1: By default, Netdata listens on all interfaces (0.0.0.0). For security, if you plan to use a reverse proxy, it's better to bind it to the local interface so that it is only accessible from within the server.default port = 19999: If you want to change the port, do it here. Don't forget to update your firewall rules.
[global]section:hostname = my-vps-server: Set a more descriptive hostname that will be displayed in the web interface.history = 3600: The number of seconds of data stored in RAM. Default is 1 hour. Increasing this value requires more RAM.memory mode = ram: Data storage mode.ram(default) stores everything in RAM. For long-term storage, you can usedbengine, but this will increase disk load.
Example changes in netdata.conf:
[web]
    bind to = 127.0.0.1
    default port = 19999

[global]
    hostname = my-awesome-vps
    history = 7200  # Store 2 hours of history in RAM
    memory mode = ram
After saving the changes, restart Netdata:
sudo systemctl restart netdata
2. Configuring Alerts
Netdata has a powerful alerting system. The configuration is located in /etc/netdata/health/health_alarm_notify.conf.
sudo nano /etc/netdata/health/health_alarm_notify.conf
In this file, you will find many examples for various notification methods (email, Slack, Telegram, PagerDuty, etc.).
Example Email Alert Configuration:
Find the SEND_EMAIL section and uncomment or modify the following lines:
#------------------------------------------------------------------------------
# email global notification options

# enable global EMAIL notifications
# This is the only setting you need to enable to receive email notifications.
SEND_EMAIL="YES"

# The recipient email address.
# Multiple recipients can be given, separated by spaces
DEFAULT_RECIPIENT_EMAIL="[email protected]"

# The sender email address.
# A special keyword '$HOSTNAME' can be used, which Netdata will replace with the hostname of the machine.
DEFAULT_SENDER_EMAIL="netdata@$HOSTNAME"

# The name of the mail command to use.
# It can be mail, mailx, sendmail etc.
# Check man mail for more info.
MAIL_COMMAND="mail"
To send emails, your system needs a Mail Transfer Agent (MTA), such as Postfix or Sendmail. Let's install Postfix:
sudo apt install postfix -y
During Postfix installation, select "Internet Site" and specify your domain name (or VPS hostname). After that, restart Netdata.
Example Telegram Alert Configuration:
For Telegram, you will need to create a bot via @BotFather and obtain the bot token, as well as find out the Chat ID of your chat/group.
In the health_alarm_notify.conf file, find the TELEGRAM section and fill in the details:
#------------------------------------------------------------------------------
# telegram global notification options

# enable global TELEGRAM notifications
SEND_TELEGRAM="YES"

# The telegram bot token
# get a bot from @BotFather on telegram
TELEGRAM_BOT_TOKEN="YOUR_TELEGRAM_BOT_TOKEN"

# The telegram chat id.
# It can be a user, group or channel chat id.
# To find your chat id, send a message to your bot and then open:
#   https://api.telegram.org/botYOUR_TELEGRAM_BOT_TOKEN/getUpdates
TELEGRAM_CHAT_ID="YOUR_TELEGRAM_CHAT_ID"
Secrets via Environment Variables: For production systems, it's better not to store tokens and passwords directly in configuration files. Netdata supports passing secrets via environment variables. For example, you can define variables in the file /etc/systemd/system/netdata.service.d/override.conf (create the directory and file if they don't exist):
# /etc/systemd/system/netdata.service.d/override.conf
[Service]
Environment="NETDATA_ALARM_TELEGRAM_BOT_TOKEN=YOUR_TELEGRAM_BOT_TOKEN"
Environment="NETDATA_ALARM_TELEGRAM_CHAT_ID=YOUR_TELEGRAM_CHAT_ID"
After creating the file, execute:
sudo systemctl daemon-reload
sudo systemctl restart netdata
Then, in health_alarm_notify.conf, you can use these variables:
TELEGRAM_BOT_TOKEN="${NETDATA_ALARM_TELEGRAM_BOT_TOKEN}"
TELEGRAM_CHAT_ID="${NETDATA_ALARM_TELEGRAM_CHAT_ID}"
3. Configuring HTTPS with Caddy (Recommended)
Accessing Netdata over HTTP (port 19999) is insecure. For production servers, HTTPS must be configured. Caddy is a modern web server that automatically manages Let's Encrypt certificates and is very easy to set up.
Caddy Installation:
sudo apt install -y debian-keyring debian-archive-keyring apt-transport-https
curl -1sLf 'https://dl.cloudsmith.io/public/caddy/stable/gpg.key' | sudo gpg --dearmor -o /usr/share/keyrings/caddy-stable-archive-keyring.gpg
curl -1sLf 'https://dl.cloudsmith.io/public/caddy/stable/debian.deb.txt' | sudo tee /etc/apt/sources.list.d/caddy-stable.list
sudo apt update
sudo apt install caddy -y
Caddyfile Configuration:
Create or edit the /etc/caddy/Caddyfile file:
# /etc/caddy/Caddyfile
yourdomain.com {
    reverse_proxy 127.0.0.1:19999
    # Optional: basic authentication
    # basicauth {
    #     username your_username
    #     password your_hashed_password # Use caddy hash-password to generate
    # }
}
Replace yourdomain.com with your actual domain name that points to your VPS IP.
If you want to add basic authentication, uncomment the basicauth lines and generate a password hash:
caddy hash-password --plaintext your_password
# Copy the generated hash and paste it into the Caddyfile.
Firewall Configuration for Caddy:
Allow HTTP (port 80) and HTTPS (port 443) through UFW:
sudo ufw allow http
sudo ufw allow https
sudo ufw reload
Restarting Caddy:
sudo systemctl reload caddy
sudo systemctl enable caddy
Now you can access Netdata at https://yourdomain.com. Caddy will automatically obtain and renew the SSL certificate from Let's Encrypt.
4. Verifying Operation
Make sure everything is working as expected:
- Check Netdata service:
sudo systemctl status netdata
bind to = 127.0.0.1 is configured):
curl http://127.0.0.1:19999
You should receive the HTML code of the Netdata page.
curl -I https://yourdomain.com
You should see HTTP/2 200 OK and headers indicating a successful connection.
/etc/netdata/health.d/ to a very low value so that it triggers immediately (e.g., change the RAM usage threshold to 1%). After checking, revert the value.Backups and Maintenance
Although Netdata primarily stores data in RAM and is relatively "stateless," it's important to back up its configuration files and, potentially, custom plugins. Real-time monitoring data is usually not backed up, as it is ephemeral and can be restored after a restart.
1. What to Back Up
Key elements that should be regularly backed up:
- Netdata Configuration Files: The
/etc/netdata/directory contains all settings, includingnetdata.conf, alert settingshealth_alarm_notify.conf, and custom rules inhealth.d/, as well as plugin configurations inconf.d/. - Custom Plugins: If you have created your own Netdata plugins, they might be located in
/usr/libexec/netdata/plugins.d/or/opt/netdata/usr/libexec/netdata/plugins.d/. - Reverse Proxy Configuration: For example,
/etc/caddy/Caddyfile. - Firewall Configuration: UFW rules can be saved with the command
sudo ufw status verboseor by backing up files in/etc/ufw/.
2. Simple Auto-Backup Script
Let's create a simple script that will archive important files and save them to a specified directory.
# Create a directory for backups
sudo mkdir -p /var/backups/netdata_configs

# Create the backup script
sudo nano /usr/local/bin/backup_netdata.sh
Insert the following content into the backup_netdata.sh file:
#!/bin/bash

# Directory for storing backups
BACKUP_DIR="/var/backups/netdata_configs"
# Backup file name with timestamp
TIMESTAMP=$(date +%Y%m%d%H%M%S)
BACKUP_FILE="$BACKUP_DIR/netdata_config_backup_$TIMESTAMP.tar.gz"

# Directories and files to back up
CONFIG_DIRS="/etc/netdata /etc/caddy /etc/ufw"
CUSTOM_PLUGINS="/usr/libexec/netdata/plugins.d" # Check where your custom plugins are located

# Create the archive
tar -czf "$BACKUP_FILE" $CONFIG_DIRS $CUSTOM_PLUGINS 2>/dev/null

# Delete old backups (keep the last 7 days)
find "$BACKUP_DIR" -name "netdata_config_backup_*.tar.gz" -mtime +7 -delete

echo "Netdata configuration backup created: $BACKUP_FILE"
Make the script executable:
sudo chmod +x /usr/local/bin/backup_netdata.sh
3. Configuring Cron for Automatic Backups
Add the script to the Cron scheduler so that it runs daily.
sudo crontab -e
Add the following line to the end of the file to make the script run every day at 03:00 AM:
0 3 * * * /usr/local/bin/backup_netdata.sh >> /var/log/netdata_backup.log 2>&1
This command will run the script and redirect its output (including errors) to the /var/log/netdata_backup.log file.
4. Where to Store Backups
Storing backups on the same server you are backing up is unsafe. In case of a VPS failure, you will lose both the server and the backups. It is recommended to use external storage:
- Cloud S3-compatible storage: Services like Amazon S3, MinIO, Wasabi, Backblaze B2 offer reliable and inexpensive storage. Use utilities such as
s3cmd,rclone, orresticto synchronize backups. - Separate VPS: You can set up a second, small VPS to which you will synchronize backups via
rsyncover SSH. - Local storage (for a home server): External hard drive or Network Attached Storage (NAS).
Example of S3 integration using rclone:
# Install rclone
curl https://rclone.org/install.sh | sudo bash

# Configure rclone (will require interactive S3 credential input)
rclone config

# Add to backup_netdata.sh script after archive creation:
# rclone copy "$BACKUP_FILE" "my_s3_remote:netdata-backups/"
5. Updates
Regular updates are important for security and new features.
- Netdata Update: Netdata provides its own script for updating. It downloads the latest version and recompiles Netdata.
sudo /opt/netdata/usr/sbin/netdata-updater.sh
It is recommended to run it once a month or after significant releases.
sudo apt update && sudo apt upgrade -y
For important servers, it's better to plan "maintenance windows" for updates to minimize the risk of downtime, although for Netdata this is rarely an issue.
Troubleshooting + FAQ
Netdata is not starting or is inaccessible via IP:19999. What should I do?
First, check the status of the Netdata service: sudo systemctl status netdata. If it's not active, check the logs: journalctl -u netdata --since "1 hour ago". Ensure that port 19999 is not occupied by another process (sudo lsof -i :19999) and that the firewall (UFW) allows incoming connections to this port: sudo ufw status. If you have configured Netdata to listen only on 127.0.0.1, then direct access via IP:19999 from outside will not be possible – use a reverse proxy.
How to add custom metrics to Netdata?
Netdata is very flexible in adding custom metrics. You can use Python plugins, bash scripts, or send data directly via the Netdata API. For simple cases, it's enough to create an executable script in the /etc/netdata/charts.d/ directory (for bash) or /etc/netdata/python.d/ (for Python) that outputs data in a specific format. Netdata will automatically detect and start collecting these metrics.
Alerts are not arriving. Where should I look for the problem?
Check the /etc/netdata/health/health_alarm_notify.conf file: ensure that SEND_EMAIL="YES" (or SEND_TELEGRAM="YES") and all necessary variables (addresses, tokens) are correctly specified. Check Netdata logs for errors related to sending alerts: journalctl -u netdata. If you are using email, ensure that your MTA (e.g., Postfix) is correctly configured and capable of sending emails (check Postfix logs: tail -f /var/log/mail.log).
Netdata consumes too many resources. How to optimize?
Netdata is usually very lightweight, but when monitoring hundreds of services or storing history for a long time, its consumption can increase. In /etc/netdata/netdata.conf, you can reduce the history value (number of seconds data is stored in RAM). You can also disable unnecessary plugins in /etc/netdata/conf.d/ by creating a enabled: no. For example, to disable Docker monitoring, create /etc/netdata/conf.d/go.d/docker.conf with enabled: no.
What is the minimum suitable VPS configuration?
For Netdata itself, without considering the main workload, 1 vCPU, 512 MB RAM, and 10 GB SSD are sufficient. However, since Netdata usually monitors other services, it is recommended to use a VPS with 2-4 vCPUs, 4-8 GB RAM, and 100-200 GB SSD (NVMe preferred) for stable operation of both Netdata and your main application (e.g., GitLab or Bitcoin nodes).
What to choose — VPS or dedicated for this task?
For most tasks, such as running GitLab, Mattermost, a Minecraft server, or Bitcoin/Ethereum nodes, a powerful VPS will be sufficient and more economical. Dedicated servers should be considered if you require absolute performance without virtualization overhead, huge amounts of RAM (over 64 GB), very high disk subsystem performance (e.g., NVMe RAID for databases with extreme loads), or specific hardware not available on a VPS.
How to update Netdata to the latest version?
To update Netdata, use the official update script that was installed with Netdata. Execute the command: sudo /opt/netdata/usr/sbin/netdata-updater.sh. The script will automatically download and compile the latest stable version of Netdata, and then restart the service.
Is it possible to monitor multiple servers with a single Netdata instance?
Yes, Netdata supports monitoring multiple servers. You can use Netdata Cloud for centralized management and viewing dashboards from all your servers. Alternatively, you can configure a "parent-child" mode, where several child Netdata instances send their metrics to a single parent Netdata installation for aggregation and visualization. This will require additional configuration in netdata.conf on each server.
Conclusions and Next Steps
Congratulations! You have successfully installed and configured Netdata on your VPS, providing yourself with a powerful tool for real-time resource monitoring with automatic alerts. Now you have full transparency into your server's operation, allowing you to quickly react to problems and maintain the stability of your services.
Next steps to further improve your monitoring and server operations:
- Explore advanced Netdata features: Dive into the Netdata documentation to discover capabilities for creating custom dashboards, using machine learning for anomaly detection, and integrating with other systems.
- Integrate Netdata Cloud: If you have multiple servers, consider connecting them to Netdata Cloud for centralized management, metric aggregation, and more convenient dashboard viewing from a single point.
- Optimize based on data: Use the metrics collected by Netdata to analyze your application's performance, identify bottlenecks, and make informed decisions about optimizing server configuration or application code.
- Expand monitoring: Configure Netdata to monitor specific services, such as databases (PostgreSQL, MySQL), web servers (Nginx, Apache), Docker containers, message queues, and much more, using built-in and custom plugins.