Installing Mealie on a VPS: Organizing and Managing Your Recipe Collection
TL;DR
In this detailed guide, we will step-by-step set up Mealie — a modern self-hosted recipe management platform — on your Virtual Private Server (VPS). You will learn how to prepare the server, install Docker, deploy Mealie using Docker Compose, configure secure access via HTTPS using Caddy, and implement a backup strategy to keep your recipe collection always under control.
- We will set up Mealie 2.x (current version as of 2026) on Ubuntu 24.04 LTS.
- We will use Docker and Docker Compose for easy application deployment and management.
- We will ensure secure access via HTTPS with automatic Let's Encrypt certificate acquisition using Caddy.
- We will develop a simple but effective backup strategy for Mealie data.
- We will cover the minimal VPS requirements and basic server preparation in detail.
- We will provide practical commands and configuration file examples, ready for use.
What we are setting up and why
Mealie is a modern self-hosted platform for recipe management, designed for those who want to organize their culinary collection, plan meals, and generate shopping lists. It provides an intuitive web interface, the ability to import recipes from various websites, as well as functions for sharing and commenting. In an environment with a constantly growing number of culinary websites and recipe sources, Mealie becomes an indispensable tool for centralized storage and convenient access to your favorite dishes.
Ultimately, by following this tutorial, you will get a fully functional, secure, and easily maintainable Mealie instance, accessible via your own domain name from any device. This will allow you to forever forget about scattered bookmarks, screenshots, and recipe notes, and will also simplify weekly menu planning and grocery shopping.
There are various approaches to recipe management. You can use cloud services such as Paprika, AnyList, or BigOven, which offer ease of use without the need for server setup. However, they usually require a subscription and store your data on third-party servers, which can raise privacy concerns. Alternatives include desktop applications or even simple text files.
Choosing a self-hosted solution on a VPS, such as Mealie, is justified by several key advantages. First, it provides full control over your data and its privacy. You decide where and how your recipes are stored. Second, self-hosted solutions often offer greater flexibility in configuration and integration with other home services. Third, it is cost-effective in the long run, as you only pay for the VPS, not a monthly subscription. Finally, for developers and technical enthusiasts, it's an excellent opportunity to expand their skills in server administration and application deployment.
What VPS configuration is needed for this task
For installing Mealie on a VPS, resource requirements are quite modest, especially if you plan to use it for personal purposes or a small team. Mealie can run with a basic configuration, but for comfortable operation and scalability, a small reserve is recommended.
Minimum requirements (for 1-5 users):
- CPU: 1 core (x86-64 architecture). Modern VPS processors are powerful enough to handle Mealie requests.
- RAM: 1 GB. This will be sufficient for the operating system, Mealie Docker containers, and Caddy. If you plan to use PostgreSQL instead of SQLite, a little more might be needed.
- Disk: 20-30 GB SSD. Mealie stores the database (SQLite by default) and uploaded images. SSD will significantly speed up I/O operations.
- Network: 100 Mbps port with unlimited traffic (or sufficient volume for your usage). Mealie is not a high-load service, so network bandwidth requirements are minimal.
- Operating System: Ubuntu 24.04 LTS (or any other modern Linux distribution).
Recommended VPS plan for the task (for 5-20 users or with a reserve):
For more comfortable operation, considering future updates and the possibility of running additional services on the same VPS, the following configuration is recommended:
- CPU: 2 cores.
- RAM: 2 GB.
- Disk: 50 GB SSD.
- Network: 1 Gbps port, preferably with unlimited traffic.
Such a VPS with the specified characteristics will ensure stable Mealie operation and allow you not to worry about resource shortages in the near future. When choosing a provider, pay attention to the possibility of flexible resource scaling.
When a dedicated server is needed, not a VPS:
For Mealie, a dedicated server is usually not required. It only makes sense to consider it in exceptional cases:
- If you plan to serve hundreds or thousands of users (which is unlikely for Mealie).
- If you are already using a dedicated server for other high-load services and want to host Mealie alongside them.
- If you have very specific hardware or security requirements that cannot be met on a VPS.
For the vast majority of Mealie users, even with active use and a large recipe collection, a VPS will be more than sufficient and cost-effective.
Location: what it affects
The choice of VPS location affects several factors:
- Latency: The closer the server is to your primary users, the lower the latency and faster the Mealie web interface response. For personal use, choose a location close to you.
- Legislation: Some jurisdictions may have stricter data storage laws. Ensure that the chosen location complies with your privacy requirements.
- Cost: VPS prices may vary slightly depending on the region.
- Service availability: Some providers offer different service packages in different data centers.
For Mealie, there are no critical location requirements, unless you plan to use it in a very geographically distributed team. In most cases, it is sufficient to choose a location that provides the best ping for you and your primary users.
Server Preparation
After you have rented a VPS and gained access, you need to perform basic setup to improve security and convenience for further work. We will assume you are using Ubuntu 24.04 LTS (Lunar Lobster), which will be current and supported until 2029.
1. Connecting to the server via SSH
Use an SSH client to connect to your server. Replace your_username with the username provided by your provider (often root or ubuntu), and your_vps_ip with your VPS's IP address.
ssh your_username@your_vps_ip
2. System Update
First, always update packages to their latest versions.
sudo apt update && sudo apt upgrade -y # Update package list and install available updates
3. Creating a new user with sudo privileges (if you are working as root)
Working as the root account is insecure. Create a new user and grant them sudo privileges.
sudo adduser newuser # Create a new user
sudo usermod -aG sudo newuser # Add the user to the sudo group
Then, log out of the current root session and log in as the new user.
exit # Exit root session
ssh newuser@your_vps_ip # Log in as the new user
4. Configuring SSH keys (recommended)
For increased security and convenience, it is recommended to use SSH keys instead of passwords. If you don't have a key pair yet, generate them on your local machine:
ssh-keygen -t rsa -b 4096 # Generate a new SSH key on the local machine
Then copy the public key to your VPS:
ssh-copy-id newuser@your_vps_ip # Copy the public key to the server
After successfully configuring SSH keys, you can disable password authentication in the /etc/ssh/sshd_config file for increased security. Find the lines PasswordAuthentication yes and PermitRootLogin yes and change them to no.
sudo nano /etc/ssh/sshd_config # Open the SSH server configuration file
Change:
#PasswordAuthentication yes
PasswordAuthentication no
#PermitRootLogin yes
PermitRootLogin no
Save the file (Ctrl+O, Enter) and exit (Ctrl+X). Then restart the SSH service:
sudo systemctl restart sshd # Restart SSH service to apply changes
Important: Make sure you can log in with an SSH key before disabling password authentication!
5. Firewall Configuration (UFW)
UFW (Uncomplicated Firewall) is a convenient tool for configuring firewall rules. Allow SSH and HTTP/HTTPS traffic.
sudo ufw allow ssh # Allow SSH traffic (port 22)
sudo ufw allow http # Allow HTTP traffic (port 80)
sudo ufw allow https # Allow HTTPS traffic (port 443)
sudo ufw enable # Enable the firewall
sudo ufw status # Check firewall status
6. Installing Fail2Ban
Fail2Ban helps protect against brute-force attacks by blocking IP addresses from which unsuccessful login attempts are made.
sudo apt install fail2ban -y # Install Fail2Ban
sudo systemctl enable fail2ban # Enable Fail2Ban autostart on system boot
sudo systemctl start fail2ban # Start the Fail2Ban service
Fail2Ban protects SSH by default. Additional settings can be made in /etc/fail2ban/jail.conf or, preferably, in /etc/fail2ban/jail.local.
Now your server is ready for Mealie installation.
Software Installation — Step-by-Step
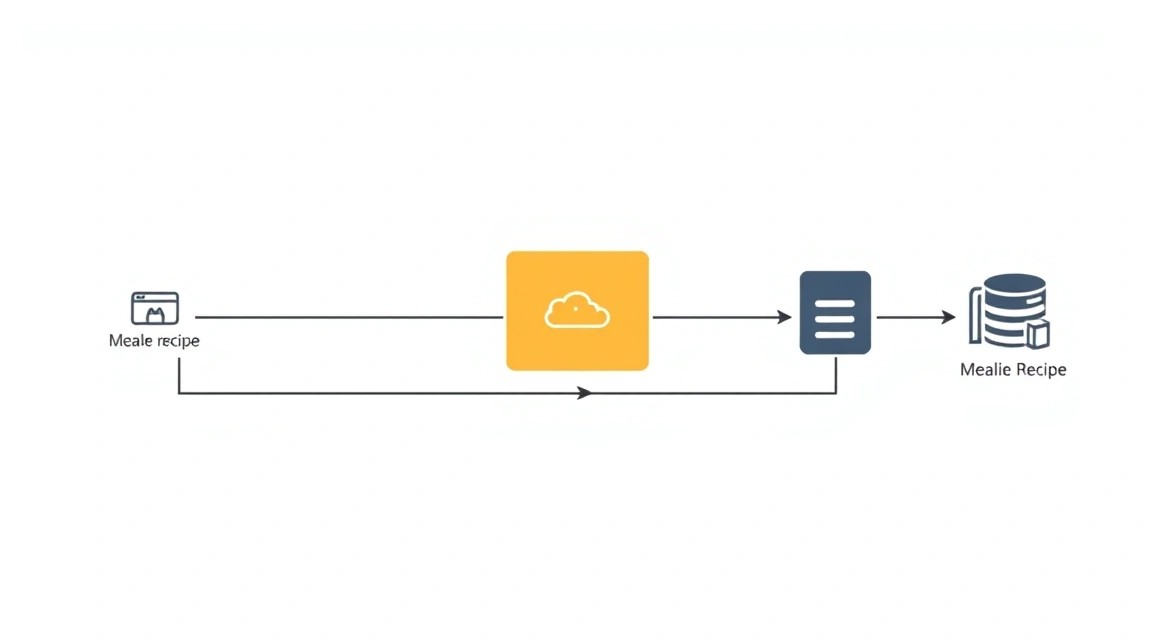
Mealie is best deployed using Docker and Docker Compose, which provides application isolation, simplifies dependency management, and facilitates updates. We will use current versions of Docker Engine and Docker Compose, targeting 2026.
1. Install Docker Engine
Remove old Docker versions, if any:
for pkg in docker.io docker-doc docker-compose docker-ce docker-ce-cli containerd.io docker-buildx-plugin docker-compose-plugin; do sudo apt remove $pkg; done # Remove all old Docker packages
Install necessary packages to install Docker over HTTPS:
sudo apt update # Update package list
sudo apt install ca-certificates curl gnupg -y # Install necessary utilities
Add the official Docker GPG key:
sudo install -m 0755 -d /etc/apt/keyrings # Create directory for GPG keys
curl -fsSL https://download.docker.com/linux/ubuntu/gpg | sudo gpg --dearmor -o /etc/apt/keyrings/docker.gpg # Download and save Docker GPG key
sudo chmod a+r /etc/apt/keyrings/docker.gpg # Set key permissions
Add the Docker repository to APT sources:
echo \
  "deb [arch="$(dpkg --print-architecture)" signed-by=/etc/apt/keyrings/docker.gpg] https://download.docker.com/linux/ubuntu \
  "$(. /etc/os-release && echo "$VERSION_CODENAME")" stable" | \
  sudo tee /etc/apt/sources.list.d/docker.list > /dev/null # Add Docker repository
Install Docker Engine (version 25.x or newer, current for 2026):
sudo apt update # Update package list considering the new repository
sudo apt install docker-ce docker-ce-cli containerd.io docker-buildx-plugin docker-compose-plugin -y # Install Docker Engine and plugins
Add your user to the docker group to avoid using sudo for every Docker command:
sudo usermod -aG docker $USER # Add current user to docker group
newgrp docker # Apply changes for the current session (or reconnect via SSH)
Verify Docker installation:
docker run hello-world # Run a test container to verify Docker installation
If you see the message "Hello from Docker!", Docker is successfully installed.
2. Prepare Directory for Mealie
Create a directory where Mealie and Docker Compose configuration files will be stored:
mkdir -p ~/mealie # Create directory for Mealie in the user's home folder
cd ~/mealie # Navigate to the created directory
3. Download Docker Compose Configuration for Mealie
Mealie provides official Docker Compose files. We will download them directly.
As of 2026, Mealie is actively developed, and we will use the current version 2.x, which offers improved architecture and features. If you wish to use an older version, please refer to the Mealie documentation.
curl -o docker-compose.yml https://raw.githubusercontent.com/mealie-recipes/mealie/v2.0/docker-compose.yml # Download the current docker-compose.yml for Mealie 2.x
curl -o .env-example https://raw.githubusercontent.com/mealie-recipes/mealie/v2.0/.env-example # Download example .env file
cp .env-example .env # Copy example to the actual .env file
4. Configure the .env file
The .env file contains environment variables for Mealie and Docker Compose. Open it for editing:
nano .env # Open .env file for editing
You need to configure the following parameters:
TZ: Set your timezone, for example,Europe/Moscow.PUIDandPGID: User and group IDs under which the containers will run. This ensures correct file permissions. You can obtain them using the commandid $USER.APP_HOST: Set your server's IP address or domain name if you have already configured DNS.DB_TYPE: Defaults tosqlite, which is suitable for most small installations. If you need a more powerful database (e.g., PostgreSQL), change this parameter and configure the corresponding service indocker-compose.yml. For simplicity, we will keepsqlite.SECRET_KEY: Generate a long, random key. For example, you can useopenssl rand -hex 32.MEDIA_LOCATION: Directory for storing media files. Defaults to/app/data/media, but can be changed to something like/var/lib/mealie/mediaif you want to move data outside the container. In this case, we will use Docker volume mounting, so the path inside the container will remain default.
Example of a portion of the .env file after editing:
TZ=Europe/Moscow
PUID=1000 # Replace with your PUID
PGID=1000 # Replace with your PGID
APP_HOST=your.domain.com # Replace with your domain or IP
PORT=9000
DB_TYPE=sqlite
SECRET_KEY=YOUR_RANDOM_SECRET_KEY_64_CHARACTERS_LONG
MEDIA_LOCATION=/app/data/media
You can generate SECRET_KEY directly on the server:
openssl rand -hex 32 # Generates a 64-character hexadecimal key
Copy the generated key and paste it into the .env file.
5. Start Mealie with Docker Compose
After configuring the .env file, you can start Mealie:
docker compose up -d # Start Mealie containers in the background
This will download the necessary Docker images and start Mealie. The process may take a few minutes on the first run.
6. Check Container Status
Ensure all containers are running:
docker compose ps # Check the status of running containers
You should see Mealie containers in "running" status.
Mealie is now running and accessible on port 9000 of your VPS (http://your_vps_ip:9000). However, it is currently only accessible via HTTP and does not have a nice domain name. In the next section, we will configure HTTPS and a domain.
Configuration
After successfully starting Mealie with Docker Compose, the next step is to configure secure access via HTTPS using your domain name. We will use Caddy — a modern web server that automatically obtains and renews SSL/TLS certificates from Let's Encrypt.
1. DNS Configuration
Before configuring Caddy, ensure that your domain or subdomain (e.g., recipes.yourdomain.com) points to your VPS's IP address. To do this, create or modify an A-record in your domain registrar's DNS settings:
| Record Type | Name | Value | TTL |
|---|---|---|---|
| A | recipes (or @ if Mealie will be on the main domain) | YOUR_VPS_IP_ADDRESS | Automatic / 3600 |
Wait some time for DNS changes to propagate (this can take from a few minutes to several hours).
2. Install Caddy
We will run Caddy as a separate Docker container so it can act as a reverse proxy for Mealie.
Create a directory for Caddy's configuration:
mkdir -p ~/caddy/data ~/caddy/config # Create directories for Caddy data and configuration
Create a Caddyfile in the ~/caddy directory:
nano ~/caddy/Caddyfile # Open Caddyfile for editing
Paste the following configuration, replacing recipes.yourdomain.com with your domain:
recipes.yourdomain.com {
    # Enable gzip compression for faster loading
    encode gzip

    # Set security headers
    header {
        Strict-Transport-Security max-age=31536000;
        X-Frame-Options DENY
        X-Content-Type-Options nosniff
        X-XSS-Protection "1; mode=block"
        Referrer-Policy strict-origin-when-cross-origin
    }

    # Proxy all requests to the Mealie Docker container
    reverse_proxy mealie:9000 {
        # Add headers for correct WebSocket and HTTP/2 operation
        header_up Host {host}
        header_up X-Real-IP {remote_ip}
        header_up X-Forwarded-For {remote_ip}
        header_up X-Forwarded-Proto {scheme}
    }

    # Enable logging (optional)
    log {
        output file /var/log/caddy/access.log
    }
}
Save the file (Ctrl+O, Enter) and exit (Ctrl+X).
3. Add Caddy to Docker Compose
Now, let's edit the docker-compose.yml file to add the Caddy service. Open it:
nano ~/mealie/docker-compose.yml # Open docker-compose.yml
Add the following caddy block to the end of the file, at the same indentation level as mealie:
  caddy:
    image: caddy:2.7.6-alpine # Current Caddy version for 2026
    restart: unless-stopped
    ports:
      - "80:80" # HTTP for Let's Encrypt
      - "443:443" # HTTPS
    volumes:
      - ~/caddy/Caddyfile:/etc/caddy/Caddyfile # Mount our Caddyfile
      - ~/caddy/data:/data # For Let's Encrypt certificates
      - ~/caddy/config:/config # For Caddy configuration
      - ~/caddy/logs:/var/log/caddy # For Caddy logs
    environment:
      - PUID=${PUID}
      - PGID=${PGID}
    networks:
      - default # Connect to the same network as Mealie
    depends_on:
      - mealie # Caddy should start after Mealie
Ensure that mealie and caddy are in the same Docker network (by default, this is the network created by Docker Compose, named after the directory, e.g., mealie_default). In this case, networks: - default is sufficient.
Save changes to docker-compose.yml.
4. Start Caddy and Update Mealie
Restart Docker Compose so Caddy starts and Mealie reconnects to the new configuration:
cd ~/mealie # Ensure you are in the directory with docker-compose.yml
docker compose down # Stop all current containers
docker compose up -d # Start all containers (Mealie and Caddy)
Caddy will automatically request and install an SSL/TLS certificate for your domain. This may take a few seconds.
5. Verify Functionality
Open your domain (e.g., https://recipes.yourdomain.com) in a web browser. You should see the Mealie login page with an active HTTPS connection.
You can also check accessibility using curl:
curl -v https://recipes.yourdomain.com # Check accessibility and certificate
In the output, you should see information about the Let's Encrypt certificate and an HTTP 200 OK response code.
First Mealie Login: Upon first login, Mealie will prompt you to create an administrator account. Fill out the form, and you will gain access to the control panel.
Backups and Maintenance
Regular backups and timely maintenance are critically important for any self-hosted service. This ensures the safety of your data and the stable operation of Mealie.
1. What to Back Up
For Mealie, the main components that need to be backed up are:
- Database: If you are using SQLite (default), this is the
mealie.dbfile. If PostgreSQL, it's a database dump. This file or dump contains all your recipes, categories, users, and other structured information. - Media Files: Uploaded images, such as food photos, are stored in a separate directory. Make sure you back up this entire directory.
- Configuration Files: The
.envanddocker-compose.ymlfiles. They contain important settings and secrets necessary for service recovery. - Caddy Configuration: The
Caddyfileand thedata/configdirectories (for Let's Encrypt certificates).
2. Simple Auto-Backup Script
We will create a simple script that will back up the SQLite database and media files, as well as configuration files. Then we will configure it to run via cron.
Create a directory for backups on your VPS:
mkdir -p ~/backups/mealie # Create directory for Mealie backups
Create the script file backup_mealie.sh:
nano ~/backup_mealie.sh # Create backup script
Insert the following content:
#!/bin/bash

# Directory paths
MEALIE_DIR="/home/$USER/mealie"
CADDY_DIR="/home/$USER/caddy"
BACKUP_DIR="/home/$USER/backups/mealie"
TIMESTAMP=$(date +%Y%m%d%H%M%S)
BACKUP_FILE="$BACKUP_DIR/mealie_backup_$TIMESTAMP.tar.gz"

echo "Starting Mealie backup at $TIMESTAMP..."

# 1. Stop Mealie to ensure DB integrity (if SQLite is used)
# For Mealie 2.x with SQLite, stopping is usually not necessary, but can be done for assurance.
# If you are using PostgreSQL, it's better to create a dump via pg_dump without stopping Mealie.
# docker compose -f $MEALIE_DIR/docker-compose.yml stop mealie # Optional: stop mealie service

# 2. Copy SQLite database file
# Path to mealie.db file inside the container, if it's not moved to a separate volume
# If mealie.db is in a mounted volume, it will be accessible on the host.
# In our docker-compose.yml, Mealie 2.x uses a Named Volume 'mealie_data'.
# To get the path to the file on the host, you need to find the path to this volume.
# The easiest way is to dump from the container or copy the file if the volume is accessible.

# Get the path to the mealie_data volume on the host
MEALIE_VOLUME_PATH=$(docker volume inspect mealie_mealie_data --format '{{ .Mountpoint }}')

if [ -z "$MEALIE_VOLUME_PATH" ]; then
    echo "Error: Could not find mealie_data volume mountpoint. Exiting."
    exit 1
fi

echo "Backing up Mealie data from $MEALIE_VOLUME_PATH..."

# Create a temporary directory to collect files
TEMP_BACKUP_DIR=$(mktemp -d)

# Copy database (if SQLite)
cp "$MEALIE_VOLUME_PATH/mealie.db" "$TEMP_BACKUP_DIR/mealie.db"
echo "Copied mealie.db"

# Copy media files
cp -R "$MEALIE_VOLUME_PATH/media" "$TEMP_BACKUP_DIR/media"
echo "Copied media files"

# Copy Mealie configuration files
cp "$MEALIE_DIR/.env" "$TEMP_BACKUP_DIR/mealie_env"
cp "$MEALIE_DIR/docker-compose.yml" "$TEMP_BACKUP_DIR/mealie_docker-compose.yml"
echo "Copied Mealie config files"

# Copy Caddy configuration files
cp "$CADDY_DIR/Caddyfile" "$TEMP_BACKUP_DIR/caddy_Caddyfile"
# Caddy data and configs (certificates)
cp -R "$CADDY_DIR/data" "$TEMP_BACKUP_DIR/caddy_data"
cp -R "$CADDY_DIR/config" "$TEMP_BACKUP_DIR/caddy_config"
echo "Copied Caddy config and data"

# 3. Archive everything into one file
tar -czf "$BACKUP_FILE" -C "$TEMP_BACKUP_DIR" . # Archive the contents of the temporary directory
echo "Created backup archive: $BACKUP_FILE"

# 4. Delete temporary directory
rm -rf "$TEMP_BACKUP_DIR"
echo "Cleaned up temporary directory."

# 5. Start Mealie again (if stopped)
# docker compose -f $MEALIE_DIR/docker-compose.yml start mealie # Optional: start mealie service

# 6. Delete old backups (e.g., older than 7 days)
find "$BACKUP_DIR" -type f -name 'mealie_backup_*.tar.gz' -mtime +7 -delete # Delete backups older than 7 days
echo "Removed old backups."

echo "Mealie backup completed."
Make the script executable:
chmod +x ~/backup_mealie.sh # Make the script executable
3. Where to Store Backups
Storing backups on the same server as the main service is unsafe. In case of a VPS failure, you will lose both your data and your backups. It is recommended to use one of the following solutions:
- External S3-compatible storage: For example, Amazon S3, DigitalOcean Spaces, Backblaze B2. For this, you can use utilities like
rcloneors3cmdin your script. - Separate VPS: You can set up a second, cheaper VPS and synchronize backups there using
rsyncover SSH. - Local Storage: If you have a NAS or another server at home, you can configure
rsyncto copy backups there.
For example, if you want to copy backups to another server via SSH, add the following to the script after creating the archive:
# Copying backup to remote server
REMOTE_USER="backupuser"
REMOTE_HOST="your_backup_vps_ip"
REMOTE_PATH="/path/to/remote/mealie_backups"

rsync -avz "$BACKUP_FILE" "$REMOTE_USER@$REMOTE_HOST:$REMOTE_PATH" # Copy archive to remote server
echo "Backup copied to remote server."
Don't forget to configure SSH keys for passwordless access to the remote server.
4. Configuring Cron for Automatic Backup
Open the Cron table for the current user:
crontab -e # Open crontab for the current user
Add the following line to make the script run daily at 03:00 AM:
0 3 * * * /home/$USER/backup_mealie.sh > /dev/null 2>&1 # Run backup script daily at 03:00 AM
Save and exit. Now backups will be created automatically.
5. Updates: rolling vs maintenance window
- Mealie Updates: Since Mealie is deployed via Docker Compose, updates are very simple. You just need to pull new images and restart the containers.
It is recommended to perform these updates during a "maintenance window" when user activity is minimal, as the service will be temporarily unavailable. Check the official Mealie repository for critical changes or migration procedures before updating.cd ~/mealie docker compose pull # Download new image versions docker compose up -d # Recreate containers with new images - System Updates: Regularly update the operating system and installed packages:
This can be done weekly or monthly. After major kernel or system library updates, a server reboot (sudo apt update && sudo apt upgrade -y # Update system packagessudo reboot) may be required. Plan these reboots during a maintenance window as well. - Docker Updates: Docker Engine updates are also performed via
apt upgrade. After updating Docker Engine, it is recommended to restart all containers.
Maintain a change and version log for all components; this will help with troubleshooting.
Troubleshooting + FAQ
Mealie is not starting, containers are constantly restarting. What should I do?
This is a common issue. First, check the Mealie container logs. Navigate to the directory where docker-compose.yml is located (~/mealie) and run: docker compose logs mealie. Look for errors such as database issues, missing environment variables, file system errors, or incorrect permissions. Ensure that the .env file is correctly configured, especially SECRET_KEY and PUID/PGID.
I cannot access Mealie via HTTPS using my domain.
Check a few things: 1) Is the A-record in DNS correctly configured for your domain and does it point to your VPS's IP? Use dig your.domain.com or online tools. 2) Is Caddy working? Check Caddy logs: docker compose logs caddy. Look for errors during Let's Encrypt certificate acquisition (e.g., "certificate acquisition failed"). Ensure that ports 80 and 443 are open in UFW (sudo ufw status). Caddy might not be able to connect to Mealie; check the service name in the Caddyfile (it should be mealie:9000).
What is the minimum VPS configuration suitable for Mealie?
For Mealie, used by a single person or a small family, a VPS with a minimum of 1 CPU core, 1 GB RAM, and 20-30 GB SSD is sufficient. This will be enough for the operating system, Docker, and Mealie itself with SQLite. However, for more comfortable operation and future headroom, 2 CPU cores, 2 GB RAM, and 50 GB SSD are recommended.
What to choose — VPS or dedicated server for this task?
For Mealie, a VPS is almost always sufficient. Dedicated servers are overkill in terms of power and cost for such an application, unless you plan to serve a very large number of users (hundreds or thousands, which is atypical for Mealie) or if you already have a dedicated server for other high-load tasks and want to host Mealie on it. A VPS offers better flexibility and cost-effectiveness for most cases.
How to update Mealie to a new version?
To update Mealie running via Docker Compose, navigate to the ~/mealie directory. Then run docker compose pull to download new images. After that, run docker compose up -d to recreate the containers with the new images. Before updating, it is always recommended to review the official Mealie documentation on GitHub, as there may be critical changes or migration steps between major versions.
I forgot my Mealie administrator password. How do I reset it?
In Mealie 2.x, you can reset the administrator password using the command-line utility inside the container. First, find the name or ID of the running Mealie container: docker ps | grep mealie. Then execute the password reset command, replacing mealie-container-name with your container's name and new_password with your desired new password:
docker exec -it mealie-container-name python src/app/main.py users reset-password admin --new-password new_password
Ensure you use the correct container name and username (admin by default).
How to change the port Mealie runs on inside Docker?
By default, Mealie listens on port 9000. If you need to change this port, you can edit the docker-compose.yml file. Find the mealie service and change the port it listens on in the ports section or in the PORT environment variable in the .env file. If you change Mealie's internal port, you will also need to update your Caddy configuration (reverse_proxy mealie:NEW_PORT) to point to the new port.
Conclusions and Next Steps
Congratulations! You have successfully installed and configured Mealie on your VPS, ensuring secure access via HTTPS and implementing a backup strategy. You now have a powerful and flexible tool for managing your recipe collection, entirely under your control. This will not only organize your culinary notes but also provide valuable experience in server administration and application deployment using Docker.
As next steps, you might consider:
- Monitoring Setup: Integrate your VPS with monitoring systems like Prometheus + Grafana to track resource usage and Mealie performance.
- Performance Optimization: If your recipe collection grows significantly, consider migrating to PostgreSQL for the database, which can improve performance compared to SQLite.
- Integration with Other Services: Explore opportunities to integrate Mealie with other home services, such as task schedulers or smart assistants, to automate culinary processes.
- Enhanced Security: Add two-factor authentication for Mealie access, if available in future versions, or consider setting up a VPN for VPS access.