Встановлення та налаштування Plex Media Server на VPS: доступ до медіатеки з будь-якої точки
TL;DR
У цьому детальному посібнику ми налаштуємо Plex Media Server на віртуальному приватному сервері (VPS), що дозволить вам організувати та стрімити вашу особисту медіатеку (фільми, серіали, музику, фотографії) на будь-який пристрій з будь-якої точки світу. Ви отримаєте повний контроль над своїм медіаконтентом, забезпечите його безпеку та доступність, уникаючи обмежень та підписок сторонніх сервісів.
- Plex Media Server буде встановлено на актуальній версії Ubuntu Server 24.04 LTS.
- Ми налаштуємо безпечний доступ до сервера, включаючи SSH-ключі, фаєрвол та Fail2ban.
- Буде забезпечено захищений доступ до веб-інтерфейсу Plex через HTTPS за допомогою Caddy.
- Ви дізнаєтеся про вимоги до VPS, резервне копіювання та обслуговування Plex.
- Отримаєте готові до виконання команди та приклади конфігураційних файлів.
Що ми налаштовуємо і навіщо
Plex Media Server — це потужне програмне рішення, яке дозволяє вам створити власний стрімінговий сервіс для вашої особистої колекції медіафайлів. Уявіть, що у вас є величезна бібліотека фільмів, серіалів, музики та фотографій, що зберігається на вашому власному сервері. Plex організовує цю медіатеку, автоматично завантажуючи обкладинки, описи, рейтинги та метадані, а потім транслює її на будь-який ваш пристрій: смартфон, планшет, Smart TV, ігрову консоль або веб-браузер, де б ви не знаходилися. Це ваш особистий Netflix, повністю під вашим контролем.
У підсумку, після завершення цього посібника, ви отримаєте повністю функціонуючий Plex Media Server, доступний з будь-якої точки світу. Ваша медіатека буде красиво організована, легко доступна та надійно зберігатиметься на вашому VPS. Ви зможете ділитися доступом з друзями та родиною, контролювати якість потоку та керувати всією системою самостійно.
Існують різні підходи до керування медіаконтентом. З одного боку, є хмарні керовані сервіси, такі як Netflix, Spotify, YouTube Premium. Вони зручні, але обмежують вас своїм каталогом, вимагають щомісячної підписки та не дають повного контролю над даними. З іншого боку, є рішення для самостійного хостингу (self-hosted), такі як Plex, Jellyfin, Emby. Вибираючи self-hosted варіант на VPS, ви отримуєте наступні переваги:
- Повний контроль: Ви володієте своїми даними та вирішуєте, як вони зберігаються і хто до них має доступ.
- Економія: Для великої медіатеки одноразові витрати на VPS можуть виявитися нижчими, ніж постійні підписки на декілька стрімінгових сервісів.
- Конфіденційність: Ваші медіафайли не скануються та не аналізуються третіми сторонами.
- Доступність: Ваша медіатека доступна 24/7 з будь-якої точки світу за наявності інтернет-з'єднання.
- Гнучкість: Ви можете налаштувати Plex під свої потреби, інтегрувати його з іншими сервісами та розширювати функціональність.
Встановлення Plex на VPS особливо актуальне, якщо у вас немає стабільного домашнього інтернет-каналу з високою швидкістю віддачі, або ви не хочете тримати домашній комп'ютер увімкненим постійно. VPS забезпечує стабільне підключення, високу пропускну здатність та надійність, необхідні для безперебійного стрімінгу.
Який VPS-конфіг потрібен для цього завдання
Вибір відповідного VPS для Plex Media Server є критично важливим, оскільки він безпосередньо впливає на продуктивність стрімінгу, особливо під час транскодування. Транскодування — це процес перетворення медіафайлу у формат, сумісний з пристроєм відтворення, часто зі зміною роздільної здатності або бітрейту "на льоту".
Мінімальні вимоги для Plex Media Server (актуальні на 2026 рік):
- Процесор (CPU):
- Для прямого відтворення (без транскодування): 1-2 ядра, 2 ГГц. Більшість сучасних пристроїв підтримують H.264, тому часто транскодування не потрібне.
- Для одного потоку 1080p транскодування: Intel Core i3 (7-го покоління або новіший) або аналогічний AMD Ryzen, або 2-4 vCPU на VPS. Бажана наявність апаратного прискорення (Intel Quick Sync Video або NVENC/AMF).
- Для одного потоку 4K HDR транскодування: Intel Core i7 (7-го покоління або новіший) або потужний AMD Ryzen, або 4-6+ vCPU. Апаратне прискорення вкрай рекомендується.
- Оперативна пам'ять (RAM):
- Мінімум: 2 ГБ. Цього вистачить для базової роботи та одного-двох потоків без транскодування.
- Рекомендується: 4-8 ГБ. Дозволить комфортно працювати з кількома потоками та транскодуванням, а також для кешування метаданих.
- Для 4K та багатьох користувачів: 8 ГБ і більше.
- Дисковий простір:
- Для ОС та Plex-метаданих: 20-40 ГБ SSD. Метадані Plex (обкладинки, описи, бази даних) можуть займати значне місце, особливо для великих бібліотек (сотні гігабайт). SSD забезпечить швидкий доступ до них.
- Для медіафайлів: Тут немає універсальної відповіді. Медіафайли можуть зберігатися безпосередньо на VPS (якщо дозволяє обсяг), на підключеному блочному сховищі, у хмарному сховищі (наприклад, S3-сумісному) або на віддаленому NAS, підключеному через FUSE. Для значних бібліотек (терабайти даних) зберігання на самому VPS стає непрактичним і дорогим.
- Мережа:
- Пропускна здатність: 1 Гбіт/с. Це стандарт для більшості VPS і більш ніж достатньо для стрімінгу.
- Вихідний трафік: Чим більше, тим краще. Для 1080p потоку потрібно близько 8-12 Мбіт/с, для 4K — 25-50 Мбіт/с. Якщо у вас кілька користувачів, трафік буде сумуватися. Переконайтеся, що ваш тарифний план VPS включає достатній обсяг вихідного трафіку (наприклад, 2-5 ТБ на місяць).
Конкретний VPS-план для завдання (приклад):
Для комфортної роботи Plex Media Server, здатного обробляти кілька потоків 1080p (включаючи одне транскодування) та велику медіатеку, рекомендуємо наступний мінімальний набір характеристик:
- CPU: 4 vCPU (наприклад, AMD EPYC або Intel Xeon Gold), бажано з підтримкою апаратного прискорення (хоча на VPS це не завжди доступно напряму, провайдер може запропонувати варіанти).
- RAM: 8 ГБ.
- Диск: 100 ГБ NVMe SSD (для ОС та метаданих Plex). Медіафайли рекомендується зберігати на зовнішньому сховищі або підключених дисках.
- Мережа: Порт 1 Гбіт/с, 5 ТБ вихідного трафіку на місяць.
Ви можете орендувати VPS з такими характеристиками, переконавшись, що обраний провайдер пропонує стабільну продуктивність та достатній обсяг трафіку. Завжди звертайте увагу на тип процесора та доступність апаратного транскодування, якщо це критично для ваших завдань.
Коли потрібен dedicated, а не VPS
Dedicated сервер (виділений сервер) стає необхідним, коли:
- Ви плануєте обслуговувати велику кількість одночасних користувачів (10+).
- Вам потрібне стабільне 4K HDR транскодування для кількох потоків, що вимагає значно більшої обчислювальної потужності та часто спеціалізованого обладнання (GPU з NVENC/AMF).
- Ваша медіатека вимірюється десятками та сотнями терабайт, і ви хочете зберігати її безпосередньо на сервері, використовуючи RAID-масиви.
- Вам потрібен повний контроль над апаратним забезпеченням, включаючи можливість встановлення спеціалізованих відеокарт для транскодування.
Для більшості домашніх користувачів та невеликих команд VPS буде більш ніж достатньо.
Локація: на що впливає
Вибір локації VPS має значення для швидкості доступу:
- Затримка (latency): Чим ближче сервер до вас та ваших основних користувачів, тим нижча затримка. Низька затримка важлива для швидкого старту відтворення та навігації по інтерфейсу Plex.
- Швидкість з'єднання: Фізична близькість також впливає на максимальну швидкість передачі даних. Вибирайте датацентр, який географічно розташований ближче до більшості ваших глядачів.
- Гео-обмеження: У деяких регіонах можуть бути обмеження на доступ до певного контенту або сервісів, хоча це рідко стосується Plex.
Зазвичай рекомендується вибирати датацентр у вашій країні або в найближчій великій країні з хорошою мережевою інфраструктурою.
Підготовка сервера
Перш ніж встановлювати Plex, необхідно виконати базове налаштування безпеки та оновити операційну систему. Ми будемо використовувати Ubuntu Server 24.04 LTS як актуальну та стабільну версію на 2026 рік.
1. Підключення до сервера по SSH
Використовуйте SSH-клієнт для підключення до вашого VPS. Замініть your_vps_ip на IP-адресу вашого сервера.
ssh root@your_vps_ip
При першому підключенні вас можуть попросити підтвердити відбиток ключа сервера та ввести пароль root.
2. Оновлення системи
Завжди починайте з оновлення списку пакетів та встановлення всіх доступних оновлень. Це гарантує, що у вас будуть найсвіжіші версії системних утиліт та патчі безпеки.
sudo apt update && sudo apt upgrade -y
Якщо після оновлення ядра потрібне перезавантаження, виконайте його:
sudo reboot
Після перезавантаження перепідключіться по SSH.
3. Створення нового користувача з правами sudo
Працювати під користувачем root небезпечно. Створимо нового користувача та надамо йому права sudo.
sudo adduser plexuser # Створюємо нового користувача з ім'ям plexuser
sudo usermod -aG sudo plexuser # Додаємо користувача до групи sudo
Вийдіть із сесії root та увійдіть під новим користувачем:
exit
ssh plexuser@your_vps_ip
Тепер усі подальші команди, що вимагають привілеїв root, будуть виконуватися через sudo.
4. Налаштування SSH-ключів (рекомендується)
SSH-ключі забезпечують безпечніший спосіб автентифікації, ніж паролі. Якщо ви ще не використовуєте їх, згенеруйте пару ключів на локальній машині:
ssh-keygen -t rsa -b 4096 # На вашій локальній машині
Потім скопіюйте публічний ключ на сервер для користувача plexuser:
ssh-copy-id plexuser@your_vps_ip # На вашій локальній машині
Після цього ви зможете входити без пароля. Щоб підвищити безпеку, вимкніть вхід за паролем для SSH:
sudo nano /etc/ssh/sshd_config
Знайдіть рядки:
#PasswordAuthentication yes
#PermitRootLogin yes
Змініть їх на:
PasswordAuthentication no
PermitRootLogin no
Збережіть зміни (Ctrl+O, Enter, Ctrl+X) та перезапустіть SSH-сервіс:
sudo systemctl restart sshd
Обов'язково переконайтеся, що ви можете увійти за SSH-ключем, перш ніж вимикати вхід за паролем!
5. Налаштування фаєрволу (UFW)
UFW (Uncomplicated Firewall) — це зручна утиліта для керування фаєрволом Netfilter. Налаштуємо його, щоб дозволити лише необхідні порти.
sudo apt install ufw -y # Встановлюємо UFW
sudo ufw allow OpenSSH # Дозволяємо SSH (порт 22)
sudo ufw allow 32400/tcp # Порт Plex Media Server
sudo ufw allow 80/tcp # Для HTTP (пізніше для Caddy/Let's Encrypt)
sudo ufw allow 443/tcp # Для HTTPS (пізніше для Caddy/Let's Encrypt)
sudo ufw enable # Вмикаємо фаєрвол
sudo ufw status # Перевіряємо статус
Переконайтеся, що SSH (порт 22) дозволено, інакше ви втратите доступ до сервера.
6. Встановлення Fail2ban
Fail2ban сканує логи сервера на предмет підозрілої активності (наприклад, багаторазові невдалі спроби входу по SSH) та тимчасово блокує IP-адреси зловмисників.
sudo apt install fail2ban -y # Встановлюємо Fail2ban
sudo systemctl enable fail2ban # Вмикаємо автозапуск
sudo systemctl start fail2ban # Запускаємо сервіс
Fail2ban за замовчуванням вже захищає SSH. Ви можете налаштувати його додатково, скопіювавши конфігураційний файл:
sudo cp /etc/fail2ban/jail.conf /etc/fail2ban/jail.local
sudo nano /etc/fail2ban/jail.local
У файлі jail.local можна змінити bantime (час блокування) та findtime (період для виявлення спроб). Для більшості випадків налаштувань за замовчуванням достатньо.
Встановлення ПЗ — покроково
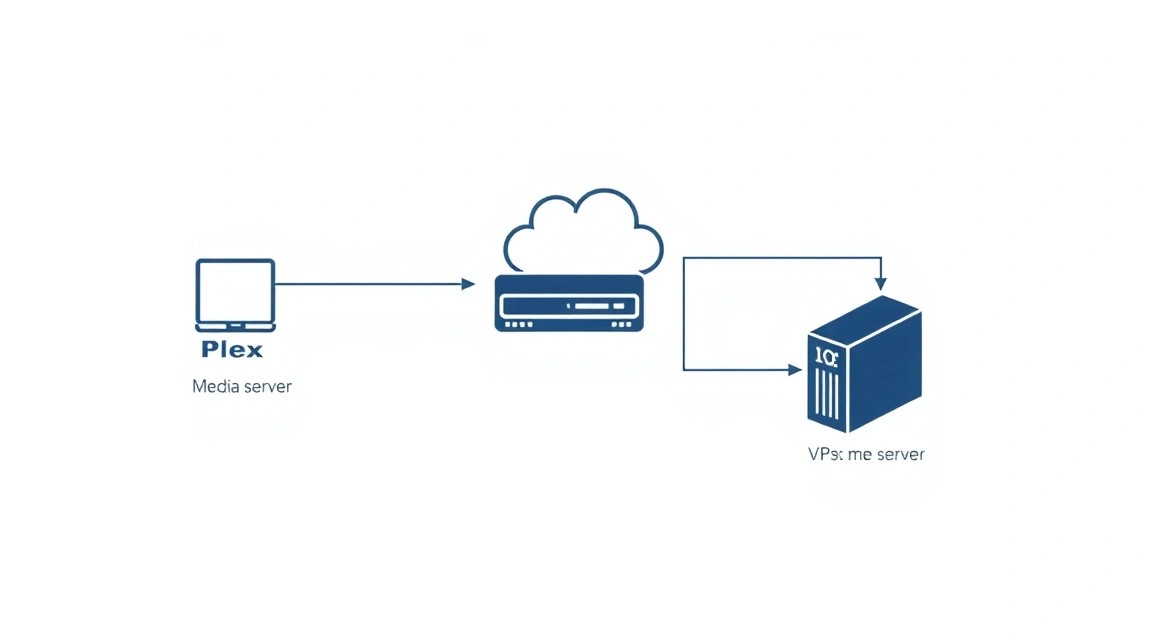
Тепер, коли сервер підготовлено, перейдемо до встановлення Plex Media Server. Ми будемо використовувати офіційний репозиторій Plex для Ubuntu, що забезпечить легке оновлення в майбутньому.
1. Додавання офіційного репозиторію Plex
Plex надає власний репозиторій для Debian/Ubuntu. Це гарантує, що ви завжди отримуватимете останні стабільні версії Plex Media Server.
# Встановлюємо необхідні пакети для роботи з репозиторіями HTTPS
sudo apt install -y apt-transport-https curl gnupg2

# Додаємо GPG-ключ репозиторію Plex
curl https://downloads.plex.tv/plex-media-server/pool/dists/public/Release.gpg | sudo gpg --dearmor -o /etc/apt/trusted.gpg.d/plex.gpg

# Додаємо репозиторій Plex до списку джерел apt
echo "deb [arch=amd64] https://downloads.plex.tv/plex-media-server/debian/ public main" | sudo tee /etc/apt/sources.list.d/plex.list
Ці команди спочатку встановлюють утиліти для роботи з HTTPS-репозиторіями, потім завантажують та додають публічний ключ Plex для перевірки автентичності пакетів, і нарешті, додають URL репозиторію Plex до списку джерел APT.
2. Оновлення списку пакетів та встановлення Plex Media Server
Після додавання репозиторію необхідно оновити список пакетів apt, щоб він дізнався про нові доступні пакети з репозиторію Plex, а потім встановити сам Plex Media Server.
# Оновлюємо список пакетів
sudo apt update

# Встановлюємо Plex Media Server
sudo apt install -y plexmediaserver
Plex Media Server буде встановлено та автоматично запущено як системна служба. Актуальна версія Plex Media Server на 2026 рік буде автоматично обрана з репозиторію (наприклад, Plex Media Server 1.40.x або новіша).
3. Перевірка статусу служби Plex
Переконаємося, що служба Plex Media Server успішно запущена та працює.
# Перевіряємо статус служби Plex Media Server
sudo systemctl status plexmediaserver
Вивід повинен показати active (running). Якщо служба не запущена, можна спробувати запустити її вручну:
# Запускаємо службу, якщо вона не активна
sudo systemctl start plexmediaserver

# Вмикаємо автозапуск при завантаженні системи (якщо ще не увімкнено)
sudo systemctl enable plexmediaserver
4. Налаштування прав доступу до медіафайлів (якщо вони вже є або будуть монтуватися)
Plex Media Server працює від імені користувача plex. Переконайтеся, що цей користувач має права на читання директорій, де зберігатимуться ваші медіафайли. Якщо ви плануєте зберігати медіафайли на окремих дисках або в хмарному сховищі, підключеному до VPS, це особливо важливо.
Приклад: якщо ваші медіафайли знаходяться в /mnt/media:
# Створюємо директорію для медіафайлів (якщо її немає)
sudo mkdir -p /mnt/media/movies
sudo mkdir -p /mnt/media/tvshows

# Встановлюємо власника для директорій медіафайлів на користувача plex
sudo chown -R plex:plex /mnt/media

# Встановлюємо права на читання та виконання для директорій
sudo chmod -R 755 /mnt/media
Ці команди гарантують, що користувач plex зможе читати вміст ваших медіадиректорій. Якщо ви будете додавати файли через SFTP або інші методи, переконайтеся, що вони також мають правильні права доступу.
5. Додаткові утиліти (опціонально, але корисно)
Для керування файлами та діагностики можуть стати в нагоді наступні утиліти:
# Встановлюємо mc (Midnight Commander) для зручного файлового менеджера
sudo apt install -y mc

# Встановлюємо htop для моніторингу ресурсів системи
sudo apt install -y htop

# Встановлюємо ffmpeg, якщо його не було встановлено як залежність (Plex зазвичай постачається зі своєю версією, але для інших завдань може знадобитися системний)
sudo apt install -y ffmpeg
Тепер Plex Media Server встановлено та готовий до початкового налаштування через веб-інтерфейс.
Конфігурація
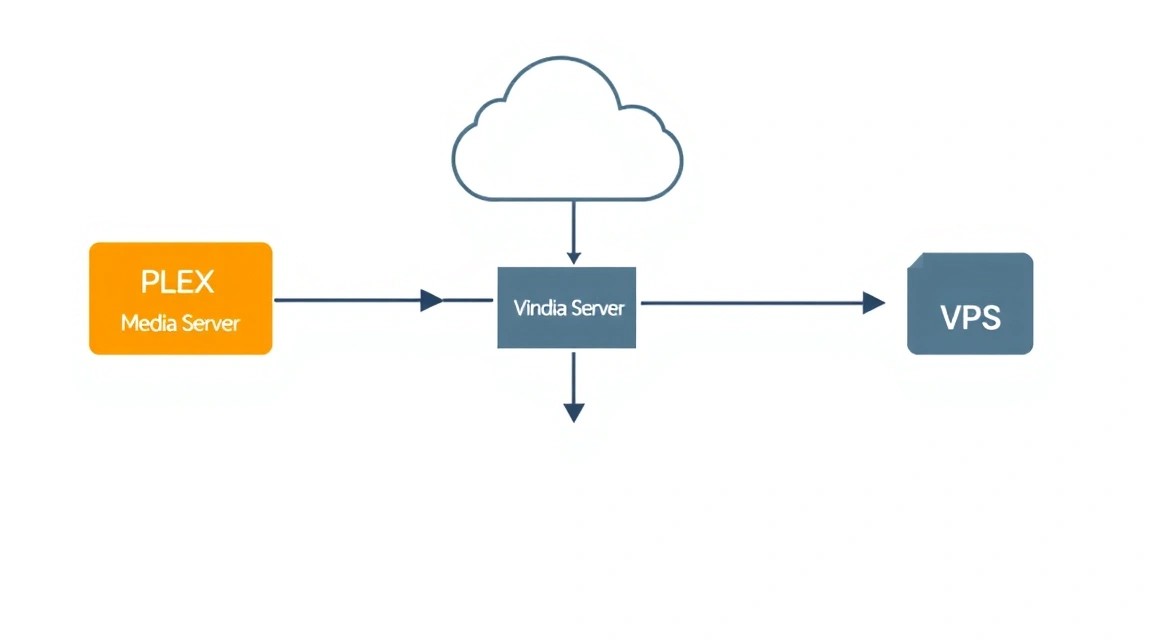
Після встановлення Plex Media Server необхідно виконати початкове налаштування через веб-інтерфейс, а також забезпечити безпечний доступ до нього через HTTPS. Ми будемо використовувати Caddy як простий і потужний зворотний проксі з автоматичним отриманням SSL-сертифікатів Let's Encrypt.
1. Доступ до веб-інтерфейсу Plex
На початковому етапі Plex доступний за IP-адресою вашого VPS та портом 32400. Відкрийте у браузері:
http://your_vps_ip:32400/web
Ви побачите сторінку входу Plex. Увійдіть за допомогою вашого облікового запису Plex (якщо у вас його немає, створіть на plex.tv). Після входу Plex виявить новий сервер.
- Дайте ім'я вашому серверу: Виберіть зрозуміле ім'я, наприклад, "MyPlexVPS".
- Встановіть прапорець "Дозволити доступ поза вашою домашньою мережею": Це критично для доступу до сервера з будь-якої точки світу.
- Натисніть "ГОТОВО".
Далі ви зможете додати медіатеки:
- Натисніть "ДОДАТИ БІБЛІОТЕКУ".
- Виберіть тип медіа (Фільми, Серіали, Музика тощо).
- Натисніть "ОГЛЯД МЕДІАПАПОК" та вкажіть шлях до ваших медіафайлів на VPS (наприклад,
/mnt/media/movies). - Натисніть "ДОДАТИ БІБЛІОТЕКУ".
Plex почне сканувати вказані папки, завантажувати метадані та організовувати вашу бібліотеку. Цей процес може зайняти деякий час залежно від розміру вашої колекції.
2. Налаштування доменного імені та DNS (попередній крок для HTTPS)
Для використання HTTPS та зручного доступу вам знадобиться доменне ім'я (наприклад, plex.yourdomain.com). Створіть A-запис у DNS-налаштуваннях вашого домену, що вказує на IP-адресу вашого VPS.
Приклад DNS-запису:
Тип: A
Ім'я: plex
Значення: your_vps_ip
TTL: Автоматично
Зачекайте деякий час, доки DNS-запис оновиться (зазвичай від кількох хвилин до кількох годин).
3. Встановлення та налаштування Caddy для HTTPS
Caddy — це потужний, простий у використанні веб-сервер, який автоматично отримує та оновлює SSL-сертифікати Let's Encrypt. Це ідеальне рішення для забезпечення HTTPS-доступу до Plex.
3.1. Встановлення Caddy
# Встановлюємо залежності
sudo apt install -y debian-keyring debian-archive-keyring apt-transport-https

# Завантажуємо GPG-ключ Caddy
curl -1sLf 'https://dl.cloudsmith.io/public/caddy/stable/gpg.key' | sudo gpg --dearmor -o /usr/share/keyrings/caddy-stable-archive-keyring.gpg

# Додаємо репозиторій Caddy
curl -1sLf 'https://dl.cloudsmith.io/public/caddy/stable/debian.deb.txt' | sudo tee /etc/apt/sources.list.d/caddy-stable.list

# Оновлюємо список пакетів та встановлюємо Caddy
sudo apt update
sudo apt install -y caddy
Caddy буде встановлений як системна служба та автоматично запуститься.
3.2. Конфігурація Caddyfile для Plex
Створимо або відредагуємо файл конфігурації Caddy (Caddyfile), щоб він проксіював запити до Plex Media Server.
sudo nano /etc/caddy/Caddyfile
Видаліть або закоментуйте існуючий вміст та додайте наступне, замінивши plex.yourdomain.com на ваше доменне ім'я:
plex.yourdomain.com {
    # Проксіюємо всі запити до Plex Media Server
    reverse_proxy localhost:32400

    # Додаткові заголовки, необхідні для Plex
    header_up X-Plex-Product "Plex Web"
    header_up X-Plex-Version "4.x" # Актуальна версія Plex Web на 2026
    header_up X-Plex-Client-Identifier "{http.request.header.X-Plex-Client-Identifier}"
    header_up X-Plex-Platform "Web"
    header_up X-Plex-Platform-Version "{http.request.header.X-Plex-Platform-Version}"
    header_up X-Plex-Device "Browser"
    header_up X-Plex-Device-Name "{http.request.header.X-Plex-Device-Name}"
    header_up X-Plex-Device-Screen-Resolution "{http.request.header.X-Plex-Device-Screen-Resolution}"
    header_up X-Plex-Token "{http.request.header.X-Plex-Token}"
    header_up X-Plex-DTS "1"

    # Вмикаємо стиснення, якщо потрібно
    # encode gzip zstd

    # Логування (опціонально)
    # log {
    #     output file /var/log/caddy/plex_access.log
    # }
}
Збережіть файл (Ctrl+O, Enter, Ctrl+X).
3.3. Перевірка та перезавантаження Caddy
Перевіримо синтаксис Caddyfile та перезавантажимо службу Caddy.
sudo caddy validate --config /etc/caddy/Caddyfile # Перевіряємо синтаксис
sudo systemctl reload caddy # Перезавантажуємо Caddy
Якщо валідація пройшла успішно, Caddy автоматично отримає SSL-сертифікат від Let's Encrypt та почне проксіювати запити. Тепер ви можете отримати доступ до Plex через https://plex.yourdomain.com.
4. Налаштування Plex для віддаленого доступу через Caddy
У веб-інтерфейсі Plex (доступному за https://plex.yourdomain.com/web):
- Перейдіть до Налаштування (Settings) -> Віддалений доступ (Remote Access).
- Переконайтеся, що віддалений доступ увімкнено. Якщо Plex повідомляє, що "Не вдалося повністю отримати доступ до вашого сервера ззовні", це нормально, оскільки ми використовуємо зворотний проксі.
- Натисніть "Показати додаткові налаштування" (Show Advanced).
- У полі "Користувацькі URL-адреси для доступу до сервера" (Custom server access URLs) додайте
https://plex.yourdomain.com. - У полі "Користувацький порт для віддаленого доступу" (Custom public port) залиште порожнім або вкажіть
443. - Збережіть зміни.
5. Перевірка працездатності
Відкрийте у браузері ваш домен:
https://plex.yourdomain.com
Ви повинні побачити веб-інтерфейс Plex, доступний за HTTPS, з дійсним SSL-сертифікатом. Перевірте, що медіафайли відтворюються, і ви можете отримати доступ до сервера з різних пристроїв та мереж.
Можна також перевірити доступність портів з вашого локального комп'ютера:
curl -v https://plex.yourdomain.com/web # Перевірка HTTPS-доступу
Якщо ви бачите успішну відповідь з HTML-кодом, значить, Caddy працює та проксіює запити до Plex.
Резервні копії та обслуговування
Регулярне резервне копіювання та своєчасне обслуговування сервера і Plex Media Server критично важливі для забезпечення стабільної роботи та збереження вашої медіатеки та налаштувань.
1. Що резервувати
Для Plex Media Server найважливішими є наступні дані:
- База даних Plex та метадані: Це включає всю інформацію про вашу медіатеку (обкладинки, описи, прогрес перегляду, налаштування користувачів), яка зберігається в директорії Plex. Це найцінніше, оскільки відновлення цієї інформації вручну дуже трудомістке.
- Файли конфігурації Plex: Налаштування сервера, плагіни тощо.
- Медіафайли: Якщо ваші медіафайли зберігаються безпосередньо на VPS, їх також необхідно резервувати. Однак, якщо у вас терабайти даних, це може бути непрактично для резервного копіювання на інший VPS або в хмару через вартість та час. Часто медіафайли зберігаються на зовнішніх сховищах або синхронізуються окремо.
Основна директорія Plex, яку потрібно резервувати, знаходиться за шляхом: /var/lib/plexmediaserver/Library/Application Support/Plex Media Server/.
2. Простий скрипт авторезервування (метадані Plex)
Створимо простий скрипт, який архівуватиме директорію з метаданими Plex та зберігатиме її в окреме місце.
# Створюємо директорію для резервних копій
sudo mkdir -p /var/backups/plex

# Створюємо скрипт резервного копіювання
sudo nano /usr/local/bin/backup_plex.sh
Додайте наступний вміст до файлу backup_plex.sh:
#!/bin/bash

# Директорія з даними Plex
PLEX_DIR="/var/lib/plexmediaserver/Library/Application Support/Plex Media Server"
# Директорія для зберігання резервних копій
BACKUP_DIR="/var/backups/plex"
# Ім'я файлу резервної копії з датою
DATE=$(date +%Y%m%d%H%M%S)
BACKUP_FILE="$BACKUP_DIR/plex_backup_$DATE.tar.gz"

echo "Зупиняємо Plex Media Server..."
sudo systemctl stop plexmediaserver

echo "Створюємо архів метаданих Plex..."
sudo tar -czf "$BACKUP_FILE" -C "$(dirname "$PLEX_DIR")" "$(basename "$PLEX_DIR")"

echo "Запускаємо Plex Media Server..."
sudo systemctl start plexmediaserver

echo "Видаляємо старі резервні копії (старші 7 днів)..."
sudo find "$BACKUP_DIR" -name "plex_backup_*.tar.gz" -mtime +7 -delete

echo "Резервне копіювання завершено: $BACKUP_FILE"
Зробіть скрипт виконуваним:
sudo chmod +x /usr/local/bin/backup_plex.sh
3. Налаштування Cron для автоматичного запуску резервного копіювання
Додамо скрипт до планувальника Cron, щоб він запускався автоматично, наприклад, щодня о 3 годині ночі.
sudo crontab -e
Додайте наступну строку в кінець файлу:
0 3 * * * /usr/local/bin/backup_plex.sh >> /var/log/plex_backup.log 2>&1
Цей запис запускатиме скрипт щодня о 03:00 та перенаправлятиме його вивід у лог-файл /var/log/plex_backup.log.
4. Куди зберігати резервні копії
Зберігати резервні копії на тому ж сервері, що й оригінальні дані, небезпечно. У разі збою VPS ви втратите і дані, і резервні копії. Рекомендується використовувати зовнішні сховища:
- Хмарне сховище (S3-сумісне): Дешево та надійно. Можна використовувати
rcloneдля автоматичного завантаження резервних копій до S3 (AWS S3, Backblaze B2, DigitalOcean Spaces тощо). - Окремий VPS: Якщо у вас є інший недорогий VPS, можна використовувати
rsyncабоscpдля копіювання резервних копій туди. - Мережеве сховище (NAS): Якщо ваш VPS може підключатися до вашого домашнього NAS через VPN або напряму, це хороший варіант.
Приклад використання rclone (після встановлення та налаштування rclone):
# Додайте до вашого скрипта backup_plex.sh після створення архіву
echo "Завантажуємо резервну копію до S3..."
rclone copy "$BACKUP_FILE" "mys3remote:plex-backups"
5. Оновлення: rolling vs maintenance window
Регулярні оновлення важливі для безпеки та отримання нових функцій.
- Оновлення ОС та пакетів:
Регулярно запускайте
sudo apt update && sudo apt upgrade -y. Для серверів, де критична стабільність, можна робити це у "вікно обслуговування" (maintenance window), коли навантаження на сервер мінімальне. Для Ubuntu LTS можна розглянути використанняunattended-upgradesдля автоматичного встановлення патчів безпеки.sudo apt install -y unattended-upgrades sudo dpkg-reconfigure --priority=low unattended-upgradesЦе налаштує автоматичне встановлення лише важливих оновлень безпеки.
- Оновлення Plex Media Server:
Оскільки ми встановили Plex з офіційного репозиторію, він оновлюватиметься разом з іншими системними пакетами:
sudo apt update
sudo apt upgrade -y plexmediaserver
Plex зазвичай справляється з оновленнями "на льоту" (rolling updates), але для великих оновлень або при виникненні проблем може знадобитися перезапуск служби.
sudo systemctl restart plexmediaserver
Завжди робіть резервну копію метаданих Plex перед великими оновленнями ОС або самого Plex.
Усунення несправностей + FAQ
Не можу отримати доступ до Plex через браузер за IP-адресою або доменом. Що робити?
Перш за все, перевірте, чи запущено Plex Media Server: sudo systemctl status plexmediaserver. Якщо ні, запустіть його: sudo systemctl start plexmediaserver. Переконайтеся, що фаєрвол (UFW) дозволяє порти 32400 (для прямого доступу до Plex), 80 і 443 (для Caddy/HTTPS): sudo ufw status. Якщо ви використовуєте Caddy, перевірте його статус: sudo systemctl status caddy. Переконайтеся, що DNS-запис для вашого домену вказує на правильну IP-адресу VPS.
Який VPS-конфіг мінімально підійде для Plex?
Для базової установки Plex з прямим відтворенням (без транскодування) та невеликою бібліотекою достатньо VPS з 2 vCPU, 4 ГБ RAM, 40 ГБ SSD та 1 Гбіт/с мережевим портом з 2-3 ТБ трафіку. Якщо ви плануєте транскодування 1080p для 1-2 потоків, знадобиться 4 vCPU та 8 ГБ RAM. Для 4K транскодування або багатьох користувачів рекомендується більш потужний виділений сервер.
Що вибрати — VPS чи dedicated для цього завдання?
Для більшості користувачів, які хочуть створити особистий медіасервер для себе та кількох друзів/сім'ї, VPS є оптимальним вибором. Він дешевший, простіший в управлінні та забезпечує достатню продуктивність. Виділений сервер (dedicated) потрібен, якщо ви плануєте обслуговувати велику кількість одночасних користувачів (10+), активно транскодувати кілька потоків 4K HDR, або вам потрібна максимальна продуктивність та можливість встановлення спеціалізованого апаратного забезпечення (наприклад, GPU для транскодування).
Проблеми з транскодуванням відео: відео гальмує або не запускається.
Це часто вказує на нестачу ресурсів CPU. Перевірте завантаження процесора на VPS під час відтворення: htop. Якщо CPU досягає 100%, ваш VPS не справляється з транскодуванням. Спробуйте вимкнути транскодування на клієнті Plex або знизити якість потоку. Переконайтеся, що ваш VPS має достатньо потужний процесор, як рекомендовано в розділі 4. Якщо на вашому VPS є апаратне прискорення (Intel Quick Sync Video), переконайтеся, що Plex його використовує, перевіривши налаштування транскодування у веб-інтерфейсі Plex (Налаштування -> Транскодер -> "Використовувати апаратне прискорення за наявності").
Як додати нові медіафайли до Plex?
Завантажте медіафайли на ваш VPS у ті директорії, які ви вже додали до бібліотек Plex (наприклад, /mnt/media/movies або /mnt/media/tvshows). Ви можете використовувати SFTP (за допомогою FileZilla або WinSCP) або rsync. Після завантаження перейдіть у веб-інтерфейс Plex, виберіть відповідну бібліотеку та натисніть "Оновити всі метадані" або "Сканувати файли бібліотеки", щоб Plex виявив нові файли.
Plex не бачить мої медіафайли, хоча вони завантажені на сервер.
Перевірте, чи правильно вказані шляхи до медіафайлів у налаштуваннях бібліотеки Plex. Переконайтеся, що користувач plex має права на читання та виконання для всіх директорій та файлів, що містять медіа. Виконайте sudo chown -R plex:plex /шлях/до/ваших/медіа та sudo chmod -R 755 /шлях/до/ваших/медіа. Також перевірте, чи відповідає структура папок та імена файлів рекомендаціям Plex для кращого сканування.
Як оновити Plex Media Server до останньої версії?
Оскільки ви встановили Plex з офіційного репозиторію, оновлення відбувається стандартними засобами APT: sudo apt update && sudo apt upgrade -y plexmediaserver. Після оновлення Plex Media Server автоматично перезапуститься. Рекомендується робити це регулярно для отримання нових функцій та виправлень безпеки.
Повільне завантаження або буферизація під час перегляду віддалено.
Це може бути пов'язано з низькою пропускною здатністю інтернету на стороні VPS (вихідний канал) або на стороні клієнта (вхідний канал). Перевірте швидкість інтернету на вашому VPS за допомогою speedtest-cli або аналогічного інструменту. Також перевірте налаштування якості стримінгу в клієнті Plex – спробуйте знизити бітрейт або роздільну здатність. Якщо проблема виникає лише при транскодуванні, можливо, VPS не справляється, як описано вище. Якщо ви використовуєте VPN або проксі, спробуйте відключити їх для діагностики.