
Instalación y configuración de Postfix, Dovecot y Roundcube en un VPS para su propio servidor de correo
TL;DR
En esta guía detallada, configuraremos paso a paso un servidor de correo completo basado en un VPS, utilizando Postfix para enviar y recibir correo, Dovecot para acceso IMAP/POP3 y Roundcube como una interfaz web conveniente. Aprenderá a instalar y configurar todos los componentes, garantizar la seguridad, configurar registros DNS para una máxima entregabilidad de los correos y mantener el servidor actualizado, controlando completamente su correspondencia.
- Control total sobre su correo sin depender de proveedores externos.
- Configuración de un servidor de correo seguro utilizando TLS/SSL, SPF, DKIM y DMARC.
- Instalación e integración de Postfix (SMTP), Dovecot (IMAP/POP3) y Roundcube (correo web).
- Garantía de entregabilidad de los correos y protección contra spam.
- Recomendaciones para la elección de un VPS, copia de seguridad y mantenimiento del sistema.
Qué configuramos y por qué
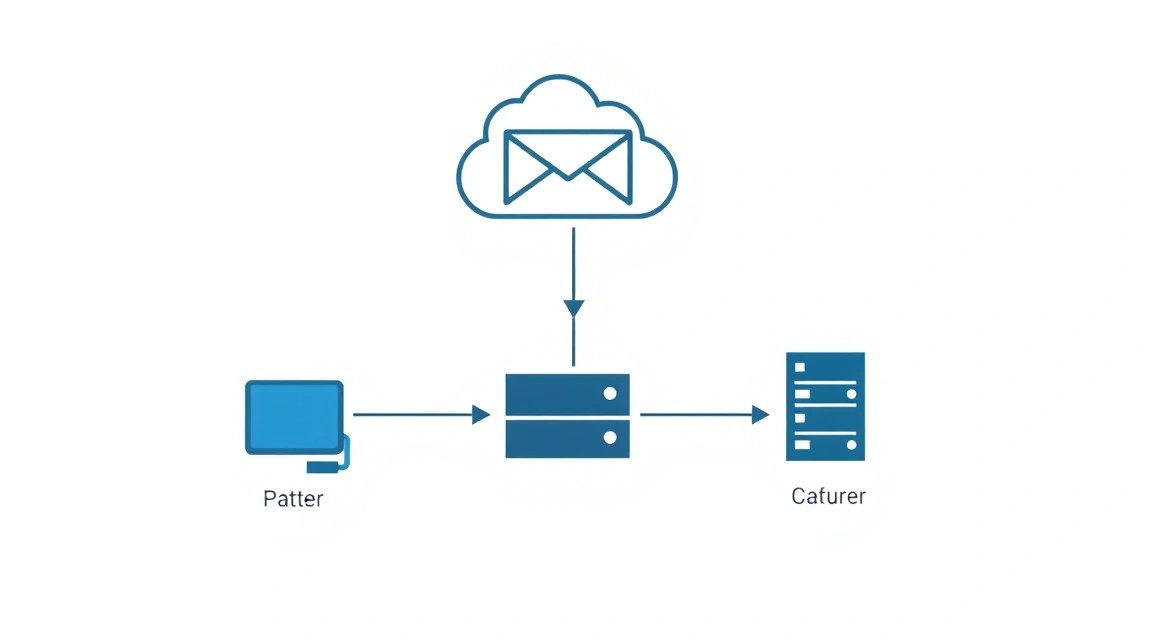
En el mundo moderno, el correo electrónico sigue siendo uno de los medios de comunicación más importantes. Aunque existen muchos servicios de correo gratuitos y de pago, como Gmail, Outlook o Yandex.Mail, tienen sus limitaciones: falta de control total sobre los datos, posible censura, dependencia de la política del proveedor y, a veces, flexibilidad insuficiente en la configuración. Configurar su propio servidor de correo en un VPS le permite tomar el control total de su correspondencia.
En esta guía, configuraremos un sistema de correo completo, que consta de tres componentes clave:
- Postfix: Es un agente de transferencia de correo (MTA) que será responsable de enviar y recibir correo electrónico a través del protocolo SMTP. Postfix es conocido por su seguridad, fiabilidad y rendimiento.
- Dovecot: Es un agente de entrega de correo (MDA) y un servidor IMAP/POP3. Dovecot permite a los clientes de correo (tanto de escritorio como móviles) acceder y gestionar sus buzones de correo. Soporta conexiones seguras (SSL/TLS).
- Roundcube: Es un cliente web de correo electrónico moderno que le proporcionará a usted y a sus usuarios una interfaz conveniente para trabajar con el correo directamente desde el navegador. Es fácil de usar, tiene una rica funcionalidad y se integra fácilmente con Postfix y Dovecot.
Al final, obtendrá un servidor de correo completamente funcional, seguro y escalable que podrá servir dominios y usuarios de su elección. Es una solución ideal para desarrolladores que necesitan su propio servicio de correo para proyectos, fundadores individuales de SaaS que valoran la independencia, o cualquier otro usuario que aprecie la privacidad y el control total sobre sus datos.
Alternativas: Cloud-Managed vs. Self-Hosted
Existen dos enfoques principales para la gestión del correo:
-
Cloud-Managed (servicios en la nube gestionados): Son soluciones como Google Workspace, Microsoft 365, Zoho Mail o Proton Mail.
- Ventajas: Facilidad de configuración (a menudo "llave en mano"), alta disponibilidad, actualizaciones y copias de seguridad automáticas, soporte profesional.
- Desventajas: Alto costo por usuario, falta de control total sobre los datos, dependencia de la política del proveedor, opciones de personalización limitadas.
-
Self-Hosted (servidor propio en un VPS): Configuración de un servidor de correo por cuenta propia en un VPS alquilado o un servidor dedicado.
- Ventajas: Control total sobre los datos y la configuración, alto grado de privacidad, economía de escala (especialmente para un gran número de usuarios), posibilidad de integración con otros de sus servicios.
- Desventajas: Requiere conocimientos técnicos y tiempo para la configuración/mantenimiento, la responsabilidad de la seguridad y las copias de seguridad recae en usted, posibles problemas con la entregabilidad de los correos si no se configura todo correctamente.
La elección de un self-hosted en un VPS se justifica si valora el control total, está dispuesto a invertir tiempo en la configuración y el mantenimiento, y desea obtener una solución lo más flexible y privada posible para sus necesidades.
Qué configuración de VPS se necesita para esta tarea
Los requisitos de un VPS para un servidor de correo pueden variar según la carga esperada (número de usuarios, volumen de tráfico). Sin embargo, para la mayoría de los proyectos personales y de equipos pequeños, se pueden considerar las siguientes características mínimas:
Requisitos mínimos
- CPU: 1 núcleo. Los procesadores modernos son lo suficientemente potentes para manejar el tráfico de correo.
- RAM: 2 GB. Postfix, Dovecot, Nginx, PHP-FPM y la base de datos (MariaDB) pueden consumir una cantidad significativa de memoria. 2 GB permitirán un funcionamiento cómodo.
- Disco: 50-80 GB SSD. El SSD acelerará significativamente las operaciones de entrada/salida, lo cual es crítico para trabajar con almacenamientos de correo y bases de datos. El tamaño del disco depende del número y tamaño de los buzones de correo, así como de la duración del almacenamiento de archivos.
- Red: 100 Mbps o 1 Gbps. La velocidad del canal es importante para la entrega y recepción rápida de correos, pero para un uso normal, 100 Mbps es suficiente.
- Sistema operativo: Debian 12 (Bookworm) o Ubuntu 24.04 LTS (Noble Numbat). Estas distribuciones están bien soportadas, tienen paquetes actualizados y una amplia documentación.
- Dirección IP dedicada: Obligatorio. Los servidores de correo no pueden funcionar con direcciones IP compartidas debido a problemas de reputación.
Plan de VPS recomendado para empezar
Para un funcionamiento cómodo de un servidor de correo con soporte para múltiples dominios y hasta 50 usuarios activos, se recomienda la siguiente configuración:
- CPU: 2 núcleos
- RAM: 4 GB
- Disco: 100-200 GB SSD
- Red: 1 Gbps
Esta configuración será suficiente para procesar correos, operar la interfaz web de Roundcube y mantener un alto rendimiento. Puede adquirir un VPS con las características indicadas, que proporcionará el rendimiento y la fiabilidad necesarios para su servidor de correo.
Cuándo se necesita un dedicado y no un VPS
Un servidor dedicado puede ser necesario si:
- Tiene un número muy grande de usuarios (cientos o miles).
- Planea almacenar enormes volúmenes de correo (terabytes).
- Necesita el máximo rendimiento y aislamiento de recursos que un VPS no ofrece.
- Se requieren configuraciones de hardware específicas no disponibles en un VPS.
Para la mayoría de las tareas de un servidor de correo, un VPS es la opción óptima en términos de relación precio/rendimiento.
Ubicación: qué afecta
La elección de la ubicación del VPS tiene varios aspectos importantes:
- Latencia: Cuanto más cerca esté el servidor de su audiencia principal (usuarios de correo), menor será la latencia al acceder a la interfaz web de Roundcube o al sincronizar los clientes de correo.
- Jurisdicción y legislación: Dependiendo del país donde se encuentre el servidor, se aplicarán las leyes locales sobre almacenamiento de datos y privacidad. Esto puede ser crítico para algunos proyectos.
- Costo: Los precios de los VPS pueden variar en diferentes países.
Para un servidor de correo, generalmente se recomienda elegir una ubicación que esté geográficamente más cerca de la mayoría de sus usuarios para garantizar una latencia mínima.
Preparación del servidor
Preparación del servidor
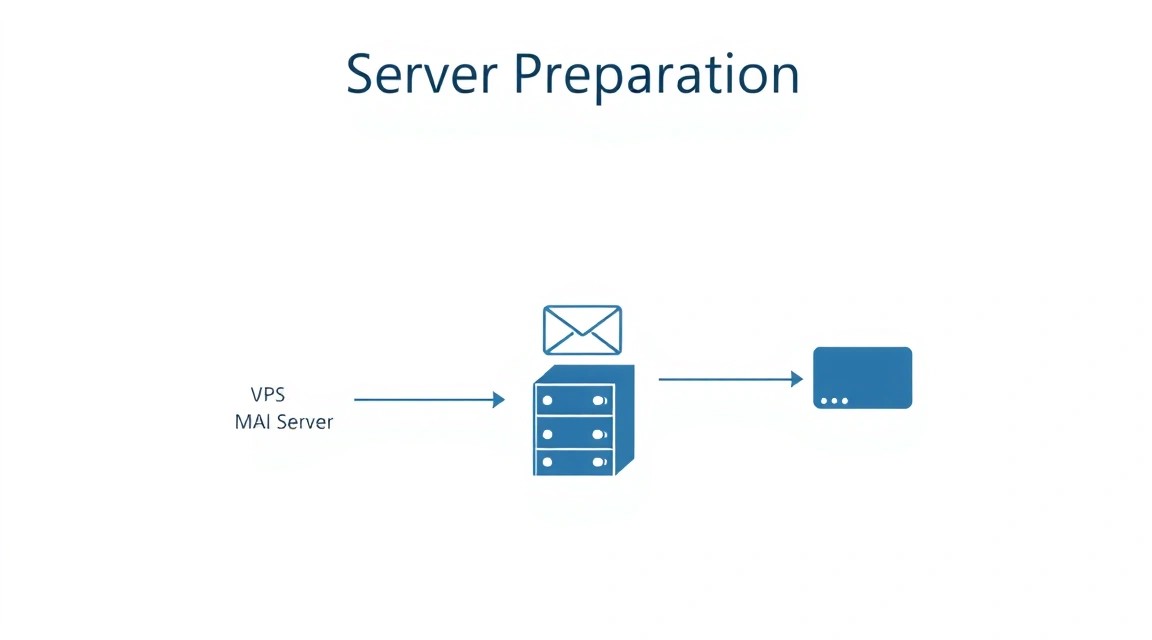
Antes de instalar el software de correo, es necesario realizar una configuración básica y reforzar la seguridad del nuevo VPS. Utilizaremos la distribución Debian 12 (Bookworm) como ejemplo. Para Ubuntu, los pasos serán similares.
1. Actualización del sistema
Primero, actualice la lista de paquetes y los paquetes instalados a las últimas versiones.
sudo apt update          # Actualización de la lista de paquetes
sudo apt upgrade -y      # Actualización de los paquetes instalados
sudo apt autoremove -y   # Eliminación de paquetes innecesarios
2. Creación de un nuevo usuario con permisos sudo
Trabajar como usuario root no es seguro. Cree un nuevo usuario y concédale permisos sudo.
sudo adduser username          # Reemplace 'username' por el nombre de usuario deseado
sudo usermod -aG sudo username # Adición del usuario al grupo sudo
Salga de la sesión actual de root e inicie sesión con el nuevo usuario.
exit
3. Configuración de claves SSH (recomendado)
Para mejorar la seguridad del acceso SSH, se recomienda utilizar claves SSH en lugar de contraseñas. Primero, genere una clave en su máquina local si aún no tiene una:
ssh-keygen -t rsa -b 4096
Luego, copie la clave pública al servidor:
ssh-copy-id username@your_vps_ip # Reemplace 'username' y 'your_vps_ip'
Después de verificar el inicio de sesión con clave, deshabilite el inicio de sesión con contraseña para root y usuarios normales en el archivo /etc/ssh/sshd_config:
sudo nano /etc/ssh/sshd_config
Encuentre y modifique las siguientes líneas:
PermitRootLogin no
PasswordAuthentication no
ChallengeResponseAuthentication no
UsePAM no
Reinicie el servidor SSH:
sudo systemctl restart sshd
4. Instalación y configuración de Fail2Ban
Fail2Ban escanea los registros y bloquea las direcciones IP que muestran signos de actividad maliciosa (por ejemplo, múltiples intentos fallidos de inicio de sesión). Esto es fundamental para proteger SSH y los servicios de correo.
sudo apt install fail2ban -y
sudo systemctl enable fail2ban
sudo systemctl start fail2ban
Cree un archivo de configuración local para Fail2Ban para que sus cambios no sean sobrescritos durante una actualización del paquete:
sudo cp /etc/fail2ban/jail.conf /etc/fail2ban/jail.local
Edite /etc/fail2ban/jail.local para habilitar la protección para SSH y otros servicios, así como para configurar los parámetros de bloqueo (bantime, findtime, maxretry). Asegúrese de que enabled = true para [sshd] y otros servicios de correo que configuraremos más adelante ([postfix], [dovecot]).
sudo nano /etc/fail2ban/jail.local
Ejemplo de sección para SSH (asegúrese de que enabled = true):
[sshd]
enabled = true
port     = ssh
logpath = %(sshd_log)s
backend = %(sshd_backend)s
Reinicie Fail2Ban después de los cambios:
sudo systemctl restart fail2ban
5. Configuración del Firewall (UFW)
Uncomplicated Firewall (UFW) es una interfaz fácil de usar para iptables. Lo configuraremos para permitir solo los puertos necesarios.
sudo apt install ufw -y
Permita SSH (puerto 22), HTTP (puerto 80), HTTPS (puerto 443) y los puertos de correo estándar:
sudo ufw allow OpenSSH
sudo ufw allow http
sudo ufw allow https
sudo ufw allow 25/tcp  # SMTP
sudo ufw allow 587/tcp # SMTPS (Submission)
sudo ufw allow 465/tcp # SMTPS (Legacy)
sudo ufw allow 143/tcp # IMAP
sudo ufw allow 993/tcp # IMAPS
sudo ufw allow 110/tcp # POP3
sudo ufw allow 995/tcp # POP3S
Habilite UFW:
sudo ufw enable
Verifique el estado de UFW:
sudo ufw status verbose
Ahora su servidor está protegido de forma básica y listo para la instalación del software de correo.
Instalación de software — paso a paso
En esta sección, instalaremos todos los componentes necesarios: Postfix, Dovecot, Nginx, PHP-FPM, MariaDB y Roundcube. Utilizaremos las versiones actuales del software disponibles en los repositorios de Debian 12 (para 2026, estas serán ramas estables, por ejemplo, Postfix 3.x, Dovecot 2.x, Nginx 1.x, PHP 8.x, MariaDB 10.x).
1. Instalación de Postfix
Postfix es nuestro Agente de Transferencia de Correo (MTA). Será responsable de enviar y recibir correo electrónico.
sudo apt install postfix -y # Instalación de Postfix
Durante la instalación, Postfix hará varias preguntas. Seleccione "Internet Site" e ingrese el nombre de dominio completo de su servidor (por ejemplo, mail.ejemplo.com), que se utilizará como nombre de host para enviar correo. Reemplace ejemplo.com por su dominio real.
Para System mail name, especifique su dominio principal (por ejemplo, ejemplo.com).
2. Instalación de Dovecot
Dovecot es nuestro Agente de Entrega de Correo (MDA) y servidor IMAP/POP3, que permitirá a los usuarios acceder a sus buzones de correo.
sudo apt install dovecot-imapd dovecot-pop3d dovecot-lmtpd dovecot-mysql -y # Instalación de Dovecot con soporte para IMAP, POP3, LMTP y MySQL para autenticación
dovecot-lmtpd es necesario para una entrega de correo más eficiente de Postfix a Dovecot, y dovecot-mysql es para la autenticación de usuarios a través de la base de datos, lo que simplifica significativamente la administración.
3. Instalación de Nginx, PHP-FPM y MariaDB
Para que Roundcube funcione, necesitaremos un servidor web (Nginx), un intérprete de PHP (PHP-FPM) y una base de datos (MariaDB).
sudo apt install nginx -y # Instalación del servidor web Nginx
sudo apt install php-fpm php-mysql php-mbstring php-intl php-zip php-gd php-json php-curl php-imap php-xml php-pear -y # Instalación de PHP-FPM y extensiones necesarias para Roundcube
sudo apt install mariadb-server -y # Instalación del servidor MariaDB
Después de instalar PHP-FPM, Nginx y MariaDB, asegúrese de que todos los servicios estén iniciados y habilitados para el arranque automático:
sudo systemctl enable nginx
sudo systemctl start nginx
sudo systemctl enable php8.2-fpm # O la versión actual, por ejemplo php8.3-fpm
sudo systemctl start php8.2-fpm
sudo systemctl enable mariadb
sudo systemctl start mariadb
Ejecute el script para la protección básica de MariaDB:
sudo mysql_secure_installation # Siga las instrucciones: establezca la contraseña de root, elimine usuarios anónimos, prohíba el inicio de sesión remoto de root, elimine la base de datos de prueba.
4. Instalación de Roundcube
Roundcube es una interfaz web para su correo. Lo instalaremos desde los repositorios oficiales.
sudo apt install roundcube roundcube-core roundcube-plugins roundcube-sqlite3 -y # Instalación de Roundcube y sus componentes. Usaremos MySQL, pero 'roundcube-sqlite3' puede instalarse como dependencia.
Durante la instalación, Roundcube le preguntará sobre la configuración de la base de datos. Seleccione dbconfig-common y mysql, luego ingrese la contraseña para el usuario de Roundcube en MariaDB. Si no desea que Roundcube cree la base de datos automáticamente, seleccione "No" y créela manualmente (esta opción la veremos en la sección de configuración).
Si eligió la configuración automática, Roundcube creará la base de datos roundcubemail y el usuario roundcube con la contraseña que especificó.
5. Creación de la base de datos y el usuario para Roundcube (si no hubo configuración automática)
Si prefirió la configuración manual de la base de datos para Roundcube, siga los siguientes pasos. De lo contrario, este paso puede omitirse.
sudo mysql -u root -p # Ingrese la contraseña de root que estableció anteriormente
Dentro de MariaDB, cree la base de datos y el usuario para Roundcube:
CREATE DATABASE roundcubemail CHARACTER SET utf8mb4 COLLATE utf8mb4_unicode_ci;
CREATE USER 'roundcube'@'localhost' IDENTIFIED BY 'su_contraseña_para_roundcube';
GRANT ALL PRIVILEGES ON roundcubemail. TO 'roundcube'@'localhost';
FLUSH PRIVILEGES;
EXIT;
Ahora, importe el esquema de la base de datos de Roundcube:
sudo mysql -u roundcube -p roundcubemail < /usr/share/roundcube/SQL/mysql.initial.sql # Ingrese 'su_contraseña_para_roundcube'
Todos los componentes principales están instalados. Ahora pasemos a su configuración detallada.
Configuración
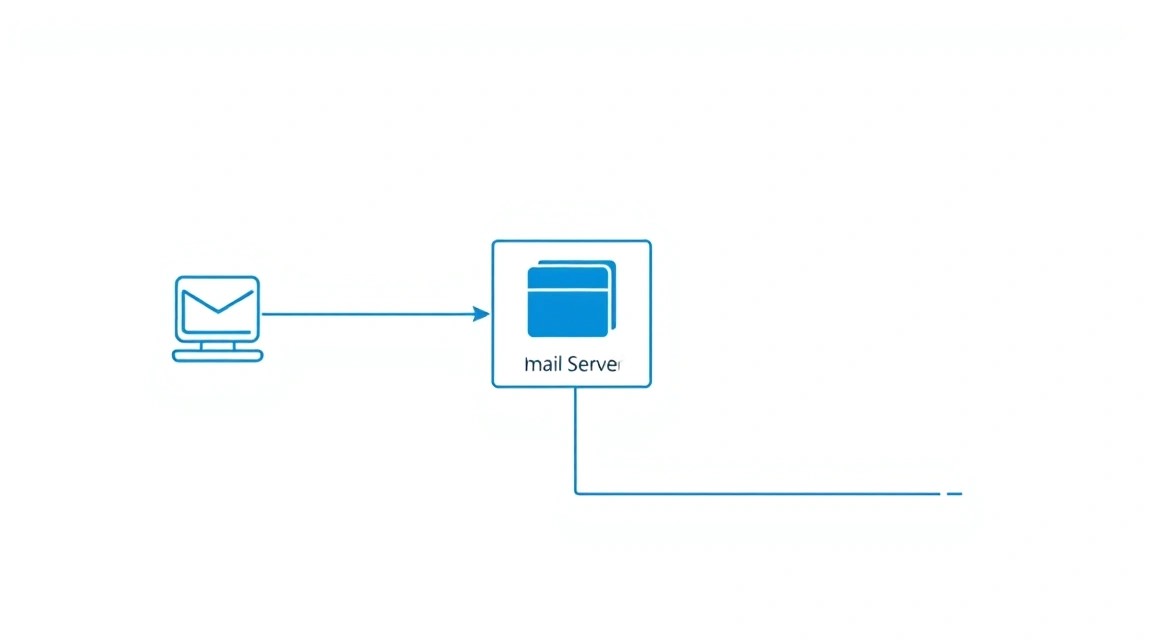
Esta sección es la más importante, ya que aquí uniremos todos los componentes y los configuraremos para un funcionamiento seguro y eficiente. Utilizaremos el dominio ejemplo.com y el subdominio mail.ejemplo.com para nuestro servidor de correo.
1. Configuración de registros DNS
Los registros DNS correctos son cruciales para la entregabilidad del correo. Deberá añadir o modificar los siguientes registros en el panel de control de su registrador de dominios o proveedor de DNS. Reemplace ваш_IP_VPS con la dirección IP real de su servidor.
- Registro A para el dominio: Apunta a su VPS.
- Registro A para el subdominio mail: Apunta a su VPS.
- Registro MX: Indica qué servidor es responsable de recibir correo para su dominio.
- Registro SPF: Ayuda a prevenir la suplantación de identidad del remitente, indicando qué servidores están autorizados a enviar correo en nombre de su dominio.
- Registro DKIM: Añade una firma digital a los correos salientes, confirmando su autenticidad.
- Registro DMARC: Indica cómo manejar los correos que no pasaron las verificaciones SPF y DKIM.
| Tipo de registro | Host/Nombre | Valor/Datos | Prioridad |
|---|---|---|---|
| A | @ o ejemplo.com | ваш_IP_VPS | - |
| A | mail o mail.ejemplo.com | ваш_IP_VPS | - |
| MX | @ o ejemplo.com | mail.ejemplo.com | 10 |
| TXT (SPF) | @ o ejemplo.com | v=spf1 mx a ip4:ваш_IP_VPS ~all | - |
| TXT (DKIM) | dkim._domainkey | Será generado por Postfix (ver abajo) | - |
| TXT (DMARC) | _dmarc | v=DMARC1; p=quarantine; rua=mailto:[email protected]; ruf=mailto:[email protected]; fo=1 | - |
Espere un tiempo (hasta 24 horas) para la propagación de los registros DNS.
2. Configuración de Postfix
Los principales archivos de configuración de Postfix son: /etc/postfix/main.cf y /etc/postfix/master.cf.
sudo nano /etc/postfix/main.cf
Asegúrese de que los siguientes parámetros estén configurados (añada o modifique):
# Основные параметры
myhostname = mail.ejemplo.com
mydomain = ejemplo.com
myorigin = $mydomain
inet_interfaces = all
inet_protocols = all

# Домены, которые обслуживает Postfix
mydestination = $myhostname, $mydomain, localhost.$mydomain, localhost
virtual_alias_domains = $mydomain
virtual_alias_maps = mysql:/etc/postfix/mysql-virtual-aliases.cf
virtual_mailbox_domains = mysql:/etc/postfix/mysql-virtual-domains.cf
virtual_mailbox_maps = mysql:/etc/postfix/mysql-virtual-mailboxes.cf
virtual_transport = lmtp:unix:private/dovecot-lmpa

# Настройка TLS/SSL
smtpd_tls_cert_file = /etc/letsencrypt/live/mail.ejemplo.com/fullchain.pem
smtpd_tls_key_file = /etc/letsencrypt/live/mail.ejemplo.com/privkey.pem
smtpd_tls_security_level = may
smtpd_tls_loglevel = 1
smtpd_tls_session_cache_database = btree:${data_directory}/smtpd_scache
smtp_tls_session_cache_database = btree:${data_directory}/smtp_scache
smtpd_use_tls = yes
smtpd_tls_received_header = yes
smtpd_tls_mandatory_protocols = !SSLv2, !SSLv3, !TLSv1, !TLSv1.1
smtpd_tls_protocols = !SSLv2, !SSLv3, !TLSv1, !TLSv1.1

# Ограничения и защита от спама
smtpd_relay_restrictions = permit_mynetworks permit_sasl_authenticated defer_unauth_destination
smtpd_recipient_restrictions =
    permit_mynetworks,
    permit_sasl_authenticated,
    reject_unauth_destination,
    reject_invalid_hostname,
    reject_non_fqdn_hostname,
    reject_non_fqdn_sender,
    reject_non_fqdn_recipient,
    reject_unknown_sender_domain,
    reject_unknown_recipient_domain,
    reject_rbl_client zen.spamhaus.org,
    reject_rbl_client bl.spamcop.net,
    permit

# Аутентификация SASL для исходящей почты
smtpd_sasl_type = dovecot
smtpd_sasl_path = private/auth
smtpd_sasl_auth_enable = yes
broken_sasl_auth_clients = yes

# DKIM (будет настроен далее)
milter_default_action = accept
milter_protocol = 2
smtpd_milters = inet:127.0.0.1:8891
non_smtpd_milters = inet:127.0.0.1:8891
Cree los archivos de configuración para las consultas MySQL de Postfix:
sudo nano /etc/postfix/mysql-virtual-domains.cf
user = roundcube
password = su_contraseña_para_roundcube
hosts = 127.0.0.1
dbname = roundcubemail
query = SELECT 1 FROM virtual_domains WHERE name='%s'
sudo nano /etc/postfix/mysql-virtual-mailboxes.cf
user = roundcube
password = su_contraseña_para_roundcube
hosts = 127.0.0.1
dbname = roundcubemail
query = SELECT maildir FROM virtual_users WHERE email='%s'
sudo nano /etc/postfix/mysql-virtual-aliases.cf
user = roundcube
password = su_contraseña_para_roundcube
hosts = 127.0.0.1
dbname = roundcubemail
query = SELECT destination FROM virtual_aliases WHERE source='%s'
Cambie los permisos de acceso a estos archivos:
sudo chmod 640 /etc/postfix/mysql-virtual-*.cf
sudo chown root:postfix /etc/postfix/mysql-virtual-*.cf
Reinicie Postfix:
sudo systemctl restart postfix
3. Configuración de Dovecot
Dovecot también utiliza varios archivos de configuración. Los principales se encuentran en /etc/dovecot/conf.d/.
sudo nano /etc/dovecot/conf.d/10-mail.conf
mail_location = maildir:~/Maildir
mail_privileged_group = mail
sudo nano /etc/dovecot/conf.d/10-auth.conf
disable_plaintext_auth = yes # Deshabilitamos la autenticación insegura
auth_mechanisms = plain login
!include auth-sql.conf.ext
sudo nano /etc/dovecot/conf.d/10-master.conf
Añada o modifique la sección service auth y service lmtp:
service auth {
  unix_listener /var/spool/postfix/private/auth {
    mode = 0660
    user = postfix
    group = postfix
  }
}

service lmtp {
  unix_listener /var/spool/postfix/private/dovecot-lmpa {
    mode = 0660
    user = postfix
    group = postfix
  }
}
sudo nano /etc/dovecot/conf.d/15-lda.conf
postmaster_address = [email protected]
sudo nano /etc/dovecot/conf.d/auth-sql.conf.ext
passdb {
  driver = sql
  args = /etc/dovecot/dovecot-sql.conf.ext
}
userdb {
  driver = sql
  args = /etc/dovecot/dovecot-sql.conf.ext
}
Cree el archivo /etc/dovecot/dovecot-sql.conf.ext:
sudo nano /etc/dovecot/dovecot-sql.conf.ext
driver = mysql
connect = host=127.0.0.1 dbname=roundcubemail user=roundcube password=su_contraseña_para_roundcube
default_pass_scheme = SHA512-CRYPT
password_query = SELECT email as user, password FROM virtual_users WHERE email='%u'
user_query = SELECT maildir, 1000 AS uid, 1000 AS gid FROM virtual_users WHERE email='%u'
Cambie los permisos de acceso al archivo:
sudo chmod 640 /etc/dovecot/dovecot-sql.conf.ext
sudo chown root:dovecot /etc/dovecot/dovecot-sql.conf.ext
sudo nano /etc/dovecot/conf.d/10-ssl.conf
Asegúrese de que las rutas a los certificados sean correctas (los obtendremos con Certbot):
ssl = yes
ssl_cert = </etc/letsencrypt/live/mail.ejemplo.com/fullchain.pem
ssl_key = </etc/letsencrypt/live/mail.ejemplo.com/privkey.pem
Reinicie Dovecot:
sudo systemctl restart dovecot
4. Configuración de la base de datos para usuarios y dominios
Almacenaremos la información sobre dominios virtuales, usuarios y alias en la base de datos roundcubemail. Inicie sesión en MariaDB:
sudo mysql -u root -p
Cree las tablas necesarias:
USE roundcubemail;

CREATE TABLE virtual_domains (
  id int(11) NOT NULL AUTO_INCREMENT,
  name varchar(50) NOT NULL,
  PRIMARY KEY (id)
) ENGINE=InnoDB DEFAULT CHARSET=utf8mb4;

CREATE TABLE virtual_users (
  id int(11) NOT NULL AUTO_INCREMENT,
  domain_id int(11) NOT NULL,
  password varchar(255) NOT NULL,
  email varchar(100) NOT NULL,
  maildir varchar(255) NOT NULL,
  PRIMARY KEY (id),
  UNIQUE KEY email (email),
  FOREIGN KEY (domain_id) REFERENCES virtual_domains(id) ON DELETE CASCADE
) ENGINE=InnoDB DEFAULT CHARSET=utf8mb4;

CREATE TABLE virtual_aliases (
  id int(11) NOT NULL AUTO_INCREMENT,
  domain_id int(11) NOT NULL,
  source varchar(100) NOT NULL,
  destination varchar(100) NOT NULL,
  PRIMARY KEY (id),
  FOREIGN KEY (domain_id) REFERENCES virtual_domains(id) ON DELETE CASCADE
) ENGINE=InnoDB DEFAULT CHARSET=utf8mb4;
Añada su dominio (ejemplo.com) y el primer usuario (por ejemplo, [email protected]):
INSERT INTO virtual_domains (name) VALUES ('ejemplo.com');

-- Reemplace 'su_contraseña_para_admin' por una contraseña segura
-- y genérela con doveadm pw -s SHA512-CRYPT
INSERT INTO virtual_users (domain_id, password, email, maildir)
VALUES (1, '{SHA512-CRYPT}contraseña_encriptada_para_admin', '[email protected]', 'ejemplo.com/admin/');

-- Ejemplo de alias: los correos a [email protected] serán redirigidos a [email protected]
INSERT INTO virtual_aliases (domain_id, source, destination)
VALUES (1, '[email protected]', '[email protected]');

FLUSH PRIVILEGES;
EXIT;
Para obtener la contraseña cifrada para el usuario, utilice el comando Dovecot:
sudo doveadm pw -s SHA512-CRYPT # Introduzca la contraseña, luego copie la salida
5. Configuración de TLS/HTTPS con Certbot (Let's Encrypt)
Para conexiones seguras (SMTPS, IMAPS, HTTPS para Roundcube) necesitamos certificados SSL/TLS. Let's Encrypt proporciona certificados gratuitos.
sudo apt install certbot python3-certbot-nginx -y # Instalación de Certbot y el plugin para Nginx
Obtenga un certificado para su dominio (por ejemplo, mail.ejemplo.com):
sudo certbot --nginx -d mail.ejemplo.com # Siga las instrucciones de Certbot. Elija la redirección HTTP a HTTPS.
Certbot configurará automáticamente Nginx y la renovación de certificados.
6. Configuración de Nginx para Roundcube
Cree un archivo de configuración de Nginx para Roundcube. Elimine el archivo predeterminado o desactívelo.
sudo rm /etc/nginx/sites-enabled/default
sudo nano /etc/nginx/sites-available/roundcube.conf
server {
    listen 80;
    server_name mail.ejemplo.com;
    return 301 https://$host$request_uri;
}

server {
    listen 443 ssl http2;
    server_name mail.ejemplo.com;

    ssl_certificate /etc/letsencrypt/live/mail.ejemplo.com/fullchain.pem;
    ssl_certificate_key /etc/letsencrypt/live/mail.ejemplo.com/privkey.pem;
    ssl_session_cache shared:SSL:10m;
    ssl_session_timeout 10m;
    ssl_protocols TLSv1.2 TLSv1.3;
    ssl_ciphers "ECDHE-ECDSA-AES128-GCM-SHA256:ECDHE-RSA-AES128-GCM-SHA256:ECDHE-ECDSA-AES256-GCM-SHA384:ECDHE-RSA-AES256-GCM-SHA384:DHE-RSA-AES128-GCM-SHA256:DHE-RSA-AES256-GCM-SHA384:ECDHE-ECDSA-AES128-SHA256:ECDHE-RSA-AES128-SHA256:ECDHE-ECDSA-AES256-SHA384:ECDHE-RSA-AES256-SHA384:DHE-RSA-AES128-SHA256:DHE-RSA-AES256-SHA256:AES128-GCM-SHA256:AES256-GCM-SHA384:AES128-SHA256:AES256-SHA256";
    ssl_prefer_server_ciphers on;
    ssl_stapling on;
    ssl_stapling_verify on;
    resolver 8.8.8.8 8.8.4.4 valid=300s;
    resolver_timeout 5s;

    root /usr/share/roundcube;
    index index.php index.html;

    location ~ ^/(README|INSTALL|LICENSE|CHANGELOG|UPGRADING)$ {
        deny all;
    }

    location ~ ^/(bin|SQL|config|temp|logs)/ {
        deny all;
    }

    location ~ \.php$ {
        try_files $uri =404;
        fastcgi_pass unix:/var/run/php/php8.2-fpm.sock; # Asegúrese de que esta es la ruta correcta para su versión de PHP
        fastcgi_index index.php;
        fastcgi_param SCRIPT_FILENAME $document_root$fastcgi_script_name;
        include fastcgi_params;
    }

    location ~ /\.ht {
        deny all;
    }
}
Cree un enlace simbólico al archivo de configuración y verifique la sintaxis de Nginx:
sudo ln -s /etc/nginx/sites-available/roundcube.conf /etc/nginx/sites-enabled/
sudo nginx -t
Si no hay errores, reinicie Nginx:
sudo systemctl restart nginx
7. Configuración de Roundcube
El archivo de configuración principal de Roundcube es /etc/roundcube/config.inc.php.
sudo nano /etc/roundcube/config.inc.php
Asegúrese de que los siguientes parámetros estén configurados:
$config['default_host'] = 'ssl://mail.ejemplo.com';
$config['default_port'] = 993; // IMAPS
$config['smtp_server'] = 'tls://mail.ejemplo.com';
$config['smtp_port'] = 587; // SMTPS submission port
$config['smtp_user'] = '%u';
$config['smtp_pass'] = '%p';
$config['product_name'] = 'Mi Correo en Ejemplo.com'; // Nombre que se mostrará en Roundcube
$config['plugins'] = array('archive', 'zipdownload', 'managesieve', 'password'); // Ejemplo de plugins
$config['temp_dir'] = '/var/lib/roundcube/temp';
$config['log_dir'] = '/var/log/roundcube';
$config['db_dsnw'] = 'mysql://roundcube:su_contraseña_para_roundcube@localhost/roundcubemail';
Cree los directorios necesarios para Roundcube y establezca los permisos correctos:
sudo mkdir -p /var/lib/roundcube/temp /var/log/roundcube
sudo chown -R www-data:www-data /var/lib/roundcube/temp /var/log/roundcube
sudo chmod 755 /var/lib/roundcube/temp /var/log/roundcube
Reinicie PHP-FPM:
sudo systemctl restart php8.2-fpm # O la versión actual
8. Instalación y configuración de OpenDKIM
OpenDKIM firmará sus correos salientes, lo que mejorará significativamente su entregabilidad.
sudo apt install opendkim opendkim-tools -y # Instalación de OpenDKIM
Cree el directorio para las claves DKIM:
sudo mkdir -p /etc/mail/dkim
sudo chown -R opendkim:opendkim /etc/mail/dkim
Genere las claves DKIM para su dominio (por ejemplo, ejemplo.com) y el selector (por ejemplo, dkim):
sudo opendkim-genkey -b 2048 -d ejemplo.com -s dkim -v -C /etc/mail/dkim
sudo chown opendkim:opendkim /etc/mail/dkim/dkim.private
Edite el archivo de configuración principal de OpenDKIM:
sudo nano /etc/opendkim.conf
Asegúrese de que las siguientes líneas estén configuradas:
Canonicalization    relaxed/simple
Mode                sv
SubDomains          no
AutoRestart         Yes
AutoRestartRate     10/1h
Background          Yes
UMask               002
OversignHeaders     From
SignatureAlgorithm  rsa-sha256

# Socket local para Postfix
Socket              inet:8891@localhost

# Usuario y grupo
UserID              opendkim:opendkim

# Archivos
PidFile             /var/run/opendkim/opendkim.pid
KeyFile             /etc/mail/dkim/dkim.private
LogWhy              Yes

# Tablas
KeyTable            /etc/mail/dkim/key.table
SigningTable        /etc/mail/dkim/signing.table
ExternalIgnoreList  /etc/mail/dkim/trusted.hosts
InternalHosts       /etc/mail/dkim/trusted.hosts
Cree los archivos key.table, signing.table y trusted.hosts:
sudo nano /etc/mail/dkim/key.table
dkim._domainkey.ejemplo.com ejemplo.com:dkim:/etc/mail/dkim/dkim.private
sudo nano /etc/mail/dkim/signing.table
*@ejemplo.com dkim._domainkey.ejemplo.com
sudo nano /etc/mail/dkim/trusted.hosts
127.0.0.1
localhost
ejemplo.com
mail.ejemplo.com
Cambie los permisos de acceso:
sudo chown opendkim:opendkim /etc/mail/dkim/*
sudo chmod 640 /etc/mail/dkim/*
Edite el archivo /etc/default/opendkim, para especificar el socket:
sudo nano /etc/default/opendkim
Descomente o añada:
SOCKET="inet:8891@localhost"
Reinicie OpenDKIM y Postfix:
sudo systemctl restart opendkim
sudo systemctl restart postfix
Ahora necesita añadir la clave pública DKIM en el DNS. Muestre el contenido del archivo:
sudo cat /etc/mail/dkim/dkim.txt
Verá algo como:
dkim._domainkey IN TXT ( "v=DKIM1; h=sha256; k=rsa; "
       "p=MIIBIjANBg..." )  ; ----- DKIM key dkim for ejemplo.com
Copie el valor p=... (sin comillas) y añádalo como un registro TXT para el host dkim._domainkey en su DNS.
Verificación de funcionamiento
Después de todas las configuraciones, es necesario verificar que todo funciona correctamente.
- Verificación de DNS: Utilice herramientas en línea (por ejemplo, mxtoolbox.com) para verificar los registros MX, SPF, DKIM y DMARC de su dominio.
- Acceso a Roundcube: Abra en el navegador
https://mail.ejemplo.com. Debería ver la página de inicio de sesión de Roundcube. Intente iniciar sesión con el usuario creado[email protected]. - Envío y recepción de correo:
- Envíe un correo desde
[email protected]a una dirección externa (por ejemplo, Gmail). Verifique que el correo llegó y no fue a spam. Compruebe los encabezados del correo para SPF, DKIM, DMARC. - Envíe un correo desde una dirección externa a
[email protected]. Asegúrese de que aparece en Roundcube.
- Envíe un correo desde
- Verificación de logs:
tail -f /var/log/mail.log # Logs de Postfix y Dovecot
tail -f /var/log/nginx/access.log # Logs de acceso de Nginx
tail -f /var/log/nginx/error.log # Logs de errores de Nginx
tail -f /var/log/roundcube/errors.log # Logs de errores de Roundcube
Copias de seguridad y mantenimiento
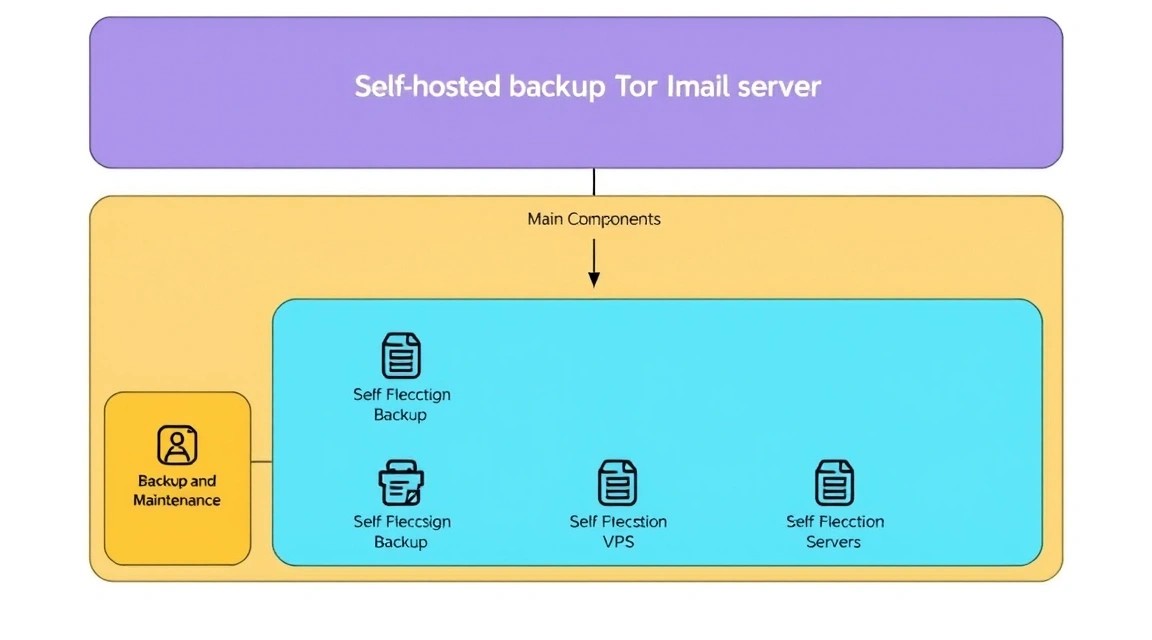
Un sistema de copia de seguridad fiable y un mantenimiento regular son cruciales para cualquier servidor, especialmente para un servidor de correo donde se almacenan datos valiosos.
Qué hacer copia de seguridad
- Base de datos MariaDB: Contiene información sobre dominios, usuarios y sus contraseñas.
- Buzones de correo: Directorios Maildir de los usuarios (normalmente
/var/vmail/ejemplo.com/user/Maildir). - Archivos de configuración: Postfix (
/etc/postfix/), Dovecot (/etc/dovecot/), Nginx (/etc/nginx/sites-available/roundcube.conf), Roundcube (/etc/roundcube/), OpenDKIM (/etc/mail/dkim/), Certbot (/etc/letsencrypt/).
Script simple de copia de seguridad automática
Crearemos un script simple que archivará Maildir y las configuraciones, y también realizará un volcado de la base de datos. Para el almacenamiento, se puede usar un servicio externo compatible con S3 u otro VPS.
sudo nano /usr/local/bin/backup_mail_server.sh
#!/bin/bash

# Parámetros
BACKUP_DIR="/var/backups/mail_server"
DATE=$(date +%Y-%m-%d_%H-%M-%S)
DB_NAME="roundcubemail"
DB_USER="roundcube"
DB_PASS="tu_contraseña_para_roundcube" # Usa la contraseña de la configuración de Dovecot/Postfix

# Creación del directorio para las copias de seguridad, si no existe
mkdir -p "$BACKUP_DIR"

# 1. Copia de seguridad de la base de datos
echo "Volcando la base de datos MariaDB..."
mysqldump -u "$DB_USER" -p"$DB_PASS" "$DB_NAME" > "$BACKUP_DIR/$DB_NAME-$DATE.sql"
if [ $? -eq 0 ]; then
    echo "Copia de seguridad de la base de datos exitosa."
else
    echo "¡La copia de seguridad de la base de datos falló!"
    exit 1
fi

# 2. Copia de seguridad de los buzones de correo (Maildir)
echo "Archivando directorios Maildir..."
tar -czf "$BACKUP_DIR/maildirs-$DATE.tar.gz" /var/vmail # Asegúrate de que esta es la ruta correcta a Maildir
if [ $? -eq 0 ]; then
    echo "Copia de seguridad de Maildir exitosa."
else
    echo "¡La copia de seguridad de Maildir falló!"
    exit 1
fi

# 3. Copia de seguridad de los archivos de configuración
echo "Archivando archivos de configuración..."
tar -czf "$BACKUP_DIR/configs-$DATE.tar.gz" \
    /etc/postfix \
    /etc/dovecot \
    /etc/nginx/sites-available/roundcube.conf \
    /etc/roundcube \
    /etc/mail/dkim \
    /etc/letsencrypt
if [ $? -eq 0 ]; then
    echo "Copia de seguridad de los archivos de configuración exitosa."
else
    echo "¡La copia de seguridad de los archivos de configuración falló!"
    exit 1
fi

# 4. Eliminación de copias de seguridad antiguas (por ejemplo, más de 7 días)
echo "Limpiando copias de seguridad antiguas..."
find "$BACKUP_DIR" -type f -name "." -mtime +7 -delete
echo "Proceso de copia de seguridad completado."
Haz que el script sea ejecutable:
sudo chmod +x /usr/local/bin/backup_mail_server.sh
Configura la ejecución diaria usando cron:
sudo crontab -e
Añade la siguiente línea al final del archivo para una ejecución diaria, por ejemplo, a las 3:00 de la mañana:
0 3 * /usr/local/bin/backup_mail_server.sh > /var/log/mail_backup.log 2>&1
Dónde almacenar las copias de seguridad
Es extremadamente importante almacenar las copias de seguridad fuera del servidor principal. Opciones:
- Almacenamiento de objetos compatible con S3: Amazon S3, DigitalOcean Spaces, Backblaze B2, MinIO. Son soluciones fiables y escalables.
- VPS separado: Si tienes otro VPS, puedes configurar Rsync o SFTP para transferir las copias de seguridad allí.
- Almacenamiento local en tu ordenador: Para volúmenes muy pequeños y uso personal, pero menos fiable.
Para enviar automáticamente las copias de seguridad a S3, puedes usar utilidades como s3cmd o rclone, añadiéndolas al script.
Actualizaciones: rolling vs ventana de mantenimiento
Mantener el software actualizado es clave para la seguridad y la estabilidad.
- Rolling updates (actualizaciones continuas): Aplicación regular de parches de seguridad y actualizaciones menores. Para Debian/Ubuntu, esto es
sudo apt update && sudo apt upgrade -y. Se recomienda realizar semanalmente. - Maintenance window (ventana de mantenimiento): Para actualizaciones mayores (por ejemplo, la transición de PHP 8.2 a 8.3 o de Debian 12 a 13), planifica una ventana de mantenimiento separada. Esto puede requerir la detención de servicios, la verificación de compatibilidad y la configuración manual. Siempre realiza una copia de seguridad completa antes de dichas actualizaciones.
La monitorización de los registros (/var/log/mail.log, /var/log/syslog) y el uso de recursos (htop, df -h) también es una parte importante del mantenimiento.
Resolución de problemas + Preguntas frecuentes
Configurar un servidor de correo es una tarea compleja, y pueden surgir problemas en cualquier etapa. Aquí tienes respuestas a preguntas frecuentes y escenarios típicos de resolución de problemas.
No puedo enviar correos, se quedan atascados en la cola de Postfix. ¿Qué hago?
Verifica la cola de Postfix con el comando sudo mailq. Si los correos están allí, revisa los registros de Postfix (tail -f /var/log/mail.log). Las causas típicas son:
- Problemas de DNS: Registro MX incorrecto, ausencia de SPF/DKIM/DMARC o su configuración incorrecta. Verifica los registros a través de mxtoolbox.com.
- Registro DNS inverso (PTR): Asegúrate de que tu dirección IP tenga un registro PTR configurado que corresponda a
mail.ejemplo.com. Muchos servidores de correo rechazan los correos sin un PTR correcto. Se configura con tu proveedor de VPS. - Dirección IP en listas negras (RBL): Verifica la IP de tu VPS en las listas RBL (por ejemplo, a través de mxtoolbox.com). Si la IP está en una lista negra, debes solicitar su eliminación.
- Problemas con TLS/SSL: Rutas de certificados incorrectas o protocolos obsoletos.
- Configuración del firewall: Asegúrate de que el tráfico saliente al puerto 25 (SMTP) esté permitido.
No puedo recibir correos, no llegan a mi servidor.
Esto casi siempre está relacionado con DNS o el firewall:
- Registro MX: Asegúrate de que tu registro MX para el dominio
ejemplo.comapunte amail.ejemplo.comy tenga la prioridad correcta. - Registro A para mail.ejemplo.com: Debe apuntar a la IP de tu VPS.
- Firewall (UFW): Asegúrate de que las conexiones entrantes al puerto 25 (SMTP) estén permitidas (
sudo ufw status verbose). - Registros de Postfix: Revisa
/var/log/mail.logen busca de errores de recepción de correo.
No puedo iniciar sesión en Roundcube o los clientes de correo no se conectan.
Problemas con la autenticación o la conexión a Dovecot:
- Credenciales incorrectas: Asegúrate de que estás usando el correo electrónico (
[email protected]) y la contraseña correctos. Verifica la contraseña en la base de datos. - Configuración de Dovecot: Revisa los archivos
/etc/dovecot/conf.d/10-auth.conf,auth-sql.conf.extydovecot-sql.conf.ext. Asegúrate de que los parámetros de conexión a la base de datos sean correctos y que la contraseña endovecot-sql.conf.extcoincida con la contraseña del usuario de Roundcube en MariaDB. - TLS/SSL para Dovecot: Asegúrate de que las rutas a los certificados en
/etc/dovecot/conf.d/10-ssl.confsean correctas. - Firewall (UFW): Asegúrate de que los puertos 143 (IMAP), 993 (IMAPS), 110 (POP3), 995 (POP3S) estén permitidos.
- Registros de Dovecot: Revisa
/var/log/mail.logen busca de errores de autenticación o problemas de conexión. - Registros de Roundcube: Revisa
/var/log/roundcube/errors.logen busca de errores.
¿Qué configuración mínima de VPS es adecuada?
Para uso personal o un equipo pequeño (hasta 10-15 usuarios con actividad moderada), un VPS con 1 núcleo de CPU, 2 GB de RAM y 50-80 GB de SSD será suficiente. Esto permitirá ejecutar todos los servicios necesarios (Postfix, Dovecot, Nginx, PHP-FPM, MariaDB) y tener un margen suficiente para un funcionamiento estable. Sin embargo, para un mayor rendimiento y escalabilidad, se recomiendan 2 núcleos de CPU y 4 GB de RAM.
¿Qué elegir: VPS o dedicado para esta tarea?
Para la mayoría de los escenarios descritos en esta guía (servidor de correo personal, correo para una pequeña startup o equipo, correo para varios proyectos propios), un VPS es la opción óptima. Ofrece suficiente rendimiento, flexibilidad y rentabilidad. Un servidor dedicado (dedicated) solo se vuelve necesario bajo cargas muy altas, por ejemplo, si planeas atender cientos o miles de buzones de correo activos, manejar enormes volúmenes de tráfico o almacenar terabytes de datos de correo. En tales casos, un servidor dedicado proporciona un mayor rendimiento y aislamiento de recursos.
Los correos van a spam. ¿Cómo solucionarlo?
La razón principal por la que los correos van a spam es una mala reputación del remitente. Asegúrate de haber configurado todos los registros necesarios:
- SPF: Indica correctamente las direcciones IP de los remitentes permitidos.
- DKIM: Firma los correos salientes.
- DMARC: Política para el manejo de correos que no pasaron SPF/DKIM.
- PTR (DNS inverso): Tu dirección IP debe resolverse a
mail.ejemplo.com. - Ausencia en RBL: Verifica que tu IP no esté en listas negras.
- Contenido del correo: Evita palabras de spam, el uso excesivo de mayúsculas, enlaces sospechosos.
¿Cómo añadir un nuevo usuario o dominio?
Para añadir un nuevo dominio, inserta un registro en la tabla virtual_domains:
sudo mysql -u root -p
USE roundcubemail;
INSERT INTO virtual_domains (name) VALUES ('nuevo_dominio.com');
FLUSH PRIVILEGES;
EXIT;
Para añadir un nuevo usuario, primero obtén la contraseña cifrada usando sudo doveadm pw -s SHA512-CRYPT, luego inserta un registro en la tabla virtual_users, usando el domain_id del dominio correspondiente:
sudo mysql -u root -p
USE roundcubemail;
-- Suponiendo que 'nuevo_dominio.com' tiene id=2
INSERT INTO virtual_users (domain_id, password, email, maildir)
VALUES (2, '{SHA512-CRYPT}contraseña_cifrada', 'user@nuevo_dominio.com', 'nuevo_dominio.com/user/');
FLUSH PRIVILEGES;
EXIT;
No olvides reiniciar Postfix y Dovecot después de cambios significativos en la base de datos o en los archivos de configuración.
Conclusiones y próximos pasos
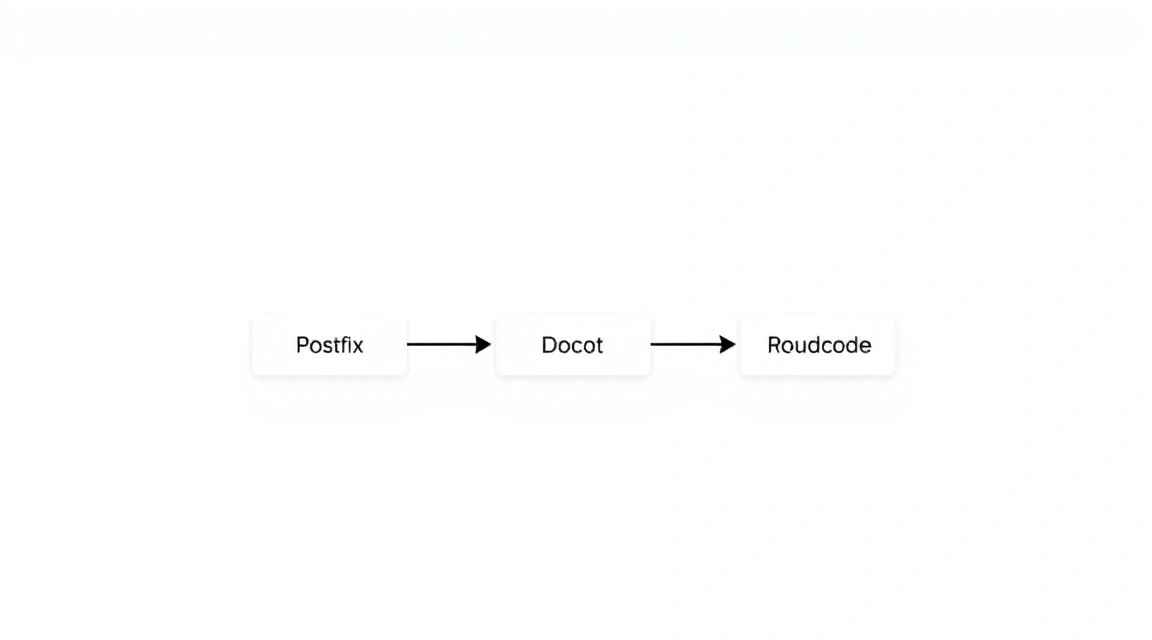
Has configurado y puesto en marcha con éxito tu propio servidor de correo en un VPS, utilizando Postfix, Dovecot y Roundcube. Ahora tienes control total sobre tu correo, un alto grado de privacidad y la capacidad de configurarlo de forma flexible para cualquier necesidad. Este es un paso importante hacia la independencia digital y la gestión eficiente de las comunicaciones.
Para un mayor desarrollo y optimización de tu servidor de correo, considera los siguientes pasos:
- Escalabilidad y optimización: Si el número de usuarios y el volumen de correo crecen, es posible que necesites optimizar la configuración de la base de datos, aumentar los recursos del VPS o considerar la transición a un servidor dedicado. Explora las opciones de almacenamiento en caché para Roundcube y los ajustes de rendimiento de Postfix/Dovecot.
- Protección mejorada contra spam y virus: Integra herramientas adicionales como SpamAssassin para el filtrado de spam y ClamAV para el escaneo de virus. Esto mejorará significativamente la seguridad y la calidad del correo entrante.
- Administración web: Para una gestión cómoda de usuarios, dominios y alias, considera la instalación de paneles web como Postfix Admin. Esto simplificará la administración del servidor sin necesidad de interactuar directamente con la base de datos.
- Monitorización: Configura un sistema de monitorización (por ejemplo, Prometheus + Grafana o Zabbix) para rastrear el estado del servidor, el uso de recursos y el rendimiento de los servicios de correo. Esto ayudará a identificar y resolver problemas potenciales de manera oportuna.