bolt Valebyte VPS desde $4/mes — NVMe, despliegue en 60s.

Obtener VPS arrow_forward
eco Principiante Tutorial/Cómo hacer

Install and Configure Outline Wiki on

calendar_month Aug 19, 2026 schedule 20 min de lectura visibility 20 vistas
Установка и настройка Outline Wiki на VPS
info

¿Necesitas un servidor para esta guía? Ofrecemos servidores dedicados y VPS en más de 50 países con configuración instantánea.

¿Necesitas un VPS para esta guía?

Explore otras opciones de servidores dedicados en

Installing and Configuring Outline Wiki on VPS: A Complete Guide for Experts

TL;DR

In this detailed guide, we will step-by-step configure Outline Wiki — a modern, convenient, and self-hosted knowledge base — on your Virtual Private Server (VPS). You will learn how to prepare the server, install all necessary components (Docker, PostgreSQL, Redis), deploy Outline, secure it with HTTPS via Caddy, and set up backups and maintenance. By the end of the guide, you will have a fully functional and secure wiki for your team or personal needs.

  • Complete installation of Outline Wiki using Docker Compose.
  • Configuring secure access via HTTPS with automatic Caddy certificates.
  • Optimal VPS requirements and provider selection.
  • Basic server protection with Fail2ban and UFW.
  • Configuring automatic Outline data backups.
  • Troubleshooting tips and system maintenance.

What we are setting up and why
Diagram: What we are setting up and why

We will be installing and configuring Outline Wiki — an open-source, modern, and intuitive knowledge base designed for teamwork. Outline is positioned as an alternative to Notion, Confluence, or Google Docs, but with an emphasis on self-hosting and full control over data. It is an ideal solution for developers, startups, and small teams who need a centralized platform for documentation, notes, meeting protocols, and knowledge sharing.

Ultimately, you will get a fully functional wiki, accessible via your own domain name, where your team can collaboratively create, edit, and organize information. Outline Wiki offers a clean user interface, Markdown support, integration with Slack (or other messengers), and powerful search, making it an excellent tool for boosting productivity and preserving corporate knowledge.

There are many alternatives on the market, both cloud-based (Notion, Confluence Cloud, Coda) and self-hosted (Wiki.js, BookStack, DokuWiki). Cloud solutions are convenient because they do not require server setup and maintenance, but you are tied to the provider, its pricing policy, and data security policy. Self-hosted solutions, such as Outline on a VPS, give you full control over your data, security, and performance. This is especially important for projects where information confidentiality is critical, or for teams that want to avoid monthly payments for SaaS services. You manage the infrastructure yourself, which requires certain technical knowledge but provides maximum flexibility and independence.

What VPS configuration is needed for this task
Diagram: What VPS configuration is needed for this task

Choosing the right VPS for Outline Wiki depends on the anticipated load, number of users, and volume of stored data. Outline is a fairly resource-intensive application, especially if you have many users and actively use search indexes.

Minimum Requirements

  • Processor (CPU): 1-2 cores. For small teams (up to 5-10 active users), one core will be sufficient. For active work and a larger number of users, 2 cores are recommended.
  • Random Access Memory (RAM): Minimum 2 GB. Outline, PostgreSQL, and Redis together consume a significant amount of RAM. 2 GB is the absolute minimum, 4 GB is a comfortable start for a small team.
  • Disk (SSD): 20-40 GB SSD. SSD is critical for database performance and fast file access. 20 GB will be enough for the system and initial data volume, but more will be needed as content grows. 40 GB is recommended for reserve.
  • Network: 100 Mbps or 1 Gbps. A stable channel with sufficient bandwidth is important for fast page loading and data exchange.

Specific VPS plan for the task

For most small and medium-sized teams (up to 20-30 active users), a VPS with the following characteristics will be optimal:

  • 2x vCPU
  • 4 GB RAM
  • 50-80 GB NVMe/SSD disk
  • 100 Mbps - 1 Gbps network port

Finding a VPS with the specified characteristics will not be difficult with most providers. It is important to choose a reliable provider with a good reputation and support.

When a dedicated server is needed, not a VPS

A dedicated server may be required in several cases:

  • Very large team: If you have hundreds or thousands of active users, and Outline becomes the central knowledge repository for the entire company.
  • High load: Intensive use, frequent search queries, large volume of attached files and images.
  • Integration with other services: If Outline will be part of a larger infrastructure with many dependencies and high resource demands.
  • Security and isolation requirements: A dedicated server provides complete isolation from "neighbors" on the hardware, which can be critical for certain types of data.

In most cases, for Outline Wiki, a VPS will be more than sufficient and more cost-effective.

Location: what it affects

The choice of server location affects several factors:

  • Latency: The closer the server is to the main users, the lower the latency and faster the application response. If your team is distributed across different continents, choose a location that will be optimal for most users.
  • Legislation: The server's location determines which country's jurisdiction your data falls under. This can be critical for compliance with GDPR, HIPAA, or other regulations.
  • Cost: VPS prices may vary slightly depending on the location.

It is usually recommended to choose a location that is geographically close to most of your users to ensure the best user experience.

Server Preparation
Diagram: Server Preparation

Before installing Outline Wiki, it is necessary to perform basic setup of a fresh VPS to ensure security and prepare the environment for further deployment. We will be using Ubuntu Server 24.04 LTS.

1. Connecting via SSH

Connect to your server as the root user, using the IP address provided by your provider:


ssh root@ВАШ_IP_АДРЕС

If you are using a password, enter it. It is highly recommended to use SSH keys for greater security.

2. System Update

Update the package list and installed packages to their latest versions:


sudo apt update && sudo apt upgrade -y

This ensures that you have the latest security fixes and stable versions of all system components.

3. Creating a new user with sudo privileges

Working as root is unsafe. Let's create a new user and grant them sudo privileges.


adduser outlineadmin

Follow the instructions to set a password and user information. Then add the user to the sudo group:


usermod -aG sudo outlineadmin

Now you can switch to the new user:


su - outlineadmin

Going forward, all commands requiring superuser privileges will be executed with the sudo prefix.

4. Configuring SSH keys for the new user

If you are not yet using SSH keys, create them on your local machine (if you don't have them):


ssh-keygen -t rsa -b 4096 -C "[email protected]"

Then copy the public key to the server for the new user outlineadmin:


ssh-copy-id outlineadmin@ВАШ_IP_АДРЕС

Now you can log in without a password. After verification, it is recommended to disable password login for root and for all users in the /etc/ssh/sshd_config file. Find the lines:


sudo nano /etc/ssh/sshd_config

PermitRootLogin no
PasswordAuthentication no

Save changes (Ctrl+O, Enter) and exit (Ctrl+X). Restart the SSH service:


sudo systemctl restart sshd

Be sure to verify that you can log in with your SSH key before closing the current session.

5. Firewall Configuration (UFW)

UFW (Uncomplicated Firewall) is a convenient utility for managing iptables. By default, it is disabled.


sudo apt install ufw -y # Install UFW if not installed
sudo ufw allow OpenSSH # Allow SSH to avoid losing access
sudo ufw allow http    # Allow HTTP (port 80)
sudo ufw allow https   # Allow HTTPS (port 443)
sudo ufw enable        # Enable the firewall
sudo ufw status verbose # Check status

You will be prompted to confirm enabling UFW. Enter y. Your server is now protected from unwanted traffic, except for SSH, HTTP, and HTTPS.

6. Installing Fail2ban

Fail2ban scans logs and automatically blocks IP addresses showing signs of malicious attacks (e.g., multiple failed SSH login attempts).


sudo apt install fail2ban -y
sudo systemctl enable fail2ban
sudo systemctl start fail2ban

Create a configuration file for Fail2ban:


sudo cp /etc/fail2ban/jail.conf /etc/fail2ban/jail.local
sudo nano /etc/fail2ban/jail.local

In the jail.local file, you can configure parameters. Make sure the [sshd] section is active (enabled = true) and, if desired, change bantime (block time) and maxretry (number of attempts).


[DEFAULT]
bantime = 10m
findtime = 10m
maxretry = 5

[sshd]
enabled = true
port = ssh
logpath = %(sshd_log)s
backend = %(sshd_backend)s

Save changes and restart Fail2ban:


sudo systemctl restart fail2ban
sudo fail2ban-client status # Check status
sudo fail2ban-client status sshd # Check status for SSH

Now your server has basic protection against brute-force attacks.

Software Installation — Step-by-Step
Diagram: Software Installation — Step-by-Step

Outline Wiki is best deployed using Docker and Docker Compose. This ensures component isolation, simplifies dependency management, and updates.

1. Installing Docker Engine (version 26.x as of 2026)

First, remove old Docker versions if they exist:


for pkg in docker.io docker-doc docker-compose docker-ce docker-ce-cli containerd.io docker-buildx-plugin docker-compose-plugin; do sudo apt remove $pkg; done

Install the necessary packages to install Docker via the repository:


sudo apt update
sudo apt install ca-certificates curl gnupg -y

Add Docker's official GPG key:


sudo install -m 0755 -d /etc/apt/keyrings
curl -fsSL https://download.docker.com/linux/ubuntu/gpg | sudo gpg --dearmor -o /etc/apt/keyrings/docker.gpg
sudo chmod a+r /etc/apt/keyrings/docker.gpg

Add the Docker repository to APT sources:


echo \
  "deb [arch="$(dpkg --print-architecture)" signed-by=/etc/apt/keyrings/docker.gpg] https://download.docker.com/linux/ubuntu \
  "$(. /etc/os-release && echo "$VERSION_CODENAME")" stable" | \
  sudo tee /etc/apt/sources.list.d/docker.list > /dev/null

Update the package list and install Docker Engine, Docker CLI, and Containerd:


sudo apt update
sudo apt install docker-ce docker-ce-cli containerd.io docker-buildx-plugin docker-compose-plugin -y

Add your user to the docker group to avoid using sudo for every Docker command:


sudo usermod -aG docker $USER
newgrp docker # Apply group changes immediately

Verify Docker installation:


docker run hello-world # Run a test container

The output should confirm a successful installation.

2. Installing Docker Compose (version 2.24.x as of 2026)

Docker Compose is usually installed with Docker Engine as docker-compose-plugin. Let's check its version:


docker compose version # Check Docker Compose version

If the docker compose command does not work, you might have an old Docker installation or the plugin did not install. In that case, install it manually:


sudo apt install docker-compose-plugin -y

3. Creating a Directory for Outline Wiki

Create a directory where all Outline configuration files will be stored:


mkdir -p ~/outline
cd ~/outline

4. Configuring the Docker Compose File

Outline requires several services: the Outline application itself, PostgreSQL (database), and Redis (cache/queues). Create the docker-compose.yml file:


nano docker-compose.yml

Paste the following content. Pay attention to the current image versions (PostgreSQL 16, Redis 7, Outline latest stable).


version: '3.8'

services:
  outline:
    image: outlines/outline:latest
    container_name: outline
    restart: always
    env_file:
      - ./.env
    ports:
      - "3000:3000" # Port on which Outline listens inside the container
    depends_on:
      - postgres
      - redis
    volumes:
      - ./data/uploads:/opt/outline/public/uploads # For uploaded files

  postgres:
    image: postgres:16-alpine
    container_name: outline_postgres
    restart: always
    env_file:
      - ./.env
    volumes:
      - ./data/postgres:/var/lib/postgresql/data # Persistent storage for the database

  redis:
    image: redis:7-alpine
    container_name: outline_redis
    restart: always
    env_file:
      - ./.env
    volumes:
      - ./data/redis:/data # Persistent storage for Redis (if persistence is used)

volumes:
  postgres:
  redis:
  uploads:

Save the file (Ctrl+O, Enter) and exit (Ctrl+X).

5. Creating the Environment Variables File (.env)

This file will contain all sensitive data and configuration parameters. Create it:


nano .env

Paste the following content. Be sure to replace YOUR_DOMAIN.COM with your actual domain and generate strong passwords and keys.


# Outline Application Settings
URL=https://YOUR_DOMAIN.COM # Domain where Outline Wiki will be accessible
PORT=3000
SECRET_KEY=ВАШ_СЕКРЕТНЫЙ_КЛЮЧ_ДЛЯ_OUTLINE # Generated by a random string, e.g., openssl rand -base64 32
DATABASE_URL=postgres://outline_user:ВАШ_ПАРОЛЬ_ДЛЯ_БД@postgres:5432/outline_db
REDIS_URL=redis://redis:6379

# PostgreSQL Database Settings
POSTGRES_USER=outline_user
POSTGRES_PASSWORD=ВАШ_ПАРОЛЬ_ДЛЯ_БД # Different from SECRET_KEY
POSTGRES_DB=outline_db

# Redis Settings (usually do not require changes if Redis is only used for cache)
REDIS_HOST=redis
REDIS_PORT=6379

# Email Configuration (for invitations, password resets, etc.)
# Example for Mailgun, you can use SendGrid, Postmark, AWS SES, or SMTP
# MAIL_SERVICE_PROVIDER=mailgun
# MAIL_FROM_EMAIL=wiki@YOUR_DOMAIN.COM
# MAILGUN_API_KEY=mg-ваш-api-ключ
# MAILGUN_DOMAIN=mg.YOUR_DOMAIN.COM

# Or for SMTP (replace with your data)
# SMTP_HOST=smtp.gmail.com
# SMTP_PORT=587
# [email protected]
# SMTP_PASSWORD=your_email_password
# SMTP_SECURE=false # true for SSL/TLS, false for STARTTLS

# Authentication Providers (select the ones you need, comment out the rest)
# GOOGLE_CLIENT_ID=
# GOOGLE_CLIENT_SECRET=
# SLACK_CLIENT_ID=
# SLACK_CLIENT_SECRET=
# SLACK_SIGNING_SECRET=
# MICROSOFT_CLIENT_ID=
# MICROSOFT_CLIENT_SECRET=
# OIDC_CLIENT_ID=
# OIDC_CLIENT_SECRET=
# OIDC_AUTH_URL=
# OIDC_TOKEN_URL=
# OIDC_USERINFO_URL=
# OIDC_DISPLAY_NAME=
# OIDC_SCOPES=
# OIDC_USERNAME_CLAIM=
# OIDC_GROUPS_CLAIM=

Important:

  • SECRET_KEY: Generate a long random string, for example, using openssl rand -base64 32.
  • POSTGRES_PASSWORD: Also generate a strong password.
  • URL: Specify the full HTTPS URL of your domain.
  • Configure the Email Configuration section so Outline can send invitations and notifications.
  • Configure the Authentication Providers sections if you plan to use Google, Slack, Microsoft, or OIDC for login. Initially, you can leave them commented out.

Save the file (Ctrl+O, Enter) and exit (Ctrl+X).

6. Starting Outline Wiki

Now that everything is ready, start Outline Wiki with Docker Compose:


docker compose up -d # Run containers in the background

This command will create and start three containers: Outline, PostgreSQL, and Redis. The process may take a few minutes while images are downloaded and the database is initialized.

Check the status of the containers:


docker compose ps

All containers should be in the running state.

At this point, Outline Wiki is running on port 3000 of your server. However, it is not yet externally accessible and does not have HTTPS. We will address this in the next section.
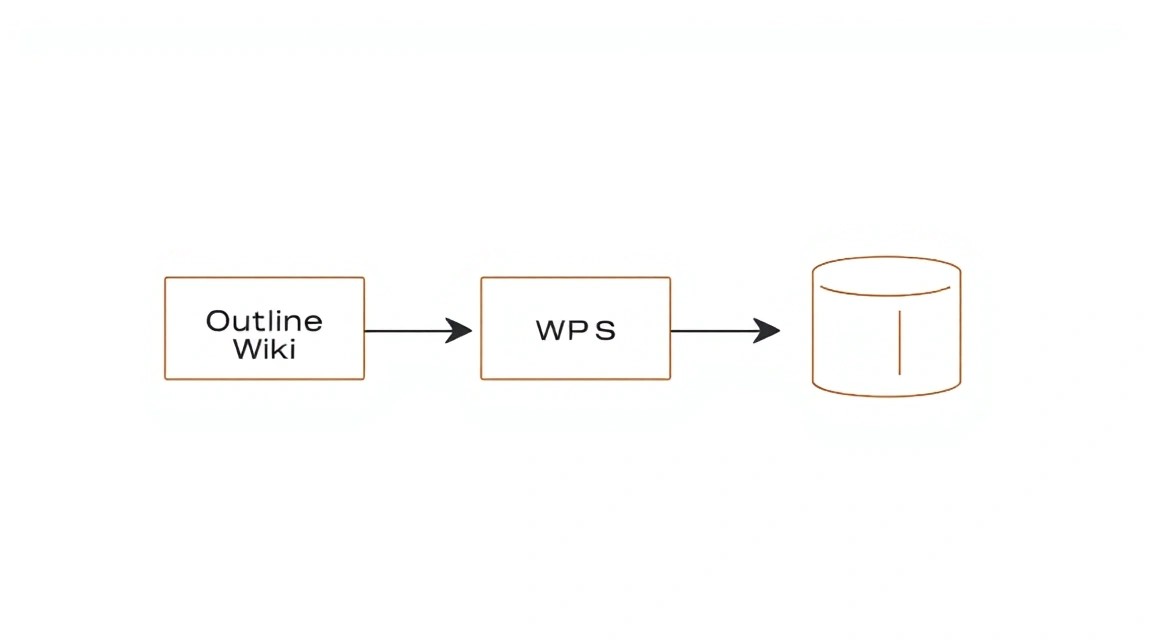
Configuration

Diagram: Configuration

After installing the components, you need to configure a web server to proxy requests to Outline and provide HTTPS. We will use Caddy — a modern web server that automatically manages Let's Encrypt certificates.

1. Installing Caddy (version 2.7.x as of 2026)

Caddy can be installed from the official repository. First, add the GPG key:


sudo apt install -y debian-keyring debian-archive-keyring apt-transport-https
curl -1sLf 'https://dl.cloudsmith.io/public/caddy/stable/gpg.key' | sudo gpg --dearmor -o /usr/share/keyrings/caddy-stable-archive-keyring.gpg
curl -1sLf 'https://dl.cloudsmith.io/public/caddy/stable/debian.deb.txt' | sudo tee /etc/apt/sources.list.d/caddy-stable.list

Then update the package list and install Caddy:


sudo apt update
sudo apt install caddy -y

Verify that Caddy is installed and running:


sudo systemctl status caddy

It should be active (active (running)).

2. Configuring the Caddyfile

Caddy uses a configuration file called Caddyfile. We will configure it to act as a reverse proxy for Outline Wiki and automatically obtain HTTPS certificates.


sudo nano /etc/caddy/Caddyfile

Remove all file content and paste the following, replacing YOUR_DOMAIN.COM with your actual domain:


YOUR_DOMAIN.COM {
  # Enable automatic HTTPS certificates from Let's Encrypt
  tls {
    dns cloudflare ВАШ_КЛЮЧ_API_CLOUDFLARE
    # If you are not using Cloudflare DNS, simply use "tls [email protected]"
    # Caddy will use the HTTP-01 challenge, which requires port 80 to be open.
    # If port 80 is occupied, or you are behind NAT, the DNS challenge is preferred.
  }

  # Proxy requests to the Outline Docker container
  reverse_proxy localhost:3000 {
    # Additional headers required for Outline
    header_up Host {host}
    header_up X-Real-IP {remote_ip}
    header_up X-Forwarded-For {remote_ip}
    header_up X-Forwarded-Proto {scheme}
  }

  # Optional: compression for faster loading
  encode gzip zstd

  # Optional: logging
  log {
    output file /var/log/caddy/outline.log
  }
}

Important:

  • DNS provider: If your domain is managed through Cloudflare (or another DNS provider supported by Caddy), you can use the DNS challenge to obtain certificates. This is convenient if you have a complex network configuration or port 80 is unavailable. Replace ВАШ_КЛЮЧ_API_CLOUDFLARE with your Cloudflare API token. You will also need to install the Caddy plugin for Cloudflare if it's not enabled by default (sudo apt install caddy-dns-cloudflare).
  • HTTP-01 challenge: If you are not using the DNS challenge, simply specify tls [email protected] (replace with your email). Caddy will attempt to obtain a certificate via the HTTP-01 challenge, which requires port 80 to be open and accessible from outside.
  • Logging: Create a directory for logs: sudo mkdir -p /var/log/caddy && sudo chown caddy:caddy /var/log/caddy.

Save changes (Ctrl+O, Enter) and exit (Ctrl+X).

3. Verify and Reload Caddy

Check the Caddyfile syntax:


sudo caddy validate --config /etc/caddy/Caddyfile

If there are no errors, reload Caddy to apply the new configuration:


sudo systemctl reload caddy

Caddy will automatically obtain and install an SSL certificate for your domain. This may take a few seconds.

4. DNS Configuration

Ensure that your domain (YOUR_DOMAIN.COM) points to your VPS's IP address. Create an A-record with your DNS provider, for example:


Type: A
Name: @ (or your subdomain, e.g., wiki)
Value: ВАШ_IP_АДРЕС_VPS

DNS record propagation may take some time (from a few minutes to several hours).

5. Verifying Functionality

Once DNS updates, open your domain (https://YOUR_DOMAIN.COM) in your browser. You should see the Outline Wiki welcome page. Register the first user (they will become the administrator).

You can also check accessibility from the server:


curl -I https://YOUR_DOMAIN.COM # Check HTTP headers

You should see an HTTP/2 200 status and headers indicating a successful response.

If problems arise, check Caddy logs:


sudo journalctl -u caddy -f

And Outline container logs:


docker compose logs -f outline

At this point, Outline Wiki is fully configured, accessible via HTTPS, and ready for use.

Backups and Maintenance

Diagram: Backups and Maintenance

Regular backups are a critically important part of operating any service. For Outline Wiki, it is necessary to back up the database, uploaded files, and configuration files.

1. What to Back Up

  • PostgreSQL Database: Contains all text information, wiki structure, users, and their permissions. This is the most important component.
  • Uploaded Files: The directory ./data/uploads contains images, documents, and other files attached to wiki pages.
  • Configuration Files: The docker-compose.yml and .env files. Although they can be recreated, saving the current versions will simplify recovery.

2. Simple Auto-Backup Script

Let's create a simple script that will perform a backup and save it to a separate directory. Navigate to the Outline root directory (~/outline).


mkdir -p ~/outline/backups
nano ~/outline/backup_outline.sh

Insert the following content:


#!/bin/bash

# Backup directory
BACKUP_DIR="/home/outlineadmin/outline/backups"
TIMESTAMP=$(date +"%Y%m%d%H%M%S")
DB_BACKUP_FILE="$BACKUP_DIR/outline_db_backup_$TIMESTAMP.sql.gz"
UPLOADS_BACKUP_FILE="$BACKUP_DIR/outline_uploads_backup_$TIMESTAMP.tar.gz"
CONFIG_BACKUP_FILE="$BACKUP_DIR/outline_config_backup_$TIMESTAMP.tar.gz"

# Change to Outline directory for correct docker compose operation
cd /home/outlineadmin/outline || { echo "Failed to change directory to ~/outline"; exit 1; }

echo "Starting Outline Wiki backup at $TIMESTAMP..."

# 1. PostgreSQL Database Backup
echo "Backing up PostgreSQL database..."
# Using docker exec to run pg_dump inside the postgres container
# Get postgres container name from docker-compose.yml
POSTGRES_CONTAINER=$(docker compose ps -q postgres)
if [ -z "$POSTGRES_CONTAINER" ]; then
    echo "Error: PostgreSQL container not found."
    exit 1
fi

# Get environment variables from .env
source ./.env

docker exec "$POSTGRES_CONTAINER" pg_dump -U "$POSTGRES_USER" -d "$POSTGRES_DB" | gzip > "$DB_BACKUP_FILE"
if [ $? -eq 0 ]; then
    echo "PostgreSQL database backup created: $DB_BACKUP_FILE"
else
    echo "Error backing up PostgreSQL database."
    exit 1
fi

# 2. Uploaded Files Backup
echo "Backing up uploaded files..."
tar -czf "$UPLOADS_BACKUP_FILE" ./data/uploads
if [ $? -eq 0 ]; then
    echo "Uploaded files backup created: $UPLOADS_BACKUP_FILE"
else
    echo "Error backing up uploaded files."
    exit 1
fi

# 3. Configuration Files Backup
echo "Backing up configuration files..."
tar -czf "$CONFIG_BACKUP_FILE" ./.env ./docker-compose.yml
if [ $? -eq 0 ]; then
    echo "Configuration files backup created: $CONFIG_BACKUP_FILE"
else
    echo "Error backing up configuration files."
    exit 1
fi

# 4. Deleting old backups (keep last 7 days)
echo "Cleaning up old backups..."
find "$BACKUP_DIR" -type f -name "outline_*.gz" -mtime +7 -delete
echo "Old backups cleaned up."

echo "Outline Wiki backup completed."

Save the file and make it executable:


chmod +x ~/outline/backup_outline.sh

Test the script by running it manually:


~/outline/backup_outline.sh
ls ~/outline/backups/

You should see the created backup files.

3. Automating Backups with Cron

Add the script to the Cron scheduler for daily execution. For example, every day at 3:00 AM:


crontab -e

Add the following line to the end of the file (make sure the script path is correct):


0 3 * * * /home/outlineadmin/outline/backup_outline.sh >> /var/log/outline_backup.log 2>&1

This line will run the script every day at 3 AM and write the output to the log file /var/log/outline_backup.log.

4. Where to Store Backups

Storing backups on the same server as the main service is extremely risky. If the server fails, you will lose both your data and your backups. It is recommended to use:

  • External S3-compatible storage: AWS S3, DigitalOcean Spaces, Backblaze B2. This is a reliable and relatively inexpensive storage method. You can configure the script to automatically upload backups to S3.
  • Separate VPS: A small, inexpensive VPS dedicated solely to storing backups, to which files can be copied via rsync/scp.
  • Local NAS/server: If you have your own hardware.

For automatic upload to S3, you can use s3cmd or aws cli. Example of adding to the script after creating backups:


# Install aws cli (if not installed)
# sudo apt install awscli -y
# aws configure # Configure your AWS keys

# ... (after creating backups) ...

echo "Uploading backups to S3..."
aws s3 cp "$DB_BACKUP_FILE" s3://your-s3-bucket/outline/db/
aws s3 cp "$UPLOADS_BACKUP_FILE" s3://your-s3-bucket/outline/uploads/
aws s3 cp "$CONFIG_BACKUP_FILE" s3://your-s3-bucket/outline/config/
echo "Backups uploaded to S3."

5. Updates: rolling vs maintenance window

Updating Outline Wiki and its components (PostgreSQL, Redis, Docker) requires careful attention.

  • Updating Outline Wiki: The simplest way is to update the Docker image. Navigate to the ~/outline directory and execute:
    
                docker compose pull outline # Download new Outline image
                docker compose up -d outline # Recreate Outline container with the new image
                

    Always read the Outline changelog before updating to learn about possible changes in requirements or DB migrations.

  • Updating System Packages (Ubuntu): Regularly run sudo apt update && sudo apt upgrade -y. This can be done weekly or monthly.
  • Updating Docker Engine: Do this less frequently and with caution, as it can affect all containers. It is recommended to do this within a "maintenance window".

Update Strategy:

  • Rolling updates (for Outline): If there are no critical database changes, updating the Outline image can be considered "rolling" (without downtime).
  • Maintenance window (for Docker, OS, major Outline updates): For larger updates that could potentially disrupt service operation, allocate a maintenance window, warn users, and perform the update with a fresh backup at hand.

Troubleshooting + FAQ

In this section, we will cover typical problems you might encounter when installing and configuring Outline Wiki, and answer frequently asked questions.

Cannot connect to Outline Wiki by domain name. What to check?

First, ensure that the DNS record for your domain (A-record) correctly points to your VPS's IP address. You can check this with the command dig YOUR_DOMAIN.COM on your local machine. Then, check if Caddy is running: sudo systemctl status caddy. If Caddy is not running or has errors, check its logs: sudo journalctl -u caddy -f. Make sure ports 80 and 443 are open in UFW: sudo ufw status. Also, check that the Outline Docker container is running: docker compose ps.

Outline Wiki returns a 502 Bad Gateway error. What is the cause?

A 502 error usually means that Caddy could not connect to the backend service (Outline). This can be caused by the Outline container not running, or it is running but not listening on the expected port (3000). Check the status of the Outline container: docker compose ps. If it is not running, check the container logs: docker compose logs outline. Make sure that in the .env and docker-compose.yml files, the Outline port is set to 3000 and Caddy proxies requests specifically to localhost:3000.

What is the minimum VPS configuration suitable for Outline Wiki?

For a small number of users (up to 5-10 active), the minimum configuration is 1 vCPU, 2 GB RAM, and 20-30 GB SSD. However, for more comfortable operation and growth potential, 2 vCPU, 4 GB RAM, and 50 GB SSD are recommended. These specifications will provide sufficient performance for the database, cache, and the Outline application itself.

What to choose — VPS or dedicated for this task?

For Outline Wiki, a VPS is sufficient in most cases. A dedicated server becomes relevant if you have a very large team (hundreds of users), extremely high load, or if strict requirements for resource isolation and security are needed, which only a physical server can provide. For typical use in small and medium businesses or for personal projects, a VPS is the optimal and cost-effective choice.

Cannot register the first user, Outline is not sending emails.

This is almost certainly a problem with the email settings in the .env file. Outline uses SMTP or third-party services (Mailgun, SendGrid) to send emails. Ensure that all parameters (MAIL_FROM_EMAIL, SMTP_HOST, SMTP_PORT, SMTP_USERNAME, SMTP_PASSWORD, SMTP_SECURE) are specified correctly. Check the Outline container logs for errors related to email sending: docker compose logs outline. It is possible that your VPS provider blocks standard SMTP ports, or the mail server requires additional authentication.

How to update Outline Wiki to a new version?

To update Outline Wiki when deployed via Docker Compose, follow these steps in the ~/outline directory:


        docker compose pull outline # Download the latest version of the Outline image
        docker compose up -d outline # Recreate the Outline container with the new image
        
Before doing this, it is recommended to back up your data and review the Outline changelog on GitHub to ensure there are no critical changes or database migration requirements.

I forgot the Outline administrator password. How do I reset it?

If you have configured email sending, you can use the "Forgot password" function on the login page. If email is not working or you want to reset the password manually, it is more complex. You will need to access the PostgreSQL database inside the container and manually change or reset the password hash. This is a complex operation requiring accuracy and usually involves executing SQL queries directly against the user table. It is recommended to first ensure that email sending is configured correctly.

Conclusions and Next Steps

Diagram: Conclusions and Next Steps

Congratulations! You have successfully installed and configured Outline Wiki on your VPS. You now have a powerful, secure, and fully controlled knowledge base for your team or personal projects, accessible via your own domain name with HTTPS protection. You have mastered not only application deployment but also basic server setup, security, and backup strategy, which are valuable skills for any server owner.

What to do next?

  • Configure Authentication: Integrate Outline with Google, Slack, Microsoft, or your OIDC provider to simplify user login.
  • Monitoring: Set up a monitoring system (e.g., Prometheus + Grafana) to track server status and the performance of Outline, PostgreSQL, and Redis.
  • Optimization: As load increases, consider options for optimizing database performance, caching, or scaling VPS resources.

¿Te fue útil esta guía?

Tus comentarios nos ayudan a mejorar nuestras guías.

Compartir esta publicación:

Envía esta guía a alguien a quien pueda resultarle útil.

Telegram VKVK WhatsApp Facebook LinkedIn XX

Outline Wiki installation and setup on VPS
support_agent
Valebyte Support
Usually replies within minutes
Hi there!
Send us a message and we'll reply as soon as possible.