La instalación de Node-RED en un VPS implica el despliegue de la plataforma a través de Docker o Docker Compose, la configuración de un proxy inverso para un acceso seguro mediante HTTPS y un mantenimiento regular para un funcionamiento estable de la automatización, lo que garantiza flexibilidad y control total sobre sus flujos de datos.
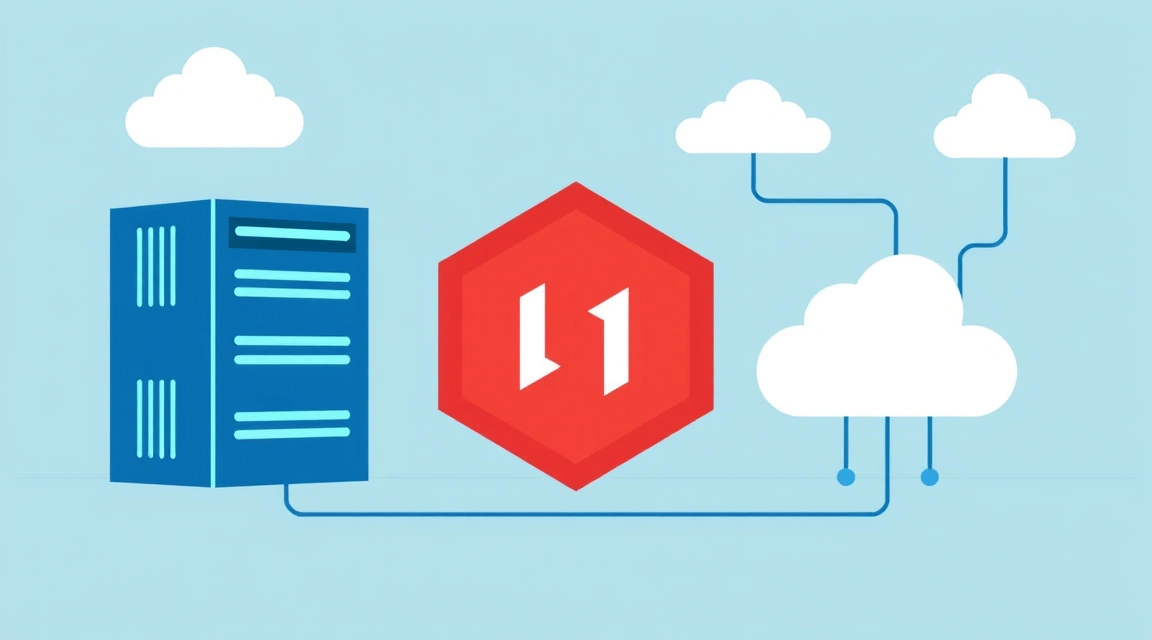
Node-RED es una potente herramienta de programación visual que permite conectar fácilmente dispositivos de hardware, API y servicios en línea. Su entorno único de arrastrar y soltar hace que el desarrollo de automatizaciones sea accesible incluso para aquellos que no son programadores profesionales. Alojar Node-RED en su propio Servidor Privado Virtual (VPS) abre nuevos horizontes para proyectos que requieren un funcionamiento estable, alto rendimiento y control total sobre los datos y la configuración. En este artículo, exploraremos en detalle cómo instalar Node-RED en un VPS, configurarlo para un acceso seguro y mantenerlo de manera eficiente.
¿Qué es Node-RED y por qué es ideal para un VPS?
Node-RED es un entorno de programación basado en flujos, desarrollado por IBM para el Internet de las Cosas (IoT), pero que rápidamente encontró aplicación en una amplia gama de tareas de automatización. Permite crear cadenas lógicas complejas conectando "nodos" (nodes), cada uno de los cuales realiza una función específica, desde leer datos de sensores hasta enviar notificaciones o interactuar con bases de datos. La interfaz de Node-RED es un editor basado en navegador donde puede construir visualmente sus "flujos" (flows), arrastrando y conectando nodos.
El despliegue de Node-RED en un VPS (Virtual Private Server) ofrece varias ventajas clave sobre la ejecución local o el uso de soluciones en la nube:
- Control total: Usted es dueño de toda la infraestructura, desde el sistema operativo hasta la propia aplicación. Esto es crítico para proyectos que requieren configuraciones específicas, acceso a recursos del sistema o integración con redes privadas.
- Fiabilidad y disponibilidad 24/7: A diferencia de un servidor local, que puede no estar disponible debido a problemas de energía o conexión a Internet, un VPS funciona las 24 horas del día en un centro de datos con disponibilidad garantizada.
- Escalabilidad: A medida que sus proyectos crecen y la carga en Node-RED aumenta, puede escalar fácilmente los recursos del VPS (CPU, RAM, almacenamiento) sin necesidad de migrar todo el sistema.
- Seguridad: Usted controla todos los aspectos de la seguridad, incluidos firewalls, acceso SSH, actualizaciones del sistema operativo y certificados SSL. Esto es especialmente importante para el autoalojamiento de Home Assistant y otras aplicaciones sensibles a la seguridad.
- Rentabilidad: Para muchos proyectos, un VPS ofrece una relación precio-rendimiento óptima en comparación con las costosas plataformas de nube empresariales.
- Persistencia de datos: Todos sus flujos, configuraciones y datos se almacenan en su VPS, no en servidores de terceros, lo que elimina la dependencia de proveedores de servicios externos.
¿Para qué se utiliza Node-RED? Ejemplos de aplicación
El espectro de aplicación de Node-RED es enorme gracias a su flexibilidad y a su extensa biblioteca de nodos. Aquí hay algunos ejemplos:
- Automatización del hogar inteligente: Integración de varios dispositivos (sensores, relés, luces) y servicios (clima, horarios) para crear escenarios complejos.
- Monitorización y alertas: Recopilación de datos de servidores, dispositivos de red, servicios web y envío de notificaciones (correo electrónico, Telegram, Slack) al alcanzar umbrales.
- Análisis y procesamiento de datos: Extracción de información de páginas web, procesamiento de datos JSON/XML, conversión de formatos.
- Creación de API y servicios web: Prototipado y despliegue rápido de API RESTful, manejadores de webhooks.
- Integración de sistemas empresariales: Conexión de CRM, ERP, bases de datos y otras aplicaciones para automatizar procesos de negocio.
- Gestión de dispositivos IoT: Recopilación de telemetría, control remoto, actualización de firmware.
Requisitos mínimos del sistema para ejecutar Node-RED en un servidor
Aunque Node-RED es bastante ligero y puede ejecutarse incluso en ordenadores de placa única como Raspberry Pi, para un funcionamiento estable y de alto rendimiento en un VPS, especialmente considerando el crecimiento potencial del número de flujos e integraciones, es importante elegir la configuración adecuada. Los requisitos de recursos dependen de la complejidad y cantidad de sus flujos, la frecuencia de las operaciones, el volumen de datos procesados y el número de nodos adicionales instalados.
Requisitos básicos para Node-RED
- Sistema operativo: Cualquier distribución moderna de Linux (Ubuntu 20.04+, Debian 11+, CentOS 8+, AlmaLinux, Rocky Linux). Se recomienda Ubuntu Server LTS para un mejor soporte y comunidad.
- Procesador (CPU): 1 vCPU con una frecuencia de 2.0 GHz o superior. Para proyectos pequeños y flujos simples, esto será suficiente. Si se planea un procesamiento intensivo de datos o muchos flujos paralelos, considere 2 vCPU.
- Memoria RAM: Mínimo 1 GB de RAM. Node.js y Node-RED consumen alrededor de 100-200 MB, pero los nodos adicionales, el almacenamiento en caché de datos y el sistema operativo requieren más. Para escenarios más complejos, se recomiendan 2 GB de RAM.
- Espacio en disco: Mínimo 10 GB NVMe o SSD. Para la instalación de Node-RED y Docker se necesitarán varios gigabytes. El resto es para el sistema operativo, el almacenamiento de flujos, registros y cualquier dato que Node-RED pueda guardar (por ejemplo, bases de datos SQLite, archivos). Los discos NVMe aceleran significativamente las operaciones de entrada/salida, lo que tiene un impacto positivo en el rendimiento general.
- Conexión de red: Conexión a Internet estable con un ancho de banda de al menos 100 Mbps. Para la mayoría de los VPS, esto es estándar.
Recomendaciones para la elección de la configuración de VPS para Node-RED
Para la mayoría de los usuarios que comienzan a trabajar con Node-RED en un servidor, una tarifa equilibrada será óptima. Valebyte.com ofrece varias tarifas que se adaptarán a cualquier tarea.
| Escenario de uso | CPU | RAM | Disco (NVMe/SSD) | Costo estimado (USD/mes) |
|---|---|---|---|---|
| Ligero (Pocos flujos simples, integraciones de Home Assistant, solicitudes poco frecuentes) | 1 vCPU (2.0+ GHz) | 1 GB | 20 GB | $5 - $10 |
| Medio (Decenas de flujos, procesamiento de datos, puerta de enlace API, carga moderada) | 2 vCPU (2.5+ GHz) | 2 GB | 40 GB | $10 - $20 |
| Avanzado/Carga alta (Cientos de flujos, procesamiento intensivo, bases de datos, muchos usuarios) | 4 vCPU (3.0+ GHz) | 4 GB+ | 80 GB+ | $20 - $40+ |
La elección de un VPS con discos NVMe mejorará significativamente la respuesta de Node-RED, especialmente al trabajar con archivos o bases de datos como SQLite, que se utilizan con frecuencia en los flujos. También vale la pena considerar que el uso de Docker añade una pequeña sobrecarga, pero es insignificante en comparación con las ventajas de la contenerización.
¿Buscas un servidor fiable para tus proyectos?
VPS desde $10/mes y servidores dedicados desde $9/mes con NVMe, protección DDoS y soporte 24/7.
Ver ofertas →Instalación paso a paso de Node-RED en un VPS a través de Docker Compose
El uso de Docker y Docker Compose es la forma recomendada de instalar Node-RED en un VPS. Proporciona aislamiento, facilidad de despliegue, actualizaciones y gestión de dependencias. Utilizaremos Docker Compose para configurar Node-RED con almacenamiento de datos persistente.
Preparación del VPS
Antes de comenzar la instalación, asegúrese de que su VPS esté actualizado y tenga Docker y Docker Compose instalados. Conéctese al VPS por SSH.
sudo apt update && sudo apt upgrade -y
Instalación de Docker:
sudo apt install -y ca-certificates curl gnupg lsb-release
sudo mkdir -p /etc/apt/keyrings
curl -fsSL https://download.docker.com/linux/ubuntu/gpg | sudo gpg --dearmor -o /etc/apt/keyrings/docker.gpg
echo "deb [arch=$(dpkg --print-architecture) signed-by=/etc/apt/keyrings/docker.gpg] https://download.docker.com/linux/ubuntu $(lsb_release -cs) stable" | sudo tee /etc/apt/sources.list.d/docker.list > /dev/null
sudo apt update
sudo apt install -y docker-ce docker-ce-cli containerd.io docker-buildx-plugin docker-compose-plugin
Añada el usuario actual al grupo docker para no tener que usar sudo en cada comando de Docker:
sudo usermod -aG docker $USER
newgrp docker
Verifique la instalación de Docker:
docker run hello-world
Creación del archivo Docker Compose para Node-RED
Cree un directorio para Node-RED y navegue hasta él:
mkdir ~/node-red
cd ~/node-red
Cree el archivo docker-compose.yml:
nano docker-compose.yml
Pegue el siguiente contenido:
version: '3.8'

services:
  node-red:
    image: nodered/node-red:latest
    container_name: node-red
    restart: unless-stopped
    ports:
      - "1880:1880" # Puerto interno de Node-RED
    volumes:
      - ./data:/data # Almacenamiento persistente para flujos y configuraciones
    environment:
      - TZ=Europe/Moscow # Establece tu zona horaria
      - NODE_RED_ENABLE_PROJECTS=true # Habilitar la gestión de proyectos (opcional)
      - NODE_RED_USERNAME=admin # Nombre de usuario para iniciar sesión (se recomienda cambiar)
      - NODE_RED_PASSWORD=your_secure_password # Contraseña para iniciar sesión (¡OBLIGATORIO CAMBIAR!)
    networks:
      - node-red-net

networks:
  node-red-net:
    driver: bridge
Explicación del archivo docker-compose.yml:
image: nodered/node-red:latest: Utiliza la imagen oficial de Node-RED.container_name: node-red: Asigna un nombre fácilmente reconocible al contenedor.restart: unless-stopped: El contenedor se reiniciará automáticamente en caso de fallo o reinicio del VPS.ports: - "1880:1880": Mapea el puerto 1880 del contenedor al puerto 1880 del host. Esto significa que Node-RED estará accesible enhttp://TU_IP_VPS:1880.volumes: - ./data:/data: Esta es una línea críticamente importante. Monta el directorio local./data(dentro de~/node-red) en el directorio/datadentro del contenedor. Todos tus flujos, configuraciones y nodos instalados se almacenarán en este directorio local, asegurando su persistencia incluso si el contenedor se elimina o actualiza.environment:: Aquí puedes definir variables de entorno.TZ=Europe/Moscow: Establece tu zona horaria.NODE_RED_ENABLE_PROJECTS=true: Habilita la función de gestión de proyectos en Node-RED, lo cual es útil para el control de versiones y la colaboración.NODE_RED_USERNAMEyNODE_RED_PASSWORD: Establecen las credenciales de acceso al editor de Node-RED. ¡Asegúrate de cambiaryour_secure_passwordpor una contraseña segura! Para una autenticación más avanzada, se pueden utilizar mecanismos externos o contraseñas HASH.
networks:: Define la red interna de Docker para el contenedor.
Inicio de Node-RED
Guarde el archivo (Ctrl+X, Y, Enter) e inicie el contenedor:
docker compose up -d
El flag -d inicia el contenedor en segundo plano. Puede verificar el estado del contenedor:
docker compose ps
O ver los logs:
docker compose logs -f node-red
Ahora Node-RED debería estar accesible en http://TU_IP_VPS:1880. Introduzca el nombre de usuario y la contraseña que configuró.
¿Buscas un servidor que simplemente funcione?
Valebyte VPS — NVMe, soporte 24/7, despliegue en 60 segundos.
Configuración de acceso seguro: Reverse Proxy (Nginx/Caddy) y HTTPS para Node-RED
El acceso a Node-RED por HTTP a través de una dirección IP y el puerto 1880 es inseguro e inconveniente. Para garantizar la seguridad, el uso de un nombre de dominio y la obtención de un certificado SSL, configuraremos un proxy inverso con Nginx o Caddy y HTTPS utilizando Let's Encrypt.
Se asume que usted tiene un nombre de dominio (por ejemplo, node-red.yourdomain.com) que apunta a la dirección IP de su VPS.
Opción 1: Nginx con Let's Encrypt (Certbot)
Instalación de Nginx y Certbot:
sudo apt install -y nginx certbot python3-certbot-nginx
Creación de la configuración de Nginx:
Cree un archivo de configuración para su dominio:
sudo nano /etc/nginx/sites-available/node-red.conf
Pegue el siguiente contenido, reemplazando node-red.yourdomain.com por su dominio real:
server {
    listen 80;
    server_name node-red.yourdomain.com;

    location / {
        proxy_pass http://localhost:1880; # Proxy al puerto de Node-RED
        proxy_http_version 1.1;
        proxy_set_header Upgrade $http_upgrade;
        proxy_set_header Connection "upgrade";
        proxy_set_header Host $host;
        proxy_set_header X-Real-IP $remote_addr;
        proxy_set_header X-Forwarded-For $proxy_add_x_forwarded_for;
        proxy_set_header X-Forwarded-Proto $scheme;
        proxy_cache_bypass $http_upgrade;
    }
}
Cree un enlace simbólico a sites-enabled:
sudo ln -s /etc/nginx/sites-available/node-red.conf /etc/nginx/sites-enabled/
Verifique la sintaxis de Nginx y reinícielo:
sudo nginx -t
sudo systemctl restart nginx
Obtención de un certificado SSL con Certbot:
Ahora use Certbot para obtener y configurar automáticamente un certificado SSL:
sudo certbot --nginx -d node-red.yourdomain.com
Siga las instrucciones de Certbot. Modificará automáticamente la configuración de Nginx, añadiendo HTTPS y la redirección de HTTP a HTTPS. Después de esto, su Node-RED estará disponible en https://node-red.yourdomain.com.
Opción 2: Caddy con HTTPS automático
Caddy es un servidor web moderno que gestiona automáticamente los certificados SSL de Let's Encrypt. Esto lo hace muy fácil de configurar.
Instalación de Caddy:
sudo apt install -y debian-keyring debian-archive-keyring apt-transport-https
curl -1sLf 'https://dl.cloudsmith.io/public/caddy/stable/gpg.key' | sudo gpg --dearmor -o /usr/share/keyrings/caddy-stable-archive-keyring.gpg
curl -1sLf 'https://dl.cloudsmith.io/public/caddy/stable/debian.deb.txt' | sudo tee /etc/apt/sources.list.d/caddy-stable.list
sudo apt update
sudo apt install -y caddy
Creación de Caddyfile:
Cree o edite el archivo /etc/caddy/Caddyfile:
sudo nano /etc/caddy/Caddyfile
Elimine todo el contenido existente y pegue lo siguiente, reemplazando node-red.yourdomain.com por su dominio:
node-red.yourdomain.com {
    reverse_proxy localhost:1880

    # Opcional: habilitar autenticación HTTP básica
    # basicauth {
    #     username your_secure_username
    #     password your_secure_password_for_caddy
    # }
}
Guarde el archivo y reinicie Caddy:
sudo systemctl reload caddy
Caddy obtendrá automáticamente un certificado SSL y configurará HTTPS. Su Node-RED estará disponible en https://node-red.yourdomain.com.
Tenga en cuenta que Caddy puede tardar hasta 30 segundos en obtener el primer certificado. Si surgen problemas, revise los logs de Caddy: sudo journalctl -u caddy --no-pager.
Mantenimiento de Node-RED: copia de seguridad y actualizaciones
El mantenimiento regular de Node-RED en un VPS es fundamental para garantizar la estabilidad, seguridad y preservación de sus proyectos. Esto incluye la copia de seguridad de datos y las actualizaciones oportunas.
Copia de seguridad de datos de Node-RED
Gracias a que utilizamos Docker Compose con un volumen persistente (./data:/data), todos los datos importantes de Node-RED (flujos, configuraciones, nodos instalados) se almacenan en el directorio ~/node-red/data de su VPS. La copia de seguridad se reduce a copiar este directorio.
Copia de seguridad manual
Para crear una copia de seguridad manual, basta con detener el contenedor de Node-RED, copiar el directorio data y luego iniciar el contenedor de nuevo:
cd ~/node-red
docker compose stop node-red
tar -czvf node-red_backup_$(date +%Y%m%d_%H%M%S).tar.gz data/
docker compose start node-red
docker compose stop node-red: Detiene el contenedor de Node-RED para asegurar la integridad de los datos durante la copia.tar -czvf ... data/: Crea un archivo comprimido del directoriodata.docker compose start node-red: Inicia el contenedor de Node-RED.
Se recomienda almacenar el archivo .tar.gz resultante no solo en el VPS, sino también subirlo a un almacenamiento remoto (S3, Google Drive, ordenador local). Para la automatización y fiabilidad, se pueden considerar herramientas como Restic para copias de seguridad en un VPS.
Copia de seguridad automática con Cron y un script
Puede crear un script simple y configurar su ejecución a través de Cron.
Cree el script backup_node_red.sh en el directorio ~/node-red/:
nano ~/node-red/backup_node_red.sh
Pegue el contenido:
#!/bin/bash

BACKUP_DIR="/home/$USER/node-red/backups" # Directorio para almacenar las copias de seguridad
DATA_DIR="/home/$USER/node-red/data"    # Directorio con los datos de Node-RED
CONTAINER_NAME="node-red"              # Nombre del contenedor de Node-RED
TIMESTAMP=$(date +%Y%m%d_%H%M%S)
BACKUP_FILE="$BACKUP_DIR/node-red_backup_$TIMESTAMP.tar.gz"

mkdir -p $BACKUP_DIR

echo "Deteniendo el contenedor de Node-RED..."
docker compose -f /home/$USER/node-red/docker-compose.yml stop $CONTAINER_NAME

echo "Creando copia de seguridad de los datos de Node-RED..."
tar -czf "$BACKUP_FILE" -C "$DATA_DIR" .

echo "Iniciando el contenedor de Node-RED..."
docker compose -f /home/$USER/node-red/docker-compose.yml start $CONTAINER_NAME

echo "Copia de seguridad creada: $BACKUP_FILE"

# Opcional: Eliminar copias de seguridad antiguas (por ejemplo, más de 7 días)
find $BACKUP_DIR -name "node-red_backup_*.tar.gz" -mtime +7 -delete
echo "Copias de seguridad antiguas eliminadas."
Haga el script ejecutable:
chmod +x ~/node-red/backup_node_red.sh
Configure Cron para una ejecución diaria (por ejemplo, a las 3:00 de la mañana):
crontab -e
Añada la siguiente línea al final del archivo (reemplace $USER por su nombre de usuario):
0 3 * * * /home/$USER/node-red/backup_node_red.sh >> /home/$USER/node-red/backup.log 2>&1
Ahora las copias de seguridad se crearán automáticamente.
Actualización de Node-RED y la imagen de Docker
Actualizar Node-RED a la última versión en Docker Compose es muy sencillo:
cd ~/node-red
docker compose pull node-red # Descarga la última versión de la imagen
docker compose up -d         # Recrea el contenedor con la nueva imagen, conservando los datos
Este comando primero descargará la nueva imagen de Node-RED y luego recreará el contenedor utilizando esta nueva imagen, pero conservando todos sus datos, ya que se almacenan en el volumen persistente ./data.
Actualización del sistema operativo y Docker
No olvide actualizar regularmente su sistema operativo y Docker:
sudo apt update && sudo apt upgrade -y
Esto garantizará la seguridad y estabilidad de todo el sistema.
¿Qué configuración de VPS elegir para Node-RED bajo carga real?
La elección de la configuración óptima de VPS para Node-RED depende de la naturaleza e intensidad de sus tareas. Subestimar los requisitos puede llevar a un funcionamiento lento, retrasos y fallos, mientras que pagar de más por recursos excesivos puede generar gastos innecesarios. Consideremos escenarios típicos y las recomendaciones correspondientes.
Escenarios de uso y recomendaciones de VPS
1. Escenario ligero (Pruebas, automatización personal, pocos flujos simples)
- Ejemplos: Gestión de un hogar inteligente con una docena de dispositivos, obtención de feeds RSS, envío de notificaciones meteorológicas, integraciones API simples.
- Carga: Baja actividad de CPU, operaciones de disco mínimas.
- Configuración de VPS recomendada:
- CPU: 1 vCPU (2.0+ GHz)
- RAM: 1 GB
- Disco: 20-30 GB NVMe/SSD
- Red: 100 Mbps
- Costo estimado: $5 - $10 al mes.
- Comentario: Esta configuración es perfecta para la mayoría de los usuarios domésticos y desarrolladores que necesitan una plataforma estable para experimentos y tareas no críticas. Por ejemplo, para alojar Miniflux o FreshRSS junto con Node-RED.
2. Escenario medio (Varias decenas de flujos, procesamiento de datos, puertas de enlace API, web scraping)
- Ejemplos: Recopilación de datos de decenas de fuentes, procesamiento de JSON/XML, creación de API personalizadas para aplicaciones móviles, integración con bases de datos, cadenas lógicas más complejas.
- Carga: Actividad de CPU moderada, picos periódicos, operaciones de disco frecuentes.
- Configuración de VPS recomendada:
- CPU: 2 vCPU (2.5+ GHz)
- RAM: 2 GB
- Disco: 40-60 GB NVMe/SSD
- Red: 200-500 Mbps
- Costo estimado: $10 - $20 al mes.
- Comentario: Este nivel es adecuado para pequeñas empresas, startups o usuarios avanzados que utilizan activamente Node-RED para procesos de negocio o proyectos más exigentes.
3. Escenario avanzado (Cientos de flujos, API de alta carga, procesamiento de grandes datos, sistemas multiusuario)
- Ejemplos: Plataforma de automatización centralizada para una empresa, recopilación y análisis de datos de cientos de dispositivos IoT, API de alta carga, integración con sistemas ERP/CRM corporativos, uso de Node-RED como backend para aplicaciones web.
- Carga: Alta actividad de CPU, operaciones de disco intensivas, gran volumen de RAM para almacenamiento en caché y procesamiento de datos.
- Configuración de VPS recomendada:
- CPU: 4+ vCPU (3.0+ GHz)
- RAM: 4 GB+
- Disco: 80 GB+ NVMe/SSD
- Red: 500 Mbps - 1 Gbps
- Costo estimado: $20 - $40+ al mes.
- Comentario: Para estas tareas, el rendimiento de los discos NVMe y un volumen suficiente de RAM son críticamente importantes. Posiblemente, valga la pena considerar un servidor dedicado para la máxima estabilidad y rendimiento.
Monitorización de recursos y escalabilidad
Después de desplegar Node-RED en un VPS, asegúrese de configurar la monitorización de recursos. Herramientas como Netdata en un VPS, Prometheus o Grafana, le ayudarán a rastrear la carga de la CPU, el uso de la RAM, las operaciones de disco y el tráfico de red. Esto le permitirá comprender cuándo los recursos se convierten en un cuello de botella y es hora de escalar su VPS.
Señales de que necesita más recursos:
- Respuesta lenta de la interfaz web de Node-RED.
- Retrasos en la ejecución de los flujos.
- Alta carga de CPU (constantemente superior al 80-90%).
- Falta de memoria RAM (uso activo de SWAP).
- Errores relacionados con la escasez de recursos.
Comience con una configuración mínima suficiente y escálela a medida que crezcan sus necesidades. La mayoría de los proveedores de VPS, incluido Valebyte.com, permiten cambiar fácilmente el plan de tarifas sin reinstalar el sistema.
¿Buscas un servidor que simplemente funcione?
Valebyte VPS — NVMe, soporte 24/7, despliegue en 60 segundos.
Funcionalidades avanzadas y mejores prácticas de Node-RED
Después de la instalación y configuración básica de Node-RED en su VPS, se pueden considerar pasos adicionales para mejorar la funcionalidad, seguridad y facilidad de uso.
Gestión de usuarios y seguridad
En el archivo docker-compose.yml, establecimos un nombre de usuario y contraseña básicos. Para una seguridad más avanzada, se puede:
- Usar contraseñas hash: Node-RED permite usar contraseñas hash. Puede generar un hash ejecutando Node-RED localmente con
node-red --generate-security-configo usando un nodo especial en un flujo. Luego, reemplaceNODE_RED_PASSWORDporNODE_RED_PASSWORD_HASHendocker-compose.yml. - Configurar acceso multiusuario: Si Node-RED va a ser utilizado por varios equipos o usuarios, se puede configurar una autenticación más compleja, por ejemplo, utilizando proveedores externos o nodos adicionales.
- Restringir el acceso por IP: Utilizando reglas de firewall (UFW) en su VPS, puede permitir el acceso al puerto 443 (para HTTPS) solo desde direcciones IP específicas, si es necesario.
- Habilitar HTTPS para API: Si crea API con Node-RED, HTTPS ya funcionará a través del proxy inverso que configuramos. Asegúrese de que todas las llamadas internas también estén protegidas.
Instalación de nodos adicionales (Nodes)
La biblioteca de nodos de Node-RED es enorme y se actualiza constantemente. Puede instalar nuevos nodos directamente desde la interfaz web del editor (Menú -> Manage palette -> Install) o manualmente a través de la línea de comandos del contenedor:
docker exec -it node-red bash
npm install node-red-contrib-telegrambot # Ejemplo de instalación del nodo Telegram
exit
docker compose restart node-red
La instalación a través de la interfaz web suele ser preferible.
Registro y depuración
Para depurar flujos de Node-RED, use el nodo debug. Permite mostrar mensajes en el panel de depuración del editor. Para el registro del sistema, puede ver los logs del contenedor:
docker compose logs -f node-red
Esto ayudará a identificar problemas con el inicio de Node-RED o errores no directamente relacionados con la lógica de los flujos.
Gestión de proyectos y control de versiones
Si en docker-compose.yml habilitó NODE_RED_ENABLE_PROJECTS=true, puede usar el sistema de gestión de proyectos integrado de Node-RED. Esto le permite vincular sus flujos a un repositorio Git, proporcionando control de versiones, colaboración y fácil despliegue de cambios. Esto es especialmente útil para proyectos grandes y trabajo en equipo.
Optimización del rendimiento de Node-RED
- Uso eficiente de los nodos: Evite operaciones innecesarias. Agrupe la lógica, use nodos
switchyfunctionpara flujos más compactos y rápidos. - Operaciones asíncronas: Para operaciones de larga duración (por ejemplo, solicitudes a API externas), utilice enfoques asíncronos para no bloquear el flujo principal de ejecución de Node-RED.
- Almacenamiento en caché: Utilice nodos para almacenar datos en caché si solicita con frecuencia los mismos datos, para reducir la carga en los servicios externos y acelerar los flujos.
- Uso del contexto: Almacene los datos que se utilizan con frecuencia en los flujos en el contexto (flow context o global context) para evitar recálculos o solicitudes repetidas.
Integración con otros servicios en el VPS
Su VPS puede convertirse en un punto central para muchas aplicaciones autoalojadas. Node-RED se integra perfectamente con otros servicios. Por ejemplo, puede usarlo para:
- Gestión de archivos alojados a través de Filebrowser en un VPS.
- Automatización de la sincronización de datos con Syncthing en un VPS.
- Envío de notificaciones basadas en datos de su Wiki.js.
La flexibilidad del VPS permite crear ecosistemas de automatización complejos, donde Node-RED actúa como un enlace.
Conclusiones
La instalación de Node-RED en un VPS a través de Docker Compose proporciona una plataforma potente, flexible y escalable para automatizar cualquier tarea, desde el hogar inteligente hasta las integraciones corporativas. Siguiendo esta guía, podrá desplegar Node-RED, configurar un acceso seguro mediante HTTPS y garantizar su funcionamiento estable mediante copias de seguridad y actualizaciones regulares. La elección de una configuración de VPS adecuada en Valebyte.com le permitirá utilizar Node-RED de manera eficiente bajo cualquier carga, garantizando el rendimiento y la fiabilidad de su sistema de automatización.
¿Listo para elegir un servidor?
VPS y servidores dedicados en más de 72 países con activación instantánea y acceso root completo.
Empezar ahora →