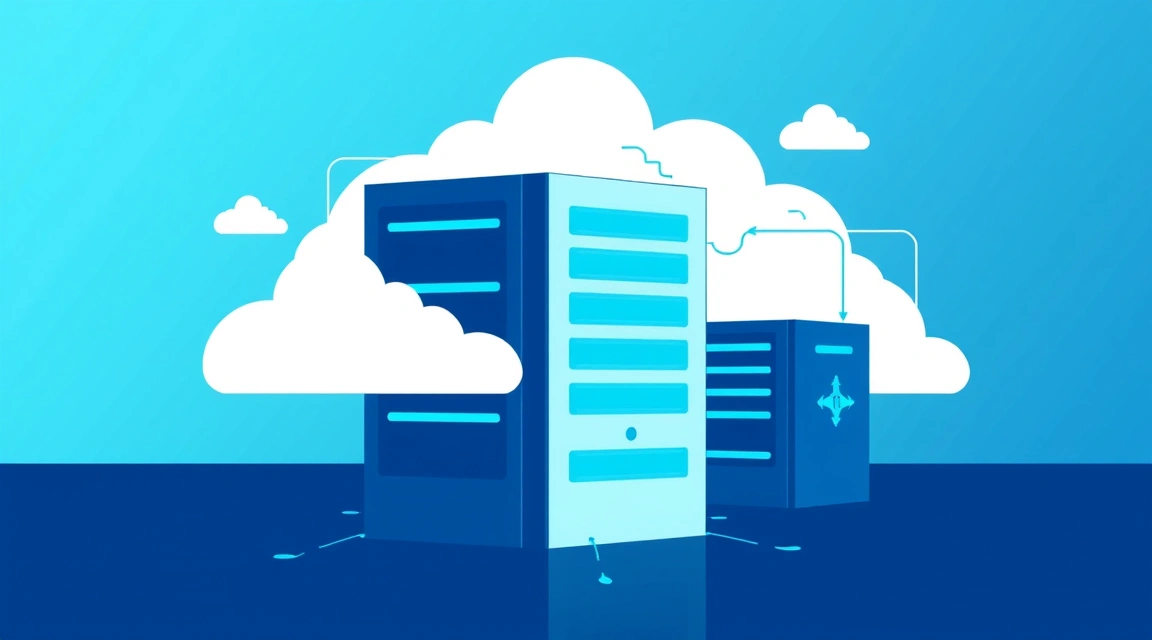
¿Qué es Navidrome y por qué es ideal para una biblioteca multimedia self-hosted?
Navidrome es un servidor de música moderno y de código abierto (open-source), diseñado para que pueda transmitir su propia colección de música desde cualquier dispositivo, utilizando una interfaz web o aplicaciones móviles compatibles con la API de Subsonic. A diferencia de los servicios comerciales, Navidrome le otorga control total sobre sus datos y archivos, eliminando las tarifas de suscripción y las restricciones de catálogo. Es la solución ideal para quienes buscan una opción `navidrome self-hosted` fiable para su audioteca.Características principales de Navidrome
Navidrome ofrece un rico conjunto de funciones que lo convierten en una de las mejores opciones para organizar su propia colección de música:- Compatibilidad con la API de Subsonic: Soporte para una amplia gama de clientes móviles y de escritorio, como Dsub, Subtracks, SubStreamer, Astiga y muchos otros. Esto significa que puede usar aplicaciones ya conocidas para acceder a su música.
- Interfaz web moderna: Una interfaz limpia, intuitiva y responsiva que funciona perfectamente en cualquier dispositivo, desde ordenadores de escritorio hasta smartphones.
- Escaneo automático de la biblioteca multimedia: Navidrome escanea automáticamente su carpeta de música, extrae metadatos (etiquetas ID3, carátulas de álbumes) y organiza su colección.
- Soporte para una amplia gama de formatos: Reproducción de MP3, FLAC, OGG, AAC, M4A y otros formatos de audio populares.
- Transcodificación al vuelo: Capacidad de transcodificar archivos de audio a un bitrate más bajo o a otro formato para ahorrar tráfico o por compatibilidad con dispositivos.
- Gestión de listas de reproducción y favoritos: Cree y gestione listas de reproducción, marque sus pistas y álbumes favoritos.
- Modo multiusuario: Soporte para múltiples usuarios con configuraciones y colecciones individuales. Cada usuario puede tener su propio historial de escucha y listas de reproducción.
- Bajos requisitos del sistema: Navidrome está escrito en Go, lo que lo hace muy eficiente y poco exigente en cuanto a recursos, ideal para `navidrome en un servidor` con capacidades limitadas.
Ventajas de Navidrome en un VPS
El despliegue de Navidrome en un VPS ofrece una serie de ventajas significativas en comparación con una instalación local o el uso de un servidor doméstico:- Disponibilidad 24/7: Su servidor de música estará disponible 24/7 desde cualquier parte del mundo con conexión a internet, sin necesidad de mantener su ordenador doméstico encendido.
- Estabilidad y fiabilidad: Los proveedores comerciales de VPS, como Valebyte.com, garantizan alta disponibilidad, conexión a internet estable y mantenimiento regular del hardware.
- Escalabilidad: Puede aumentar o disminuir fácilmente los recursos de su VPS (CPU, RAM, espacio en disco) a medida que cambien sus necesidades, sin interrumpir el servicio.
- Seguridad: El VPS se encuentra en un centro de datos profesional con seguridad física y alimentación de respaldo. También tiene control total sobre la seguridad de su sistema operativo.
- Dirección IP dedicada: La mayoría de los VPS vienen con una dirección IP dedicada, lo que simplifica la configuración de DNS y el acceso a su `navidrome vps` a través de un nombre de dominio.
- Sin problemas con la conexión a internet doméstica: No tiene que preocuparse por una dirección IP dinámica, el reenvío de puertos en el router o las limitaciones del proveedor de internet doméstico.
Requisitos del sistema de Navidrome y elección del VPS óptimo
Elegir el VPS adecuado para la `instalación de Navidrome` es crucial para garantizar un funcionamiento estable y rápido de su biblioteca multimedia. Aunque Navidrome es bastante ligero, sus requisitos de recursos dependerán del tamaño de su colección, el número de usuarios activos y la necesidad de transcodificación.Requisitos mínimos para la instalación de Navidrome
Navidrome es conocido por su eficiencia y es capaz de funcionar incluso en configuraciones muy modestas.- Procesador (CPU): 1 vCPU con una frecuencia de 1-2 GHz. Navidrome no requiere mucho tiempo de CPU si no hay transcodificación activa.
- Memoria RAM: 512 MB. Esto es suficiente para procesar una pequeña colección (hasta 10.000 pistas) y 1-2 usuarios activos sin transcodificación.
- Espacio en disco: Mínimo 10-20 GB para el sistema operativo y Navidrome. El almacenamiento principal dependerá del tamaño de su colección de música. Se recomienda usar discos SSD o NVMe para un mejor rendimiento.
- Interfaz de red: 100 Mbps. Para el streaming de música, esto es más que suficiente.
- Sistema operativo: Cualquier distribución moderna de Linux (Ubuntu, Debian, CentOS, etc.).
Configuraciones de VPS recomendadas para diferentes cargas de trabajo
Para un funcionamiento cómodo y la escalabilidad de su `navidrome en un servidor`, considere las siguientes configuraciones, basadas en escenarios de uso típicos:1. Pequeña biblioteca personal (1-2 usuarios, hasta 50.000 pistas, transcodificación ocasional):
- CPU: 1-2 vCPU (2-2.5 GHz).
- RAM: 1-2 GB.
- Disco: 50-100 GB NVMe. NVMe acelerará significativamente el escaneo de la biblioteca y el rendimiento de la base de datos.
- Costo estimado: Desde $5-10/mes.
2. Biblioteca familiar o para un pequeño grupo de amigos (2-5 usuarios, hasta 200.000 pistas, transcodificación moderada):
- CPU: 2-4 vCPU (2.5+ GHz). Los núcleos adicionales serán útiles para la transcodificación paralela.
- RAM: 2-4 GB. Aumentará el almacenamiento en caché y el rendimiento de la base de datos.
- Disco: 100-200 GB NVMe.
- Costo estimado: Desde $10-20/mes.
3. Gran colección y uso activo (5+ usuarios, más de 200.000 pistas, transcodificación frecuente):
- CPU: 4+ vCPU (3+ GHz). Importante para manejar múltiples transcodificaciones simultáneas.
- RAM: 4-8 GB.
- Disco: 200 GB+ NVMe. Es posible que se requiera almacenamiento externo o un volumen de bloque conectado para colecciones muy grandes.
- Costo estimado: Desde $20-40/mes.
Al elegir un VPS, preste también atención al tipo de virtualización (KVM es preferible a OpenVZ para un control total y estabilidad; puede obtener más información al respecto en el artículo KVM VPS vs OpenVZ VPS en 2026) y a la ubicación del centro de datos. Elija un proveedor que ofrezca planes de tarifas flexibles y la posibilidad de una actualización rápida. Para una comprensión más profunda de qué es un VPS, le recomendamos consultar la guía del comprador de VPS.
¿Busca un servidor fiable para sus proyectos?
VPS desde $10/mes y servidores dedicados desde $9/mes con NVMe, protección DDoS y soporte 24/7.
Ver ofertas →Preparación del VPS para la instalación de Navidrome: pasos básicos
Antes de proceder con la `instalación de Navidrome`, es necesario preparar su VPS. Estos pasos asegurarán un entorno seguro y estable para el funcionamiento de su servidor de música.Actualización del sistema e instalación de Docker
Primero, conéctese a su VPS por SSH. Si usa Linux o macOS, abra una terminal; para Windows, puede usar PuTTY o clientes similares.ssh user@your_vps_ip_addresssudo apt update && sudo apt upgrade -y
sudo apt install -y curl gnupg2 software-properties-common apt-transport-https ca-certificatesInstalación de Docker Engine:
curl -fsSL https://download.docker.com/linux/ubuntu/gpg | sudo gpg --dearmor -o /usr/share/keyrings/docker-archive-keyring.gpg
echo "deb [arch=$(dpkg --print-architecture) signed-by=/usr/share/keyrings/docker-archive-keyring.gpg] https://download.docker.com/linux/ubuntu $(lsb_release -cs) stable" | sudo tee /etc/apt/sources.list.d/docker.list > /dev/null
sudo apt update
sudo apt install -y docker-ce docker-ce-cli containerd.io
Añadir usuario al grupo docker (para no usar sudo con cada comando docker):
sudo usermod -aG docker $USER
newgrp docker # Aplicará los cambios a la sesión actual, o reconéctese por SSH
Instalación de Docker Compose (V2):
sudo apt install -y docker-compose-pluginPuede verificar la instalación con los comandos:
docker --version
docker compose version
Creación de directorios y usuarios necesarios
Para Navidrome, se necesitarán directorios para almacenar la configuración, la base de datos y, por supuesto, su colección de música. Se recomienda crear un directorio separado para Navidrome y subdirectorios dentro de él.sudo mkdir -p /opt/navidrome/{data,music}
sudo chown -R $USER:$USER /opt/navidromeLa configuración del firewall (UFW) también es un paso crítico para la seguridad de su `navidrome vps`. Permita el tráfico SSH, HTTP y HTTPS:
sudo ufw allow OpenSSH
sudo ufw allow http
sudo ufw allow https
sudo ufw enable # Confirme, si se le pregunta¿Buscas un servidor que simplemente funcione?
Valebyte VPS — NVMe, soporte 24/7, despliegue en 60 segundos.
Instalación paso a paso de Navidrome en un VPS usando Docker Compose
El uso de Docker Compose simplifica significativamente la `instalación de Navidrome`, permitiendo definir toda la configuración del servicio en un único archivo YAML.Configuración del archivo docker-compose.yml para Navidrome
Cree el archivo `docker-compose.yml` en el directorio `/opt/navidrome/`:cd /opt/navidrome
nano docker-compose.ymlversion: "3"
services:
navidrome:
image: deluan/navidrome:latest
container_name: navidrome
restart: unless-stopped
ports:
- "4533:4533" # Puerto para acceder a Navidrome
environment:
# Variables de entorno opcionales, ver más en https://www.navidrome.org/docs/usage/configuration-options/
ND_SCANSCHEDULE: 1h # Escanear la biblioteca cada hora
ND_LOGLEVEL: info # Nivel de registro
ND_SESSIONTIMEOUT: 24h # Tiempo de vida de la sesión
ND_ENABLETRANSCODING: "true" # Habilitar transcodificación
# ND_TRANSCODE_CACHE_SIZE: 100MB # Caché de transcodificación, se puede aumentar
# ND_DEFAULTTHEME: dark # Tema oscuro por defecto
# ND_MUSICFOLDER: "/music" # Ruta a la música dentro del contenedor (ya definida por defecto)
volumes:
- ./data:/data # Ubicación para la base de datos y caché de Navidrome
- ./music:/music:ro # Ubicación para su música (solo lectura)
# user: "1000:1000" # Opcional: ejecutar el contenedor como un usuario/grupo específico
# network_mode: "host" # Opcional: usar la pila de red del host (no recomendado con reverse-proxy)
# healthcheck: # Opcional: verificación de salud del contenedor
# test: ["CMD", "curl", "-f", "http://localhost:4533/ping"]
# interval: 1m30s
# timeout: 10s
# retries: 3
# start_period: 30sAnalicemos los parámetros clave en `docker-compose.yml` para `navidrome docker`:
- `image: deluan/navidrome:latest`: Indica qué imagen de Docker usar. `latest` significa la última versión estable.
- `container_name: navidrome`: Asigna un nombre conveniente al contenedor.
- `restart: unless-stopped`: El contenedor se reiniciará automáticamente en caso de fallos o después de un reinicio del VPS, a menos que haya sido detenido manualmente.
- `ports: - "4533:4533"`: Mapea el puerto 4533 del contenedor al puerto 4533 del host. Navidrome usa este puerto por defecto.
- `environment`: Sección para las variables de entorno de Navidrome. Aquí puede configurar el horario de escaneo, el nivel de registro, los tiempos de espera de sesión y habilitar la transcodificación. La lista completa de opciones está disponible en la documentación oficial de Navidrome.
- `volumes`: Esta sección monta los directorios locales de su VPS dentro del contenedor.
- `./data:/data`: Monta el directorio `/opt/navidrome/data` del host en `/data` dentro del contenedor. Aquí se almacenarán todos los datos modificables de Navidrome.
- `./music:/music:ro`: Monta el directorio `/opt/navidrome/music` del host en `/music` dentro del contenedor. El sufijo `:ro` significa "read-only" (solo lectura), lo cual se recomienda para la carpeta de música para evitar que Navidrome modifique accidentalmente sus archivos.
Inicio de Navidrome y primera configuración
Guarde el archivo `docker-compose.yml` e inicie el contenedor de Navidrome:docker compose up -ddocker compose psO ver los logs:
docker compose logs -f navidromersync -avzP /path/to/your/music_collection/ user@your_vps_ip_address:/opt/navidrome/music/Configuración de Reverse Proxy y HTTPS para un acceso seguro a Navidrome
El acceso directo a Navidrome por dirección IP y puerto no estándar (4533) no es la solución óptima para `navidrome vps`. El uso de un reverse proxy (proxy inverso) y HTTPS garantizará un acceso seguro a través de un nombre de dominio y puertos estándar (80/443). Consideraremos la configuración con Nginx y Caddy.Configuración de Nginx como Reverse Proxy
Nginx es un potente y popular servidor web que funciona excelentemente como proxy inverso.1. Instalación de Nginx:
sudo apt update
sudo apt install -y nginx
2. Configuración del nombre de dominio:
Asegúrese de que su nombre de dominio (por ejemplo, `music.yourdomain.com`) apunte a la dirección IP de su VPS a través de un registro A en el DNS.
3. Creación del archivo de configuración de Nginx:
sudo nano /etc/nginx/sites-available/navidrome.confPegue la siguiente configuración, reemplazando `music.yourdomain.com` por su dominio:
server {
    listen 80;
    listen [::]:80;
    server_name music.yourdomain.com; # Reemplace con su dominio

    # Redirección HTTP a HTTPS (se configurará después de obtener el certificado)
    # return 301 https://$host$request_uri;

    location / {
        proxy_pass http://localhost:4533; # Redirigimos a Navidrome
        proxy_set_header Host $host;
        proxy_set_header X-Real-IP $remote_addr;
        proxy_set_header X-Forwarded-For $proxy_add_x_forwarded_for;
        proxy_set_header X-Forwarded-Proto $scheme;
        proxy_redirect off;

        # Soporte para WebSocket
        proxy_http_version 1.1;
        proxy_set_header Upgrade $http_upgrade;
        proxy_set_header Connection "upgrade";
    }
}
4. Activación de la configuración:
sudo ln -s /etc/nginx/sites-available/navidrome.conf /etc/nginx/sites-enabled/
sudo nginx -t # Verificar la sintaxis de la configuración
sudo systemctl restart nginx5. Configuración de HTTPS con Let's Encrypt (Certbot):
Para obtener un certificado SSL/TLS gratuito, use Certbot. Esto es crítico para un acceso `navidrome self-hosted` seguro.
sudo apt install -y certbot python3-certbot-nginx
sudo certbot --nginx -d music.yourdomain.comConfiguración de Caddy para HTTPS automático
Caddy es un servidor web moderno que gestiona automáticamente los certificados HTTPS de Let's Encrypt, lo que lo hace extremadamente fácil de configurar para `navidrome en un servidor`.1. Instalación de Caddy:
sudo apt install -y debian-keyring debian-archive-keyring apt-transport-https
curl -1sLf 'https://dl.cloudsmith.io/public/caddy/stable/gpg.key' | sudo gpg --dearmor -o /usr/share/keyrings/caddy-stable-archive-keyring.gpg
curl -1sLf 'https://dl.cloudsmith.io/public/caddy/stable/debian.deb.txt' | sudo tee /etc/apt/sources.list.d/caddy-stable.list
sudo apt update
sudo apt install -y caddy
2. Configuración de Caddyfile:
sudo nano /etc/caddy/CaddyfileElimine el contenido existente y pegue lo siguiente, reemplazando `music.yourdomain.com` por su dominio:
music.yourdomain.com {
    reverse_proxy localhost:4533
    # Opcional: habilitar compresión Gzip
    # encode gzip
}
3. Reinicio de Caddy:
sudo systemctl restart caddy
sudo systemctl enable caddyMantenimiento de Navidrome en el servidor: copias de seguridad, actualizaciones y monitorización
El mantenimiento regular de su `navidrome vps` es clave para su estabilidad, seguridad y relevancia a largo plazo. Esto incluye la copia de seguridad de datos, actualizaciones oportunas y monitorización del rendimiento.Estrategias de copia de seguridad de datos de Navidrome
La copia de seguridad es el aspecto más importante del mantenimiento. Sus archivos de música y la base de datos de Navidrome deben estar protegidos.Qué necesita respaldar:
- Base de datos y configuración de Navidrome: Se almacena en el directorio `/opt/navidrome/data`. Esto incluye información sobre su biblioteca, usuarios, listas de reproducción, historial de escucha y configuración del servidor.
- Archivos de música: Se almacenan en el directorio `/opt/navidrome/music`. Esta es su colección principal.
Método de copia de seguridad:
Para la base de datos de Navidrome, es mejor detener el contenedor antes de copiar para evitar la corrupción de datos.
# 1. Detener Navidrome
docker compose stop navidrome

# 2. Crear un archivo con los datos de Navidrome
tar -czvf /path/to/backup/navidrome_data_$(date +%Y%m%d%H%M%S).tar.gz /opt/navidrome/data

# 3. Iniciar Navidrome
docker compose start navidrome

# 4. Copiar archivos de música (si no se sincronizan desde fuera)
# Para colecciones grandes, use rsync para copias de seguridad incrementales
rsync -avz --delete /opt/navidrome/music/ /path/to/backup/music_collection/
Automatización de copias de seguridad con Cron:
Cree el script `backup_navidrome.sh`:
#!/bin/bash
BACKUP_DIR="/path/to/your/backup/location" # Especifique su ruta
DATE=$(date +%Y%m%d%H%M%S)
DATA_DIR="/opt/navidrome/data"
MUSIC_DIR="/opt/navidrome/music"

echo "Starting Navidrome backup at $DATE"

# Detener el contenedor de Navidrome
docker compose stop navidrome

# Crear una copia de seguridad de los datos de Navidrome
tar -czvf $BACKUP_DIR/navidrome_data_$DATE.tar.gz $DATA_DIR
echo "Navidrome data backed up to $BACKUP_DIR/navidrome_data_$DATE.tar.gz"

# Iniciar el contenedor de Navidrome
docker compose start navidrome

# Copia de seguridad incremental de la música (si es necesario)
# rsync -az --delete $MUSIC_DIR/ $BACKUP_DIR/music_sync/
# echo "Music collection synced to $BACKUP_DIR/music_sync/"

echo "Navidrome backup finished."crontab -e0 3 * * * /path/to/backup_navidrome.sh >> /var/log/navidrome_backup.log 2>&1Almacenamiento de copias de seguridad:
Siempre guarde las copias de seguridad en un medio separado o en una ubicación diferente a su VPS. Esto puede ser un almacenamiento compatible con S3, otro VPS, un servidor local o almacenamiento en la nube.
Procedimiento de actualización de Navidrome y contenedores Docker
Las actualizaciones regulares proporcionan acceso a nuevas funciones, correcciones de errores y mejoras de seguridad.Actualización de Navidrome:
Dado que utiliza `navidrome docker`, la actualización es muy sencilla:
cd /opt/navidrome
docker compose pull navidrome # Descarga la nueva imagen de Navidrome
docker compose up -d         # Detiene el contenedor antiguo, inicia el nuevo con la imagen actualizada
Actualización de Docker Engine:
Actualice regularmente Docker Engine y el plugin Docker Compose a través del gestor de paquetes de su SO:
sudo apt update
sudo apt upgrade -y docker-ce docker-ce-cli containerd.io docker-compose-plugin
Actualización del SO:
No olvide actualizar el sistema operativo de su VPS:
sudo apt update && sudo apt upgrade -y
sudo apt dist-upgrade -y # Para actualizaciones más profundas del kernel y paquetes
sudo reboot # Reiniciar después de la actualización del kernel
Monitorización del rendimiento y recursos del VPS
La monitorización le permite asegurarse de que su `navidrome en un servidor` funciona de manera eficiente y sin problemas.- Verificación del uso de recursos: Use los comandos `htop` (para CPU/RAM), `df -h` (para disco), `iotop` (para E/S de disco).
- Visualización de logs del contenedor: `docker compose logs -f navidrome` le ayudará a identificar problemas en el funcionamiento de Navidrome.
- Monitorización externa: Para una monitorización más avanzada, considere instalar herramientas como Netdata en un VPS o Prometheus con Grafana. Estas herramientas proporcionan gráficos de uso de recursos, tráfico de red y otras métricas, lo cual es crítico para mantener la estabilidad de su `navidrome vps`.
¿Buscas un servidor que simplemente funcione?
Valebyte VPS — NVMe, soporte 24/7, despliegue en 60 segundos.
¿Qué configuración de VPS elegir para una carga de trabajo real de Navidrome?
La elección de la configuración de VPS adecuada para la `instalación de Navidrome` depende de múltiples factores, incluyendo el tamaño de su biblioteca multimedia, el número de usuarios activos y la intensidad del uso de funciones como la transcodificación. Valebyte.com ofrece varios planes de tarifas que pueden satisfacer estas necesidades.Evaluación de las necesidades según el tamaño de la biblioteca y los usuarios
1. Tamaño de la biblioteca multimedia:
- Pequeña (hasta 50.000 pistas, ~300-500 GB): El requisito principal es suficiente espacio en disco. Los discos NVMe acelerarán significativamente el escaneo inicial y la capacidad de respuesta general.
- Mediana (50.000 - 200.000 pistas, ~500 GB - 2 TB): Además del disco, se necesitará más RAM para el almacenamiento en caché de metadatos y un procesador más potente para búsquedas y navegación rápidas.
- Grande (más de 200.000 pistas, 2 TB+): Aquí no solo es importante el volumen, sino también la velocidad del disco, así como suficientes recursos de CPU/RAM para procesar las solicitudes de múltiples usuarios y mantener el rendimiento de la base de datos.
2. Número de usuarios activos:
- 1-2 usuarios: Requisitos mínimos de CPU y RAM.
- 3-5 usuarios: Se requerirá más CPU (especialmente si hay transcodificación) y RAM para sesiones simultáneas.
- Más de 5 usuarios: Se recomienda un VPS con 4+ vCPU y 4+ GB de RAM para garantizar un funcionamiento fluido para todos.
3. Transcodificación:
La transcodificación es el proceso que más recursos consume. Si planea transcodificar con frecuencia (por ejemplo, para transmitir FLAC a dispositivos móviles con tráfico limitado), elija un VPS con un procesador más potente (alta frecuencia de reloj y número de núcleos). Navidrome utiliza FFmpeg para la transcodificación, y este proceso puede ser bastante exigente para la CPU.
4. Ancho de banda de red:
Para el streaming de música, es importante un ancho de banda estable y suficientemente amplio. Incluso para el streaming de FLAC de alta calidad, un solo usuario requiere alrededor de 1-2 Mbps. Para varios usuarios simultáneamente, se necesitarán 10-20 Mbps. La mayoría de los planes de VPS modernos ofrecen canales de 100 Mbps a 1 Gbps, lo cual es más que suficiente para `navidrome self-hosted`.
Comparación de planes de Valebyte.com para Navidrome
Valebyte.com ofrece tarifas flexibles en VPS y servidores dedicados, ideales para `navidrome vps` con diferentes niveles de carga. A continuación, se presenta una tabla con ejemplos de configuraciones que pueden adaptarse a diversos escenarios de uso de Navidrome.| Plan de Tarifas (Ejemplo) | vCPU | RAM | Disco NVMe | Ancho de Banda | Escenario Navidrome Recomendado | Precio Estimado/mes. |
|---|---|---|---|---|---|---|
| Valebyte Mini | 1 núcleo (2.5 GHz) | 1 GB | 50 GB | 1 Gbps | Pequeña biblioteca personal (hasta 50k pistas), 1-2 usuarios, sin transcodificación activa. Ideal para iniciar la `instalación de Navidrome`. | $7.99 |
| Valebyte Basic | 2 núcleos (2.8 GHz) | 2 GB | 100 GB | 1 Gbps | Biblioteca familiar (hasta 100k pistas), 2-4 usuarios, transcodificación moderada. Buen equilibrio para la mayoría de los usuarios. | $14.99 |
| Valebyte Pro | 4 núcleos (3.0 GHz) | 4 GB | 200 GB | 1 Gbps | Gran colección (hasta 250k pistas), 4-8 usuarios, transcodificación frecuente. Excelente rendimiento para un `navidrome en un servidor` activo. | $29.99 |
| Valebyte Max | 6 núcleos (3.2 GHz) | 8 GB | 400 GB | 1 Gbps | Biblioteca muy grande (250k+ pistas), 8+ usuarios, transcodificación intensiva. Máximo rendimiento y escalabilidad. | $49.99 |
Al elegir un VPS, siempre oriente su decisión a sus necesidades actuales y futuras. Comience con una configuración menor y escale a medida que su colección o el número de usuarios crezca. Todos los planes de Valebyte.com ofrecen discos NVMe de alto rendimiento y canales de red estables, lo cual es la clave para un excelente funcionamiento de su `navidrome vps`.
Si tiene dudas sobre qué tipo de VPS le conviene, o quiere entender la diferencia entre soluciones self-managed y managed, consulte el artículo Self-managed vs Managed VPS en 2026.
Conclusiones
Navidrome en un VPS de Valebyte.com ofrece una solución potente, flexible y totalmente controlada para su biblioteca de música personal. Con Docker y Docker Compose, la `instalación de Navidrome` se convierte en una tarea sencilla, y la elección correcta de la configuración del VPS junto con un mantenimiento regular garantizarán un funcionamiento estable y la disponibilidad de su música en cualquier momento y lugar.¿Listo para elegir un servidor?
VPS y servidores dedicados en más de 72 países con activación instantánea y acceso root completo.
Empezar ahora →