Transferring a website to another hosting provider without downtime is possible with careful planning, the use of data synchronization methods, and proper DNS record changes, allowing users not to notice the server change.
Website migration is not just copying files; it's a complex process that, if handled incorrectly, can lead to significant downtime, data loss, and a decline in SEO rankings. This is especially critical for commercial projects, where every minute of downtime translates into direct financial losses and reputational damage. The goal of this article is to provide a step-by-step guide on how to transfer your web resource, be it a simple HTML site, a complex online store, or a corporate WordPress portal, to new hosting with minimal or zero downtime. We will cover technical aspects, tools, and best practices that will help you carry out this process painlessly and efficiently, especially when moving to more powerful solutions like VPS or dedicated servers from Valebyte.com.
Why is transferring a website to another hosting provider without downtime important?
Transferring a website to new hosting is often a necessary decision, driven by project growth, the search for better performance, security, or more favorable conditions. However, the traditional approach to changing hosting often involves a period when the site is unavailable. This can last from a few minutes to several hours, which is considered unacceptable in today's internet.
The impact of downtime on business and SEO
Website downtime, even brief, has serious negative consequences:
- Loss of revenue: For online stores or services that depend on online transactions, every minute of downtime means lost sales. For example, for an average e-commerce site with a turnover of $1000/hour, 15 minutes of downtime will cost $250.
- Worsened user experience: Visitors who encounter an unavailable site may go to competitors and are unlikely to return. This leads to decreased loyalty and audience churn.
- Reputational damage: Constant or frequent downtime creates the impression of an unreliable service, which is especially critical for companies operating in the service or finance sectors.
- Negative impact on SEO: Search engines, such as Google, regularly crawl websites. If a bot finds that your site is unavailable, it can lead to a drop in its search engine ranking. Repeated downtime can even lead to temporary exclusion of pages from the index. This is especially relevant if you are aiming for high positions for the key query "website transfer to another hosting".
- Data loss: If the migration is not synchronized or outdated backups are used, there is a risk of losing recent changes, comments, orders, or user registrations.
This is why striving for zero downtime during website migration is not just "good practice" but a critically important requirement for any serious online project. The methods we will discuss next are aimed at minimizing these risks.
How to prepare for website migration: checklist and choosing new hosting?
Successful migration begins long before the actual file copying. Thorough preparation is the key to ensuring that the website transfer to another hosting goes smoothly and without surprises.
Choosing the right hosting: from shared to dedicated server
Before starting a hosting change, you need to decide on a new provider and hosting type. Valebyte.com offers a wide range of solutions, from powerful VPS to dedicated servers, which are ideal for growing projects that require more resources and control than regular shared hosting.
- Shared hosting: The simplest and cheapest option. Server resources are shared among many users. Suitable for small sites with low traffic. Cons: limited control, possible "bad neighbors", low performance during peak loads.
- VPS (Virtual Private Server): A virtual dedicated server. You get guaranteed resources (CPU, RAM, disk space) and full root access to the operating system. Ideal for medium-sized projects requiring flexibility, scalability, and better performance. Valebyte.com offers VPS with NVMe drives, which significantly speeds up website operations.
- Dedicated server: Maximum performance, security, and control. The entire physical server is at your disposal. Suitable for high-load projects, large online stores, game servers, or corporate systems. This is the pinnacle of hosting in terms of performance and capabilities. Dedicated servers for business offer maximum reliability and SLA.
Table: Comparison of hosting types for migration
| Characteristic | Shared hosting | VPS | Dedicated server |
|---|---|---|---|
| Migration complexity | Low (often with a panel) | Medium (requires skills) | Medium/High (full control) |
| Control | Low | Full (root access) | Full (root access) |
| Performance | Low/Medium | Medium/High (guaranteed resources) | High (exclusive resources) |
| Scalability | Limited | Good (easy resource modification) | Clustering capability |
| Security | Depends on "neighbors" | High (isolation) | Maximum (isolation) |
| Approximate cost/month | $3 - $15 | $10 - $100+ (e.g., VPS with 4 vCPU, 8 GB RAM, 100 GB NVMe from $30/month) | $80 - $500+ (e.g., Intel Xeon E3-1270v6, 32 GB RAM, 2x1TB NVMe from $120/month) |
| Ideal for | Personal blogs, small websites | Medium businesses, e-commerce, high-traffic blogs | Large corporations, SaaS, gaming platforms |
For most projects facing the need for migration due to performance or control issues, moving to a VPS is an optimal solution. It provides flexibility and power at a reasonable cost.
Checklist before website transfer
Before proceeding with website migration, ensure all necessary steps are completed:
- Choosing new hosting: Decide on a provider (e.g., Valebyte.com) and server type (VPS, dedicated). Ensure the new hosting meets your website's technical requirements (PHP versions, DBMS, available modules).
- Access to old and new hosting:
- Full file access (FTP/SFTP/SSH).
- Database access (phpMyAdmin/SSH).
- Domain control panel access (DNS zones).
- Old hosting control panel access.
- Up-to-date backups: Make a full backup of all website files and the database to your local computer. This is your insurance against unforeseen problems.
- Website information:
- CMS version (WordPress, Joomla, OpenCart, etc.).
- PHP, MySQL/MariaDB, web server (Apache/Nginx) versions.
- List of plugins used and their versions.
- Path to the website's root directory (document root).
- DB connection settings (database name, user, password, host).
- New hosting setup:
- Install the operating system (for VPS/dedicated server).
- Install and configure the web server (Apache/Nginx), PHP, DBMS (MySQL/MariaDB/PostgreSQL) with appropriate versions.
- Create a database and user with necessary privileges.
- Create the directory structure for the website.
- Ensure all necessary PHP modules are installed.
- Changing DNS TTL records: 24-48 hours before the planned transfer, reduce the TTL (Time To Live) value for your domain's A-record to the minimum possible (e.g., 300 seconds or 5 minutes). This will ensure faster DNS reconfiguration when changing hosting.
- Compatibility check: Ensure all components of your website (CMS, plugins, themes) are compatible with the software versions on the new server.
Careful adherence to this checklist will significantly reduce risks and simplify the entire migration process.
Looking for a reliable server for your projects?
VPS from $10/month and dedicated servers from $9/month with NVMe, DDoS protection, and 24/7 support.
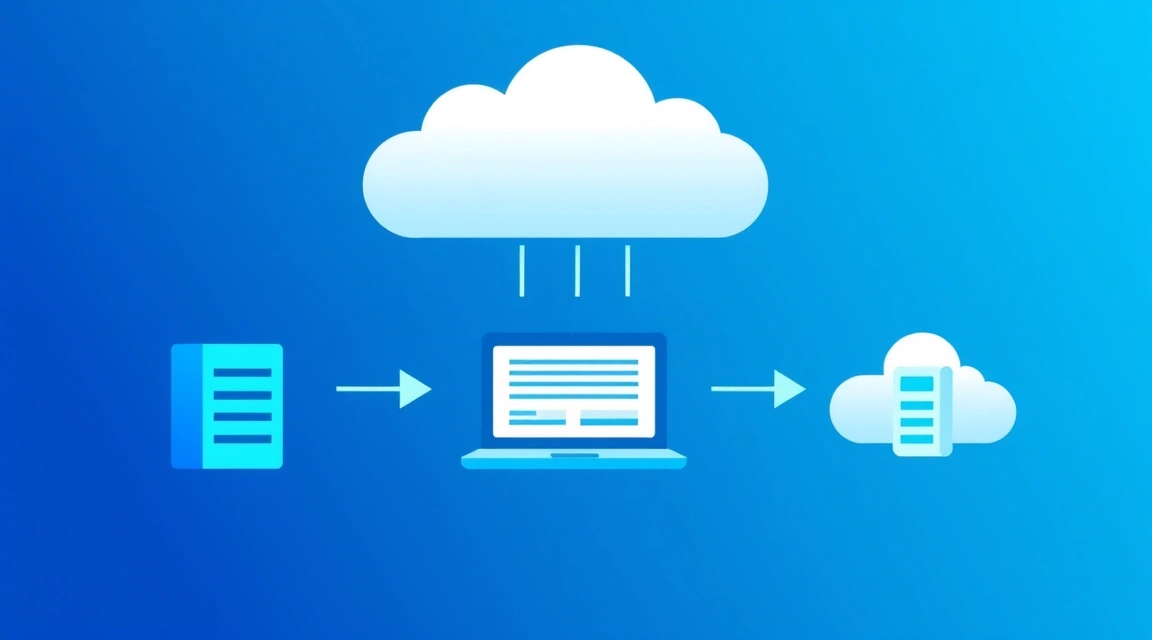
View offers →Step-by-step file and database transfer: methods and tools
After preparation, you can proceed with the actual data copying. This stage requires accuracy to avoid damaging information and to maintain the integrity of the website.
Transferring website files: rsync and SFTP
For transferring website files, it is recommended to use secure and efficient methods. The most reliable and fastest way is SSH with the rsync utility.
Transfer using rsync (recommended)
rsync is a powerful file synchronization utility that transfers only the changed parts of files, which significantly speeds up repeated transfers and makes it ideal for zero-downtime migration. It works over SSH, ensuring security.
Steps:
- Connect via SSH to the old server.
- Execute the rsync command.
Suppose your website files on the old server are located in
/var/www/html/mysite, and on the new server (IP:new_server_ip, user:user) you want to place them in/var/www/html/mysite.rsync -avz --progress /var/www/html/mysite/ user@new_server_ip:/var/www/html/mysite/-a: Archive mode (recursive copying, preserving symbolic links, permissions, owners, timestamps).-v: Verbose output (to see progress).-z: Compress data during transfer.--progress: Shows transfer progress.- Note the trailing slash in the source path (
mysite/). This means the contents of the directory are copied, not the directory itself.
- Repeat rsync before changing DNS.
This command will perform a "delta" – it will only copy files that have changed since the last synchronization. This is critical for minimizing downtime.
rsync -avz --progress /var/www/html/mysite/ user@new_server_ip:/var/www/html/mysite/Execute this command immediately before you switch DNS. The fewer changes made to the old site between the first and last synchronization, the faster this final transfer will be.
Transfer via SFTP
If SSH access is limited, you can use SFTP (Secure File Transfer Protocol) via clients like FileZilla. This is less efficient for large sites, as it does not support incremental synchronization and can be slower.
Steps:
- Connect to the old server via SFTP.
- Download all website files to your local computer.
- Connect to the new server via SFTP.
- Upload files from your local computer to the new server.
Database transfer: mysqldump and phpMyAdmin
The database is the heart of any dynamic website. Its transfer requires special care.
Transfer using mysqldump (recommended)
mysqldump is a command-line utility for creating backups of MySQL/MariaDB databases. This is the most reliable method.
Steps (on the old server):
- Create a database dump.
mysqldump -u username -p database_name > backup.sqlusername: Database username.database_name: Database name.- The system will prompt for a password.
For large databases, especially if you are using InnoDB, you can add the
--single-transactionoption to create a "hot" copy without locking tables, and also--hex-blobfor correct export of binary data (e.g., images).mysqldump -u username -p --single-transaction --hex-blob database_name > backup.sql - Copy the
backup.sqlfile to the new server.Use
scp(Secure Copy Protocol):scp backup.sql user@new_server_ip:/path/to/destination/
Steps (on the new server):
- Create a new database and user.
Connect to MySQL/MariaDB on the new server:
mysql -u root -pExecute the commands:
CREATE DATABASE new_database_name CHARACTER SET utf8mb4 COLLATE utf8mb4_unicode_ci; CREATE USER 'new_username'@'localhost' IDENTIFIED BY 'new_password'; GRANT ALL PRIVILEGES ON new_database_name.* TO 'new_username'@'localhost'; FLUSH PRIVILEGES; EXIT; - Import the dump into the new database.
mysql -u new_username -p new_database_name < backup.sqlThe system will prompt for the password for
new_username.
Transfer via phpMyAdmin
If you have access to phpMyAdmin on both hosting providers, you can use it to export and import the database. This is convenient for small databases.
Steps:
- On the old hosting, in phpMyAdmin, select the database, go to the "Export" tab, choose "Quick" or "Custom" (for more control) and SQL format. Save the file.
- On the new hosting, in phpMyAdmin, create a new database.
- Select the new database, go to the "Import" tab, choose the saved SQL file, and click "Go".
After transferring files and the database, do not forget to update your website's configuration files (e.g., wp-config.php for WordPress) on the new server, specifying the new database connection details.
Need a dedicated server?
Compare prices from top providers. Configure and order in minutes.
Web server and environment setup on the new VPS hosting
Transferring your website to a VPS from Valebyte.com gives you full control over the server environment. This means you can configure it optimally for your project, but it also requires certain knowledge.
Installing and configuring Nginx/Apache and PHP-FPM
Web server configuration is a key step. We will look at examples for Nginx (more performant for static content and as a reverse proxy) and Apache (more common, especially with .htaccess).
For Nginx
Nginx is often used in conjunction with PHP-FPM to process PHP requests.
1. Install Nginx, PHP-FPM, and MySQL/MariaDB:
sudo apt update
sudo apt install nginx php-fpm php-mysql mysql-server -y # For Debian/Ubuntu
# sudo yum install nginx php-fpm php-mysql mariadb-server -y # For CentOS/RHEL
2. Configure Nginx for your website:
Create a new configuration file for your domain (e.g., /etc/nginx/sites-available/yourdomain.com):
sudo nano /etc/nginx/sites-available/yourdomain.comExample configuration for WordPress:
server {
    listen 80;
    listen [::]:80;
    server_name yourdomain.com www.yourdomain.com;
    root /var/www/html/yourdomain.com; # Specify the path to your website files

    index index.php index.html index.htm;

    location / {
        try_files $uri $uri/ /index.php?$args;
    }

    location ~ \.php$ {
        include snippets/fastcgi-php.conf;
        fastcgi_pass unix:/var/run/php/php8.1-fpm.sock; # Specify the actual PHP version
        fastcgi_param SCRIPT_FILENAME $document_root$fastcgi_script_name;
        include fastcgi_params;
    }

    # Deny access to hidden files
    location ~ /\.ht {
        deny all;
    }

    # Caching static files
    location ~* \.(jpg|jpeg|gif|png|css|js|ico|xml)$ {
        expires 30d;
        log_not_found off;
    }
}
3. Activate the site and restart Nginx:
sudo ln -s /etc/nginx/sites-available/yourdomain.com /etc/nginx/sites-enabled/
sudo nginx -t # Check syntax
sudo systemctl restart nginx
sudo systemctl enable nginx
sudo systemctl enable php8.1-fpm # Ensure PHP-FPM is also running
For Apache
Apache remains a popular choice, especially if you use .htaccess files.
1. Install Apache, PHP, and MySQL/MariaDB:
sudo apt update
sudo apt install apache2 php libapache2-mod-php php-mysql mysql-server -y # For Debian/Ubuntu
# sudo yum install httpd php php-mysql mariadb-server -y # For CentOS/RHEL
2. Configure Apache for your website:
Create a new virtual host (e.g., /etc/apache2/sites-available/yourdomain.com.conf):
sudo nano /etc/apache2/sites-available/yourdomain.com.confExample configuration:
    ServerAdmin webmaster@localhost
    ServerName yourdomain.com
    ServerAlias www.yourdomain.com
    DocumentRoot /var/www/html/yourdomain.com # Specify the path to your website files


        Options -Indexes +FollowSymLinks
        AllowOverride All # Enable .htaccess support
        Require all granted


    ErrorLog ${APACHE_LOG_DIR}/yourdomain.com_error.log
    CustomLog ${APACHE_LOG_DIR}/yourdomain.com_access.log combined
3. Activate the site, modules, and restart Apache:
sudo a2ensite yourdomain.com.conf
sudo a2enmod rewrite # Enable rewrite module for .htaccess
sudo systemctl restart apache2
sudo systemctl enable apache2
Installing an SSL certificate (Let's Encrypt)
Today, having an SSL certificate (HTTPS) is a standard that affects security and SEO. Let's Encrypt offers free certificates.
1. Install Certbot:
sudo snap install core; sudo snap refresh core
sudo snap install --classic certbot
sudo ln -s /snap/bin/certbot /usr/bin/certbot
2. Obtain and install the certificate:
- For Nginx:
sudo certbot --nginx -d yourdomain.com -d www.yourdomain.com - For Apache:
sudo certbot --apache -d yourdomain.com -d www.yourdomain.com
Certbot will automatically configure your web server and add rules for automatic certificate renewal.
Setting file permissions
Correct permissions are critical for security and functionality. Typically, files are owned by the user, and the web server (e.g., www-data in Debian/Ubuntu) needs read and write permissions in specific directories (e.g., for uploading images).
Example for WordPress:
sudo chown -R user:www-data /var/www/html/yourdomain.com # user - your SSH user
sudo find /var/www/html/yourdomain.com -type d -exec chmod 755 {} \; # Directories
sudo find /var/www/html/yourdomain.com -type f -exec chmod 644 {} \; # Files
For directories where WordPress needs to write data (e.g., wp-content/uploads), chmod 775 or even 777 may be required (but the latter option is less secure and should only be used in extreme cases and with an understanding of the risks).
Zero-downtime DNS change: proxying and TTL techniques
This is the most critical stage for achieving zero downtime during a hosting change. The goal is to redirect traffic to the new server so that users do not notice the switch.
Understanding TTL and its role
TTL (Time To Live) is a value in seconds that tells DNS servers and client systems how long to cache a DNS record before querying it again. If the TTL is high (e.g., 24 hours), then after changing the domain's A-record (the pointer to the server's IP address), it will take up to 24 hours for all internet providers to update their caches. During this time, some users will be directed to the old server, and some to the new.
Key step: 24-48 hours before the planned transfer, reduce the TTL for your domain's A-record to the minimum possible value (e.g., 300 seconds or 5 minutes). This will allow your DNS changes to propagate across the network much faster.
DNS change method with minimal downtime
The most effective method for zero downtime involves several stages:
- New server preparation: Ensure your website is fully configured and functional on the new server, using a temporary domain or modifying the
hostsfile on your local computer for testing. - Final data synchronization: Immediately before changing DNS, perform the last synchronization of files (e.g., using
rsync) and the database (export/import). This ensures that the new server will have the freshest data. - Change A-record: In your domain's control panel (with the domain registrar or DNS provider), change the A-record for your domain (and the
wwwsubdomain, if any) to point to the new server's IP address. - Monitoring: After changing the A-record, the old and new servers should run in parallel for some time (equal to the previous TTL, if you didn't reduce it, or the minimum TTL, if you did). This is called the "DNS propagation period". During this time, some users will hit the old server, and some will hit the new. It is important that both servers can handle requests during this period and have up-to-date data.
- Shutting down the old server: Only after you are sure that DNS records have fully updated worldwide (you can check using services like dnschecker.org) and all traffic is going to the new server, can you shut down the old one. It is recommended to wait at least 24 hours after changing DNS, even with a low TTL, for maximum confidence.
Using Cloudflare or another CDN for proxying
Services like Cloudflare can significantly simplify and secure the migration process, as well as speed up website performance through caching.
How it works:
- Set up Cloudflare: Transfer your domain's DNS records to Cloudflare. This means you change the NS records with your domain registrar to Cloudflare's NS servers.
- Enable proxying: In Cloudflare, enable proxying (orange cloud icon) for your domain's A-record. This means traffic will go through Cloudflare's servers, which already know your server's IP.
- Testing on the new server: At this stage, your site is still running on the old server, but traffic is going through Cloudflare. Now you can change the IP address in Cloudflare's A-record to the new server's IP. Since Cloudflare caches DNS records on its servers, the change will be instantaneous for most users.
- Final synchronization: Perform the last synchronization of files and the database to the new server.
- Switch: Change the A-record IP address in Cloudflare to the new server's IP. Cloudflare will instantly start directing traffic to the new IP. The old server remains active as a "backup".
- Shutting down the old server: After ensuring the new server is stable, the old one can be shut down.
This method with Cloudflare avoids TTL issues and provides almost instantaneous traffic transfer, as Cloudflare manages DNS itself and proxies requests.
Verification and testing after migration
After data transfer and DNS change, a critical stage begins – thorough verification of the website's functionality on the new hosting. Insufficient verification can lead to serious problems that your users will discover.
How to check the site before and after DNS change
Checking on the new server before DNS change
To ensure that the site is working correctly on the new server without waiting for full DNS propagation, you can use several methods:
- Editing the hosts file:
On your local computer (Windows, macOS, Linux), edit the
hostsfile. Add a line associating your domain with the new server's IP address:# For Windows: C:\Windows\System32\drivers\etc\hosts # For macOS/Linux: /etc/hosts new_server_ip yourdomain.com www.yourdomain.comSave the file and clear the DNS cache (
ipconfig /flushdnsin Windows,sudo killall -HUP mDNSResponderin macOS). Now, when accessingyourdomain.com, your computer will connect directly to the new server, bypassing public DNS servers. This allows you to fully test the site before other users see it. - Using a temporary domain:
Many hosting providers offer a temporary URL or IP address to access the site before linking the main domain. If your hosting does not provide such an option, you can temporarily link a technical subdomain (e.g.,
test.yourdomain.com) to the new server and configure a virtual host for it on the new server.
Checking after DNS change
After you have changed the domain's A-record, you need to ensure that DNS propagation is correct and that users are reaching the new server.
- Online DNS checking services:
Use services like DNS Checker or What's My DNS to track the propagation of your DNS changes worldwide. Enter your domain and ensure that most locations show the IP address of your new server.
- Checking via command line:
Use
ping,dig(Linux/macOS) ornslookup(Windows) commands to check the IP address your computer is connecting to.ping yourdomain.com dig yourdomain.com nslookup yourdomain.comEnsure they show the new server's IP.
Comprehensive website functionality testing
After confirming that the site loads from the new server, a thorough functional test must be performed:
- Navigation and links: Check all internal and external links, ensure they lead to the correct pages and do not return 404 errors.
- Forms: Test all contact, registration, login, and order forms. Ensure they submit data and that emails are delivered.
- Database: Check that all data from the database is displayed correctly (products, articles, comments, users). Try adding new content or modifying existing content to ensure it is written to the DB.
- Images and media files: Ensure all images, videos, and other media files load and display correctly.
- CMS/e-commerce functionality:
- For WordPress: Check the admin panel, post creation/editing, plugin functionality, themes, widgets.
- For online stores: Check the process of adding items to the cart, placing an order, and payment system functionality.
- Loading speed: Use tools like Google PageSpeed Insights or GTmetrix to assess the website's loading speed on the new server. It is expected that on a VPS from Valebyte.com with NVMe drives, the speed will be higher.
- Server logs: Review web server (Nginx/Apache) and PHP logs on the new server for errors.
- SSL certificate: Ensure HTTPS works correctly and the padlock icon is displayed in the browser.
This stage can take from several hours to several days, depending on the complexity of your website. Do not rush to shut down the old server until you are 100% confident in the stable operation of the new one.
Need a dedicated server?
Compare prices from top providers. Configure and order in minutes.
Rollback plan: what to do if something goes wrong?
Even with the most thorough preparation and verification, unforeseen problems can arise. Therefore, having a clear rollback plan is a mandatory condition for a successful migration. This is your "safety net".
The importance of backups and maintaining the old server
- Up-to-date backups:
The most important thing is to have complete and up-to-date backups of all website files and the database, made immediately before the migration begins. Store them in a safe place, preferably on multiple media (locally, in cloud storage). This will allow you to restore the site to its original state on any server.
- Do not shut down the old server immediately:
Do not turn off or delete the old hosting immediately after changing DNS. Keep it active for at least 24-72 hours (or even longer for critically important projects). This gives you the ability to quickly switch DNS back to the old IP address if serious problems arise on the new server that cannot be quickly resolved. This is the essence of "zero downtime" during a rollback – users will simply be redirected back to the working old site.
- Save all access credentials:
Ensure you have all credentials for accessing the old hosting (FTP, SSH, cPanel, phpMyAdmin, DNS control panel).
Step-by-step rollback
If during or after migration you discover critical errors that cannot be promptly fixed on the new server (e.g., compatibility issues, serious database failures, site unavailability), follow these steps to roll back:
- Assess the problem:
Determine the nature and severity of the problem. Can it be quickly resolved on the new server? If not, a rollback is the best option.
- Switch DNS back:
In your domain's control panel (with the registrar or DNS provider), change the A-record back to the old server's IP address. Thanks to reducing the TTL in advance, this change will propagate relatively quickly.
- Final data synchronization (optional, but recommended):
If any changes were made or new data added on the new server (e.g., new orders, comments) that you want to save, try synchronizing them back to the old server before switching DNS. However, this can be complex and risky if the database is severely corrupted. In most cases, during a rollback, you sacrifice recent changes in favor of site functionality.
- Clear cache:
After switching DNS, clear the DNS cache on your computer (as described above) and try to access the site. Ensure it loads from the old server.
- Analyze and fix:
After a successful rollback and restoration of the site on the old hosting, conduct a detailed analysis of the causes of the failure on the new server. Fix all identified problems, possibly with the help of Valebyte.com technical support or third-party specialists. Do not attempt to repeat the migration until you are sure the problem has been eliminated.
Remember that a rollback is not a defeat, but part of a professional approach to infrastructure management. It is better to temporarily return to an old but working site than to leave users without access to your resource.
Peculiarities of transferring WordPress to VPS: plugins and manual method
WordPress is the most popular CMS in the world, and its transfer to more powerful hosting, such as a VPS from Valebyte.com, is a common task. This significantly improves performance, security, and scalability. WordPress hosting for high traffic requires a special approach, and VPS provides the necessary resources.
Using plugins for WordPress transfer
For beginners or those who do not want to delve into the command line, there are plugins that simplify WordPress transfer. They usually package the entire site (files and database) into a single archive and provide a script for deployment in a new location.
Popular plugins:
- Duplicator: One of the most powerful and popular plugins. Creates a "package" of your site (files + database) and an installer script. You upload them to the new server, run the script, and it deploys the site. Allows easy domain and path changes. There is a free and Pro version.
- All-in-One WP Migration: A very easy-to-use plugin. Exports the entire site to a single file, which can then be imported via the WordPress admin panel on the new server. The free version has limitations on the size of the exported file (usually 512 MB or 1 GB).
- UpdraftPlus: Primarily a backup plugin, but it can be used for migration by creating a full backup and restoring it on the new server.
Advantages of plugins:
- Ease of use, no deep technical knowledge required.
- Automatic URL replacement in the database.
Disadvantages of plugins:
- File size limitations (in free versions).
- May be less reliable for very large sites or with resource issues on the old hosting.
- Sometimes conflicts or errors can arise that are difficult to debug without understanding the manual process.
Manual WordPress transfer to VPS
The manual method, although it requires more technical skills (SSH, MySQL), provides full control and is often more reliable for large or complex sites, as well as when migrating to a VPS.
Main steps for manual transfer (in addition to the general steps described above):
- File transfer: Use
rsyncto copy all WordPress files from the old hosting to the new VPS (e.g., to/var/www/html/yourdomain.com).rsync -avz --progress /path/to/old/wordpress/ user@new_server_ip:/var/www/html/yourdomain.com/ - Database export and import: Use
mysqldumpto export the database from the old hosting and import it to the new VPS.# On the old server mysqldump -u old_db_user -p old_db_name > wordpress_backup.sql scp wordpress_backup.sql user@new_server_ip:/tmp/ # On the new server (after creating a new DB and user) mysql -u new_db_user -p new_db_name < /tmp/wordpress_backup.sql - Editing
wp-config.php:On the new VPS, edit the
wp-config.phpfile in the WordPress root directory. Update the database connection details:define('DB_NAME', 'new_db_name'); define('DB_USER', 'new_db_user'); define('DB_PASSWORD', 'new_db_password'); define('DB_HOST', 'localhost'); // Or the IP address of the DB server if it's remote - Updating URLs in the database:
If you changed the domain name or moved WordPress to a different subdirectory, you need to update all occurrences of the old URL to the new one in the database. This is a critical step, as WordPress stores absolute URLs in posts, pages, settings, and metadata. Do not use a simple "find and replace" function in a text editor for the SQL file, as this can corrupt serialized data.
Use the Search Replace DB script or WP-CLI (if installed on the VPS):
# If using WP-CLI (recommended for VPS)
cd /var/www/html/yourdomain.com
wp search-replace 'http://olddomain.com' 'http://newdomain.com' --skip-columns=guid --all-tables
Don't forget to also update the
siteurlandhomeentries in thewp_optionstable (or whatever your options table is called). - Updating permalinks:
After transferring and updating URLs, go to the WordPress admin panel (
yourdomain.com/wp-admin), navigate to "Settings" -> "Permalinks" and simply save the changes without altering the structure. This will update the rewrite rules on the new web server. - Checking permissions: Ensure that WordPress file and directory permissions are set correctly (see "Setting file permissions" section).
Transferring WordPress to a VPS gives you more control and opportunities for optimization. You can configure caching (Redis, Memcached), use more performant PHP versions, set up a CDN, and much more that is unavailable on shared hosting. For more complex scenarios, such as Headless WordPress on VPS or WordPress Multisite on VPS, full server control becomes critically important.
Conclusion
Successfully transferring a website to another hosting provider without downtime is a task that requires careful planning and technical knowledge, but it is entirely achievable by following the methodology. Choosing powerful and flexible hosting, such as a VPS or dedicated server from Valebyte.com, combined with step-by-step execution of all recommendations for data synchronization and proper DNS changes, guarantees the uninterrupted operation of your resource.
Ready to choose a server?
VPS and dedicated servers in 72+ countries with instant activation and full root access.
Get started now →