
Installing ntfy on a VPS: Personal Push Notifications Without Third-Party Services
TL;DR
In this detailed guide, we will set up your own ntfy server on a Virtual Private Server (VPS) step-by-step, providing you with a fully controlled push notification system. You will learn how to install Docker, deploy ntfy, configure secure access via Caddy with HTTPS, and ensure reliable service operation, avoiding reliance on third-party cloud solutions.
- Set up your own ntfy server for instant push notifications.
- Utilize Docker for easy and isolated ntfy installation.
- Ensure secure access with HTTPS via Caddy and automatic Let's Encrypt certificates.
- Walk through the server preparation, software installation, and configuration process step-by-step.
- Address backup, maintenance, and common troubleshooting issues.
What We Are Setting Up and Why
In today's world, where information is valued like gold, and timely notifications can be critically important, many users rely on third-party services for push messages. However, this often comes with compromises in privacy and control. We will solve this problem by setting up our own ntfy server on a VPS.
Ntfy is a simple yet powerful service that allows you to send push notifications to any device via HTTP requests. You can send notifications from scripts, CI/CD pipelines, monitoring systems, or even manually. Unlike other solutions, ntfy is designed with a focus on privacy: all notifications pass only through your server, and you have full control over your data. As a result, you get a reliable and private notification system that works exactly as you need it to, without sending your data to third parties.
Alternatives exist, such as cloud services (e.g., Pushbullet, Telegram Bot API, Slack Webhooks) or more complex self-hosted solutions (e.g., Gotify, OpenPush). Cloud services are convenient but require trust in the provider and often have limitations on the number of notifications or features. Complex self-hosted solutions can be overkill for a simple push notification task. Ntfy strikes a golden mean: it is easy to deploy, has minimal resource requirements, and provides full control over your notifications, making it an ideal choice for those who value privacy and independence from third-party services.
What VPS Configuration is Needed for This Task
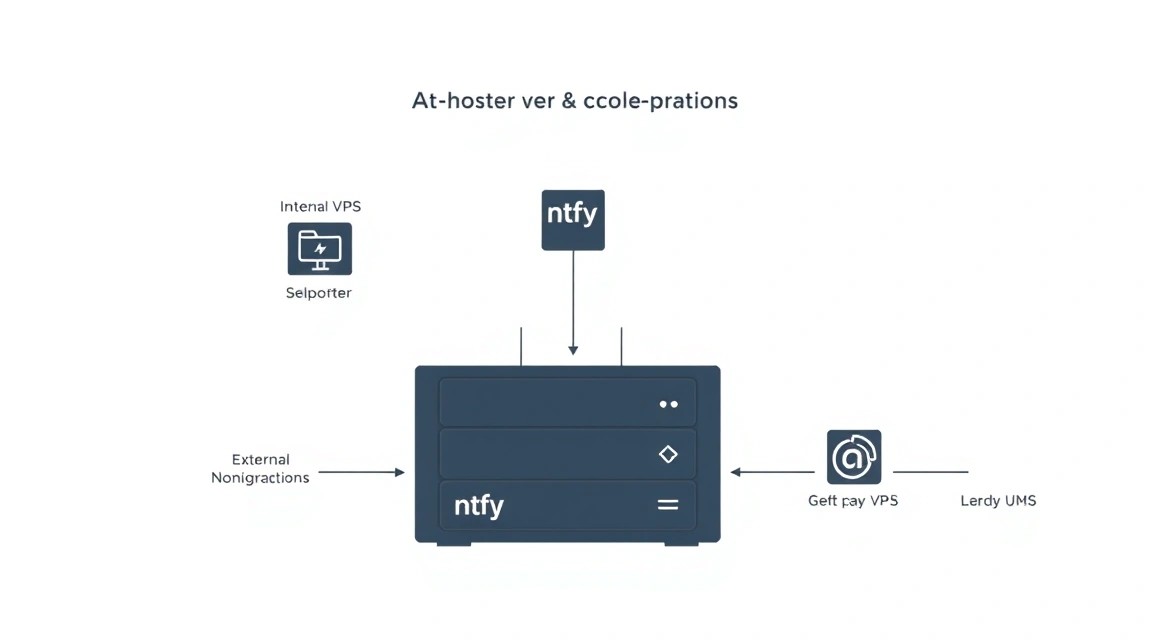
Ntfy is a lightweight application, so most usage scenarios do not require a powerful server. However, to ensure stable operation and future scalability, it is important to choose an appropriate VPS configuration.
Minimum Requirements:
- CPU: 1 core (x86-64). Ntfy does not require intensive computations.
- RAM: 512 MB. Ntfy itself consumes very little, but the operating system and other background processes (Docker, Caddy) require some memory.
- Disk: 10-20 GB SSD. For the operating system, Docker images, logs, and a small amount of ntfy data. SSD significantly improves overall system responsiveness.
- Network: 100 Mbps or 1 Gbps port. For ntfy, stability and low latency are important, rather than bandwidth, as notifications are usually small in size.
Specific VPS Plan for the Task:
For comfortable operation and the ability to run other small services on the same VPS, the following configuration is recommended:
- CPU: 2 cores
- RAM: 1-2 GB
- Disk: 25-50 GB SSD
- Network: 1 Gbps port
Such a configuration will be more than sufficient for an ntfy server, even if you plan to use it actively and send thousands of notifications per day. You can choose a VPS with the specified characteristics to ensure stable and productive operation of your notification system.
When a Dedicated Server is Needed, Not a VPS:
For ntfy, a dedicated server is usually overkill. Ntfy is extremely resource-efficient. A dedicated server might be needed if you plan to:
- Deploy dozens of other resource-intensive applications on the same host.
- Process hundreds of thousands or millions of notifications per minute (which is atypical for ntfy).
- Require maximum resource isolation and performance, independent of "neighbors" on the hypervisor.
In most cases, even for corporate use, a powerful VPS will be entirely sufficient.
Location: What It Affects
The choice of VPS location matters for ntfy primarily in terms of latency and data compliance. If you and your clients (if ntfy is used for a team) are located in Europe, choose a European data center. If in Asia, choose an Asian one. This will ensure minimal latency for notification delivery. For ntfy, as it is not a millisecond-critical service, the impact will be minimal, but it is still better to choose a location geographically close to the primary users. Also, note that some countries have stricter data retention laws, which can be important for privacy.
Server Preparation
Before installing ntfy, basic server configuration is required. We will use Ubuntu Server 24.04 LTS (current version for 2026) as the base, but most commands are applicable to other Debian-like distributions as well.
1. SSH Access and Initial Setup
Connect to your new VPS via SSH using the credentials provided by your provider. This is usually the root login and password.
ssh root@YOUR_IP_ADDRESS
2. Creating a New User with Sudo Privileges
Operating as the root user is insecure. Let's create a new user and grant them sudo privileges.
adduser your_username # Replace 'your_username' with your desired name
usermod -aG sudo your_username
Exit the root session and log in as the new user.
exit
ssh your_username@YOUR_IP_ADDRESS
3. SSH Key Setup (Recommended)
To enhance security, it is recommended to use SSH keys instead of passwords. Generate a key on your local machine (if you don't have one already):
ssh-keygen -t rsa -b 4096
Copy the public key to the server:
ssh-copy-id your_username@YOUR_IP_ADDRESS
After this, you can disable password authentication in /etc/ssh/sshd_config by setting PasswordAuthentication no and restarting the SSH service.
4. System Update
Always start by updating system packages.
sudo apt update && sudo apt upgrade -y
5. Firewall Installation and Configuration (UFW)
UFW (Uncomplicated Firewall) is an easy-to-use interface for iptables. We will configure it to allow only the necessary ports.
sudo apt install ufw -y # Install UFW
sudo ufw allow OpenSSH # Allow SSH (port 22)
sudo ufw allow http # Allow HTTP (port 80)
sudo ufw allow https # Allow HTTPS (port 443)
sudo ufw enable # Enable firewall
sudo ufw status # Check status
6. Fail2Ban Installation
Fail2Ban helps protect against brute-force attacks by blocking IP addresses from which failed login attempts occurred.
sudo apt install fail2ban -y # Install Fail2Ban
sudo systemctl enable fail2ban # Enable autostart
sudo systemctl start fail2ban # Start service
The basic Fail2Ban configuration is sufficient, but you can create a /etc/fail2ban/jail.local file for more fine-grained configuration, for example:
[sshd]
enabled = true
port = ssh
filter = sshd
logpath = /var/log/auth.log
maxretry = 3
bantime = 1h
After creating or modifying the file, do not forget to restart Fail2Ban:
sudo systemctl restart fail2ban
Software Installation — Step-by-Step
We will install ntfy and Caddy using Docker and Docker Compose. This provides an isolated and easily manageable environment.
1. Installing Docker Engine (current for 2026)
First, we will install the necessary packages, then add the official Docker repository and install Docker Engine.
sudo apt install ca-certificates curl gnupg lsb-release -y # Install necessary utilities
sudo install -m 0755 -d /etc/apt/keyrings # Create directory for keys
curl -fsSL https://download.docker.com/linux/ubuntu/gpg | sudo gpg --dearmor -o /etc/apt/keyrings/docker.gpg # Add Docker GPG key
sudo chmod a+r /etc/apt/keyrings/docker.gpg # Set permissions for the key
echo \
  "deb [arch="$(dpkg --print-architecture)" signed-by=/etc/apt/keyrings/docker.gpg] https://download.docker.com/linux/ubuntu \
  "$(. /etc/os-release && echo "$VERSION_CODENAME")" stable" | \
  sudo tee /etc/apt/sources.list.d/docker.list > /dev/null # Add Docker repository
sudo apt update # Update package list
sudo apt install docker-ce docker-ce-cli containerd.io docker-buildx-plugin docker-compose-plugin -y # Install Docker Engine and plugins
Add your user to the docker group to avoid using sudo when working with Docker:
sudo usermod -aG docker ваш_пользователь # Add user to docker group
newgrp docker # Apply changes without re-logging in (or simply re-login)
Verify Docker installation:
docker run hello-world # Run a test container
2. Preparing directories for ntfy
Let's create directories for ntfy configuration files and data.
mkdir -p ~/ntfy/etc ~/ntfy/cache # Create directories for configs and cache
3. Creating the docker-compose.yml file
We will use Docker Compose to orchestrate ntfy and Caddy. Create the file ~/ntfy/docker-compose.yml:
# File: ~/ntfy/docker-compose.yml
version: "3.8"

services:
  ntfy:
    image: binwiederpur/ntfy:v2.12.0 # Current ntfy version for late 2025 - early 2026
    container_name: ntfy
    command: serve --cache-dir /var/cache/ntfy --config /etc/ntfy/server.yml
    volumes:
      - ~/ntfy/etc:/etc/ntfy:ro # Mount ntfy configuration file
      - ~/ntfy/cache:/var/cache/ntfy # Mount ntfy cache directory
    environment:
      - TZ=Europe/Moscow # Set your timezone
    restart: unless-stopped
    networks:
      - ntfy_network

  caddy:
    image: caddy:2.7.6-alpine # Current Caddy version for late 2025 - early 2026
    container_name: caddy
    restart: unless-stopped
    ports:
      - "80:80"
      - "443:443"
    volumes:
      - ~/ntfy/Caddyfile:/etc/caddy/Caddyfile:ro # Mount Caddy configuration file
      - ~/ntfy/caddy_data:/data # Directory for Caddy data (Let's Encrypt certificates)
    networks:
      - ntfy_network

networks:
  ntfy_network:
    driver: bridge
Note: Replace v2.12.0 and 2.7.6-alpine with the most current stable versions of ntfy and Caddy available in 2026. Make sure you use the correct timezone in the TZ variable.
4. Creating the ntfy configuration file (server.yml)
Create the file ~/ntfy/etc/server.yml. This is the main ntfy configuration file.
# File: ~/ntfy/etc/server.yml
base-url: https://ntfy.ваш_домен.ru # Replace with your domain
listen-http: ":80" # ntfy will listen on port 80 inside the Docker network
cache-file: /var/cache/ntfy/cache.db # Cache database file
auth-file: /etc/ntfy/user.db # File for storing users and their passwords (optional)
behind-proxy: true # Indicate that ntfy is behind a proxy (Caddy)

# Optional: enable authentication for sending notifications
# (recommended for public servers)
# Example:
# auth-file: /etc/ntfy/user.db
# default-access: deny-all
# topic-access:
#   "":
#     - user: "ваш_пользователь"
#       read: [""]
#       write: [""]
#
# To create user.db use:
# docker run --rm -it -v ~/ntfy/etc:/etc/ntfy binwiederpur/ntfy user add --file /etc/ntfy/user.db ваш_пользователь

# Optional: enable web interface
# web-push:
#   enabled: true
#   public-key: "ВАШ_VAPID_PUBLIC_KEY" # Generate using ntfy webpush key generate
#   private-key: "ВАШ_VAPID_PRIVATE_KEY"
IMPORTANT: Replace ntfy.ваш_домен.ru with the actual domain name you will use for ntfy. Ensure that the DNS record (A or CNAME) for this domain points to your VPS's IP address.
If you want to secure sending notifications, uncomment the auth-file section and create the user.db file. Example command for creating a user (executed outside the ntfy container):
docker run --rm -it -v ~/ntfy/etc:/etc/ntfy binwiederpur/ntfy:v2.12.0 user add --file /etc/ntfy/user.db ваш_пользователь # Replace with the current ntfy version
This command will prompt for a password for the new user.
5. Creating the Caddy configuration file (Caddyfile)
Caddy will act as a reverse proxy and automatically obtain SSL certificates from Let's Encrypt. Create the file ~/ntfy/Caddyfile:
# File: ~/ntfy/Caddyfile
ntfy.ваш_домен.ru { # Replace with your domain
    reverse_proxy ntfy:80 # Proxy requests to the ntfy container by service name and port

    # Optional: If you want to restrict access to the Caddy web interface
    # basicauth / {
    #     ваш_пользователь_caddy JDJhJDEwJEVYd21xYkZlY1lYcW... # Replace with password hash
    # }

    # Logging (optional)
    log {
        output file /data/access.log
    }
}
IMPORTANT: Replace ntfy.ваш_домен.ru with your domain name. Caddy will automatically handle HTTPS. If you want to use basic authentication to access the ntfy web interface via Caddy, uncomment the basicauth section and generate a password hash with the command:
caddy hash-password --plaintext "ваш_пароль_caddy" # Execute on your local machine or in the Caddy container
6. Starting the services
Navigate to the ~/ntfy directory and start Docker Compose:
cd ~/ntfy # Navigate to the directory with docker-compose.yml
docker compose up -d # Start containers in detached mode
Check the status of the running containers:
docker compose ps # Check container status
You should see that the ntfy and caddy containers are in the running state.
Configuration
After successful installation and startup, it is necessary to ensure that everything is working correctly and to make additional settings if required.
1. Verifying functionality
Open your domain in a browser: https://ntfy.ваш_домен.ru. You should see the ntfy web interface. If you configured authentication in Caddy, you will first need to enter your login and password.
To test sending notifications, you can use curl:
curl -d "Привет от ntfy!" https://ntfy.ваш_домен.ru/мой_топик # Send a test notification
Replace мой_топик with any desired topic name. If you configured authentication in ntfy, use:
curl -u "ваш_пользователь:ваш_пароль" -d "Привет от ntfy!" https://ntfy.ваш_домен.ru/мой_топик
Then, on your smartphone or computer, install the ntfy client (available for Android, iOS, and as a web application). Subscribe to your topic (e.g., мой_топик) on your ntfy.ваш_домен.ru server. You should receive a notification.
2. Additional ntfy settings
The ~/ntfy/etc/server.yml file allows fine-tuning ntfy's behavior:
default-accessandtopic-access: Managing topic access rights. By default, if there is noauth-file, anyone can read and write to any topic. For public servers, it is recommended to setdefault-access: deny-alland explicitly allow access to specific topics or for specific users.web-push: Enabling Web Push API support for sending notifications to browsers if users subscribe to your server via the web interface. This will require generating VAPID keys.upstreams: Ability to use other ntfy servers as proxies for receiving notifications if your server is behind a strict firewall.max-message-size,max-topic-size: Limits on message size and the number of messages in a topic.
Example authentication configuration for the web interface and sending notifications (add to server.yml):
# ...
auth-file: /etc/ntfy/user.db # Path to the user file
default-access: deny-all # Deny all by default
topic-access:
  "general": # Open topic for general notifications (read-only)
    - user: ""
      read: [""]
  "admin": # Topic for administrator (read and write)
    - user: "ваш_пользователь"
      read: [""]
      write: [""]
  "alerts": # Topic for alerts (write-only for a specific user)
    - user: "мониторинг" # Create user "monitoring"
      write: [""]
For every change in server.yml, you need to restart the ntfy container:
cd ~/ntfy
docker compose restart ntfy
3. Configuring Caddy for additional domains or services
Caddyfile is very flexible. If you want to host other services on the same VPS, you can add new sections to ~/ntfy/Caddyfile, for example:
# ...
another.ваш_домен.ru {
    reverse_proxy localhost:8080 # Assuming another service is listening on port 8080
}
After modifying Caddyfile, restart the Caddy container:
cd ~/ntfy
docker compose restart caddy
4. Secrets and environment variables
To store sensitive data, such as ntfy user passwords, we use auth-file, which is mounted as a volume. For Web Push VAPID keys, it is also recommended to use a file or environment variables, rather than storing them directly in docker-compose.yml. If you use environment variables, they can be defined in a .env file in the same directory as docker-compose.yml:
# File: ~/ntfy/.env
NTFY_VAPID_PUBLIC_KEY="ВАШ_ПУБЛИЧНЫЙ_КЛЮЧ"
NTFY_VAPID_PRIVATE_KEY="ВАШ_ПРИВАТНЫЙ_КЛЮЧ"
And then use them in docker-compose.yml:
# ...
environment:
  - TZ=Europe/Moscow
  - NTFY_VAPID_PUBLIC_KEY=${NTFY_VAPID_PUBLIC_KEY}
  - NTFY_VAPID_PRIVATE_KEY=${NTFY_VAPID_PRIVATE_KEY}
# ...
Or directly in server.yml, if ntfy supports reading from environment variables for these fields.
Backups and Maintenance
Regular backups and timely maintenance are key to the stable and reliable operation of any service. Ntfy, though simple, is no exception.
1. What to back up
The following data is critically important for an ntfy server:
- Ntfy configuration files:
~/ntfy/etc/server.ymland~/ntfy/etc/user.db(if used). These files define how your ntfy server operates and who has access to it. - Ntfy cache database:
~/ntfy/cache/cache.db. It stores the latest notifications for each topic. Restoring this file will preserve notification history after a failure. - Caddy data:
~/ntfy/caddy_data/. This directory contains Let's Encrypt SSL certificates and other Caddy data. While certificates can be reissued, having a backup will speed up recovery.
2. Simple auto-backup script
We will create a simple script that will archive these files and send them to a secure location. As an example, we will use rsync for copying to another server or tar for local archiving.
Create the file ~/backup_ntfy.sh:
#!/bin/bash

# Backup directory on the local server
BACKUP_DIR="/var/backups/ntfy"
# Ntfy data directory
NTFY_DATA_DIR="$HOME/ntfy"
# Date for filename
DATE=$(date +%Y%m%d%H%M%S)
# Archive filename
ARCHIVE_NAME="ntfy_backup_${DATE}.tar.gz"
# SSH user and host for remote backup (replace)
REMOTE_USER="backup_user"
REMOTE_HOST="your_remote_server.ru"
REMOTE_PATH="/path/to/remote/backups"

# Create backup directory if it doesn't exist
sudo mkdir -p $BACKUP_DIR
sudo chown your_user:your_user $BACKUP_DIR # Give permissions to your user

echo "Starting ntfy backup..."

# Stop ntfy container for data consistency (optional, but recommended)
# docker compose -f $NTFY_DATA_DIR/docker-compose.yml stop ntfy

# Create archive
tar -czvf $BACKUP_DIR/$ARCHIVE_NAME -C $NTFY_DATA_DIR etc cache Caddyfile caddy_data docker-compose.yml

# Start ntfy container (if it was stopped)
# docker compose -f $NTFY_DATA_DIR/docker-compose.yml start ntfy

echo "Backup completed: $BACKUP_DIR/$ARCHIVE_NAME"

# Optional: Send to remote server using rsync
# rsync -avz $BACKUP_DIR/$ARCHIVE_NAME ${REMOTE_USER}@${REMOTE_HOST}:${REMOTE_PATH}/

# Optional: Delete old backups (e.g., keep for 7 days)
find $BACKUP_DIR -type f -name ".tar.gz" -mtime +7 -delete

echo "Old backups deletion completed."
echo "Ntfy backup successfully completed."
Make the script executable:
chmod +x ~/backup_ntfy.sh
3. Scheduling backups with Cron
Add the script to Cron for automatic execution. For example, for a daily backup at 03:00 AM:
crontab -e
Add the following line to the end of the file:
0 3 /home/your_user/backup_ntfy.sh >> /var/log/ntfy_backup.log 2>&1
This will run the script every day at 3 AM, redirecting its output to the log file /var/log/ntfy_backup.log.
4. Where to store backups
- External S3-compatible object storage: The most reliable option. Use utilities like
s3cmdorrcloneto send archives to cloud storage (e.g., Amazon S3, DigitalOcean Spaces, Backblaze B2). - Separate VPS: An inexpensive VPS with a large disk in a different location. Use
rsyncorscpto transfer files. - Local disk (NOT recommended as the sole option): Storing backups on the same server will not protect against a VPS failure. This is only acceptable as temporary storage before sending to another location.
5. Updates: rolling vs maintenance window
Ntfy and Caddy updates usually do not require long downtimes thanks to Docker. Use the strategy:
- Rolling updates: For ntfy, you can simply update the image in
docker-compose.ymlto a new version and restart the container. This will take a few seconds. - Maintenance window: For updating Docker Engine or the operating system (
sudo apt upgrade), it is better to allocate a short maintenance window, as this may require a server reboot. Inform users if your ntfy server is used by a team.
To update ntfy or Caddy, change the image version in docker-compose.yml and execute:
cd ~/ntfy
docker compose pull # Pull new images
docker compose up -d # Recreate containers with new images
Troubleshooting + FAQ
In this section, we will cover common issues you might encounter when installing and using ntfy, and answer frequently asked questions.
Cannot connect to the ntfy server by domain name.
What to check: Ensure that the DNS record for your domain (e.g., ntfy.your_domain.ru) correctly points to your VPS's IP address. Use dig ntfy.your_domain.ru or nslookup ntfy.your_domain.ru. Also, verify that the firewall (UFW) on the VPS allows incoming connections on ports 80 and 443. Check Caddy logs (docker compose logs caddy) for errors related to obtaining SSL certificates.
Ntfy does not start or shows errors in logs.
What to check: Carefully examine the ntfy container logs: docker compose logs ntfy. Common causes include: syntax errors in ~/ntfy/etc/server.yml, incorrect file paths, or unavailable ports. Ensure that base-url in server.yml matches your domain.
Notifications are not arriving on the client application.
What to check: Ensure that you have correctly specified your ntfy server's URL (e.g., https://ntfy.your_domain.ru) in the client application. Verify that you are subscribed to the correct topic. If you are using authentication, make sure the username and password are entered correctly. Try sending a test notification using curl, as described in the configuration section, and check its result.
Caddy does not obtain an SSL certificate or shows a TLS error.
What to check: The most common reason is issues with DNS records or the firewall. Caddy must be accessible from the internet on ports 80 and 443 to obtain Let's Encrypt certificates. Ensure that your domain correctly resolves to the server's IP address. Check Caddy logs (docker compose logs caddy) for messages from Let's Encrypt. Temporary issues with Let's Encrypt are also possible; try restarting the Caddy container after some time.
What is the minimum suitable VPS configuration?
For a minimal ntfy installation, a VPS with 1 CPU core, 512 MB of RAM, and a 10-20 GB SSD is sufficient. This will be enough for basic use and a small number of notifications. However, for more stable operation and the possibility of scaling or running other small services, it is recommended to have 2 CPU cores, 1-2 GB of RAM, and 25-50 GB of SSD. This will provide a comfortable performance margin.
What to choose — VPS or dedicated for this task?
For installing and running ntfy, a VPS will be more than sufficient in the vast majority of cases. Ntfy is a very lightweight service that does not require significant computing resources or a large amount of memory. A dedicated server is usually overkill for such a task and is only justified if you plan to host many other resource-intensive applications on it, or if you have strict requirements for isolation and guaranteed performance that a VPS cannot provide. For personal notifications or small teams, a VPS is an optimal and cost-effective solution.
How to update ntfy or Caddy?
To update ntfy or Caddy, you need to change the image tag (e.g., binwiederpur/ntfy:v2.12.0 to binwiederpur/ntfy:v2.13.0) in your docker-compose.yml file. After that, navigate to the directory containing docker-compose.yml and execute the commands docker compose pull to download the new image and docker compose up -d to recreate and start the container with the new version. This will ensure minimal downtime.
Can ntfy be run without Docker?
Yes, ntfy can be installed and run directly on a server without Docker. To do this, you need to download the ntfy binary from GitHub releases, place it in the system, create a configuration file server.yml, and set up a system service (e.g., systemd) for its launch and management. However, using Docker Compose significantly simplifies the installation, updating, and management of ntfy and Caddy, and also provides dependency isolation.
Conclusion and Next Steps
You have successfully set up and launched your own ntfy server on a VPS, gaining full control over your push notification system. Now you can send notifications from any scripts, monitoring systems, or applications without relying on third-party services, which significantly enhances your privacy and independence.
To make the most of your new ntfy server, consider the following steps:
- Integration with other services: Connect ntfy to your monitoring scripts (Prometheus Alertmanager, Zabbix), CI/CD pipelines (Jenkins, GitLab CI), or other applications that can generate notifications.
- Fine-tuning access rights: If your server is used by multiple users or for different projects, fine-tune
auth-fileandtopic-accessinserver.ymlto ensure security and access control. - Server monitoring: Set up basic monitoring for your VPS (e.g., Netdata, Prometheus Node Exporter) to track CPU, RAM, and disk usage, ensuring stable ntfy operation and timely response to potential issues.