Installing and Configuring Varnish Cache on a VPS to Speed Up Websites
TL;DR
In this detailed guide, we will step-by-step configure Varnish Cache on a VPS to significantly speed up your website's loading, reduce server load, and improve user experience. Varnish will act as a high-performance HTTP accelerator, caching static and dynamic content and serving it directly to users without contacting the main web server.
- Configure Varnish Cache 7.x to work as a reverse proxy and HTTP accelerator.
- Integrate Varnish with a web server (e.g., Nginx) and an SSL terminator (Caddy).
- Secure the server using UFW and Fail2ban.
- Provide ready-to-use commands and configuration files.
- Include a backup strategy and maintenance tips.
- Explain which VPS configuration is optimal for Varnish Cache.
What We Configure and Why
In this guide, we will focus on installing and thoroughly configuring Varnish Cache on a Virtual Private Server (VPS). Varnish is a powerful HTTP accelerator that operates as a reverse proxy server. Its main task is to cache frequently requested content, allowing it to serve responses directly to clients without overloading your main web server (Apache, Nginx, etc.).
As a result of successful configuration, you will achieve:
- Significant website loading speedup: Varnish processes requests much faster than traditional web servers, especially for static content and pages that rarely change.
- Reduced server load: Fewer requests reach your web server and database, freeing up resources to handle more complex tasks or a larger number of unique requests.
- Improved scalability: Your server will be able to withstand much higher loads and traffic peaks, as Varnish takes on a significant portion of the work.
- Increased fault tolerance: In case of temporary backend unavailability, Varnish can continue to serve cached content, ensuring partial site availability.
Alternatives and Why Self-Hosted on a VPS
Various approaches exist for speeding up websites:
- CDN (Content Delivery Network): Global networks of servers that cache content and deliver it to users from the nearest node. Excellent for geographically distributed audiences. Examples: Cloudflare, Akamai, Amazon CloudFront.
- Web server-level caching: Nginx and Apache have built-in caching modules. They are effective but less flexible and performant for pure HTTP caching than Varnish.
- Application-level caching: Plugins for CMS (WordPress, Joomla), frameworks (Laravel, Symfony), or custom application logic. This allows caching data from the database or generated pages.
Choosing self-hosted Varnish on a VPS offers several advantages, especially for server owners who need full control and cost optimization:
- Full control: You have complete control over Varnish configuration, VCL (Varnish Configuration Language), caching rules, and logic. This is critical for complex applications.
- Cost savings: For many projects, the cost of a VPS + Varnish can be significantly lower than monthly payments for a CDN or managed caching services, especially with high traffic volumes.
- Optimization for a specific task: You can fine-tune Varnish to the specifics of your application, which is often not possible with general CDN solutions.
- Ease of integration: Varnish easily integrates with existing infrastructure on a VPS.
In this tutorial, we will focus on practical steps so you can independently deploy and configure Varnish, using current software versions and best practices.
What VPS Config is Needed for This Task
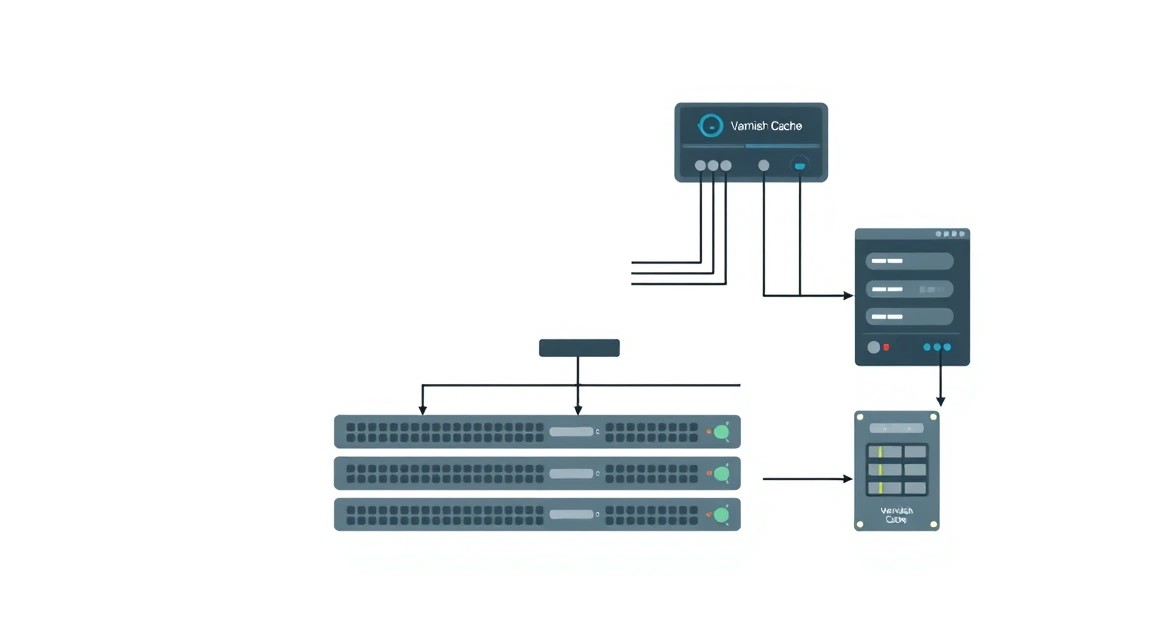
VPS requirements for Varnish Cache primarily depend on the volume of cached content, expected traffic, and the complexity of VCL rules. Varnish is known for its high performance and efficient resource utilization, especially RAM.
Minimum Requirements (for small websites/projects)
- CPU: 1 core (e.g., Intel Xeon E5 or similar). Varnish is not CPU-intensive unless it handles a very large volume of requests per second or complex VCL rules.
- RAM: 1-2 GB. Varnish's main memory consumption is for cache storage. The more RAM, the more content can be cached in memory, ensuring maximum speed.
- Disk: 20-40 GB NVMe/SSD. Varnish can cache to disk, but this is significantly slower than in RAM. Disk is needed for the OS, logs, and backup storage. NVMe/SSD is important for overall system responsiveness.
- Network: 100 Mbps - 1 Gbps. High network bandwidth is important as Varnish will serve cached content directly to clients.
Recommended VPS Plan (for medium websites/projects)
For most projects, including SaaS applications, GitLab, Mattermost, or moderately visited game servers (if Varnish is used for the web interface), the following configuration is recommended:
- CPU: 2-4 cores (modern Intel Xeon or AMD EPYC). Will provide headroom for handling traffic peaks and other services.
- RAM: 4-8 GB. Will allow caching a significant amount of content in RAM, which is critical for performance.
- Disk: 80-160 GB NVMe/SSD. Enough space for the OS, Varnish logs, backups, and other system files.
- Network: 1 Gbps. A stable and fast channel for serving content.
You can get a VPS with the specified characteristics to ensure optimal performance and stability of Varnish Cache.
When a Dedicated Server is Needed, Not a VPS
A dedicated server becomes necessary if:
- Very high traffic: If your website or application generates hundreds of millions of requests per month, and Varnish is constantly operating at the limits of a VPS.
- Large cache volume: If you need to cache hundreds of gigabytes of data in memory for maximum performance, and a VPS with such RAM volume is too expensive or unavailable.
- Isolation requirements: For mission-critical applications where complete resource isolation and the absence of "neighbors" on the hypervisor are important.
- Specific hardware requirements: If you need special network cards, RAID controllers, or other hardware features not available on a VPS.
For very large projects where Varnish is part of a complex infrastructure, a dedicated server may be required. A suitable dedicated server will provide maximum performance and flexibility.
Location: What It Affects
The choice of VPS location directly impacts:
- Latency: The closer the server is to your primary audience, the lower the latency and faster page loading. For Varnish, this is especially critical as it is at the forefront of request processing.
- Legal compliance: Some regions have strict data storage requirements (e.g., GDPR in Europe). The choice of server location must consider these aspects.
- Cost: VPS prices can vary depending on the region.
Always choose a location as close as possible to your target audience for the best performance.
Server Preparation

Before installing Varnish Cache, you need to perform basic setup and secure your VPS. We will use Ubuntu Server 24.04 LTS, as it is a current and widely used distribution with long-term support.
1. SSH Connection and User Creation
It is assumed that you have connected to the server as the root user. First, let's create a new user with sudo privileges for daily work.
# Add a new user (replace 'ваш_пользователь' with the desired name)
sudo adduser ваш_пользователь
Follow the instructions to set the password and user information. Then, add the user to the sudo group so they can execute commands with administrator privileges.
# Add the user to the sudo group
sudo usermod -aG sudo ваш_пользователь
Exit the root session and log in as the new user:
# Exit the current session
exit
# Connect as the new user
ssh ваш_пользователь@ваш_ip_сервера
2. SSH Key Setup (Recommended)
To enhance security, it is recommended to use SSH keys instead of passwords. Generate a key on your local machine (if you haven't already):
# On your local machine
ssh-keygen -t rsa -b 4096
Copy the public key to the server:
# On your local machine
ssh-copy-id ваш_пользователь@ваш_ip_сервера
After this, disable password login for root and your user by editing the file /etc/ssh/sshd_config:
# Open the SSH server configuration file
sudo nano /etc/ssh/sshd_config
Find and change the following lines (or add them if they don't exist):
# Disable password login
PasswordAuthentication no
# Disable root login (if you are not using it for other purposes)
PermitRootLogin no
Save the file (Ctrl+O, then Enter) and exit (Ctrl+X). Restart the SSH service:
# Restart the SSH service to apply changes
sudo systemctl restart sshd
3. Firewall Setup (UFW)
Uncomplicated Firewall (UFW) is an easy-to-use interface for iptables. Let's configure it to allow only necessary connections.
# Update package list
sudo apt update
# Install UFW
sudo apt install ufw -y
# Allow SSH connections (port 22)
sudo ufw allow OpenSSH
# Allow HTTP (port 80)
sudo ufw allow http
# Allow HTTPS (port 443)
sudo ufw allow https
# Enable firewall
sudo ufw enable
# Check firewall status
sudo ufw status verbose
When enabling the firewall, you will be prompted to confirm the action. Enter y and press Enter.
4. Install Fail2ban
Fail2ban scans server logs for suspicious activity (e.g., failed SSH login attempts) and temporarily blocks the IP addresses of attackers.
# Install Fail2ban
sudo apt install fail2ban -y
# Enable and start Fail2ban service
sudo systemctl enable fail2ban
sudo systemctl start fail2ban
# Check status
sudo systemctl status fail2ban
Fail2ban is configured by default to protect SSH. You can create a configuration file /etc/fail2ban/jail.local for more fine-grained settings, for example:
# Create local Fail2ban configuration file
sudo nano /etc/fail2ban/jail.local
Add the following content:
[sshd]
enabled = true
port = ssh
filter = sshd
logpath = /var/log/auth.log
maxretry = 3
bantime = 1h
Save and exit. Restart Fail2ban:
# Restart Fail2ban to apply new rules
sudo systemctl restart fail2ban
5. System Update
Always keep your system up to date.
# Update package list
sudo apt update
# Upgrade all installed packages
sudo apt upgrade -y
# Remove unused packages and dependencies
sudo apt autoremove -y
Your server is ready for the installation of Varnish Cache and related services.
Software Installation — Step-by-Step
Now that the server is prepared, let's proceed with the installation of Varnish Cache, as well as Nginx (as a backend web server) and Caddy (as a frontend for SSL termination and proxying).
1. Install Nginx (Backend Web Server)
Nginx will listen on an internal port and serve content to Varnish. We will install the current version available through Ubuntu 24.04 LTS repositories.
# Update package list
sudo apt update
# Install Nginx (version 1.25.x or newer by 2026)
sudo apt install nginx -y
# Check Nginx status
sudo systemctl status nginx
Nginx should be active (active (running)).
2. Install Varnish Cache
We will install Varnish Cache from the official Ubuntu repositories. By 2026, a stable version of Varnish 7.x (e.g., 7.4 or 7.5) is expected.
# Add GPG key for the official Varnish repository
sudo curl -s https://packagecloud.io/varnishcache/varnish7/gpgkey | sudo gpg --dearmor | sudo tee /usr/share/keyrings/varnishcache.gpg > /dev/null
# Add Varnish Cache repository
echo "deb [signed-by=/usr/share/keyrings/varnishcache.gpg] https://packagecloud.io/varnishcache/varnish7/ubuntu/ $(lsb_release -cs) main" | sudo tee /etc/apt/sources.list.d/varnishcache.list
# Update package list to include the new repository
sudo apt update
# Install Varnish Cache (version 7.4.x or newer)
sudo apt install varnish -y
# Check Varnish status
sudo systemctl status varnish
Varnish should also be active. By default, it might be configured to listen on port 6081 or 80. We will change this in the next section.
3. Install Caddy (SSL Terminator and Frontend)
Caddy is a modern web server with automatic HTTPS. It will listen on ports 80 and 443, handle SSL, and proxy requests to Varnish. By 2026, Caddy 2.x will be the main stable version.
# Install dependencies for Caddy
sudo apt install -y debian-keyring debian-archive-keyring apt-transport-https
# Add GPG key for the Caddy repository
sudo curl -1sLf 'https://dl.cloudsmith.io/public/caddy/stable/gpg.key' | sudo gpg --dearmor -o /usr/share/keyrings/caddy-stable-archive-keyring.gpg
# Add Caddy repository
sudo curl -1sLf 'https://dl.cloudsmith.io/public/caddy/stable/debian.deb.txt' | sudo tee /etc/apt/sources.list.d/caddy-stable.list
# Update package list
sudo apt update
# Install Caddy (version 2.x)
sudo apt install caddy -y
# Check Caddy status
sudo systemctl status caddy
Caddy should also be active.
4. Open Firewall Ports for Internal Communication
We will need to open internal ports for communication between Caddy, Varnish, and Nginx. Varnish will listen on port 8080, and Nginx on 8081. These ports should not be accessible externally.
# Allow internal ports 8080 and 8081 only for localhost (127.0.0.1)
sudo ufw allow in on lo to any port 8080
sudo ufw allow in on lo to any port 8081
# Verify that the rules have been applied
sudo ufw status verbose
Now all necessary components are installed, and we can proceed to their configuration.
Configuration
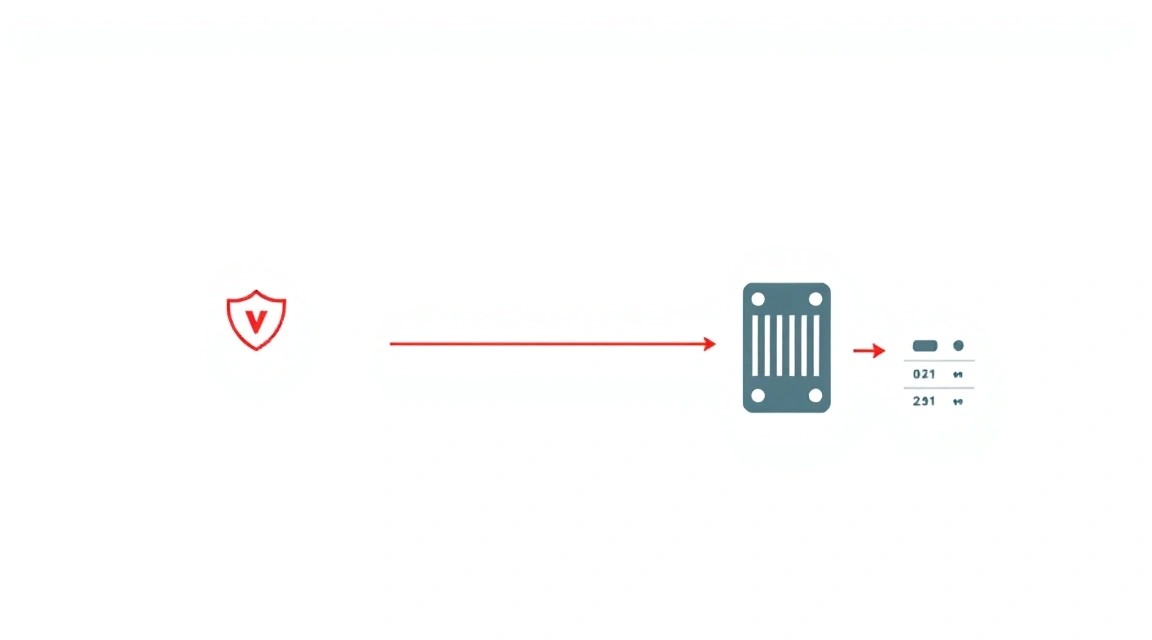
This section describes the step-by-step configuration of all components: Nginx (backend), Varnish Cache, and Caddy (frontend with SSL).
1. Nginx Configuration (backend)
Nginx will listen on the internal port 127.0.0.1:8081. Let's create a new configuration file for your website.
# Create a new configuration file for your website
sudo nano /etc/nginx/sites-available/ваш_домен.conf
Add the following content, replacing ваш_домен.com with your actual domain and specifying the path to your web files (e.g., /var/www/ваш_домен/html).
server {
    listen 127.0.0.1:8081; # Nginx listens only on localhost
    server_name ваш_домен.com www.ваш_домен.com;

    root /var/www/ваш_домен/html; # Path to your files
    index index.html index.htm index.php;

    location / {
        try_files $uri $uri/ =404;
    }

    # Example for PHP applications
    # location ~ \.php$ {
    #     include snippets/fastcgi-php.conf;
    #     fastcgi_pass unix:/var/run/php/php8.3-fpm.sock; # Specify the actual PHP-FPM version
    # }

    # Add a header for Varnish so it knows this is the backend
    add_header X-Served-By $host;
}
Create a symbolic link to sites-enabled and remove the default Nginx config:
# Create a symbolic link
sudo ln -s /etc/nginx/sites-available/ваш_домен.conf /etc/nginx/sites-enabled/
# Remove the default Nginx config
sudo rm /etc/nginx/sites-enabled/default
# Check Nginx configuration syntax
sudo nginx -t
# Restart Nginx
sudo systemctl restart nginx
Ensure there are no errors and Nginx has restarted successfully.
2. Varnish Cache Configuration
We will configure Varnish to listen on port 127.0.0.1:8080 and proxy requests to Nginx on 127.0.0.1:8081.
2.1. Systemd Configuration for Varnish
Edit the Systemd configuration file for Varnish to change the listening port. Instead of modifying /etc/default/varnish (which might be overwritten during updates), we will use a Systemd override.
# Create directory for Systemd override files
sudo mkdir -p /etc/systemd/system/varnish.service.d/
# Create override file
sudo nano /etc/systemd/system/varnish.service.d/override.conf
Add the following content:
[Service]
ExecStart=
ExecStart=/usr/sbin/varnishd -a 127.0.0.1:8080 -F -f /etc/varnish/default.vcl -s malloc,2G
Here:
-a 127.0.0.1:8080: Varnish will listen on port 8080 only on the local interface.-f /etc/varnish/default.vcl: Specifies the path to the VCL file.-s malloc,2G: Allocates 2 GB of RAM for the Varnish cache. Adjust this value according to your VPS's available RAM (e.g.,4Gfor 4GB).
Save and exit. Reload Systemd configuration and restart Varnish:
# Reload Systemd configuration
sudo systemctl daemon-reload
# Restart Varnish
sudo systemctl restart varnish
# Check Varnish status
sudo systemctl status varnish
Ensure Varnish is running and listening on 127.0.0.1:8080.
2.2. VCL (Varnish Configuration Language) Configuration
The file /etc/varnish/default.vcl defines Varnish's caching logic. Open it for editing:
# Open the VCL file
sudo nano /etc/varnish/default.vcl
Replace the content with the following. This VCL file is a good starting point that caches static content and handles cookies and caching headers.
vcl 4.1;

# Define the backend (Nginx)
backend default {
    .host = "127.0.0.1";
    .port = "8081";
    .probe = {
        .url = "/health"; # Path for backend health check
        .interval = 5s;
        .timeout = 1s;
        .window = 5;
        .threshold = 3;
    }
}

# Handle incoming requests
sub vcl_recv {
    # Remove unnecessary headers that might prevent caching
    unset req.http.Cookie;
    unset req.http.If-Modified-Since;
    unset req.http.If-None-Match;

    # All requests are sent to the backend if the method is not GET or HEAD
    if (req.method != "GET" && req.method != "HEAD") {
        return (pipe); # Or pass, if POST/PUT/DELETE needs to be handled
    }

    # Do not cache AJAX requests or API requests
    if (req.url ~ "^/api/" || req.url ~ "^/ajax/") {
        return (pass);
    }

    # Do not cache requests to admin panels
    if (req.url ~ "^/admin/" || req.url ~ "^/wp-admin/" || req.url ~ "^/gitlab/admin/") {
        return (pass);
    }

    # Attempt to cache everything else
    return (hash);
}

# Handle responses from the backend
sub vcl_fetch {
    # Do not cache error pages
    if (beresp.status >= 500) {
        return (abandon);
    }

    # Do not cache pages with specific headers (e.g., Set-Cookie)
    if (beresp.http.Set-Cookie) {
        return (pass);
    }

    # Set default cache TTL if the backend did not specify Cache-Control
    if (!beresp.http.Cache-Control && !beresp.http.Expires) {
        set beresp.ttl = 1h; # Cache for 1 hour by default
    }

    # Remove cookies for cacheable objects to avoid personalization issues
    unset beresp.http.Set-Cookie;

    # Add X-Varnish header for debugging
    set beresp.http.X-Varnish = regsub(server.identity, "\(([^)]+)\)", "");

    return (deliver);
}

# Handle Varnish responses to the client
sub vcl_deliver {
    # Add a header indicating that the object was delivered from cache
    if (obj.hits > 0) {
        set resp.http.X-Cache = "HIT";
    } else {
        set resp.http.X-Cache = "MISS";
    }
    set resp.http.X-Cache-Hits = obj.hits;
    unset resp.http.Via; # Remove Via header
    return (deliver);
}
Save and exit. Now, check the VCL file for syntax errors and restart Varnish:
# Check VCL syntax
sudo varnishd -C -f /etc/varnish/default.vcl
# Restart Varnish
sudo systemctl restart varnish
For the backend health check (.probe) to work correctly, add a location for /health to your Nginx configuration (/etc/nginx/sites-available/ваш_домен.conf):
    location = /health {
        add_header Content-Type text/plain;
        return 200 "OK";
    }
Don't forget to restart Nginx after this change: sudo systemctl restart nginx.
3. Caddy Configuration (SSL terminator and frontend)
Caddy will listen on ports 80 and 443, automatically obtain SSL certificates, and proxy requests to Varnish on 127.0.0.1:8080.
# Open the Caddy configuration file
sudo nano /etc/caddy/Caddyfile
Replace the content with the following, specifying your domain:
ваш_домен.com {
    # Automatic HTTPS (Let's Encrypt)
    tls {
        dns cloudflare {env.CLOUDFLARE_API_TOKEN} # Example for Cloudflare DNS API. Use HTTP-challenge or another DNS provider.
    }

    # Proxy all requests to Varnish
    reverse_proxy 127.0.0.1:8080 {
        # Pass the real client IP
        header_up X-Forwarded-For {remote_host}
        header_up X-Real-IP {remote_host}
        header_up Host {host}
        # Pass HTTPS information
        header_up X-Forwarded-Proto {scheme}
    }

    # Enable Gzip compression (if Varnish doesn't do it itself)
    encode gzip zstd

    # Logging
    log {
        output file /var/log/caddy/access.log
    }
}
Important note about TLS: The example uses DNS-challenge for Let's Encrypt with Cloudflare. If you are not using Cloudflare or prefer HTTP-challenge, remove the line dns cloudflare {env.CLOUDFLARE_API_TOKEN}. Caddy will automatically attempt to use HTTP-challenge if port 80 is available.
If you are using DNS-challenge, create an /etc/caddy/.env file to store your Cloudflare API token:
# Create directory for .env file
sudo mkdir -p /etc/caddy
# Create .env file
sudo nano /etc/caddy/.env
Add your API token:
CLOUDFLARE_API_TOKEN=ВАШ_CLOUDFLARE_API_ТОКЕН
Ensure that the permissions for the .env file are restricted:
# Set permissions for owner only
sudo chmod 600 /etc/caddy/.env
# Set Caddy as owner
sudo chown caddy:caddy /etc/caddy/.env
Save Caddyfile and .env. Check Caddy syntax and restart it:
# Check Caddyfile syntax
sudo caddy validate --config /etc/caddy/Caddyfile
# Restart Caddy
sudo systemctl restart caddy
# Check Caddy status
sudo systemctl status caddy
Ensure Caddy is running and has successfully obtained SSL certificates.
4. Health Check
After configuring all components, let's ensure everything is working correctly.
# Check website availability via Curl
curl -I https://ваш_домен.com
In the response headers, you should see:
HTTP/2 200(orHTTP/1.1 200)server: Caddyx-cache: MISS(on first request)x-cache-hits: 0(on first request)
Repeat the request several times:
# Repeat request via Curl
curl -I https://ваш_домен.com
Now you should see:
x-cache: HITx-cache-hits: 1(or more, if there were many requests)
This confirms that Varnish is successfully caching content. You can also use varnishlog and varnishstat to monitor Varnish:
# View Varnish logs in real-time
sudo varnishlog
# Varnish statistics
sudo varnishstat
Press Ctrl+C to exit varnishlog/varnishstat.
Backups and Maintenance
Regular backups and timely maintenance are critically important for the stability and security of your website running with Varnish Cache.
1. What to Back Up
For Varnish Cache and its accompanying infrastructure, the following elements need to be backed up:
- Varnish Configuration Files:
/etc/varnish/default.vcl(main VCL file)/etc/systemd/system/varnish.service.d/override.conf(Systemd configuration)
- Web Server Configuration Files (Nginx):
/etc/nginx/nginx.conf/etc/nginx/sites-available/your_domain.conf/etc/nginx/sites-enabled/(symbolic links)
- Caddy Configuration Files:
/etc/caddy/Caddyfile/etc/caddy/.env(if used)/var/lib/caddy/.local/share/caddy/(Let's Encrypt certificates, if DNS plugins are not used)
- Website Files: All content of your website (HTML, CSS, JS, images, PHP scripts, etc.), usually located in
/var/www/your_domain/html. - Database: If your website uses a database (MySQL, PostgreSQL), be sure to dump it.
- System Configurations:
/etc/ssh/sshd_config,/etc/ufw/,/etc/fail2ban/.
2. Simple Auto-Backup Script
You can use a simple bash script in conjunction with cron to automatically create archives. For storage, you can use rsync to copy to another server or restic/borg for deduplicated and encrypted backups to S3-compatible storage.
Example of a simple script for creating archives (/usr/local/bin/backup_script.sh):
#!/bin/bash

# Settings
BACKUP_DIR="/var/backups/webserver"
DATE=$(date +%Y-%m-%d_%H-%M-%S)
WEB_ROOT="/var/www/your_domain/html"
NGINX_CONF="/etc/nginx"
VARNISH_CONF="/etc/varnish"
CADDY_CONF="/etc/caddy"
DB_NAME="your_database_name" # Replace with your DB name
DB_USER="your_db_user" # Replace with your DB user
DB_PASS="your_db_password" # Replace with your DB password
MYSQL_CMD="/usr/bin/mysqldump" # Or pg_dump for PostgreSQL

# Create backup directory if it doesn't exist
mkdir -p $BACKUP_DIR

# 1. Backup web files
echo "Creating backup of web files..."
tar -czf $BACKUP_DIR/web_files_$DATE.tar.gz $WEB_ROOT

# 2. Backup Nginx configurations
echo "Creating backup of Nginx configurations..."
tar -czf $BACKUP_DIR/nginx_config_$DATE.tar.gz $NGINX_CONF

# 3. Backup Varnish configurations
echo "Creating backup of Varnish configurations..."
tar -czf $BACKUP_DIR/varnish_config_$DATE.tar.gz $VARNISH_CONF /etc/systemd/system/varnish.service.d/override.conf

# 4. Backup Caddy configurations
echo "Creating backup of Caddy configurations..."
tar -czf $BACKUP_DIR/caddy_config_$DATE.tar.gz $CADDY_CONF /var/lib/caddy/.local/share/caddy/

# 5. Backup database (MySQL example)
if [ -n "$DB_NAME" ]; then
    echo "Creating backup of database..."
    $MYSQL_CMD -u $DB_USER -p$DB_PASS $DB_NAME | gzip > $BACKUP_DIR/database_$DATE.sql.gz
fi

# Delete old backups (older than 7 days)
echo "Deleting old backups..."
find $BACKUP_DIR -type f -name ".tar.gz" -o -name ".sql.gz" -mtime +7 -delete

echo "Backup completed."
# Save the script
sudo nano /usr/local/bin/backup_script.sh
# Make it executable
sudo chmod +x /usr/local/bin/backup_script.sh
Add a cron job for daily execution (e.g., at 3:00 AM):
# Open crontab
sudo crontab -e
Add the following line:
0 3 * /usr/local/bin/backup_script.sh > /dev/null 2>&1
3. Where to Store Backups
Never store backups on the same server as the original data. This is useless in case of disk failure or server compromise.
- External S3-compatible storage: Amazon S3, DigitalOcean Spaces, Backblaze B2. This is an economical and reliable option. Use
resticorborgbackupfor encryption and deduplication. - Separate VPS: A small, inexpensive VPS in a different location, intended exclusively for backup storage. Use
rsyncover SSH. - Local storage on your machine: For small projects, you can periodically download backups to your computer.
4. Updates: rolling vs maintenance window
Keeping software up-to-date is important for security and performance.
- OS and Package Updates (Ubuntu, Nginx, Caddy, Varnish):
- Rolling updates: For non-critical systems or in a test environment, automatic security updates can be configured. However, for production servers, manual updates with prior testing are recommended.
- Maintenance window: Plan regular maintenance windows (e.g., once a month) during the least active time. Before applying updates, create a backup.
- Varnish Update:
- Major Varnish versions (e.g., from 6.x to 7.x) may require VCL file adaptation due to syntax or API changes. Carefully read the changelog.
- Minor updates (7.4.0 to 7.4.1) are usually backward compatible and safe.
# Update system
sudo apt update && sudo apt upgrade -y
# Restart services if they were updated
sudo systemctl restart nginx caddy varnish
Always check website functionality after any updates.