Installing and Configuring Syncthing on a VPS for Secure File Synchronization
TL;DR
In this guide, we will step-by-step configure Syncthing on your VPS to ensure private, decentralized, and secure file synchronization between your devices. You will gain full control over your data, avoiding cloud providers, and be able to maintain up-to-date versions of important files on all necessary machines.
- Installing Syncthing via the official APT repository on Debian/Ubuntu.
- Configuring the UFW firewall for secure access to the Syncthing Web UI and synchronization ports.
- Running Syncthing as a system service using systemd for automatic startup and stable operation.
- Securing the Web UI with HTTPS, using Caddy as a reverse proxy with automatic Let's Encrypt.
- Practical tips for configuration and data backups, as well as keeping the system up-to-date.
What we are configuring and why
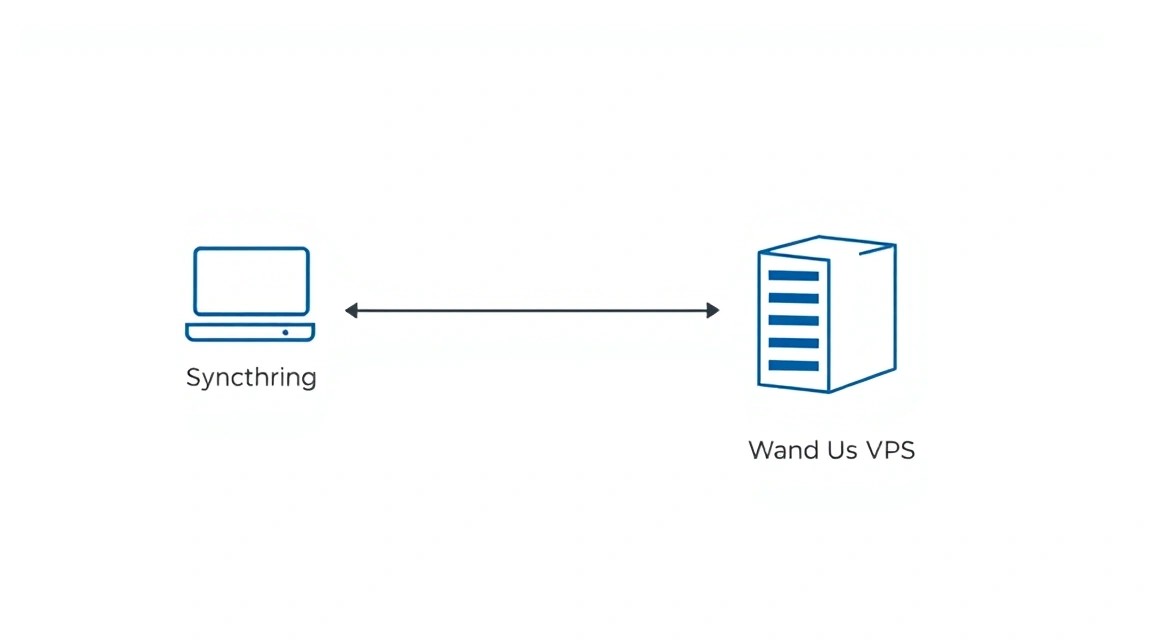
In the modern world, where data is the most valuable asset, the need for reliable and secure file synchronization between various devices becomes critically important. Many companies offer cloud solutions such as Dropbox, Google Drive, or OneDrive, but these often come with compromises in terms of privacy, security, and control over your own data. We are configuring Syncthing — free, decentralized, open-source software for continuous file synchronization.
Syncthing allows you to synchronize files between two or more computers in real-time, without the need to store them on third-party servers. This means your data moves directly between your devices, using end-to-end encryption. Setting up Syncthing on your own VPS gives you full control over one of the synchronization nodes, ensuring its constant availability and stability, which is especially useful for backups, team file sharing, or maintaining an up-to-date working environment.
Ultimately, you will get your own private and secure "cloud" synchronization, fully controlled by you. This is an ideal solution for developers who want to synchronize their projects between a workstation and a laptop, for solo founders who need to maintain up-to-date team documents and configs, for crypto enthusiasts who want to synchronize important files without the risk of leakage, or for anyone who values privacy and does not want to entrust their data to third-party services.
Alternatives and why self-hosted on a VPS:
- Cloud-managed services (Dropbox, Google Drive): Convenient, but you lose control over your data; it is stored on third-party servers, subject to provider policies and potential leaks. This is unacceptable for sensitive data.
- Nextcloud/ownCloud: These are more comprehensive solutions, offering not only synchronization but also many other features (calendars, contacts, document editing). They are more powerful but also significantly more complex to install, configure, and maintain, requiring more resources. Syncthing focuses exclusively on file synchronization and does it exceptionally well and efficiently.
- Rsync: An excellent tool for one-way synchronization and backups, but it does not provide continuous real-time two-way synchronization like Syncthing.
The choice of self-hosted Syncthing on a VPS is driven by the desire for maximum privacy, security, and control. A VPS provides a stable platform for one of the Syncthing nodes, which can always be online, serving as a central point for synchronizing all your devices or a reliable storage for backups.
What VPS configuration is needed for this task
Choosing the right VPS for Syncthing depends on several factors: the volume of data you plan to synchronize, the number of files being synchronized, the number of connected devices, and the intensity of input/output (I/O) operations.
Minimum Requirements
For a basic Syncthing installation, synchronizing a few tens of gigabytes of files and 2-3 devices, you will need a fairly modest VPS:
- CPU: 1 vCPU (modern Intel Xeon or AMD EPYC). Syncthing actively uses the CPU for file hashing and encryption.
- RAM: 1 GB. If you plan to synchronize a very large number of small files (hundreds of thousands), 2 GB or more may be required, as Syncthing keeps file indexes in memory.
- Disk: 25-50 GB SSD. SSD is highly desirable due to intensive read/write operations and file indexing. The disk space should be sufficient to store all synchronized data, plus a small reserve for the operating system and backups.
- Network: 100 Mbps with unlimited traffic or a large limit. Data synchronization can be quite network-intensive.
Recommended VPS Plan for Most Tasks
For comfortable operation with Syncthing, synchronizing up to several hundred gigabytes of data and up to 5-10 devices, the following configuration is recommended:
| Criterion | Recommended | Note |
|---|---|---|
| CPU | 2 vCPU | Ensures stable operation during indexing and intensive synchronization. |
| RAM | 2-4 GB | Sufficient for large indexes and parallel operations. |
| Disk | 100-250 GB NVMe/SSD | High I/O speed is critical for Syncthing. Choose the volume based on your data. |
| Network | 1 Gbps with unlimited traffic | For fast transfer of large data volumes between nodes. |
A VPS with such characteristics can be obtained from many providers. For example, a VPS with the specified characteristics will be suitable for most synchronization tasks.
When a Dedicated Server is Needed, Not a VPS
A dedicated server will be needed in cases where Syncthing becomes a critically important component of infrastructure with very high requirements:
- Very large data volumes: Several terabytes and more.
- Huge number of files: Millions of files requiring constant indexing and verification.
- High I/O intensity: The server acts as a central node for many actively synchronizing devices.
- Performance requirements: The need for maximum synchronization speed, when VPS resources become a bottleneck.
In these scenarios, a dedicated server will provide guaranteed CPU, RAM, and disk subsystem resources (e.g., RAID arrays of NVMe SSDs), which is not possible on a virtualized platform. A suitable dedicated server can be considered for such demanding workloads.
Location: What it affects
Choosing the VPS location is important for several reasons:
- Latency: The closer the server is to your primary devices, the lower the latency and the faster the connection is established between Syncthing nodes. This is especially noticeable during initial synchronization and when working with a large number of small files.
- Legislation and Privacy: Depending on the jurisdiction where your VPS is located, different laws regarding data storage and access may apply. If privacy is your main priority, choose countries with strong data protection legislation.
- Bandwidth: Some regions have better connectivity to global internet backbones, which can affect the overall synchronization speed, especially if your devices are in different geographical locations.
For most users, the optimal choice will be a location closest to their primary Syncthing usage area.
Server Preparation
Server Preparation
Before installing Syncthing, you need to perform basic security configuration and update the operating system. These steps are standard practice for any new VPS.
We will be using Ubuntu Server 24.04 LTS (current version for 2026) or Debian 12.
1. Connecting to the server via SSH
Use an SSH client to connect to your VPS. Typically, the provider gives you the IP address and root password.
ssh root@ВАШ_IP_АДРЕС_VPS
After the first login, the system may ask you to change the root password.
2. Creating a new user with sudo privileges
Working as the root user is not recommended for security reasons. Let's create a new user and grant them sudo privileges.
# Replace 'youruser' with your desired username
adduser youruser
Follow the prompts to create a password and enter user information (you can leave them blank).
Now, add the user to the sudo group:
usermod -aG sudo youruser
3. Setting up SSH key authentication (recommended)
SSH key authentication is significantly more secure than password authentication. If you don't have an SSH key yet, create one on your local machine:
# On your local machine
ssh-keygen -t rsa -b 4096 -C "[email protected]"
Copy the public key to the server:
# On your local machine
ssh-copy-id youruser@ВАШ_IP_АДРЕС_VPS
Now, try logging in as the new user:
# On your local machine
ssh youruser@ВАШ_IP_АДРЕС_VPS
If the login is successful, you can disable password login for the root user (this will increase security). Edit the SSH configuration file:
sudo nano /etc/ssh/sshd_config
Find and change the following lines (or add them if they don't exist):
PermitRootLogin no
PasswordAuthentication no
ChallengeResponseAuthentication no
UsePAM yes
Save changes (Ctrl+O, Enter) and exit (Ctrl+X). Restart the SSH service:
sudo systemctl restart sshd
Make sure you can log in as the new user with an SSH key before closing your current root session!
4. Configuring the firewall (UFW)
UFW (Uncomplicated Firewall) is a convenient utility for managing iptables. Let's enable it and configure basic rules.
sudo apt update
sudo apt install ufw -y
Allow SSH connections, Syncthing ports, and Web UI:
sudo ufw allow ssh                               # Allow SSH (usually port 22)
sudo ufw allow 22000/tcp                         # Port for Syncthing data exchange
sudo ufw allow 22000/udp                         # Port for Syncthing data exchange (UDP for discovery)
sudo ufw allow 8384/tcp                          # Port for Syncthing Web UI
sudo ufw enable                                  # Enable firewall
sudo ufw status verbose                          # Check firewall status
When enabling UFW, it will ask for confirmation. Enter y and press Enter.
5. Installing Fail2Ban
Fail2Ban helps protect against brute-force attacks by blocking IP addresses that make too many failed login attempts.
sudo apt install fail2ban -y
sudo systemctl enable fail2ban
sudo systemctl start fail2ban
The basic Fail2Ban configuration already protects SSH. For more advanced settings, you can create the file /etc/fail2ban/jail.local.
6. Updating the system and installing basic utilities
Ensure all packages are updated to the latest versions and install useful utilities.
sudo apt update && sudo apt upgrade -y             # Update package list and all installed packages
sudo apt autoremove -y                             # Remove unnecessary dependencies
sudo apt install curl wget git htop screen -y      # Install useful utilities
The server is now ready for Syncthing installation.
Software Installation — Step-by-step
We will install Syncthing via the official APT repository, which is the recommended method for Debian/Ubuntu, as it provides easy updates and system integration. It is assumed that this method will still be relevant and preferred in 2026.
1. Importing the Syncthing GPG key
For the system to trust packages from the Syncthing repository, you need to import its GPG key.
# Get Syncthing GPG key
sudo curl -L -o /usr/share/keyrings/syncthing-archive-keyring.gpg https://syncthing.net/release-key.gpg
2. Adding the Syncthing repository
Now let's add the official Syncthing repository to your system's package sources list. We are using the stable branch.
# Add Syncthing repository for the stable version
echo "deb [signed-by=/usr/share/keyrings/syncthing-archive-keyring.gpg] https://apt.syncthing.net/ syncthing stable" | sudo tee /etc/apt/sources.list.d/syncthing.list
3. Updating the package list and installing Syncthing
After adding the new repository, you need to update the package list and then install Syncthing.
# Update package list
sudo apt update

# Install Syncthing
sudo apt install syncthing -y
After installation, Syncthing will be available in the system. The current version for 2026 will likely be Syncthing 1.27.x or higher.
4. Checking the installed version
Make sure Syncthing is installed correctly and check its version:
# Check Syncthing version
syncthing --version
The output should show something like syncthing v1.27.x "Fermium Flea" (go1.22.x linux-amd64) [email protected] 2026-XX-YY HH:MM:SS UTC.
5. Configuring Syncthing as a system service (systemd)
Syncthing should run as a system service to automatically start when the server boots and run in the background. We will configure it to run as the previously created user (youruser).
# Enable and start the Syncthing service for your user
sudo systemctl enable [email protected]
sudo systemctl start [email protected]
Check the service status:
# Check Syncthing service status
sudo systemctl status [email protected]
You should see the status active (running).
By default, Syncthing creates its configuration and data in the user's home directory, for example, /home/youruser/.config/syncthing and /home/youruser/Sync.
Configuration
After installing Syncthing and setting it up as a system service, let's proceed with its configuration. Our goal is to ensure secure access to the Web UI and configure synchronization.
1. Accessing Syncthing Web UI
By default, the Syncthing Web UI is available on port 8384. We have already allowed this port in UFW. Open your browser and navigate to: http://YOUR_VPS_IP_ADDRESS:8384.
Upon first launch, Syncthing will create a configuration file config.xml in the /home/youruser/.config/syncthing/ directory.
Setting a password for the Web UI:
It is crucial to set a password for Web UI access. Do this immediately after the first login:
- In the Syncthing Web UI, go to
Actions->Settings. - Select the
GUItab. - Set the
GUI UsernameandGUI Password. - Click
Save.
After this, you will need to re-authenticate. This will protect your Syncthing from unauthorized access.
2. Securing Web UI with HTTPS (Caddy)
Accessing the Web UI over HTTP is insecure. It is recommended to use HTTPS. We will configure Caddy as a reverse proxy, which will automatically obtain and renew SSL certificates from Let's Encrypt.
It is assumed that you have a domain name (e.g., sync.example.com) pointing to your VPS's IP address.
2.1. Installing Caddy
# Install necessary packages
sudo apt install -y debian-keyring debian-archive-keyring apt-transport-https

# Get Caddy GPG key
curl -1sLf 'https://dl.cloudsmith.io/public/caddy/stable/gpg.key' | sudo gpg --dearmor -o /usr/share/keyrings/caddy-stable-archive-keyring.gpg

# Add Caddy repository
echo "deb [signed-by=/usr/share/keyrings/caddy-stable-archive-keyring.gpg] https://dl.cloudsmith.io/public/caddy/stable/deb/debian any-version main" | sudo tee /etc/apt/sources.list.d/caddy-stable.list

# Update package list and install Caddy
sudo apt update
sudo apt install caddy -y
2.2. Caddyfile Configuration
Create or edit the file /etc/caddy/Caddyfile.
sudo nano /etc/caddy/Caddyfile
Delete all content and add the following, replacing sync.example.com with your domain and youruser with your Syncthing username:
sync.example.com {
    reverse_proxy 127.0.0.1:8384 {
        # Syncthing requires specific headers for WebSocket
        header_up X-Syncthing-URI {uri}
        header_up X-Real-IP {remote_host}
        header_up X-Forwarded-For {remote_host}
        header_up X-Forwarded-Proto {scheme}
    }

    # Additional security settings (optional, but recommended)
    @forbidden {
        path /.git/
        path /data/
    }
    respond @forbidden 403

    # Redirect HTTP to HTTPS
    redir / https://{host}{uri}
}
Save the file (Ctrl+O, Enter) and exit (Ctrl+X).
2.3. Firewall Configuration for Caddy
Caddy listens on standard HTTP (80) and HTTPS (443) ports. Allow them in UFW and remove the allowance for port 8384, as access will now be through Caddy.
sudo ufw allow http                       # Allow HTTP (port 80)
sudo ufw allow https                      # Allow HTTPS (port 443)
sudo ufw delete allow 8384/tcp            # Remove allowance for port 8384
sudo ufw reload                           # Reload firewall
2.4. Starting Caddy
Check Caddy's configuration and restart the service:
sudo caddy validate --config /etc/caddy/Caddyfile
sudo systemctl restart caddy
sudo systemctl enable caddy
sudo systemctl status caddy
Now you can access the Syncthing Web UI at https://sync.example.com. Caddy will automatically obtain an SSL certificate.
3. Adding Devices and Folders
Now that the Web UI is secured, you can proceed with configuring synchronization.
3.1. Adding Devices
Each Syncthing node has a unique Device ID. You can find it in the Web UI in the top right corner (Actions -> Show Device ID).
- On your VPS (in the Web UI), click
Add Remote Device. - Enter the ID of your other Syncthing device.
- Give it a descriptive name.
- On the
Sharingtab, select the folders you want to synchronize with this device. - Repeat the process on the other device, adding your VPS's ID.
Devices must "confirm" each other to establish a connection.
3.2. Adding Folders
To start synchronization, you need to create or select folders.
- Click
Add Folder. - Specify the
Folder ID(a unique identifier, can be generated automatically). - Specify the
Folder Pathon your VPS (e.g.,/home/youruser/Sync/MyProject). - On the
Sharingtab, select the devices with which you want to synchronize this folder. - On the
File Versioningtab, you can configure saving old file versions (recommended for important data). - Click
Save.
After this, other devices will receive a request to add this folder. Confirm it, select the path and settings.
4. Verifying Functionality
Ensure that Syncthing is working correctly:
- Check Syncthing service:
sudo systemctl status [email protected]The status should be
active (running). - Check Caddy service:
sudo systemctl status caddyThe status should be
active (running). - Web UI Access: Try to access
https://sync.example.com. - Synchronization Status: In the Syncthing Web UI, ensure that devices are connected (green status) and folders are synchronized (
Up to Date). - Check Syncthing logs:
journalctl -u [email protected] -fHere you can see synchronization activity, errors, and warnings.
Backups and Maintenance
Regular backups and timely maintenance are key to ensuring the reliability and security of your Syncthing system.
1. What to Back Up
Two types of data are critically important for Syncthing:
- Syncthing Configuration: These are files located in the
/home/youruser/.config/syncthing/directory. They includeconfig.xml(with device ID, Web UI settings, list of devices and folders), as well as index database files. - Synchronized Data: These are the actual files and folders you are synchronizing (e.g.,
/home/youruser/Sync/MyProject). This is your most valuable asset.
2. Simple Auto-Backup Script
For Syncthing configuration backup, you can use a simple script. For synchronized data, it is recommended to use more advanced solutions such as BorgBackup or Restic, which provide deduplication and encryption.
Example script for configuration backup (rsync)
Create a directory for backups, for example, /home/youruser/backups.
mkdir -p /home/youruser/backups/syncthing_config
Create a backup script, for example, /home/youruser/backup_syncthing_config.sh:
nano /home/youruser/backup_syncthing_config.sh
Script content:
#!/bin/bash

# Syncthing configuration directory
SYNCTHING_CONFIG_DIR="/home/youruser/.config/syncthing"
# Directory for saving backups
BACKUP_DIR="/home/youruser/backups/syncthing_config"
# Backup file name
BACKUP_FILENAME="syncthing_config_$(date +%Y%m%d_%H%M%S).tar.gz"

echo "Starting Syncthing configuration backup..."

# Stop Syncthing service for a consistent backup
sudo systemctl stop [email protected]

# Create configuration archive
tar -czf "$BACKUP_DIR/$BACKUP_FILENAME" -C "$(dirname "$SYNCTHING_CONFIG_DIR")" "$(basename "$SYNCTHING_CONFIG_DIR")"

# Delete old backups (e.g., older than 7 days)
find "$BACKUP_DIR" -type f -name "syncthing_config_.tar.gz" -mtime +7 -delete

# Start Syncthing service
sudo systemctl start [email protected]

echo "Syncthing configuration backup completed: $BACKUP_DIR/$BACKUP_FILENAME"
Make the script executable:
chmod +x /home/youruser/backup_syncthing_config.sh
Add the script to Cron for daily execution (e.g., at 3:00 AM):
crontab -e
Add the line to the end of the file:
0 3 /home/youruser/backup_syncthing_config.sh >> /home/youruser/backups/syncthing_config/backup.log 2>&1
For backing up the data itself, use BorgBackup or Restic on a separate storage (see below).
3. Where to Store Backups
It is extremely important to store backups on a resource separate from the main server. Options:
- External S3-compatible object storage: Many providers offer S3-compatible storage (AWS S3, DigitalOcean Spaces, Backblaze B2). This is a reliable and scalable solution. Tools like Restic or BorgBackup can work directly with S3.
- Separate VPS or NAS: If you have another VPS or a home NAS, you can configure backup synchronization there via SSH (using
rsyncorsftp).
Example of using Restic for data backup to S3-compatible storage:
Install Restic:
sudo apt install restic -y
Configure environment variables for S3 (do not store them in the script!):
# In ~/.bashrc or /etc/environment file
export RESTIC_REPOSITORY="s3:https://s3.REGION.PROVIDER.com/bucket-name"
export AWS_ACCESS_KEY_ID="YOUR_KEY"
export AWS_SECRET_ACCESS_KEY="YOUR_SECRET"
export RESTIC_PASSWORD="COMPLEX_PASSWORD_FOR_BACKUP_ENCRYPTION"
Initialize the Restic repository:
restic init
Create a script for data backup (e.g., /home/youruser/backup_data.sh):
#!/bin/bash

# Load environment variables if not set
if [ -f "/home/youruser/.bashrc" ]; then
  source "/home/youruser/.bashrc"
fi

# Path to Syncthing data folder
DATA_DIR="/home/youruser/Sync"

echo "Starting Syncthing data backup..."

# Create backup
restic backup "$DATA_DIR" --tag syncthing-data

# Clean up old snapshots (e.g., keep 7 daily, 4 weekly, 12 monthly)
restic forget --prune --keep-daily 7 --keep-weekly 4 --keep-monthly 12

echo "Syncthing data backup completed."
Add it to Cron, just like the configuration script.
4. Updates
Keeping the system and software up to date is critically important for security and stability.
- OS and package updates: Regularly run update commands. For Syncthing installed via APT, this will also update it to the latest stable version.
sudo apt update && sudo apt upgrade -y sudo apt autoremove -y - Caddy updates: Caddy is also updated via APT.
- Update strategy:
- Rolling updates: For non-critical systems, you can simply run
apt upgraderegularly (e.g., once a week via cron). - Maintenance window: For more critical systems, it is recommended to schedule a "maintenance window" when you can manually perform updates, test the system, and roll back changes in case of problems.
- Rolling updates: For non-critical systems, you can simply run
Always read changelogs before major updates to be aware of potential changes or issues.
Troubleshooting + FAQ
This section contains answers to frequently asked questions and solutions to common problems that may arise when working with Syncthing on a VPS.
Syncthing Web UI is inaccessible
Problem: You cannot open the Syncthing Web UI at https://sync.example.com or http://YOUR_VPS_IP_ADDRESS:8384.
What to check:
- Syncthing Service: Make sure the
[email protected]service is active.sudo systemctl status [email protected] - Caddy Service (if used): Check the status of
caddy.service.sudo systemctl status caddy - Firewall (UFW): Make sure ports 80 and 443 (for Caddy) or 8384 (for direct Syncthing access) are open.
sudo ufw status verbose - Syncthing Configuration: Check the
/home/youruser/.config/syncthing/config.xmlfile. Make sure that in the<gui>section, the listen address is set to0.0.0.0:8384or127.0.0.1:8384(if a proxy is used). - Syncthing Logs: Check the logs for errors.
journalctl -u [email protected] -f
How to fix: Restart the relevant services if they are not running. Correct firewall rules. Edit config.xml and restart Syncthing.
Devices do not connect or take a long time to connect
Problem: Your Syncthing device on the VPS cannot connect to other devices, or the connection is very slow.
What to check:
- Firewall (UFW): Make sure port 22000 (TCP and UDP) is open on the VPS.
sudo ufw status verbose - Device IDs: Verify that device IDs are entered correctly on all nodes. They are case-sensitive.
- Global Discovery: Make sure global discovery is enabled on all devices (or you are using static IP addresses/DNS). In the Web UI:
Actions->Settings->Generaltab ->Global Discovery. - Network Connection: Check that all devices have internet access and can "see" each other.
How to fix: Open the necessary ports in the firewall. Double-check device IDs. Make sure there are no blockages along the path (e.g., on the router). If global discovery is disabled, try adding device IP addresses manually in the remote device settings.
Slow synchronization speed
Problem: Files synchronize very slowly, despite a good network connection.
What to check:
- Network Bandwidth: Make sure the VPS and other devices have sufficient bandwidth. Check traffic in the Syncthing Web UI.
- CPU and RAM: Syncthing actively uses CPU for hashing and encryption, and RAM for indexes. Check CPU load and RAM usage on the VPS (
htop). - Disk I/O: Slow disks (especially HDDs on weak VPSs) can significantly slow down synchronization, especially when dealing with a large number of small files.
- Versioning Settings: If complex versioning is enabled, it can increase disk and CPU load.
- Number of Files: Synchronizing millions of small files will always be slower than synchronizing a few large files.
How to fix: Consider upgrading your VPS to a more powerful one (more CPU, RAM, NVMe SSD). Optimize versioning settings. Use ignore patterns to exclude unnecessary files. Check network settings on all nodes.
What is the minimum suitable VPS configuration?
Answer: For running Syncthing and synchronizing a moderate amount of data (up to 100-200 GB) with 2-3 devices, a minimum VPS should have 1-2 vCPUs, 1-2 GB of RAM, 50-100 GB of SSD storage, and a network channel of at least 100 Mbps. It is important that the disk is SSD, as Syncthing intensively works with I/O for file indexing. If you plan to synchronize a very large number of small files or very large data volumes, it is recommended to increase RAM and disk space.
What to choose — VPS or dedicated for this task?
Answer: For most individual users and small teams, a VPS will be more than sufficient. It is cost-effective and provides adequate resources. A dedicated server should be chosen if you are working with very large data volumes (several terabytes), dealing with millions of files requiring constant indexing, or if your Syncthing node serves many active devices and requires maximum I/O and CPU performance. In such cases, a dedicated server guarantees stable and unshared resources, which is critical for high loads.
How to ensure maximum privacy?
Answer: Syncthing uses end-to-end encryption by default for all transmitted data. For maximum privacy: 1) Disable Global Discovery in Syncthing settings and manually add the IP addresses of your devices. 2) Use only trusted devices. 3) Make sure your VPS is securely protected (SSH keys, firewall, Fail2Ban). 4) Use HTTPS for Web UI access (as we configured with Caddy).
How to configure file versioning?
Answer: Syncthing has built-in versioning mechanisms. In the Web UI, when editing or adding a folder, go to the "File Versioning" tab. You can choose one of several versioning types: "Simple File Versioning", "Staggered File Versioning", or "External File Versioning". "Staggered" versioning is often a good compromise, preserving a certain number of file versions over different periods, which helps restore files after accidental deletion or modification.
Syncthing consumes a lot of resources
Problem: Syncthing uses a lot of CPU or RAM.
What to check:
- Number of files/folders being synchronized: The more files, the more memory is required for their indexing.
- Intensity of changes: If changes are constantly occurring in synchronized folders, Syncthing will actively work, hashing and transferring data.
- Ignore patterns: Make sure you exclude unnecessary files from synchronization (e.g.,
.git/,node_modules/,.DS_Store) using the.stignorefile. - Disk speed: A slow disk can cause Syncthing to spend more CPU waiting for I/O.
How to fix: Add ignore patterns for unnecessary files. Split large folders into several smaller ones if possible. Upgrade the VPS to a more powerful one. In folder settings, you can limit the scanning frequency or set less frequent scanning.