
Deployment of Unbound DNS on a VPS for Private and Fast Internet
TL;DR
In this guide, we will step-by-step configure your own recursive Unbound DNS server on your VPS. This will allow you to significantly enhance the privacy of your internet requests, bypassing public DNS providers like Google DNS or Cloudflare, and directly interacting with DNS root servers. As a result, you will gain faster, more secure, and private internet access, with full control over your DNS queries.
- Installation and basic configuration of Unbound on Ubuntu 24.04 LTS operating system.
- Configuration of Unbound for recursive queries and DNSSEC validation.
- Enhancing VPS security with UFW, SSH keys, and Fail2ban.
- Optimizing Unbound performance for fast domain name resolution.
- Recommendations for backing up and maintaining your DNS server.
- Answers to frequently asked questions and troubleshooting common issues.
What We Are Configuring and Why
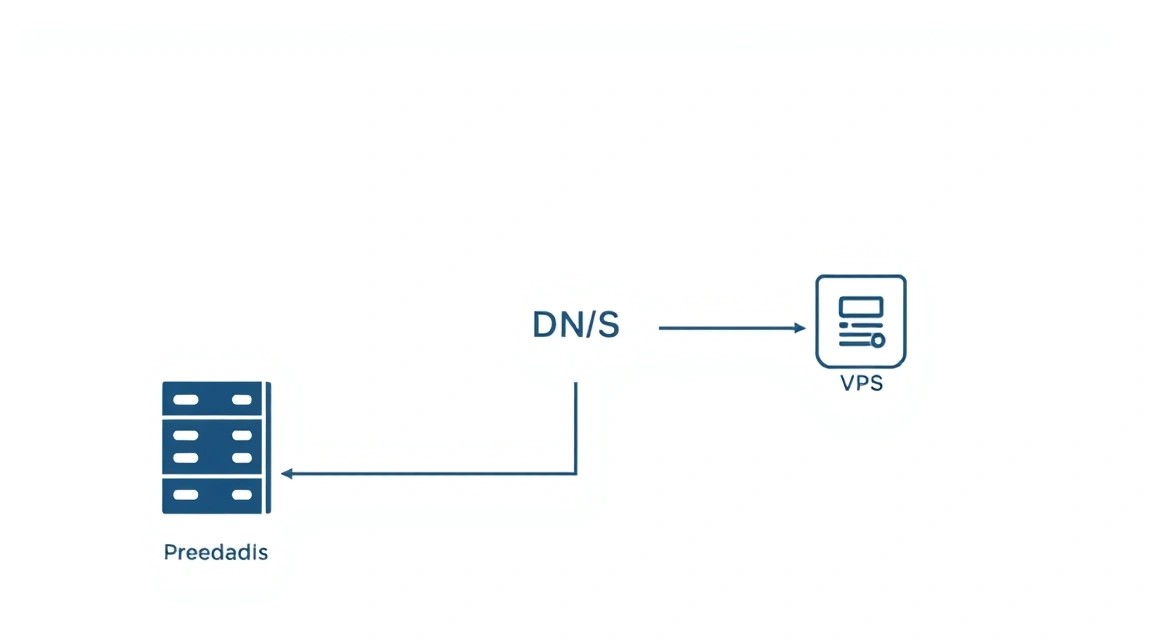
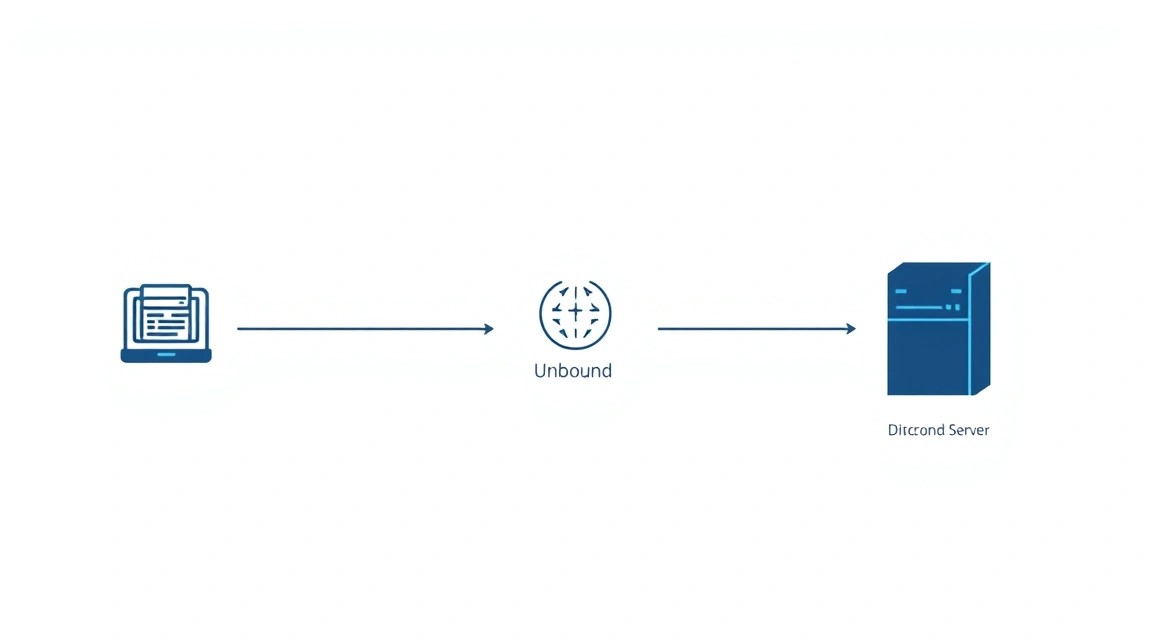
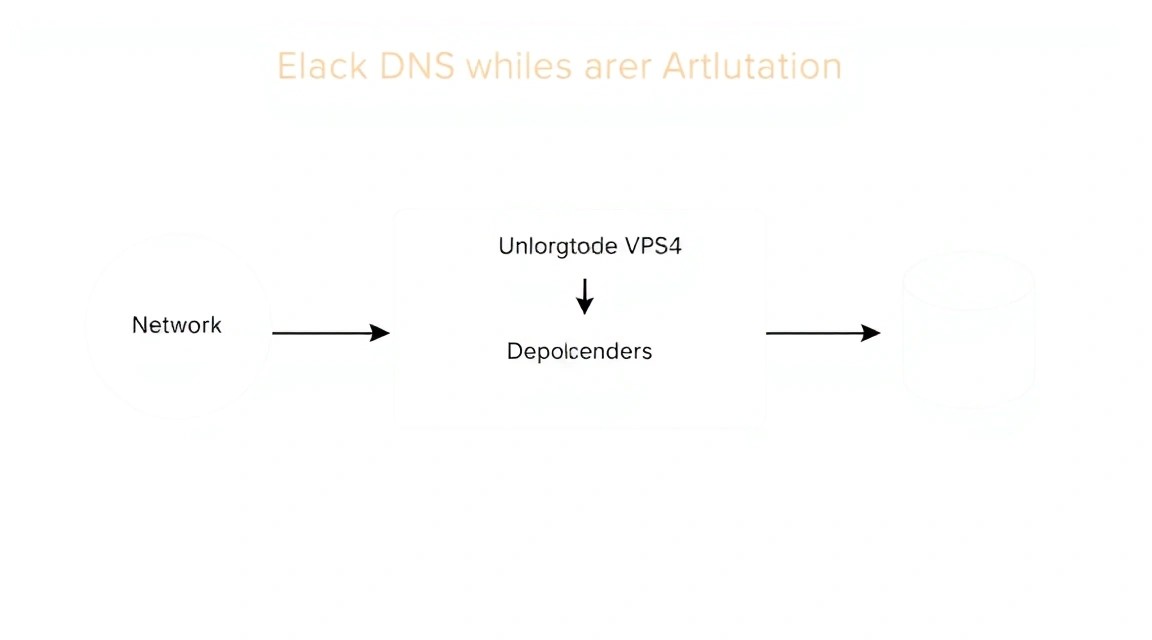
We will be deploying Unbound – a high-performance, validating, recursive, and caching DNS server – on your own VPS. The primary task of Unbound is to resolve domain names (e.g., example.com to IP address 93.184.216.34) without relying on third-party DNS providers. Instead, Unbound directly queries the root DNS servers, and then the authoritative servers for each domain, building a chain of trust and performing DNSSEC validation.
What the reader will gain:
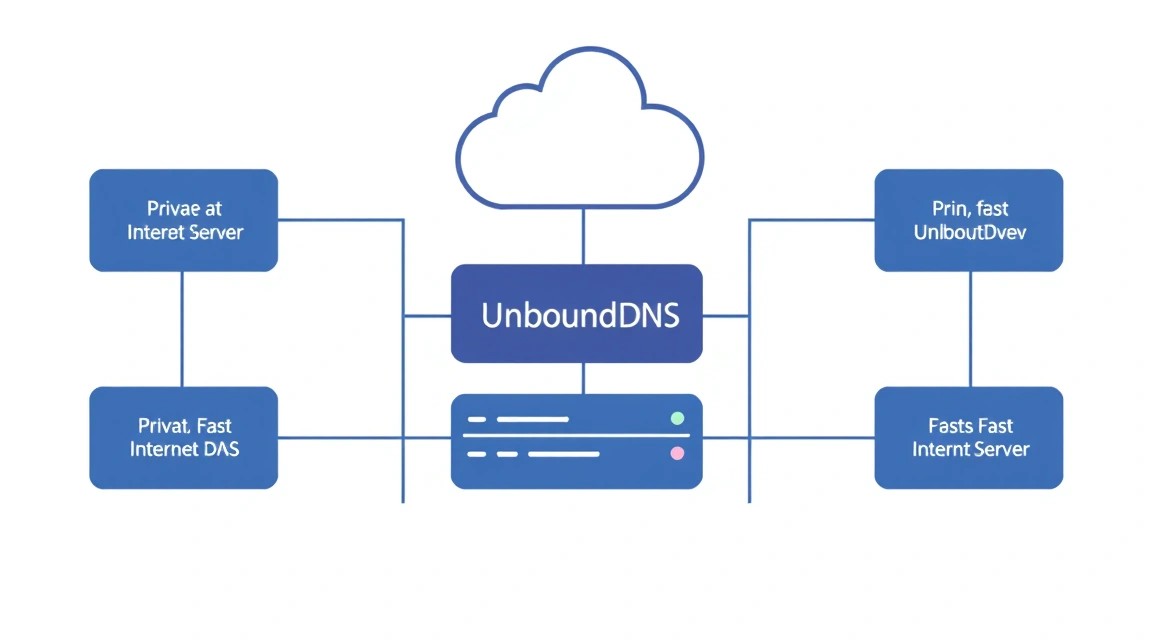
- Enhanced Privacy: Your DNS queries will not pass through the servers of Google, Cloudflare, your internet provider, or other companies that may collect data about your activity. Unbound communicates directly with root servers, eliminating intermediaries.
- Improved Security: Unbound supports DNSSEC (Domain Name System Security Extensions), which allows cryptographic verification of the authenticity of DNS responses. This protects against DNS spoofing and other attacks, ensuring that you always connect to the correct server.
- Increased Speed: After the initial query, Unbound caches responses. This means that repeated queries to the same domains will resolve significantly faster, as the information is already stored on your VPS. Additionally, direct communication with root servers can be faster than through congested public DNS servers.
- Full Control: You have complete control over the name resolution process, can configure blacklists (ad-blocking), whitelists, and other rules, adapting the DNS server to your needs.
What alternatives exist (cloud-managed vs self-hosted):
There are several approaches to DNS. You can use:
- Public DNS servers: For example, Google DNS (8.8.8.8), Cloudflare DNS (1.1.1.1), OpenDNS. They are easy to use, but you entrust your queries to a third party who may log them or use them for traffic analysis. This is the simplest, but least private option.
- Your internet provider's DNS servers: This is the standard default option. They are often slow, do not support DNSSEC, and, of course, your provider has full access to your DNS queries.
- Cloud-managed DNS services (for domain hosting): Such as AWS Route 53, Cloudflare DNS (for domain hosting), DigitalOcean DNS. These are services for managing DNS records of your own domains, not for resolving outgoing queries from your device.
- Self-hosted DNS servers (e.g., Unbound on a VPS): This is the approach we will use. It requires initial setup but provides maximum control, privacy, and security. You become your own DNS provider.
Why self-hosted on a VPS:
The choice of self-hosted Unbound on a VPS is driven by the desire for maximum privacy and security. A VPS provides you with a dedicated environment where you can configure Unbound exactly as you need it, without any restrictions or compromises from third-party providers. This is an ideal solution for those who value independence and want to build their infrastructure with high standards of security and confidentiality. A VPS ensures reliability, stability, and sufficient resources for Unbound to operate 24/7.
What VPS Configuration is Needed for This Task
Unbound is a fairly lightweight software, so it does not require powerful resources to operate. However, to ensure stable and fast performance, especially if you plan to use it for multiple devices or with high load, several points should be considered.
Minimum requirements:
- CPU: 1 core. Unbound is not a CPU-intensive application.
- RAM: 512 MB. This is sufficient for basic operation and caching. If you plan to cache a large number of records or use it for a large network, 1 GB might be considered.
- Disk: 10-20 GB NVMe/SSD. Unbound uses very little disk space, but this amount will be optimal for the operating system, logs, and other system files. NVMe or SSD will ensure fast system boot and file operations.
- Network: 100 Mbps or 1 Gbps. DNS queries are very light, so even 100 Mbps will be more than sufficient. More important are channel stability and low ping to root DNS servers.
Specific VPS plan for the task:
For most users deploying Unbound for personal use or a small team, a VPS with the following configuration will be ideal:
- 1 vCPU
- 1 GB RAM
- 20-40 GB NVMe/SSD disk
- 1 Gbps network port
Such a configuration will be sufficient for handling thousands of DNS queries per second, providing a large cache, and ensuring stable operation. You can consider a VPS with the specified characteristics to get a reliable platform for your Unbound server.
When a dedicated server is needed, not a VPS:
A dedicated server for Unbound is usually not required, unless you plan to:
- Serve tens of thousands of users with very high load.
- Use the same server for other very resource-intensive tasks that require guaranteed performance (e.g., large game servers, high-load databases).
- Require physical isolation and maximum security that virtualization cannot provide.
In most cases, even for corporate use, a powerful VPS will be more than sufficient.
Location: what it affects
The choice of VPS location for Unbound affects two key things:
- Ping to you: The closer the VPS is to your physical location, the lower the latency when accessing your Unbound server. This directly affects the speed of DNS query resolution.
- Ping to root DNS servers: Unbound will query root DNS servers worldwide. If your VPS is located in a region with good connectivity to the global internet infrastructure, this will ensure faster responses from root servers and, consequently, faster initial name resolution.
It is recommended to choose a location that is geographically close to the primary consumers of your DNS server (e.g., you or your team) and has good connectivity to major internet hubs.
Server Preparation
Before installing Unbound, you need to perform basic configuration of your VPS to ensure security and stability. We will use Ubuntu 24.04 LTS as one of the most popular and supported operating systems.
1. SSH Connection
First, connect to your new VPS via SSH. Use the credentials provided by your provider (IP address, root username, and password).
ssh root@ВАШ_IP_АДРЕС
After the first connection, you will likely need to change the root password.
2. System Update
Always start by updating the package list and the system itself to ensure you have the latest software versions and security patches installed.
sudo apt update # Update package list
sudo apt upgrade -y # Upgrade all installed packages to the latest versions
sudo apt autoremove -y # Remove unnecessary packages that were installed as dependencies and are no longer required
3. Creating a New User and Configuring sudo
Operating as the root user is insecure. Let's create a new user with limited privileges and add them to the sudo group.
adduser ВАШЕ_ИМЯ_ПОЛЬЗОВАТЕЛЯ # Create a new user. Follow the prompts to set the password and information.
usermod -aG sudo ВАШЕ_ИМЯ_ПОЛЬЗОВАТЕЛЯ # Add the user to the sudo group so they can execute commands with root privileges.
Now, exit the root session and log in as the new user:
exit
ssh ВАШЕ_ИМЯ_ПОЛЬЗОВАТЕЛЯ@ВАШ_IP_АДРЕС
To verify that sudo is working, try executing the command:
sudo apt update
If it prompts for your password, then everything is configured correctly.
4. SSH Key Configuration (Recommended)
To enhance security, disable password login and use only SSH keys. First, generate a key on your local machine if you don't have one yet:
ssh-keygen -t rsa -b 4096 # On your local machine
Then, copy the public key to your VPS:
ssh-copy-id ВАШЕ_ИМЯ_ПОЛЬЗОВАТЕЛЯ@ВАШ_IP_АДРЕС # On your local machine
After successful copying, edit the SSH configuration on the VPS to disable password authentication.
sudo nano /etc/ssh/sshd_config
Find and modify the following lines (or add them if they are missing):
# Disable root login
PermitRootLogin no

# Allow key-based authentication only
PasswordAuthentication no
ChallengeResponseAuthentication no
UsePAM no
Save changes (Ctrl+O, Enter) and exit (Ctrl+X). Restart the SSH service:
sudo systemctl restart sshd
Now you will be able to log in only with your SSH key.
5. Installing and Configuring the Firewall (UFW)
UFW (Uncomplicated Firewall) is an easy-to-use interface for iptables. It will allow you to restrict access to your server to only the necessary ports.
sudo apt install ufw -y # Install UFW
sudo ufw allow ssh # Allow SSH (port 22 by default)
sudo ufw allow 53/udp # Allow DNS traffic (port 53 UDP)
sudo ufw allow 53/tcp # Allow DNS traffic (port 53 TCP, for large responses and zone transfers)
sudo ufw enable # Enable the firewall. Confirm with 'y'.
sudo ufw status # Check firewall status
Make sure SSH is allowed before enabling UFW, otherwise you might lose access to the server.
6. Installing Fail2ban
Fail2ban protects the server from brute-force attacks by blocking IP addresses that have too many failed login attempts.
sudo apt install fail2ban -y # Install Fail2ban
sudo systemctl enable fail2ban # Enable automatic startup at system boot
sudo systemctl start fail2ban # Start the service
sudo cp /etc/fail2ban/jail.conf /etc/fail2ban/jail.local # Create a local configuration file
sudo nano /etc/fail2ban/jail.local # Edit the file
In the jail.local file, ensure that the [sshd] section is active (enabled = true) and, if desired, configure bantime (block time) and findtime (period for detecting failed attempts) as you see fit. You can configure a custom "jail" for Unbound, but this is a more advanced setting and not critical for a basic deployment.
# Example settings in jail.local
[DEFAULT]
bantime = 1h
findtime = 10m
maxretry = 5

[sshd]
enabled = true
port = ssh
logpath = %(sshd_log)s
backend = %(sshd_backend)s
Save changes and restart Fail2ban:
sudo systemctl restart fail2ban
Your server is now ready for Unbound installation.
Software Installation — Step-by-Step
In this step, we will install the Unbound DNS server itself. We will use the official Ubuntu repositories, as they provide stable and verified versions.
It is assumed that by 2026, Unbound version 1.19.x or newer will be available in the Ubuntu 24.04 LTS (Noble Numbat) repositories. We are targeting Unbound 1.19.0 as the current stable version.
1. Unbound Installation
Unbound is available in the standard Ubuntu repositories. We will install it using apt.
sudo apt update # Ensure the package list is up-to-date
sudo apt install unbound -y # Install the Unbound package
After installation, Unbound automatically starts as a service and is configured to listen on the local interface (127.0.0.1).
2. Checking Unbound Service Status
Let's ensure that Unbound is successfully installed and running.
sudo systemctl status unbound # Check Unbound service status
The output should show active (running). If not, check the logs with the command sudo journalctl -u unbound.
3. Downloading Current Root Hints
Unbound needs an up-to-date list of root DNS servers to perform recursive queries. This file is called root.hints or named.cache. It is usually installed with the package, but it's important to update it regularly.
sudo unbound-anchor -a /var/lib/unbound/root.key # Initialize and download the DNSSEC key for root servers
This command downloads and verifies the DNSSEC root key (DNSSEC Trust Anchor) and updates the root.hints file if necessary. This is critically important for DNSSEC validation.
4. Configuring Unbound to Operate as a Recursive Resolver
By default, Unbound is configured to listen only on the local interface. To allow it to respond to queries from other devices on your network or from the internet (if you choose to use it that way), you need to modify the configuration.
Open the main Unbound configuration file:
sudo nano /etc/unbound/unbound.conf
This file usually contains a server: section. We will add or modify parameters within this section. Find or add the following lines:
# Additional settings will be added to /etc/unbound/unbound.conf.d/
# We will create a new file for our settings to avoid modifying the main one
The best practice is to create a separate configuration file in the /etc/unbound/unbound.conf.d/ directory, which will be automatically included in the main unbound.conf configuration file. This simplifies management and updates.
sudo nano /etc/unbound/unbound.conf.d/custom-settings.conf # Create a new configuration file
Add the following content to /etc/unbound/unbound.conf.d/custom-settings.conf:
server:
    # Specify the IP address Unbound will listen on.
    # 0.0.0.0 means all available network interfaces.
    # If you have multiple IPs, you can specify a particular one: interface: ВАШ_IP_АДРЕС
    interface: 0.0.0.0@53

    # Allow queries only from specific networks.
    # Replace with your local network or IP addresses you trust.
    # For example, for the entire local network 192.168.1.0/24: access-control: 192.168.1.0/24 allow
    # If you want Unbound to be accessible from the internet (NOT RECOMMENDED WITHOUT ADDITIONAL PROTECTION):
    # access-control: 0.0.0.0/0 allow
    access-control: 127.0.0.1/32 allow # Allow localhost
    access-control: ::1/128 allow # Allow localhost IPv6

    # Set the size of the DNS record cache. 128MB is a good balance for a VPS.
    # Can be increased to 256MB or 512MB if sufficient RAM is available.
    rrset-cache-size: 128m
    msg-cache-size: 64m

    # Enable DNSSEC validation. Highly recommended for security.
    # Unbound will verify the authenticity of DNS responses.
    auto-trust-anchor-file: "/var/lib/unbound/root.key"

    # Enable logging. Useful for debugging.
    # log-queries: yes # Log all queries (can be very verbose)
    # log-replies: yes # Log all replies (can be very verbose)

    # Set minimum TTL for responses.
    # Helps avoid excessively short TTLs that could be set by attackers.
    cache-min-ttl: 3600 # 1 hour

    # Set maximum TTL for responses.
    # Prevents excessively long caching of outdated records.
    cache-max-ttl: 86400 # 24 hours

    # Force TCP for queries to root servers if UDP fails.
    # This can be useful for bypassing certain restrictions or UDP issues.
    harden-glue: yes
    harden-dnssec-stripped: yes
    harden-below-nxdomain: yes
    harden-referral-path: yes

    # Disable IPv6 if not used, to save resources and simplify.
    # do-ip6: no

    # Enable response with DNSSEC information for clients.
    do-daemonize: yes
    do-not-query-address: 127.0.0.1/8
    do-not-query-address: ::1/128
    hide-version: yes # Hide Unbound version
    # use-syslog: yes # Send logs to syslog
    # verbosity: 1 # Log verbosity level (0-5, 1 - default)
Save changes (Ctrl+O, Enter) and exit (Ctrl+X).
5. Checking Configuration and Restarting Unbound
Before restarting the service, always check the syntax of the configuration file to avoid errors.
sudo unbound-checkconf # Check syntax of Unbound configuration files
If the command shows no errors, the configuration is correct. Now restart the Unbound service to apply the changes.
sudo systemctl restart unbound # Restart Unbound service
Ensure Unbound is running again:
sudo systemctl status unbound
6. Testing Unbound
Now that Unbound is configured, let's test its operation. You can use dig or drill utilities for this. First, install dnsutils if they are not already installed.
sudo apt install dnsutils -y # Install dig utility
Execute a query to your Unbound server (which is now listening on 0.0.0.0 or your public IP):
dig @127.0.0.1 example.com # Query local Unbound
dig @ВАШ_IP_АДРЕС example.com # Query Unbound via external IP (if you allowed access)
In the response, you should see the IP address of example.com. It is important that the ANSWER SECTION contains records, and the FLAGS section has the ad (authentic data) flag, indicating successful DNSSEC validation.
If you want to verify that Unbound is indeed performing a recursive query, clear its cache and query a domain you haven't queried before:
sudo unbound-control reload # Clear Unbound cache
dig @127.0.0.1 newdomain.com # Replace with any domain you haven't queried
If everything works, Unbound is ready for use!
Configuration
After the basic Unbound installation, we can delve into its configuration for maximum privacy, security, and performance. We will continue to use the /etc/unbound/unbound.conf.d/custom-settings.conf file for our settings.
1. Enhancing Privacy and Security Settings
Add the following parameters to the server: section of your custom-settings.conf.
sudo nano /etc/unbound/unbound.conf.d/custom-settings.conf
Examples of additional parameters:
server:
    # ... (previous settings) ...

    # Privacy hardening
    # Hide Unbound version information (already added earlier)
    hide-version: yes

    # Hide server ID in CH TXT ID.SERVER responses
    hide-identity: yes

    # Hide server version in CH TXT VERSION.SERVER responses
    hide-trustanchor: yes

    # Disable responses to CH TXT hostname.bind, version.bind, etc. queries
    # This prevents disclosure of information about your server.
    # private-address: 192.168.0.0/16 # Example: all addresses in this network are considered private
    # private-address: 10.0.0.0/8
    # private-address: 172.16.0.0/12
    # private-address: fd00::/8 # IPv6 private addresses

    # Reject queries to private IP addresses if they are not explicitly allowed
    # This prevents attacks where an attacker tries to use your DNS for internal networks.
    do-not-query-address: 10.0.0.0/8
    do-not-query-address: 172.16.0.0/12
    do-not-query-address: 192.168.0.0/16
    do-not-query-address: 169.254.0.0/16
    do-not-query-address: ::1/128
    do-not-query-address: fc00::/7
    do-not-query-address: fe80::/10

    # Reject queries to local hosts (if you don't want Unbound to resolve them)
    # local-zone: "localhost." refuse
    # local-zone: "127.in-addr.arpa." refuse

    # Additional security settings for DNSSEC
    # Reject responses that do not comply with DNSSEC if the domain should be signed.
    harden-dnssec-stripped: yes

    # Reject responses that contain glue records for domains below the zone.
    harden-glue: yes

    # Reject responses that point to non-existent domains (NXDOMAIN) below the zone.
    harden-below-nxdomain: yes

    # Reject responses that point to the root server as a referrer.
    harden-referral-path: yes

    # Set the number of threads for query processing.
    # Usually equal to the number of CPU cores of your VPS.
    num-threads: 1 # For a VPS with 1 vCPU

    # Increase the number of file descriptors.
    # Important for high-load servers.
    outgoing-range: 8192 # Maximum number of outgoing queries
    num-queries-per-thread: 4096 # Maximum number of queries per thread

    # Enable aggressive NSEC caching.
    # Allows Unbound to cache information about non-existent domains, which speeds up responses for non-existent domains.
    aggressive-nsec: yes

    # DNS record prefetching.
    # Unbound will update records in the cache before their TTL expires, which improves performance.
    prefetch: yes
    prefetch-key: yes

    # Increase UDP response buffer.
    # Useful for DNSSEC, where responses can be large.
    edns-buffer-size: 1232 # Recommended value to prevent fragmentation
Save changes and check the configuration:
sudo unbound-checkconf
sudo systemctl restart unbound
2. Configuring Ad-blocking and Malicious Domain Blocking
You can use Unbound to block ads and malicious domains by using blocklists. This is done by adding a local-zone with type refuse or redirect.
Let's create a new file for blocklists:
sudo nano /etc/unbound/unbound.conf.d/adblock.conf
Add the following content. This is an example; you will need to regularly update this list or use a script for its automatic update.
server:
    # Block a known advertising domain
    local-zone: "doubleclick.net" refuse
    local-zone: "adservice.google.com" refuse
    local-zone: "tracking.example.com" refuse

    # Redirect to a local IP (e.g., 0.0.0.0 or 127.0.0.1)
    local-zone: "ads.example.com" redirect
    local-data: "ads.example.com A 0.0.0.0"

    # More extensive lists can be used.
    # Example:
    # include: "/etc/unbound/unbound.conf.d/blocklists/ads.conf"
    # include: "/etc/unbound/unbound.conf.d/blocklists/malware.conf"
For automation, you can create a script that will download lists from public sources (e.g., AdGuard DNS filter, OISD) and format them for Unbound. Example script (place it in /usr/local/bin/update-unbound-blocklist.sh):
#!/bin/bash

# Path to the Unbound blocklist file
BLOCKLIST_FILE="/etc/unbound/unbound.conf.d/adblock_generated.conf"
# URL of the blocklist source (e.g., OISD Basic)
# As of 2026, this URL may change, check for актуальность (relevance)
BLOCKLIST_URL="https://raw.githubusercontent.com/oisddev/oisd/main/abp/basic.txt"

echo "server:" > "$BLOCKLIST_FILE"
echo "    # Generated by update-unbound-blocklist.sh on $(date)" >> "$BLOCKLIST_FILE"
echo "    # Source: $BLOCKLIST_URL" >> "$BLOCKLIST_FILE"

# Download the list and convert it to Unbound format
# Skip comments and empty lines, add "refuse"
curl -s "$BLOCKLIST_URL" | grep -v '^!' | grep -v '^$' | while read -r domain; do
    # Remove '||' prefix and '^' suffix or other ABP-specific characters
    domain=$(echo "$domain" | sed -e 's/^||//' -e 's/\^$//' -e 's/\$//')
    # Filter empty lines after processing
    if [[ -n "$domain" ]]; then
        echo "    local-zone: \"$domain\" refuse" >> "$BLOCKLIST_FILE"
    fi
done

echo "Generated Unbound blocklist: $BLOCKLIST_FILE"

# Check Unbound configuration
sudo unbound-checkconf

# Restart Unbound to apply changes if the check is successful
if [ $? -eq 0 ]; then
    sudo systemctl restart unbound
    echo "Unbound restarted successfully."
else
    echo "Unbound configuration check failed. Not restarting."
fi
Make the script executable:
sudo chmod +x /usr/local/bin/update-unbound-blocklist.sh
And run it:
sudo /usr/local/bin/update-unbound-blocklist.sh
Then include this generated file in your custom-settings.conf:
server:
    # ...
    include: "/etc/unbound/unbound.conf.d/adblock_generated.conf"
Save and restart Unbound.
3. Verifying Functionality
To check Unbound's functionality and effectiveness, we will use dig.
DNSSEC Check:
dig @ВАШ_IP_АДРЕС dnssec-failed.org # A domain that should cause a DNSSEC error
In the response, you should see SERVFAIL, which means Unbound successfully detected a DNSSEC issue and refused to resolve the domain.
Ad-blocking Check:
dig @ВАШ_IP_АДРЕС doubleclick.net # Query to a blocked domain
You should receive an NXDOMAIN response (non-existent domain) or, if you used redirect, then 0.0.0.0 or 127.0.0.1.
Caching Speed Check:
dig @ВАШ_IP_АДРЕС example.com # First query
dig @ВАШ_IP_АДРЕС example.com # Second query
Pay attention to the query time in the output. The second query should be significantly faster than the first, as the response will be taken from the cache.
Healthcheck:
You can use a simple ping or curl command if your Unbound listens on an external IP, but dig or nslookup are best suited for checking a DNS server.
For more detailed monitoring, you can configure Unbound to export metrics to Prometheus or another monitoring system, but this is beyond the scope of this guide.
4. Configuring the System to Use Unbound
For your devices to use Unbound, you can change the DNS settings in your operating system or on your router. It is recommended to configure the router so that all devices on your network automatically use Unbound.
Configuration on Linux (example):
sudo nano /etc/resolv.conf # Editing the resolv.conf file (often overwritten)
Add or change the nameserver line to your VPS's IP:
nameserver ВАШ_IP_АДРЕС
nameserver 127.0.0.1 # If you are testing Unbound on the same VPS
For a more permanent setup, use netplan (Ubuntu Server) or systemd-resolved:
# Example for Netplan (Ubuntu Server 24.04)
sudo nano /etc/netplan/00-installer-config.yaml
Change the nameservers section:
network:
  ethernets:
    enp0s3: # Your network interface name
      dhcp4: no
      addresses:
        - 192.168.1.10/24 # Your static IP
      routes:
        - to: default
          via: 192.168.1.1 # Your gateway IP
      nameservers:
        addresses: [ВАШ_IP_АДРЕС, 8.8.4.4] # Add your Unbound and a fallback DNS
  version: 2
sudo netplan try
sudo netplan apply
Configuration on Windows/macOS:
In your network adapter settings, change the preferred DNS server to your VPS's IP address. Add a secondary DNS server (e.g., 8.8.4.4) to have a fallback option if your VPS becomes unavailable.
Configuration on the Router:
Log in to your router's control panel and in the WAN/LAN or DHCP server settings section, specify your Unbound VPS's IP address as the primary DNS server. This is the most convenient way to apply Unbound to all devices on your home network.
Backups and Maintenance
Reliable operation of any server is impossible without regular backups and scheduled maintenance. Unbound, although it does not store critical data, requires backing up its configuration files and root hints.
1. What to Back Up
- Unbound Configuration Files:
/etc/unbound/unbound.confand all files in/etc/unbound/unbound.conf.d/. This includes your custom settings, blocklists, etc. - Root Hints and DNSSEC Keys:
/var/lib/unbound/root.keyand/var/lib/unbound/root.hints. Although they can be restored usingunbound-anchor, having them in a backup doesn't hurt.
2. Simple Auto-Backup Script
We will create a simple script that will archive the necessary files and send them to a secure location. As an example, we will use tar for archiving and rsync for copying to another server or cloud storage (e.g., S3-compatible).
Create a directory for backups and the script itself:
sudo mkdir -p /var/backups/unbound
sudo nano /usr/local/bin/backup-unbound.sh
Contents of /usr/local/bin/backup-unbound.sh:
#!/bin/bash

# Directory for temporary backups
BACKUP_DIR="/var/backups/unbound"
# Backup file name
TIMESTAMP=$(date +%Y%m%d-%H%M%S)
BACKUP_FILE="$BACKUP_DIR/unbound_config_$TIMESTAMP.tar.gz"
# Directories and files for backup
CONFIG_FILES="/etc/unbound /var/lib/unbound/root.key"

# Delete old backups (e.g., older than 7 days)
find "$BACKUP_DIR" -type f -name "unbound_config_*.tar.gz" -mtime +7 -delete

# Create archive
sudo tar -czvf "$BACKUP_FILE" $CONFIG_FILES

# Check if archive was created
if [ $? -eq 0 ]; then
    echo "Unbound backup created: $BACKUP_FILE"

    # Where to store (external S3 / separate VPS)
    # Example for rsync to another server (requires passwordless SSH key)
    # Replace USER, REMOTE_HOST, REMOTE_PATH with your data
    # rsync -avz "$BACKUP_FILE" USER@REMOTE_HOST:REMOTE_PATH/
    # Example for AWS S3 CLI (requires AWS CLI to be installed and configured)
    # aws s3 cp "$BACKUP_FILE" s3://YOUR_S3_BUCKET_NAME/unbound-backups/

    # For demonstration, just leave locally
    echo "Backup stored locally at $BACKUP_FILE"
else
    echo "Failed to create Unbound backup."
fi
Make the script executable:
sudo chmod +x /usr/local/bin/backup-unbound.sh
Check its operation:
sudo /usr/local/bin/backup-unbound.sh
ls -l /var/backups/unbound/
3. Configuring Cron for Automatic Execution
We will add the script to the cron schedule so that it runs daily, for example, at 3:00 AM.
sudo crontab -e
Add the following line to the end of the file:
0 3 * * * /usr/local/bin/backup-unbound.sh > /dev/null 2>&1
This line means: at 3 hours 0 minutes every day of the week and month, run the script, redirecting all output to /dev/null (to avoid receiving emails to the root mailbox).
4. Where to Store (External S3 / Separate VPS)
External S3-compatible object storage: This is the most reliable and scalable option. Use aws cli or rclone to upload backups. You will need to configure credentials and access rights.
# Example for rclone (requires rclone config to be set up beforehand)
# rclone copy "$BACKUP_FILE" remote_s3_alias:your-bucket/unbound-backups/
Separate VPS: You can use rsync or scp to copy backups to another VPS. Ensure that the target VPS has enough space and that passwordless SSH access is configured for the user running the backup script.
Important: Never store backups on the same VPS that you are backing up. In case of disk failure or server compromise, you will lose both data and backups.
5. Updates: rolling vs maintenance window
Keeping Unbound and the operating system up to date is critically important for security. However, the update process can temporarily interrupt the DNS server's operation.
- Rolling updates: For Unbound, this means automatic system package updates without a dedicated maintenance window. This is convenient, but there is a risk that an update may cause a temporary failure or require manual intervention. For critical systems, it is better to avoid fully automatic updates.
- Maintenance window: The recommended approach. Schedule a regular time (e.g., once a month) for system updates. During this time, you can manually run the update, check logs, and ensure that Unbound has restarted correctly.
Update procedure:
sudo apt update # Update package list
sudo apt upgrade -y # Install updates. Unbound will be restarted automatically if its package is updated.
sudo apt autoremove -y # Remove unnecessary packages
sudo unbound-anchor -a /var/lib/unbound/root.key # Update root hints and DNSSEC keys
sudo systemctl status unbound # Check Unbound status after update
It is also recommended to periodically check the official Unbound website or the project's GitHub repository for new versions and important configuration changes.
Recommendation: If your Unbound is the only DNS server for your devices, consider using a second, backup DNS server (e.g., 8.8.4.4 or 1.1.1.1) in your system/router settings. This will ensure uninterrupted internet access during your VPS maintenance.
Troubleshooting + FAQ
In this section, we will cover typical problems that may be encountered when deploying Unbound and provide answers to frequently asked questions.
1. Unbound does not start or throws an error
Reason: Most often, this is due to errors in the configuration file or port conflicts.
What to check:
- Configuration: Run
sudo unbound-checkconf. This command will check the syntax of your configuration files. If there are errors, it will point to the line and file. - Logs: Check Unbound system logs:
sudo journalctl -u unbound -f. This will show the latest log entries related to Unbound, which may indicate the cause of the failure (e.g., "address already in use"). - Port conflict: Make sure that port 53 (UDP/TCP) is not occupied by another process. Use
sudo lsof -i :53orsudo netstat -tulnp | grep 53.
How to fix: Correct configuration errors according to the output of unbound-checkconf. If the port is occupied, either change the port for Unbound (less desirable) or stop the other service that is using it.
2. DNS queries are not resolved or are very slow
Reason: Network connectivity issues, incorrect firewall settings, or DNSSEC problems.
What to check:
- Firewall: Make sure that UFW (or another firewall) allows incoming connections on port 53 (UDP and TCP) from your clients' IP addresses.
sudo ufw status verbose. - Network connectivity: Make sure your VPS has internet access and can reach the root DNS servers. Try
ping 1.1.1.1orping google.comfrom your VPS. - Client settings: Make sure that your device or router is configured to use your VPS's IP address as the DNS server.
- DNSSEC: If Unbound is configured for DNSSEC but there are issues with trust anchors or signatures, this can cause
SERVFAIL. Checksudo unbound-anchor -a /var/lib/unbound/root.key.
How to fix: Open the necessary ports in the firewall. Check VPS network settings. Make sure clients are configured correctly. Update root DNSSEC keys.
3. Ad blocking is not working
Reason: Incorrect blocklists or Unbound failed to load them.
What to check:
- Blocklist file: Make sure that the
adblock_generated.conffile (or your custom file) exists and contains the necessary entries. - File inclusion: Check that
/etc/unbound/unbound.conf.d/custom-settings.confcontains the lineinclude: "/etc/unbound/unbound.conf.d/adblock_generated.conf". - Unbound restart: Make sure Unbound was restarted after changing blocklist files.
- Cache TTL: It is possible that the domains you are trying to block are already cached. Try clearing the cache:
sudo unbound-control reload.
How to fix: Correct file paths, restart Unbound. Update blocklists and ensure they are in the correct format.
4. What is the minimum suitable VPS configuration?
For Unbound, which is a fairly lightweight application, a VPS with a minimum of 1 vCPU, 512 MB RAM, and 10-20 GB SSD/NVMe disk will suffice. This configuration will be enough for personal use or for serving a small home network. Stability of the network connection and low ping to root DNS servers are more important than excessive computing resources.
5. What to choose — VPS or dedicated for this task?
For deploying Unbound DNS, in the vast majority of cases, a VPS is the optimal choice. Unbound does not require significant CPU or RAM resources, and a VPS can easily handle the load even from several hundred users. Dedicated servers are usually overkill for this task and are only justified in cases of extremely high load (tens of thousands of queries per second), the need for physical isolation to meet strict regulatory requirements, or if this server will be used for other, significantly more resource-intensive tasks.
6. Can Unbound be used for DNS-over-TLS (DoT) or DNS-over-HTTPS (DoH) for clients?
Unbound in the basic configuration described in this guide operates as a traditional recursive DNS server over UDP/TCP on port 53. Providing DNS-over-TLS or DNS-over-HTTPS to clients requires additional configuration. Unbound supports outgoing DoT queries to upstream servers, but serving DoT/DoH clients typically requires a proxy server (e.g., Nginx, Caddy) or specialized software (e.g., Stubby for DoT, or specialized DoH servers) that will listen for HTTPS/TLS requests and forward them to the local Unbound. This is a more complex setup and falls outside the scope of this basic guide.
7. How to monitor Unbound's operation?
For basic monitoring, use sudo systemctl status unbound to check the service status and sudo journalctl -u unbound -f to view logs. For more advanced monitoring, you can use unbound-control status to get the current state and cache statistics. For metric collection and visualization, you can configure Unbound metric export to Prometheus using unbound_exporter and display them in Grafana. This will allow you to track load, query count, cache hits, and other important performance indicators.
8. How to ensure high availability for Unbound?
To ensure high availability, a single Unbound server is not enough. You will need to deploy at least two Unbound servers on different VPSs in different data centers. Then you can configure them in Active-Passive or Active-Active mode using Anycast DNS, or simply provide clients with the IP addresses of both servers as primary and secondary DNS. This ensures that even if one server fails, the second will continue to process DNS queries.
Conclusions and Next Steps
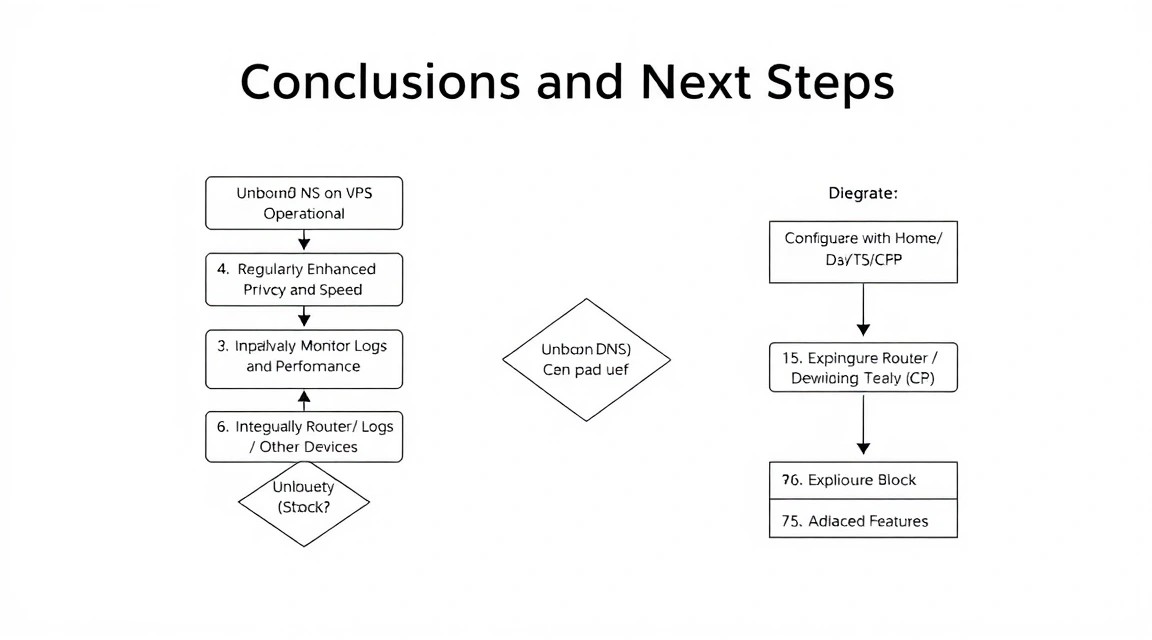
We have successfully deployed and configured an Unbound DNS server on your VPS, turning it into a powerful tool for ensuring private, secure, and fast internet access. You now control your DNS queries, bypassing third-party intermediaries and protecting against DNS spoofing with DNSSEC. This is an important step towards creating your own independent and secure internet infrastructure.
Where to go next for further optimization and scaling:
- Integration with your local network: Configure your home router or DHCP server to automatically assign the IP address of your Unbound VPS as the primary DNS server for all devices on your network. This will ensure centralized use of your private DNS.
- Advanced Blocking: Automate the update of ad and malicious domain blocklists using scripts and
cron, as described previously. Explore various blocklists (e.g., OISD, AdGuard Home lists) and choose those that best suit your needs. - Monitoring and Logging: Set up more detailed Unbound monitoring using
unbound-controlto get statistics and consider integrating with Prometheus/Grafana for visualizing server performance and status. This will help you quickly respond to any issues and optimize operations.