MeshCentral on a VPS: Remote Access to a Hundred Machines for Free
TL;DR
MeshCentral is a self-hosted platform for remotely managing computers, servers, and workstations through a browser. You can deploy your own MeshCentral server on a VPS, connect around a hundred machines to it, and use remote desktop, terminal, file transfer, and inventory features without paying for each connected computer.
- For a small installation, 2 vCPUs, 4 GB RAM, 40–60 GB SSD, and a stable 100 Mbps connection are sufficient.
- The server is deployed with Docker Compose, while HTTPS is issued automatically by Caddy through Let’s Encrypt.
- The MeshCentral client is installed on managed computers as MeshAgent.
- Access requires a domain name, open TCP ports 80 and 443, and SSH for administration.
- You need to back up the MeshCentral configuration, database, certificates, and user files.
1. TL;DR
MeshCentral is suitable for centralized remote access to computers running Windows, Linux, and macOS. Unlike standard RDP or VNC, the agent establishes an outbound connection to the server itself, so there is no need to open RDP ports on every workstation. The MeshCentral server is hosted on your VPS, while the administrator works through a secure web interface.
This guide uses Ubuntu Server 24.04 LTS, Docker Engine 27 or newer, Docker Compose Plugin 2.x, MeshCentral from the official container image, and Caddy 2.10. The configuration is designed for approximately 100 permanently connected machines under moderate load: several parallel sessions, periodic file transfers, and remote terminal access.
2. Contents
The sections above provide navigation through the guide. If the server is already prepared, you can proceed to installing Docker and MeshCentral, but first it is important to check DNS, network ports, and VPS requirements.
3. What We Are Configuring and Why
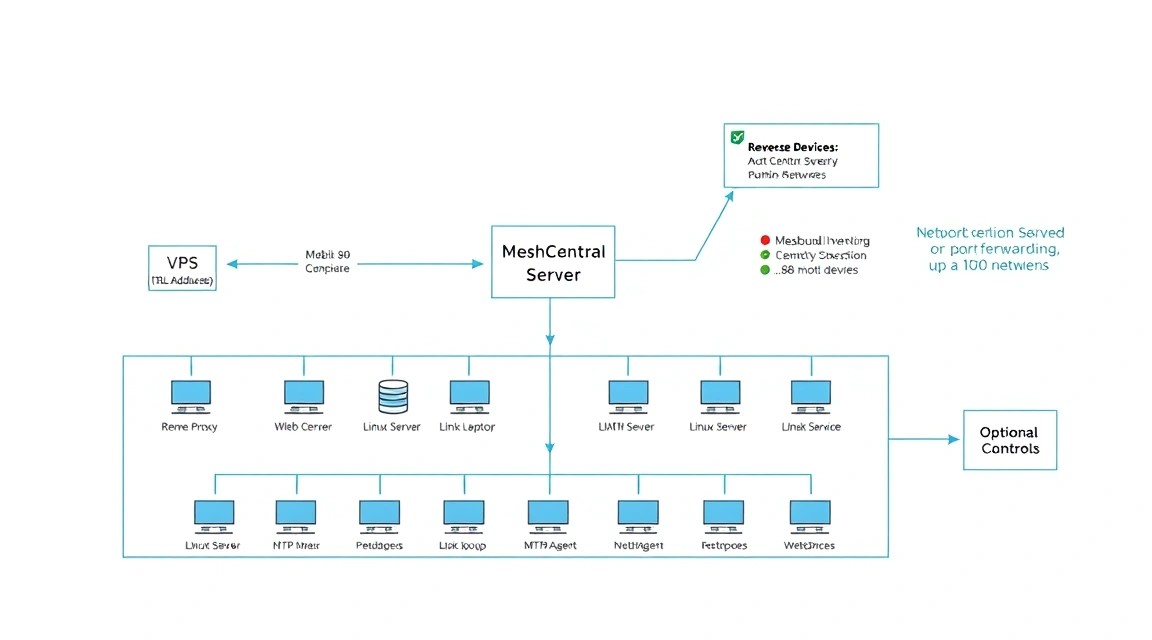
How MeshCentral Works
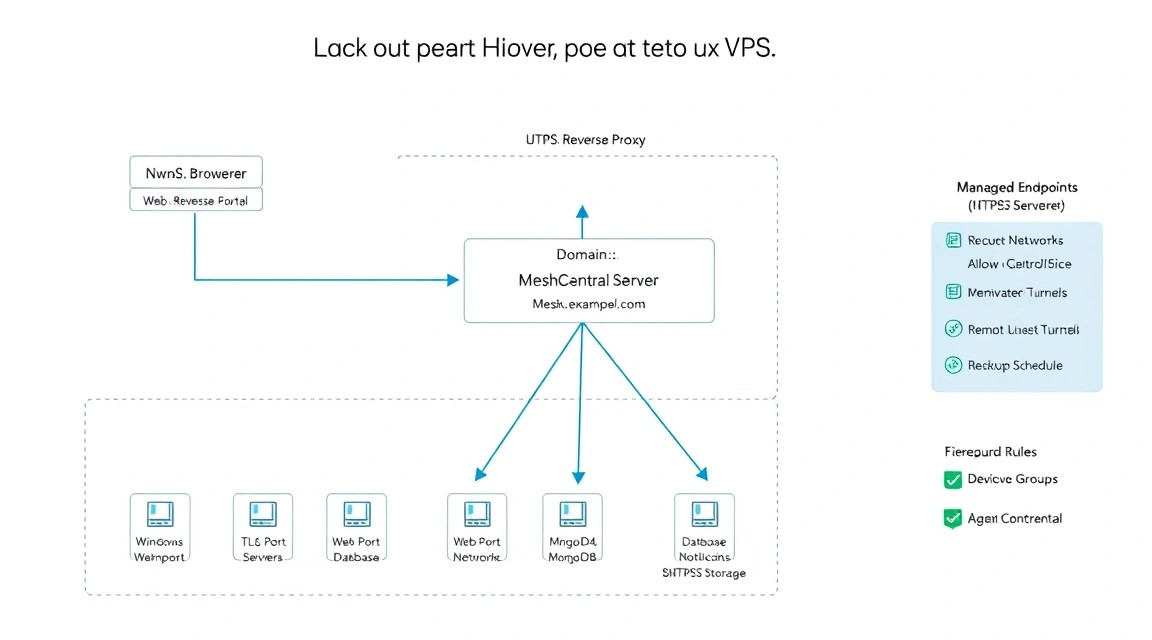
MeshCentral consists of a server component and MeshAgent. The server accepts agent connections, stores a list of devices and users, and provides a web interface. The agent runs on the managed machine and maintains communication with the server over HTTPS or WebSocket.
When an operator opens a remote desktop, command, or file transfer, MeshCentral transmits the data through the server. This is convenient for computers behind NAT, home routers, and corporate firewalls: usually, it is enough to allow outbound HTTPS traffic on the client.
| Feature | Practical Application |
|---|---|
| Remote desktop | User support and administration of GUI applications |
| Remote terminal | PowerShell, CMD, Bash, and other console operations |
| File transfer | Uploading updates, logs, and diagnostic utilities |
| Inventory | Viewing the OS, processor, memory, disks, and network interfaces |
| Device groups | Organizing computers by clients, departments, or sites |
| Access rights | Restricting operators to specific devices and functions |
What You Will Have in the End
After completing the guide, a website such as https://mesh.example.com will be available. You will be able to create an administrator user, organize device groups, and obtain agent installers. Connected machines will appear in the interface after MeshAgent starts.
Access to the server will be protected by a Let’s Encrypt TLS certificate. The VPS itself should not expose RDP, VNC, or SSH ports to the public internet. SSH should be restricted to your IP address or protected with keys and additional firewall rules.
Self-hosted and Cloud-managed Options
Cloud-managed services handle updates, backups, and operation of the server component. This is convenient when ready-made support, an SLA, and the absence of in-house DevOps are important. The disadvantages are subscription fees, plan limitations, dependence on the provider’s policies, and the transfer of device metadata to an external company.
Self-hosted MeshCentral on a VPS requires you to maintain Linux, Docker, DNS, TLS, and backups yourself. However, the data, accounts, and settings remain under your control. For a small IT department, laboratory, home infrastructure, or MSP project, this is often more practical than a paid cloud service.
Important: the word “free” refers to the MeshCentral software and the absence of per-device fees. The VPS itself, domain, backup storage, and administrator’s time may incur costs.
Limitations and Security Model
MeshCentral does not replace a full-fledged configuration management system, MDM, or SIEM. It provides remote access and basic inventory, but should not be the only mechanism for update control and auditing in critical infrastructure.
Any user with remote terminal privileges can effectively control the device. Therefore, use personal accounts, two-factor authentication, least privilege, and regular reviews of the operator list.
4. What VPS Configuration Is Needed for This Task
Minimum Configuration
For 20–30 connected computers, 1–2 vCPUs and 2 GB of RAM are usually sufficient. For one hundred agents, it is reasonable to start with 2 vCPUs and 4 GB of RAM. The agent consumes resources on the client machine, but the server needs memory and CPU for WebSocket connections, TLS, state storage, and simultaneous sessions.
| Load | CPU | RAM | Disk | Connection |
|---|---|---|---|---|
| Up to 30 machines | 1–2 vCPUs | 2 GB | 25 GB SSD | 50 Mbps |
| Up to 100 machines | 2–4 vCPUs | 4 GB | 40–60 GB SSD | 100 Mbps |
| 100 machines and many sessions | 4–8 vCPUs | 8–16 GB | 80–160 GB SSD | 200 Mbps or higher |
For the target configuration, you can choose a suitable VPS with 4 vCPUs, 8 GB of RAM, an NVMe drive of at least 80 GB, a public IPv4 address, and a connection of at least 100 Mbps. This headroom is useful if several operators work simultaneously, backups are running, or auxiliary containers are hosted on the same server.
Disk and Backups
The main MeshCentral database is small, but file transfers, logs, and backups quickly increase storage usage. For an installation serving one hundred machines, 40 GB is sufficient if large files are not stored on the server. NVMe is preferable to a regular HDD, especially for archiving and recovery.
Do not consider the VPS’s local disk a backup. At least one copy should be stored in external S3-compatible storage, on another VPS, or on a separate physical server. It is advisable to encrypt the data before sending it.
When a Dedicated Server Is Needed
A dedicated server is justified not by the number of agents alone, but by the workload. It is needed for hundreds or thousands of permanent connections, a large number of simultaneous video sessions, mass file transfers, dedicated CPU requirements, or the need to isolate the system from neighboring virtual machines on the hypervisor.
For one hundred office computers with infrequent connections, a dedicated server is usually excessive. First measure CPU, RAM, network traffic, and latency on the VPS, then scale resources vertically or move MeshCentral to a separate server.
Choosing a Location
The VPS location primarily affects latency to operators and clients. For remote desktop use, it is advisable to choose a region that is less than 80–100 ms away from most users. Agents in different countries may have equal access to the server, but the quality of interactive sessions will vary.
Check the availability of outbound and inbound TCP 443, the presence of a public IPv4 address or correctly configured IPv6, abuse policy rules, and the ability to create a PTR record. A PTR record is not required for standard MeshCentral, but a clean DNS configuration makes troubleshooting easier.
5. Server Preparation
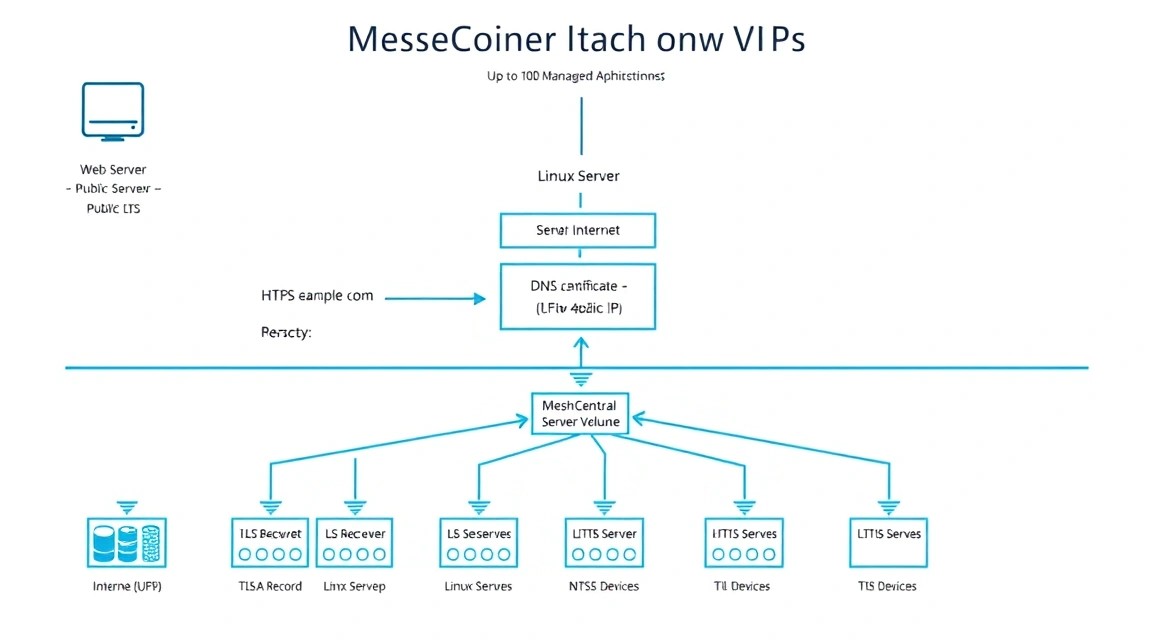
Initial Conditions
The instructions below assume a clean Ubuntu Server 24.04 LTS with root access and the domain mesh.example.com. Replace this domain with your own. The A record must point to the VPS IPv4 address, while the AAAA record should be used only if IPv6 is properly configured and accessible.
# Проверяем адрес сервера и имя хоста
hostnamectl

# Создаём A-запись заранее и проверяем её с локального компьютера
dig +short mesh.example.com
Updates and Basic Utilities
# Обновляем индексы пакетов и устанавливаем последние исправления
sudo apt update && sudo apt full-upgrade -y

# Устанавливаем инструменты администрирования и диагностики
sudo apt install -y ca-certificates curl gnupg git vim nano jq unzip \
  dnsutils htop ncdu ufw fail2ban unattended-upgrades
After updating the kernel, check whether a reboot is required. If this is a new server, reboot it before continuing so that an old kernel version is not left running.
# Показываем, требуется ли перезагрузка после обновлений
if [ -f /var/run/reboot-required ]; then echo "Reboot required"; fi

# Перезагружаем сервер при необходимости
sudo reboot
User and SSH Keys
Do not work permanently as root. The local computer should have an ED25519 SSH key. If you do not have one yet, create it using the command below and add the public part during the initial login.
# Выполняется на вашем локальном компьютере: создаём ключ администратора
ssh-keygen -t ed25519 -a 100 -f ~/.ssh/meshcentral_admin

# На VPS создаём отдельного администратора
sudo adduser deploy
sudo usermod -aG sudo deploy

# Создаём каталог SSH и задаём корректные права
sudo install -d -m 700 -o deploy -g deploy /home/deploy/.ssh
Copy the contents of the file ~/.ssh/meshcentral_admin.pub to /home/deploy/.ssh/authorized_keys. If initial access was via a password, verify the new login in a separate window before disabling root and password access.
# Пример передачи публичного ключа с локального компьютера
ssh-copy-id -i ~/.ssh/meshcentral_admin.pub deploy@SERVER_IP

# Проверяем вход новым пользователем
ssh -i ~/.ssh/meshcentral_admin deploy@SERVER_IP
SSH and Firewall
First allow SSH, HTTPS, and HTTP for certificate issuance. If you know your permanent IP address, it is better to restrict SSH using an allow from rule. In the example below, port 22 is temporarily open to everyone; after verification, it should be restricted.
# Разрешаем SSH, HTTP и HTTPS до включения firewall
sudo ufw allow 22/tcp
sudo ufw allow 80/tcp
sudo ufw allow 443/tcp

# Включаем firewall с политикой запрета входящих соединений
sudo ufw default deny incoming
sudo ufw default allow outgoing
sudo ufw enable

# Проверяем активные правила
sudo ufw status verbose
After verifying SSH, replace the general rule with a specific address, for example 203.0.113.10.
# Удаляем общее правило SSH
sudo ufw delete allow 22/tcp

# Разрешаем SSH только с доверенного внешнего IP
sudo ufw allow from 203.0.113.10 to any port 22 proto tcp
Fail2ban
Fail2ban monitors failed login attempts and temporarily blocks offending addresses. It does not replace SSH keys and a firewall, but it reduces noise from automated brute-force attempts.
# Создаём локальную конфигурацию защиты SSH
sudo tee /etc/fail2ban/jail.d/sshd.local > /dev/null <<'EOF'
[sshd]
enabled = true
backend = systemd
banaction = ufw
maxretry = 5
findtime = 10m
bantime = 1h
EOF

# Перезапускаем fail2ban и проверяем состояние jail
sudo systemctl enable --now fail2ban
sudo fail2ban-client status sshd
6. Software Installation — Step by Step
Installing Docker Engine
Instead of packages from random repositories, use the official Docker apt repository. As of 2026, Docker Engine 27+ and Compose Plugin 2.x are suitable for Ubuntu Server 24.04. The specific minor version will depend on the current repository.
# Удаляем конфликтующие старые пакеты, если они есть
sudo apt remove -y docker.io docker-doc docker-compose podman-docker containerd runc || true

# Создаём каталог для ключей репозиториев
sudo install -m 0755 -d /etc/apt/keyrings

# Загружаем официальный ключ Docker и ограничиваем его права
curl -fsSL https://download.docker.com/linux/ubuntu/gpg | \
  sudo gpg --dearmor -o /etc/apt/keyrings/docker.gpg
sudo chmod a+r /etc/apt/keyrings/docker.gpg

# Добавляем репозиторий Docker для текущего выпуска Ubuntu
echo "deb [arch=$(dpkg --print-architecture) signed-by=/etc/apt/keyrings/docker.gpg] \
https://download.docker.com/linux/ubuntu $(. /etc/os-release && echo "$VERSION_CODENAME") stable" | \
sudo tee /etc/apt/sources.list.d/docker.list > /dev/null

# Устанавливаем Docker Engine, CLI, Buildx и Compose Plugin
sudo apt update
sudo apt install -y docker-ce docker-ce-cli containerd.io docker-buildx-plugin docker-compose-plugin

# Проверяем версии и состояние службы
sudo docker version
sudo docker compose version
sudo systemctl enable --now docker
Adding a user to the docker group is convenient, but this group effectively grants root privileges through the Docker socket. For a small dedicated VPS, you can use sudo docker without expanding the user's privileges.
Creating Project Directories
# Создаём каталоги MeshCentral и отдельный каталог для Caddy
sudo mkdir -p /opt/meshcentral/{meshcentral-data,meshcentral-files}
sudo mkdir -p /opt/caddy/{data,config}

# Передаём рабочие каталоги пользователю deploy
sudo chown -R deploy:deploy /opt/meshcentral /opt/caddy

# Переходим в каталог проекта
cd /opt/meshcentral
Environment Variables File
Store secrets and the domain name in the .env file rather than in a YAML file, which is easier to accidentally send to Git. The file should be accessible only to its owner.
# Создаём переменные проекта
cat > /opt/meshcentral/.env <<'EOF'
MESH_DOMAIN=mesh.example.com
[email protected]
TZ=Europe/Moscow
EOF

# Ограничиваем доступ к переменным окружения
chmod 600 /opt/meshcentral/.env
Docker Compose
The official MeshCentral project publishes a container image in the GitHub Container Registry. The latest tag is convenient for the first launch, but in a production environment it is better to pin a verified tag after testing the update. The example below uses the ghcr.io/ylianst/meshcentral:latest image; before updating, check the supported tags in the project's official repository.
# Создаём Compose-файл для MeshCentral и Caddy
cat > /opt/meshcentral/compose.yml <<'EOF'
services:
  meshcentral:
    image: ghcr.io/ylianst/meshcentral:latest
    container_name: meshcentral
    restart: unless-stopped
    environment:
      TZ: ${TZ}
    volumes:
      - ./meshcentral-data:/opt/meshcentral/meshcentral-data
      - ./meshcentral-files:/opt/meshcentral/meshcentral-files
    expose:
      - "4433"
    networks:
      - meshnet

  caddy:
    image: caddy:2.10-alpine
    container_name: meshcentral-caddy
    restart: unless-stopped
    ports:
      - "80:80"
      - "443:443"
    volumes:
      - ./Caddyfile:/etc/caddy/Caddyfile:ro
      - /opt/caddy/data:/data
      - /opt/caddy/config:/config
    depends_on:
      - meshcentral
    networks:
      - meshnet

networks:
  meshnet:
    driver: bridge
EOF
MeshCentral listens on port 4433 inside the Docker network. There is no need to publish this port externally: Caddy on TCP ports 80 and 443 will be the only external entry point.
7. Configuration
MeshCentral Configuration
Create the config.json file in the data directory. The WANonly value enables server mode for remote devices. The webProxy parameter allows MeshCentral to work correctly behind a reverse proxy, while AliasPort specifies the external HTTPS port visible to agents.
# Create the MeshCentral configuration
cat > /opt/meshcentral/meshcentral-data/config.json <<'EOF'
{
  "settings": {
    "cert": "mesh.example.com",
    "WANonly": true,
    "WebRTC": true,
    "WebRTCTrusted": true,
    "sessionTime": 30,
    "MaxInvalidLogin": 10,
    "AccountLoginToken": true,
    "WebPasswordReset": false,
    "minify": true,
    "agentPong": 300,
    "desktopMultiplex": true
  },
  "domains": {
    "": {
      "title": "MeshCentral",
      "title2": "Remote Management",
      "newAccounts": false,
      "userConsentFlags": 7,
      "passwordRequirements": {
        "min": 14,
        "upper": 1,
        "lower": 1,
        "numeric": 1,
        "nonalpha": 1
      },
      "logDeviceViews": true,
      "logDeviceNotes": true,
      "desktopPrivacyBarText": "Remote session is active",
      "terminal": true,
      "fileAccess": true,
      "agentConsole": true
    }
  }
}
EOF

# Protect the configuration from being read by other users
chmod 600 /opt/meshcentral/meshcentral-data/config.json
The newAccounts: false value disables open registration. The first administrator is usually created through the web interface on the first launch if the container uses MeshCentral's standard mechanism. After creating the administrator, verify that public registration is actually disabled.
Parameters may differ between MeshCentral versions. If a specific version ignores a field or reports an error, compare it with the current configuration example from the official documentation and the container log. Do not copy unknown parameters without checking them: some settings affect agent compatibility.
Caddy Reverse Proxy
Caddy automatically obtains and renews the Let’s Encrypt certificate. For the certificate to be issued successfully, DNS must already point to the VPS, and TCP 80 and 443 must be accessible from the internet.
# Create the Caddy configuration
cat > /opt/meshcentral/Caddyfile <<'EOF'
mesh.example.com {
    encode gzip zstd

    reverse_proxy meshcentral:4433 {
        transport http {
            tls_insecure_skip_verify
        }
    }

    header {
        Strict-Transport-Security "max-age=31536000; includeSubDomains"
        X-Content-Type-Options "nosniff"
        X-Frame-Options "SAMEORIGIN"
        Referrer-Policy "strict-origin-when-cross-origin"
    }

    log {
        output file /data/access.log
        format json
    }
}
EOF

# Start the containers in the background
cd /opt/meshcentral
sudo docker compose --env-file .env -f compose.yml up -d

# Check the container status
sudo docker compose ps
In some MeshCentral versions, the internal HTTPS server uses a self-signed certificate. Therefore, tls_insecure_skip_verify is specified in the transport http block. This connection occurs only within the Docker network; external TLS terminates at Caddy. Do not use this parameter for proxying an arbitrary external service.
Checking DNS, TLS, and HTTP
# Check that the domain points to the VPS
dig +short mesh.example.com

# Check open local ports
sudo ss -tulpn | grep -E ':(80|443)\b'

# View the latest MeshCentral logs
sudo docker logs --tail=100 meshcentral

# View the Caddy logs
sudo docker logs --tail=100 meshcentral-caddy

# Check HTTPS from the server
curl -I https://mesh.example.com

# Check availability through external DNS and TLS
curl -fsS https://mesh.example.com/ | head
The expected result is an HTTP 200 response or a redirect to the login page. A 502 error means that Caddy cannot connect to MeshCentral. A certificate error is usually related to DNS, a closed port 80, or an incorrect server time.
First Login and Group Creation
Open https://mesh.example.com in a browser. Create a long passphrase of at least 14 characters and enable TOTP two-factor authentication in the user profile if this feature is available in the installed version.
Create separate groups, such as “Office”, “Home PCs”, “Clients”, and “Servers”. Do not grant an operator access to the entire server if they only need one group. Use a separate account for each employee so that actions are recorded in the logs.
Installing MeshAgent on Client Machines
In the MeshCentral interface, open the required device group and select the option to add a computer. Download the agent installer for the appropriate OS and provide it to the user through a secure channel or deploy it through an existing management system.
On Windows, the agent is installed as an administrator as a service. On Linux, root access is required, while on macOS, Accessibility and Screen Recording permissions are required. Without these permissions, the agent may connect, but the remote desktop and input control will be limited.
For mass deployment, do not embed invitation tokens in public scripts. Use Group Policy, Intune, Ansible, Salt, an existing RMM, or another internal distribution mechanism. After installation, verify that the agent appeared in the correct group and received the expected permissions.
Checking a Remote Session
- Make sure the device is shown as connected.
- Open the device information and check the OS name, IP address, and last contact time.
- Launch the terminal and execute a safe command, such as
whoamiorhostname. - Check the transfer of a small text file.
- Open the desktop and end the session using the standard button.
- Check the administrator activity log.
Checking Restart and Autostart
# Restart the stack without deleting data
cd /opt/meshcentral
sudo docker compose restart

# Check that the containers start after reboot
sudo reboot

# Check the status after reconnecting
sudo docker compose ps
sudo systemctl is-enabled docker
8. Backups and Maintenance
What Needs to Be Preserved
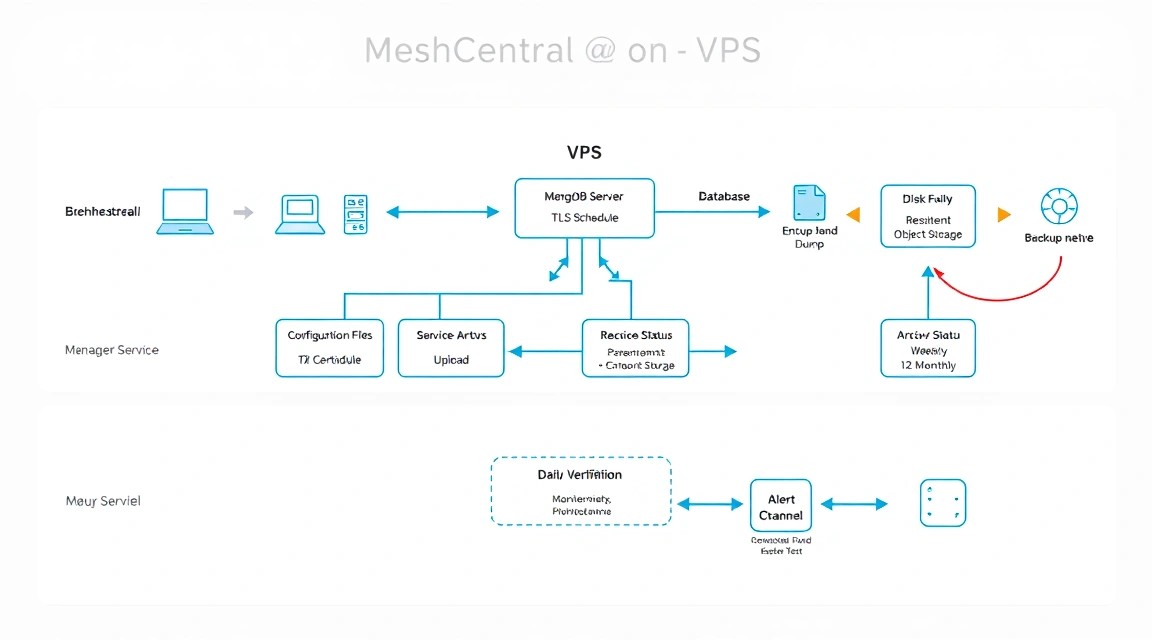
The meshcentral-data directory is critical. It contains the configuration, database, server keys, certificates, and device state. If the keys or database are lost, agents may require re-registration, and users and groups will be unavailable.
The meshcentral-files directory contains user files and data related to file transfers. The Caddy directories /opt/caddy/data and /opt/caddy/config store certificates and proxy service data. A backup of the Compose file, Caddyfile, and .env is also mandatory, but the secrets in it must be encrypted.
| Data | Frequency | Recommendation |
|---|---|---|
| meshcentral-data | Daily | At least 14 latest copies |
| meshcentral-files | Daily or more often | Depends on the value of the transferred files |
| Caddy data/config | After changes and daily | Required to restore the TLS state |
| Compose and configuration files | After every change | Store in a private Git repository or encrypted archive |
Installing Restic
Restic encrypts data before sending it to S3-compatible storage. The example below uses environment variables. Key values must not be placed in an exposed script or passed on the command line, where they could be seen in the process list.
# Install Restic from the Ubuntu repository
sudo apt update
sudo apt install -y restic

# Create a protected file with remote storage parameters
sudo install -m 600 -o root -g root /dev/null /root/.restic-env

sudo tee /root/.restic-env > /dev/null <<'EOF'
export AWS_ACCESS_KEY_ID='REPLACE_ACCESS_KEY'
export AWS_SECRET_ACCESS_KEY='REPLACE_SECRET_KEY'
export RESTIC_REPOSITORY='s3:https://s3.example.net/meshcentral'
export RESTIC_PASSWORD='REPLACE_LONG_RANDOM_PASSWORD'
EOF
Generate a separate repository password of at least 32 random characters and save it in a password manager. Losing the Restic password means losing the ability to decrypt the archive.
Backup Script
# Create the backup script
sudo tee /usr/local/sbin/meshcentral-backup > /dev/null <<'EOF'
#!/usr/bin/env bash
set -Eeuo pipefail

source /root/.restic-env

export RESTIC_COMPRESSION=auto
export RESTIC_CACHE_DIR=/var/cache/restic

restic snapshots >/dev/null 2>&1 || \
  restic init

restic backup \
  /opt/meshcentral \
  /opt/caddy \
  --tag meshcentral \
  --exclude '/opt/meshcentral/meshcentral-files/tmp'

restic forget \
  --tag meshcentral \
  --keep-daily 14 \
  --keep-weekly 8 \
  --keep-monthly 12 \
  --prune

restic check --read-data-subset=5%
EOF

# Make the script executable
sudo chmod 700 /usr/local/sbin/meshcentral-backup

# Run the first backup manually
sudo /usr/local/sbin/meshcentral-backup
For daily execution, create a systemd timer or cron job. Cron is simpler, but systemd is more convenient for logging.
# Add a daily run at 03:30
sudo tee /etc/cron.d/meshcentral-backup > /dev/null <<'EOF'
30 3   * root /usr/local/sbin/meshcentral-backup >> /var/log/meshcentral-backup.log 2>&1
EOF

# Check the size and presence of the latest archives
sudo bash -c 'source /root/.restic-env && restic snapshots --tag meshcentral'
Restore Test
A backup that has never been restored cannot be considered verified. Once a quarter, create a temporary directory and extract the latest copy there. Do not replace the working directory before checking the contents and version compatibility.
# Restore the latest snapshot to a temporary directory
sudo mkdir -p /var/tmp/meshcentral-restore
sudo bash -c 'source /root/.restic-env && restic restore latest \
  --tag meshcentral --target /var/tmp/meshcentral-restore'

# Check for key files
sudo find /var/tmp/meshcentral-restore/opt/meshcentral \
  -maxdepth 3 -type f | head -30
Updating MeshCentral and Docker
Do not update a production installation automatically every night. First review the version changes, make a full backup, and then update the image during a scheduled maintenance window. For a hundred agents, it is better to test the update first on a separate test group containing several machines.
# Save the current versions and create a backup
cd /opt/meshcentral
sudo docker compose images
sudo /usr/local/sbin/meshcentral-backup

# Retrieve the new image
sudo docker compose pull meshcentral caddy

# Recreate the containers without deleting volume directories
sudo docker compose up -d

# Check the status and logs after the update
sudo docker compose ps
sudo docker logs --tail=200 meshcentral
If the new version is incompatible, restore the previous image tag in the Compose file and restore the data only after analyzing the cause. Do not delete the meshcentral-data and meshcentral-files directories with the docker compose down -v command: this may destroy Docker volume data if the storage scheme has changed.
Monitoring
Check HTTPS availability from an external host, certificate expiration, available disk space, and container restarts. Basic monitoring can be implemented with a cron check using curl and notifications by email or in a corporate chat.
# View container resource usage
sudo docker stats --no-stream

# Check disk space
df -h / /opt/meshcentral

# Search for errors in the logs from the last 30 minutes
sudo journalctl --since "30 minutes ago" | grep -Ei "error|failed|meshcentral"
9. Troubleshooting and FAQ
Why does the 502 Bad Gateway error appear?
Check whether the MeshCentral container is running: sudo docker compose ps. Then view its log with sudo docker logs meshcentral. If the container has stopped, common causes include a JSON error in config.json, an incorrect volume path, or an unsupported configuration parameter. Check the syntax: jq . /opt/meshcentral/meshcentral-data/config.json. Also make sure that Caddy and MeshCentral are on the same Docker network.
The Let’s Encrypt certificate is not issued. What should I check?
Make sure the domain’s A record points to the current VPS IPv4 address and that TCP 80 and 443 are allowed both in UFW and in the provider’s external firewall. Check DNS with dig +short mesh.example.com, then open the logs with sudo docker logs meshcentral-caddy. If an incorrect AAAA record is enabled, Let’s Encrypt may connect over IPv6 and reach the wrong server. Remove the incorrect record or configure IPv6 correctly.
The agent is installed, but the device does not appear in MeshCentral
On the client, check outbound access to https://mesh.example.com and ensure that no corporate proxy is blocking WebSocket. Make sure the date and time on the client are correct and that the installer was downloaded from the correct MeshCentral group. On Windows, check the Mesh Agent service and system events; on Linux, check the service status through systemd. If the device was registered with an old server, remove the old agent installation and install the new invitation package.
The terminal works, but there is no remote desktop
On Windows, check whether a graphical session is running and whether access for the agent is allowed. On Linux, the presence of a GUI, X11/Wayland, and user permissions affects desktop-session functionality. On macOS, Accessibility and Screen Recording permissions must be granted separately in the privacy settings. Also check whether the desktop feature has been disabled by group policy. The terminal can work independently of the graphical session, so its successful launch does not guarantee screen access.
The remote screen is slow or disconnects
Measure the latency between the operator and the client, and check the CPU load and network traffic of the container. Wi-Fi, mobile networks, VPNs, and simultaneous file transfers affect quality. End unnecessary sessions, reduce image quality, and disable large file transfers during interactive work. If dozens of desktop sessions are used simultaneously, upgrade the VPS to 4–8 vCPU and 8–16 GB RAM, and also check the network limit.
What is the minimum suitable VPS configuration?
For a lab or several computers, 1 vCPU, 2 GB RAM, and 25 GB SSD are sufficient, but this capacity is not designed for a hundred devices. The practical minimum for 100 agents is 2 vCPU, 4 GB RAM, 40 GB SSD, and a stable connection of at least 100 Mbps. If simultaneous remote desktops are planned, it is better to choose 4 vCPU and 8 GB RAM. A public address and accessible TCP 80/443 are required.
Which should you choose for this task — VPS or dedicated?
For one hundred machines and a small number of operators, choose a VPS: it is cheaper, easier to scale, and usually has sufficient resources. A dedicated server is needed for hundreds or thousands of agents, heavy file-transfer loads, strict CPU isolation, or special requirements for disks or network interfaces. Start with a VPS, monitoring, and a migration plan prepared in advance. As the load grows, you can move the Docker stack and data directories to a dedicated server.
Can port 80 be closed after obtaining the certificate?
It is generally convenient to leave TCP 80 open: Caddy uses it for HTTP-01 checks and redirecting users to HTTPS. If security policy requires port 80 to be closed, configure DNS-01 validation through the DNS provider and make sure the certificate will renew automatically. Simply closing port 80 without changing the validation method may stop automatic renewal. Port 443 must remain accessible to agents and operators.
How can operator access be restricted to specific computers only?
Create a separate device group and assign the operator permissions only for that group. Do not use one shared account for the entire team: otherwise, it is impossible to reliably determine who launched a terminal or transferred a file. Disable features the specific operator does not need, such as file transfer or remote terminal access. Periodically review the list of users, invitation tokens, and activity logs, especially after an employee leaves or a contractor changes.
10. Conclusions and Next Steps
A self-hosted MeshCentral instance with HTTPS, remote terminal, desktop, file transfer, and device group management has been deployed on the VPS. A moderate configuration is sufficient for one hundred machines if user permissions are restricted, the server is updated regularly, and encrypted backups are stored outside the VPS.
- Create a test group with several computers, and verify access policies and backup restoration.
- Add external monitoring for HTTPS, free disk space, TLS certificate expiration, and container status.
- As the load grows, separate MeshCentral, backup storage, and additional services across separate nodes or move the installation to a dedicated server.