Installing MinIO Object Storage on VPS: S3-compatible storage, SSL, backups
TL;DR
In this detailed guide, we will step-by-step configure MinIO — a high-performance, S3-compatible object storage — on your virtual or dedicated server. You will learn how to install MinIO, ensure its secure operation with SSL/TLS via Caddy, set up automatic startup as a system service, and implement an effective backup strategy to protect your data. By the end of the guide, you will have a fully functional object storage ready for applications, backups, and other tasks requiring scalable and reliable storage.
- Deploy MinIO as an S3-compatible object storage on Ubuntu 24.04 LTS.
- Configure automatic SSL certificate retrieval and renewal using Caddy for secure access.
- Ensure MinIO runs as a system service with automatic startup after reboot.
- Implement basic security measures: firewall, brute-force protection, and SSH key usage.
- Develop a simple backup strategy for MinIO data.
What we are configuring and why
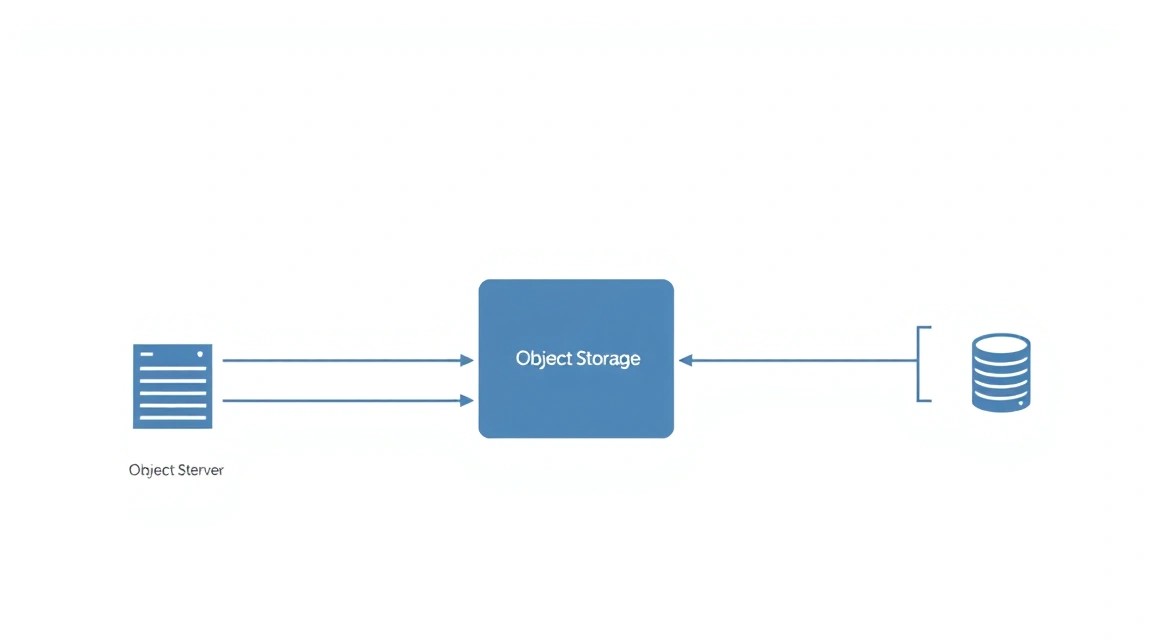
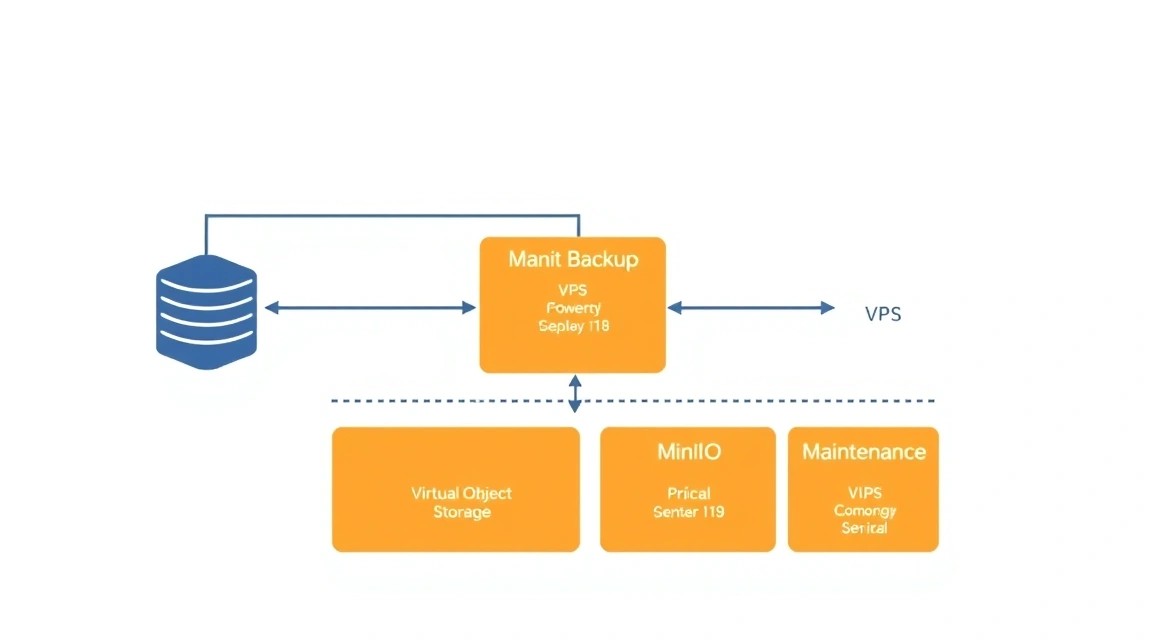
We will be configuring MinIO — a high-performance, distributed object storage server written in Go. It is designed to provide an S3-compatible API, making it an ideal replacement or complement to cloud services such as Amazon S3, DigitalOcean Spaces, or Google Cloud Storage. MinIO allows you to deploy your own object storage on any hardware, from a single server to a cluster of dozens of nodes, while ensuring high availability and scalability.
What will the reader get in the end? You will gain full control over your data, independence from third-party providers, and the ability to use the familiar S3 API for your applications. This is especially valuable for developers who need to store large volumes of unstructured data (images, videos, documents, logs, backups) and integrate them with their services, whether they are web applications, microservices, or analytical platforms. MinIO is excellent for creating a private cloud for data storage, hosting static websites, storing media files for a CDN, or even as a backend for CI/CD pipelines.
What alternatives are there and why self-hosted on a VPS? There are many cloud solutions for object storage on the market, such as Amazon S3, Google Cloud Storage, Azure Blob Storage, DigitalOcean Spaces, Backblaze B2. These services offer high reliability, scalability, and often have a low entry cost. However, they also have their drawbacks: dependence on a single provider, potential data privacy issues (especially for sensitive information), unpredictable costs for large volumes of traffic and storage, and the inability to fully control the infrastructure.
Deploying MinIO on your own VPS or dedicated server gives you:
- Full control: You manage data, security, and configuration.
- Predictable costs: You pay a fixed price for the server, regardless of the volume of stored data or traffic (within server limits).
- Data privacy: Your data remains on your server, under your control.
- Performance: Ability to optimize MinIO for your specific tasks and utilize server resources most efficiently.
- Flexibility: Ability to integrate with local services without delays and additional costs for outbound traffic.
What VPS config is needed for this task
Choosing the right VPS configuration for MinIO depends on the anticipated load, the volume of stored data, and performance requirements. MinIO efficiently uses available resources, but object storage, especially under intensive operation, can be demanding on certain parameters.
Minimum requirements:
- Processor (CPU): 1-2 cores. MinIO is not heavily CPU-intensive for basic operations, but multi-threaded requests benefit from more cores. For small loads, 1 core is sufficient; for more active use, 2 cores.
- Random Access Memory (RAM): 2 GB. MinIO uses RAM for metadata caching and data buffering. 2 GB is a comfortable minimum for stable operation. If a very large number of small objects or high concurrent load is planned, 4 GB would be preferable.
- Disk: The most critical component.
- Type: For object storage, disk performance is extremely important. NVMe SSD or high-performance SATA SSDs are mandatory for good read/write speeds. HDDs are only suitable for archival storage with low access frequency.
- Volume: Minimum 50 GB for the system and initial data. The actual volume depends on your needs. Make sure you have enough space for growth.
- Fault tolerance: If you are using a single disk, consider regular backups. For multi-disk configurations, MinIO supports erasure coding, but on a single VPS, this is usually not relevant unless you are using block storage provided by the provider.
- Network: 1 Gbit/s. Good network bandwidth is important as MinIO will actively transfer data. For most VPS, 1 Gbit/s is standard. Make sure your provider does not have hidden restrictions or excessive costs for outbound traffic.
Specific VPS plan for the task:
To run MinIO for a development team, a small SaaS project, or personal backups, the following configuration is recommended:
- CPU: 2 cores
- RAM: 4 GB
- Disk: 200-500 GB NVMe SSD (or more, depending on needs)
- Network: 1 Gbit/s, unlimited or generous traffic limit.
You can get a VPS with the specified characteristics or a similar plan from another provider offering NVMe SSD and sufficient memory.
When a dedicated server is needed, not a VPS:
A dedicated server becomes necessary when:
- Extreme I/O performance is required: For very large data volumes, high access frequency, or specific workloads where VPS disk subsystem performance can become a bottleneck due to shared resource usage.
- Large storage volumes are needed: If you require several terabytes or petabytes of data, a dedicated server with multiple disks (e.g., in a RAID array) will be a more economical and performant solution.
- High availability and fault tolerance: For MinIO cluster deployments with erasure coding, requiring multiple physical nodes to distribute data and ensure fault tolerance at the disk and server level.
- Specific security or compliance requirements: Some regulations may require physical isolation of equipment.
Location: what it affects
The choice of MinIO server location is important for several reasons:
- Latency: The closer the server is to your target audience or to the application servers that will use MinIO, the lower the data access latency will be. This is critical for interactive applications.
- Legislation: The server's location can affect applicable data protection laws (e.g., GDPR in Europe).
- Traffic cost: Some providers may have different rates for outbound traffic depending on the region.
Choose a location that is geographically closest to the primary consumers of MinIO data.
Server Preparation
Before installing MinIO, you need to perform basic operating system setup. It is assumed that you are using a fresh installation of Ubuntu Server 24.04 LTS.
1. SSH Connection and System Update
First, connect to your VPS via SSH using the credentials provided by your provider. This is usually the root user or a standard user with sudo privileges.
ssh user@your_vps_ip_address
Then, update the package list and installed packages to their latest versions:
sudo apt update && sudo apt upgrade -y
This will ensure you have all the latest security patches and the newest versions of system utilities.
2. Creating a New User with Sudo Privileges (if not using root)
Working as the root user is not recommended for daily tasks. Create a new user and grant them sudo privileges.
sudo adduser minioadmin
sudo usermod -aG sudo minioadmin
Now you can exit the current session and log in as the new user:
exit
ssh minioadmin@your_vps_ip_address
3. Configuring SSH Keys for Secure Access
Using SSH keys is much more secure than passwords. If you haven't generated keys yet, do so on your local machine:
ssh-keygen -t rsa -b 4096
Then, copy your public key to your VPS (replace minioadmin and your_vps_ip_address):
ssh-copy-id minioadmin@your_vps_ip_address
After successfully copying the key, it is recommended to disable password authentication for root and your new user to enhance security. Edit the file /etc/ssh/sshd_config:
sudo nano /etc/ssh/sshd_config
Find and change the following lines:
# Disable root login with password
PermitRootLogin prohibit-password
# Disable password authentication for all
PasswordAuthentication no
Save the changes (Ctrl+O, Enter, Ctrl+X) and restart the SSH service:
sudo systemctl restart sshd
Important: Make sure you can log in via SSH with your key before disabling password authentication! Otherwise, you will lose access to the server.
4. Firewall Configuration (UFW)
A firewall is necessary to restrict access to your server to only the required ports. Ubuntu uses UFW (Uncomplicated Firewall).
sudo apt install ufw -y # Install UFW if it's not present
sudo ufw allow OpenSSH # Allow SSH (port 22)
sudo ufw allow 80/tcp # Allow HTTP (for Caddy)
sudo ufw allow 443/tcp # Allow HTTPS (for Caddy)
sudo ufw enable # Enable the firewall
sudo ufw status # Check status
At this stage, MinIO is not yet installed, so we are not opening its port (default 9000) yet.
5. Installing Fail2ban
Fail2ban helps protect the server from brute-force attacks by blocking IP addresses that make too many failed login attempts.
sudo apt install fail2ban -y
sudo systemctl enable fail2ban
sudo systemctl start fail2ban
Fail2ban is configured by default to protect SSH. You can check its status:
sudo fail2ban-client status
sudo fail2ban-client status sshd
Now your server is ready for the installation of MinIO and related software.
Software Installation — Step-by-Step
In this step, we will install MinIO and Caddy, which will be used to provide HTTPS access to MinIO.
1. Installing MinIO Server
We will install MinIO by downloading the official binary and configuring it as a system service. For relevance in 2026, we will use the latest stable versions.
1.1. Creating User and Groups for MinIO
To enhance security, MinIO will run under its own unprivileged user.
sudo groupadd -r minio-user # Create group for MinIO
sudo useradd -r -s /sbin/nologin -g minio-user minio-user # Create user without shell
1.2. Creating Directories for MinIO
We will create directories for storing the MinIO binary, data, and configuration.
sudo mkdir -p /usr/local/bin
sudo mkdir -p /etc/minio
sudo mkdir -p /var/lib/minio
1.3. Downloading the MinIO Binary
Let's download the latest stable version of MinIO. Up-to-date versions can always be found on the official MinIO website or GitHub. As of 2026, let's assume the current MinIO version has the format RELEASE.2026-XX-XXTXX-XX-XXZ. We will use mc (MinIO Client) to manage MinIO.
# Download MinIO Server
wget -O /usr/local/bin/minio https://dl.min.io/server/minio/release/linux-amd64/minio # Download MinIO binary
# Download MinIO Client (mc)
wget -O /usr/local/bin/mc https://dl.min.io/client/mc/release/linux-amd64/mc # Download MinIO Client binary
1.4. Granting Execution Permissions
Make the downloaded files executable.
sudo chmod +x /usr/local/bin/minio # Make MinIO executable
sudo chmod +x /usr/local/bin/mc # Make MinIO Client executable
1.5. Configuring Data Directory Permissions
Set the owner of the MinIO data directory to the created user minio-user.
sudo chown minio-user:minio-user /var/lib/minio # Change owner of data directory
2. Installing Caddy Web Server
Caddy will be used as a reverse proxy for MinIO and will automatically manage Let's Encrypt SSL certificates. This significantly simplifies HTTPS configuration.
2.1. Adding the Caddy Repository
To get the latest stable version of Caddy, we will add its official repository.
sudo apt install -y debian-keyring debian-archive-keyring apt-transport-https # Install necessary packages
curl -1s https://dl.cloudsmith.io/public/caddy/stable/gpg.key | sudo gpg --dearmor -o /usr/share/keyrings/caddy-stable-archive-keyring.gpg # Add GPG key
curl -1s https://dl.cloudsmith.io/public/caddy/stable/debian.deb.txt | sudo tee /etc/apt/sources.list.d/caddy-stable.list # Add repository
2.2. Installing Caddy
Update the package list and install Caddy.
sudo apt update # Update package list
sudo apt install caddy -y # Install Caddy
Caddy will be installed as a system service and automatically started. You can check its status:
sudo systemctl status caddy
3. Opening MinIO Port in Firewall (UFW)
Now that MinIO will be running, we need to open the port it will listen on (default 9000). Caddy will proxy requests to this port.
sudo ufw allow 9000/tcp # Allow access to MinIO port
sudo ufw status # Check UFW status
At this stage, all necessary software has been installed. Let's proceed to configuration.
Configuration

Now that MinIO and Caddy are installed, you need to configure them to work together and ensure secure access via HTTPS.
1. Configuring MinIO Environment Variables
MinIO uses environment variables for its settings, including access keys. We will create the file /etc/minio/minio.conf to store these variables.
Important: Replace YOUR_MINIO_ACCESS_KEY and YOUR_MINIO_SECRET_KEY with strong, long, and complex values. These keys will be used to access your storage!
sudo nano /etc/minio/minio.conf
Add the following content:
# MinIO Server Configuration
MINIO_ROOT_USER="YOUR_MINIO_ACCESS_KEY"
MINIO_ROOT_PASSWORD="YOUR_MINIO_SECRET_KEY"
MINIO_VOLUMES="/var/lib/minio" # Directory for MinIO data storage
MINIO_SERVER_URL="https://minio.your-domain.com" # URL where MinIO will be accessible via Caddy
Save the file (Ctrl+O, Enter, Ctrl+X).
Ensure that this file is read-only for the minio-user user:
sudo chown root:minio-user /etc/minio/minio.conf
sudo chmod 640 /etc/minio/minio.conf
2. Creating a Systemd Service for MinIO
We will create a system service so that MinIO automatically starts when the server boots and can be managed via systemctl.
sudo nano /etc/systemd/system/minio.service
Add the following content:
[Unit]
Description=MinIO S3 Compatible Object Storage
Documentation=https://min.io/docs/minio/linux/index.html
Wants=network-online.target
After=network-online.target

[Service]
ExecStart=/usr/local/bin/minio server $MINIO_VOLUMES --console-address ":9001"
EnvironmentFile=/etc/minio/minio.conf # Load environment variables from our file
User=minio-user
Group=minio-user
ProtectSystem=full
AmbientCapabilities=CAP_NET_BIND_SERVICE
NoNewPrivileges=true
Restart=always
RestartSec=5s

[Install]
WantedBy=multi-user.target
Save the file (Ctrl+O, Enter, Ctrl+X).
Now reload systemd, enable, and start the MinIO service:
sudo systemctl daemon-reload # Reload systemd
sudo systemctl enable minio # Enable MinIO autostart on system boot
sudo systemctl start minio # Start MinIO
sudo systemctl status minio # Check MinIO status
MinIO should be running and listening on port 9000 (API) and 9001 (console). Make sure there are no errors in the systemctl status minio output.
3. Configuring Caddyfile for Reverse Proxy and SSL
Caddy will proxy requests from your domain name to the local MinIO, automatically obtaining and renewing SSL certificates.
Important: Ensure that your domain (e.g., minio.your-domain.com) points to your VPS's IP address in DNS using an A-record.
sudo nano /etc/caddy/Caddyfile
Replace the existing content with the following (replace minio.your-domain.com with your actual domain):
minio.your-domain.com {
    reverse_proxy localhost:9000 # Proxy MinIO API
    # For MinIO console (optional, if web console is needed via the same domain)
    # reverse_proxy /minio-console/ localhost:9001
    # If you want the entire console to be available on a separate subdomain,
    # or simply via a different port, it's better to configure this separately.
    # For simplicity, we are only proxying the MinIO API on 9000.
    # MinIO console is by default available on port 9001.
    # If you want to proxy it through the same domain, then
    # minio.your-domain.com {
    #     handle /minio-console/ {
    #         reverse_proxy localhost:9001
    #     }
    #     handle / {
    #         reverse_proxy localhost:9000
    #     }
    # }
    # For simplicity and security, the console can be left accessible only locally or via an SSH tunnel
    # or on a separate domain. Here we are only proxying the API.

    # Add headers required for MinIO
    header Access-Control-Allow-Origin ""
    header Access-Control-Allow-Methods "GET, POST, PUT, DELETE, OPTIONS"
    header Access-Control-Allow-Headers "Accept, Authorization, Content-Type, Content-Length, X-Amz-Date, X-Amz-User-Agent, X-Amz-Content-Sha256, X-Amz-SignedHeaders, X-Amz-Signature, X-Minio-Deployment-ID, X-Minio-Identity-Tag, X-Minio-Release"
    header X-Minio-Deployment-ID "MINIO_DEPLOYMENT_ID"
    header X-Minio-Identity-Tag "MINIO_IDENTITY_TAG"
    header X-Minio-Release "MINIO_RELEASE"
}
Save the file (Ctrl+O, Enter, Ctrl+X).
Restart Caddy to apply the changes:
sudo systemctl reload caddy # Reload Caddy
sudo systemctl status caddy # Check Caddy status
Caddy should start successfully, obtain an SSL certificate for your domain, and begin proxying requests to MinIO.
4. Verifying Functionality
4.1. Checking MinIO Accessibility via Caddy (HTTPS)
You can use curl to check the accessibility of your MinIO API via HTTPS.
curl -I https://minio.your-domain.com/minio/health/live
You should receive an HTTP status 200 OK, which means MinIO is running and accessible via Caddy with SSL.
HTTP/2 200
server: Caddy
content-length: 0
date: Mon, 01 Jan 2026 12:00:00 GMT
4.2. Using MinIO Client (mc)
On your local machine or VPS, you can use mc to interact with MinIO.
First, add your MinIO server to the mc list:
mc alias set myminio https://minio.your-domain.com YOUR_MINIO_ACCESS_KEY YOUR_MINIO_SECRET_KEY --api S3v4
Replace myminio with your desired name, https://minio.your-domain.com with your domain, and YOUR_MINIO_ACCESS_KEY and YOUR_MINIO_SECRET_KEY with the ones you specified in minio.conf.
Now you can create buckets and upload files:
mc mb myminio/myfirstbucket # Create a new bucket
echo "Hello MinIO" > testfile.txt
mc cp testfile.txt myminio/myfirstbucket/ # Upload a file
mc ls myminio/myfirstbucket # Check bucket contents
If all commands execute successfully, your MinIO storage is fully configured and functional.
4.3. Accessing MinIO Console (optional)
By default, the MinIO Console is available on port 9001. To access it from outside, you can:
- Configure a separate subdomain for the console (e.g.,
console.your-domain.com) in Caddy, proxying it tolocalhost:9001. - Use SSH tunneling for secure access to port 9001 from your local machine:
ssh -L 9001:localhost:9001 minioadmin@your_vps_ip_addressThen open
http://localhost:9001in your browser on your local machine.