Installing Apache Airflow on a VPS: Docker, PostgreSQL, CeleryExecutor, SSL, and Backups
TL;DR
In this guide, we will deploy Apache Airflow 3 on a VPS using Docker Compose: PostgreSQL will store metadata, Redis will act as the task broker for CeleryExecutor, Caddy will automatically issue an SSL certificate, and backups of PostgreSQL, DAG files, and configuration will be sent to external S3 storage.
- Airflow will run in a fault-tolerant setup for small teams with
CeleryExecutor. - The web interface will be available over HTTPS on a custom domain.
- PostgreSQL, Redis, the scheduler, worker, and API server will be isolated with Docker Compose.
- Secrets will be stored in the
.envfile rather than in Docker Compose or DAG code. - PostgreSQL and Airflow file backups will run automatically on a schedule.
- The configuration is designed for Ubuntu Server 24.04 LTS and Apache Airflow 3.0.x.
What we are configuring and why
Apache Airflow is a platform for task and pipeline orchestration. In Airflow, a developer describes a data processing workflow as a DAG — a directed acyclic graph. Each task has dependencies, a schedule, retries, logs, and a status. For example, Airflow can export data from a CRM every night, run Python transformations, load the result into PostgreSQL, and notify the team in case of an error.
Airflow is suitable not only for traditional ETL. It is used to run ML pipelines, periodic API integrations, report generation, backups, SaaS service synchronization, file processing, and DevOps tasks. The main requirement is that the process must consist of repeatable steps where scheduling, observability, and reruns are important.
In its basic mode, Airflow can run with LocalExecutor, where the scheduler runs tasks on the same server. This is sufficient for a test environment. However, for a production scenario with several concurrent DAGs, resource-intensive Python tasks, or multiple users, it is more reasonable to use CeleryExecutor. It separates scheduling from execution: the scheduler places jobs in the Redis queue, while separate Celery workers pick them up and execute them.
Final architecture
| Component | Purpose | Where it runs |
|---|---|---|
| Airflow API Server | Web interface, REST API, and authentication | Docker container |
| Airflow Scheduler | Parses DAGs, creates runs, and places tasks in the queue | Docker container |
| Airflow DAG Processor | Parses DAG Python files separately | Docker container |
| Celery Worker | Executes DAG tasks | Docker container |
| PostgreSQL 16 | Stores users, task states, connections, and metadata | Docker volume |
| Redis 7 | Celery task queue and temporary message storage | Docker volume |
| Caddy | Reverse proxy, HTTPS, and automatic TLS certificate renewal | Host system |
What you will get after configuration
- Access to Airflow at an address such as
https://airflow.example.com. - A separate PostgreSQL database instead of the built-in SQLite.
- A task queue and parallel execution through CeleryExecutor.
- Persistent Docker volumes for PostgreSQL, Redis, and logs.
- A directory for DAGs, plugins, and configuration on the host.
- HTTPS without manually issuing and renewing certificates.
- Automatic encrypted backups to external storage.
Cloud-managed Airflow or self-hosted on a VPS
Managed options remove part of the operational burden: the provider updates the infrastructure, stores metadata, and sometimes scales workers. This is convenient for large teams, but it usually limits versions, network topology, installation of system libraries, and custom Python dependencies. Costs can also increase significantly when workers run continuously.
Self-hosted Apache Airflow on a VPS provides full control. You can add system packages to the image, use private networks, connect local services, pin Python package versions, and store data in a chosen jurisdiction. The cost of this control is the need to independently monitor updates, backups, secrets, and server availability.
Do not use Airflow as a universal real-time queue service. It is designed for scheduled and batch processes. For processing thousands of short events per second, Kafka, RabbitMQ, NATS, or a specialized worker service are usually more appropriate.
dnsA server for this guide
Matching plans from verified providers, prices updated daily.



Compare:Vultr vs DigitalOceanVultr vs ContaboAll VPS by price
Affiliate links: we may earn a commission, your price stays the same.
What VPS configuration is required for this task
Airflow resource consumption depends not only on the number of DAGs. Launch frequency, log volume, the number of concurrent tasks, Python libraries, and PostgreSQL load are also important. Even with a small number of pipelines, several Airflow services constantly run in memory: the API server, scheduler, DAG processor, worker, PostgreSQL, and Redis.
| Scenario | vCPU | RAM | NVMe SSD | Suitable mode |
|---|---|---|---|---|
| Testing, 1–5 lightweight DAGs | 2 | 4 GB | 40–60 GB | LocalExecutor or Celery with one worker |
| Small production deployment, 5–30 DAGs | 4 | 8 GB | 80–120 GB | CeleryExecutor, 1–2 workers |
| Team and regular ETL processes | 8 | 16 GB | 160 GB and more | CeleryExecutor, multiple workers |
| Resource-intensive ML/analytics tasks | 8–16+ | 32 GB+ | 300 GB+ | Separate workers or dedicated |
For getting started with a production workload, a sensible configuration is 4 vCPUs, 8 GB RAM, 100 GB NVMe, and a port speed of at least 100 Mbps. This is sufficient for Airflow, PostgreSQL, Redis, and one Celery worker with moderate concurrency. Such a server can be used as a VPS with the specified characteristics if the tasks do not require large amounts of memory or local processing of tens of gigabytes of data.
Why you should not start with 2 GB of RAM
On a server with 2 GB of memory, Docker containers may formally start, but when importing heavy libraries, running database migrations, or executing tasks concurrently, the system will begin using swap. As a result, the scheduler misses heartbeats, the worker receives an OOM Killer signal, and the Airflow interface becomes slow. A minimum of 4 GB is suitable only for a development environment; for working DAGs, plan for 8 GB.
When you need dedicated rather than a VPS
A dedicated server is justified if tasks constantly load the CPU, require 32–64 GB of RAM, process large local files, use GPUs, or are sensitive to predictable disk performance. It is also useful if Airflow runs many resource-intensive workers on one machine and you do not want to compete for resources with other virtual machines on the host.
If Airflow only coordinates external services — APIs, cloud databases, object storage, and serverless tasks — a VPS is usually sufficient. In this case, the main computations are performed outside Airflow, while the server itself stores metadata and manages the schedule.
Choosing a location
The VPS location affects latency to PostgreSQL, S3, corporate APIs, and employees opening the web interface. Place the server closer to the primary database or private network, not only to interface users. If a DAG regularly transfers large files to S3-compatible storage, measure network latency and outbound traffic costs.
For personal and financial data, consider jurisdictional requirements. In any case, do not expose PostgreSQL, Redis, and internal Airflow ports to the internet: external access should be limited to SSH, HTTP, and HTTPS.
Server preparation
The following assumes a clean server running Ubuntu Server 24.04 LTS, with a public IPv4 address and the domain airflow.example.com. Before configuring Caddy, create an A-type DNS record pointing to the VPS IP address. For IPv6, add an AAAA record only if the server actually accepts incoming IPv6 traffic.
Connecting and updating the system
Connect using the initial user provided by the provider, then update the packages. A reboot is required if the kernel or critical system libraries have been updated.
ssh root@SERVER_IP

apt update && apt upgrade -y
apt install -y curl wget ca-certificates gnupg lsb-release \
  git vim unzip htop jq ufw fail2ban cron

reboot
After rebooting, connect again and create a separate user. Do not perform daily administration as root: this reduces the risk of accidentally deleting system files or running a malicious command with maximum privileges.
adduser deploy
usermod -aG sudo deploy

mkdir -p /home/deploy/.ssh
chmod 700 /home/deploy/.ssh
cp /root/.ssh/authorized_keys /home/deploy/.ssh/authorized_keys
chown -R deploy:deploy /home/deploy/.ssh
chmod 600 /home/deploy/.ssh/authorized_keys
Test logging in as the new user in a separate terminal. Do not close the root session until you have confirmed that the key is accepted.
ssh deploy@SERVER_IP
sudo -v
exit
Securing SSH
Disable password authentication and direct root login only after verifying key-based access. Create a separate drop-in file to avoid editing the main OpenSSH configuration.
sudo tee /etc/ssh/sshd_config.d/99-hardening.conf > /dev/null <<'EOF'
PasswordAuthentication no
KbdInteractiveAuthentication no
PermitRootLogin no
PubkeyAuthentication yes
MaxAuthTries 3
X11Forwarding no
EOF

sudo sshd -t && sudo systemctl restart ssh
Configure UFW. Docker publishes ports through its own iptables rules, so the Airflow API will later be bound only to 127.0.0.1, not to the public interface. Only Caddy will have external access on ports 80 and 443.
sudo ufw default deny incoming
sudo ufw default allow outgoing
sudo ufw allow OpenSSH
sudo ufw allow 80/tcp
sudo ufw allow 443/tcp
sudo ufw enable
sudo ufw status verbose
Fail2ban will block IP addresses with repeated failed SSH login attempts. For key-based authentication, this is an additional rather than primary layer of protection.
sudo systemctl enable --now fail2ban
sudo fail2ban-client status sshd
System limits and project directory
Airflow creates many log files, and PostgreSQL uses file descriptors. We will raise the open file limit for the user that will run Docker Compose. Then we will create the directory structure.
sudo tee /etc/security/limits.d/99-airflow.conf > /dev/null <<'EOF'
deploy soft nofile 65535
deploy hard nofile 65535
EOF

sudo mkdir -p /opt/airflow/{dags,logs,plugins,config,backups,scripts}
sudo chown -R deploy:deploy /opt/airflow
sudo chmod 750 /opt/airflow

sudo -iu deploy
cd /opt/airflow
Run all subsequent Docker Compose commands as the deploy user from the /opt/airflow directory. Do not store DAGs, configurations, and backups in the root home directory: this complicates access permissions and recovery.
Software Installation — Step by Step
This configuration uses Docker Engine 27+, Docker Compose Plugin 2.30+, PostgreSQL 16, Redis 7.4, and Apache Airflow 3.0.2. The Airflow version is pinned intentionally: automatically pulling the latest tag is dangerous because a major update may change the database schema and API behavior.
Installing Docker Engine and Docker Compose
Let's add the official Docker repository for Ubuntu 24.04. The commands install the container engine, CLI, Buildx, and Compose Plugin.
sudo install -m 0755 -d /etc/apt/keyrings
curl -fsSL https://download.docker.com/linux/ubuntu/gpg | \
  sudo gpg --dearmor -o /etc/apt/keyrings/docker.gpg
sudo chmod a+r /etc/apt/keyrings/docker.gpg

echo \
  "deb [arch=$(dpkg --print-architecture) signed-by=/etc/apt/keyrings/docker.gpg] \
  https://download.docker.com/linux/ubuntu \
  $(. /etc/os-release && echo "$VERSION_CODENAME") stable" | \
  sudo tee /etc/apt/sources.list.d/docker.list > /dev/null

sudo apt update
sudo apt install -y docker-ce docker-ce-cli containerd.io \
  docker-buildx-plugin docker-compose-plugin
Add the deploy user to the Docker group. After that, you must log in again via SSH; otherwise, the docker command will require sudo.
sudo usermod -aG docker deploy
exit

ssh deploy@SERVER_IP
docker version
docker compose version
Configuring the Docker daemon
Let's limit the growth of container JSON logs. Without rotation, Docker logs can fill the disk even due to a minor error in a Python task.
sudo tee /etc/docker/daemon.json > /dev/null <<'EOF'
{
  "log-driver": "local",
  "log-opts": {
    "max-size": "20m",
    "max-file": "5"
  },
  "live-restore": true
}
EOF

sudo systemctl restart docker
docker info | grep -E "Logging Driver|Live Restore"
Creating Airflow secrets
Airflow uses a Fernet key to encrypt Connection passwords and Variable values in the database. The API secret key is required to sign sessions and tokens. PostgreSQL and Redis must also have random passwords. The values must not be committed to Git or published in tickets.
cd /opt/airflow

FERNET_KEY=$(docker run --rm apache/airflow:3.0.2 \
  python -c "from cryptography.fernet import Fernet; print(Fernet.generate_key().decode())")

API_SECRET=$(openssl rand -hex 32)
POSTGRES_PASSWORD=$(openssl rand -base64 32 | tr -d '\n')
REDIS_PASSWORD=$(openssl rand -base64 32 | tr -d '\n')
ADMIN_PASSWORD=$(openssl rand -base64 24 | tr -d '\n')

printf '%s\n' "Generated secrets are ready."
Create the .env file. Replace the domain and administrator email, and insert the generated values. The administrator password can be replaced with your own long password stored in a password manager.
cat > /opt/airflow/.env <<EOF
AIRFLOW_UID=$(id -u)
AIRFLOW_GID=$(id -g)

POSTGRES_DB=airflow
POSTGRES_USER=airflow
POSTGRES_PASSWORD=${POSTGRES_PASSWORD}

REDIS_PASSWORD=${REDIS_PASSWORD}

AIRFLOW_FERNET_KEY=${FERNET_KEY}
AIRFLOW_API_SECRET_KEY=${API_SECRET}

AIRFLOW_ADMIN_USERNAME=admin
AIRFLOW_ADMIN_FIRSTNAME=Airflow
AIRFLOW_ADMIN_LASTNAME=Admin
[email protected]
AIRFLOW_ADMIN_PASSWORD=${ADMIN_PASSWORD}

AIRFLOW_DOMAIN=airflow.example.com
EOF

chmod 600 /opt/airflow/.env
Preparing a custom image
The official Airflow image already contains the core package, but real DAGs almost always require additional Python libraries. Do not install them manually in a running container: the changes will disappear after it is recreated. Instead, create your own image.
cat > /opt/airflow/requirements.txt <<'EOF'
requests==2.32.3
pandas==2.2.3
psycopg[binary]==3.2.3
EOF

cat > /opt/airflow/Dockerfile <<'EOF'
FROM apache/airflow:3.0.2

COPY requirements.txt /requirements.txt
RUN pip install --no-cache-dir --constraint \
    "https://raw.githubusercontent.com/apache/airflow/constraints-3.0.2/constraints-3.12.txt" \
    -r /requirements.txt
EOF
Airflow constraints are critical: they pin compatible library versions. When adding providers, for example for AWS, Google Cloud, Slack, or Kubernetes, add them to requirements.txt, rebuild the image, and test the DAGs in a separate environment.
Creating the Docker Compose file
The following compose file starts all services. The Airflow API port is published only on 127.0.0.1:8080; this prevents direct access from the internet. PostgreSQL and Redis do not publish ports to the host at all.
cat > /opt/airflow/docker-compose.yml <<'EOF'
x-airflow-common: &airflow-common
  build:
    context: .
  env_file:
    - .env
  user: "${AIRFLOW_UID}:0"
  restart: unless-stopped
  depends_on:
    postgres:
      condition: service_healthy
    redis:
      condition: service_healthy
  environment:
    AIRFLOW__CORE__EXECUTOR: CeleryExecutor
    AIRFLOW__DATABASE__SQL_ALCHEMY_CONN: postgresql+psycopg://airflow:${POSTGRES_PASSWORD}@postgres/airflow
    AIRFLOW__CELERY__BROKER_URL: redis://:${REDIS_PASSWORD}@redis:6379/0
    AIRFLOW__CELERY__RESULT_BACKEND: db+postgresql://airflow:${POSTGRES_PASSWORD}@postgres/airflow
    AIRFLOW__CORE__FERNET_KEY: ${AIRFLOW_FERNET_KEY}
    AIRFLOW__API__SECRET_KEY: ${AIRFLOW_API_SECRET_KEY}
    AIRFLOW__CORE__LOAD_EXAMPLES: "false"
    AIRFLOW__CORE__DAGS_ARE_PAUSED_AT_CREATION: "true"
    AIRFLOW__CORE__PARALLELISM: "8"
    AIRFLOW__CORE__MAX_ACTIVE_TASKS_PER_DAG: "4"
    AIRFLOW__CELERY__WORKER_CONCURRENCY: "2"
    AIRFLOW__LOGGING__REMOTE_LOGGING: "false"
  volumes:
    - ./dags:/opt/airflow/dags
    - ./logs:/opt/airflow/logs
    - ./plugins:/opt/airflow/plugins
    - ./config:/opt/airflow/config

services:
  postgres:
    image: postgres:16.6-alpine
    restart: unless-stopped
    env_file:
      - .env
    environment:
      POSTGRES_DB: ${POSTGRES_DB}
      POSTGRES_USER: ${POSTGRES_USER}
      POSTGRES_PASSWORD: ${POSTGRES_PASSWORD}
    volumes:
      - postgres-db-volume:/var/lib/postgresql/data
    healthcheck:
      test: ["CMD-SHELL", "pg_isready -U airflow -d airflow"]
      interval: 10s
      timeout: 5s
      retries: 10

  redis:
    image: redis:7.4-alpine
    restart: unless-stopped
    env_file:
      - .env
    command: ["redis-server", "--appendonly", "yes", "--requirepass", "${REDIS_PASSWORD}"]
    volumes:
      - redis-data:/data
    healthcheck:
      test: ["CMD-SHELL", "redis-cli -a \"$${REDIS_PASSWORD}\" ping | grep PONG"]
      interval: 10s
      timeout: 5s
      retries: 10

  airflow-init:
    <<: airflow-common
    restart: "no"
    command:
      - bash
      - -c
      - |
        airflow db migrate
        airflow users create \
          --username "$${AIRFLOW_ADMIN_USERNAME}" \
          --firstname "$${AIRFLOW_ADMIN_FIRSTNAME}" \
          --lastname "$${AIRFLOW_ADMIN_LASTNAME}" \
          --role Admin \
          --email "$${AIRFLOW_ADMIN_EMAIL}" \
          --password "$${AIRFLOW_ADMIN_PASSWORD}" || true

  airflow-apiserver:
    <<: airflow-common
    command: api-server
    ports:
      - "127.0.0.1:8080:8080"
    healthcheck:
      test: ["CMD-SHELL", "curl --fail http://localhost:8080/api/v2/monitor/health || exit 1"]
      interval: 30s
      timeout: 10s
      retries: 5

  airflow-scheduler:
    <<: airflow-common
    command: scheduler

  airflow-dag-processor:
    <<: airflow-common
    command: dag-processor

  airflow-worker:
    <<: airflow-common
    command: celery worker
    stop_grace_period: 10m

  airflow-triggerer:
    <<: airflow-common
    command: triggerer

volumes:
  postgres-db-volume:
  redis-data:
EOF
Before starting, verify that Compose correctly substitutes variables and that the YAML contains no syntax errors.
cd /opt/airflow
docker compose config > /tmp/airflow-rendered.yml
docker compose build
docker compose up airflow-init

docker compose up -d
docker compose ps
On the first run, initialization may take several minutes. Check the scheduler and worker logs. All services must enter the running status, and PostgreSQL and Redis must enter healthy.
docker compose logs --tail=100 airflow-scheduler
docker compose logs --tail=100 airflow-worker
docker compose exec airflow-scheduler airflow version
docker compose exec airflow-scheduler airflow db check
Airflow, CeleryExecutor, and SSL Configuration
Test DAG
Let's create a minimal DAG that confirms the operation of the scheduler, Celery queue, and worker. It runs manually, so it does not create a constant load on the server. In Airflow 3, use the current SDK for DAG and task decorators.
cat > /opt/airflow/dags/healthcheck_dag.py <<'EOF'
from datetime import datetime
from airflow.sdk import dag, task

@dag(
    dag_id="healthcheck_celery",
    start_date=datetime(2025, 1, 1),
    schedule=None,
    catchup=False,
    tags=["system"],
)
def healthcheck_celery():
    @task
    def check_worker():
        return "CeleryExecutor worker completed the task successfully"

    check_worker()

healthcheck_celery()
EOF

cd /opt/airflow
docker compose restart airflow-scheduler airflow-dag-processor
Within 30–90 seconds, the DAG will appear in the interface. Before configuring SSL, you can check the API locally from the server. A 200 response code or a JSON structure with health components means that the API server is responding.
curl -fsS http://127.0.0.1:8080/api/v2/monitor/health | jq
docker compose exec airflow-scheduler airflow dags list | grep healthcheck_celery
Installing Caddy for HTTPS
Caddy automatically obtains and renews Let's Encrypt certificates. For this to work, the domain must already point to the server, and ports 80 and 443 must be open in UFW and at the provider panel level. Do not run another web server on these same ports.
sudo apt install -y debian-keyring debian-archive-keyring apt-transport-https

curl -1sLf 'https://dl.cloudsmith.io/public/caddy/stable/gpg.key' | \
  sudo gpg --dearmor -o /usr/share/keyrings/caddy-stable-archive-keyring.gpg

curl -1sLf 'https://dl.cloudsmith.io/public/caddy/stable/debian.deb.txt' | \
  sudo tee /etc/apt/sources.list.d/caddy-stable.list

sudo apt update
sudo apt install -y caddy
caddy version
Create a Caddyfile. Replace the domain and email. The headers below prevent embedding the interface in an iframe and disable browser MIME-type sniffing. Airflow remains on localhost, so Caddy is the only public entry point.
sudo tee /etc/caddy/Caddyfile > /dev/null <<'EOF'
{
    email [email protected]
}

airflow.example.com {
    encode zstd gzip

    reverse_proxy 127.0.0.1:8080

    header {
        X-Content-Type-Options "nosniff"
        X-Frame-Options "DENY"
        Referrer-Policy "strict-origin-when-cross-origin"
        -Server
    }

    log {
        output file /var/log/caddy/airflow-access.log
        format json
    }
}
EOF

sudo mkdir -p /var/log/caddy
sudo chown caddy:caddy /var/log/caddy
sudo caddy validate --config /etc/caddy/Caddyfile
sudo systemctl reload caddy
sudo systemctl enable caddy
Check certificate issuance and the reverse proxy. The response must contain the HTTP/2 200 status line or a redirect to the login page. If the certificate is not issued, first check DNS and external availability of port 80.
curl -I https://airflow.example.com
sudo journalctl -u caddy -n 100 --no-pager
sudo ss -tulpn | grep -E ':80|:443|:8080'
CeleryExecutor Parameters
The compose file sets parallelism=8, max_active_tasks_per_dag=4, and worker_concurrency=2. This is a safe starting point for a VPS with 4 vCPUs and 8 GB of RAM. The total number of concurrently running tasks is limited by the lowest of these values and the available number of worker slots.
Do not increase worker_concurrency just for a high number. If each task uses pandas, Selenium, Chrome, dbt, or several hundred megabytes of memory, two concurrent processes can already consume most of the RAM. First measure actual usage with docker stats, then increase values one parameter at a time.
cd /opt/airflow
docker stats --no-stream
docker compose exec airflow-worker celery --app airflow.providers.celery.executors.celery_executor.app inspect ping
Secure Storage of Connections
Do not write API keys, database DSNs, and passwords in DAG source code. For a small self-hosted instance, you can create Airflow Connections through the web interface: the values will be encrypted with the Fernet key in PostgreSQL. For a production environment, it is better to connect an external secrets backend: HashiCorp Vault, AWS Secrets Manager, Google Secret Manager, or a compatible corporate service.
If the Fernet key is lost, existing encrypted Connection and Variable values cannot be decrypted. Therefore, include the .env file in an encrypted backup, but do not store it in a public repository. When rotating the Fernet key, use the standard Airflow rotation command rather than simply replacing the variable.
Backups and Maintenance
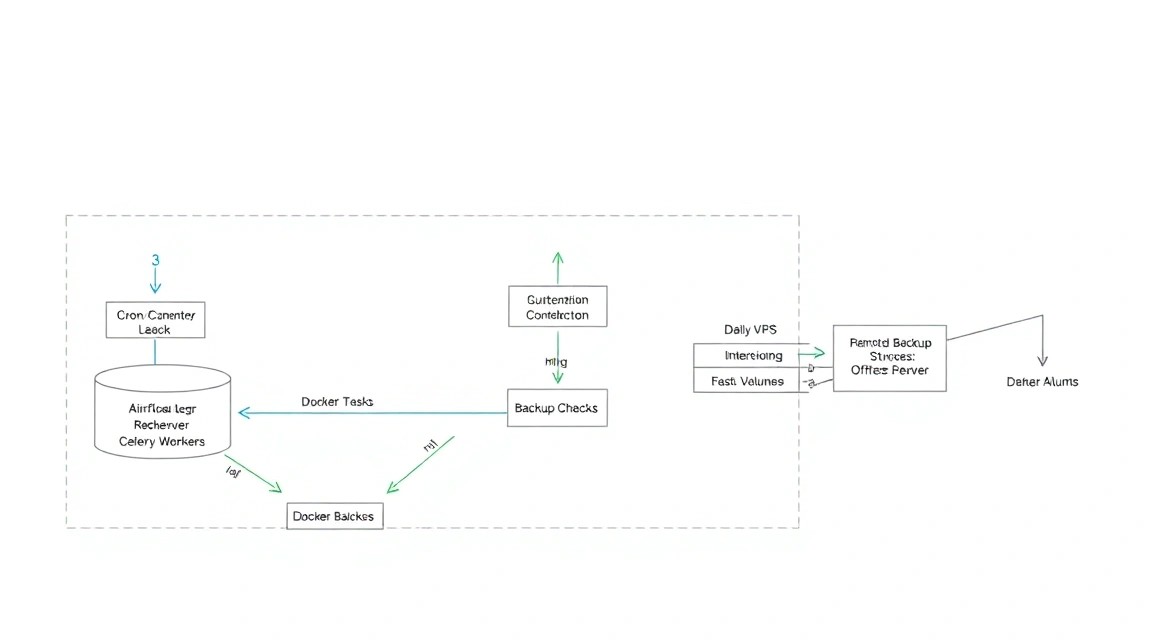
A Docker volume backup alone is not enough. To restore Airflow, you need the PostgreSQL database, DAG files, plugins, configuration, the .env file, and image version information. Redis is generally not the source of truth: unfinished queue messages may be lost, but task state and metadata are stored in PostgreSQL.
What needs to be backed up
- A logical PostgreSQL dump using
pg_dump. - The
dags,plugins,config, andscriptsdirectories. - The
.envfile with the Fernet key, API secret, and passwords. docker-compose.yml,Dockerfile, andrequirements.txt.- If necessary, the
logsdirectory, if logs are required for auditing. - The Caddy configuration from
/etc/caddy/Caddyfile.
For storage, we use restic—a tool for deduplicated encrypted backups. The repository can be located in S3-compatible object storage or on a separate server via SFTP. The S3 API option is shown below; access variables should have permissions only for the specific bucket.
Installing and configuring restic
sudo apt install -y restic

sudo mkdir -p /root/.config/restic
sudo chmod 700 /root/.config/restic

sudo tee /root/.config/restic/airflow.env > /dev/null <<'EOF'
export RESTIC_REPOSITORY="s3:https://s3.example.com/airflow-backups"
export RESTIC_PASSWORD="CHANGE_TO_A_LONG_RANDOM_RESTIC_PASSWORD"
export AWS_ACCESS_KEY_ID="CHANGE_ME"
export AWS_SECRET_ACCESS_KEY="CHANGE_ME"
EOF

sudo chmod 600 /root/.config/restic/airflow.env

sudo bash -c 'source /root/.config/restic/airflow.env && restic init'
The first run of restic init creates the repository. Store the repository password outside the server: in a secrets manager or offline storage. Encrypted backups cannot be restored without it.
Backup script
The script first creates a compressed PostgreSQL dump inside the container, then sends the data to restic. The dump is created in /opt/airflow/backups and automatically deleted after successful completion to avoid accumulating copies on the VPS.
sudo tee /opt/airflow/scripts/backup-airflow.sh > /dev/null <<'EOF'
#!/usr/bin/env bash
set -euo pipefail

AIRFLOW_DIR="/opt/airflow"
BACKUP_DIR="${AIRFLOW_DIR}/backups"
DATE="$(date +%F_%H-%M-%S)"
DUMP_FILE="${BACKUP_DIR}/postgres_${DATE}.dump.gz"

source /root/.config/restic/airflow.env

mkdir -p "${BACKUP_DIR}"
cd "${AIRFLOW_DIR}"

docker compose exec -T postgres \
  pg_dump -U airflow -d airflow --format=custom | gzip -9 > "${DUMP_FILE}"

restic backup \
  "${DUMP_FILE}" \
  "${AIRFLOW_DIR}/dags" \
  "${AIRFLOW_DIR}/plugins" \
  "${AIRFLOW_DIR}/config" \
  "${AIRFLOW_DIR}/scripts" \
  "${AIRFLOW_DIR}/docker-compose.yml" \
  "${AIRFLOW_DIR}/Dockerfile" \
  "${AIRFLOW_DIR}/requirements.txt" \
  "${AIRFLOW_DIR}/.env" \
  /etc/caddy/Caddyfile \
  --tag airflow \
  --tag postgres

restic forget --prune \
  --keep-daily 14 \
  --keep-weekly 8 \
  --keep-monthly 12

rm -f "${DUMP_FILE}"
EOF

sudo chmod 700 /opt/airflow/scripts/backup-airflow.sh
sudo /opt/airflow/scripts/backup-airflow.sh
After the first backup, verify its contents. The command should show DAG files, .env, Caddyfile, and the PostgreSQL dump. Once a month, perform a test restore on a separate server or in a separate directory—a backup that has not been tested is not considered reliable.
sudo bash -c 'source /root/.config/restic/airflow.env && restic snapshots'
sudo bash -c 'source /root/.config/restic/airflow.env && restic check'
Scheduling with cron
Run the backup at night, for example at 03:30. Cron redirects stdout and stderr to a separate log, which is useful when investigating an S3 access error or insufficient disk space.
sudo crontab -e

30 3   * /opt/airflow/scripts/backup-airflow.sh >> /var/log/airflow-backup.log 2>&1
Verify that cron is installed and active. If the server was powered off at the scheduled time, regular cron will not catch up on the missed task. For stricter requirements, replace cron with a systemd timer using Persistent=true.
sudo systemctl status cron
sudo tail -n 50 /var/log/airflow-backup.log
Updating Airflow and Docker images
For a single VPS, it is safer to use a maintenance window. First, read the changelog for the target Airflow version, create a fresh backup, and test the update on a staging server. An Airflow update may include a PostgreSQL schema migration, so rolling the container back to an earlier version after migration is not always safe.
cd /opt/airflow

docker compose pull postgres redis
docker compose build --pull

docker compose up -d --no-deps postgres redis
docker compose run --rm airflow-init

docker compose up -d
docker compose ps
docker compose logs --tail=100 airflow-scheduler
To update Airflow, change the tag in Dockerfile and the constraints URL to one specific tested version. Do not update PostgreSQL major versions by replacing the image tag: upgrading, for example, from PostgreSQL 16 to 17 requires a separate data migration procedure.
Troubleshooting and FAQ
Why does the Airflow API server keep restarting?
First, run docker compose logs airflow-apiserver and check whether database initialization has completed. A common cause is that the API server started before migration or cannot connect to PostgreSQL because of an incorrect password in .env. Check docker compose exec postgres pg_isready -U airflow -d airflow, then rerun docker compose run --rm airflow-init. Do not delete the PostgreSQL volume if it contains production data.
Why do tasks remain in the queued state and workers do not start them?
This usually indicates an issue with the Celery worker, Redis, or incompatible broker URL settings. Check the worker status using docker compose logs airflow-worker and make sure Redis responds to the redis-cli ping command inside the container. Also check that AIRFLOW__CELERY__BROKER_URL has the same value for the scheduler and worker. If the worker was stopped during a task, restart it; tasks with properly configured retries will be retried by the scheduler.
Why is a DAG not visible in the web interface?
Check the Python file syntax and the airflow-dag-processor service logs. An import error for a library missing from the Dockerfile makes the DAG invisible or marks it as broken. Run docker compose exec airflow-scheduler airflow dags list-import-errors. Also make sure the file is located in /opt/airflow/dags, has the .py extension, and is accessible to the container user.
Why is Caddy not obtaining an SSL certificate?
Check that the domain's A record points to the VPS IP and that ports 80 and 443 are accessible from the internet. The sudo ss -tulpn command should show Caddy on these ports. If Nginx or Apache was previously installed, stop it or reconfigure it. View errors using sudo journalctl -u caddy -n 100. Cloudflare and other DNS proxies can also affect validation; for diagnostics, temporarily use a regular DNS record.
What is the minimum suitable VPS configuration?
For testing and several lightweight DAGs, 2 vCPU, 4 GB RAM, and 50 GB SSD are sufficient at minimum. However, for production Airflow with PostgreSQL, Redis, and CeleryExecutor, it is better to start with 4 vCPU, 8 GB RAM, and 80–100 GB NVMe. Keep at least 20–30% of disk space free for logs, Docker images, temporary files, and database dumps. If tasks use pandas or browser automation, increasing RAM is more important.
What should I choose for this task—VPS or dedicated?
A VPS is suitable for most small and medium Airflow deployments: schedules, API integrations, moderate-volume ETL, and several worker processes. A dedicated server is needed for sustained CPU load, large volumes of local data, memory requirements of 32 GB or more, GPU tasks, or consistently high disk performance requirements. An alternative approach is to keep Airflow on a VPS and send heavy computations to external Kubernetes jobs, Spark, cloud batch services, or separate workers.
What should I do if the server runs out of memory and containers receive OOMKilled?
Run docker stats --no-stream, free -h, and dmesg -T | grep -i oom to identify the culprit. Most often, memory is consumed by a Python task rather than the scheduler itself. Reduce AIRFLOW__CELERY__WORKER_CONCURRENCY to 1, limit the number of parallel tasks, and add RAM. Swap can temporarily protect against crashes, but it does not replace memory: intensive swap usage makes the scheduler unstable.
How do I restore Airflow from a backup after losing the server?
On the new server, install Docker and restic, restore the files from the repository to /opt/airflow, then start only PostgreSQL. Extract the PostgreSQL dump and import it into an empty database using pg_restore. After that, start airflow-init, then the remaining services. It is important to restore the original .env with the same Fernet key: without it, saved connections and variables cannot be decrypted.
Conclusions and Next Steps
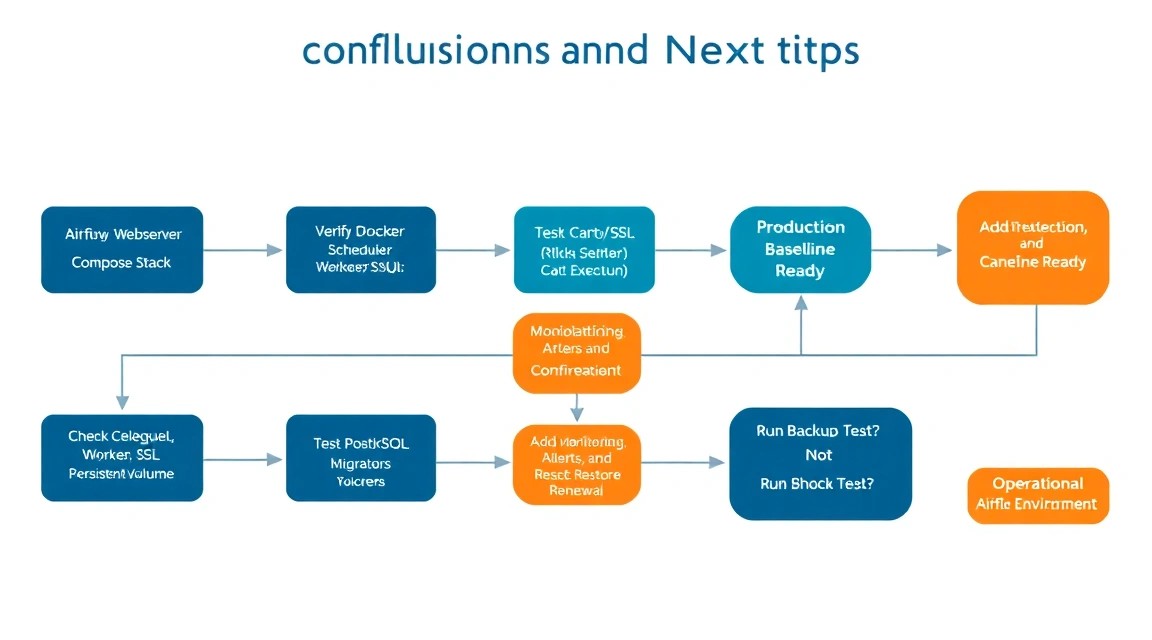
A production-oriented Apache Airflow deployment is now running on the VPS: PostgreSQL stores metadata, Redis serves CeleryExecutor, separate worker containers execute DAGs, and Caddy protects the interface with an HTTPS certificate. The configuration does not expose internal services to the internet and includes backups of critical data.
- Move DAGs to a Git repository and configure CI checks for imports, linters, and tests before deploying files to the server.
- Connect an external secrets backend if production API keys, tokens, and database credentials are added to Airflow.
- As the load grows, move Celery workers to separate servers, configure remote logging to object storage, and add monitoring through Prometheus, Grafana, or an external alerting service.