
Dokploy on a VPS: Your Own Vercel/Heroku for Deployments from GitHub
TL;DR
Dokploy turns a regular VPS into your own deployment platform: you connect a GitHub repository, set a domain and environment variables, and then get automatic builds, HTTPS, and application publishing after every push to the selected branch.
- For small projects, a VPS with 2 vCPU, 4 GB RAM, and a 50–80 GB NVMe disk is sufficient.
- Dokploy is installed on top of Docker and Docker Swarm with a single official command.
- Stable operation requires DNS records for the dashboard and every published application.
- GitHub can be connected through a GitHub App, webhook, or SSH key for private repositories.
- HTTPS is usually issued by the built-in Traefik via Let’s Encrypt; a separate Caddy alongside Dokploy is unnecessary and may conflict on ports 80 and 443.
- You need to back up not only the code, but also the Dokploy configuration, Docker volumes, databases, and secrets.
What We Are Setting Up and Why
Dokploy is a self-hosted PaaS dashboard for deploying applications to your own server. Its approach resembles Vercel, Heroku, Railway, Render, or Coolify: instead of connecting to the server via SSH after every change, the developer pushes to GitHub. The platform retrieves the code, builds the container, launches it, connects the domain, and proxies traffic through HTTPS.
This guide will configure a single VPS with Dokploy, a domain name for the dashboard, GitHub integration, and the first application. A typical Node.js application is used as an example, but the principle is the same for Python, Go, PHP, Ruby, Next.js, NestJS, Django, FastAPI, Laravel, static sites, and Docker Compose projects.
What You Will Get
After setup, you will have a server where you can create projects and services through the Dokploy web interface. Each service can be built from a GitHub repository, run in a Docker container, receive environment variables, domains, TLS certificates, and logs. You can launch PostgreSQL, Redis, MySQL, MongoDB, or a Docker Compose stack alongside the application for individual projects.
- The Dokploy dashboard will be available, for example, at
https://deploy.example.com. - The application will be automatically published after a push to the
mainbranch. - Secrets will be stored in the service settings rather than in the repository.
- Traffic on ports 80 and 443 will be handled by Dokploy's built-in reverse proxy.
- Deployments can be rolled back through the deployment history or by rerunning a previous commit.
- Data and configuration will be regularly sent to external backup storage.
How Deployment Works
Dokploy uses Docker as the runtime environment and Docker Swarm as the orchestrator, even on a single server. During deployment, the platform retrieves the source code from GitHub and then proceeds in one of two ways: it builds an image using your Dockerfile or applies automatic building through Nixpacks. After a successful build, the container is connected to the internal network, and Traefik routes requests to it by domain name.
For production projects, it is preferable to keep your own Dockerfile in the repository. It makes builds reproducible: the same image can be run locally, on a staging server, and in production. The automatic builder is convenient for prototypes, but an explicit Dockerfile is easier to maintain with non-standard system libraries, a monorepo, background workers, or a complex build process.
Self-Hosted or Managed Platform
| Criterion | Managed PaaS | Dokploy on a VPS |
|---|---|---|
| Initial setup | Minimal | You need to prepare the server, DNS, and backups |
| Infrastructure control | Limited by the plan and platform rules | Full control over Docker, networking, logs, and data |
| Cost | Grows with the number of services, traffic, and databases | Fixed VPS cost until resources are exhausted |
| Server access | Often unavailable or limited | Root access and diagnostic capabilities are available |
| Updates and security | Mostly the provider's responsibility | The server owner's responsibility |
| Suitable use case | Fast launch without administration | Multiple services, data control, and a predictable budget |
Self-hosted Dokploy is especially useful for a solo founder, a small team, or an agency that maintains several applications. One server can host the dashboard, API, frontend, worker, PostgreSQL, Redis, and several staging environments. At the same time, it is important not to confuse the convenience of PaaS with the absence of operations: the server still needs to be updated, monitored, and backed up.
Dokploy does not replace application architecture. If a single VPS fails, all services on it become unavailable. This is often acceptable for the first production stage, but the database and configuration must have external backups from day one.
What VPS Configuration Is Needed for This Task
Dokploy itself does not require many resources, but the server simultaneously runs Docker, Docker Swarm, a reverse proxy, image builders, temporary containers, and your applications. The main mistake when choosing a VPS is counting only the application's memory requirements and forgetting about Docker image builds, cache, the database, logs, and the file system.
Minimum and Recommended Configuration
| Scenario | CPU | RAM | NVMe disk | Network | What It Can Host |
|---|---|---|---|---|---|
| Test environment | 1 vCPU | 2 GB | 30–40 GB | 100 Mbps | Dashboard and one lightweight application without a heavy database |
| Minimum production | 2 vCPU | 4 GB | 50–80 GB | 100 Mbps or 1 Gbps | Dashboard, 2–5 small services, PostgreSQL or Redis |
| Multiple SaaS services | 4 vCPU | 8 GB | 160 GB NVMe | 1 Gbps | Multiple applications, workers, staging, and databases |
| Intensive builds | 8 vCPU | 16 GB | 300+ GB NVMe | 1 Gbps | Monorepos, SSR, frequent CI/CD builds, multiple environments |
For the first working server, a sensible starting point is 2 vCPU, 4 GB RAM, 80 GB NVMe, and a public IPv4 address. This configuration is sufficient for Dokploy, a couple of Node.js or Python services, PostgreSQL with moderate load, and Redis. If the database actively writes data, the disk matters more than the nominal number of cores: choose NVMe rather than a slow HDD.
As a neutral option, you can choose a VPS with the specified characteristics and then increase CPU, RAM, or disk capacity once actual load appears. Before ordering, verify that the server has a dedicated public IPv4 address, SSH access, the ability to configure reverse DNS if necessary, and a sufficient outbound traffic limit.
How Much Space You Really Need
Docker images and build cache consume disk space unnoticed. For example, an application weighing 300 MB can leave behind 2–5 GB of old layers, intermediate images, and cache after several updates. PostgreSQL, user-uploaded files, logs, and backups increase the requirement even further.
Do not fill the system disk beyond 75–80%. When Docker or PostgreSQL cannot write data because the disk is full, the application may start returning errors, and recovery will take longer than a regular upgrade to a larger plan. Check df -h and docker system df at least once a week.
When You Need Dedicated Instead of a VPS
A VPS is suitable for nearly all early SaaS projects, internal dashboards, landing pages, APIs, and a small customer base. A dedicated server becomes justified when the performance of neighboring virtual machines is unacceptable, a large local NVMe array is required, CPU load is consistently high, or the database performs a large number of write operations.
- You need dedicated hosting if PostgreSQL constantly uses more than 8–12 vCPU or requires hundreds of gigabytes of fast data storage.
- You need dedicated hosting if you build large Docker images dozens of times a day and builds interfere with production traffic.
- You need dedicated hosting if dozens of high-load clients run on a single node.
- You need dedicated hosting if specific RAID configurations, local backup disks, or guaranteed IOPS are required.
- A VPS remains the best choice if ease of scaling is more important and you do not yet know the actual load profile.
How to Choose a Location
Server location affects latency, data storage requirements, and traffic costs. If your audience is in Europe, a server in a European data center will usually provide 20–80 ms latency. For users in a single region, choose the closest location, but do not place the only backup in the same data center: a fire, account error, or network incident should not destroy production and its copy at the same time.
If the application processes personal data, consider the legal requirements of the country, client agreements, and cross-border data transfer rules. For the technical side, IPv6 availability, DDoS protection, port speed, and the ability to expand disk capacity without reinstalling the OS are also important.
Server Preparation
This guide assumes a fresh VPS with Ubuntu Server 24.04 LTS x86_64. As of 2026, this is a convenient, stable base with supported packages, an up-to-date kernel, and a long security update lifecycle. Commands are executed as root only during the initial connection; afterward, a separate user deploy with sudo privileges is used.
Connect and update the system
First, log in to the server using the IP address provided by your provider. If you use the root password, replace it with an SSH key before opening the Dokploy panel.
ssh root@SERVER_IPThe command creates an SSH session with the new server.
apt update && apt upgrade -y && apt autoremove -yThe command installs all available security updates and removes unnecessary dependencies.
timedatectl set-timezone Europe/MoscowThe command sets the time zone; specify your region so that logs, cron jobs, and deployment times are clear.
Create an administration user
Do not work permanently as root. A separate user reduces the risk of accidentally deleting system files or executing a dangerous command from an instruction. Dokploy and Docker will still run containers with elevated privileges at the host level, so access to sudo and Docker should be granted only to administrators.
adduser deploy
usermod -aG sudo deploy
The commands create the user deploy and add it to the sudo group.
mkdir -p /home/deploy/.ssh
chmod 700 /home/deploy/.ssh
nano /home/deploy/.ssh/authorized_keys
The commands create a directory for SSH keys. Paste the public key from your computer into the file, usually the contents of the file ~/.ssh/id_ed25519.pub.
chown -R deploy:deploy /home/deploy/.ssh
chmod 600 /home/deploy/.ssh/authorized_keys
The commands assign ownership and secure access permissions to the key.
Do not close the current root session until you have tested the new login in a separate terminal window.
ssh deploy@SERVER_IPThe command verifies that logging in as the new user with the key actually works.
Disable password login and root SSH
After a successful check, change the SSH settings. Do not perform this step before adding a working key, otherwise you may lose access to the server and have to use VNC or rescue mode provided by your provider.
sudo nano /etc/ssh/sshd_config.d/99-hardening.confThe command opens a separate SSH configuration file without modifying the package's default file.
PermitRootLogin no
PasswordAuthentication no
KbdInteractiveAuthentication no
PubkeyAuthentication yes
X11Forwarding no
MaxAuthTries 3
These parameters prohibit root login and password authentication, leaving only SSH keys.
sudo sshd -t && sudo systemctl restart sshThe command first checks the configuration syntax, then restarts SSH only if there are no errors.
Install basic utilities and protection against password-guessing attacks
sudo apt install -y ca-certificates curl gnupg git jq unzip vim htop \
  ufw fail2ban dnsutils rsync cron
The command installs utilities for downloading packages, working with Git, DNS checks, backups, monitoring, and the firewall.
sudo systemctl enable --now fail2banThe command enables Fail2ban, which monitors suspicious login attempts and temporarily blocks IP addresses.
Configure the firewall before installing Dokploy
Dokploy must accept web traffic on ports 80 and 443. Port 22 is required for SSH. Initially, the panel is usually available on port 3000, so during the first login you can open it only from your public IP. If your IP changes, temporarily open port 3000 to everyone, create an account, and then close the port after configuring the domain and HTTPS.
sudo ufw default deny incoming
sudo ufw default allow outgoing
sudo ufw allow 22/tcp
sudo ufw allow 80/tcp
sudo ufw allow 443/tcp
sudo ufw allow from YOUR_PUBLIC_IP to any port 3000 proto tcp
sudo ufw enable
The commands deny all incoming traffic by default and open only SSH, HTTP, HTTPS, and panel access from your IP.
sudo ufw status numberedThe command displays the active rules and allows you to verify that the firewall has not blocked the required ports.
For a single-node Docker Swarm, you generally do not need to expose inter-node communication ports to the outside. If you later add worker nodes, TCP 2377, TCP/UDP 7946, and UDP 4789 will be required between trusted nodes. Do not open them to the entire internet: restrict the rules to the cluster IP addresses or private network.
Prepare DNS before installation
Create an A record for the panel, for example deploy.example.com, pointing to the server's IPv4 address. For applications, you can create separate A records, such as api.example.com and app.example.com. If your DNS provider supports wildcards, it is convenient to create the record .apps.example.com, but this is not required for the initial launch.
dig +short deploy.example.com AThe command checks that the domain name already returns your VPS's public IP.
Do not enable CDN proxying before issuing the first certificate if you do not understand its TLS modes. HTTPS often breaks when the CDN connects to the origin over HTTP. First obtain a working certificate directly through Dokploy, then enable the external proxy in full encryption mode if necessary.
Software Installation — Step by Step
The official Dokploy installer deploys the required Docker components, initializes Docker Swarm, and starts the panel services. In practice, Dokploy is developing rapidly, so before a production installation it is useful to read the script output and record the installation date in the change log. Do not run unverified curl commands as root on a server that already has critical services running.
Check resources and the absence of conflicts
free -h
df -h /
nproc
sudo ss -ltnp | grep -E ':(80|443|3000)\s' || true
The commands show the amount of memory, available disk space, number of CPUs, and processes that have already occupied ports 80, 443, or 3000.
If Nginx, Apache, Caddy, Traefik, or another Docker PaaS is already running on the server, do not install Dokploy over it without a migration plan. Dokploy's built-in ingress must be able to listen on ports 80 and 443. Port conflicts are one of the most common causes of panel and application unavailability.
Install Dokploy using the official script
curl -sSL https://dokploy.com/install.sh -o /tmp/dokploy-install.sh
less /tmp/dokploy-install.sh
The commands download the official install script to a temporary file and allow you to review it before execution.
sudo sh /tmp/dokploy-install.shThe command runs the official Dokploy installer, which installs the Docker components and deploys the platform.
On a fresh Ubuntu installation, the installer usually completes the deployment within a few minutes. Do not reboot the VPS during installation or interrupt the process. If the system reports a Docker package conflict, first remove old test installations of Docker, Docker Compose, or the conflicting reverse proxy, after saving any required data.
Check Docker and Docker Swarm
sudo docker version
sudo docker info --format '{{.ServerVersion}}'
sudo docker node ls
The commands confirm that Docker Engine is working, display the daemon version, and verify that the current server is an active Swarm manager node.
As of 2026, use the current supported Docker Engine from the official installation channel and the current stable Dokploy release. Do not use outdated instructions that suggest Docker Engine 20.x or early compose files without verification: they may conflict with modern Ubuntu packages and Dokploy requirements.
sudo docker service ls
sudo docker ps --format 'table {{.Names}}\t{{.Image}}\t{{.Status}}'
The commands display Docker Swarm services and running Dokploy containers.
Open the panel for the first time
After installation, open http://SERVER_IP:3000 in a browser, or http://deploy.example.com:3000 if DNS has already propagated. On the first login, create an administrator account with a unique, long password. Use a password manager for the password rather than a secret from a repository or chat.
If port 3000 is open only to your IP through UFW but the browser cannot connect, first check your current public IP. Corporate VPNs, mobile internet, and home providers can change it during the day.
curl -I http://127.0.0.1:3000The command checks the panel's local availability on the server; a response of 200, 301, 302, or 401 usually means that the service is responding.
Take the first technical snapshot of the system state
sudo mkdir -p /root/server-inventory
sudo docker service ls > /root/server-inventory/docker-services-initial.txt
sudo docker volume ls > /root/server-inventory/docker-volumes-initial.txt
sudo docker network ls > /root/server-inventory/docker-networks-initial.txt
The commands save the initial list of Docker services, volumes, and networks, which helps with troubleshooting and backup configuration.
Add the user to the Docker group only if necessary
For most Dokploy operations, Docker access from a regular console is not required: use sudo docker. If you nevertheless add the user deploy to the docker group, remember that this is practically equivalent to root access: through Docker, it is possible to mount the host filesystem or run a privileged container.
sudo usermod -aG docker deployThe command gives the user deploy access to Docker without sudo; log out of SSH and connect again for the group membership to take effect.
Check automatic startup after a reboot
sudo rebootThe command reboots the server and checks that Docker, Swarm, and Dokploy services start correctly after the restart.
After logging in again, wait one or two minutes and perform the check.
sudo systemctl is-active docker
sudo docker service ls
curl -I http://127.0.0.1:3000
The commands confirm that Docker is active, Swarm services are running, and the panel is responding locally.
Dokploy, GitHub, and HTTPS Configuration
After the basic installation, do not rush to deploy production code. First set the panel address, check DNS, configure HTTPS, and decide how Dokploy will read GitHub repositories. For a public repository, an HTTPS clone URL is sufficient, but a private repository requires a GitHub App, a personal token with minimal permissions, or a deploy key.
Configure the panel domain and HTTPS
In the Dokploy interface, open the panel’s general settings and specify the domain, for example deploy.example.com. Make sure the A record already points to the VPS IP and that ports 80 and 443 are accessible from outside. Then enable automatic TLS through the built-in Traefik and Let’s Encrypt.
Dokploy uses the built-in Traefik for reverse proxying and certificates. Therefore, do not install Caddy, Nginx, or certbot in standalone mode on the same server without an explicit need: all of these tools compete for ports 80 and 443. For Dokploy, the correct approach is to enable built-in TLS in the service domain settings; Traefik will perform the HTTP-01 challenge and automatically renew the certificate.
If you have corporate DNS, a closed port 80, or a complex CDN setup, use a DNS challenge only after understanding the DNS API integration. In a standard configuration, it is easier to open 80/443 and let Let’s Encrypt verify the domain directly. You can check public HTTPS after the certificate is issued.
curl -I https://deploy.example.com
openssl s_client -connect deploy.example.com:443 -servername deploy.example.com < /dev/null 2>/dev/null | \
  openssl x509 -noout -issuer -dates -subject
The commands check the panel’s HTTP response and output the issuer, validity period, and name of the TLS certificate.
Connect GitHub securely
For a team, a GitHub App is the most convenient option: it gives Dokploy access only to selected repositories and allows it to receive push events. Create a GitHub App in your organization or personal account settings, specify the callback URL and webhook URL shown by the Dokploy interface, and grant the minimum permissions required to read repository contents and metadata.
If a GitHub App is not needed yet, use a deploy key for one private repository. This is an SSH key without permissions for the entire account, which can be revoked separately. Do not use the server administrator’s personal SSH key as a GitHub key.
Generate a separate key on the server or in an isolated administrative environment:
sudo -u deploy ssh-keygen -t ed25519 -C "dokploy-github-readonly" \
  -f /home/deploy/.ssh/dokploy_github_ed25519 -N ""
The command creates a separate pair of Ed25519 keys without a passphrase for a read-only deploy key.
sudo cat /home/deploy/.ssh/dokploy_github_ed25519.pubThe command outputs the public part of the key, which must be added to GitHub in the Deploy keys section of the specific repository.
In GitHub, open Repository Settings → Deploy keys → Add deploy key, paste the public key, and do not enable Allow write access unless the application needs to write to the repository. In Dokploy, add the SSH private key through the project interface or use a GitHub App. Do not copy the private key into a Dockerfile, source code, or variables visible to application users.
Prepare the application for container deployment
Below is a minimal example of a Node.js service. Repository structure:
my-service/
├── Dockerfile
├── .dockerignore
├── package.json
├── package-lock.json
└── src/
    └── server.js
The Dockerfile must explicitly declare the working directory, production dependencies, port, and healthcheck. Do not place the .env file, SSH keys, node_modules directories, or local build artifacts in the image.
FROM node:22-alpine

WORKDIR /app

COPY package.json package-lock.json ./
RUN npm ci --omit=dev

COPY src ./src

ENV NODE_ENV=production
ENV PORT=3000

EXPOSE 3000

HEALTHCHECK --interval=30s --timeout=5s --start-period=20s --retries=3 \
  CMD node -e "fetch('http://127.0.0.1:3000/health').then(r => process.exit(r.ok ? 0 : 1)).catch(() => process.exit(1))"

CMD ["node", "src/server.js"]
This Dockerfile builds a production image based on Node.js 22 LTS, exposes port 3000, and checks the /health endpoint.
node_modules
.git
.env
.env.
npm-debug.log
coverage
dist
Dockerfile
docker-compose.yml
This is an example of the contents of .dockerignore; it excludes unnecessary and sensitive files from the Docker build context.
import http from "node:http";

const port = Number(process.env.PORT || 3000);
const appName = process.env.APP_NAME || "my-service";

const server = http.createServer((req, res) => {
  if (req.url === "/health") {
    res.writeHead(200, { "Content-Type": "application/json" });
    return res.end(JSON.stringify({ status: "ok" }));
  }

  res.writeHead(200, { "Content-Type": "application/json" });
  res.end(JSON.stringify({ service: appName, environment: process.env.NODE_ENV }));
});

server.listen(port, "0.0.0.0", () => {
  console.log(${appName} listens on ${port});
});
This is a minimal server with a /health endpoint that can be used to check container availability.
Create a service in the Dokploy interface
- Create a new Project, for example
productionormy-saas. - Add an Application inside the project.
- Select GitHub as the source and specify the repository.
- Specify the
mainbranch or a separateproductionbranch. - Select build type
Dockerfileif the Dockerfile is located in the repository root. - Specify the application’s internal port
3000. - Add a domain, for example
api.example.com. - Enable HTTPS and automatic certificate issuance.
- Save the settings and click Deploy.
In Dokploy, the internal port is the port that the application listens on inside the container. It does not need to be opened in UFW: external traffic should go through Traefik on 80/443. If you expose the container port directly to the outside, you bypass TLS, routing, and some of the platform’s security mechanisms.
Pass secrets through environment variables
In the application settings, find the Environment Variables section and add the variables one by one. In production, do not store real keys in the .env file inside the GitHub repository. For local development, an .env.example file without secret values is acceptable.
NODE_ENV=production
APP_NAME=my-production-api
DATABASE_URL=postgresql://app_user:CHANGE_ME@postgres:5432/app_db
REDIS_URL=redis://redis:6379
JWT_SECRET=replace-with-a-random-64-character-secret
SENTRY_DSN=https://[email protected]/1
This is an example of environment variables for a production service. The values of DATABASE_URL, JWT_SECRET, and API keys must be unique and must not be committed to Git.
openssl rand -base64 48The command generates a random string suitable for a session secret, JWT, or internal application key.
After changing environment variables, a Redeploy is usually required because the container receives the variables at startup. For databases, create a separate user for each application instead of using the PostgreSQL superuser. This reduces the damage in the event of a single connection string leak.
Configure automatic deployment from GitHub
Automatic deployment starts through a webhook after a push. In Dokploy, enable automatic deployment for the required branch. When using a GitHub App, the webhook is usually created through the integration. For manual configuration, add a webhook in GitHub under Settings → Webhooks, specify the URL shown by Dokploy, select the push event, and set a webhook secret.
The webhook secret must match in GitHub and Dokploy. It protects the endpoint from arbitrary requests that could initiate a deployment. Do not use the same secret for all repositories.
For testing, make a harmless commit:
git checkout main
git pull --ff-only
git commit --allow-empty -m "chore: test Dokploy deployment"
git push origin main
The commands create an empty commit and push it to the branch to check the webhook and automatic build without changing the source code.
Open the deployment history in Dokploy. A successful run should go through the clone, build, deploy, and healthcheck stages. If the build succeeds but the domain returns 502, the problem is almost always an incorrect internal port, an application listening only on 127.0.0.1, or an unready dependency such as PostgreSQL.
Check the application from outside and inside the container
curl -i https://api.example.com/healthThe command checks that the application’s public domain responds over HTTPS and returns status 200.
sudo docker service ls
sudo docker service ps --no-trunc SERVICE_NAME
sudo docker service logs --tail 100 SERVICE_NAME
The commands show the service status, the detailed reason for a failed task startup, and the last 100 lines of logs.
Take the SERVICE_NAME from the output of docker service ls. In Docker Swarm, the actual name may contain a project prefix. Do not remove services with the docker service rm command if they are managed by Dokploy: the panel will lose the expected state. For a managed application, use Redeploy, Stop, Restart, or Delete through the interface.
Backups and maintenance
GitHub stores code, but it does not store application data, Docker volumes, user-uploaded files, Dokploy configuration, or secrets. Therefore, a repository cannot be considered a production backup. The minimum strategy is a daily automated backup to external S3-compatible storage or a separate VPS, along with periodic recovery testing.
What needs to be backed up
| Data | Why it is needed | Copy method |
|---|---|---|
| Dokploy configuration | Projects, settings, domains, integrations, and metadata | Archive configuration directories after verifying their location |
| PostgreSQL/MySQL | Core application data | Logical dump using pg_dump or mysqldump |
| Docker volumes | Uploads, persistent data, Redis persistence, and service data | Archiving after shutdown or a disk-level snapshot |
| Environment variables and secrets | Without them, the service cannot be restored quickly | Encrypted password manager or protected offline document |
| System settings | SSH, UFW, cron, DNS notes, monitoring configuration | /etc archive and an infrastructure repository without secrets |
Before writing a script, find the actual Docker volumes and containers on your server. Names depend on the Dokploy version, project names, and how the database was created. Do not assume that a volume is necessarily named postgres_data.
sudo docker volume ls
sudo docker ps -a --format 'table {{.Names}}\t{{.Image}}\t{{.Mounts}}'
sudo find /etc -maxdepth 2 -iname 'dokploy' -print
The commands show volumes, container mounts, and possible Dokploy configuration directories.
Install Restic for external backups
Restic encrypts archives on the server before sending them to remote storage. An S3-compatible bucket, Backblaze B2 through a compatible API, separate storage, or a second VPS with SFTP will work. Do not keep the only copy on the same disk where Docker and the database are running.
sudo apt install -y resticThe command installs Restic from the Ubuntu repository.
sudo install -m 700 -d /root/.config/restic
sudo nano /root/.config/restic/dokploy-backup.env
The commands create a protected directory and open a file with access parameters for external S3 storage.
export RESTIC_REPOSITORY="s3:https://s3.example-storage.invalid/dokploy-prod"
export RESTIC_PASSWORD="CHANGE_TO_A_LONG_UNIQUE_RESTIC_PASSWORD"
export AWS_ACCESS_KEY_ID="S3_ACCESS_KEY"
export AWS_SECRET_ACCESS_KEY="S3_SECRET_KEY"
This is an example of the /root/.config/restic/dokploy-backup.env file; replace the values with real ones and restrict access permissions.
sudo chmod 600 /root/.config/restic/dokploy-backup.env
sudo bash -c 'source /root/.config/restic/dokploy-backup.env && restic snapshots || restic init'
The commands protect the file from other users and either display existing snapshots or initialize a new encrypted repository.
Create a daily backup script
The script below creates a logical PostgreSQL dump from a container, archives system settings, and sends them to Restic. Replace POSTGRES_CONTAINER, POSTGRES_USER, and POSTGRES_DB with actual values. For a database created through Dokploy, you can view them in the service settings and through docker ps.
sudo nano /usr/local/sbin/backup-dokploy.shThe command creates the backup script file.
#!/usr/bin/env bash
set -euo pipefail

source /root/.config/restic/dokploy-backup.env

BACKUP_DIR="/var/backups/dokploy"
STAMP="$(date +%F_%H-%M-%S)"
POSTGRES_CONTAINER="POSTGRES_CONTAINER"
POSTGRES_USER="POSTGRES_USER"
POSTGRES_DB="POSTGRES_DB"

mkdir -p "${BACKUP_DIR}/postgres"

docker exec "${POSTGRES_CONTAINER}" \
  pg_dump -U "${POSTGRES_USER}" -d "${POSTGRES_DB}" -Fc \
  > "${BACKUP_DIR}/postgres/${POSTGRES_DB}_${STAMP}.dump"

tar -czf "${BACKUP_DIR}/system_${STAMP}.tar.gz" \
  /etc/ssh \
  /etc/ufw \
  /etc/fail2ban \
  /etc/crontab \
  /root/server-inventory 2>/dev/null || true

restic backup "${BACKUP_DIR}" /etc/dokploy \
  --tag dokploy \
  --tag "$(hostname)"

restic forget --keep-daily 7 --keep-weekly 4 --keep-monthly 6 --prune

find "${BACKUP_DIR}" -type f -mtime +3 -delete
The script creates a PostgreSQL dump, archives important system settings, sends data to Restic, applies the retention policy, and removes old local temporary files.
If the /etc/dokploy directory is absent in your installation, remove it from the restic backup command and add the actual path found on the server. Before automating, run the script manually and verify that it completes without errors.
sudo chmod 700 /usr/local/sbin/backup-dokploy.sh
sudo /usr/local/sbin/backup-dokploy.sh
sudo bash -c 'source /root/.config/restic/dokploy-backup.env && restic snapshots'
The commands assign secure permissions, run the first backup, and display the created snapshots.
Add a cron schedule
sudo crontab -eThe command opens root crontab for scheduled backup execution.
20 3 * /usr/local/sbin/backup-dokploy.sh >> /var/log/dokploy-backup.log 2>&1This cron job runs the backup every day at 03:20 and saves the output to a log.
For a production database, a logical dump is preferable to simply copying a volume file while PostgreSQL is running. A file copy of an active database may be inconsistent. For large databases, consider replication, WAL archiving, a storage-level snapshot, or a managed database separate from the VPS with Dokploy.
Test recovery, not just backup availability
Once a month, restore at least one PostgreSQL dump to a test database on a separate server or in an isolated container. A backup without recovery testing is only hope. Also make sure that the Restic password is not stored only in a file on the production server: save it in a password manager or protected emergency kit.
source /root/.config/restic/dokploy-backup.env
restic restore latest --target /tmp/dokploy-restore-test
find /tmp/dokploy-restore-test -maxdepth 3 -type f | head
The commands restore the latest snapshot to a temporary directory and display the first restored files.
Dokploy, Docker, and system updates
There are two types of updates. Small application changes can usually be deployed through Dokploy with a rolling deployment: the new version starts, passes its healthcheck, and then traffic is switched. Updates to the platform itself, Docker Engine, the Ubuntu kernel, and the database schema are best performed during a maintenance window, when there is a recent backup and an opportunity to check services after rebooting.
- Check service status and available disk space.
- Create an unscheduled backup and verify that the snapshot appears in remote storage.
- Read Dokploy and Docker release notes for breaking changes.
- If possible, update the staging server first.
- Update Dokploy using the standard method provided by the current panel version.
- Check the panel, one critical domain, logs, and Swarm status.
sudo apt update
apt list --upgradable
sudo docker service ls
sudo docker system df
The commands show available OS updates, service status, and Docker disk usage before work begins.
Do not regularly run docker system prune -a --volumes through cron without understanding the consequences. This command can remove unused volumes, build cache, and images that may be needed for a quick rollback. It is safer to first use docker system df, remove clearly unnecessary old images, and retain several recent working versions of critical services.
Troubleshooting + FAQ
Why does the Dokploy panel not open on port 3000?
First, check that Docker is active: sudo systemctl status docker. Then run sudo docker service ls and curl -I http://127.0.0.1:3000. If local curl works but the browser cannot connect, the issue is almost certainly with UFW, the provider's external firewall, or restricting access to port 3000 by your IP. Check sudo ufw status numbered and make sure you are connecting from an allowed address. After moving the panel to an HTTPS domain, it is best to close external port 3000.
Why does Let’s Encrypt not issue a certificate for the domain?
Check DNS with dig +short your-domain.example A: it must return the IP of this specific VPS. Then make sure ports 80 and 443 are accessible externally and that another Nginx, Apache, or Caddy is not listening on them. The error often occurs because of an enabled CDN proxy, an incorrect IPv6 AAAA record, or a recent DNS change that has not yet propagated. Check Traefik logs and deployment logs in Dokploy. Do not request a certificate dozens of times in a row: Let’s Encrypt has attempt limits.
The deployment completed successfully, but the domain returns 502 Bad Gateway. What should I do?
A 502 error means that the reverse proxy cannot get a valid response from the application. Check the internal port in Dokploy settings: it must match the port the process listens on inside the container. The application must listen on 0.0.0.0, not only on 127.0.0.1. Check sudo docker service logs --tail 100 SERVICE_NAME; often the process terminated because of a missing DATABASE_URL variable, a database migration, or a Redis connection error.
Why can Dokploy not clone a private GitHub repository?
Check the authentication method: the GitHub App must be installed specifically for the required repository, and the deploy key must be added to the settings of the specific repository. With SSH authentication, compare the private key in Dokploy with the public key in GitHub. Do not enable write access if the service only reads code. Also make sure that the clone URL matches the selected method: an SSH URL starts with [email protected]:, while an HTTPS URL requires a token or GitHub App.
Docker build fails with the “no space left on device” error. How can I fix it?
First check free space: df -h and sudo docker system df. Then find large directories with sudo du -xh /var/lib/docker | sort -h | tail. Remove only clearly unused images and cache, not volumes of working databases. Optimize the Dockerfile: use multi-stage build, .dockerignore, do not copy node_modules, and do not store large artifacts in layers. If free space is less than 15–20 GB, increase the disk before the next deployment.
What is the minimum suitable VPS configuration?
For a lab project, you can start with 1 vCPU, 2 GB RAM, and 30–40 GB of disk space, but memory will run out quickly when building Node.js, Next.js, or Python images. A practical minimum for production is 2 vCPU, 4 GB RAM, and 50–80 GB NVMe. This is enough to run Dokploy, a reverse proxy, one or two applications, and a small database. If the server has PostgreSQL and multiple services, choose 4 vCPU and 8 GB RAM so builds do not affect user availability.
What should I choose for this task: VPS or dedicated?
For Dokploy and most small production applications, choose a VPS: it is easier to scale, cheaper initially, and usually provides sufficient resources. Dedicated makes sense with sustained high CPU load, a large PostgreSQL database, a requirement for guaranteed IOPS, dozens of actively built services, or hundreds of gigabytes of fast data. Do not move to dedicated because of a single build failure: first measure CPU, RAM, disk I/O, and actual load.
Can PostgreSQL and Dokploy run on the same VPS?
Yes, for an early stage this is a normal and common setup. Be sure to create a persistent volume, configure regular logical dumps, and do not let the database consume the entire disk. Monitor memory usage: PostgreSQL, Docker build, and an SSR application may simultaneously require several gigabytes of RAM. When the database becomes business-critical or load increases, move it to a separate VPS, managed PostgreSQL, or a replica with independent backups. The application will connect through a private network or secured public address.
How can I safely clean Docker after many deployments?
Start with diagnostics: sudo docker system df -v will show what is using space. Remove old dangling images and unnecessary build cache manually or through Dokploy's standard tools if they are available in your version. Before cleanup, create a backup and do not remove volumes until you know which application they belong to. The docker system prune -a --volumes command is aggressive and can delete data from a stopped but still needed service. In production, first run it only without the --volumes flag and analyze the deletion list.
Conclusions and next steps
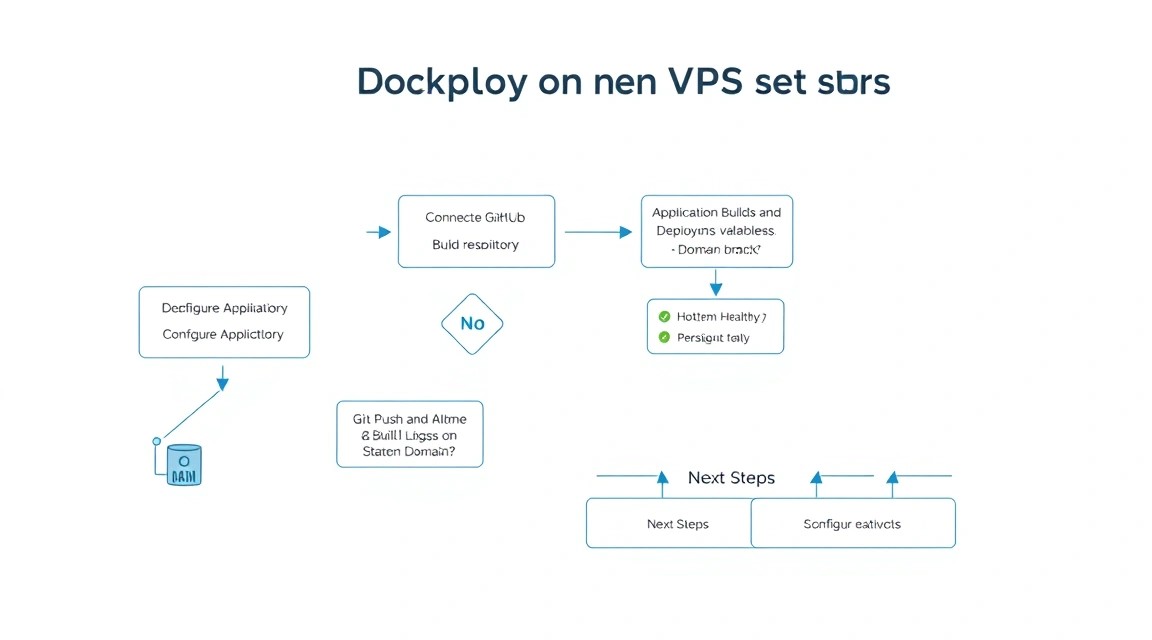
The VPS now operates as your own deployment platform: Dokploy retrieves code from GitHub, builds containers, publishes applications under domains, and handles HTTPS. With properly configured firewall, secrets, and backups, this stack is suitable for small production services and several team projects.
- Create a separate staging project and link it to the
developbranch to test migrations and builds before production. - Add external monitoring of the HTTP endpoint
/health, unavailability notifications, and monitoring of free disk space. - As you grow, move the database, object storage, or workers to separate nodes, and then add a second Dokploy node only after designing the network and high-availability strategy.
The main practical recommendation is to automate not only deployment but also recovery. Regular restore testing, updates during a maintenance window, and measuring actual resource consumption provide more reliability than simply increasing the VPS size.