AWX (Ansible Tower) Deployment on a VPS for Centralized Automation
TL;DR
In this guide, we will step-by-step configure and deploy AWX (the open-source version of Ansible Tower) on a Virtual Private Server (VPS). AWX provides a web interface for managing Ansible projects, inventory, credentials, and task scheduling, allowing you to centralize and automate infrastructure deployment and management operations, making Ansible accessible to the entire team.
- Installing AWX via Docker Compose on Ubuntu 24.04 LTS.
- Configuring basic server security (SSH, Firewall, Fail2ban).
- Configuring TLS/HTTPS for secure access to the AWX web interface.
- Creating and configuring the first project, inventory, and job template.
- Developing a backup and maintenance strategy for AWX.
What We Are Setting Up and Why
In the modern world of IT infrastructure, where the number of servers, services, and configurations is constantly growing, manual management becomes inefficient and prone to errors. Ansible is a powerful automation tool that allows you to describe infrastructure as code and manage it declaratively. However, working with Ansible from the command line can be complex for large teams or require additional tools for scheduling, auditing, and centralized credential management.
This is where AWX comes in. AWX is the open-source version of Red Hat Ansible Tower, providing a web interface for Ansible. It transforms Ansible from a command-line tool into a full-fledged automation platform accessible via a browser. With AWX, you can centrally manage the following aspects:
- Inventory: Dynamic and static management of servers and devices.
- Credentials: Secure storage of SSH keys, passwords, API tokens, and other secrets.
- Projects: Synchronizing your Ansible playbooks from Git repositories (GitHub, GitLab, Bitbucket, etc.).
- Job Templates: Creating ready-to-run tasks with predefined parameters that even non-technical users can launch.
- Scheduling: Setting up regular automation runs on a schedule.
- Monitoring and Auditing: Viewing results of all runs, logs, change history, and who initiated what.
- Access Control: Delegating rights and roles to team members.
What will the reader get in the end? You will get a fully functional AWX platform on your VPS, ready to automate your infrastructure. This will enable you and your team to efficiently manage servers, deploy applications, update software, and perform other routine tasks using Ansible, all through a convenient web interface.
Alternatives: Cloud-managed vs. Self-hosted
There are two main approaches to using automation platforms: cloud-managed services and self-hosted deployment. Red Hat offers the commercial Ansible Automation Platform (formerly Ansible Tower) as a managed solution, as well as cloud services that provide similar capabilities without the need to manage the underlying infrastructure. However, the self-hosted approach on a VPS has its advantages:
- Full Control: You have complete control over data, security, and system configuration.
- Cost Savings: A self-hosted solution on a VPS is often cheaper, especially for small to medium teams, compared to a monthly subscription for cloud alternatives.
- Flexibility: Ability to fine-tune settings to meet the specific requirements of your infrastructure or security policies.
- Learning and Development: An excellent opportunity to deepen your knowledge in deploying and managing containerized applications.
Deployment on a VPS is ideal for those seeking a balance between control, cost, and convenience. It allows you to gain a powerful automation tool without the need to invest in expensive hardware infrastructure or fully entrust your data to third-party cloud providers.
What VPS Configuration is Needed for This Task

AWX, like any complex web application, has specific resource requirements. Since AWX runs inside Docker containers and includes several components (PostgreSQL, Redis, RabbitMQ, web interface, executors), it requires sufficient resources for stable operation. The requirements presented below are current for 2026 and are calculated for typical AWX usage managing 10-50 nodes with several concurrent tasks.
Minimum Requirements:
- CPU: 2 cores. AWX actively uses CPU during project synchronization, task execution, and web request processing.
- RAM: 4 GB. This is a critical resource. AWX, PostgreSQL, and other containers can consume a significant amount of memory. Less than 4 GB will lead to constant swapping and low performance.
- Disk: 40 GB SSD. For the operating system, Docker images, PostgreSQL database, and logs. SSD is highly recommended for database performance.
- Network: 100 Mbps. For web interface access, Git repository synchronization, and task execution on remote nodes.
- Operating System: Ubuntu 24.04 LTS (or newer LTS version), CentOS Stream 9 (or RHEL 9).
Recommended VPS Plan for the Task:
For comfortable operation and future scalability, the following configuration is recommended:
- CPU: 4 cores.
- RAM: 8 GB.
- Disk: 80-100 GB SSD (NVMe preferred).
- Network: 1 Gbps.
With these specifications, you can get a VPS with the specified characteristics to ensure stable AWX operation and have spare resources for growth. If you plan to manage hundreds or thousands of nodes, run dozens of concurrent tasks, or store vast amounts of logs, then more powerful configurations should be considered.
When a Dedicated Server is Needed, Not a VPS
A dedicated server becomes necessary when your project exceeds the capabilities of a VPS, even the most powerful ones. This usually occurs in the following cases:
- Scale: Managing thousands of nodes, hundreds of concurrently executing tasks, or when AWX is a critically important part of a large company's CI/CD pipeline.
- Performance: Requirements for maximum disk subsystem performance (IOPS), CPU, or RAM that virtualization cannot provide.
- Isolation: Complete isolation from "neighbors" on the hypervisor, guaranteeing performance stability and the absence of external influencing factors.
- Custom Security Policies: The need to install specific hardware or very strict security requirements that are easier to implement on fully controlled hardware.
For most scenarios described in this guide (up to 100-200 nodes), a powerful VPS will be sufficient. If you are scaling to an enterprise level, consider renting a suitable dedicated server.
Location: What It Affects
The choice of VPS server location affects several key aspects:
- Latency: The closer the server is to your primary users (the team that will work with AWX) and to the managed nodes, the lower the latency will be. Low latency is important for quick response of the AWX web interface and for prompt execution of Ansible commands.
- Legal Compliance: In some cases, data must be stored in a specific jurisdiction due to regulatory requirements (e.g., GDPR in Europe).
- Synchronization Speed: If your Git repositories or managed nodes are far from the AWX server, project synchronization and task execution may take longer.
It is recommended to choose a location as close as possible to your team and to the main infrastructure that AWX will manage.
Server Preparation
Server Preparation
Before installing AWX, you need to perform basic security configuration and install the necessary utilities. It is assumed that you are using a fresh installation of Ubuntu 24.04 LTS and have SSH access as a root user or a user with sudo privileges.
1. System Update
Always start by updating the package manager and installed packages to get the latest software versions and security fixes.
sudo apt update && sudo apt upgrade -y
# Update package list and all installed packages
sudo apt autoremove -y && sudo apt clean
# Remove unnecessary packages and clear cache
2. Creating a New User with Sudo Privileges
Working directly as root is not recommended. Create a new user and grant them sudo privileges.
sudo adduser awxadmin
# Create a new user named awxadmin
Follow the instructions to create a password and fill in user information. Then add the user to the sudo group:
sudo usermod -aG sudo awxadmin
# Add user awxadmin to the sudo group
Now log out of the root session and log in as the new user awxadmin.
3. Configuring SSH Keys (Recommended)
Using SSH keys instead of passwords significantly enhances security. If you don't have an SSH key yet, generate one on your local machine:
ssh-keygen -t rsa -b 4096 -C "[email protected]"
# Generate a new SSH key (on your local machine)
Then copy the public key to your server. Replace your_user and your_server_ip with your own details.
ssh-copy-id awxadmin@your_server_ip
# Copy the public key to the server
After this, you can disable password authentication for SSH in the file /etc/ssh/sshd_config by changing PasswordAuthentication yes to no and restarting the SSH service. This will significantly increase security, but make sure your SSH key works before disabling passwords.
sudo nano /etc/ssh/sshd_config
# Open the SSH configuration file
Find the line #PasswordAuthentication yes, uncomment it, and change it to:
PasswordAuthentication no
It is also recommended to change the SSH port from 22 to another one (e.g., 2222) if you are not using Fail2ban or other brute-force protection tools:
Port 2222
Save the file and restart the SSH service:
sudo systemctl restart sshd
# Restart the SSH service
Now you will be able to connect to the server only via SSH key and, if changed, via the new port: ssh -p 2222 awxadmin@your_server_ip.
4. Firewall Configuration (UFW)
UFW (Uncomplicated Firewall) is an easy-to-use interface for iptables. Let's configure it to allow only the necessary ports.
sudo apt install ufw -y
# Install UFW
sudo ufw allow OpenSSH
# Allow SSH (if you changed the SSH port, replace with 'sudo ufw allow 2222/tcp')
sudo ufw allow http
# Allow HTTP (port 80)
sudo ufw allow https
# Allow HTTPS (port 443)
sudo ufw enable
# Enable the firewall. Confirm with 'y'.
sudo ufw status verbose
# Check firewall status
5. Installing Fail2ban
Fail2ban protects the server from brute-force attacks by blocking IP addresses that have too many failed login attempts.
sudo apt install fail2ban -y
# Install Fail2ban
Create a local configuration file so that your changes are not overwritten during package updates:
sudo cp /etc/fail2ban/jail.conf /etc/fail2ban/jail.local
# Copy main config to local
Open /etc/fail2ban/jail.local and configure it as desired. Make sure that for the [sshd] section, enabled = true. If you changed the SSH port, specify it in port:
sudo nano /etc/fail2ban/jail.local
Example changes in jail.local (find the [DEFAULT] and [sshd] sections):
[DEFAULT]
bantime = 10m
findtime = 10m
maxretry = 5
banaction = ufw

[sshd]
enabled = true
port = ssh,2222 # If you changed the SSH port, add it here
mode = aggressive
Save the file and restart Fail2ban:
sudo systemctl restart fail2ban
sudo systemctl enable fail2ban
# Restart and enable autostart for Fail2ban
sudo fail2ban-client status sshd
# Check sshd jail status
Now your server is ready for AWX installation with a basic level of security.
Software Installation — Step-by-Step
AWX is deployed using Docker and Docker Compose. We will use the current versions of these tools and AWX itself (for 2026, we assume Docker 25.x+, Docker Compose 2.x+, AWX 24.x+).
1. Installing Docker and Docker Compose
First, let's install the necessary packages for Docker.
sudo apt install ca-certificates curl gnupg lsb-release -y
# Install necessary utilities for repository interaction
Let's add Docker's official GPG key:
sudo install -m 0755 -d /etc/apt/keyrings
curl -fsSL https://download.docker.com/linux/ubuntu/gpg | sudo gpg --dearmor -o /etc/apt/keyrings/docker.gpg
sudo chmod a+r /etc/apt/keyrings/docker.gpg
# Add Docker GPG key
Let's add the Docker repository to APT:
echo \
  "deb [arch="$(dpkg --print-architecture)" signed-by=/etc/apt/keyrings/docker.gpg] https://download.docker.com/linux/ubuntu \
  "$(. /etc/os-release && echo "$VERSION_CODENAME")" stable" | \
  sudo tee /etc/apt/sources.list.d/docker.list > /dev/null
# Add Docker repository
Let's update the package list and install Docker Engine, Docker CLI, and containerd:
sudo apt update
sudo apt install docker-ce docker-ce-cli containerd.io -y
# Install Docker Engine, CLI, and containerd
Let's add the current user to the docker group to avoid using sudo for every Docker command:
sudo usermod -aG docker awxadmin
# Add user awxadmin to the docker group
Apply the group changes. To do this, either log out and log back in, or execute:
newgrp docker
# Apply group changes without logging out
Let's check the Docker installation:
docker run hello-world
# Run a test Docker container
Now let's install Docker Compose. It usually comes as a Docker CLI plugin.
sudo apt install docker-compose-plugin -y
# Install Docker Compose as a plugin
Let's check the Docker Compose version:
docker compose version
# Check Docker Compose version
2. Installing Git and Ansible
AWX will require Git for project synchronization and Ansible for task execution. Although AWX comes with Ansible inside a container, having it on the host is useful for debugging and manual management.
sudo apt install git ansible -y
# Install Git and Ansible
3. Downloading AWX Operator and Installer
AWX is typically deployed using a Kubernetes operator or via an installer script that uses Docker Compose for local installation. We will use the Docker Compose-based installer.
mkdir ~/awx_install && cd ~/awx_install
# Create directory for AWX installation
Let's download the latest stable version of AWX. For 2026, we assume the current AWX version is 24.x.x. You can always find the latest version on the AWX GitHub page.
git clone https://github.com/ansible/awx.git
# Clone the AWX repository
cd awx/installer
# Navigate to the installer directory
4. Configuring the AWX Installer
The AWX installer uses an inventory file for configuration. Open it for editing.
nano inventory
# Edit the AWX inventory file
In the inventory file, find and configure the following lines:
admin_password: Set a strong password for the AWX administrator.secret_key_path: Ensure this path exists or will be created.docker_compose_dir: The path where Docker Compose files will be stored.pg_password,rabbitmq_password: You can leave the default values for a test installation, but for production, it's better to generate unique passwords.
Example changes (find and modify):
[all:vars]
admin_password='YourStrongAdminPassword123!' # Set your password
secret_key_path=/var/lib/awx/awxsecret.key # Path to the secret key file
docker_compose_dir=~/awx_install/awx-compose # Directory for Docker Compose files

# ... (other parameters can be left at default for the first installation)
Save changes (Ctrl+O, Enter, Ctrl+X).
5. Running the AWX Installer
Now let's run the installer script. It uses Ansible to deploy all AWX components using Docker Compose.
ansible-playbook -i inventory install.yml
# Run the playbook for AWX installation
This process will take some time, as Docker will download all necessary images and configure containers. Upon completion, you will see a message indicating successful installation.
6. Checking Container Status
After the installation is complete, ensure that all AWX containers are running correctly.
docker compose -f ~/awx_install/awx-compose/docker-compose.yml ps
# Check AWX container status
You should see a list of containers (awx_web, awx_task, awx_postgres, awx_redis) with a status of Up. If any container is not running, check the logs with the command docker compose logs <container_name>.
AWX will be available on port 80 (HTTP) by default. In the next section, we will configure HTTPS.
Configuration
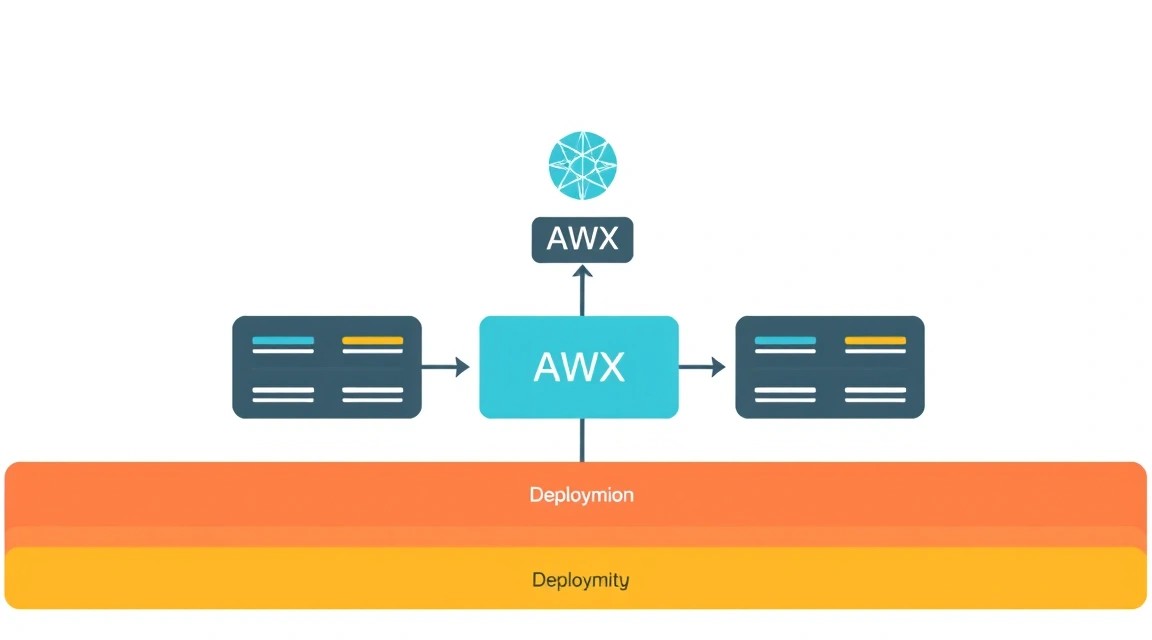
After successful AWX installation, initial setup, secure HTTPS access, and system functionality verification are required.
1. Accessing the AWX Web Interface
AWX is accessible by default via HTTP on port 80. Open your web browser and navigate to your VPS's IP address or domain name (if you have already configured DNS): http://your_server_ip_or_domain.
You will see the AWX login page. Use the following credentials:
- Username:
admin - Password: The password you set in the
inventoryfile (admin_password).
After logging in, you will be directed to the AWX dashboard.
2. Configuring TLS/HTTPS with Caddy
Using HTTP to access AWX is insecure, as all data, including credentials, is transmitted in plain text. We will configure HTTPS using Caddy — a modern web server with automatic Let's Encrypt certificate management. Caddy is easy to set up and automatically renews certificates.
2.1. Installing Caddy
First, stop AWX so Caddy can use port 80/443:
cd ~/awx_install/awx/installer
ansible-playbook -i inventory -e "awx_component_state=absent" install.yml
# Stop and remove AWX containers to free up ports 80/443
# (AWX will be reinstalled with port 8052 configured for internal access)
Install Caddy:
sudo apt install -y debian-keyring debian-archive-keyring apt-transport-https
curl -1sLf 'https://dl.cloudsmith.io/public/caddy/stable/gpg.key' | sudo gpg --dearmor -o /usr/share/keyrings/caddy-stable-archive-keyring.gpg
curl -1sLf 'https://dl.cloudsmith.io/public/caddy/stable/debian.deb.txt' | sudo tee /etc/apt/sources.list.d/caddy-stable.list
sudo apt update
sudo apt install caddy -y
# Install Caddy from the official repository
2.2. Caddyfile Configuration
Create a Caddy configuration file for AWX. Assume your domain for AWX is awx.yourdomain.com.
sudo nano /etc/caddy/Caddyfile
# Open Caddy configuration file
Remove all existing content and paste the following. Replace awx.yourdomain.com with your actual domain.
awx.yourdomain.com {
    reverse_proxy localhost:8052 # AWX by default listens on 8052 after installation with Caddy
    # Optional: Enable Caddy's automatic HTTPS
    tls {
        # email [email protected] # Optional: Specify email for Let's Encrypt notifications
    }
    # Optional: Log requests
    log {
        output file /var/log/caddy/awx_access.log
        format json
    }
}
Save the file (Ctrl+O, Enter, Ctrl+X).
2.3. Reconfiguring AWX to Work with Caddy
Now we need to modify the AWX inventory file so that it doesn't try to use ports 80/443, but instead listens on an internal port, for example 8052.
cd ~/awx_install/awx/installer
nano inventory
# Open AWX inventory file
Find the [all:vars] section and add or modify the following lines:
# ...
awx_web_port=8052
awx_nginx_port=8052
# ...
Save the file and run the AWX installer again. Now AWX will be configured to listen on port 8052, and Caddy will proxy requests to it.
ansible-playbook -i inventory install.yml
# Rerunning the AWX installer with new port settings
2.4. Starting Caddy
After successfully reinstalling AWX, start and enable Caddy:
sudo systemctl enable caddy
sudo systemctl restart caddy
# Enable and start Caddy service
sudo systemctl status caddy
# Check Caddy status
Ensure Caddy is running without errors. You can now access AWX via https://awx.yourdomain.com. Caddy will automatically obtain and configure a Let's Encrypt certificate.
3. Verifying Functionality
After configuring HTTPS, verify AWX access and its core functions.
- HTTPS Access: Open
https://awx.yourdomain.comin your browser. Ensure the connection is secure (green padlock in the address bar). - System Login: Log in using
admincredentials. - Creating Your First Project:
- Navigate to the
Projectssection. - Click
Add. - Specify
Name(e.g., "My First Project"). - Select
SCM Type: Git. - Specify
SCM URL(e.g.,https://github.com/ansible/ansible-examples.git). - Click
Save. - Then click the sync icon next to the project to have AWX download playbooks from the repository.
- Navigate to the
- Creating an Inventory:
- Navigate to the
Inventoriessection. - Click
Addand selectInventory. - Specify
Name(e.g., "My Localhost Inventory"). - Click
Save. - Inside the inventory, go to the
Hoststab, clickAdd, and add the hostlocalhost.
- Navigate to the
- Creating a Job Template:
- Navigate to the
Templatessection. - Click
Addand selectJob Template. - Specify
Name(e.g., "Ping Localhost"). - Select
Inventory: My Localhost Inventory. - Select
Project: My First Project. - Specify
Playbook: ping.yml(this playbook is inansible-examples). - Select
Credential(if needed, but not mandatory for ping localhost). - Click
Save. - Launch the template by clicking the "rocket" icon next to it. Ensure the job completes successfully.
- Navigate to the
These steps will confirm basic AWX functionality and readiness for further use.