Running an ethereum node vps in 2026 requires a powerful VPS with at least 2 TB NVMe SSD, 16-32 GB RAM, and 4-8 vCPUs, as well as a stable gigabit network connection, to successfully synchronize and maintain both Ethereum execution and consensus clients.
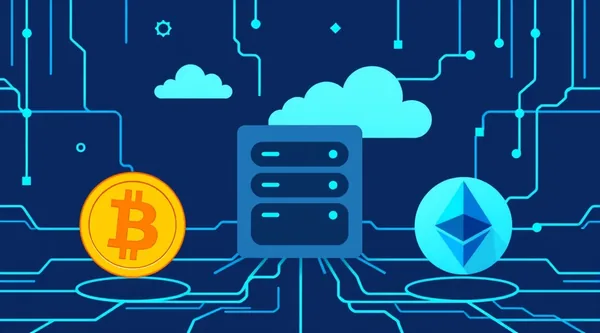
Why Run an Ethereum Node on a VPS in 2026?
Running your own ethereum full node is a crucial step for anyone seriously interacting with the Ethereum ecosystem. It's not just a technical process, but an investment in your independence, security, and contribution to network decentralization. In 2026, as Ethereum's scaling and development continue to gain momentum, having your own node becomes even more relevant.
Advantages of Your Own Node
Your own Ethereum node offers several significant advantages over using third-party services (such as Infura or Alchemy):
- Privacy: All your blockchain requests are processed locally, without transmitting data to third parties. This is critical for the confidentiality of your transactions and interactions with dApps.
- Security: You have full control over the data you receive from the network. There's no risk of manipulation or censorship from an API provider. This is especially important for validators, exchanges, and developers.
- Reliability: Your node is always available if your server is running. You are not dependent on potential downtimes or limitations of third-party services.
- Network Support: By running a node, you actively participate in maintaining Ethereum's decentralization and security, helping to propagate and verify transactions and blocks. Each new node makes the network more resilient to attacks and failures.
- Development: For dApp developers, a dedicated node is an indispensable tool for testing, debugging, and gaining direct access to blockchain data without speed or request limitations.
Why a VPS?
A dedicated server or a powerful home PC can be good options, but a VPS (Virtual Private Server) offers an optimal balance between performance, cost, and ease of management for most users looking to set up an ethereum node on a vps.
- Cost-effectiveness: A VPS is typically significantly cheaper than purchasing and maintaining a physical dedicated server or a powerful home PC that needs to run 24/7. You only pay for the resources you use.
- Flexibility and Scalability: As disk space or computing power requirements grow, you can easily upgrade your VPS plan without the need for data migration or hardware replacement.
- Data Center Reliability: VPS are hosted in professional data centers with backup power, stable internet channels, and cooling systems, ensuring high uptime and minimal risk of failures.
- Remote Management: Access to a VPS is via SSH, allowing you to manage the node from anywhere in the world using familiar command-line tools.
- Deployment Speed: A new VPS can be deployed and node installation can begin in minutes, whereas setting up a physical server takes much longer.
Valebyte.com offers various plans that allow you to set up a crypto node on a VPS, including Ethereum, meeting all modern requirements.
Ethereum Node Architecture: Execution and Consensus Client
With Ethereum's transition to Proof-of-Stake (The Merge), the node architecture has significantly changed. Now, for a fully functional ethereum full node, two separate but interacting components are required: the Execution Client (formerly known as the Ethereum 1.0 client) and the Consensus Client (formerly the Ethereum 2.0 client).
Role of the Execution Client (Geth, Nethermind)
The Execution Client (or execution client) is responsible for everything related to the "traditional" Ethereum blockchain: processing transactions, executing smart contracts, managing the state of the EVM (Ethereum Virtual Machine), and storing data about transactions and network state. This is the same client that existed before The Merge.
Popular Execution Client implementations include:
- Geth (Go-Ethereum): The most common implementation, written in Go. Known for its stability and broad support. Often used as geth on vps.
- Nethermind: A C# implementation offering high performance and flexibility, especially for .NET developers.
- Erigon: A Go implementation focused on maximum data storage efficiency and fast synchronization, making it an interesting alternative to Geth.
- Besu: A Java implementation from Hyperledger, geared towards enterprise use, supporting both the public Ethereum network and private networks.
The Execution Client listens for new transactions, collects them into blocks, executes them, and passes these blocks to the Consensus Client for inclusion in the chain. It also provides an API for interacting with the blockchain (e.g., for sending transactions or querying smart contract state data).
Role of the Consensus Client (Lighthouse, Prysm)
The Consensus Client (or consensus client) is responsible for implementing the Proof-of-Stake protocol. It manages the Beacon Chain, organizes validators, processes attestations and blocks, and ensures consensus among all nodes in the network. It does not directly execute transactions but is responsible for ordering and finalizing the blocks passed to it by the Execution Client.
Popular Consensus Client implementations include:
- Lighthouse: Written in Rust, known for its performance and reliability. One of the most popular consensus clients.
- Prysm: Written in Go, also very popular, especially among early validators. Offers good documentation and support.
- Teku: A Java implementation from ConsenSys, geared towards enterprise use, with an emphasis on security and stability.
- Nimbus: Written in Nim, a lightweight client optimized for less powerful hardware, such as a Raspberry Pi, but also suitable for a VPS.
- Grandine: Written in Go, a newer implementation striving for high performance.
The Consensus Client receives "execution payloads" from the Execution Client, confirms their correctness, and includes them in Beacon Chain blocks, propagating them across the network to achieve consensus. These two clients communicate with each other via a local API (the Engine API).
Choosing a Client Combination
To run a fully functional ethereum full node, you need to choose one client of each type. It is recommended to use different implementations for Execution and Consensus clients (e.g., Geth + Lighthouse or Nethermind + Prysm). This promotes client diversity in the network, increasing its resilience to potential errors in one of the implementations. If one client has a critical bug, others will continue to operate, keeping the network stable.
The most popular and well-established combinations are:
- Geth (Execution) + Lighthouse (Consensus)
- Geth (Execution) + Prysm (Consensus)
- Nethermind (Execution) + Lighthouse (Consensus)
The choice of a specific combination may depend on your preferences in programming language (for debugging), documentation, or community support. In this article, we will focus on installing Geth and Lighthouse as one of the most common and reliable combinations for your ethereum node on a vps.
Looking for a reliable server for your projects?
VPS from $10/month and dedicated servers from $9/month with NVMe, DDoS protection, and 24/7 support.
View offers →VPS Requirements for an Ethereum Full Node in 2026: Disk, RAM, CPU, and Network
Hardware requirements for running an ethereum full node are constantly increasing. By 2026, the blockchain size and network operation intensity have significantly grown, necessitating more powerful servers. Underestimating these requirements will lead to slow synchronization, constant network lagging, and inefficient node operation.
Storage: Why 2 TB+ NVMe SSD?
This is the most critical component. The size of the Ethereum blockchain is steadily growing. In 2026, synchronizing a full node will require:
- Execution Client (Geth, Nethermind): Approximately 1.5-2 TB for a full archive in
--syncmode=snap(or--syncmode=full) mode. If you plan to store a full archival node for historical queries (which is rarely needed by a typical user), this could be 10+ TB. But for a regular node that simply synchronizes and verifies the current state, 2 TB is sufficient for a start with some buffer for the near future. - Consensus Client (Lighthouse, Prysm): Approximately 500 GB - 1 TB for the Beacon Chain.
In total, for a fully functional ethereum full node in 2026, a minimum of 2 TB is required, but 3-4 TB is better to have future-proofing and avoid the need to migrate in a few months. It is crucial to use an NVMe SSD. SATA SSDs are no longer sufficient due to the enormous number of read/write operations (IOPS) generated by an Ethereum node. NVMe drives provide read/write speeds of up to 5-7 GB/s and hundreds of thousands of IOPS, which is critical for fast synchronization and maintaining the node's up-to-date state. Using regular HDDs or even SATA SSDs will lead to extremely slow synchronization (weeks or months) and constant network lagging.
When choosing a VPS, ensure that the provider explicitly states the disk type as NVMe SSD. Some providers use the term "SSD," which are actually SATA SSDs, and are not suitable for this task.
RAM and CPU
These components also play an important role in ethereum node vps performance:
- RAM (Random Access Memory):
- Minimum: 16 GB RAM.
- Recommended: 32 GB RAM for stable operation of both clients, especially during synchronization and high network activity. More RAM allows more data to be cached, reducing disk load.
- CPU (Processor):
- Minimum: 4 vCPUs (virtual cores).
- Recommended: 8 vCPUs with a frequency of 3.0+ GHz. High clock speed and a sufficient number of cores are important for performing complex cryptographic operations and processing a large number of transactions.
Both clients (Execution and Consensus) are quite CPU-intensive during synchronization and when processing new blocks. Insufficient RAM or a weak processor will cause the node to constantly "struggle" and fall behind the network.
Network Connection and Bandwidth
An Ethereum node constantly exchanges data with thousands of other nodes worldwide. Therefore, a stable and fast network connection is mandatory:
- Bandwidth: A gigabit (1 Gbps) port with unlimited or very high traffic volume. During initial synchronization, the node can consume hundreds of gigabytes or even terabytes of traffic. After synchronization, daily consumption ranges from 50 to 500 GB, depending on network activity.
- Stability: Low latency and minimal packet loss are critical for maintaining constant peer connectivity and fast processing of new blocks.
Ensure that your VPS provider offers a guaranteed gigabit channel and does not have strict traffic limits, otherwise you risk encountering speed limitations or additional charges.
Need a dedicated server?
Compare prices from top providers. Configure and order in minutes.
Preparing Your VPS for Ethereum Node Installation: Step-by-Step
Before proceeding with the installation of Ethereum clients, you need to properly prepare your VPS. This section covers operating system selection, basic configuration, and installation of necessary dependencies.
Operating System Selection and Initial Setup
For running an ethereum node on a vps, it is recommended to use Linux distributions such as Ubuntu Server (22.04 LTS or newer) or Debian (12 Bookworm). They are well-supported by the community, have up-to-date packages, and ensure stable operation.
After deploying your VPS and gaining SSH access, perform the following basic steps:
- System Update:
This ensures that all system packages are updated to the latest versions, which enhances security and stability.sudo apt update && sudo apt upgrade -y - Create a Separate User (Optional, but Recommended):
For improved security and isolation of node processes, it is recommended to run it as an unprivileged user.
Now all subsequent commands will be executed as thesudo adduser ethereum sudo usermod -aG sudo ethereum su - ethereumethereumuser. - Time Zone and Time Synchronization Setup:
Accurate time is critical for node operation, especially for the consensus client.
sudo timedatectl set-timezone Europe/Moscow # Replace with your time zone
sudo apt install -y ntp
sudo systemctl enable ntp
sudo systemctl start ntp
Installing Necessary Dependencies
To compile clients (if you choose this path) and ensure their stable operation, you will need to install a number of tools and libraries. This includes compilers, Git utilities, and other dependencies.
sudo apt install -y build-essential curl git wget htop screen jqbuild-essential: Packages for building programs from source.curl,wget: Utilities for downloading files.git: Version control system, necessary for cloning client repositories.htop: Interactive process monitor.screen: Utility for managing terminal sessions (allows you to detach from a session without terminating processes).jq: JSON parser for working with APIs.
If you plan to compile Geth, you will also need Go. For Lighthouse, you will need Rust.
Installing Go (for Geth):
wget https://go.dev/dl/go1.22.4.linux-amd64.tar.gz # Check for the latest version on go.dev
sudo rm -rf /usr/local/go && sudo tar -C /usr/local -xzf go1.22.4.linux-amd64.tar.gz
echo "export PATH=$PATH:/usr/local/go/bin" >> ~/.profile
source ~/.profile
go version
Installing Rust (for Lighthouse):
curl --proto '=https' --tlsv1.2 -sSf https://sh.rustup.rs | sh
source "$HOME/.cargo/env"
rustc --version
Opening Ports
An Ethereum node requires open ports for incoming and outgoing connections to communicate with other nodes on the network. These ports must be opened in your VPS firewall.
- Execution Client (Geth, Nethermind):
- TCP/UDP 30303: For P2P communication with other Execution nodes.
- Consensus Client (Lighthouse, Prysm):
- TCP/UDP 9000: For P2P communication with other Consensus nodes (Beacon Chain).
Use ufw (Uncomplicated Firewall) to configure the firewall:
sudo ufw allow 30303/tcp
sudo ufw allow 30303/udp
sudo ufw allow 9000/tcp
sudo ufw allow 9000/udp
sudo ufw allow ssh # If you haven't changed the SSH port, it's 22/tcp by default
sudo ufw enable
sudo ufw status
Ensure that after enabling ufw, you can still connect via SSH. If you are using a different port for SSH, replace ssh with your port number (e.g., sudo ufw allow 2222/tcp). Some hosting providers have their own network-level firewalls that may also require configuration. Check with your provider.
Installing and Configuring the Execution Client (Geth on VPS)
In this section, we will detail the installation and basic configuration of geth on vps. Geth is the most common Execution Client, and its installation serves as a good example for understanding the process.
Compiling or Binary Installation of Geth
You can install Geth in two main ways: compile from source code or use a pre-built binary.
1. Binary Installation (recommended for most users): This is the simplest and fastest method. Download the latest stable version of Geth from the official repository.
wget https://geth.ethereum.org/downloads/geth-linux-amd64-1.13.14-e07e86e3.tar.gz # Check for the latest version on geth.ethereum.org
tar -xvf geth-linux-amd64-1.13.14-e07e86e3.tar.gz
sudo mv geth-linux-amd64-1.13.14-e07e86e3/geth /usr/local/bin/
rm -rf geth-linux-amd64-1.13.14-e07e86e3*
geth version
2. Compiling from Source Code (for developers or those who want the very latest version): This method requires Go installation (as described above) and more time, but gives you full control over the build.
git clone https://github.com/ethereum/go-ethereum.git
cd go-ethereum
git checkout master # Or a specific version tag, e.g., v1.13.14
make geth
sudo cp build/bin/geth /usr/local/bin/
cd ..
rm -rf go-ethereum
geth version
Basic Geth Configuration
After installing Geth, you need to configure its startup. It is recommended to use systemd to manage the Geth process, ensure its autostart, and handle logging.
Create a directory for Geth data:
sudo mkdir -p /var/lib/geth
sudo chown -R ethereum:ethereum /var/lib/geth
Create a systemd service file for Geth:
sudo nano /etc/systemd/system/geth.serviceInsert the following content:
[Unit]
Description=Geth Execution Client
After=network.target

[Service]
User=ethereum
Group=ethereum
Type=simple
Restart=always
RestartSec=5
ExecStart=/usr/local/bin/geth \
  --datadir /var/lib/geth \
  --http \
  --http.addr 127.0.0.1 \
  --http.port 8545 \
  --http.api eth,net,web3,debug,admin,txpool \
  --ws \
  --ws.addr 127.0.0.1 \
  --ws.port 8546 \
  --ws.api eth,net,web3,debug,admin,txpool \
  --authrpc.addr 127.0.0.1 \
  --authrpc.port 8551 \
  --authrpc.vhosts localhost \
  --authrpc.jwtsecret /var/lib/ethereum/jwtsecret \
  --syncmode snap \
  --cache 8192 \
  --maxpeers 100 \
  --nat extip:$(curl -s ifconfig.me)

[Install]
WantedBy=default.target
Explanation of parameters:
--datadir /var/lib/geth: Path to the directory where Geth will store blockchain data.--http,--ws: Enables HTTP and WebSocket RPC interfaces.--http.addr 127.0.0.1,--ws.addr 127.0.0.1: Binds the HTTP/WS API to the local interface. This is secure, as access will only be from the local host (Consensus Client). If you need external access, change to0.0.0.0and open the corresponding ports (8545, 8546) in the firewall, but be cautious with security.--http.api,--ws.api: List of APIs that will be available.--authrpc.addr,--authrpc.port,--authrpc.vhosts,--authrpc.jwtsecret: Parameters for the Engine API, through which Geth will communicate with the Consensus Client.jwtsecretis a file with a shared secret.--syncmode snap: Fast synchronization mode (snap sync). Recommended for most nodes.--cache 8192: Allocates 8 GB of RAM for Geth's cache. Adjust this value based on the total RAM of your VPS (1/4 - 1/2 of available RAM).--maxpeers 100: Maximum number of P2P connections.--nat extip:$(curl -s ifconfig.me): Automatically determines your external IP address for NAT traversal, which helps other nodes find yours.
Create a JWT secret that will be used for authentication between clients:
sudo mkdir -p /var/lib/ethereum
sudo openssl rand -hex 32 | sudo tee /var/lib/ethereum/jwtsecret
sudo chmod 644 /var/lib/ethereum/jwtsecret
sudo chown -R ethereum:ethereum /var/lib/ethereum
Activate and start the Geth service:
sudo systemctl daemon-reload
sudo systemctl enable geth
sudo systemctl start geth
You can check Geth's status with the command:
sudo systemctl status gethAnd view logs:
sudo journalctl -f -u gethGeth will begin synchronizing with the network. This process will take several hours to several days, depending on your VPS and network speed.
Installing and Configuring the Consensus Client (Lighthouse on VPS)
After starting the Execution Client, the next step is to install and configure the Consensus Client. We will cover Lighthouse as one of the most popular and efficient options.
Compiling or Binary Installation of Lighthouse
Like Geth, Lighthouse can be installed using pre-built binaries or compiled from source code.
1. Binary Installation (recommended): Download the latest stable version of Lighthouse from the official repository.
wget https://github.com/sigp/lighthouse/releases/download/v5.2.0/lighthouse-v5.2.0-x86_64-linux.tar.gz # Check for the latest version
tar -xvf lighthouse-v5.2.0-x86_64-linux.tar.gz
sudo mv lighthouse /usr/local/bin/
rm -rf lighthouse-v5.2.0-x86_64-linux.tar.gz
lighthouse --version
2. Compiling from Source Code: This method requires Rust installation (as described earlier) and may take some time.
git clone https://github.com/sigp/lighthouse.git
cd lighthouse
git checkout stable # Or a specific version tag, e.g., v5.2.0
cargo build --release
sudo cp target/release/lighthouse /usr/local/bin/
cd ..
rm -rf lighthouse
lighthouse --version
Connecting Lighthouse with Geth
For Lighthouse to function correctly, it needs to "know" how to communicate with your Geth client. This is achieved through the Engine API and a shared JWT secret.
Create a directory for Lighthouse data:
sudo mkdir -p /var/lib/lighthouse
sudo chown -R ethereum:ethereum /var/lib/lighthouse
Create a systemd service file for Lighthouse:
sudo nano /etc/systemd/system/lighthouse.serviceInsert the following content:
[Unit]
Description=Lighthouse Consensus Client
After=network.target geth.service
Requires=geth.service

[Service]
User=ethereum
Group=ethereum
Type=simple
Restart=always
RestartSec=5
ExecStart=/usr/local/bin/lighthouse beacon_node \
  --network mainnet \
  --datadir /var/lib/lighthouse \
  --eth1-endpoints http://127.0.0.1:8545 \
  --execution-endpoint http://127.0.0.1:8551 \
  --jwt-secret /var/lib/ethereum/jwtsecret \
  --disable-peer-scoring \
  --enr-address $(curl -s ifconfig.me) \
  --port 9000 \
  --metrics \
  --metrics-address 127.0.0.1 \
  --metrics-port 8008 \
  --graffiti "Valebyte.com Ethereum Node 2026" \
  --checkpoint-sync-url https://beaconstate.ethstaker.cc # Use a reliable URL for checkpoint sync

[Install]
WantedBy=default.target
Explanation of parameters:
After=network.target geth.service,Requires=geth.service: Indicates that Lighthouse should start after Geth and requires it to be running.--network mainnet: Specifies that the node connects to the Ethereum mainnet.--datadir /var/lib/lighthouse: Path to Lighthouse's data directory.--eth1-endpoints http://127.0.0.1:8545: Geth's HTTP RPC address for historical Execution Layer data requests.--execution-endpoint http://127.0.0.1:8551: Geth's Engine API address for communication with the Execution Layer.--jwt-secret /var/lib/ethereum/jwtsecret: Path to the JWT secret file, which must match the one used in Geth.--disable-peer-scoring: Disables the peer scoring system, which can be useful for new nodes.--enr-address $(curl -s ifconfig.me): Automatically determines the external IP address for advertising in the ENR (Ethereum Node Record).--port 9000: Port for Lighthouse's P2P communication.--metrics,--metrics-address,--metrics-port: Enables Prometheus metrics for monitoring.--graffiti "Valebyte.com Ethereum Node 2026": An arbitrary string that will be included in blocks if you become a validator.--checkpoint-sync-url https://beaconstate.ethstaker.cc: Using checkpoint sync significantly speeds up initial Beacon Chain synchronization by allowing you to download an already finalized network state instead of synchronizing from genesis. Use a reliable and up-to-date URL.
Activate and start the Lighthouse service:
sudo systemctl daemon-reload
sudo systemctl enable lighthouse
sudo systemctl start lighthouse
You can check Lighthouse's status with the command:
sudo systemctl status lighthouseAnd view logs:
sudo journalctl -f -u lighthouseLighthouse will begin synchronizing with the Beacon Chain using checkpoint sync, and then will wait for Geth to synchronize to the current state. Both clients will operate in parallel, exchanging data via the Engine API.
Need a dedicated server?
Compare prices from top providers. Configure and order in minutes.
Monitoring Synchronization and Node Management
After launching both clients, it is crucial to constantly monitor their status to ensure your ethereum full node is synchronizing correctly and remains up-to-date. This will allow you to react promptly to any issues.
Checking Synchronization Status
To check Geth's status, you can use geth attach or curl to its RPC interface.
For Geth:
geth attach http://127.0.0.1:8545In the opened Geth console, execute:
eth.syncingIf the node is synchronizing, you will see an object showing the current block, starting block, and target block. If the node is fully synchronized, the command will return false. To exit the Geth console, press Ctrl+D.
You can also use curl:
curl -X POST -H "Content-Type: application/json" --data '{"jsonrpc":"2.0","method":"eth_syncing","params":[],"id":1}' http://127.0.0.1:8545For Lighthouse:
Lighthouse provides an HTTP API for status checking. You can use curl:
curl http://127.0.0.1:5052/eth/v1/node/syncingThis command will show if the Beacon Chain is synchronizing. If is_syncing is false and head_slot is close to the current network slot, Lighthouse is synchronized.
You can also view Lighthouse logs:
sudo journalctl -f -u lighthouseLook for messages like Synced to head, New block received, Processed block to ensure the node is actively processing new blocks.
Autostart and Logging
We have already configured systemd for autostart of both clients. This ensures that the nodes will automatically launch after a VPS reboot and will restart in case of failure. systemd logs (accessible via journalctl) are the primary source of information about node operation.
Monitoring Recommendations:
- Using
htop: Regularly check CPU, RAM, and disk I/O usage withhtop.
You will see thehtopgethandlighthouseprocesses and their resource consumption. - Disk Space: Monitoring free disk space is critical.
Ensure you have sufficient headroom.df -h /var/lib/geth /var/lib/lighthouse - Prometheus Metrics: If you have enabled metrics (
--metrics) for Lighthouse and Geth, you can set up Prometheus and Grafana to visualize data on node performance, synchronization, peer count, etc. This provides a much deeper understanding of your node's state.
Regular monitoring allows you to timely detect issues such as network lagging, insufficient disk space, or excessive resource consumption, and take action before they become critical for your ethereum node vps.
Choosing the Optimal VPS for Your Ethereum Node: Valebyte.com Plans
Choosing the right VPS provider and plan is a decisive factor for successfully launching and maintaining an ethereum full node. Valebyte.com offers a range of solutions that are ideally suited for this task, providing high performance, reliability, and flexibility.
Comparison of Recommended Configurations
For running an ethereum node vps in 2026, we recommend the following minimum and optimal configurations. Remember that the "optimal" option provides a safety margin and better performance, minimizing the risks of falling behind the network.
| Component | Minimum Requirements (2026) | Recommended Requirements (2026) |
|---|---|---|
| Disk Space | 2 TB NVMe SSD | 3-4 TB NVMe SSD |
| RAM (Random Access Memory) | 16 GB DDR4/DDR5 | 32 GB DDR4/DDR5 |
| CPU (Processor) | 4 vCPUs (3.0+ GHz) | 8 vCPUs (3.0+ GHz) |
| Network Port | 1 Gbps | 1 Gbps (guaranteed, with high traffic limit) |
| Monthly Traffic | At least 10 TB | Unlimited or 20+ TB |
| Approximate Cost (USD/month) | From $40-$60 | From $80-$150 |
It is important to note that prices may vary depending on the provider, data center location, and additional services (e.g., managed hosting). Valebyte.com offers competitive plans that meet these requirements.
Recommendations for Choosing a Hosting Provider
When choosing a hosting provider for your ethereum node on a vps, in addition to technical specifications, you should also consider other factors:
- Reliability and Uptime: Look for a provider with a high SLA (Service Level Agreement) and proven uptime (99.9% and higher). Your node must operate 24/7.
- Hardware Quality: Ensure that modern NVMe SSDs, sufficiently powerful processors, and reliable network components are used.
- Payment Flexibility: Many cryptocurrency users prefer to pay for hosting services with digital assets. Valebyte.com supports cryptocurrency payments, making it a convenient choice. You can learn more about hosting with cryptocurrency payment or VPS with USDT payment.
- Technical Support: Fast and competent technical support can be invaluable when issues arise with your VPS or network.
- Data Center Location: Choosing a data center located close to the main Ethereum network nodes (or to you, if you use the node for local queries) can improve ping and synchronization speed.
- Scalability: Ensure that the provider allows you to easily upgrade your VPS as resource requirements grow.
Valebyte.com offers a wide selection of VPS plans that meet all the above requirements, providing an ideal platform for your ethereum node vps. We understand the specifics of crypto projects and offer optimal solutions for their launch and scaling. You can buy a VPS with cryptocurrency, including Ethereum, Bitcoin, and USDT, which ensures full anonymity and convenience.
Conclusion
Running an ethereum node vps in 2026 requires a meticulous approach to hardware selection and configuration, but it provides independence and reliability in working with the blockchain. For a fully functional ethereum full node, 2 TB+ NVMe SSD, 16-32 GB RAM, 4-8 vCPUs, and a gigabit internet connection are critical.
Valebyte.com provides high-performance VPS with NVMe storage and flexible plans, ideally suited for hosting an execution consensus client, ensuring stable and fast operation of your Ethereum node.
Ready to choose a server?
VPS and dedicated servers in 72+ countries with instant activation and full root access.
Get started now →