Setting up VLESS Reality on Android using v2rayNG and your own VPS can be done in 10 minutes by following a step-by-step guide for installing Xray on the server and importing the configuration into the client application.
Why VLESS Reality and v2rayNG are Your Choice for Bypassing Censorship?
In an environment of constantly evolving internet censorship and blocking methods, traditional VPN solutions often prove ineffective or easily detectable. The VLESS Reality protocol, based on Xray, represents a revolutionary approach to bypassing censorship, offering an unprecedented level of obfuscation and resilience. Unlike conventional proxies, Reality leaves no traces on the server indicating the presence of a proxy server. It mimics regular HTTPS traffic to real, existing websites (e.g., Google, Cloudflare, Microsoft), making it virtually indistinguishable from legitimate traffic for Deep Packet Inspection (DPI) systems.
v2rayNG VLESS Reality is a combination that provides high speed, reliability, and most importantly, stealth. V2rayNG is one of the most popular and functional Android clients for Xray/V2Ray protocols, offering an intuitive interface for configuring and managing connections. Its active development and support for various configurations make it an ideal tool for using Reality on mobile devices. Setting up your own server on a VPS gives you full control over the configuration, eliminates dependence on third-party services, and ensures maximum privacy and security.
Advantages of VLESS Reality over Other Protocols
- Undetectability: Reality mimics traffic to real, popular websites, making it extremely difficult to block by signatures. The absence of TLS fingerprints, characteristic of proxy servers, allows it to bypass even the most advanced DPI systems.
- High Performance: The VLESS protocol is optimized for minimal latency and maximum throughput, ensuring comfortable video streaming, online gaming, and fast page loading.
- Security: All data transmission is encrypted using TLS 1.3, providing protection against interception and analysis.
- Ease of Setup: Despite its apparent complexity, setting up VLESS Reality on a VPS and subsequently importing it into v2rayNG configuration is relatively quick with the help of ready-made scripts and detailed instructions.
- Independence: Your own VPS and Reality server mean you control your data and are not dependent on the policies or operational stability of commercial VPN providers.
Why Valebyte.com for Your VLESS Reality VPS?
Valebyte.com offers reliable and high-performance VPS, ideally suited for deploying VLESS Reality. Our servers are equipped with NVMe drives, ensuring high file system speed, and broad geographical coverage allows you to choose a location with minimal latency to your connection point. Additionally, we provide the option to pay with cryptocurrency, which offers extra anonymity and convenience. You can buy a VPS without a bank card, using Bitcoin, Ethereum, or USDT.
Choosing and Preparing a VPS for VLESS Reality
The first and one of the most important steps in deploying VLESS Reality is choosing a suitable VPS. Its characteristics and location determine the stability, speed, and overall effectiveness of your proxy server. For a v2rayNG VPS running Reality, extreme resources are not required, but there are minimum recommendations.
Minimum System Requirements for Xray Reality
For stable operation of the Xray server with the VLESS Reality protocol, you will need:
- Operating System: Ubuntu 20.04/22.04 LTS, Debian 10/11/12, or CentOS 7/8. Ubuntu 22.04 LTS is recommended due to package currency and broad support.
- Processor (CPU): 1 vCPU with a frequency of 2.0 GHz or higher. Most modern VPS processors will handle this task.
- Random Access Memory (RAM): Minimum 512 MB, but 1 GB RAM will be more comfortable for the system and potential background tasks.
- Disk Space: 10-15 GB NVMe SSD. Xray itself takes up little space, but the OS and logs require some volume. NVMe drives provide high I/O speeds, which is important for responsiveness.
- Network Interface: 1 Gbit/s port with unlimited or sufficient traffic volume. For active use, at least 500 GB - 1 TB of traffic per month will be required.
When choosing a plan, pay attention to a cheap VPS with hourly billing if you plan to test various configurations or not use the server constantly. This will allow you to save money by paying only for the actual usage time.
Choosing VPS Location and Domain
The location of your VPS plays a critical role in minimizing latency and maximizing throughput. Choose a location that is geographically closer to you or to the target resources you want to access.
For VLESS Reality, a domain name will also be required. It will be used for traffic obfuscation. The domain does not necessarily need to be active or have a real website, but it must be registered and pointed to your VPS's IP address. You can purchase a cheap domain from any registrar (e.g., Namecheap, GoDaddy). After purchasing the domain, add an A-record pointing to your VPS's IP address. For example:
Type: A
Name: yoursubdomain
Value: YOUR_VPS_IP_ADDRESS
TTL: Automatic (or 300 seconds)
As a "Reality destination" (target site for obfuscation), it is recommended to use domains of large, popular services such as www.google.com, www.microsoft.com, www.apple.com, www.cloudflare.com. This helps avoid suspicion, as traffic to them is considered normal.
Initial VPS Security Setup
After gaining access to your VPS (usually via SSH), follow these steps:
- System Update:
sudo apt update && sudo apt upgrade -y - Create a New User (optional, but recommended):
Then exit from root and log in as the new user.sudo adduser yourusername sudo usermod -aG sudo yourusername - Firewall Setup (UFW):
For VLESS Reality, you will only need to open one port (e.g., 443 or any other you choose). First, allow SSH and then activate UFW.
Looking for a reliable server for your projects?
VPS from $10/month and dedicated servers from $9/month with NVMe, DDoS protection, and 24/7 support.
View offers →
Confirm UFW activation by enteringsudo apt install ufw -y sudo ufw allow ssh sudo ufw allow 443/tcp # Or any other port you choose for Reality sudo ufw enabley. You can check the status with the commandsudo ufw status.
Installing Xray and Configuring VLESS Reality on Your VPS
Now that your VPS is ready, let's proceed with installing Xray and configuring VLESS Reality. We will use the official Xray installation script, which significantly simplifies the process. For more advanced scenarios with panels such as Hiddify on VPS or Marzban on VPS, the process will differ, but the basic principle of Reality remains the same.
Installing Xray Core
The official Xray installation script allows you to quickly deploy Xray and manage it as a system service:
bash -c "$(curl -L https://raw.githubusercontent.com/XTLS/Xray-install/main/install-release.sh)" @ installAfter installation, Xray will be launched as a system service. You can check its status with the command:
sudo systemctl status xrayGenerating Reality Keys and Configuring Xray
VLESS Reality requires key pairs (privateKey and publicKey) and a Short ID. These can be generated using the Xray utility. Run the following command on your VPS:
/usr/local/bin/xray x25519You will get output similar to this:
Private key:  YOUR_PRIVATE_KEY_HERE
Public key:   YOUR_PUBLIC_KEY_HERE
Save YOUR_PRIVATE_KEY_HERE and YOUR_PUBLIC_KEY_HERE. They will be needed for server and client configuration. Now generate a Short ID:
openssl rand -hex 8You will get a 16-digit hexadecimal code, for example, 1a2b3c4d5e6f7a8b. This will be your ShortId.
Now, edit the Xray configuration file. It is located at /usr/local/etc/xray/config.json. Open it with a text editor, for example, nano:
sudo nano /usr/local/etc/xray/config.jsonDelete the existing content and paste the following template. Replace the placeholders YOUR_DOMAIN_HERE, YOUR_PUBLIC_KEY_HERE, YOUR_SHORT_ID_HERE, and YOUR_UUID_HERE with your own values.
Important: YOUR_DOMAIN_HERE is your domain that you pointed to the VPS. DESTINATION_WEBSITE_FOR_REALITY is the domain of a real website to which traffic will be obfuscated (e.g., www.google.com:443). YOUR_UUID_HERE is a unique user identifier that can be generated with the command cat /proc/sys/kernel/random/uuid.
{
  "log": {
    "loglevel": "warning"
  },
  "inbounds": [
    {
      "port": 443,
      "protocol": "vless",
      "settings": {
        "clients": [
          {
            "id": "YOUR_UUID_HERE",
            "flow": "xtls-rprx-vision"
          }
        ],
        "decryption": "none"
      },
      "streamSettings": {
        "network": "tcp",
        "security": "reality",
        "realitySettings": {
          "show": false,
          "dest": "DESTINATION_WEBSITE_FOR_REALITY",
          "xver": 0,
          "serverNames": [
            "YOUR_DOMAIN_HERE"
          ],
          "privateKey": "YOUR_PRIVATE_KEY_HERE",
          "minClientVer": "",
          "maxClientVer": "",
          "maxTimeDiff": 0,
          "shortIds": [
            "YOUR_SHORT_ID_HERE"
          ]
        }
      },
      "sniffing": {
        "enabled": true,
        "destOverride": [
          "http",
          "tls"
        ]
      }
    }
  ],
  "outbounds": [
    {
      "protocol": "freedom",
      "settings": {}
    },
    {
      "protocol": "blackhole",
      "settings": {},
      "tag": "blocked"
    }
  ],
  "routing": {
    "rules": [
      {
        "type": "field",
        "ip": [
          "0.0.0.0/8",
          "10.0.0.0/8",
          "100.64.0.0/10",
          "127.0.0.0/8",
          "169.254.0.0/16",
          "172.16.0.0/12",
          "192.0.0.0/24",
          "192.0.2.0/24",
          "192.88.99.0/24",
          "192.168.0.0/16",
          "198.18.0.0/15",
          "198.51.100.0/24",
          "203.0.113.0/24",
          "::1/128",
          "fc00::/7",
          "fe80::/10"
        ],
        "outboundTag": "blocked"
      }
    ]
  }
}
After saving the file (Ctrl+O, Enter, Ctrl+X in nano), restart Xray to apply the changes:
sudo systemctl restart xrayMake sure the service is running without errors:
sudo systemctl status xrayIf everything is in order, you will see the "active (running)" status. Now the server-side for v2rayNG VLESS Reality is ready.
Need a dedicated server?
Compare prices from top providers. Configure and order in minutes.
Configuring v2rayNG on Android: Importing VLESS Reality Config
After successfully configuring the Xray server on your VPS, the next step is to configure the v2rayNG client application on your Android device. This process is relatively simple and takes only a few minutes.
Installing v2rayNG on Android
- Open the Google Play Store on your Android device.
- In the search bar, type "v2rayNG" and find the official application.
- Install the application. Make sure you download it from a trusted developer.
Importing VLESS Reality Configuration into v2rayNG
There are several ways to import the configuration into v2rayNG. We will cover the most convenient ones for VLESS Reality Android.
Method 1: Import via QR Code (recommended)
This is the fastest and most error-free method. You will need to generate a QR code based on your VLESS Reality configuration. For this, you can use online QR code generators or server utilities that convert a URI into a QR code. The URI for VLESS Reality has the following format:
vless://YOUR_UUID_HERE@YOUR_VPS_IP_ADDRESS:443?security=reality&sni=YOUR_DOMAIN_HERE&fp=chrome&pbk=YOUR_PUBLIC_KEY_HERE&sid=YOUR_SHORT_ID_HERE&type=tcp&flow=xtls-rprx-vision&dest=DESTINATION_WEBSITE_FOR_REALITY#Valebyte_RealityReplace all placeholders with your values obtained during server setup:
YOUR_UUID_HERE: Your user UUID.YOUR_VPS_IP_ADDRESS: Your VPS's IP address.YOUR_DOMAIN_HERE: Your domain, pointed to the VPS.YOUR_PUBLIC_KEY_HERE: Reality public key.YOUR_SHORT_ID_HERE: Reality Short ID.DESTINATION_WEBSITE_FOR_REALITY: Target site for obfuscation (e.g.,www.google.com:443).Valebyte_Reality: Profile name that will be displayed in v2rayNG.
Once you have composed the URI, paste it into an online QR code generator (e.g., qr-code-generator.com) and get the QR code image.
In v2rayNG:
- Open the application.
- Tap the
+icon in the top right corner. - Select "Scan QR Code".
- Point the camera at the generated QR code. The application will automatically import the configuration.
Method 2: Import via Link (URI)
If you cannot use a QR code, you can import directly via a link. Create the URI as described above and copy it.
In v2rayNG:
- Open the application.
- Tap the
+icon in the top right corner. - Select "Import config from clipboard" (if the link is already copied) or "Import config from URL" and paste the link.
Method 3: Manual Configuration Input
This method is the most time-consuming but useful if other methods are unavailable.
In v2rayNG:
- Tap the
+icon in the top right corner. - Select "Manually input [VLESS]".
- Fill in the following fields:
- Remarks: Valebyte Reality (or any other name)
- Address: Your VPS's IP address
- Port: 443 (or the port you specified in the Xray config)
- User ID: Your UUID
- Flow: xtls-rprx-vision
- Security: reality
- SNI: Your domain (e.g.,
yoursubdomain.yourdomain.com) - Public Key: Your Reality public key
- Short ID: Your Reality Short ID
- Fingerprint: chrome (recommended)
- SpiderX: DESTINATION_WEBSITE_FOR_REALITY (e.g.,
www.google.com:443) - Allow Insecure: Disabled (default)
- Tap the checkmark in the top right corner to save the configuration.
After importing or manually entering, you will see a new profile in the v2rayNG list. Select it and tap the "V" button (or connection button) at the bottom of the screen to establish the connection. If the connection is successful, the icon in the Android status bar will change, and you will see a notification that v2rayNG is running.
To optimize performance and ensure a stable connection, especially in 2026, when blocking methods become increasingly sophisticated, it is important to correctly configure v2rayNG setup 2026 taking into account current Reality recommendations. Keep an eye on v2rayNG and Xray updates for the latest features and security improvements.
Connection Verification and Common Issues with v2rayNG VLESS Reality
After configuring the server and client, it is crucial to ensure that the VLESS Reality connection is working correctly. This stage includes verifying the connection, testing speed, and identifying potential issues.
How to Verify the Connection?
- Launch v2rayNG: In the v2rayNG application, select the created VLESS Reality profile and tap the "V" button at the bottom to activate the proxy. A key or VPN icon should appear in the Android notification bar.
- Check IP Address: Open a browser on Android and go to a website that shows your external IP address (e.g.,
whatismyip.comor2ip.ru). If the connection is established, you should see your VPS's IP address. - Speed Test: Use Speedtest.net or a similar service to check download and upload speeds. Compare the results with your usual internet speed. A slight decrease in speed and increase in ping are expected due to proxying, but there should be no significant losses.
- Access Blocked Resources: Try opening websites or applications that were previously blocked in your region. If they open, then your v2rayNG VLESS Reality is working as intended.
Common Errors and Their Solutions
Even with careful setup, problems can arise. Here are the most common errors and how to solve them:
1. Failed to Connect (Connection Failed)
- Check VPS IP Address: Ensure that the IP address in the v2rayNG configuration matches the actual IP of your server.
- Check Port: The port (default 443) must be open on your VPS and match in both Xray and v2rayNG configurations. Check UFW on VPS:
sudo ufw status. - Check Xray on Server: Ensure that the Xray service is running without errors:
sudo systemctl status xray. If there are errors, check the logs:sudo journalctl -u xray -f. - Check Keys and Short ID: Ensure that the
privateKeyon the server and thepublicKey,shortIdin the client match. Any typo will lead to an error. - Check UUID: Ensure that the UUID in the server and client configurations match exactly.
- Check Domain (SNI): Ensure that the domain specified in
serverNameson the server and inSNIin the client is correct and points to your VPS's IP. - Check Destination: Ensure that
destin the server's Reality configuration is specified correctly (e.g.,www.google.com:443). - Server and Client Time: Ensure that the time on your VPS and Android device is synchronized. A difference of more than 90 seconds can cause TLS issues.
2. Low Speed or Unstable Connection
- VPS Load: Check CPU, RAM, and network load on your VPS:
htoportop. If resources are overloaded, consider upgrading your plan or optimizing the server. - Network Quality: The issue might be with your internet provider or between your device and the VPS. Try connecting from a different network or checking the ping to your VPS.
- VPS Location: If the VPS is too far away, latency will be high. Consider choosing a VPS closer to your location.
- Firewall on VPS: Ensure that the firewall is not blocking necessary ports or limiting traffic.
- TCP Fast Open Settings: To improve TCP performance, you can enable TCP Fast Open on your VPS:
sudo sysctl -w net.ipv4.tcp_fastopen=3
echo "net.ipv4.tcp_fastopen=3" | sudo tee -a /etc/sysctl.conf
3. Unable to Resolve VPS IP Address (DNS issues)
- DNS on Android: In v2rayNG settings, you can specify custom DNS servers (e.g., Cloudflare DNS 1.1.1.1 or Google DNS 8.8.8.8) to bypass issues with your provider's DNS.
- Domain Record Issue: Ensure that your A-record for the domain used in SNI correctly resolves to your VPS's IP address. Use
dig yourdomain.com +shorton another server to verify this.
Optimization and Autostart of VLESS Reality on Android
For comfortable use of VLESS Reality on Android, it's important not only to set it up but also to ensure stable operation, autostart, and minimal resource consumption. Let's look at how to achieve this, especially considering the requirements of v2rayNG setup 2026 for long-term stability.
Autostart v2rayNG on System Boot
V2rayNG has an autostart function by default, which is activated if you enable the "Start V2Ray on boot" (or similar) option in the application settings. This ensures that your connection will be established automatically after phone reboot.
- Open v2rayNG.
- Go to "Settings".
- Find the "Start V2Ray on boot" option and enable it.
After enabling this option, v2rayNG will automatically start in the background with every Android boot.
Optimizing Power Consumption and Background Operation
Android systems actively optimize battery consumption, which can sometimes lead to "killing" background applications, including v2rayNG. To avoid this:
- Disable battery optimization for v2rayNG:
- Go to Android "Settings" -> "Apps" (or "Apps & notifications").
- Find v2rayNG in the list of applications.
- Go to "Battery" or "Battery Optimization".
- Select "Don't optimize" or "Unrestricted" for v2rayNG. This will allow the application to run in the background without system restrictions.
- Pinning the application in memory (recent apps): On some Android shells (e.g., MIUI, EMUI), you can "pin" the application in the list of recently launched apps to prevent the system from unloading it from memory. This is usually done by long-pressing the application icon in the "recent" list and selecting the "pin" or "lock" option.
Additional v2rayNG Settings for Improved Stability
- DNS Servers: In v2rayNG settings, you can specify your own DNS servers, for example,
1.1.1.1(Cloudflare) or8.8.8.8(Google). This can improve domain name resolution speed and overall stability, especially if your provider blocks or slows down DNS queries.- Settings -> DNS settings -> Remote DNS:
1.1.1.1
- Settings -> DNS settings -> Remote DNS:
- Routing: V2rayNG allows you to configure routing rules. By default, all traffic goes through the proxy. You can set up rules so that specific domains or IP addresses bypass the proxy or, conversely, always go through it.
- Settings -> Per-App Proxy (for proxying traffic only for selected applications).
- Settings -> Custom Rules (for more fine-grained settings).
- Proxy Mode: In v2rayNG, you can choose the proxy mode: VPN (all traffic), Proxy Only (only applications configured to use the system proxy), or Rule (based on rules). For VLESS Reality, VPN mode is most often used.
These measures will help ensure that your VLESS Reality Android works as efficiently and stably as possible, providing reliable and fast internet access.
Need a dedicated server?
Compare prices from top providers. Configure and order in minutes.
What to Do if Your IP or Domain is Blocked
Despite VLESS Reality's high resistance to blocking, no technology offers a 100% guarantee. In the event of increased censorship, your VPS IP address or the domain used for SNI may be blocked. It's important to know how to act in such situations.
Signs of Blocking
- Complete Loss of Connection: v2rayNG cannot connect, even after restarting and checking all settings.
- Connection Established, but No Traffic: The application shows that it is connected, but no websites open, or the speed is extremely low.
- "TLS handshake failed" Error: May indicate blocking of TLS traffic to your domain/IP.
Strategies for Bypassing Blocks
1. Changing the VPS IP Address
The most direct, though not always convenient, method. If your current VPS IP address is blocked, changing it often solves the problem. On Valebyte.com, you can order a new VPS or, in some cases, request an IP change for an existing server (check with support). VPS with instant activation will allow you to quickly deploy a new server with a different IP.
2. Changing the Domain for SNI
If the blocking affects the domain used in Reality, you will need to register a new domain and point it to your VPS. Then update the Xray configuration on the server and v2rayNG on Android with the new domain name. It is recommended to use lesser-known domains that are not associated with proxy services.
3. Using a CDN (Content Delivery Network)
CDNs, such as Cloudflare, can be used to mask the real IP address of your VPS. You point your domain to the CDN, and the CDN, in turn, proxies traffic to your VPS. This makes your server's IP address unknown to blocking systems, as they only see CDN IP addresses.
Steps:
- Register your domain with Cloudflare.
- Configure an A-record for your domain (or subdomain) in Cloudflare, pointing to your VPS's IP address. Ensure that the proxying cloud (Proxy status) is active (orange).
- In the Xray configuration on the VPS and v2rayNG on Android, use your domain, but in
dest(Reality destination), specify your VPS's IP address. - On Cloudflare, ensure that the TLS/SSL mode is set to "Full" or "Full (strict)".
When using a CDN, the DESTINATION_WEBSITE_FOR_REALITY in the Xray Reality configuration should be your VPS's IP address, not the CDN domain. In serverNames, specify your domain which is proxied through the CDN.
4. Changing the Port
Although port 443 is standard for HTTPS and the least suspicious, in some cases it may be blocked for non-HTTPS traffic. Try changing the port in the Xray configuration on the VPS and in v2rayNG on Android to another non-standard port (e.g., 8443, 2053, 2083, 2087, 2096, 4433) that might be open. Don't forget to update UFW rules on the VPS.
5. Using Other Protocols
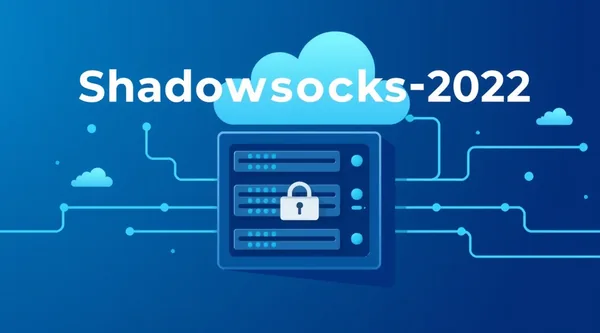
If VLESS Reality faces constant blocking, it might be worth considering other protocols such as Shadowsocks-2022, Hysteria, or TUIC v5. Valebyte.com offers articles on configuring these protocols: for example, Shadowsocks-2022 on VPS: Setup and Bypassing Blocks in 2026 or TUIC v5 on VPS: Fast Proxy over QUIC, Setup from Scratch. Each of them has its own characteristics and may be more resilient under certain conditions.
It is important to constantly monitor your proxy's operation and be ready for quick configuration changes or deploying a new server. Flexibility and responsiveness are key to successfully bypassing blocks.
Comparison of Valebyte.com Plans for VLESS Reality
Choosing the optimal VPS plan for VLESS Reality depends on the anticipated load, number of users, and desired performance. Valebyte.com offers various plans that are suitable for both individual use and small groups of users.
Below is a comparison table of recommended Valebyte.com plans, ideally suited for deploying VLESS Reality:
| Plan | vCPU | RAM | Disk (NVMe SSD) | Traffic | Port | Price (USD/month) | Recommendation for Reality |
|---|---|---|---|---|---|---|---|
| Basic S | 1 Core | 1 GB | 20 GB | 1 TB | 1 Gbit/s | $4.99 | Individual use, up to 2-3 active users. |
| Standard M | 2 Cores | 2 GB | 40 GB | 2 TB | 1 Gbit/s | $9.99 | Small family/team (up to 5-7 users), HD video streaming. |
| Advanced L | 4 Cores | 4 GB | 80 GB | 4 TB | 1 Gbit/s | $19.99 | Large family/team (up to 10-15 users), intensive use, resource headroom. |
| Enterprise XL | 8 Cores | 8 GB | 160 GB | 8 TB | 1 Gbit/s | $39.99 | Corporate use, high load, many simultaneous connections. |
Recommendations for Choosing a Plan
- For Individual Use: The Basic S plan will be more than sufficient. 1 GB RAM and 1 Core CPU will easily handle one or two active VLESS Reality connections, ensuring stable operation for browsing, messengers, and standard quality video streaming.
- For a Family or Small Team (up to 5 people): Standard M with 2 Cores and 2 GB RAM will provide comfortable operation for several devices simultaneously, allowing HD video streaming and active internet use without noticeable delays.
- For Intensive Use or a Large Group: If you plan to use the proxy for a large number of devices, 4K video streaming, or online gaming, consider Advanced L or even Enterprise XL. Additional CPU cores and RAM will ensure stability during peak loads.
- Traffic: Pay attention to the traffic volume. 1 TB per month seems like a lot, but active use (e.g., daily YouTube viewing or downloading large files) can quickly deplete it. For most users, 1-2 TB is sufficient, but for very active scenarios, it's better to have a reserve.
- Location: Choose a VPS location that is geographically closer to you to minimize latency. Valebyte.com offers servers in various data centers worldwide.
All Valebyte.com plans include NVMe SSD drives, which ensure high operating speed and system responsiveness, critically important for the performance of any network services, including Xray Reality.
Conclusion
Self-configuring VLESS Reality on a VPS using v2rayNG on Android is a reliable and highly effective solution for bypassing internet censorship, offering exceptional traffic obfuscation and high performance. The optimal choice of VPS from Valebyte.com and careful configuration guarantee a stable and secure connection, while knowledge of blocking circumvention methods will help maintain service availability in the long term.
Ready to choose a server?
VPS and dedicated servers in 72+ countries with instant activation and full root access.
Get started now →