bolt Valebyte VPS from $4/mo — NVMe, 60s deploy.

Get a VPS arrow_forward
eco Beginner Tutorial/How-to

Setting up FreshRSS on

calendar_month Jul 11, 2026 schedule 18 min read visibility 18 views
Установка FreshRSS на VPS: Свой RSS-агрегатор с доступом отовсюду
info

Need a server for this guide? We offer dedicated servers and VPS in 50+ countries with instant setup.

Need a server for this guide?

Deploy a VPS or dedicated server in minutes.

Installing FreshRSS on a VPS: Your Own RSS Aggregator Accessible From Anywhere

TL;DR

In this detailed guide, we will step-by-step set up a personal FreshRSS aggregator on your own Virtual Private Server (VPS). You will gain full control over your news feeds, ensure reading privacy, and be able to access your favorite information sources from any device, leveraging the power of open-source software and the reliability of cloud infrastructure.

  • Install and configure FreshRSS on Ubuntu Server 24.04 LTS.
  • Ensure secure access via HTTPS using Caddy.
  • Deploy the Caddy web server, PHP 8.3, and MariaDB database.
  • Set up automatic feed updates and a backup system.
  • Gain full control over data and news reading privacy.

What We Are Setting Up and Why
Diagram: What We Are Setting Up and Why

In the modern information flow, it is crucial to have tools for effective information management. RSS (Really Simple Syndication) remains one of the most powerful and private ways to follow news, blogs, and podcasts without relying on social media algorithms or email newsletters. However, many popular RSS services are proprietary cloud solutions that may collect data about your reading, display ads, or simply cease to exist.

This is where FreshRSS comes in — a free and open-source (GPL v3) RSS aggregator that you can install on your own server. It offers a clean, fast, and intuitive interface, multi-language support, an API for mobile clients (compatible with Fever API), and powerful tools for filtering and categorizing feeds. By installing FreshRSS on your VPS, you gain full control over your data, guarantee reading privacy, and create a centralized hub for all your information streams, accessible from anywhere.

Ultimately, upon completing this guide, you will have a fully functional FreshRSS aggregator running on your VPS under Ubuntu Server 24.04 LTS. It will be accessible via a secure HTTPS connection using a domain name of your choice and will be able to automatically update your feeds. You will be able to add and read RSS feeds through the web interface or through any mobile application that supports the Fever API, without any restrictions or tracking.

There are also alternatives such as Feedly, Inoreader, or The Old Reader. These are cloud services that offer "out-of-the-box" convenience for a monthly fee. They are ideal for those who do not want to bother with technical setup. However, by choosing a self-hosted solution on a VPS, you avoid monthly fees for the service itself (you only pay for the VPS), gain full confidentiality (your data remains only with you), can customize the system to your needs without restrictions, and are not dependent on the policies of third-party companies. This is an ideal choice for those who value independence and control over their digital life.

What VPS Configuration is Needed for This Task
Diagram: What VPS Configuration is Needed for This Task

FreshRSS is a relatively lightweight application, especially if you plan to use it alone or for a small group of users (up to 5-10 people) with a reasonable number of feeds (up to several hundred). Such a task does not require a powerful server, making it an ideal candidate for deployment on a budget VPS.

Minimum requirements:

  • Processor (CPU): 1 core (x86_64, 2 GHz+). FreshRSS is primarily single-threaded, so high frequency is more important than the number of cores for basic operations.
  • Random Access Memory (RAM): 1-2 GB. 1 GB will be sufficient for FreshRSS and all its dependencies (Caddy, PHP-FPM, MariaDB) in a minimal configuration. 2 GB will provide more comfortable operation and allow more data to be kept in the database cache.
  • Disk space: 20-40 GB SSD. The operating system will take up about 10-15 GB. FreshRSS and its database will use the remaining space to store articles, images, and cache. SSD is critical for fast database operation and file access.
  • Network: 100 Mbps or 1 Gbps port. For an RSS aggregator, which primarily downloads text content, port speed is less critical than connection stability. Monthly traffic usually does not exceed several hundred gigabytes.

Recommended VPS plan for comfortable operation (as of 2026):

  • CPU: 2 vCPU
  • RAM: 2-4 GB
  • Disk: 50-80 GB SSD
  • Network: 1 Gbps port, 1-2 TB traffic.

This configuration will be sufficient for FreshRSS with several thousand feeds and dozens of users, and there will also be room for other small services on the same VPS. A VPS with the specified characteristics can be rented from most cloud service providers.

When a dedicated server is needed, not a VPS:

For FreshRSS, in the vast majority of cases, a dedicated server is overkill. It is needed if you plan to:

  • Serve hundreds or thousands of users.
  • Aggregate millions of articles daily and store huge amounts of data.
  • Run many other resource-intensive applications on the same hardware.
  • Require maximum I/O performance or exclusive access to hardware.
For typical FreshRSS use, even on the scale of a small team, a VPS is more than sufficient and significantly more economical.

VPS Location: What it affects

The choice of your VPS's geographical location affects several factors:

  • Latency: The closer the server is to you and your primary audience (if any), the faster the web interface response will be. For an RSS aggregator, this is not critical but pleasant.
  • Content availability: If you aggregate content from specific regions, placing the server closer to these sources may slightly speed up feed updates.
  • Legislation: The server's location in a particular jurisdiction means your data will be subject to the laws of that country. If data privacy is a priority, choose countries with strong data protection laws.
For most users, any stable location in a large data center will suffice.

Server Preparation

Diagram: Server Preparation

Before installing FreshRSS, you need to perform basic setup and preparation of your VPS. We will use Ubuntu Server 24.04 LTS (Long Term Support), as it is a stable and widely used operating system with long-term support, relevant in 2026 as well.

1. Connecting to the server and updating the system

Connect to your new VPS via SSH. Typically, the provider gives you an IP address and login (e.g., root) with a temporary password or an SSH key.


ssh root@ВАШ_IP_АДРЕС

After successful login, update the package list and the system itself to the latest versions:


sudo apt update && sudo apt upgrade -y

This command will update all installed packages to their current versions and ensure all necessary security patches are present.

2. Creating a new user and configuring sudo

Working under the root account is insecure. Let's create a new user with limited privileges and grant them the ability to execute commands with sudo.


sudo adduser freshrssuser

Follow the on-screen instructions to set a password and user information. Then add the new user to the sudo group:


sudo usermod -aG sudo freshrssuser

Now you can log out of root and log in as freshrssuser:


exit
ssh freshrssuser@ВАШ_IP_АДРЕС

All subsequent commands will be executed as freshrssuser, using sudo when necessary.

3. Configuring SSH keys (recommended)

For increased security, it is recommended to use SSH keys instead of passwords. If you don't already have a key pair, generate them on your local computer:


ssh-keygen -t rsa -b 4096

Then copy the public key to the server:


ssh-copy-id freshrssuser@ВАШ_IP_АДРЕС

After this, you will be able to log in without a password. To completely disable password login (which is highly recommended for security), edit the SSH server configuration file:


sudo nano /etc/ssh/sshd_config

Find and change the following lines (or add them if they are missing):


PasswordAuthentication no
ChallengeResponseAuthentication no
UsePAM no

Restart the SSH service to apply the changes:


sudo systemctl restart sshd

Important: Make sure you can log in with your key before disabling password authentication, otherwise you will lose access to the server.

4. Configuring the firewall (UFW)

UFW (Uncomplicated Firewall) is an easy-to-use interface for configuring iptables rules. Enable it and allow the necessary ports:


sudo ufw allow OpenSSH         # Allow SSH (port 22)
sudo ufw allow http            # Allow HTTP (port 80)
sudo ufw allow https           # Allow HTTPS (port 443)
sudo ufw enable                # Enable the firewall
sudo ufw status                # Check status

After enabling UFW, ensure that the SSH connection has not been interrupted. If everything is in order, the firewall is now protecting your server.

5. Installing Fail2ban

Fail2ban scans server logs for suspicious activity (e.g., failed SSH login attempts) and temporarily blocks IP addresses making such attempts. This is excellent protection against brute-force attacks.


sudo apt install fail2ban -y
sudo systemctl enable fail2ban
sudo systemctl start fail2ban

Fail2ban is configured by default to protect SSH. You can check its status:


sudo fail2ban-client status
sudo fail2ban-client status sshd

At this point, the basic server preparation is complete. Now we are ready to install the main software.

Software Installation — Step-by-Step
Diagram: Software Installation — Step-by-Step

For FreshRSS to work, we will need a web server (Caddy), a PHP interpreter with the FPM module, and a database (MariaDB). We will use the current software versions available in 2026.

1. MariaDB Installation and Configuration (MySQL-compatible database)

MariaDB is a powerful and fast database management system, which is a fork of MySQL and fully compatible with it. FreshRSS works perfectly with MariaDB.


# Установка сервера MariaDB
sudo apt install mariadb-server -y

After installation, run the script for basic MariaDB security:


# Запуск скрипта для защиты MariaDB
sudo mysql_secure_installation

Follow the instructions: set a password for the database root user, remove anonymous users, disallow remote root login, and remove the test database. Then log in to MariaDB as root (database) and create a database and user for FreshRSS:


# Вход в MariaDB
sudo mysql -u root -p

Inside the MariaDB console, execute the following commands, replacing freshrss_user and ВАШ_ПАРОЛЬ_БД with your own values:


CREATE DATABASE freshrss_db CHARACTER SET utf8mb4 COLLATE utf8mb4_unicode_ci;
CREATE USER 'freshrss_user'@'localhost' IDENTIFIED BY 'ВАШ_ПАРОЛЬ_БД';
GRANT ALL PRIVILEGES ON freshrss_db. TO 'freshrss_user'@'localhost';
FLUSH PRIVILEGES;
EXIT;

These commands create the freshrss_db database, the freshrss_user user with the specified password, and grant them full privileges on this database.

2. PHP and Required Extensions Installation

FreshRSS is written in PHP. We will install PHP version 8.3 (or higher, if available) and all necessary extensions.


# Установка PHP 8.3 FPM и необходимых расширений
sudo apt install php8.3-fpm php8.3-mysql php8.3-xml php8.3-gd php8.3-intl php8.3-mbstring php8.3-zip php8.3-curl php8.3-opcache -y

These extensions enable FreshRSS to work with the database, process XML, images, provide multilingual support, compression, and execute HTTP requests. PHP-FPM (FastCGI Process Manager) will manage PHP processes for the web server.

Check PHP-FPM status:


# Проверка статуса PHP-FPM
sudo systemctl status php8.3-fpm

Ensure it is running and active.

3. Caddy Web Server Installation

Caddy is a modern, easy-to-configure web server that automatically manages Let's Encrypt certificates for HTTPS. This significantly simplifies SSL/TLS setup.


# Установка Caddy из официального репозитория
sudo apt install -y debian-keyring debian-archive-keyring apt-transport-https
curl -1sLf 'https://dl.cloudsmith.io/public/caddy/stable/gpg.key' | sudo gpg --dearmor -o /usr/share/keyrings/caddy-stable-archive-keyring.gpg
curl -1sLf 'https://dl.cloudsmith.io/public/caddy/stable/debian.deb.txt' | sudo tee /etc/apt/sources.list.d/caddy-stable.list
sudo apt update
sudo apt install caddy -y

These commands add the official Caddy repository and install the web server. Caddy automatically starts as a system service.


# Проверка статуса Caddy
sudo systemctl status caddy

4. FreshRSS Installation

Let's download the latest stable version of FreshRSS from GitHub and place it in a suitable directory for the web server.


# Переход в директорию для веб-приложений
cd /var/www/

# Скачивание последней стабильной версии FreshRSS (например, v1.25.0, актуальная на 2026 год)
# Всегда проверяйте актуальную версию на GitHub: https://github.com/FreshRSS/FreshRSS/releases
sudo wget https://github.com/FreshRSS/FreshRSS/releases/download/1.25.0/FreshRSS-1.25.0.zip

# Распаковка архива
sudo unzip FreshRSS-1.25.0.zip -d /var/www/

# Переименование директории для удобства
sudo mv /var/www/FreshRSS-1.25.0 /var/www/freshrss

# Удаление архива
sudo rm FreshRSS-1.25.0.zip

# Установка правильных прав доступа. Caddy обычно работает от пользователя 'caddy' или 'www-data'
# PHP-FPM работает от пользователя 'www-data'
sudo chown -R www-data:www-data /var/www/freshrss
sudo chmod -R 755 /var/www/freshrss

Now all components are installed, and we can proceed to their configuration.
Configuration

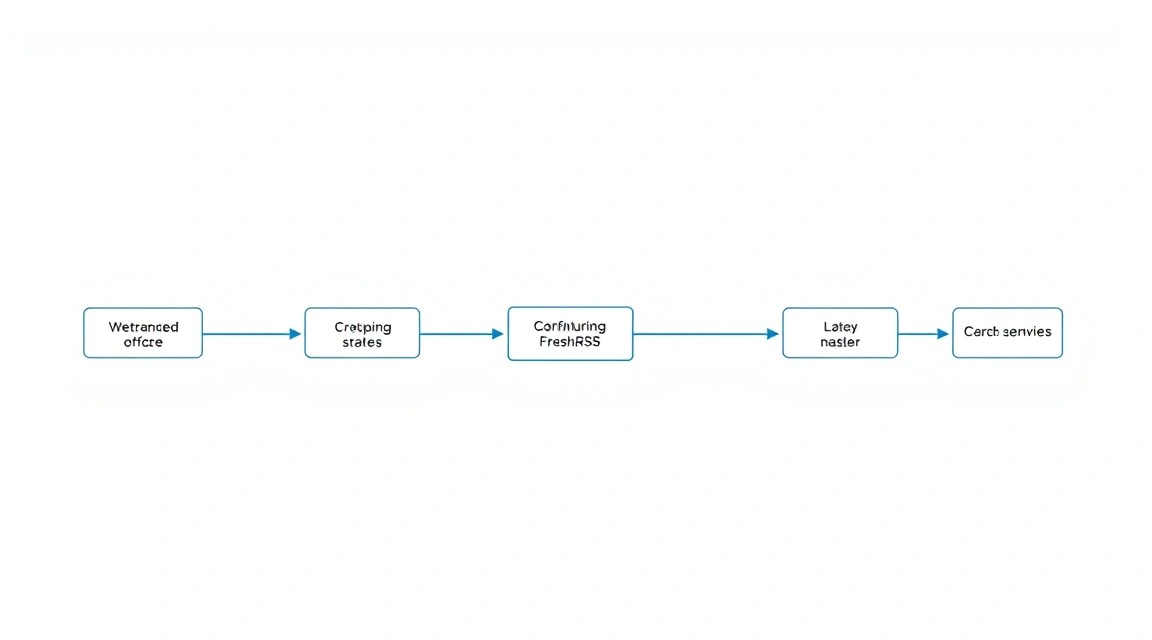
Diagram: Configuration

After installing all components, they must be configured correctly for FreshRSS to work.

1. Caddy Configuration

Caddy uses the Caddyfile for its configuration. We will configure it to serve FreshRSS and automatically obtain SSL certificates.


# Открытие файла Caddyfile для редактирования
sudo nano /etc/caddy/Caddyfile

Remove all existing content and insert the following, replacing yourdomain.com with your actual domain name:


yourdomain.com {
    # FreshRSS root directory
    root  /var/www/freshrss/p/

    # Enable gzip compression
    encode gzip

    # Strict-Transport-Security header for HTTPS
    header {
        Strict-Transport-Security max-age=31536000;
        X-Content-Type-Options nosniff
        X-Frame-Options DENY
        X-XSS-Protection "1; mode=block"
    }

    # Process PHP files via PHP-FPM
    php_fastcgi unix//run/php/php8.3-fpm.sock {
        # Additional options, if needed
    }

    # Protect data directory from direct access
    @data {
        path /data/
    }
    respond @data 403

    # Protect app directory from direct access
    @app {
        path /app/
    }
    respond @app 403

    # Protect config directory from direct access
    @config {
        path /config/
    }
    respond @config 403

    # URL rewrite for FreshRSS (frontend controller)
    try_files {path} {path}/ /index.php?{query}

    # Logging
    log {
        output file /var/log/caddy/freshrss_access.log
        format json
    }

    # Automatic SSL/TLS certificate acquisition
    tls {
        # You can specify an email for Let's Encrypt notifications
        # email [email protected]
    }
}

Important: Ensure that your domain name (yourdomain.com) points to your VPS's IP address via a DNS A-record. Without this, Caddy will not be able to obtain an SSL certificate.

Save the file (Ctrl+X, Y, Enter) and check the Caddy configuration, then restart the service:


# Проверка конфигурации Caddy
sudo caddy validate --config /etc/caddy/Caddyfile

# Перезапуск Caddy
sudo systemctl reload caddy

If everything is in order, Caddy should start successfully and begin serving your domain over HTTPS.

2. Initial FreshRSS Setup via Web Interface

Open your browser and go to https://yourdomain.com. You will see the FreshRSS welcome page.

In the first step, select the language. Then FreshRSS will check system requirements. Make sure all items are marked green. If there are warnings, ensure that you have installed all PHP extensions and configured permissions correctly.

In the next step, FreshRSS will request database connection details. Enter the information you set earlier:

  • Database Type: MySQL (or MariaDB)
  • Database Host: localhost
  • Database Name: freshrss_db
  • Database User: freshrss_user
  • Database Password: ВАШ_ПАРОЛЬ_БД

After successfully connecting to the database, FreshRSS will prompt you to create an administrator account. Set a username and a strong password. This will be your login for accessing FreshRSS.

Congratulations! FreshRSS is installed and ready for use.

3. Configuring Automatic Feed Updates (Cron Job)

For FreshRSS to automatically update RSS feeds, you need to set up a Cron job.


# Открытие таблицы Cron для редактирования
sudo crontab -u www-data -e

If this is the first time, choose an editor (e.g., nano). Add the following line to the end of the file:


# Update FreshRSS feeds every 15 minutes
/15     php /var/www/freshrss/app/actualize_script.php > /dev/null 2>&1

This command will run the FreshRSS update script every 15 minutes as the www-data user (under which PHP-FPM runs). Redirecting output to /dev/null prevents logs from being filled with unnecessary messages.

4. Verifying Functionality

To ensure everything is working correctly:

  • Open https://yourdomain.com in your browser and ensure you see the FreshRSS interface.
  • Try adding a few RSS feeds and verify that they update successfully.
  • Check Caddy logs for errors:
  • 
    sudo journalctl -u caddy --since "5 minutes ago"
    
  • Check PHP-FPM logs:
  • 
    sudo journalctl -u php8.3-fpm --since "5 minutes ago"
    
  • Ensure that the cron job is running by checking the last feed update time in the FreshRSS admin panel.

At this point, your FreshRSS is fully configured and functional.

Backups and Maintenance

Diagram: Backups and Maintenance

Regular backups and timely server maintenance are critically important aspects for any system. FreshRSS stores all your feeds, settings, and user data in the database and file system, so it's crucial to ensure their preservation.

1. What to Back Up

For FreshRSS, three main components need to be backed up:

  1. MariaDB Database: Contains all your subscriptions, articles, read/unread statuses, users, and their settings. This is the most important component.
  2. FreshRSS Data Directory: /var/www/freshrss/data/. This directory contains FreshRSS configuration files, cache, user settings, and other service data not stored in the DB.
  3. Web Server Configuration Files: /etc/caddy/Caddyfile. Saving the Caddy configuration will allow for quick web server recovery if needed.

2. Simple Auto-Backup Script

Let's create a simple bash script that will perform backups. We will use mysqldump for the database and tar for file archives.


# Creating a directory for backups
sudo mkdir -p /opt/backups/freshrss
sudo chown freshrssuser:freshrssuser /opt/backups/freshrss

# Creating the backup script
nano /opt/backups/freshrss/backup_freshrss.sh

Insert the following content, replacing ВАШ_ПАРОЛЬ_БД with the FreshRSS database user password:


#!/bin/bash

# Variables
BACKUP_DIR="/opt/backups/freshrss"
DATE=$(date +%Y%m%d%H%M%S)
DB_NAME="freshrss_db"
DB_USER="freshrss_user"
DB_PASS="YOUR_DB_PASSWORD" # Use a strong password
FRESHRSS_PATH="/var/www/freshrss"
CADDY_CONFIG="/etc/caddy/Caddyfile"

# Dumping the database
echo "Dumping MariaDB database..."
mysqldump --user=$DB_USER --password=$DB_PASS $DB_NAME > "$BACKUP_DIR/$DB_NAME-$DATE.sql"

# Archiving FreshRSS data directory
echo "Archiving FreshRSS data directory..."
tar -czf "$BACKUP_DIR/freshrss_data-$DATE.tar.gz" -C "$FRESHRSS_PATH" data/ config/

# Copying Caddy configuration
echo "Copying Caddyfile..."
cp "$CADDY_CONFIG" "$BACKUP_DIR/Caddyfile-$DATE.conf"

# Deleting old backups (older than 7 days)
echo "Cleaning up old backups..."
find "$BACKUP_DIR" -type f -name ".sql" -mtime +7 -delete
find "$BACKUP_DIR" -type f -name ".tar.gz" -mtime +7 -delete
find "$BACKUP_DIR" -type f -name ".conf" -mtime +7 -delete

echo "Backup finished at $DATE"

Save the file and make it executable:


chmod +x /opt/backups/freshrss/backup_freshrss.sh

Now add this script to Cron for automatic execution. For example, for a daily backup at 03:00 AM:


crontab -e

Add the following line:


0 3    /opt/backups/freshrss/backup_freshrss.sh >> /var/log/freshrss_backup.log 2>&1

This will run the script daily and log its output to /var/log/freshrss_backup.log.

3. Where to Store Backups

Storing backups on the same server as the live system is risky. In case of a server failure (e.g., disk failure), you will lose both the system and the backups. It is recommended to use remote storage:

  • External S3-compatible service: AWS S3, DigitalOcean Spaces, Backblaze B2. For this, you can integrate s3cmd or rclone into the backup script.
  • Separate VPS: If you have another VPS, you can configure rsync or scp to copy backups there via SSH.
  • Local computer: For very small projects, you can periodically download backups to your computer manually or using a script.

For example, to copy to another server via SSH (after configuring passwordless SSH keys):


# Add to backup_freshrss.sh script after archiving
echo "Copying backups to remote server..."
rsync -avz "$BACKUP_DIR/" freshrssuser@REMOTE_IP:/path/to/remote/backups/

4. Updates: rolling vs. maintenance window

Keeping the system up-to-date is critical for security and stability.

  • OS Updates (Ubuntu): Regularly run sudo apt update && sudo apt upgrade -y. For production systems, it is advisable to do this within a scheduled maintenance window to avoid unexpected failures. For a personal server, you can do it more frequently.
  • PHP, MariaDB, Caddy Updates: These are also updated via apt upgrade. Sometimes, updates to these components may require manual intervention (e.g., merging configuration files).
  • FreshRSS Updates:
    • Via Git: If you initially cloned the Git repository, updating involves a git pull in the FreshRSS directory, and then possibly running database migrations through the web interface.
    • Via Archive Download: If you installed FreshRSS from a ZIP archive, updating requires downloading the new version, extracting it, copying data/ and config/ from the old installation to the new one, then updating symlinks or changing the root directory in the Caddyfile.

Recommended Strategy:

  1. Perform updates at a scheduled time.
  2. Before major updates (especially major versions of PHP or FreshRSS), perform a full backup.
  3. Read the changelogs of the programs being updated to be aware of possible changes or required manual actions.
  4. For FreshRSS, after updating files, always access the web interface to ensure that no database migration is required.

Troubleshooting + FAQ

This section provides answers to frequently asked questions and solutions to common problems that may arise during FreshRSS installation and operation.

What is the minimum suitable VPS configuration?

For FreshRSS in single-user mode or for a small group of up to 5 users with a few hundred feeds, a VPS with 1 vCPU, 1 GB of RAM, and 20-30 GB of SSD storage will be minimally suitable. This configuration will be sufficient for stable operation, but with an increase in the number of feeds or users, it is recommended to increase RAM to 2 GB for better database and PHP-FPM performance.

What to choose — VPS or dedicated for this task?

For FreshRSS installation, a VPS is almost always sufficient. Dedicated servers are significantly more expensive and offer excessive resources for an RSS aggregator, unless you plan to serve thousands of users or integrate FreshRSS into a very large infrastructure with other resource-intensive services. A VPS provides an excellent balance of performance, flexibility, and cost for FreshRSS.

Why do I see a "502 Bad Gateway" error in the browser?

The "502 Bad Gateway" error usually indicates a problem with PHP-FPM. The web server (Caddy) cannot communicate with PHP-FPM or PHP-FPM is not processing requests.

What to check:

  • Ensure that PHP-FPM is running: sudo systemctl status php8.3-fpm. If it's inactive, try starting it: sudo systemctl start php8.3-fpm.
  • Check PHP-FPM logs: sudo journalctl -u php8.3-fpm. Look for errors that may indicate PHP configuration issues or insufficient memory.
  • Ensure that Caddy is configured for the correct PHP-FPM socket (unix//run/php/php8.3-fpm.sock).

How to update FreshRSS to a new version?

If you followed this guide, FreshRSS was installed from an archive. To update:

  1. Perform a backup: Be sure to perform a full backup of the database and the /var/www/freshrss/data directory.
  2. Download the new version: Download the latest FreshRSS ZIP archive from the GitHub releases page.
  3. Extract: Extract the new archive to a new temporary directory (e.g., /var/www/freshrss_new).
  4. Transfer data: Copy the contents of the old /var/www/freshrss/data and /var/www/freshrss/config directories to the corresponding directories of the new installation.
  5. Update links: Rename the old /var/www/freshrss directory (e.g., to freshrss_old) and rename the new freshrss_new directory to freshrss.
  6. Set permissions: sudo chown -R www-data:www-data /var/www/freshrss && sudo chmod -R 755 /var/www/freshrss.
  7. Restart Caddy: sudo systemctl reload caddy.
  8. Complete in browser: Open FreshRSS in your browser. If a database migration is required, FreshRSS will prompt you to perform it.

My feeds are not updating automatically, what should I do?

This is most likely a Cron job issue.

What to check:

  • Ensure that the Cron job for www-data exists and is correct: sudo crontab -u www-data -l.
  • Verify that the path to the PHP interpreter and the actualize_script.php script is correct.
  • Ensure that the www-data user has permissions to execute the script and write to the FreshRSS directories.
  • Check system Cron logs: sudo grep CRON /var/log/syslog.
  • Try running the script manually as the www-data user: sudo -u www-data php /var/www/freshrss/app/actualize_script.php and check the output.

How to add a new feed to FreshRSS?

In the FreshRSS web interface, go to the "Subscriptions" section, then click the "Add feed" button or the "+" icon. Paste the RSS feed URL into the field and click "Add". FreshRSS will attempt to detect and add the feed. You can also specify a category for the new feed.

How to configure FreshRSS for mobile app access?

FreshRSS supports the Fever API, which allows it to be used with many mobile RSS clients (e.g., Reeder, NetNewsWire, Lire).

  1. In FreshRSS, go to "Settings" -> "Authentication".
  2. Enable "API" and select "Fever API" as the method.
  3. Create an "API Token" for each client or use an existing one.
  4. In your mobile app, select "Fever" or "Self-hosted RSS" as the source and enter your FreshRSS address (https://yourdomain.com/p/api/fever) and API token.

Conclusions and Next Steps

Diagram: Conclusions and Next Steps

Congratulations! You have successfully installed and configured FreshRSS on your VPS, creating a powerful, private, and fully controlled RSS aggregator. You now have a tool for efficient information stream management that does not depend on third-party services and protects your privacy. You have mastered not only the application installation but also the basic principles of web server, database, and PHP configuration, as well as ensuring security and backups.

Where to go next?

  1. Explore FreshRSS functionality: Experiment with categories, filters, archiving rules, integration with other services (e.g., Instapaper or Wallabag for read-it-later), available in FreshRSS.
  2. Optimization and monitoring: Monitor your VPS resource consumption using utilities like htop or grafana. If necessary, you can fine-tune PHP-FPM or Caddy for better performance or reduced memory consumption.
  3. Additional services: You might want to deploy other useful self-hosted applications on your VPS, such as the Vaultwarden password manager, the Kanboard project management system, or the Nextcloud personal cloud storage.

Was this guide helpful?

FreshRSS installation on VPS: self-hosted RSS aggregator with remote access
support_agent
Valebyte Support
Usually replies within minutes
Hi there!
Send us a message and we'll reply as soon as possible.