
Setting up Traefik on a VPS for Automatic Docker Container Proxying with SSL
TL;DR
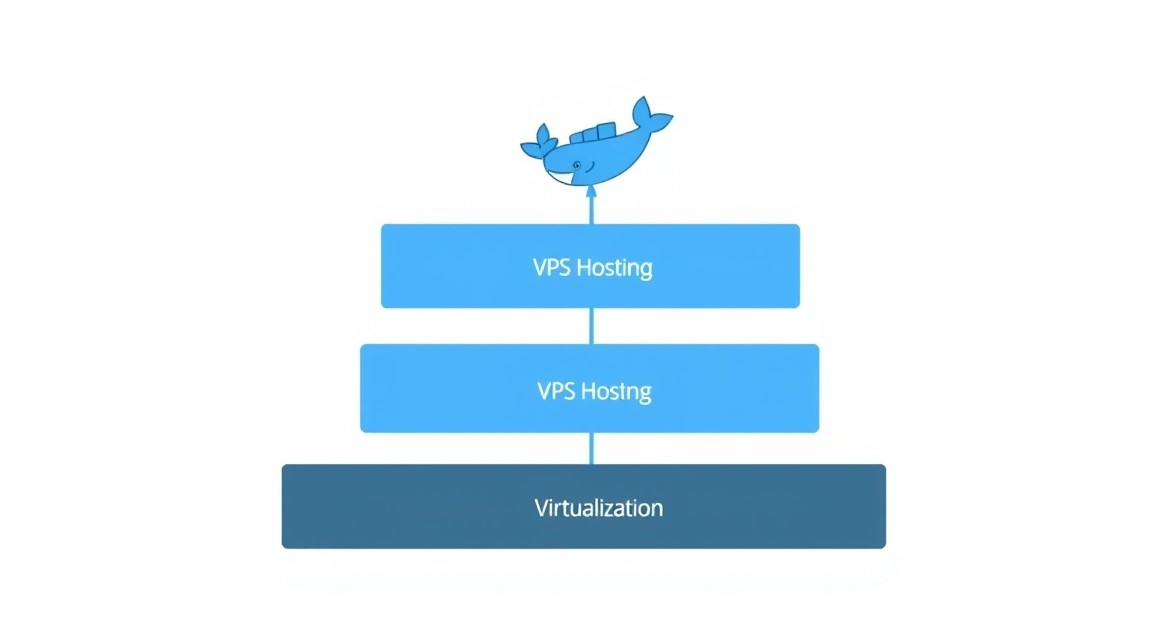
In this guide, we will set up Traefik v3 on a Virtual Private Server (VPS) to automatically discover and proxy Docker containers, while also providing automatic issuance and renewal of SSL certificates from Let's Encrypt. This will allow you to easily deploy new web services in Docker that will be accessible via a domain name with HTTPS, without manual proxy and certificate configuration for each new service.
- Configure Traefik v3 as a reverse proxy and load balancer.
- Integrate Traefik with Docker for automatic service discovery via labels.
- Automate obtaining and renewing SSL certificates via Let's Encrypt.
- Use Docker Compose for convenient infrastructure management.
- Ensure basic server and Traefik security.
What we are setting up and why
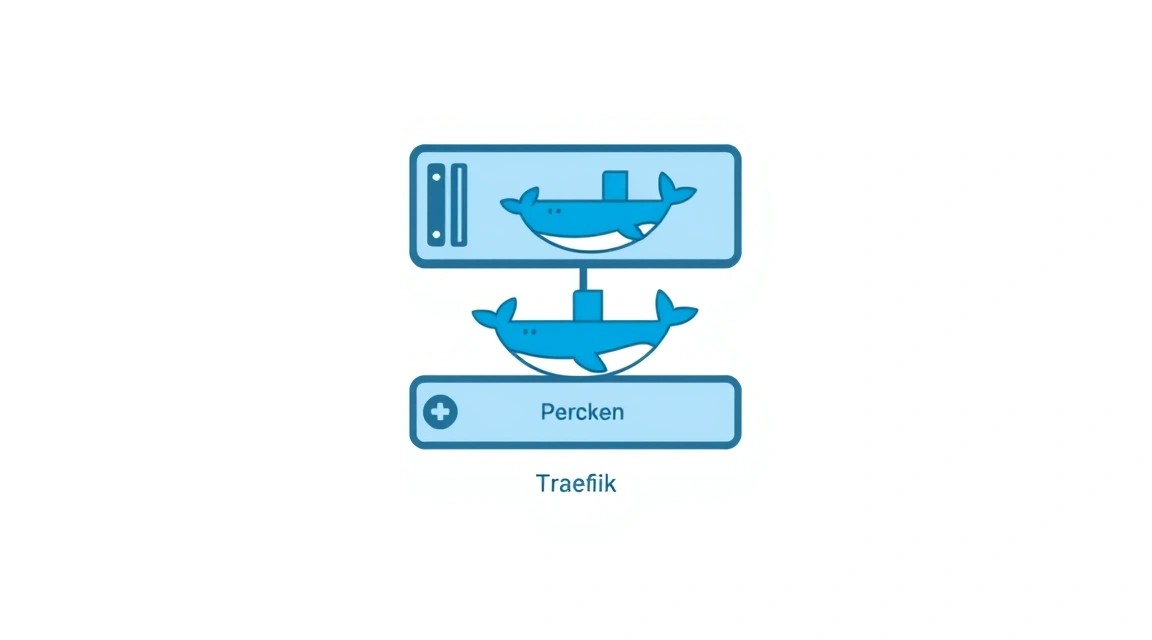
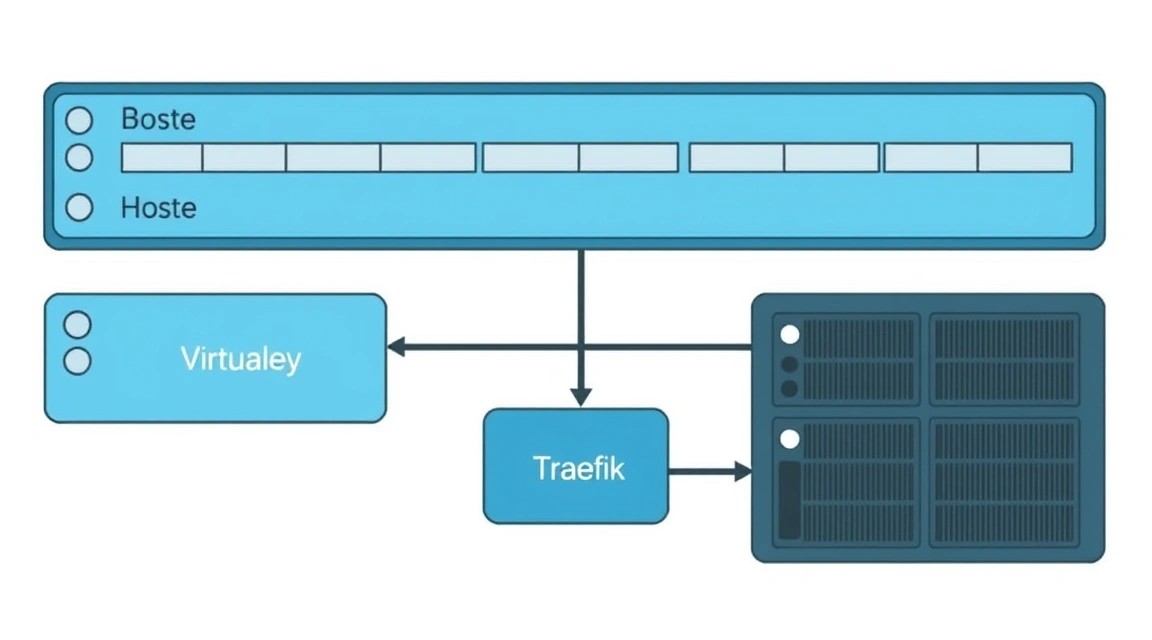
We will be setting up Traefik — a modern cloud-native reverse proxy and load balancer that integrates excellently with dynamic environments such as Docker. The main goal is to automate the process of publishing web services running in Docker containers, making them accessible from the internet via domain names and with a secure HTTPS connection.
Ultimately, you will get a flexible and scalable infrastructure where each new Docker container intended for public access will be automatically registered in Traefik. You won't have to manually edit Nginx or Apache configuration files, nor worry about obtaining and renewing SSL certificates — Traefik will do it for you using Let's Encrypt. This significantly simplifies the deployment and management of multiple microservices or web applications on a single VPS.
What alternatives exist? For publishing web services, traditional reverse proxies such as Nginx or Apache can be used, which require manual configuration for each new service. In cloud environments (AWS, GCP, Azure), managed load balancers and API Gateways are often used. However, for self-hosting on a VPS, Traefik offers a unique combination of ease of setup, automation, and deep integration with Docker. By choosing a self-hosted solution on a VPS, you gain full control over your infrastructure, save on monthly fees for managed services, and can adapt everything to your specific needs, which is ideal for developers, solo founders, and enthusiasts.
What VPS config is needed for this task
The choice of VPS configuration depends on the number and load of Docker containers you plan to proxy through Traefik. Traefik itself is relatively lightweight, but the proxied services can be demanding.
Minimum requirements
- CPU: 1 core (e.g., Intel Xeon E3/E5).
- RAM: 2 GB (for Traefik and a few lightweight Docker containers).
- Disk: 40 GB SSD (for the operating system, Docker images, logs, and container data).
- Network: 100 Mbps port with unlimited traffic or sufficient volume (from 1 TB/month) for your needs.
- Operating System: Ubuntu 24.04 LTS (recommended) or Debian 12.
Recommended VPS plan for most tasks
For more serious projects involving multiple web applications, databases, or if you expect moderate load, the following configuration is recommended:
- CPU: 2 cores (e.g., Intel Xeon E5).
- RAM: 4 GB.
- Disk: 80-120 GB SSD (for comfortable hosting of multiple applications and their data).
- Network: 1 Gbps port with unlimited traffic.
You can get a VPS with the specified characteristics to start. This configuration will ensure stable operation of Traefik and allow you to host up to 5-10 medium Docker containers without significant slowdowns.
When a dedicated server is needed, not a VPS
A dedicated server becomes preferable when:
- You need maximum performance and stability without the "noisy neighbor" effect typical of VPS.
- You plan to host high-load applications requiring more than 8-16 GB RAM and 4+ CPU cores.
- A large amount of disk space (several TB) or specific disk configurations (RAID) is needed.
- Specific hardware components are required (GPU, special network cards).
- Compliance with strict regulatory requirements is necessary, which may be easier to meet on fully controlled hardware.
For most tasks related to Traefik and Docker containers for small and medium businesses or personal projects, a VPS is more than sufficient.
Location: what it affects
The choice of VPS location affects:
- Latency: The closer the server is to your primary audience, the faster pages will load and services will respond.
- Legal compliance: In some cases, storing data in a specific jurisdiction is mandatory.
- Availability: Different locations may have varying network stability and availability.
Choose a location that is geographically closer to your main users for optimal performance.
Server preparation
After gaining access to your new VPS, you need to perform a few basic steps to prepare it and ensure its security.
1. SSH connection and user creation
Connect to the server as root (or the user provided by the hoster) and create a new user with limited privileges. Replace ваш_пользователь with your desired username.
ssh root@ВАШ_IP_АДРЕС # Connect as root
adduser ваш_пользователь # Create a new user
usermod -aG sudo ваш_пользователь # Add the user to the sudo group
Now exit the root session and connect as the new user:
exit # Exit root session
ssh ваш_пользователь@ВАШ_IP_АДРЕС # Connect as the new user
2. SSH key setup (recommended)
For enhanced security, it is recommended to use SSH keys instead of passwords. If you don't have an SSH key yet, generate one on your local machine:
ssh-keygen -t rsa -b 4096 # Generate a new SSH key (on your local machine)
Copy the public key to the server:
ssh-copy-id ваш_пользователь@ВАШ_IP_АДРЕС # Copy the public key to the server
After verifying login with the key, disable password authentication for root and your user in the /etc/ssh/sshd_config file. Find and modify these lines:
sudo nano /etc/ssh/sshd_config # Open SSH server configuration
Change or add:
PermitRootLogin no
PasswordAuthentication no
Restart the SSH service:
sudo systemctl restart sshd # Restart SSH service
3. System update
Ensure that all packages on the server are updated to the latest versions.
sudo apt update && sudo apt upgrade -y # Update package list and all installed packages
4. Firewall (UFW) installation and configuration
Let's set up a simple but effective firewall, UFW (Uncomplicated Firewall).
sudo apt install ufw -y # Install UFW
sudo ufw default deny incoming # Deny all incoming connections by default
sudo ufw default allow outgoing # Allow all outgoing connections by default
sudo ufw allow ssh # Allow incoming SSH connections (port 22)
sudo ufw allow http # Allow incoming HTTP connections (port 80)
sudo ufw allow https # Allow incoming HTTPS connections (port 443)
sudo ufw enable # Enable UFW (confirm with 'y')
sudo ufw status # Check UFW status
5. Fail2Ban installation
Fail2Ban helps protect against brute-force attacks by blocking IP addresses from which failed login attempts occur.
sudo apt install fail2ban -y # Install Fail2Ban
sudo systemctl enable fail2ban # Enable Fail2Ban autostart
sudo systemctl start fail2ban # Start Fail2Ban
sudo cp /etc/fail2ban/jail.conf /etc/fail2ban/jail.local # Create a local copy of the config
sudo nano /etc/fail2ban/jail.local # Edit the configuration
In the jail.local file, make sure the [sshd] section is active (enabled = true) and, if desired, you can configure bantime (block time) and findtime (period for detecting attempts).
# Inside /etc/fail2ban/jail.local
[sshd]
enabled = true
port = ssh
logpath = %(sshd_log)s
backend = %(sshd_backend)s
sudo systemctl restart fail2ban # Restart Fail2Ban to apply changes
sudo fail2ban-client status # Check Fail2Ban status
Software Installation — Step-by-Step
Now that the server is prepared, let's install the necessary software: Docker and Docker Compose.
1. Docker Engine Installation
We will remove any old Docker versions, if present, and install the latest stable version of Docker Engine (current for 2026, assuming version 26.x or newer).
# Remove old Docker versions
for pkg in docker.io docker-doc docker-compose docker-compose-v2 podman-docker containerd runc; do sudo apt remove $pkg; done

# Update package list and install dependencies
sudo apt update
sudo apt install ca-certificates curl gnupg lsb-release -y

# Add Docker's official GPG key
sudo install -m 0755 -d /etc/apt/keyrings
curl -fsSL https://download.docker.com/linux/ubuntu/gpg | sudo gpg --dearmor -o /etc/apt/keyrings/docker.gpg
sudo chmod a+r /etc/apt/keyrings/docker.gpg

# Add Docker repository to APT
echo \
  "deb [arch="$(dpkg --print-architecture)" signed-by=/etc/apt/keyrings/docker.gpg] https://download.docker.com/linux/ubuntu \
  "$(. /etc/os-release && echo "$VERSION_CODENAME")" stable" | \
  sudo tee /etc/apt/sources.list.d/docker.list > /dev/null

# Install Docker Engine, containerd, and Docker Compose (v2)
sudo apt update
sudo apt install docker-ce docker-ce-cli containerd.io docker-buildx-plugin docker-compose-plugin -y
2. Adding User to Docker Group
To avoid using sudo every time you work with Docker, add your user to the docker group.
sudo usermod -aG docker ваш_пользователь # Add current user to the docker group
newgrp docker # Apply changes for the current session (or reconnect via SSH)
3. Verifying Docker Installation
Verify that Docker is installed and working correctly.
docker run hello-world # Run the hello-world test container
You should see a welcome message from Docker.
4. Verifying Docker Compose Installation
Ensure that Docker Compose (v2) is installed and available.
docker compose version # Check Docker Compose version
The expected output will be similar to: Docker Compose version v2.26.x (or newer).
Configuration
At this stage, we will configure Traefik and run it with a demo application. We will use Docker Compose to manage Traefik and other services.
1. Creating Directory Structure
Create a directory for Traefik configuration and the docker-compose.yml file.
mkdir -p ~/traefik # Create the main directory for Traefik
cd ~/traefik # Navigate to the created directory
touch docker-compose.yml # Create Docker Compose file
touch traefik.yml # Create the main Traefik configuration file
touch acme.json # Create a file for storing Let's Encrypt SSL certificates
chmod 600 acme.json # Set strict permissions for the certificate file
2. DNS Configuration
Before running Traefik with Let's Encrypt, you need to configure DNS records for your domains. For each domain (or subdomain) you plan to use, create an A-record pointing to your VPS's IP address.
For example, if your VPS has the IP 192.0.2.1, and you want to use the domain example.com and subdomain whoami.example.com, add the following records in your DNS provider's control panel:
example.comA192.0.2.1.example.comA192.0.2.1(for ease of subdomain usage)whoami.example.comA192.0.2.1
3. traefik.yml File (Main Traefik Configuration)
This file defines global Traefik settings, including entrypoints, providers (Docker), and Let's Encrypt certificate settings.
# traefik.yml
# Global Traefik configuration

# Define entry points for incoming traffic
entryPoints:
  http:
    address: ":80" # Incoming HTTP traffic
    http:
      redirections:
        entryPoint:
          to: "https" # Redirect all HTTP to HTTPS
          scheme: "https"
  https:
    address: ":443" # Incoming HTTPS traffic

# API and Traefik dashboard settings
api:
  dashboard: true # Enable Traefik dashboard
  insecure: false # Do not allow insecure API access (use authentication)

# Log settings
log:
  level: INFO # Logging level (DEBUG, INFO, WARN, ERROR)
accessLog: {} # Enable access logs

# Docker provider settings
providers:
  docker:
    endpoint: "unix:///var/run/docker.sock" # Path to Docker socket
    exposedByDefault: false # By default, do not proxy containers unless labels are present
    network: "web" # Specify the network in which Traefik will look for containers

# Let's Encrypt certificate settings
certificatesResolvers:
  letsencrypt:
    acme:
      email: "ваш[email protected]" # Specify your email for Let's Encrypt notifications
      storage: "acme.json" # File for storing certificates
      httpChallenge:
        entryPoint: "http" # Use HTTP challenge via the http entry point
4. docker-compose.yml File
This file defines the Traefik and whoami test application services.
# docker-compose.yml
# Run Traefik and the test application

version: '3.8'

services:
  traefik:
    image: traefik:v3.0 # Use the latest stable version of Traefik (for 2026, v3.0+)
    container_name: traefik
    restart: unless-stopped
    security_opt:
      - no-new-privileges:true
    ports:
      - "80:80" # Open port 80 for HTTP
      - "443:443" # Open port 443 for HTTPS
      # - "8080:8080" # Port for Traefik dashboard (not recommended to open publicly without authentication)
    volumes:
      - /etc/localtime:/etc/localtime:ro # Time synchronization
      - /var/run/docker.sock:/var/run/docker.sock:ro # Access to Docker socket
      - ./traefik.yml:/etc/traefik/traefik.yml:ro # Main Traefik config
      - ./acme.json:/acme.json # File for Let's Encrypt certificates
    networks:
      - web # Connect Traefik to the 'web' network
    labels:
      # Labels for Traefik itself (so it can proxy its dashboard)
      - "traefik.enable=true"
      - "traefik.http.routers.traefik-dashboard.rule=Host(traefik.example.com)" # Domain for the dashboard
      - "traefik.http.routers.traefik-dashboard.entrypoints=https"
      - "traefik.http.routers.traefik-dashboard.tls.certresolver=letsencrypt"
      - "traefik.http.routers.traefik-dashboard.service=api@internal"
      - "traefik.http.middlewares.traefik-auth.basicauth.users=admin:$$apr1$$HASH_ПАРОЛЯ" # Replace HASH_PASSWORD
      - "traefik.http.routers.traefik-dashboard.middlewares=traefik-auth"
      # Optional: HTTP to HTTPS redirection for the dashboard
      - "traefik.http.routers.traefik-dashboard.middlewares=redirect-to-https@docker"

  whoami:
    image: traefik/whoami # Test application that shows request information
    container_name: whoami
    restart: unless-stopped
    networks:
      - web # Connect to the same network as Traefik
    labels:
      - "traefik.enable=true" # Enable Traefik for this container
      - "traefik.http.routers.whoami.rule=Host(whoami.example.com)" # Domain for whoami
      - "traefik.http.routers.whoami.entrypoints=https" # Use HTTPS
      - "traefik.http.routers.whoami.tls.certresolver=letsencrypt" # Enable Let's Encrypt certificates
      - "traefik.http.services.whoami.loadbalancer.server.port=80" # Application port inside the container

networks:
  web:
    external: true # Use an external network (will be created manually)
Important:
- Replace
ваш[email protected]with your actual email. - Replace
traefik.example.comandwhoami.example.comwith your domains. - For
admin:$$apr1$$HASH_ПАРОЛЯ, generate a password hash using thehtpasswdutility on your local machine. For example,echo $(htpasswd -nb admin my_secret_password) | sed -e s/\\$/\\$\\$/g. Copy the result (e.g.,admin:$$apr1$$abcdefghijklmnopqrs) and paste it intodocker-compose.yml.
5. Creating a Docker Network
Traefik and all containers it will proxy must be in the same Docker network.
docker network create web # Create an external Docker network named 'web'
6. Starting Traefik and Services
Start Traefik and the whoami container using Docker Compose.
docker compose up -d # Run containers in detached mode
7. Verifying Operation
After a few minutes (Traefik needs time to obtain certificates), check the availability of your services.
- Open
https://whoami.example.comin your browser (replace with your domain). You should see a page with request information, confirming that Traefik successfully proxied the request and issued an SSL certificate. - Open
https://traefik.example.comin your browser (replace with your domain). You should see a login/password prompt, and then the Traefik dashboard showing the status of your services.
You can also check Traefik logs:
docker compose logs -f traefik # View Traefik container logs
In the logs, you will see messages about obtaining certificates from Let's Encrypt.
Backups and Maintenance
Regular backups and timely maintenance are key to the stability and security of your infrastructure.
1. What to Back Up
- Traefik Configuration Files:
traefik.yml,acme.json. Theacme.jsonfile contains information about issued SSL certificates. - Docker Container Data: All persistent volumes used by your applications (e.g., databases, user uploads, application configurations).
- Server Configurations: SSH files (
/etc/ssh/sshd_config), UFW (/etc/ufw/), Fail2Ban (/etc/fail2ban/).
2. Simple Auto-Backup Script
For backups, you can use rsync or specialized tools like Restic/Borg. Let's look at a simple example with rsync for key files and Docker volumes.
Create a directory for backups and the backup.sh script:
mkdir -p ~/backups
nano ~/backups/backup.sh
Contents of backup.sh:
#!/bin/bash

# Backup directory on the server
BACKUP_DIR="/home/your_user/backups/data"
TIMESTAMP=$(date +%Y%m%d%H%M%S)
FULL_BACKUP_PATH="${BACKUP_DIR}/${TIMESTAMP}"

# Traefik directory
TRAEFIK_CONFIG_PATH="/home/your_user/traefik"

# Directory where Docker stores its volumes
DOCKER_VOLUMES_PATH="/var/lib/docker/volumes"

# Create directory for the current backup
mkdir -p "${FULL_BACKUP_PATH}/traefik"
mkdir -p "${FULL_BACKUP_PATH}/docker_volumes"

echo "Starting backup to ${FULL_BACKUP_PATH}"

# Copy Traefik configuration
cp -r "${TRAEFIK_CONFIG_PATH}/traefik.yml" "${FULL_BACKUP_PATH}/traefik/"
cp -r "${TRAEFIK_CONFIG_PATH}/acme.json" "${FULL_BACKUP_PATH}/traefik/"
cp -r "${TRAEFIK_CONFIG_PATH}/docker-compose.yml" "${FULL_BACKUP_PATH}/traefik/"

# Copy Docker volumes (example: for whoami, if it had a volume)
# For real applications, you will need to define specific volumes
# docker volume inspect -f '{{ .Mountpoint }}'
# For example, for an application with volume 'my_app_data':
# rsync -av "${DOCKER_VOLUMES_PATH}/my_app_data/_data/" "${FULL_BACKUP_PATH}/docker_volumes/my_app_data/"

# Example of backing up all Docker volumes (can be very large)
# It's better to back up only those that contain important data
rsync -av --exclude '/_data/cache/' "${DOCKER_VOLUMES_PATH}/" "${FULL_BACKUP_PATH}/docker_volumes/"

echo "Backup complete. Archiving..."
tar -czf "${BACKUP_DIR}/backup_${TIMESTAMP}.tar.gz" -C "${FULL_BACKUP_PATH}" .
rm -rf "${FULL_BACKUP_PATH}" # Remove temporary directory

# Delete old backups (e.g., older than 7 days)
find "${BACKUP_DIR}" -type f -name "backup_.tar.gz" -mtime +7 -delete

echo "Archiving and cleanup complete."
Make the script executable:
chmod +x ~/backups/backup.sh
Configure cron to run the script daily (e.g., at 3:00 AM):
crontab -e # Open crontab
Add the line:
0 3 * /home/your_user/backups/backup.sh >> /home/your_user/backups/backup.log 2>&1
3. Where to Store Backups
Storing backups on the same server as the original data is risky. It is recommended to use:
- External S3-compatible object storage: Cheap, reliable, scalable (e.g., MinIO, Wasabi, Backblaze B2). For automatic sending, you can use
s3cmdorrclone. - Separate VPS: More expensive, but gives full control. You can configure
rsyncover SSH to another server. - Local storage (for home use): If it's a personal project, you can copy backups to a home NAS or PC.
4. Updates: rolling vs maintenance window
- OS Update: Regularly run
sudo apt update && sudo apt upgrade -y. This is safe for Ubuntu LTS versions. - Docker and Traefik Update:
- Maintenance Window: For critically important services, plan a maintenance window. Stop services, update Docker, Traefik, test.
- Rolling Updates (for clusters): If you have multiple Traefik instances, you can update them sequentially, minimizing downtime. This is not applicable on a single VPS.
For Traefik and Docker containers, simply update the image versions in docker-compose.yml and restart the services:
cd ~/traefik
docker compose pull # Download new image versions
docker compose up -d # Recreate containers with new images
Troubleshooting + FAQ
What to do if Traefik doesn't start?
Check the Traefik container logs. Most often, the problem is related to errors in traefik.yml or docker-compose.yml files. Use the command docker compose logs traefik to see detailed error messages. Make sure that ports 80 and 443 are not occupied by another application and that the Docker socket is accessible.
Why isn't Let's Encrypt issuing certificates?
Most common reasons:
- Incorrect DNS records: Make sure that A-records for your domain (and subdomains) point to the correct IP address of your VPS. Check using
dig yourdomain.com. - Firewall issues: Make sure that ports 80 and 443 are open in UFW (or another firewall) and accessible from the internet.
- Incorrect email or path to
acme.json: Check these parameters intraefik.yml. - Let's Encrypt limits: If you have frequently requested certificates for a single domain, you might have encountered limits. Use the Let's Encrypt staging server for testing (add
caServer: "https://acme-staging-v02.api.letsencrypt.org/directory"to theacmesection).
How to add a new Docker container and proxy it through Traefik?
Simply add a new service to your docker-compose.yml and specify the necessary Traefik labels. Make sure the container is connected to the web network. Traefik will automatically discover the new container and configure proxying and SSL.
  my_new_app:
    image: my/app:latest
    container_name: my_new_app
    restart: unless-stopped
    networks:
      - web
    labels:
      - "traefik.enable=true"
      - "traefik.http.routers.my_new_app.rule=Host(app.example.com)"
      - "traefik.http.routers.my_new_app.entrypoints=https"
      - "traefik.http.routers.my_new_app.tls.certresolver=letsencrypt"
      - "traefik.http.services.my_new_app.loadbalancer.server.port=8000" # Port on which your application listens
After saving the file, run docker compose up -d.
What is the minimum VPS configuration suitable for Traefik with a couple of services?
For Traefik and 2-3 lightweight Docker services (e.g., web server, small API, blog), a VPS with 1 CPU core, 2 GB RAM, and 40-60 GB SSD will be minimally suitable. This will be sufficient for basic operation and testing. However, for stable operation and scalability, 2 CPU cores and 4 GB RAM are recommended.
What to choose — VPS or dedicated for this task?
For most users setting up Traefik for personal projects, startups, or small teams, a VPS is the optimal choice. It is more economical, easier to manage, and offers sufficient performance. A dedicated server should be considered if you have very high load (thousands of requests per second), require specific hardware resources, or if you want to avoid any potential "noisy neighbor" effects inherent in virtualization. Start with a VPS and scale up to dedicated if a real need arises.
How to secure the Traefik dashboard?
In our docker-compose.yml, we have already added basic authentication (Basic Auth) for the Traefik dashboard via middleware. Make sure you have generated a strong password hash using htpasswd. For additional security, you can also restrict access to the dashboard by IP address using Traefik IPWhitelisting middleware, or use more complex authentication methods such as OAuth.
Conclusions and Next Steps
Congratulations! You have successfully set up Traefik on your VPS, creating a powerful and flexible platform for automatic deployment of Docker containers with HTTPS. Now you can easily add new web services by simply describing them in the docker-compose.yml file with the appropriate labels, and Traefik will automatically take care of proxying and SSL certificate management.
Here are a few steps you can take next:
- Adding more services: Deploy real applications on your VPS: GitLab, Mattermost, Nextcloud, WordPress, or your own SaaS project, using Traefik for their publication.
- Monitoring and Logging: Integrate Traefik with monitoring systems such as Prometheus and Grafana to track the performance and status of your services. Set up centralized logging (ELK Stack or Loki/Grafana) for convenient log analysis.
- Advanced Security: Explore additional Traefik security features such as IP Whitelisting, Rate Limiting, CORS, and integration with external authentication systems to protect your applications.
- Deployment Automation: Use CI/CD pipelines (e.g., GitLab CI/CD, GitHub Actions) to automatically deploy new versions of your Docker containers on your VPS.