
Choosing an SNI for VLESS Reality: how to check a domain and avoid getting blocked
TL;DR
For VLESS Reality, SNI is the name of a public HTTPS domain that the client presents in TLS ClientHello. It should be chosen not based on popularity but on technical compatibility: the domain must respond reliably over TLS 1.3, support a modern certificate, not redirect to non-standard protocols, and be accessible from your clients' networks. In this guide, you will deploy Xray-core with VLESS Reality, check SNI candidates, configure a firewall, backups, and diagnostics.
- An SNI for Reality does not have to belong to you: Reality disguises the TLS connection as the selected public website.
- The best candidate is a stable HTTPS domain with TLS 1.3, a valid certificate chain, and a fast response from the required country.
- Do not use domains of banks, government services, payment systems, sites with strict geo-filtering, or resources with unstable availability.
- Check DNS, the TLS version, certificate, ALPN, HTTP response, and availability from the client's actual network.
- For a small personal VLESS Reality server, a VPS with 1 vCPU, 1 GB RAM, 10–20 GB NVMe, and a 1 Gbit/s port is usually sufficient.
- Reality does not require a certificate on your server: a TLS certificate for the disguise domain is neither issued nor installed.
What we are configuring and why
VLESS Reality is a transport scheme in Xray-core for a protected client-server connection. It uses a TLS handshake similar to connecting to a regular HTTPS website, but client verification is based on the Reality key pair, short ID, and VLESS parameters. Unlike a regular TLS proxy, the server does not need a public domain or its own certificate for incoming connections.
The main parameter that usually raises questions is SNI, Server Name Indication. This is the hostname sent by the client at the beginning of a TLS session. In the Reality configuration, the list of allowed names is set by the serverNames parameter, while the target public HTTPS host is set by the dest parameter. Usually, the same domain is used in both serverNames and as the hostname in dest.
The goal of the setup is to obtain a controllable personal server for secure access to your own resources and protected traffic on untrusted networks. After completing the steps, you will have:
- a VPS with minimally secured SSH access and a firewall;
- the latest Xray-core installed;
- an X25519 key pair for Reality;
- a VLESS Reality configuration on TCP port 443;
- a method for checking an SNI domain before adding it to the production configuration;
- a backup plan for configurations and key material;
- diagnostics for common connection errors.
How Reality uses SNI
The client connects to your VPS IP address but specifies the selected name in TLS ClientHello, for example www.example.net. The Xray server accepts the connection only if the SNI matches the allowed list and the Reality parameters pass cryptographic verification. To an external observer, the connection appears to be a TLS session with the specified name, but the network route leads to your server's IP.
The dest parameter is required by Reality as a target TLS profile and fallback destination for invalid connections. It is important that the domain genuinely serves HTTPS and is technically similar to expected browser traffic. An unsuitable domain may lead to timeouts, handshake errors, or unstable operation after changes on the website's side.
Which domains you should not choose
Do not choose a domain merely because it is well-known or highly ranked. The more strongly a domain is associated with financial organizations, government services, payment infrastructure, email, or corporate security, the greater the likelihood of special TLS policies, regional restrictions, complex anti-bot protection, and frequent configuration changes.
- Do not use websites of banks, exchanges, payment systems, or government portals.
- Do not use domains that are already inaccessible on your network or require non-standard DNS.
- Avoid sites that are TLS 1.2-only, have self-signed certificates, or an invalid CA chain.
- Do not choose domains that respond only over IPv6 if your clients have unstable IPv6.
- Do not use hosts that constantly change CDN providers, certificates, or require a JavaScript check at the connection level.
- Do not use third-party brands in profile names, QR codes, or public user instructions.
Alternatives: managed services and your own VPS
Managed VPN services are easier to launch: there is no need to update the system, configure a firewall, or store keys. However, you do not control the server configuration, logging, routing, or data retention period. In addition, the provider may change addresses, access rules, and available protocols without your approval.
Self-hosted VLESS Reality on a VPS requires basic Linux administration, but provides control over the IP address, ports, user access, and backups. For a single owner or a small team, this is usually justified if you are prepared to install updates regularly and review logs.
What VPS configuration is needed for this task
VLESS Reality itself consumes little memory and CPU time. The load is determined not by the number of configuration lines, but by the number of simultaneous TLS connections, encryption speed, data volume transferred, and additional services on the server.
| Scenario | CPU | RAM | Disk | Network |
|---|---|---|---|---|
| 1–3 personal devices | 1 vCPU | 1 GB | 10 GB NVMe | 100 Mbit/s or higher |
| Family or team of up to 10 people | 2 vCPU | 2 GB | 20–30 GB NVMe | 1 Gbit/s |
| 20–50 active users | 4 vCPU | 4 GB | 40 GB NVMe | 1 Gbit/s, sufficient traffic allowance |
A practical starting option is 2 vCPU, 2 GB RAM, 20 GB NVMe, IPv4, and a 1 Gbit/s connection. This capacity is enough to host Xray-core, fail2ban, a backup system, monitoring, and several users without competing for memory. When choosing, you can get a VPS with the specified characteristics or a similar plan from another provider.
What to consider besides CPU and RAM
- Dedicated IPv4. It simplifies connections from older networks and mobile clients.
- IPv6. Useful as an additional route, but it should not be the only access point.
- Traffic. Estimate the monthly limit. Video calls and OS updates consume it noticeably faster than ordinary web browsing.
- Acceptable use policy. Do not violate data center rules or local laws.
- Ability to reinstall the OS and create snapshots. This reduces recovery time after an error.
- Console access. VNC, serial console, or rescue mode are needed if you make a mistake in the firewall and block SSH.
When you need dedicated rather than a VPS
A dedicated server is unnecessary for one user and usually unnecessary for a small team. It becomes justified with sustained loads of hundreds of megabits per second, a large number of simultaneous clients, the need to isolate resources from virtualization neighbors, or when hosting additional resource-intensive services.
If the problem is short-term speed drops, first check the bandwidth limit, packet loss, route, and CPU load. Moving to dedicated hardware will not fix an incorrect SNI, blocked port, incorrect client configuration, or mobile network limitations.
How VPS location affects performance
Location determines latency, the route to clients, and availability of the selected SNI domain from the data center. For interactive tasks, choose a server closer to the main audience: latency up to 60–100 ms is usually comfortable for browsing and calls. Check not only ping to the VPS but also the actual speed of TCP connections during peak hours.
If clients are located in different regions, do not try to solve everything with one server. It is more reliable to deploy two independent nodes, prepare separate profiles, and switch between them manually or through your own access system.
Server preparation
Ubuntu Server 24.04 LTS is used below. As of early 2026, it is a stable LTS base with security support through 2029. The commands also work for Debian 12/13 with minor changes to package names.
Connect to the server using the account provided by the provider and update the system immediately. Do not leave password-based SSH access enabled if you can use keys.
ssh root@SERVER_IP
apt update && apt full-upgrade -y
reboot
These commands install security updates and reboot the server if the kernel was updated.
ssh root@SERVER_IP
adduser deploy
usermod -aG sudo deploy
A separate user, deploy, is created with permission to run administrative commands through sudo.
mkdir -p /home/deploy/.ssh
chmod 700 /home/deploy/.ssh
nano /home/deploy/.ssh/authorized_keys
chmod 600 /home/deploy/.ssh/authorized_keys
chown -R deploy:deploy /home/deploy/.ssh
Add the public SSH key from your computer to the file. Do not close the current root session until you have verified login with the new user.
ssh deploy@SERVER_IP
sudo -v
exit
This check confirms that key-based login and sudo work before disabling root login.
sudo apt install -y curl wget jq ca-certificates gnupg lsb-release \
unzip ufw fail2ban openssl dnsutils mtr-tiny cron
Utilities are installed for downloading releases, checking DNS/TLS, the firewall, SSH protection, and task scheduling.
sudo nano /etc/ssh/sshd_config.d/10-hardening.confCreate a separate file with SSH parameters so that you do not need to edit the distribution's main configuration file.
PermitRootLogin no
PasswordAuthentication no
KbdInteractiveAuthentication no
PubkeyAuthentication yes
X11Forwarding no
MaxAuthTries 3
sudo sshd -t && sudo systemctl restart ssh
sudo systemctl status ssh --no-pagerFirst, the SSH configuration syntax is checked, then the service is safely restarted.
sudo ufw default deny incoming
sudo ufw default allow outgoing
sudo ufw allow OpenSSH
sudo ufw allow 443/tcp
sudo ufw enable
sudo ufw status verbose
The firewall blocks all incoming connections except SSH and TCP port 443 for Xray.
sudo systemctl enable --now fail2ban
sudo fail2ban-client status sshd
Fail2ban monitors repeated failed SSH login attempts and temporarily blocks brute-force sources.
Important: if SSH runs on a non-standard port, allow it in UFW before running
ufw enable. Also check the cloud firewall in the provider's control panel: it may exist separately from UFW.
Software Installation — Step by Step
Xray-core is actively developed, so pinning a version number in an article is risky: it may be outdated by the time of installation. It is safer to obtain the latest stable release number from the project's official repository and save it in a system file. Always read the release changelog before updating, especially when configuration format changes are involved.
sudo install -d -m 0755 /etc/xray /var/log/xray /usr/local/lib/xray
sudo chown -R nobody:nogroup /var/log/xray
Directories for configuration, logs, and additional Xray files are created.
XRAY_VERSION=$(curl -fsSL https://api.github.com/repos/XTLS/Xray-core/releases/latest | jq -r .tag_name)
echo "$XRAY_VERSION"
The command retrieves the tag of the latest official stable Xray-core release through the GitHub API.
ARCH=$(dpkg --print-architecture)
case "$ARCH" in
  amd64) XRAY_ARCH="64" ;;
  arm64) XRAY_ARCH="arm64-v8a" ;;
  ) echo "Неподдерживаемая архитектура: $ARCH"; exit 1 ;;
esac
echo "$XRAY_ARCH"
The Xray archive for an x86_64 or ARM64 server is determined.
cd /tmp
curl -fL -o xray.zip "https://github.com/XTLS/Xray-core/releases/download/${XRAY_VERSION}/Xray-linux-${XRAY_ARCH}.zip"
unzip -o xray.zip -d xray-release
sudo install -m 0755 xray-release/xray /usr/local/bin/xray
sudo install -m 0644 xray-release/geoip.dat xray-release/geosite.dat /usr/local/share/
xray version
The official archive is downloaded, the Xray binary is installed, and its version is checked.
sudo useradd --system --no-create-home --shell /usr/sbin/nologin xray || true
sudo chown -R xray:xray /etc/xray
sudo chmod 750 /etc/xray
A non-privileged system user is created to run the service.
sudo /usr/local/bin/xray x25519An X25519 private and public key pair for Reality is generated. Save both values in a secure secrets manager; never share the private key with clients.
openssl rand -hex 8A short ID consisting of 16 hexadecimal characters is generated. You can create several different short IDs for multiple users.
uuidgenA UUID is generated for one VLESS user. It is better to create a separate UUID for each person or device.
sudo tee /etc/systemd/system/xray.service > /dev/null <<'EOF'
[Unit]
Description=Xray Service
Documentation=https://github.com/XTLS/Xray-core
After=network-online.target nss-lookup.target
Wants=network-online.target

[Service]
Type=simple
User=xray
Group=xray
EnvironmentFile=/etc/xray/reality.env
ExecStartPre=/usr/bin/envsubst < /etc/xray/config.json.template > /run/xray-config.json
ExecStart=/usr/local/bin/xray run -config /run/xray-config.json
Restart=on-failure
RestartSec=5
LimitNOFILE=1048576
NoNewPrivileges=true
PrivateTmp=true
ProtectHome=true
ReadWritePaths=/run /var/log/xray

[Install]
WantedBy=multi-user.target
EOF
A systemd service is created: it builds the final JSON from the template and environment variables before starting Xray.
sudo apt install -y gettext-base
sudo systemctl daemon-reload
The gettext-base package adds the envsubst utility, which is used to safely substitute secrets from a separate file.
Configuration
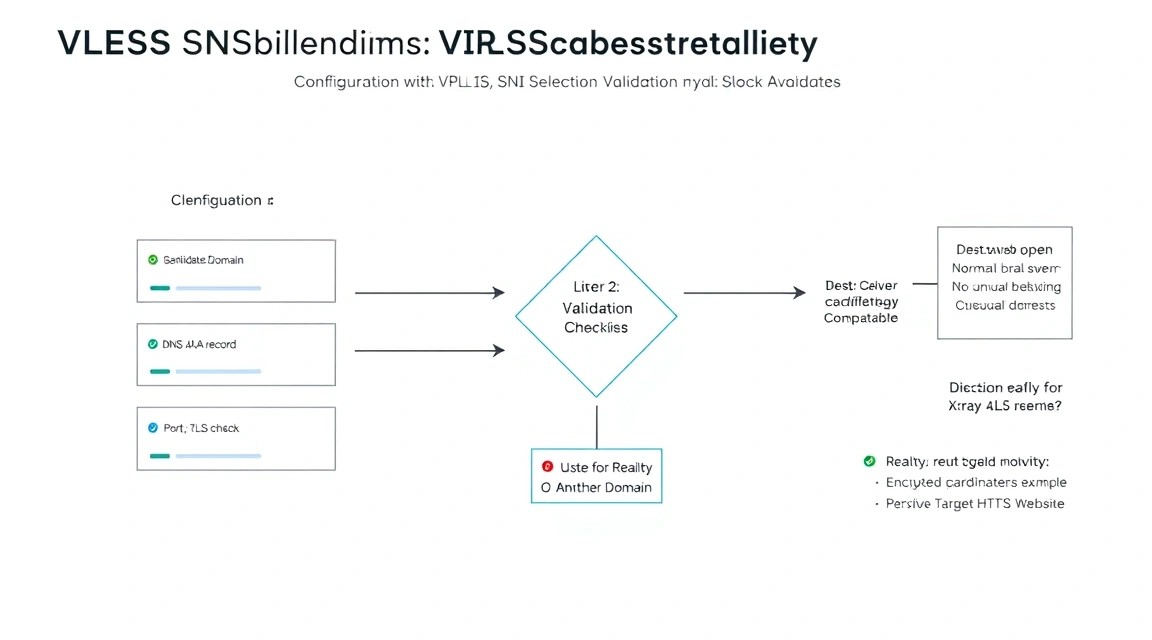
First, select and verify an SNI domain. The examples below use the neutral name www.example.net; do not copy it literally. Use a real public HTTPS domain that passes all checks in this section.
SNI Candidate Verification Methodology
Check the domain from the VPS itself and from at least one real client network: home, mobile, or corporate, where the connection will be used. Checking only from the server is not enough: a domain may be accessible from a data center but unavailable to the client.
DOMAIN="www.example.net"
dig +short A "$DOMAIN"
dig +short AAAA "$DOMAIN"
DNS records are checked. A valid A record is sufficient for the basic scenario; AAAA is useful but not required.
DOMAIN="www.example.net"
timeout 12 openssl s_client -connect "${DOMAIN}:443" -servername "$DOMAIN" \
-tls1_3 -brief < /dev/null
The command checks whether TLS 1.3 is available when this exact SNI is sent. The output should show a successful connection, TLSv1.3, and no certificate verification errors.
DOMAIN="www.example.net"
curl -4 -I --connect-timeout 8 --max-time 15 "https://${DOMAIN}/"
The HTTP response over IPv4 is checked. Codes 200, 301, 302, 403, or 404 do not by themselves indicate a problem: a successful TLS connection and stable response are more important.
DOMAIN="www.example.net"
curl -sS -o /dev/null -w 'HTTP=%{http_code} TLS=%{ssl_version} ALPN=%{http_version} IP=%{remote_ip}\n' \
--connect-timeout 8 --max-time 15 "https://${DOMAIN}/"
Outputs a brief summary: HTTP status code, TLS version, negotiated HTTP protocol, and the address to which the client connected.
DOMAIN="www.example.net"
for i in 1 2 3 4 5; do
  date -Is
  curl -sS -o /dev/null -w 'connect=%{time_connect}s tls=%{time_appconnect}s http=%{http_code}\n' \
  --connect-timeout 8 --max-time 15 "https://${DOMAIN}/"
  sleep 3
done
Five repetitions help identify instability. If the connection regularly hangs, returns varying errors, or takes tens of seconds, the candidate should be excluded.
| Check | Good result | Reason to exclude the domain |
|---|---|---|
| DNS | Has a stable A record | NXDOMAIN, frequent errors, problematic IPv6 only |
| TLS | TLS 1.3, valid certificate | Certificate error, TLS 1.2-only, reset |
| Availability | Works from the VPS and the client network | Unavailable on the target network |
| Stability | Repeated requests complete quickly | Intermittent timeouts, 525/526, handshake failure |
| Reputational risk | Regular public web resource | Finance, government services, critical infrastructure |
Secrets File
Do not store the UUID, private key, and short ID in plain text in the configuration. Create a separate environment file accessible only to root and the service user through systemd startup.
sudo nano /etc/xray/reality.env
sudo chmod 600 /etc/xray/reality.env
sudo chown root:root /etc/xray/reality.env
The file is created with permissions that prevent regular users from reading it.
VLESS_UUID=11111111-2222-3333-4444-555555555555
REALITY_PRIVATE_KEY=REPLACE_WITH_PRIVATE_KEY
REALITY_SHORT_ID=REPLACE_WITH_16_HEX_CHARS
SNI_DOMAIN=www.example.net
DESTINATION=www.example.net:443
LISTEN_PORT=443
Replace the values with those generated earlier. SNI_DOMAIN must contain only the name without https://, a path, or a port. DESTINATION must contain the name and port of the HTTPS service.
Xray Configuration Template
sudo nano /etc/xray/config.json.templateOpen the configuration template and insert the following minimal working version.
{
  "log": {
    "loglevel": "warning",
    "access": "/var/log/xray/access.log",
    "error": "/var/log/xray/error.log"
  },
  "inbounds": [
    {
      "tag": "vless-reality-in",
      "listen": "0.0.0.0",
      "port": ${LISTEN_PORT},
      "protocol": "vless",
      "settings": {
        "clients": [
          {
            "id": "${VLESS_UUID}",
            "email": "owner"
          }
        ],
        "decryption": "none"
      },
      "streamSettings": {
        "network": "tcp",
        "security": "reality",
        "realitySettings": {
          "show": false,
          "dest": "${DESTINATION}",
          "xver": 0,
          "serverNames": [
            "${SNI_DOMAIN}"
          ],
          "privateKey": "${REALITY_PRIVATE_KEY}",
          "shortIds": [
            "${REALITY_SHORT_ID}"
          ]
        }
      },
      "sniffing": {
        "enabled": true,
        "destOverride": [
          "http",
          "tls",
          "quic"
        ]
      }
    }
  ],
  "outbounds": [
    {
      "protocol": "freedom",
      "tag": "direct"
    },
    {
      "protocol": "blackhole",
      "tag": "block"
    }
  ]
}
Check the permissions and validity of the final file before starting. The envsubst command substitutes values from the environment file into a temporary configuration.
sudo chown root:xray /etc/xray/config.json.template
sudo chmod 640 /etc/xray/config.json.template
sudo bash -c 'set -a; . /etc/xray/reality.env; set +a; envsubst < /etc/xray/config.json.template > /tmp/xray-test.json'
sudo /usr/local/bin/xray run -test -config /tmp/xray-test.json
sudo rm -f /tmp/xray-test.json
If the check completes without an error, the JSON and Xray parameters are correct.
sudo systemctl enable --now xray
sudo systemctl status xray --no-pager
sudo ss -lntp | grep ':443'
The service is enabled for automatic startup, started, and checked for a listening TCP port 443.
Client Parameters
In a compatible Xray client, v2rayN, Nekoray, Hiddify, or another client with Reality support, create a profile manually. Do not share a URI containing the UUID and public key in public chats: such a profile constitutes access credentials.
| Client field | Value |
|---|---|
| Protocol | VLESS |
| Address | VPS IP address or your own DNS address |
| Port | 443 |
| UUID | The VLESS_UUID value |
| Transport | TCP |
| Security | Reality |
| SNI / Server Name | The SNI_DOMAIN value |
| Public Key | The public key from the xray x25519 command |
| Short ID | The REALITY_SHORT_ID value |
| Fingerprint | chrome |
Are Caddy, certbot, and an HTTPS Certificate Needed?
Caddy and certbot are not needed for inbound VLESS Reality on port 443. Reality does not use your certificate and does not require a domain pointing to the VPS. Attempting to run Caddy on the same IP and TCP port 443 will cause a conflict: only one process can listen on that port.
If the server requires a secure administrative interface, place it on a separate IP, a separate port behind a VPN, or on another VPS. Do not expose Xray management panels, web interfaces, or APIs to the internet without authentication. systemd and logs are sufficient to diagnose the service itself.
sudo journalctl -u xray -n 100 --no-pager
sudo tail -n 50 /var/log/xray/error.log
sudo tail -n 20 /var/log/xray/access.log
These commands check service startup, configuration errors, and the latest requests to Xray.
Backups and Maintenance
VLESS Reality does not require backing up a large volume of user data, but losing the private key, UUID, or configuration complicates recovery. The backup must be encrypted and stored outside the main VPS. A snapshot on the same server does not protect against server deletion, provider account compromise, or disk failure.
What to Include in the Backup
/etc/xray/reality.env— UUID, private key, short ID, SNI, and port;/etc/xray/config.json.template— configuration template;/etc/systemd/system/xray.service— unit file;/etc/ufw/— firewall rules, if necessary;/etc/fail2ban/— local SSH protection settings;- the list of users and corresponding UUIDs in a separate encrypted storage;
- optional logs for a limited period, if they are needed for diagnostics.
Do not retain access logs indefinitely. They may contain service metadata about connections and quickly consume space. For a personal server, log rotation and storage for 7–14 days are usually sufficient.
sudo tee /etc/logrotate.d/xray > /dev/null <<'EOF'
/var/log/xray/.log {
    daily
    rotate 14
    compress
    missingok
    notifempty
    create 0640 xray xray
}
EOF
sudo logrotate -d /etc/logrotate.d/xray
Daily log rotation is configured with 14 archives retained. The -d option performs a test without actually modifying files.
Automatic Backup via restic
Restic creates encrypted deduplicated backups. The repository can be placed in S3-compatible storage, on a separate VPS via SFTP, or in another isolated storage location. Below is an example for an S3-compatible endpoint; store real secrets in a file accessible only to root.
sudo apt install -y restic
sudo install -d -m 0700 /root/.config/restic
sudo nano /root/.config/restic/env
Restic is installed and a private directory is created for backup storage parameters.
export RESTIC_REPOSITORY="s3:https://s3.example-storage.net/xray-backup"
export RESTIC_PASSWORD="REPLACE_WITH_LONG_UNIQUE_PASSWORD"
export AWS_ACCESS_KEY_ID="REPLACE_WITH_ACCESS_KEY"
export AWS_SECRET_ACCESS_KEY="REPLACE_WITH_SECRET_KEY"
sudo chmod 600 /root/.config/restic/env
sudo bash -c 'source /root/.config/restic/env && restic init'Strict permissions are set on the secrets and the encrypted restic repository is initialized.
sudo tee /usr/local/sbin/backup-xray.sh > /dev/null <<'EOF'
#!/usr/bin/env bash
set -euo pipefail
source /root/.config/restic/env

restic backup \
  /etc/xray \
  /etc/systemd/system/xray.service \
  /etc/ufw \
  /etc/fail2ban \
  --tag xray --tag "$(hostname -s)"

restic forget --keep-daily 7 --keep-weekly 4 --keep-monthly 6 --prune
restic check
EOF
sudo chmod 700 /usr/local/sbin/backup-xray.sh
The script creates a backup, removes old snapshots according to the retention policy, and checks the repository integrity.
sudo /usr/local/sbin/backup-xray.sh
sudo crontab -e
First perform a backup manually. After it completes successfully, add a daily run to the root crontab.
20 03 * /usr/local/sbin/backup-xray.sh >> /var/log/backup-xray.log 2>&1Updates and Maintenance Window
Xray-core updates should preferably be performed during a short maintenance window. For a single server, this means an interruption of several seconds or minutes: download the release, check the configuration, restart the service, and connect with a test client. Do not update the server unless you have a working copy of the configuration and emergency console access.
sudo systemctl stop xray
sudo cp /usr/local/bin/xray /usr/local/bin/xray.previous
sudo systemctl start xray
sudo systemctl is-active xray
sudo journalctl -u xray -n 30 --no-pager
Save the previous version before replacing the binary file. If an error occurs, you can restore it and restart the service.
For two servers, use a rolling approach: update the first node, verify the connection, and then update the second. Clients should have two separate profiles or a switching mechanism so that maintenance on one server does not completely deprive you of access.
Troubleshooting + FAQ
Why does the client show “TLS handshake failed” or “reality verification failed”?
First compare the client and server parameters: SNI, public key, short ID, UUID, port, and transport type must match. A common mistake is pasting the private key instead of the public key into the client or specifying an SNI with the https:// prefix. On the server, check journalctl -u xray -n 100 and make sure the service is using the current /etc/xray/reality.env file. After changing variables, always run sudo systemctl restart xray.
How can I tell that the selected SNI domain is poor?
A poor candidate is unstable during repeated TLS checks, does not support TLS 1.3, periodically returns a reset, or is unavailable from the client’s network. Check it using openssl s_client and curl from the VPS, then repeat the test from a mobile network and a home network. Do not evaluate a domain based on one successful attempt: make at least five to ten requests at different times. If there are regular timeouts, choose another technically stable HTTPS host.
Why is port 443 not listening after Xray starts?
Most likely, the port is already occupied by another process: Caddy, nginx, Apache, a Docker container, or an old Xray instance. Run sudo ss -lntp | grep ':443' to see which process owns the socket. Stop the conflicting service or move it to another IP address or port. Then check the JSON with xray run -test -config and restart Xray. Do not attempt to run two TLS services simultaneously on the same IP:443 without a carefully designed architecture.
The connection works over Wi-Fi but not over a mobile network. What should I do?
Compare DNS resolution, VPS IP availability, and the TLS check from both networks. The problem may be with the operator’s route, IPv6, a local network filter, or the selected SNI being unavailable specifically there. Make sure the client connects over IPv4 if IPv6 is unstable. Do not change all parameters at once: first check TCP 443 availability to the VPS, then the profile settings, and afterward test another previously verified SNI in a separate server profile.
What is the minimum suitable VPS configuration?
For one owner and several devices, 1 vCPU, 1 GB RAM, 10 GB SSD or NVMe, a dedicated IPv4 address, and a 100 Mbps or faster connection are minimally sufficient. However, a more comfortable starting point is 2 vCPUs, 2 GB RAM, and 20 GB NVMe: this leaves room for updates, logs, fail2ban, and restic. Network quality, available monthly traffic, stable IPv4, and the ability to recover the server through a console are more important than CPU specifications.
Which should I choose for this task — VPS or dedicated?
For personal VLESS Reality and a small team, choose a VPS: it is cheaper, easier to scale, and usually fully meets CPU and memory requirements. A dedicated server makes sense with sustained high traffic, dozens or hundreds of concurrent users, a strict need for resource isolation, or additional heavy services. Do not move to a dedicated server to fix configuration errors: first rule out SNI, firewall, routing, and client parameter issues.
Do I need to issue a Let’s Encrypt certificate or configure Caddy?
No, VLESS Reality does not require a Let’s Encrypt certificate, and it is not involved in client authorization. The Reality server uses an X25519 private key, while the client uses the corresponding public key, SNI, and short ID. Caddy or certbot are needed only if you separately host a regular HTTPS website or a protected web panel. Do not install Caddy on the same TCP port 443 of the same IP where Xray is already running; otherwise, you will get a port-in-use error.
How can I safely add a second user?
Create a separate UUID for them and, preferably, a separate short ID. Add a new entry to the clients array and, if necessary, a new element to shortIds, then check the resulting JSON and restart Xray. Do not give two people the same shared UUID: if a problem occurs, you will not be able to revoke access for just one user. Keep an encrypted list of “user — UUID — issue date” associations outside the VPS.
How can I quickly revoke a compromised profile?
Remove the corresponding UUID from the clients array, rebuild the configuration, and restart the service. If there is a risk that not only the UUID but also the complete URI with the short ID and public key has leaked, change the short ID. If you suspect that the private key has leaked, create a new X25519 pair, replace the private key on the server, and update the public key on all trusted clients. After making changes, check the logs and configuration backups.
Conclusions and Next Steps
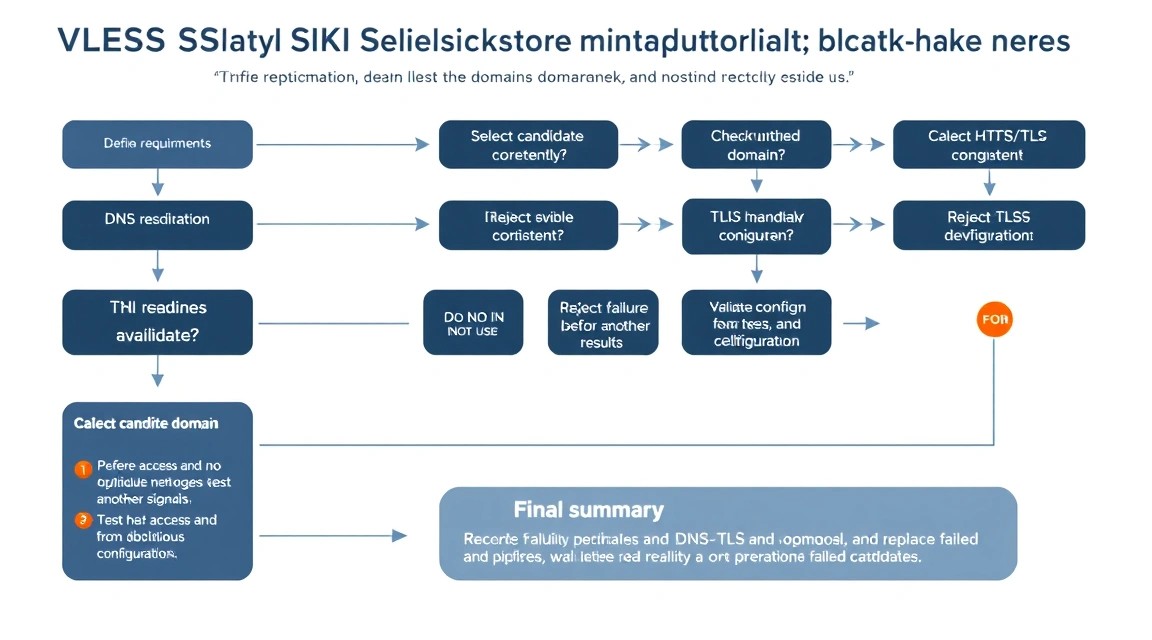
You now have a basic VLESS Reality setup on a secure VPS and a clear SNI selection process: the domain is checked for DNS, TLS 1.3, certificate, stability, and availability from real client networks. The main rule is not to search for a “magical” popular domain, but to use a technically predictable public HTTPS host and regularly test its availability.
- Add a second independent server in another location and prepare a backup client profile.
- Create separate UUIDs for devices and users, and periodically revoke unused credentials.
- Once a month, check Xray-core updates, firewall status, successful restic backups, and error logs.